
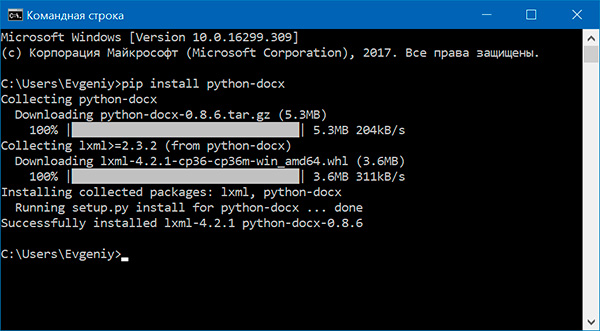
С помощью модуля python-docx можно создавать и изменять документы MS Word с расширением .docx. Чтобы установить этот модуль, выполняем команду
> pip install python-docx
При установке модуля надо вводить python-docx, а не docx (это другой модуль). В то же время при импортировании модуля python-docx следует использовать import docx, а не import python-docx.
Чтение документов MS Word
Файлы с расширением .docx обладают развитой внутренней структурой. В модуле python-docx эта структура представлена тремя различными типами данных. На самом верхнем уровне объект Document представляет собой весь документ. Объект Document содержит список объектов Paragraph, которые представляют собой абзацы документа. Каждый из абзацев содержит список, состоящий из одного или нескольких объектов Run, представляющих собой фрагменты текста с различными стилями форматирования.

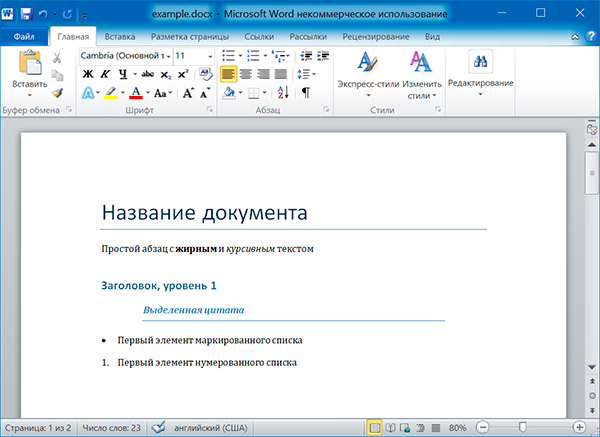
import docx

doc = docx.Document('example.docx')

# количество абзацев в документе
print(len(doc.paragraphs))

# текст первого абзаца в документе
print(doc.paragraphs[0].text)

# текст второго абзаца в документе
print(doc.paragraphs[1].text)

# текст первого Run второго абзаца
print(doc.paragraphs[1].runs[0].text)
6
Название документа
Простой абзац с жирным и курсивным текстом
Простой абзац с
Получаем весь текст из документа:
text = []
for paragraph in doc.paragraphs:
    text.append(paragraph.text)
print('n'.join(text))
Название документа
Простой абзац с жирным и курсивным текстом
Заголовок, уровень 1
Выделенная цитата
Первый элемент маркированного списка
Первый элемент нумерованного списка
Стилевое оформление
В документах MS Word применяются два типа стилей: стили абзацев, которые могут применяться к объектам Paragraph, стили символов, которые могут применяться к объектам Run. Как объектам Paragraph, так и объектам Run можно назначать стили, присваивая их атрибутам style значение в виде строки. Этой строкой должно быть имя стиля. Если для стиля задано значение None, то у объекта Paragraph или Run не будет связанного с ним стиля.
Стили абзацев
NormalBody TextBody Text 2Body Text 3CaptionHeading 1Heading 2Heading 3Heading 4Heading 5Heading 6Heading 7Heading 8Heading 9Intense QuoteListList 2List 3List BulletList Bullet 2List Bullet 3List ContinueList Continue 2List Continue 3List NumberList Number 2List Number 3List ParagraphMacro TextNo SpacingQuoteSubtitleTOCHeadingTitle
Стили символов
EmphasisStrongBook TitleDefault Paragraph FontIntense EmphasisSubtle EmphasisIntense ReferenceSubtle Reference
paragraph.style = 'Quote'
run.style = 'Book Title'
Атрибуты объекта Run
Отдельные фрагменты текста, представленные объектами Run, могут подвергаться дополнительному форматированию с помощью атрибутов. Для каждого из этих атрибутов может быть задано одно из трех значений: True (атрибут активизирован), False (атрибут отключен) и None (применяется стиль, установленный для данного объекта Run).
bold— Полужирное начертаниеunderline— Подчеркнутый текстitalic— Курсивное начертаниеstrike— Зачеркнутый текст
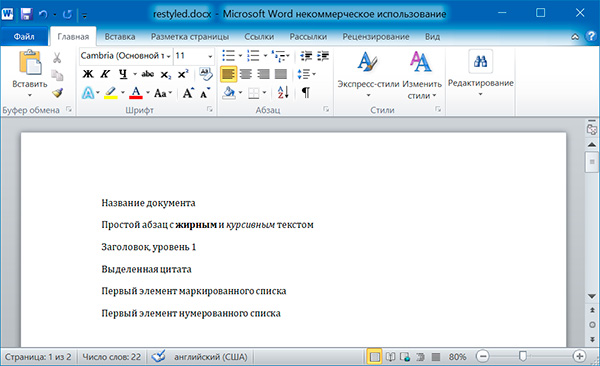
Изменим стили для всех параграфов нашего документа:
import docx

doc = docx.Document('example.docx')

# изменяем стили для всех параграфов
for paragraph in doc.paragraphs:
    paragraph.style = 'Normal'

doc.save('restyled.docx')
А теперь восстановим все как было:
import docx

os.chdir('C:\example')

doc1 = docx.Document('example.docx')
doc2 = docx.Document('restyled.docx')

# получаем из первого документа стили всех абзацев
styles = []
for paragraph in doc1.paragraphs:
    styles.append(paragraph.style)

# применяем стили ко всем абзацам второго документа
for i in range(len(doc2.paragraphs)):
    doc2.paragraphs[i].style = styles[i]

doc2.save('restored.docx')

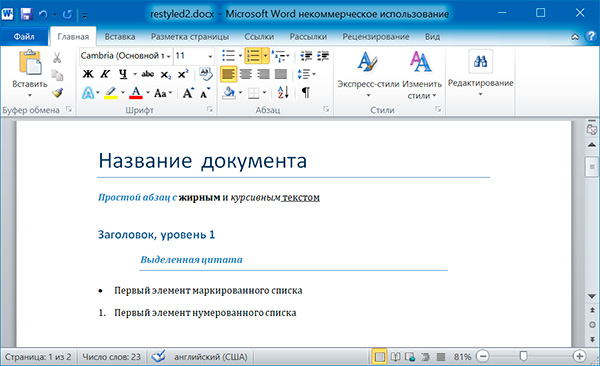
Изменим форматирвание объектов Run второго абзаца:
import docx

doc = docx.Document('example.docx')

# добавляем стиль символов для runs[0]
doc.paragraphs[1].runs[0].style = 'Intense Emphasis'
# добавляем подчеркивание для runs[4]
doc.paragraphs[1].runs[4].underline = True

doc.save('restyled2.docx')
Запись докуменов MS Word
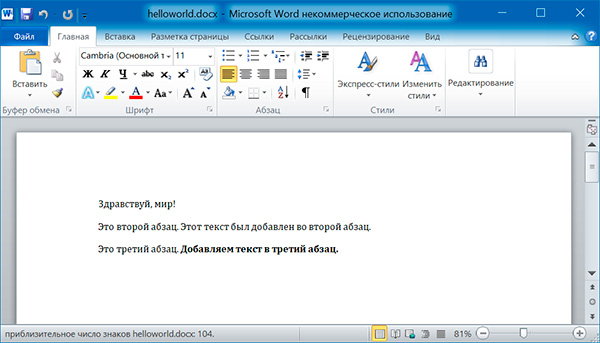
Добавление абзацев осуществляется вызовом метода add_paragraph() объекта Document. Для добавления текста в конец существующего абзаца, надо вызвать метод add_run() объекта Paragraph:
import docx

doc = docx.Document()

# добавляем первый параграф
doc.add_paragraph('Здравствуй, мир!')

# добавляем еще два параграфа
par1 = doc.add_paragraph('Это второй абзац.')
par2 = doc.add_paragraph('Это третий абзац.')

# добавляем текст во второй параграф
par1.add_run(' Этот текст был добавлен во второй абзац.')

# добавляем текст в третий параграф
par2.add_run(' Добавляем текст в третий абзац.').bold = True

doc.save('helloworld.docx')
Оба метода, add_paragraph() и add_run() принимают необязательный второй аргумент, содержащий строку стиля, например:
doc.add_paragraph('Здравствуй, мир!', 'Title')
Добавление заголовков
Вызов метода add_heading() приводит к добавлению абзаца, отформатированного в соответствии с одним из возможных стилей заголовков:
doc.add_heading('Заголовок 0', 0)
doc.add_heading('Заголовок 1', 1)
doc.add_heading('Заголовок 2', 2)
doc.add_heading('Заголовок 3', 3)
doc.add_heading('Заголовок 4', 4)
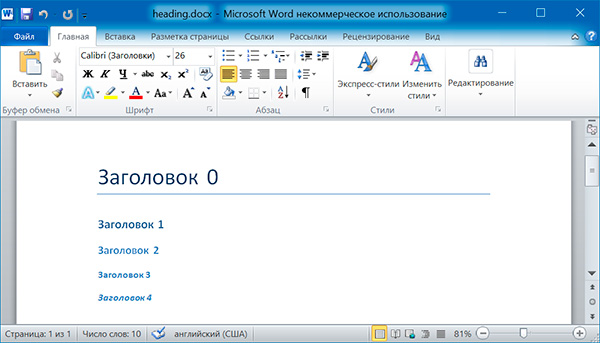
Аргументами метода add_heading() являются строка текста и целое число от 0 до 4. Значению 0 соответствует стиль заголовка Title.
Добавление разрывов строк и страниц
Чтобы добавить разрыв строки (а не добавлять новый абзац), нужно вызвать метод add_break() объекта Run. Если же требуется добавить разрыв страницы, то методу add_break() надо передать значение docx.enum.text.WD_BREAK.PAGE в качестве единственного аргумента:
import docx

doc = docx.Document()

doc.add_paragraph('Это первая страница')
doc.paragraphs[0].runs[0].add_break(docx.enum.text.WD_BREAK.PAGE)
doc.add_paragraph('Это вторая страница')

doc.save('pages.docx')
Добавление изображений
Метод add_picture() объекта Document позволяет добавлять изображения в конце документа. Например, добавим в конец документа изображение kitten.jpg шириной 10 сантиметров:
import docx

doc = docx.Document()

doc.add_paragraph('Это первый абзац')
doc.add_picture('kitten.jpg', width = docx.shared.Cm(10))

doc.save('picture.docx')
Именованные аргументы width и height задают ширину и высоту изображения. Если их опустить, то значения этих аргументов будут определяться размерами самого изображения.
Добавление таблицы
import docx

doc = docx.Document()

# добавляем таблицу 3x3
table = doc.add_table(rows = 3, cols = 3)
# применяем стиль для таблицы
table.style = 'Table Grid'

# заполняем таблицу данными
for row in range(3):
    for col in range(3):
        # получаем ячейку таблицы
        cell = table.cell(row, col)
        # записываем в ячейку данные
        cell.text = str(row + 1) + str(col + 1)

doc.save('table.docx')
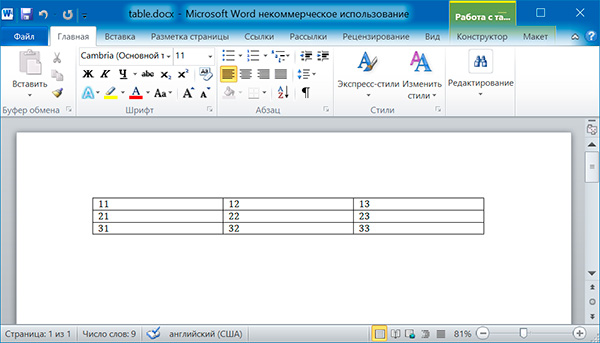
import docx

doc = docx.Document('table.docx')

# получаем первую таблицу в документе
table = doc.tables[0]

# читаем данные из таблицы
for row in table.rows:
    string = ''
    for cell in row.cells:
        string = string + cell.text + ' '
    print(string)
11 12 13
21 22 23
31 32 33
Дополнительно
- Документация python-docx
Поиск:
MS • Python • Web-разработка • Word • Модуль
Каталог оборудования
Lorem ipsum dolor sit amet, consectetur adipiscing elit, sed do eiusmod tempor incididunt ut labore et dolore magna aliqua.
Производители
Lorem ipsum dolor sit amet, consectetur adipiscing elit, sed do eiusmod tempor incididunt ut labore et dolore magna aliqua.
Функциональные группы
Lorem ipsum dolor sit amet, consectetur adipiscing elit, sed do eiusmod tempor incididunt ut labore et dolore magna aliqua.
В этой статье вы узнаете, как в Python считывать и записывать файлы MS Word.
- Установка библиотеки Python-Docx
- Чтение файлов MS Word с помощью модуля Python-Docx
- Чтение параграфов
- Чтение прогонов
- Написание файлов MS Word с помощью модуля Python-Docx
- Запись абзацев
- Запись прогонов
- Запись заголовков
- Добавление изображений
- Заключение
Существует несколько библиотек, которые можно использовать для чтения и записи в Python файлов MS Word. Мы будем использовать модуль python-docx .
Выполните приведенную ниже pip команду в терминале, чтобы загрузить модуль python-docx:
$ pip install python-docx
Создайте новый файл MS Word и переименуйте его в my_word_file.docx. Я сохранил файл в корне диска E. Файл my_word_file.docx должен иметь следующее содержимое

Чтобы считать указанный файл, импортируйте модуль docx, а затем создайте объект класса Document из модуля docx. Затем передайте путь к файлу my_word_file.docx в конструктор класса Document:
import docx

doc = docx.Document("E:/my_word_file.docx")
Объект doc класса Document теперь можно использовать для чтения содержимого файла my_word_file.docx.
С помощью объекта класса Document и пути к файлу можно получить доступ ко всем абзацам документа с помощью атрибута paragraphs. Пустая строка также читается как абзац.
Извлечем все абзацы из файла my_word_file.docx и затем отобразим общее количество абзацев документа:
all_paras = doc.paragraphs
len(all_paras)
Вывод:
Теперь поочередно выведем все абзацы, присутствующие в файле my_word_file.docx:
for para in all_paras:
    print(para.text)
    print("-------")
Вывод:
-------
Introduction
-------

-------
Welcome to stackabuse.com
-------
The best site for learning Python and Other Programming Languages
-------
Learn to program and write code in the most efficient manner
-------

-------
Details
-------

-------
This website contains useful programming articles for Java, Python, Spring etc.
-------
Вывод демонстрирует все абзацы, присутствующие в файле my_word_file.docx.
Также можно получить доступ к определенному абзацу, индексируя свойство paragraphs как массив. Давайте выведем пятый абзац в файле:
single_para = doc.paragraphs[4]
print(single_para.text)
Вывод:
The best site for learning Python and Other Programming Languages
Прогон в текстовом документе представляет собой непрерывную последовательность слов, имеющих схожие свойства. Например, одинаковые размеры шрифта, формы шрифта и стили шрифта.
Вторая строка файла my_word_file.docx содержит текст «Welcome to stackabuse.com». Слова «Welcome to» написаны простым шрифтом, а текст «stackabuse.com» — жирным. Следовательно, текст «Welcome to» считается одним прогоном, а текст, выделенный жирным шрифтом «stackabuse.com», считается другим прогоном.
Чтобы получить все прогоны в абзаце, можно использовать свойство run атрибута paragraphобъекта doc.
Считаем все прогоны из абзаца №5 (четвертый указатель) в тексте:
single_para = doc.paragraphs[4]
for run in single_para.runs:
    print(run.text)
Вывод:
The best site for
learning Python
 and Other
Programming Languages
Аналогичным образом приведенный ниже скрипт выводит все прогоны из 6-го абзаца файла my_word_file.docx:
second_para = doc.paragraphs[5]
for run in second_para.runs:
    print(run.text)
Вывод:
Learn to program and write code in the
most efficient manner
Чтобы записать файлы MS Word, создайте объект класса Document с пустым конструктором.
Для записи абзацев используйте метод add_paragraph() объекта класса Document. После добавления абзаца нужно вызвать метод save(). Путь к файлу, в который нужно записать абзац, передается в качестве параметра методу save(). Если файл не существует, то будет создан новый файл. Иначе абзац будет добавлен в конец существующего файла MS Word.
Приведенный ниже скрипт записывает простой абзац во вновь созданный файл my_written_file.docx.
mydoc.add_paragraph("This is first paragraph of a MS Word file.")
mydoc.save("E:/my_written_file.docx")
После выполнения этого скрипта вы должны увидеть новый файл my_written_file.docx в каталоге, который указали в методе save(). Внутри файла должен быть один абзац, который гласит: «This is first paragraph of a MS Word file.».
Добавим в файл my_written_file.docx еще один абзац:
mydoc.add_paragraph("This is the second paragraph of a MS Word file.")
mydoc.save("E:/my_written_file.docx")
Этот абзац будет добавлен в конец файла my_written_file.docx.
Вы также можете записать прогоны с помощью модуля python-docx. Для этого нужно создать дескриптор абзаца, к которому хотите добавить прогон:
third_para = mydoc.add_paragraph("This is the third paragraph.")
third_para.add_run(" this is a section at the end of third paragraph")
mydoc.save("E:/my_written_file.docx")
В приведенном выше скрипте записывается абзац с помощью метода add_paragraph()объекта mydoc класса Document. Метод add_paragraph() возвращает дескриптор для вновь добавленного пункта.
Чтобы добавить прогон к новому абзацу, необходимо вызвать метод add_run() для дескриптора абзаца. Текст прогона передается в виде строки в метод add_run(). Затем необходимо вызвать метод save() для создания фактического файла.
В файлы MS Word также можно добавлять заголовки. Для этого нужно вызвать метод add_heading(). Первым параметром метода add_heading() является текстовая строка для заголовка, а вторым – размер заголовка.
Приведенный ниже скрипт добавляет в файл my_written_file.docx три заголовка уровня 0, 1 и 2:
mydoc.add_heading("This is level 1 heading", 0)
mydoc.add_heading("This is level 2 heading", 1)
mydoc.add_heading("This is level 3 heading", 2)
mydoc.save("E:/my_written_file.docx")
Чтобы добавить в файлы MS Word изображения, используется метод add_picture(). Путь к изображению передается как параметр метода add_picture(). Также можно указать ширину и высоту изображения с помощью атрибута docx.shared.Inches().
Приведенный ниже скрипт добавляет изображение из локальной файловой системы в файл my_written_file.docx. Ширина и высота изображения будут 5 и 7 дюймов:
mydoc.add_picture("E:/eiffel-tower.jpg", width=docx.shared.Inches(5), height=docx.shared.Inches(7))
mydoc.save("E:/my_written_file.docx")
После выполнения всех скриптов, рассмотренных в этой статье, окончательный файл my_written_file.docx должен выглядеть следующим образом:

Он должен содержать три абзаца, три заголовка и одно изображение.
И этой статьи вы узнали, как читать и записывать файлы MS Word с помощью модуля python-docx.
Дайте знать, что вы думаете по этой теме материала в комментариях. Мы очень благодарим вас за ваши комментарии, лайки, отклики, дизлайки, подписки!
С помощью python-docx вы можете легко читать, создавать и изменять документы Word с помощью Python. Независимо от того, нужно ли вам создавать отчеты, шаблоны или автоматизировать задачи управления документами, python-docx может помочь вам оптимизировать рабочий процесс и сэкономить драгоценное время. В этой статье мы рассмотрим основы использования python-docx, а также некоторые продвинутые методы работы с документами Word на Python.
Чтение документа Word с помощью Python
import docx

# Load the Word document
doc = docx.Document('my_document.docx')

# Iterate through the paragraphs in the document
for para in doc.paragraphs:
    print(para.text)
Запись в документ Word с помощью Python
import docx

# Create a new Word document
doc = docx.Document()

# Add some text to the document
doc.add_paragraph('Hello, World!')

# Save the document
doc.save('my_new_document.docx')
Сканирование папки и применение изменений ко всем
Вы можете использовать модули «os» и «python-docx» вместе. Вот пример фрагмента кода:
import os
import docx

# Set the path of the folder to scan
folder_path = 'path/to/folder'

# Iterate through all files in the folder
for filename in os.listdir(folder_path):
    # Check if the file is a Word document
    if filename.endswith('.docx'):
        # Load the Word document
        doc = docx.Document(os.path.join(folder_path, filename))

        # Apply changes to the document
        # For example, add a new paragraph
        doc.add_paragraph('This document has been modified.')

        # Save the modified document
        doc.save(os.path.join(folder_path, filename))
В этом коде мы сначала устанавливаем путь к папке для сканирования, используя переменную folder_path. Затем мы перебираем все файлы в папке, используя функцию os.listdir(), и проверяем, является ли каждый файл документом Word, используя метод endwith(), чтобы проверить, заканчивается ли имя файла на «.docx».
Для каждого файла документа Word мы загружаем документ с помощью функции Document() и пути к файлу, созданного с помощью функции os.path.join(). Затем мы применяем изменения к документу по желанию, например, добавляем новый абзац.
Наконец, мы сохраняем измененный документ, используя метод save() и путь к файлу, созданный с помощью os.path.join(), перезаписывая исходный файл.
Обратите внимание, что этот код изменяет исходные документы Word на месте, поэтому при его использовании следует соблюдать осторожность, чтобы случайно не перезаписать важные документы. Рекомендуется сделать резервную копию исходных файлов перед запуском этого кода.
Другие распространенные операции
Модуль «python-docx» предоставляет широкий набор функций и возможностей для работы с документами Word в Python. Вот некоторые общие операции, которые вы можете выполнять с помощью этого модуля:
Создание таблиц
Вы можете создавать таблицы в документе Word с помощью функции add_table(), которая принимает в качестве аргументов количество строк и столбцов в таблице. Затем вы можете добавить данные в таблицу, используя метод cell() для доступа к отдельным ячейкам.
import docx

# Create a new Word document
doc = docx.Document()

# Add a table with 2 rows and 2 columns
table = doc.add_table(rows=2, cols=2)

# Access individual cells and set their text
table.cell(0, 0).text = 'Header 1'
table.cell(0, 1).text = 'Header 2'


table.cell(1, 0).text = 'Cell 1'
table.cell(1, 1).text = 'Cell 2'

table.cell(2, 0).text = 'Cell 3'
table.cell(2, 1).text = 'Cell 4'


# Save the document
doc.save('path/to/document_with_table.docx')
Добавить изображения
Вы можете добавлять изображения в документ Word с помощью функции add_picture(), которая принимает в качестве аргументов путь к файлу изображения, а также ширину и высоту изображения в документе.
import docx

# Open an existing Word document
doc = docx.Document('path/to/document.docx')

# Add an image to the end of the document
doc.add_picture('path/to/image.jpg', width=docx.shared.Inches(2), height=docx.shared.Inches(2))

# Save the modified document
doc.save('path/to/document_with_image.docx')
Применение форматирования
Вы можете применять различные параметры форматирования к тексту и другим элементам в документе Word, например размер и стиль шрифта, полужирный и курсивный текст, подчеркивание и т. д., используя функции, предоставляемые классом Font.
import docx

# Open an existing Word document
doc = docx.Document('path/to/document.docx')

# Access the first paragraph and apply formatting
first_para = doc.paragraphs[0]
first_para.add_run(' This text is bold.').bold = True
first_para.add_run(' This text is italic.').italic = True
first_para.add_run(' This text is underlined.').underline = True

# Save the modified document
doc.save('path/to/document_with_formatting.docx')
Добавьте верхние и нижние колонтитулы
Вы можете добавить верхние и нижние колонтитулы в документ Word, используя свойство section и методы верхнего и нижнего колонтитула класса Section.
import docx

# Open an existing Word document
doc = docx.Document('path/to/document.docx')

# Access the first section and add a header and footer
first_section = doc.sections[0]
header = first_section.header
footer = first_section.footer

# Set the text of the header and footer
header_text = header.paragraphs[0].add_run('This is the header text.')
footer_text = footer.paragraphs[0].add_run('This is the footer text.')

# Save the modified document
doc.save('path/to/document_with_header_footer.docx')
Создание списков
Вы можете создавать маркированные и нумерованные списки в документе Word, используя функцию add_paragraph() с аргументом стиля, установленным на «List Bullet» или «List Number» соответственно.
import docx

# Create a new Word document
doc = docx.Document()

# Add a bulleted list
doc.add_paragraph('This is the first item.', style='List Bullet')
doc.add_paragraph('This is the second item.', style='List Bullet')

# Add a numbered list
doc.add_paragraph('This is the first item.', style='List Number')
doc.add_paragraph('This is the second item.', style='List Number')
doc.add_paragraph('This is the third item.', style='List Number')

# Save the document
doc.save('path/to/document_with_lists.docx')The MS Word utility from Microsoft Office suite is one of the most commonly used tools for writing text documents, both simple and complex. Though humans can easily read and write MS Word documents, assuming you have the Office software installed, often times you need to read text from Word documents within another application.
For instance, if you are developing a natural language processing application in Python that takes MS Word files as input, you will need to read MS Word files in Python before you can process the text. Similarly, often times you need to write text to MS Word documents as output, which could be a dynamically generated report to download, for example.
In this article, article you will see how to read and write MS Word files in Python.
Installing Python-Docx Library
Several libraries exist that can be used to read and write MS Word files in Python. However, we will be using the python-docx module owing to its ease-of-use. Execute the following pip command in your terminal to download the python-docx module as shown below:
$ pip install python-docx
Reading MS Word Files with Python-Docx Module
In this section, you will see how to read text from MS Word files via the python-docx module.
Create a new MS Word file and rename it as «my_word_file.docx». I saved the file in the root of my «E» directory, although you can save the file anywhere you want. The my_word_file.docx file should have the following content:
To read the above file, first import the docx module and then create an object of the Document class from the docx module. Pass the path of the my_word_file.docx to the constructor of the Document class, as shown in the following script:
import docx

doc = docx.Document("E:/my_word_file.docx")
The Document class object doc can now be used to read the content of the my_word_file.docx.
Reading Paragraphs
Once you create an object of the Document class using the file path, you can access all the paragraphs in the document via the paragraphs attribute. An empty line is also read as a paragraph by the Document. Let’s fetch all the paragraphs from the my_word_file.docx and then display the total number of paragraphs in the document:
all_paras = doc.paragraphs
len(all_paras)
Output:
10
Now we’ll iteratively print all the paragraphs in the my_word_file.docx file:
for para in all_paras:
    print(para.text)
    print("-------")
Output:
-------
Introduction
-------

-------
Welcome to stackabuse.com
-------
The best site for learning Python and Other Programming Languages
-------
Learn to program and write code in the most efficient manner
-------

-------
Details
-------

-------
This website contains useful programming articles for Java, Python, Spring etc.
-------
The output shows all of the paragraphs in the Word file.
We can even access a specific paragraph by indexing the paragraphs property like an array. Let’s print the 5th paragraph in the file:
single_para = doc.paragraphs[4]
print(single_para.text)
Output:
The best site for learning Python and Other Programming Languages
Reading Runs
A run in a word document is a continuous sequence of words having similar properties, such as similar font sizes, font shapes, and font styles. For example, if you look at the second line of the my_word_file.docx, it contains the text «Welcome to stackabuse.com», here the text «Welcome to» is in plain font, while the text «stackabuse.com» is in bold face. Hence, the text «Welcome to» is considered as one run, while the bold faced text «stackabuse.com» is considered as another run.
Check out our hands-on, practical guide to learning Git, with best-practices, industry-accepted standards, and included cheat sheet. Stop Googling Git commands and actually learn it!
Similarly, «Learn to program and write code in the» and «most efficient manner» are treated as two different runs in the paragraph «Learn to program and write code in the most efficient manner».
To get all the runs in a paragraph, you can use the run property of the paragraph attribute of the doc object.
Let’s read all the runs from paragraph number 5 (4th index) in our text:
single_para = doc.paragraphs[4]
for run in single_para.runs:
    print(run.text)
Output:
The best site for
learning Python
 and Other
Programming Languages
In the same way, the following script prints all the runs from the 6th paragraph of the my_word_file.docx file:
second_para = doc.paragraphs[5]
for run in second_para.runs:
    print(run.text)
Output:
Learn to program and write code in the
most efficient manner
Writing MS Word Files with Python-Docx Module
In the previous section, you saw how to read MS Word files in Python using the python-docx module. In this section, you will see how to write MS Word files via the python-docx module.
To write MS Word files, you have to create an object of the Document class with an empty constructor, or without passing a file name.
mydoc = docx.Document()
Writing Paragraphs
To write paragraphs, you can use the add_paragraph() method of the Document class object. Once you have added a paragraph, you will need to call the save() method on the Document class object. The path of the file to which you want to write your paragraph is passed as a parameter to the save() method. If the file doesn’t already exist, a new file will be created, otherwise the paragraph will be appended at the end of the existing MS Word file.
The following script writes a simple paragraph to a newly created MS Word file named «my_written_file.docx».
mydoc.add_paragraph("This is first paragraph of a MS Word file.")
mydoc.save("E:/my_written_file.docx")
Once you execute the above script, you should see a new file «my_written_file.docx» in the directory that you specified in the save() method. Inside the file, you should see one paragraph which reads «This is first paragraph of a MS Word file.»
Let’s add another paragraph to the my_written_file.docx:
mydoc.add_paragraph("This is the second paragraph of a MS Word file.")
mydoc.save("E:/my_written_file.docx")
This second paragraph will be appended at the end of the existing content in my_written_file.docx.
Writing Runs
You can also write runs using the python-docx module. To write runs, you first have to create a handle for the paragraph to which you want to add your run. Take a look at the following example to see how it’s done:
third_para = mydoc.add_paragraph("This is the third paragraph.")
third_para.add_run(" this is a section at the end of third paragraph")
mydoc.save("E:/my_written_file.docx")
In the script above we write a paragraph using the add_paragraph() method of the Document class object mydoc. The add_paragraph() method returns a handle for the newly added paragraph. To add a run to the new paragraph, you need to call the add_run() method on the paragraph handle. The text for the run is passed in the form of a string to the add_run() method. Finally, you need to call the save() method to create the actual file.
You can also add headers to MS Word files. To do so, you need to call the add_heading() method. The first parameter to the add_heading() method is the text string for header, and the second parameter is the header size. The header sizes start from 0, with 0 being the top level header.
The following script adds three headers of level 0, 1, and 2 to the file my_written_file.docx:
mydoc.add_heading("This is level 1 heading", 0)
mydoc.add_heading("This is level 2 heading", 1)
mydoc.add_heading("This is level 3 heading", 2)
mydoc.save("E:/my_written_file.docx")
Adding Images
To add images to MS Word files, you can use the add_picture() method. The path to the image is passed as a parameter to the add_picture() method. You can also specify the width and height of the image using the docx.shared.Inches() attribute. The following script adds an image from the local file system to the my_written_file.docx Word file. The width and height of the image will be 5 and 7 inches, respectively:
mydoc.add_picture("E:/eiffel-tower.jpg", width=docx.shared.Inches(5), height=docx.shared.Inches(7))
mydoc.save("E:/my_written_file.docx")
After executing all the scripts in the Writing MS Word Files with Python-Docx Module section of this article, your final my_written_file.docx file should look like this:
In the output, you can see the three paragraphs that you added to the MS word file, along with the three headers and one image.
Conclusion
The article gave a brief overview of how to read and write MS Word files using the python-docx module. The article covers how to read paragraphs and runs from within a MS Word file. Finally, the process of writing MS Word files, adding a paragraph, runs, headers, and images to MS Word files have been explained in this article.

This post will talk about how to read Word Documents with Python. We’re going to cover three different packages – docx2txt, docx, and my personal favorite: docx2python.
The docx2txt package
Let’s talk about docx2text first. This is a Python package that allows you to scrape text and images from Word Documents. The example below reads in a Word Document containing the Zen of Python. As you can see, once we’ve imported docx2txt, all we need is one line of code to read in the text from the Word Document. We can read in the document using a method in the package called process, which takes the name of the file as input. Regular text, listed items, hyperlink text, and table text will all be returned in a single string.
import docx2txt

# read in word file
result = docx2txt.process("zen_of_python.docx")

What if the file has images? In that case we just need a minor tweak to our code. When we run the process method, we can pass an extra parameter that specifies the name of an output directory. Running docx2txt.process will extract any images in the Word Document and save them into this specified folder. The text from the file will still also be extracted and stored in the result variable.
import docx2txt

result = docx2txt.process("zen_of_python_with_image.docx", "C:/path/to/store/files")
Sample Image

docx2txt will also scrape any text from tables. Again, this will be returned into a single string with any other text found in the document, which means this text can more difficult to parse. Later in this post we’ll talk about docx2python, which allows you to scrape tables in a more structured format.
The docx package
The source code behind docx2txt is derived from code in the docx package, which can also be used to scrape Word Documents. docx is a powerful library for manipulating and creating Word Documents, but can also (with some restrictions) read in text from Word files.
In the example below, we open a connection to our sample word file using the docx.Document method. Here we just input the name of the file we want to connect to. Then, we can scrape the text from each paragraph in the file using a list comprehension in conjunction with doc.paragraphs. This will include scraping separate lines defined in the Word Document for listed items. Unlike docx2txt, docx, cannot scrape images from Word Documents. Also, docx will not scrape out hyperlinks and text in tables defined in the Word Document.
import docx

# open connection to Word Document
doc = docx.Document("zen_of_python.docx")

# read in each paragraph in file
result = [p.text for p in doc.paragraphs]

The docx2python package
docx2python is another package we can use to scrape Word Documents. It has some additional features beyond docx2txt and docx. For example, it is able to return the text scraped from a document in a more structured format. Let’s test out our Word Document with docx2python. We’re going to add a simple table in the document so that we can extract that as well (see below).

docx2python contains a method with the same name. If we call this method with the document’s name as input, we get back an object with several attributes.
from docx2python import docx2python

# extract docx content
doc_result = docx2python('zen_of_python.docx')
Each attribute provides either text or information from the file. For example, consider that our file has three main components – the text containing the Zen of Python, a table, and an image. If we call doc_result.body, each of these components will be returned as separate items in a list.
# get separate components of the document
doc_result.body

# get the text from Zen of Python
doc_result[0]

# get the image
doc_result[1]

# get the table text
doc_result[2]
Scraping a word document table with docx2python
The table text result is returned as a nested list, as you can see below. Each row (including the header) gets returned as a separate sub-list. The 0th element of the list refers to the header – or 0th row of the table. The next element refers to the next row in the table and so on. In turn, each value in a row is returned as an individual sub-list within that row’s corresponding list.

We can convert this result into a tabular format using pandas. The data frame is still a little messy – each cell in the data frame is a list containing a single value. This value also has quite a few “t”‘s (which represent tab spaces).
pd.DataFrame(doc_result.body[1][1:])

Here, we use the applymap method to apply the lambda function below to every cell in the data frame. This function gets the individual value within the list in each cell and removes all instances of “t”.
import pandas as pd


pd.DataFrame(doc_result.body[1][1:]).
                            applymap(lambda val: val[0].strip("t"))

Next, let’s change the column headers to what we see in the Word file (which was also returned to us in doc_result.body).
df.columns = [val[0].strip("t") for val in doc_result.body[1][0]]

Extracting images
We can extract the Word file’s images using the images attribute of our doc_result object. doc_result.images consists of a dictionary where the keys are the names of the image files (not automatically written to disk) and the corresponding values are the images files in binary format.
type(doc_result.images) # dict

doc_result.images.keys() # dict_keys(['image1.png'])
We can write the binary-formatted image out to a physical file like this:
for key,val in doc_result.images.items():
    f = open(key, "wb")
    f.write(val)
    f.close()
Above we’re just looping through the keys (image file names) and values (binary images) in the dictionary and writing each out to file. In this case, we only have one image in the document, so we just get one written out.
Other attributes
The docx2python result has several other attributes we can use to extract text or information from the file. For example, if we want to just get all of the file’s text in a single string (similar to docx2txt) we can run doc_result.text.
# get all text in a single string
doc_result.text
In addition to text, we can also get metadata about the file using the properties attribute. This returns information such as the creator of the document, the created / last modified dates, and number of revisions.
doc_result.properties
If the document you’re scraping has headers and footers, you can also scrape those out like this (note the singular version of “header” and “footer”):
# get the headers
doc_result.header

# get the footers
doc_result.footer
Footnotes can also be extracted like this:
doc_result.footnotes
Getting HTML returned with docx2python
We can also specify that we want to get an HTML object returned with the docx2python method that supports a few types of tags including font (size and color), italics, bold, and underline text. We just need to specify the parameter “html = True”. In the example below we see The Zen of Python in bold and underlined print. Corresponding to this, we can see the HTML version of this in the second snapshot below. The HTML feature does not currently support table-related tags, so I would recommend using the method we went through above if you’re looking to scrape tables from Word documents.
doc_html_result = docx2python('zen_of_python.docx', html = True)


Hope you enjoyed this post! Please check out other Python posts of mine below or by clicking here.