
You can use either a text box or WordArt to add text on top of a photo in Word, Outlook, PowerPoint, or Excel.
Text box over a photo

If your text is longer or doesn’t need fancy styling, a text box may be suitable. You can format the text any way you like.
WordArt over a photo

If the text is brief and you want a stylized look—similar to what you might see on a postcard—then WordArt might be your best option.
Which app are you using?
Word or Outlook | PowerPoint or Excel
Word or Outlook
Use a text box to add text on top of a photo
-
In your document, click to select an insertion point.
-
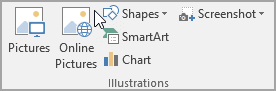
On the Insert tab, in the Illustrations group, click Shapes, and then click New Drawing Canvas.

-
Click the drawing canvas, and then, on the Insert tab, in the Illustrations group, click Pictures.
-
Browse to and double-click the photo that you want to use, and then click outside the drawing canvas.
-
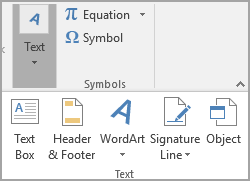
On the Insert tab, in the Text group, click Text Box, and then at the bottom of the menu, click Draw Text Box.
-
Type the text that you want to appear in the text box, and then drag the text box to the location that you want on top of the picture.
-
To change the font or style of the text, highlight the text and then select the text formatting you want on the shortcut menu.
-
Click the outside edge of the text box, and then drag the text box to position it over your photo.
-
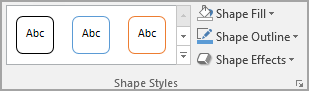
Make sure that the text box is still selected, and then, on the Shape Format tab, in the Shape Styles group, do the following:
-
Click Shape Fill, and then click No Fill.
-
Click Shape Outline, and then click No Outline.
-
-
Click the outside edge of the photo, press and hold Ctrl, and then click the edge of the WordArt so that both items are selected.
-
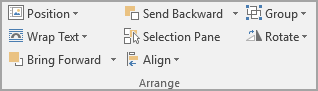
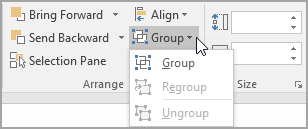
On the Shape Format tab, in the Arrange group, select Group > Group.


Use WordArt to add text on top of a photo
-
In your document, click to select an insertion point.
-
On the Insert tab, in the Illustrations group, click Shapes, and then click New Drawing Canvas.
-
Click the drawing canvas, and then, on the Insert tab, in the Illustrations group, click Pictures.
-
Browse to and double-click the photo that you want to use.
-
On the Insert tab, in the Text group, click WordArt, click the style of text you want, and then type your text.
-
Click the outside edge of the WordArt to select it, drag the text over your photo and then, if you want, rotate the text to the angle that works best for your photo.
-
Click the outside edge of the photo, press and hold Ctrl, and then click the edge of the WordArt so that both items are selected.
-
On the Picture Format tab, in the Arrange group, select Group > Group.
PowerPoint or Excel
Use a text box to add text on top of a photo
-
In your file, make sure that you’ve inserted a photo.
-
On the Insert tab, in the Text group, click Text Box, drag to draw a text box anywhere near the picture, and then type your text.
-
To change the font or style of the text, highlight the text, right-click it, and then select the text formatting you want on the shortcut menu.
-
Click the outside edge of the text box, drag the text over your photo and then, if you want, rotate the text to the angle that works best for your photo.
-
Make sure that the text box is still selected, and then, on the Shape Format tab, in the Shape Styles group, do the following:
-
Click Shape Fill, and then click No Fill.
-
Click Shape Outline, and then click No Outline.
-
-
Click the outside edge of the photo, press Ctrl, and then click the edge of the text box so that both items are selected.
-
On the Shape Format tab, in the Arrange group, select Group > Group.
Use WordArt to add text on top of a photo
-
In your file, make sure that you’ve inserted a photo.
-
On the Insert tab, in the Text group, click WordArt, click the style of text you want, and then type your text.
-
Click the outside edge of the WordArt to select it, drag the text over your photo and then, if you want to, rotate the text to the angle that works best for your photo.
-
Click the outside edge of the photo, press and hold Ctrl, and then click the edge of the WordArt so that both items are selected.
-
On the Shape Format tab, in the Arrange group, select Group > Group.
Which app are you using?
Word or Outlook | PowerPoint or Excel
Word or Outlook
Use a text box to add text on top of a photo
-
In your document, click to select an insertion point.
-
On the Insert tab, in the Illustrations group, click Shapes, and then click New Drawing Canvas.
-
Click the drawing canvas, and then, on the Insert tab, in the Illustrations group, click Pictures.
-
Browse to and double-click the photo that you want to use, and then click outside the drawing canvas.
-
On the Insert tab, in the Text group, click Text Box, and then at the bottom of the menu, click Draw Text Box.
-
Type the text that you want to appear in the text box, and then drag the text box to the location that you want on top of the picture.
-
To change the font or style of the text, highlight the text and then select the text formatting you want on the shortcut menu.
-
Click the outside edge of the text box, and then drag the text box to position it over your photo.
-
Make sure that the text box is still selected, and then, under Drawing Tools, on the Format tab, in the Shape Styles group, do the following:
-
Click Shape Fill, and then click No Fill.
-
Click Shape Outline, and then click No Outline.
-
-
Click the outside edge of the photo, press and hold Ctrl, and then click the edge of the WordArt so that both items are selected.
-
Under Drawing Tools, on the Format tab, in the Arrange group, select Group > Group.
Use WordArt to add text on top of a photo
-
In your document, click to select an insertion point.
-
On the Insert tab, in the Illustrations group, click Shapes, and then click New Drawing Canvas.
-
Click the drawing canvas, and then, on the Insert tab, in the Illustrations group, click Pictures.
-
Browse to and double-click the photo that you want to use.
-
On the Insert tab, in the Text group, click WordArt, click the style of text you want, and then type your text.
-
Click the outside edge of the WordArt to select it, drag the text over your photo and then, if you want, rotate the text to the angle that works best for your photo.
-
Click the outside edge of the photo, press and hold Ctrl, and then click the edge of the WordArt so that both items are selected.
-
Under Picture Tools, on the Format tab, in the Arrange group, select Group > Group.
PowerPoint or Excel
Use a text box to add text on top of a photo
-
In your file, make sure that you’ve inserted a photo.
-
On the Insert tab, in the Text group, click Text Box, drag to draw a text box anywhere near the picture, and then type your text.
-
To change the font or style of the text, highlight the text, right-click it, and then select the text formatting you want on the shortcut menu.
-
Click the outside edge of the text box, drag the text over your photo and then, if you want, rotate the text to the angle that works best for your photo.
-
Make sure that the text box is still selected, and then, under Drawing Tools, on the Format tab, in the Shape Styles group, do the following:
-
Click Shape Fill, and then click No Fill.
-
Click Shape Outline, and then click No Outline.
-
-
Click the outside edge of the photo, press Ctrl, and then click the edge of the text box so that both items are selected.
-
Under Drawing Tools, on the Format tab, in the Arrange group, select Group > Group.
Use WordArt to add text on top of a photo
-
In your file, make sure that you’ve inserted a photo.
-
On the Insert tab, in the Text group, click WordArt, click the style of text you want, and then type your text.
-
Click the outside edge of the WordArt to select it, drag the text over your photo and then, if you want to, rotate the text to the angle that works best for your photo.
-
Click the outside edge of the photo, press and hold Ctrl, and then click the edge of the WordArt so that both items are selected.
-
Under Drawing Tools, on the Format tab, in the Arrange group, select Group > Group.
On the Insert tab, in the Text group, click Text Box, drag to draw a text box anywhere near the picture, and then type your text. To change the font or style of the text, highlight the text, right-click it, and then select the text formatting you want on the shortcut menu.
Contents
- 1 How do I put text onto a picture?
- 2 Can we edit text in image?
- 3 How can I add text to a picture for free?
- 4 How do I put text beside a picture in Word?
- 5 How do I insert text into text in Word?
- 6 How do I put text and pictures side by side in Word?
- 7 How do I edit words in a picture?
- 8 How do I edit text in a screenshot?
- 9 How can I edit text in a JPG file?
- 10 How do I put text side by side in Word?
- 11 Can you layer text in Word?
- 12 How do you overlay text on text?
- 13 What is insertion mode?
- 14 How can I add text to a JPEG image online?
- 15 How do I add text to a screenshot?
- 16 How do I put a screenshot into a photo?
- 17 How do you write on a screen shot?
How do I put text onto a picture?
Add Text to Photos on Android Using Google Photos
- Open a photo in Google Photos.
- At the bottom of the photo, tap Edit (three horizontal lines).
- Tap the Markup icon (squiggly line). You can also select the color of text from this screen.
- Tap the Text tool and enter your desired text.
- Select Done when you’ve finished.
Can we edit text in image?
Edit text in an image
Edit the style and content of any Type layer. To edit text on a type layer, select the type layer in the Layers panel and select the Horizontal or Vertical Type tool in the Tools panel. Make a change to any of the settings in the options bar, such as font or text color.
How can I add text to a picture for free?
How it works
- Upload a single photo from your computer, Google Drive or Dropbox. Add a text or a logo.
- Edit your text or logo using the editing toolkit. Drag your text or logo to any place within the picture.
- Click on “Save image” and download a copy of your image with the text or logo.
How do I put text beside a picture in Word?
Configure text wrapping around a picture or drawing object
- Select the picture or object.
- Go to Picture Format or Shape Format and select Arrange > Wrap Text. If the window is wide enough, Word displays Wrap Text directly on the Picture Format tab.
- Choose the wrapping options that you want to apply.
How do I insert text into text in Word?
Word Options
- Click “File,” “Options” and then the “Advanced” tab.
- Check “Use Overtype Mode” in the Editing Options section.
- Click “OK” to enable Overtype and close the Word Options window.
- Click anywhere in the document and start typing to overwrite text to the right of the cursor.
How do I put text and pictures side by side in Word?
Word – insert side by side images into document
- Click on the first of the two images that you want to align.
- Click the “Format” tab, then click “Wrap Text” in the Arrange group.
- Click the second image and repeat the process of changing the way text interacts with the image.
How do I edit words in a picture?
It’s super easy. Go to the online photo editor – Fotor and click “Edit a Photo” and upload your image. Then click “Text” and insert the text pane into your images and type the words you want to add. After a few clicks, you can give your photo something honest to give it context.
How do I edit text in a screenshot?
Ways to Edit Screenshots on Android
- Take a screenshot on your stock Android phone using the shortcut: pressing the power button and volume down button simultaneously.
- When it is captured, you will see three options- Edit, Delete and Share.
- Tap on Edit and it will take you to Google Photos editor.
How can I edit text in a JPG file?
Use Kapwing’s tools to crop, resize, rotate, flip, filter, recolor, and frame your pictures, or add text, shapes, animations, watermarks, logos, and overlays.
Edit your pictures with your own personality, style, and flair, no matter what you use them for.
- Upload your image.
- Make your edits.
- Export.
How do I put text side by side in Word?
How to Make Two-Column Text in Word 2016
- Start up a new document. Or if you have an existing document, move the toothpick cursor to the document’s tippy-top by pressing Ctrl+Home.
- Click the Layout tab.
- Click the Columns button and choose Two. You’re done.
Can you layer text in Word?
To layer items in any Word document, including label templates, you need to use the “Arrange” tools. The key tools that you need are “Bring Forward”, “Send Backward”, and (if you are using pictures or shapes) “Wrap Text”. To find the Arrange tools, left click on an image to select it.
How do you overlay text on text?
To have text appear “on top” of other text or objects in Word, set it within a text box (Insert > Text Box), then right-click it and choose Format Text Box to change the wrapping style Layout to “In Front of text”.
What is insertion mode?
Updated: 08/02/2020 by Computer Hope. Insert mode is a mechanism that allows users to insert text without overwriting other text. This mode, if it’s supported, is entered and exited by pressing the Insert key on a keyboard. Tip.
How can I add text to a JPEG image online?
How to Add Custom Text to Images with Kapwing
- Upload your Image. Upload the photo that you want to add text to or paste a link from Instagram, Twitter, etc to import the photo directly.
- Add and Style Text. Use the Text tool to put the font where you want it on the photo.
- Export and Share.
How do I add text to a screenshot?
Best thing you can do is this:
- Take a screen shot using the Snip n Sketch tool.
- Click on the […]
- Select Paint on the menu that will show up (you can try another photo editor app if you have another one)
- On the Paint window, you’ll see your screen shot.
- Click on the place you want to add the text and just type it in.
How do I put a screenshot into a photo?
Insert a Picture Screen Shot
Click the Screenshot button. Click Screen Clipping. Display the screen you want to capture, and then drag the large plus cursor to select the screen area to capture. Click the Screenshot button, and then click the thumbnail of the screen shot you want to insert.
How do you write on a screen shot?
Use your mouse like a pen to draw on the screenshot. Draw a line. Click-and-drag to start the line and release to end it. Hold the Ctrl key while dragging to force a horizontal or vertical line.
Содержание
- Добавление поверх рисунка надписи в стиле WordArt
- Добавление поверх рисунка обычного текста
- Добавление подписи к рисунку
- Вопросы и ответы

Помимо работы с текстом, программа MS Word также позволяет работать и с графическими файлами, которые в ней можно изменять (хоть и по минимуму). Так, нередко добавленную в документ картинку требуется как-нибудь подписать или дополнить, причем, сделать это необходимо так, чтобы сам текст находился поверх изображения. Именно о том, как наложить текст на картинку в Ворде, мы и расскажем ниже.
Существует два метода, с помощью которых можно наложить текст поверх картинки — это использование стилей WordArt и добавление текстового поля. В первом случае надпись будет красивая, но шаблонная, во втором — вы имеете свободу выбора шрифтов, типа написания и форматирования.
Microsoft Word заслужено считается одним из лучших текстовых редакторов, но для работы с графическими элементами, даже элементарной, он подходит с большой натяжкой. Поэтому для наложения надписи на картинку целесообразнее будет воспользоваться не этой программой, а более специализированным средством – онлайн-сервисом Canva, где данная задача решается буквально в несколько кликов, а доступные во встроенном редакторе шаблоны помогут качественно улучшить подобный проект.
Урок: Как в Word изменить шрифт
Добавление поверх рисунка надписи в стиле WordArt
1. Откройте вкладку “Вставка” и в группе “Текст” нажмите на пункт “WordArt”.
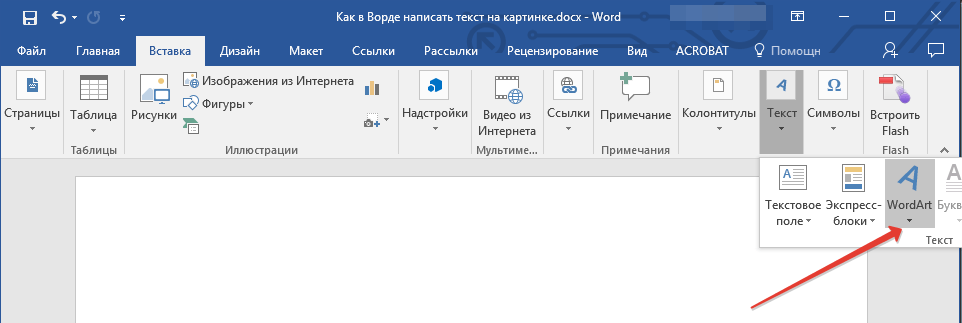
2. Из развернувшегося меню выберите подходящий стиль для надписи.
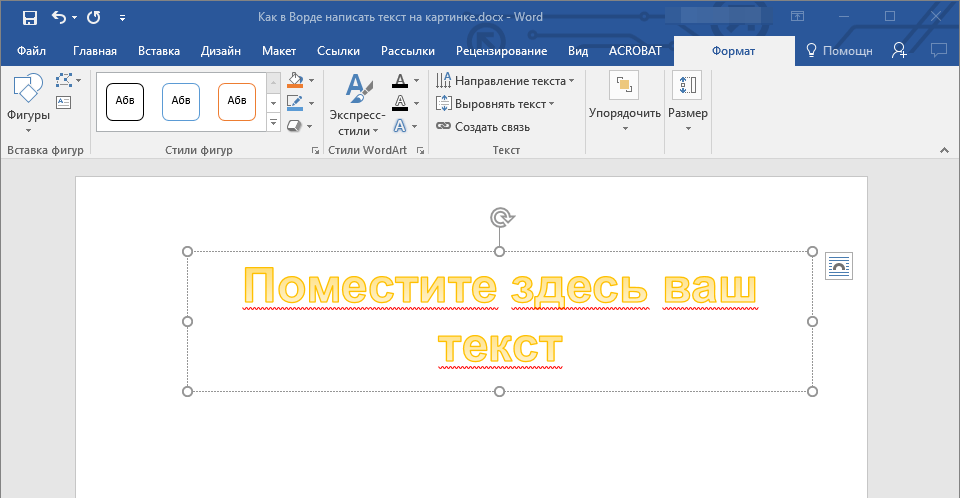
3. После того, как вы кликните по выбранному стилю, он будет добавлен на страницу документа. Введите необходимую надпись.
Примечание: После добавления надписи WordArt появится вкладка “Формат”, в которой можно выполнить дополнительные настройки. Кроме того, вы можете изменить размер надписи, потянув за границы поля, в котором она находится.

4. Добавьте в документ изображение, воспользовавшись инструкцией по ссылке ниже.


Урок: Как в Word вставить картинку
5. Переместите надпись WordArt, расположив ее поверх изображения так, как вам это необходимо. Кроме того, вы можете выровнять положение текста, воспользовавшись нашей инструкцией.
Урок: Как в Ворде выровнять текст
6. Готово, вы наложили надпись в стиле WordArt поверх изображения.
Добавление поверх рисунка обычного текста
1. Откройте вкладку “Вставка” и в разделе “Текстовое поле” выберите пункт “Простая надпись”.

2. Введите необходимый текст в появившееся текстовое поле. Выровняйте размеры поля, если это необходимо.

3. Во вкладке “Формат”, которая появляется после добавления текстового поля, выполните необходимые настройки. Также, вы можете изменить внешний вид текста в поле стандартным способом (вкладка “Главная”, группа “Шрифт”).

Урок: Как в Word повернуть текст
4. Добавьте изображение в документ.

5. Переместите текстовое поле на картинку, если это необходимо, выровняйте положение объектов, воспользовавшись инструментами в группе “Абзац” (вкладка “Главная”).

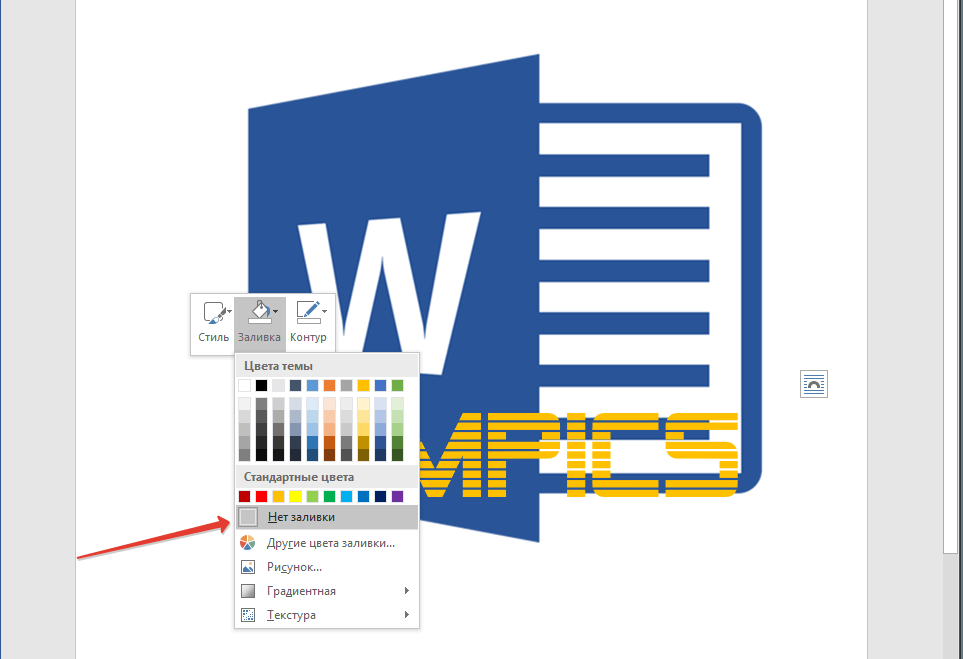
- Совет: Если текстовое поле отображается в виде надписи на белом фоне, перекрывая таким образом изображение, кликните по его краю правой кнопкой мышки и в разделе “Заливка” выберите пункт “Нет заливки”.
Добавление подписи к рисунку
Кроме наложения надписи поверх изображения, вы также можете добавить к нему подпись (название).
1. Добавьте изображение в документ Word и кликните по нему правой кнопкой мышки.

2. Выберите пункт “Вставить название”.
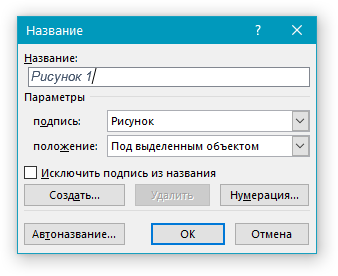
3. В открывшемся окне введите необходимый текст после слова “Рисунок 1” (остается неизменным в этом окне). Если это необходимо, выберите положение подписи (над или под изображением), развернув меню соответствующего раздела. Нажмите кнопку “ОК”.
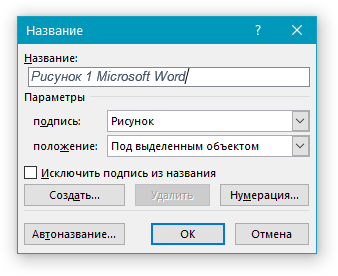
4. Подпись будет добавлена к графическому файлу, надпись “Рисунок 1” можно будет удалить, оставив только введенный вами текст.

На этом все, теперь вы знаете, как сделать надпись на картинке в Ворде, а также о том, как подписывать рисунки в этой программе. Желаем вам успехов в дальнейшем освоении этого офисного продукта.
Как вставить текст в картинку в Ворде
Что обычный пользователь делает, когда в документе Word нужно поместить текст на изображении? Правильно, применяет разные графические редакторы от стандартного Paint до мощного PhotoShop, а на это тратится время и результат может не порадовать. Но существует несколько вариантов вставки в картинку текста в ворде, который будет смотреться оригинально, в самом Word не прибегая к применению других программ.
Приведенная инструкция познакомит с приемами создания любых надписей на изображении.
Способ №1: текстовый блок
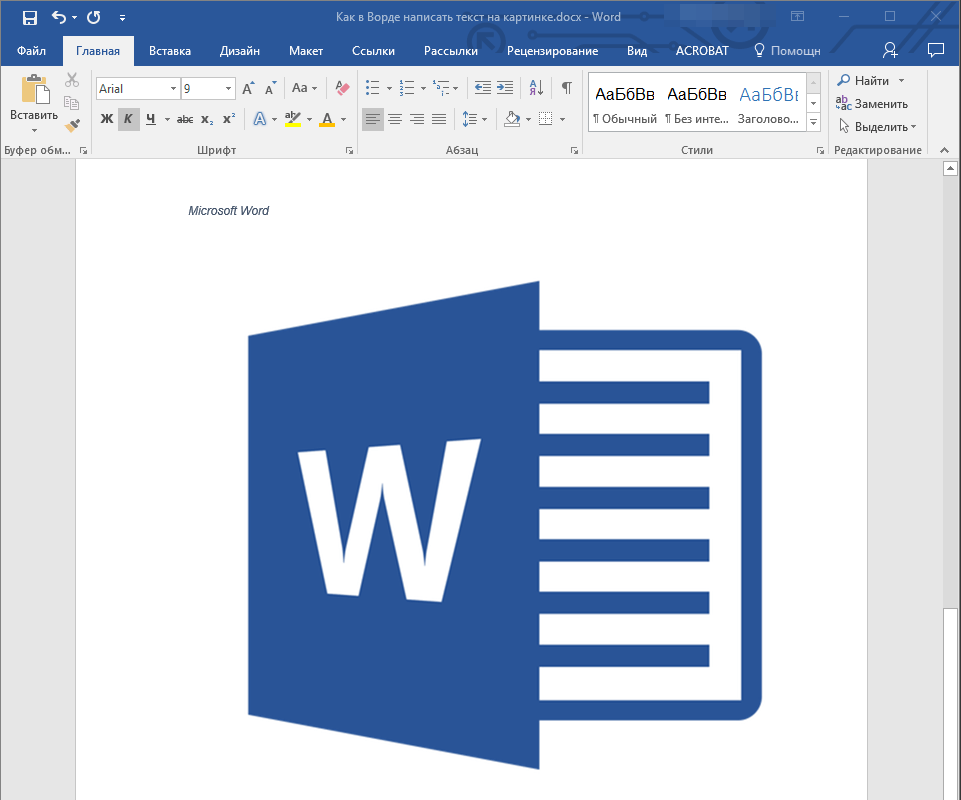
Итак, предположим, что в документе уже присутствует нужный рисунок и на нем осталось лишь разместить несколько предложений или список. Как это сделать? Для каждого релиза текстового редактора схема отличается, но незначительно.
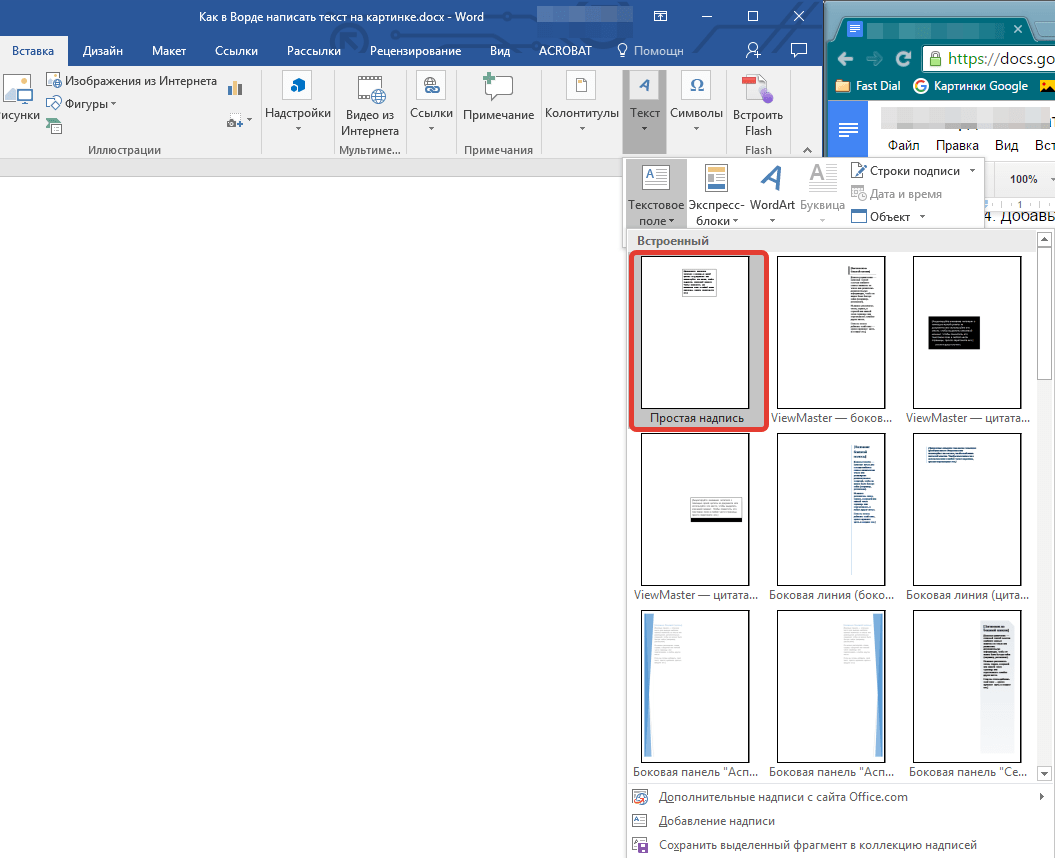
После этого развернется меню с набором готовых шаблонов. Тут нажмите «Простая надпись» (это будет первый пример в окне). В результате на листе отобразится рамка с образцом текста.
Далее, перетащите полученный объект на картинку. Для этого наведите курсор на обрамление, стрелка поменяет вид на черный крестик. Зажмите левую кнопку и, не отпуская ее, передвиньте блок в требуемое место на рисунке.

Пока вы получите белое поле, обрамленное черной рамкой. Напечатайте вместо примера текста нужный фрагмент и отформатируйте его согласно своим требованиям (величину шрифта, цвет, стиль и прочее). Размеры блока тоже изменяются. Его можно расширить или уменьшить.
Теперь надо убрать белый фон и обрамление. Для этого просто кликните по надписи и перейдите во вкладку «Формат». Отыщите и щелкните в группе «Стили» по кнопке «Заливка фигуры». Выпадет меню, где выберите пункт «Нет заливки», и фон отключится.
Осталось убрать рамку. В этой же группе кликните «Контур фигуры», а в списке нажмите «Нет контура». Команда отключает обрамление.

Стандартными средствами Word можно создать хорошо оформленную подпись, любого цвета, стиля, размера. Это гораздо удобней и быстрей, чем пользоваться графическими редакторами.
Способ №2: объект Вордарт
Есть еще один интересный прием создания надписи — вставка объекта WordArt. По сути, это такое же текстовое поле, только имеющее более интересную стилизацию шрифта (с тенью, отражением, объемом и так далее).
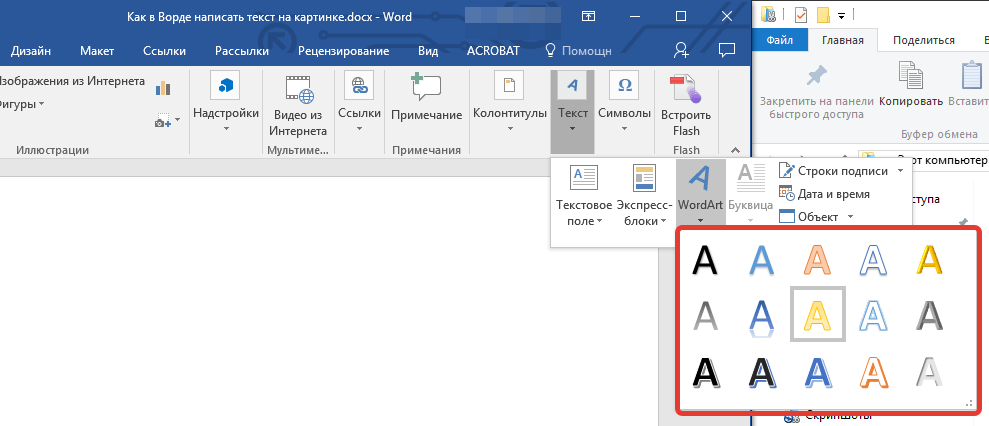
Во вкладке «Вставка» щелкните кнопку «Добавить объект WordArt» в виде голубой повернутой буквы А. Отобразятся наглядные примеры. Выберите, что подходит к изображению и просто кликните по образцу.

Теперь введите нужную информацию в блоке и перетащите полученное на картинку.
Способ №3: обтекание текстом
Метод хорош в том случае, когда рисунок используется в качестве подложки страницы целиком.
На вставленной картинке щелкните правой кнопкой и выберите в контекстном меню строку «Обтекание текстом». Далее, нажмите пункт «За текстом».

Теперь наполняйте документ как обычно. Только фоном будет служить рисунок, а не стандартный белый цвет.
С помощью приведенных приемов вы легко сделаете отлично оформленный текст на картинке. При этом надобность в использовании графических редакторов отпадает.
Изменение прозрачности рисунка в Microsoft Word

Как вы наверняка уже знаете, в MS Word можно работать не только с текстом, но и с рисунками. Последние после добавления в программу можно даже редактировать с помощью большого набора встроенных инструментов. Однако, учитывая тот факт, что Ворд — это все-таки текстовый редактор, с некоторыми задачами по работе с изображениями бывает не так просто справиться.
Одна из задач, с которой могут столкнуться пользователи данной программы — необходимость изменить прозрачность добавленного рисунка. Это может потребоваться для того, чтобы уменьшить акцент на изображении, либо же визуально “отдалить” его от текста, а также по ряду других причин. Именно о том, как в Ворде изменить прозрачность рисунка мы и расскажем ниже.
1. Откройте документ, но пока не торопитесь добавлять в него рисунок, прозрачность которого требуется изменить.

2. Перейдите во вкладку “Вставка” и нажмите кнопку “Фигуры”.

3. В выпадающем меню выберите простую фигуру, прямоугольник подойдет лучше всего.

4. Правой кнопкой мышки кликните внутри добавленной фигуры.

5. В открывшемся справа окне в разделе “Заливка” выберите пункт “Рисунок”.

6. Выберите в открывшемся окне “Вставка картинок” пункт “Из файла”.

7. В окне проводника укажите путь к рисунку, прозрачность которого необходимо изменить.

8. Нажмите “Вставить” для добавления рисунка в область фигуры.
9. Кликните правой кнопкой мышки по добавленному рисунку, нажмите на кнопку “Заливка” и выберите пункт “Текстура”, а затем “Другие текстуры”.

10. В окне “Формат рисунка”, которое появится справа, перемещайте ползунок параметра “Прозрачность”, пока не добьетесь желаемого результата.

11. Закройте окно “Формат рисунка”.

11. Удалите контур фигуры, внутри которой находится картинка. Для этого выполните следующие действия:
- Во вкладке “Формат”, которая появляется при нажатии на фигуру, разверните меню кнопки “Контур фигуры”;
- Выберите пункт “Нет контура”.
- Кликните в пустом месте документа, чтобы выйти из режима редактирования.

Важное примечание: Изменяя исходные размеры фигуры путем перетаскивания маркеров, расположенных на ее контуре, можно исказить находящееся внутри нее изображение.
- Совет: Для настройки внешнего вида рисунка можно использовать параметр “Смещение”, который находится под параметром “Прозрачность”, расположенным в окне “Формат рисунка”.
12. После внесения всех необходимых изменений, закройте окно “Формат рисунка”.

Изменение прозрачности части рисунка
Среди инструментов, представленных во вкладке “Формат” (появляется после добавления рисунка в документ) есть и те, с помощью которых можно сделать прозрачным не все изображение, а его отдельную область.
Важно понимать, что идеального результата можно добиться лишь в том случае, если область рисунка, прозрачность которой вы хотите изменить, является одноцветной.
Примечание: Некоторые области изображений могут казаться одноцветными, не являясь таковыми на самом деле. Например, обычный листья деревьев на фотографии или картинке могут содержать в себе широчайший диапазон близких по цвету оттенков. В таком случае желаемого эффекта прозрачности добиться не получится.
1. Добавьте изображение в документ, воспользовавшись нашей инструкцией.

2. Дважды кликните по изображению, чтобы открылась вкладка “Формат”.

3. Нажмите на кнопку “Цвет” и выберите в выпадающем меню параметр “Установить прозрачный цвет”.

4. Вид указателя курсора изменится. Кликните ним по тому цвету, который необходимо сделать прозрачным.
5. Выбранная вами область рисунка (цвет) станет прозрачной.

Примечание: На печати прозрачные области изображений будут иметь тот же цвет, что и бумага, на которой они распечатываются. При вставке такого изображения на веб-сайт, его прозрачная область примет цвет фона сайта.
На этом все, теперь вы знаете, как в Word изменить прозрачность рисунка, а также знаете о том, как сделать прозрачными отдельные его фрагменты. Не забывайте о том, что данная программа — это текстовый, а не графический редактор, поэтому не следует выдвигать к нему слишком высоких требований.
Мы рады, что смогли помочь Вам в решении проблемы.
Помимо этой статьи, на сайте еще 11902 инструкций.
Добавьте сайт Lumpics.ru в закладки (CTRL+D) и мы точно еще пригодимся вам.
Отблагодарите автора, поделитесь статьей в социальных сетях.
Опишите, что у вас не получилось. Наши специалисты постараются ответить максимально быстро.
Вставляем текст в картинку в ворде
На ваш выбор есть 3 основных способа вставить текст в картинку в ворде. Самый простой – это использование объекта WordArt. Он позволяет быстро создать “плавающий” текстовый блок, который можно переместить в любое место документа MS Word.
Второй способ – через создание текстового поля. По умолчанию оно будет иметь рамку и белый фон, которые можно изменить или удалить.
Третий – это использовать параметры обтекания для картинки таким образом, чтобы изображение оказалось за текстом. Таким образом текст будет на картинке, а сама картинка станет фоном.
Способы вставить текст в картинку в Word
Текстовое поле
Тут мы поместим текстовый блок прямо на картинку, которую заранее вставили в документ MS Word. Для этого переходим: Вставка -> Текстовое поле -> Простая надпись .
Появится текстовый блок, который нужно настроить. Сначала изменим его позицию, чтобы текст оказался на картинке, а затем поменяем фон, цвет и размер.
1 Нажимаем на иконку параметров разметки и выбираем обтекание Перед текстом .


2 Теперь мы можем наш текстовый блок передвинуть на картинку. Наведите курсор на рамку для появления перекрестия, затем удерживая левую клавишу мыши переместите блок в нужное место.

Передвигать нужно за линию рамки, а не за кружки, т.к. они отвечают за размер, а не за перемещение.
4 Для изменения цвета фона и рамки – ставим курсор на текстовом блоке и переходим: Формат -> Заливка фигуры и Контур фигуры . Если хотите вовсе убрать фон текста и рамку, то при выборе цвета укажите Нет заливки и Нет контура .


5 Теперь выделяем наш текст, и в появившемся меню настраиваем размер, цвет и т.д. Если текст не помещается, то просто увеличьте размер блока, потянув за кружки.

6 Еще можно поиграться с текстовыми эффектами (тенями, формой и т.д.) в меню: Формат -> Текстовые эффекты . Сам текст нужно предварительно выделить.

В итоге у меня получился такой вариант.

Объект WordArt
Если вам быстро нужно вставить текст в картинку без рамки и фона, то этот способ вам подойдет больше.
1 Создаем объект: Вставка -> Добавить объект WordArt .

2 Здесь нужно выбрать готовый стиль.

3 Размещаем текст на картинке. При необходимости корректируем оформление текста.

Разметка изображения
В предыдущих 2-х вариантах мы помещали именно текст на картинку, а сейчас будем перемещать само изображение. Картинка и текст уже должны присутствовать в документе Word.
1 Кликаем по изображению, чтобы появилось меню разметки.
2 В меню выбираем обтекание За текстом .

3 Теперь перетаскиваем картинку за текст, и меняем цвет шрифта, чтобы он был контрастным для фона изображения.
![]()
Download Article
![]()
Download Article
This wikiHow will show you how to use Microsoft Word to add text to an image on your computer, phone, or tablet. The Microsoft Word app is freely available for Androids, iPhones, and iPads, but you’ll need to purchase the app from Microsoft if you’re using a Windows or macOS.
Things You Should Know
- If you’re using a computer, use a text box with no fill and no outline to overlay text on an image.
- If you’re using the mobile Word app, insert a text box with no fill and no outline. Move the text box onto the image and edit the text.
- Make sure to tap the checkmark on mobile app Word documents to save your work!
-
1
Open your project in Word. You can do this by clicking Open from the File tab, or by right-clicking the file icon in your file browser and choosing Word from the «Open with…» dialog.
-
2
Click the Insert tab. You’ll find this above the document in the menu toolbar or along the top of your screen.
Advertisement
-
3
Click Text Box. You’ll find this in the Text group. A menu will dropdown.
-
4
Click Draw Text Box. You’ll see this at the bottom of the menu that drops down.
-
5
Enter your text. You’ll see your text entered into a moveable object.
- You can highlight your text and change the font size, color, and style before continuing.
-
6
Drag and drop your text box over the picture. Don’t deselect the text box yet.
-
7
Click the Format tab. You’ll find this above the document in the menu toolbar or along the top of your screen.
-
8
Format your text box in «Shape Styles.» You’ll want to make sure your text is not hidden by other elements.
- Click Shape Fill and select No fill.
- Click Shape Outline and select No outline.
-
9
Group the picture and text box. You can do this by clicking the picture to select it, then pressing and holding Ctrl (PC) or ⌘ Cmd (Mac) and clicking the text box to select it as well. Under the Format tab, click Group.[1]


Advertisement
-
1
Open your project in Word. This app icon looks like a blue page with white writing on it, and you can find this app on your home screen, in the app drawer, or by searching. To open your project in Word, you’ll need to tap Open from the File tab.[2]
-
2
Tap the pencil icon (optional). If you don’t see the pencil icon above the document, you may already be in editing mode.
-
3
Tap the upwards-pointing arrow
. You’ll see this on the right of the options menu.
-
4
Tap Home. You’ll open up a list of toolbar options.
-
5
Tap Insert. You’ll see the Insert menu options.
-
6
Tap Text Box. You might have to scroll down to see this option.
- After you tap this, you’ll see a text box with dummy text inserted on your page.
-
7
Format your text box. After you’ve inserted your text box, you’ll notice the main menu shifts to Shape. You’ll want to edit this text box from this menu.
- From Fill, choose ‘No fill.
- From Outline, choose No outline.
-
8
Tap inside the text box. A menu will pop up.
-
9
Tap Edit Text. Your cursor will appear in the text box. You’ll first need to delete what’s already in the text box.[3]
-
10
Tap the checkmark when you’re done to save your work. You’ll see this in the upper left corner of the app.


Advertisement
Ask a Question
200 characters left
Include your email address to get a message when this question is answered.
Submit
Advertisement
Thanks for submitting a tip for review!
References
About This Article
Article SummaryX
1. Open the picture in Word.
2. Insert a new text box from the Insert tab.
3. Type in your text.
4. Drag and drop the new text box over the picture.
5. Group the picture and text box.
Did this summary help you?
Thanks to all authors for creating a page that has been read 54,735 times.