
Note: This article has done its job, and will be retiring soon. To prevent «Page not found» woes, we’re removing links we know about. If you’ve created links to this page, please remove them, and together we’ll keep the web connected.
If you need to save a Word document as a webpage, your best bet is to use the Web Page, Filtered option.
When you save your document as a filtered webpage, Word keeps only the content, style instructions, and some other information. The file is small, without a lot of extra code.
-
Click File > Save As and choose the location where you want to save your document.
-
Name your file.
-
In the Save as type list, choose Web Page, Filtered.

-
Click Change Title and type the title you want to display in a web browser’s title bar.
-
Click Save.
Tips
To save document properties and more Word information with the webpage, choose the Single File Web Page type. But your file will be larger—almost 10 times larger.
To save pictures in a separate folder from the text part of the webpage, choose the Web Page type. When you post the webpage to a website, post the pictures folder, too.
To see the webpage’s HTML code, browse to the file in Windows Explorer, right-click the file, point to Open with, and click Internet Explorer. Then right-click the page in Internet Explorer and click View Source.
Other ways to share a document online
Word was originally designed to create and print documents. In Word 2013, you now have other options for sharing your thoughts and your work online.
Save a document as a blog post
If you’re blogging and you want to write your post in Word, you can save your document as a blog post. Word keeps the least amount of information with your content. And the published document uses the blog’s styles.
-
Click File > Share > Publish as Blog Post.
-
Click Publish as Blog Post.
The first time you post a document to your blog, Word guides you through registering your blog account.
Save onto OneDrive and share
Share your document with friends and colleagues by saving it to OneDrive and inviting them to view it.
-
Click File > Save As > OneDrive.
-
Choose a location in your OneDrive folders.
-
Type a file name, and then click Save.
Then invite others to view your document. If people don’t have Word, the document opens automatically in Word for the web.
-
Click File > Share > Invite People.

-
Add their email addresses.
-
Click Share.

For more information, see Share a document using SharePoint or OneDrive.
Save as a PDF
To convert your document to a PDF you can post to a website, click File > Save As. In the Save as type list, click PDF.
Need more help?
Want more options?
Explore subscription benefits, browse training courses, learn how to secure your device, and more.
Communities help you ask and answer questions, give feedback, and hear from experts with rich knowledge.
Karen Chard ~
Modified: 11-05-2022 ~ DOCX , How To ~ 3 Minutes Reading

Did you ever think about creating webpages using your Word documents? Yes, it is possible to save Word document as Webpage. Even if it is not the right practice of generating webpages. This will help the users to keep there MS Word files in Web page format access without the installation of Microsoft application.
Publishing Word document as Web Page will help the users to avoid the process to create pages in HTML format. By considering this situation in this we are going to explain how to save a Word Document as a Webpage. Also, we are introducing one expert software solution with the assistance of step by step procedure.
Expert Choice: If you are looking for the best solution to convert multiple Word files into a Web page then it is better to go with Word to HTML converter. It is one of the fast & secure solutions available in the market. Ge the free trial version from here:

How to Save Word Document as Webpage ? Step by Step
Go with the following simple steps to expert MS Word to Webpage file.
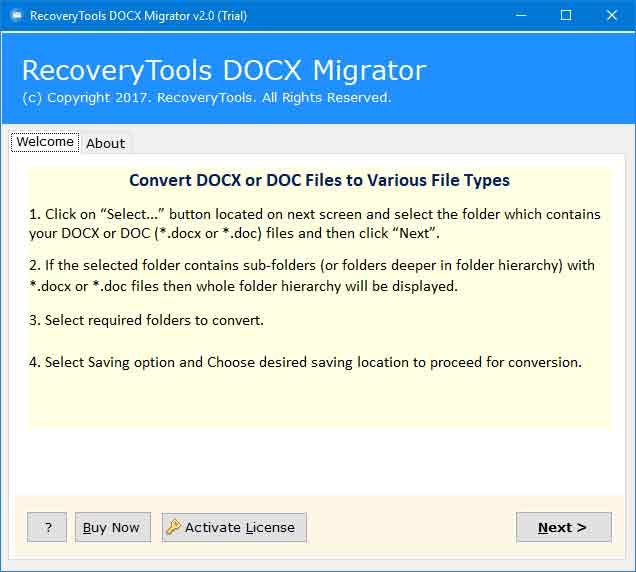
1. Run the Word to HTML converter on your Windows system.
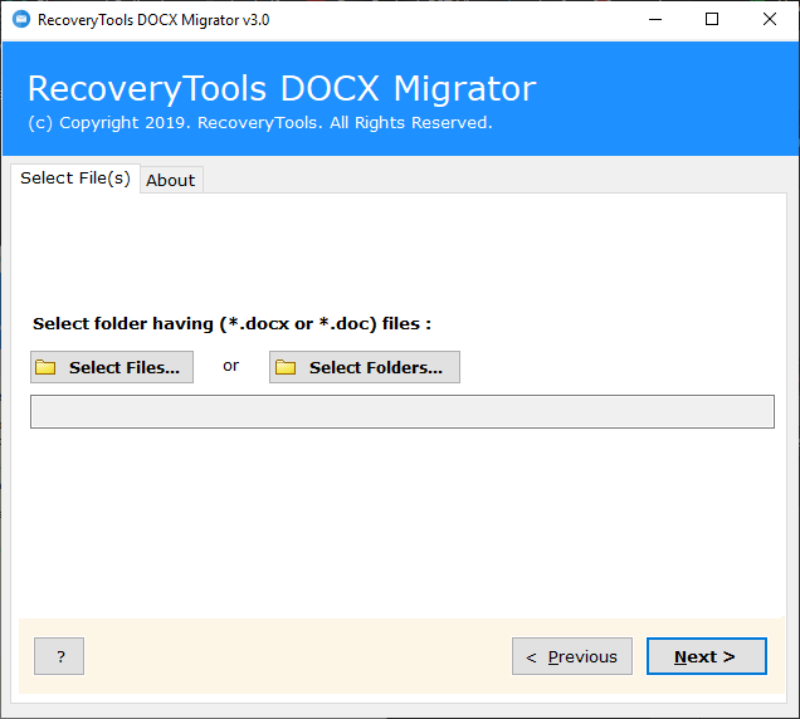
2. Add the Word files through Select File / Folder & hit the Next button.
3. Choose the required documents from the list & click on Convert button.

4. After that, Select HTML in Saving Option & browse the destination location.
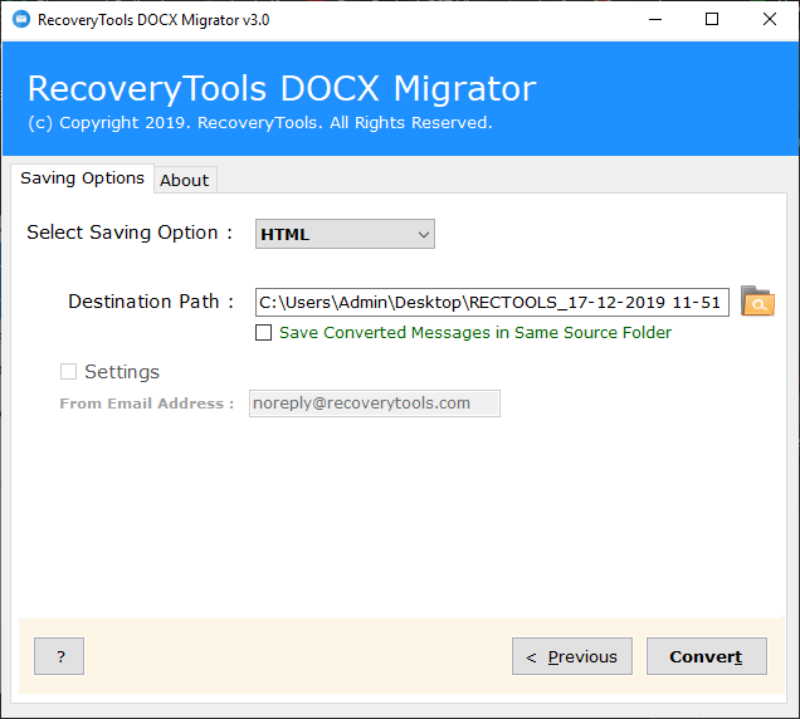
5. Finally hit the Convert button to publish Word document as Web page.
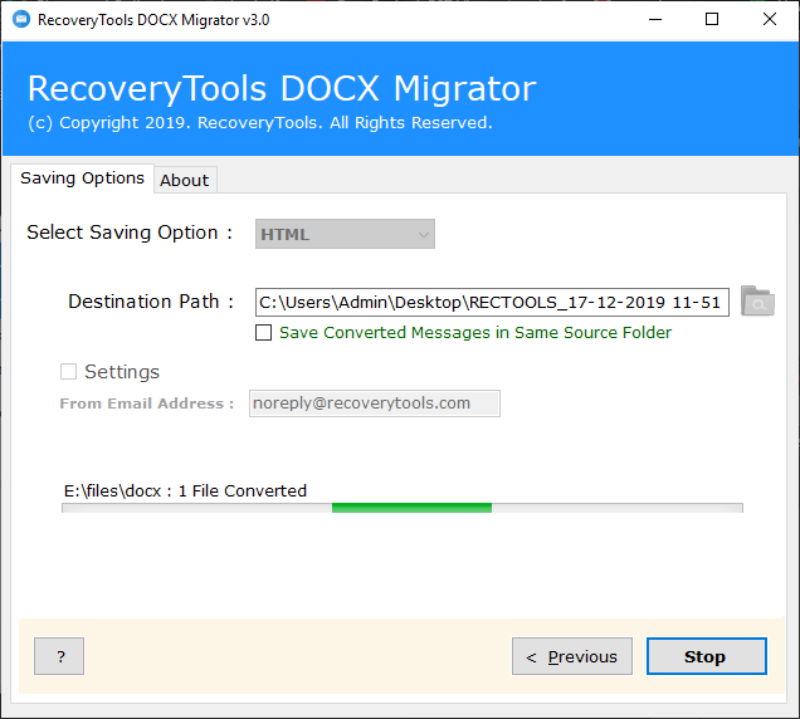
Note: Users can save the resultant Webpage in the desired location. Also through the “Save Converted Messages in Same Source Folder” option the tool allows you to save the HTML file in the source folder together with the Word documents.
Expert Solution to Publish Word Document as Web Page
If you having a bulk number Word documents to convert into Webpage. Then the manual solutions are not perfect for you. The manual process is very time consuming and need a lot of effort to successfully complete the process. Word DOCX Migrator is one of the best solution available in the market to export multiple Word documents as Web Pages in one shot. It allows to convert both single as well as multiple Word Files into HTML format. The self-explanatory nature of the software interface helps the users easily work with tool even without any special guidance. It also provides various advance options to save Word document as Webpage effortlessly. Continue with the reading to know about various software features.

Unique Features of Word to Webpage Converter
- Compatible with all the versions of Windows OS.
- Allow to save resultant Webpage in the desired location.
- Save Word document as Webpage in offline mode.
- Maintain the document structure without any alteration.
- Permits to convert multiple Word documents to Webpages.
- Provides the option to store output file source folder.
- Bulk conversion of MS Word files in batch mode.
Refer to More Blogs:
1. How to Convert Word to PNG ?
2. Convert DOCX File to DOC Format.
3. How to Change Document to Text File ?
Wrapping Up
In this blog, we explained how to save Word document as Webpage with the assistance of an automated software solution. The above mentioned step by step procedure will help you to understand the whole process in a simple way. Go with the software solution & publish Word document as Web page.
Microsoft Word is the most popular word processing application for creating documents. By default, Word app will save the files as .docx extension. This is most compatible with other applications like Apple Pages and Google Docs. However, many do not know that it is easy to save the Microsoft Word document as a webpage in HTML format. In this article, we will explain the process along with the other aspects of using HTML webpages.
Converting Word Document to HTML Webpage
In our earlier article, we have explained how to publish Word documents in a live WordPress blog. However, converting to HTML webpage can help you in different ways.
- HTML pages can be opened with any browser apps like Edge or Chrome. Therefore, you can access the document on any computer by converting it to a HTML webpage.
- You can upload the converted HTML page on the live server to publish your content along with images without any other content management platforms.
- It is possible to add additional styles to your webpage and make them looks beautiful.
However, some Word fonts and styles may not be compatible when saving the document as a webpage. If you are fine with that, here is how to save your Word document as a webpage in HTML format.
Save Word Document as Webpage
First open the document you want to convert in Word app and go to “Files” menu. Select “Save as” option and click “Browse” under “Other locations”.

When the browse window is open, navigate and find the location on your computer to save the file. However, before clicking on the “Save” button, click on “Save as type” dropdown and select “Webpage” option.

It should look like below after the selection.

Now click on “Save” button and Word will immediately change the layout to Web Layout. You can click on the “Print Layout” icon showing on the status bar to make the view comfortable if you want.

Now open File Explorer and go to the location where you have saved the file. You will see a folder containing all images, thumbnails and color schemes required for the webpage along with the HTML file.

Double click on the HTML file to open it in Edge or with any of your favorite browser.

If you want to upload the webpage to a server or want to share with someone, always make sure to use both the folder and HTML file together. When saving as a webpage, you can change the title of the document. This title will be used as a title tag for the webpage and shown in the browser tab when you open the page. In addition, you can also save thumbnails of the document by selecting “Save Thumbnail” option in the “Save As” window. This will create a .wmf file showing the preview of your document and store it in the folder that is generated with the webpage.
Save as Webpage Filtered
If you have noticed, there are two more options available for saving your Word document as a HTML webpage. The first option is to save the document as a filtered webpage. Though this will also save the file as HTML, it will remove some of the Word specific styles from your document. Word will show you the warning when you try to save the document as a filtered webpage.

The advantage of filtered webpage is that the size will be reduced around one third compared with normal webpage format.
Saving as Single Webpage
The last option is to save the Word document as a single webpage format. In this case, the document will be saved as a single webpage with .mht file extension. This is a HTML archive format which can hold all related files like text and images in a single file. You can open this with Edge or any other browser similar to HTML file. Though this will help to get a single webpage, the problem is that the file will be huge in size. When we tested the same document, the size was two times more than the normal webpage format and seven times more than the filtered webpage format.
In addition, sometimes we also noticed the images in the documents are not properly converted. Therefore, we recommend avoiding this format or check your webpage thoroughly for any missing items from original Word document.

Additional Options for Webpages
In the “Save As” dialog box, Word offers some hidden features to customize the webpages. When you are in the “Save As” dialog box, click on “Tools” button and select “Web Options…”. This will open a pop-up as shown below where you can navigate through different tabs and customize the settings.
For example, you can change the encoding, fonts and target browser’s screen size/pixels for the pictures. In most cases, you can leave all these options as per the default settings and save the Word document as webpage by selecting one of the above explained options.

![]()
Download Article
Save your .docx as an .html web page file
![]()
Download Article
- Using Microsoft Word
- Using Google Drive
- Using Word 2 Clean HTML
- Video
- Q&A
- Tips
|
|
|
|
|
If you have Microsoft Word on your computer, you can resave the DOC/DOCX file as an HTML file without installing additional software. If you don’t have Word or prefer a free online option, you can upload the document to Google Drive and save it as an HTML file. Or, paste the contents of the Word file into a converter like Word 2 Clean HTML. Since Word documents and HTML files are very different, the finished HTML webpage may not contain the same formatting as the original. This wikiHow will show you how to convert a Word document to HTML on your Windows PC or Mac.
Things You Should Know
- In Microsoft Word, go to File > Save As. Change the file type to Web Page.
- For Google Drive, upload and open the Word file in Google Docs. Then, go to File > Download > Web Page.
- Try an HTML conversion web app like Word 2 Clean HTML for additional automatic formatting options.
-

1
Open the document in Microsoft Word. Word has a built-in feature to convert .docx documents to HTML files. Although the resulting HTML code may be a bit bulkier than if you’d written the HTML from scratch, the conversion is quick and can be used for simpler projects.[1]
- If you’re looking for general HTML tips, check out how to create a simple web page, create a link, and make radio buttons.
-
2
Click the File menu. It’s at the top-left corner of Word.
Advertisement
-
3
Click Save As. A list of locations will appear.
-
4
Select a location. You can save the file to any folder on your computer (or a cloud drive).
-
5
Type a name for the file. Enter the name in the textbox next to “File name:”.
-
6
Select Web Page from the «Save as type» dropdown menu. This will save the file in HTML format.
- If you’re okay with losing some of the advanced layout code in favor of a simpler file, select Web Page, Filtered instead. This keeps only the style instructions, content, and some other info.
-
7
Click Save. A new version of the file is now saved in the HTML format.


Advertisement
-
1
Go to https://www.google.com/drive in a web browser. Then click Go to Drive. As long as you have a Google account, you can use Google Drive to convert a Word document to a web page.
-
2
Click the + New button. It’s at the top-left corner of Google Drive.
-
3
Click File upload. It’s the second option.
-
4
Select your Word document and click Open. This uploads the Word document to your Google Drive.
-
5
Right-click the Word document in Google Drive. A pop-up context menu will open.
-
6
Click Open with. Another menu will expand.
-
7
Click Google Docs. The contents of your Word document will display in Google Docs.
-
8
Click the File menu in Google Docs. It’s just below the file name at the top-left corner of the document.
-
9
Click Download. Additional menu options will appear.
-
10
Click Web Page. This allows you to save the .docx as an HTML zipped file. If prompted to do so, click Save or OK to start the download.


Advertisement
-
1
Go to https://word2cleanhtml.com in a web browser. Word 2 Clean HTML is a free, easy-to-use tool that will take the contents of a Word document and convert it to HTML code.
-
2
Open the Word document you want to convert. If you have Microsoft Word, open the document in that application. If not, you can either use the free version of Word located at https://www.office.com to open the file, or a Word alternative like Google Drive.
-
3
Copy the contents of the Word file to the clipboard. Press the Control and A keys (PC) or Command and A keys (Mac) at the same time to highlight everything in the file, right-click the highlighted area, and then click Copy.
-
4
Paste the copied text into the Word to Clean HTML field. Right-click the typing area and select Paste to paste the selected content.
-
5
Adjust your HTML preferences below the form. Use the checkboxes at the bottom of the page to toggle conversion preferences, such as converting Word’s Smart Quotes to regular ASCII quotes.
-
6
Click the convert to clean html button. It’s the button below the form. This converts the content to the HTML format and displays it in the text area.
- To see the regular HTML (not «cleaned up») from the conversion, click the Original HTML tab.
- To see a preview of how the code would look in a web browser, click the Preview tab.
- To copy the code so you can paste it elsewhere, click the Copy cleaned HTML to clipboard link at the top of the page.


Advertisement
Add New Question
-
Question
What do I do if I did this accidentally and really want to delete it now?

If you want to delete it, right-click on it and click delete. If you want to change it back, rename the file extension from randomfile.html to randomfile.docx.
-
Question
I want to convert a Word document with controls (text box) to an HTML file, which has those controls. How do I do this?
Change the ending from whatever it is (ex: .txt) to .html (ex: .html).
-
Question
If I save a Word document as a web page using HTML, will it have an URL?
Yes it will because you are basically making a website and all websites have a URL.
See more answers
Ask a Question
200 characters left
Include your email address to get a message when this question is answered.
Submit
Advertisement
-
If you have to convert hundreds of files to HTML, use commercial software that can convert them all at once. Some options are Doc Converter Pro (formerly Word Cleaner) and NCH Doxillion.
-
It is not always possible to keep all of your Word formatting and styles during the conversion, and still have the HTML file display consistently on all browsers. You might need to use CSS to achieve this on your website.
-
Looking for money-saving deals on Microsoft Office products? Check out our coupon site for tons of coupons and promo codes on your next subscription.
Thanks for submitting a tip for review!
Advertisement
References
About This Article
Article SummaryX
«To use Microsoft Word to convert a Word document to HTML, start by opening the document in Word. Click the File menu and choose Save as. Choose where you want to save the file, and then give it a name. Click the «»Save as type»» menu and select Web Page. Click Save to save your new HTML code to the desired location.
To use Google Drive, start by signing in to Google Drive in a web browser. Click the New button and select File upload. Select the Word document and click Open to add it to your Drive. Once the upload is complete, right-click the document in drive, select Open with, and then select Google Docs. When you see the document, click the File menu, select Download, and choose the Web Page option. This downloads a ZIP file of your new HTML to your computer.
»
Did this summary help you?
Thanks to all authors for creating a page that has been read 768,193 times.
Is this article up to date?

You may not think of Word as a tool for designing web pages, and that’s okay—it’s really not very good at it, anyway. But, if you have an existing Word document that you need to turn into a web page for whatever reason, Word has you covered with some built-in tools.
Note: We’re using Word 2016 in our examples for this article, but the ability to save a document as a web page (or HTML) has been available in many past versions of Word. If you’re using a version older than Word 2016, you might not see all the features we describe in this article, but you’ll be able to follow along with most of it.
First, open up the document you’d like to save as a web page. On the File menu, choose the “Save As” command, and then click the “Browse” option.

In the Save As window, navigate to where you’d like to store your file. Then, type a name for your page into the “File Name” box. By default, the name of your Word document will already be filled in if you’ve saved it previously.
Next, click the “Save As Type” dropdown menu. On the menu, you’ll find three options for saving your document as a web page: Single File Web Page; Web Page; and Web Page, Filtered.
All of these options will convert your document to HTML (Hypertext Markup Language), the standard for displaying text on a web page. However, each file type produces a slightly different kind of HTML file. Which one you should use depends on your online publishing preferences and whether or not you plan to convert the file back to a Word document later.
Let’s take a closer look at those three options.
Save Your Document as a Filtered Web Page
In most cases, the Filtered Web Page option is the best way to save a Word document as a web page. It preserves your document’s content and formatting, but strips out a bunch of extra HTML code that you just don’t need, and keeps the file size small. This gives you the cleanest code and fastest page loading time for your web page, but it also strips Word-specific formatting elements from the document. You should only choose this file type if you don’t plan to convert the web page back to a Word document later—which, let’s face it, isn’t really a thing people do often.
In the Save as Type dropdown, click the “Web Page, Filtered” option.
Click the “Change Title” button.
In the menu that appears, type a title for your web page, and then click the “OK” button.
A warning box appears asking if you’re sure you want to convert the document to an HTML file, because it will remove Office-specific tags and features. Click the “Yes” button.
Now, you’ll have a web page saved to your chosen location. You can load it up in your browser to check it out, or upload it to your web site. By default, Word saves the actual html file in whatever folder you selected, and all the supporting images on the page to a subfolder. And, you’ll need to upload that folder of images to your website, too.
Although, as we’ll talk about a bit later, you can change that default behavior.
Save Your Document as a Web Page
The “Web Page” option on the “Save As Type” dropdown menu works just a bit differently. Just like the filtered option, it saves your web page as an HTML file and saves any supporting images into their own subfolder. However, the “Web Page” option preserves as much of Word’s formatting and extra document information as possible instead of filtering that stuff out.
And of course, since it saves that information, the resulting will be slightly larger than with a filtered page.
You’ll have to play with it a bit to see if it really saves the specific types of formatting you need on your page, but it generally does an okay job.
Save Your Document as a Single File Web Page
The “Single File Web Page” option does save all possible formatting information (just like the “Web Page” option), but instead of saving images into a separate folder, it saves all your supporting images and the page itself as part of the same MHTML file.
It can be handy for keeping track of pages where you might forget to bring along the separate supporting files, but this option also saves a much larger file. Sometimes, the resulting file size is close to a combination of the size of the page and supporting files (like images). But sometimes, the files can get quite a bit bigger, just depending on what’s getting saved.
It really not the best option if you’re planning to make the page a part of a web site—at least not one where you want pages to load quickly. But it can be useful in specific circumstances—like when you want to share a document with someone who has no other way to read a Word file (not even the free solutions out there) or PDF.
RELATED: How to Convert a Microsoft Word Document to a PDF
Note: If you’ve got a blog, you can also publish a Word document directly to your blog using Word’s sharing features. It works a bit differently than what we’re talking about in this article, so we’re not going to go into detail on it here, but it’s worth checking out.
How to Configure Additional Web Options
Word also offers a number of helpful options for customizing how documents are saved as web pages.
To get to these options, in the Save As menu, open the “Tools” dropdown, and then click the “Web Options” button.
The Web Options window features five tabs you can use to configure various settings governing how web pages get saved.
The kinds of things you can configure on these tabs include:
- Browser tab: This tab lets you choose a target browser for compatibility reasons (although that setting really doesn’t matter as much these days), allow PNG as a graphics format, rely on CSS for font formatting, and provides a few other small options.
- Files tab: The big option on this tab is controlling whether supporting files (like images) are organized into their own folder. If you turn this option off, supporting files are saved to the same folder as the web page. There are also options for configuring whether long file names are used and whether Word updates links when you save the document.
- Pictures tab: This tab is used for controlling the screen size and density (pixels per inch) for the target browser. Images and text can wrap differently depending the video resolution at which they’re viewed. The default setting is probably good enough, since you’re not really going to be using Word to create sophisticated web sites. But if you open up your web page and all the text wraps around images in strange ways, this is the option to play with.
- Encoding tab: This tab lets you change the language that the page is encoded in.
- Fonts tab: This tab lets you specify the character set and font used on the page. It’s generally good to leave this one alone, because using different fonts in browsers can get weird (you never know which browser people will use). But changing character sets for readers of different languages might be useful.
It’s also important to know that these options are set on a per document basis. Set these options on a document, and that document will retain the settings. However, other documents you work with will continue using the default settings.
READ NEXT
- › The New NVIDIA GeForce RTX 4070 Is Like an RTX 3080 for $599
- › BLUETTI Slashed Hundreds off Its Best Power Stations for Easter Sale
- › How to Adjust and Change Discord Fonts
- › HoloLens Now Has Windows 11 and Incredible 3D Ink Features
- › Google Chrome Is Getting Faster
- › This New Google TV Streaming Device Costs Just $20