
I know this is an old thread but I had asked a similar question not knowing about this one. I needed an Excel VBA Progress Bar and found this link: Excel VBA StatusBar. Here is a generalized version that I wrote. There are 2 methods, a simple version DisplaySimpleProgressBarStep that defaults to ‘[|| ] 20% Complete’ and a more generalized version DisplayProgressBarStep that takes a laundry list of optional arguments so that you can make it look like just about anything you wish.
    Option Explicit

    ' Resources
    '   ASCII Chart: https://vbaf1.com/ascii-table-chart/

    Private Enum LabelPlacement
        None = 0
        Prepend
        Append
    End Enum

    #If VBA7 Then
     Public Declare PtrSafe Sub Sleep Lib "kernel32" (ByVal dwMilliseconds As LongPtr) 'For 64 Bit Systems
    #Else
     Public Declare Sub Sleep Lib "kernel32" (ByVal dwMilliseconds As Long) 'For 32 Bit Systems
    #End If

    Public Sub Test()
        Call ProgressStatusBar(Last:=10)
    End Sub

    Public Sub Test2()
    Const lMilliseconds As Long = 500
    Dim lIndex As Long, lNumberOfBars As Long
    Dim sBarChar As String
        sBarChar = Chr$(133) ' Elipses …
        sBarChar = Chr$(183) ' Middle dot ·
        sBarChar = Chr$(176) ' Degree sign °
        sBarChar = Chr$(171) ' Left double angle «
        sBarChar = Chr$(187) ' Right double angle »
        sBarChar = Chr$(166) ' Broken vertical bar ¦
        sBarChar = Chr$(164) ' Currency sign ¤
        sBarChar = Chr$(139) ' Single left-pointing angle quotation mark ‹
        sBarChar = Chr$(155) ' Single right-pointing angle quotation mark ›
        sBarChar = Chr$(149) ' Bullet •
        sBarChar = "|"

        For lIndex = 1 To 10
            Call DisplayProgressBarStep(lIndex, 10, 50, LabelPlacement.Append, sBarChar)
            Call Sleep(lMilliseconds)
        Next
        Call MsgBox("Status bar test completed.", vbOKOnly Or vbInformation, "Test2 Completed")
        Call DisplayProgressBarStep(lIndex, 10, bClearStatusBar:=True)
    End Sub

    Public Sub Test2Simple()
    Const lMilliseconds As Long = 500
    Dim lIndex As Long, lNumberOfBars As Long
        For lIndex = 1 To 10
            Call DisplayProgressBarStep(lIndex, 10, 50)
            Call Sleep(lMilliseconds)
        Next
        Call MsgBox("Status bar test completed.", vbOKOnly Or vbInformation, "Test2Simple Completed")
        Call DisplayProgressBarStep(lIndex, 10, bClearStatusBar:=True)
    End Sub

    ''' <summary>
    ''' Method to display an Excel ProgressBar. Called once for each step in the calling code process.
    ''' Defaults to vertical bar surrounded by square brackets with a trailing percentage label (e.g. [|||||] 20% Complete).
    '''
    ''' Adapted
    ''' From: Excel VBA StatusBar
    ''' Link: https://www.wallstreetmojo.com/vba-status-bar/
    ''' </summary>
    ''' <param name="Step">The current step count.</param>
    ''' <param name="StepCount">The total number of steps.</param>
    ''' <param name="NumberOfBars">Optional, Number of bars displayed for StepCount. Defaults to StepCount. The higher the number, the longer the string.</param>
    ''' <param name="LabelPlacement">Optional, Can be None, Prepend or Append. Defaults to Append.</param>
    ''' <param name="BarChar">Optional, Character that makes up the horizontal bar. Defaults to | (Pipe).</param>
    ''' <param name="PrependedBoundaryText">Optional, Boundary text prepended to the StatusBar. Defaults to [ (Left square bracket).</param>
    ''' <param name="AppendedBoundaryText">Optional, Boundary text appended to the StatusBar. Defaults to ] (Right square bracket).</param>
    ''' <param name="ClearStatusBar">Optional, True to clear the StatusBar. Defaults to False.</param>
    Private Sub DisplayProgressBarStep( _
        lStep As Long, _
        lStepCount As Long, _
        Optional lNumberOfBars As Long = 0, _
        Optional eLabelPlacement As LabelPlacement = LabelPlacement.Append, _
        Optional sBarChar As String = "|", _
        Optional sPrependedBoundaryText As String = "[", _
        Optional sAppendedBoundaryText As String = "]", _
        Optional bClearStatusBar As Boolean = False _
        )
    Dim lCurrentStatus As Long, lPctComplete As Long
    Dim sBarText As String, sLabel As String, sStatusBarText As String
        If bClearStatusBar Then
            Application.StatusBar = False
            Exit Sub
        End If

        If lNumberOfBars = 0 Then
            lNumberOfBars = lStepCount
        End If
        lCurrentStatus = CLng((lStep / lStepCount) * lNumberOfBars)
        lPctComplete = Round(lCurrentStatus / lNumberOfBars * 100, 0)
        sLabel = lPctComplete & "% Complete"
        sBarText = sPrependedBoundaryText & String(lCurrentStatus, sBarChar) & Space$(lNumberOfBars - lCurrentStatus) & sAppendedBoundaryText
        Select Case eLabelPlacement
            Case LabelPlacement.None: sStatusBarText = sBarText
            Case LabelPlacement.Prepend: sStatusBarText = sLabel & " " & sBarText
            Case LabelPlacement.Append: sStatusBarText = sBarText & " " & sLabel
        End Select
        Application.StatusBar = sStatusBarText
        ''Debug.Print "CurStatus:"; lCurrentStatus, "PctComplete:"; lPctComplete, "'"; sStatusBarText; "'"
    End Sub

    ''' <summary>
    ''' Method to display a simple Excel ProgressBar made up of vertical bars | with a trailing label. Called once for each step in the calling code process.
    '''
    ''' Adapted
    ''' From: Excel VBA StatusBar
    ''' Link: https://www.wallstreetmojo.com/vba-status-bar/
    ''' </summary>
    ''' <param name="Step">The current step count.</param>
    ''' <param name="StepCount">The total number of steps.</param>
    ''' <param name="NumberOfBars">Optional, Number of bars displayed for StepCount. Defaults to StepCount. The higher the number, the longer the string.</param>
    ''' <param name="ClearStatusBar">Optional, True to clear the StatusBar. Defaults to False.</param>
    Private Sub DisplaySimpleProgressBarStep( _
        lStep As Long, _
        lStepCount As Long, _
        Optional lNumberOfBars As Long = 0, _
        Optional bClearStatusBar As Boolean = False _
        )
        Call DisplayProgressBarStep(lStep, lStepCount, lNumberOfBars, bClearStatusBar:=bClearStatusBar)
    End Sub
The primary ingredients to making this work are:
- VBA
- UserForms
- Loops
The complete code and the downloadable file can be found at the end of this post. The following sections provide high-level explanations of each major facet of code. For a more in-depth explanation of each facet, consider enrolling in the complete “Unlock Excel VBA & Excel Macros” course at XelPlus.

Part 1: The Task(s) to be Automated
What we are automating can be anything our Excel minds can imagine. The great thing about this progress bar tutorial is that it can be inserted into almost any existing or future macro.
In this demonstration, our automation process will “walk” through records in a table, pausing for 1/10th of a second at every record.


In reality, we would likely be performing much more sophisticated operations on each record.
Part 2: The Visual Interface
The scroll bar window is created using a VBA UserForm.
- In the Visual Basic Editor, insert the UserForm (Insert – Userform).

This presents us with a blank, generic UserForm which acts as a canvas for our imagination’s unlimited creativity.

NOTE: If you are missing the Toolbox controls, select View -> Toolbox.
- Rename the UserForm by selecting (Name) in the Properties We will name our UserForm “UserForm_v1”.

- Set the UserForm Caption (what is displayed in the Title Bar area) to read “Create PDF Documentation”. This, of course, can be anything you wish it to display.


- Using the ToolBox Label feature, insert a label and set the Caption to read “Your Assistant at Work…”


- Using the Toolbox Image feature, insert an image placeholder. Set the Picture property to the location of your image. The ellipse button to the right of the property will allow you to browse out to your image file.


- Using the Toolbox Frame feature, insert a frame object. This will serve as a border for the scroll bar as well as display a numeric percent counter. Set the Caption to read “0%”. This will be changed to read a progressive percentage during code execution.


- Within the boundary of the Frame, insert another Label This label will not contain text, rather it will act as the scroll bar. This is performed by coloring the interior of the label and resizing it incrementally, making it larger and larger as the macro progresses. Label Properties you may wish to experiment with are:
- BackColor – &H00C00000& (Blue)
- BackStyle – 1-fmBackStyleOpaque
- BorderColor – &H80000006& (Gray)
- Height – 30
- SpecialEffect – 1-fmSpecialEffectRaised
- Width – 18

Part 3: The Code That Drives the Visual
Double-clicking on any blank area of the UserForm will open the code window for the UserForm.
Some of the major features of the code are:
Variable Declarations

Turning off screen updating (to reduce screen flicker) and suppressing alerts (if encountered.)

Check to ensure there is at least one record in the table being processed

Looping through the table rows

A few notes about the above snip of code:
- The loop will execute ‘N’ number of times as there are rows in the table.
- The PCT = calculates an ever-increasing percentage. This begins at 1/N and ends with N/N. (i.e. 1% to 100%). The more records in the table, the more granular the percentage calculation.
- The timer will count to 1/10th of a second, creating a very small pause effect. This keeps the progress bar from moving too fast for this demonstration. In the real world, you would want to omit this self-induced “pause” as it hampers performance.
- The Call UpdateProgress(Pct) line passes the calculated percentage (Pct) to the UpdateProgress This percentage will be displayed in the Caption of the Frame object.
Removing the form from the screen when finished

Part 4: Launching the UserForm
To display the UserForm when the user clicks the macro launch button, we create a traditional Module sheet (Insert -> Module) and load the UserForm into memory.


To ensure the UserForm for the progress bar appears in the center of the screen, we calculate the center position with some crafty math. After the calculations are complete, we Show the memory-loaded UserForm.

Part 5: Announcing Code Completion
You can inform the user that the code has completed in a myriad of ways. Our code will display a Message Box that informs the user to retrieve their report from the printer.

A forced line break was added to the code for easier reading.
Part 6: Cleanup
The screen updating and error reporting are re-enabled.

This is where the magic happens.
Remember that part earlier where we made a call to another macro named “UpdateProgress”? We passed that macro a value stored in a variable named Pct.

The value in Pct serves two purposes:
- The value of Pct is displayed in the Caption of the Frame
- Pct is used to calculate the Width property of the label object.
- The .Repaint instruction forces the label object to be visually refreshed based on the newly calculated Width

By redrawing the label object at an ever-increasing larger width, we achieve the illusion that the label object is growing. Ingenious, no?
The “DoEvents” instruction allows VBA to detect user-interaction via the keyboard. This is helpful during long-duration macros where the user may wish to break out of a loop prematurely.

Part 8: Assigning the Macro to the Launch Button
You can launch a macro variety of objects: buttons, images, icons, shapes, etc.
We will add an Excel icon image and assign the macro to the image. This is done by right-clicking on the image and selecting “Assign Macro”.

Next, in the Assign Macro dialog box, select the macro located on the traditional module sheet that loads and shows the UserForm. In our case, it was named “GetMyForm_v1”.

Part 9: Testing the Progress Bar Macro
Click the launch icon to test your amazing creation.

And there you have it, a homemade progress bar.

This second version of the progress bar was designed by my friend Bryon Smedley. I love it! It’s really creative.
It takes the opposite approach to displaying progress. Instead of the Label “grow”, we will have the Label “shrink”.
The trick here is that our Label will not be the indicator of progress. Instead, we have a static image indicating progress and the Label will act as a mask that hides part of the static graphic.

By coloring the Label the same as the background and placing the Label in front of the Image, we can reveal portions of the Image as we reduce the size of the Label.
When we “shrink” the Label it will give us the illusion of “growing” the Image.

Code Differences
For the most part, the code is the same. The main differences lie in the scroll bar/mask and the percentage display.
Percentage Display
Instead of inserting a Frame object and changing the Caption property, we will add a Text object and change the Caption property.

The gray background is an inserted Image object that pointed to a simple image of a gray, bordered shape.


Progress Bar (Static Image)
The green “Excel” progress bar is a static image of a green rectangle with the Excel logo repeated four times.

Progress Bar (“Shrinking” Mask)
The Label object that “shrinks” has two main differences in operation compared to the first example.
- The Width property is calculated by multiplying Pct by 218 (the maximum width) and deducting that from 218. Ex: if Pct is .5, then the Width is 109; half of the original 218.
- Instead of fixing the Left property to a set position, the left side of the Label will be calculated. The logic is to deduct the calculated Width from 230 (the far-right side of the Label). Ex: if Pct is .5, the calculated Width is 109, then the Left property is calculated at 121.
NOTE: These results represent the number of pixels. 109 represents the number of pixels wide. 121 represents 121 pixels from the left edge of the UserForm. Depending on your UserForm size, you may need to experiment with these values. A bit of experimentation may be required to achieve the perfect look.

Be Careful of the Stacking Order (Layers)
Make certain that the Label object is in front of the Image object. This can be accomplished by right-clicking on an object and selecting either “Bring Forward” or “Send Backward”.


Macro Assignment & Testing
After you have assigned the “GetMyForm_v2” macro to the launch button, we can see the magic that is the “shrinking” progress bar.
Download Workbook
Feel free to Download the Workbook HERE.
![]()
Full Code for Version 1
Procedure “GetMyForm_v1”
Sub GetMyForm_v1()
Load UserForm_v1
With UserForm_v1
  .StartUpPosition = 0
  .Left = Application.Left + (0.5 * Application.Width) - (0.5 * .Width)
  .Top = Application.Top + (0.5 * Application.Height) - (0.5 * .Height)
  .Show
End With

End Sub
Procedure “UserForm Activate” (v1)
Private Sub UserForm_Activate()
Dim startrow As Integer
Dim endrow As Integer
Dim i As Integer
Dim myScrollTest As Object
Set mainbook = ThisWorkbook
Application.ScreenUpdating = False
Application.DisplayAlerts = False
Set myScrollTest = Worksheets("ScrollTest_v1")
mylabel = Worksheets("ScrollTest_v1").Range("A2").Value
With myScrollTest
    'where to start
    startrow = .Range("A1").Row + 1

    'where to end
    endrow = .Range("A1").End(xlDown).Row

    If .Range("A2").Value = "" Then
        MsgBox "Please paste your entity codes starting from Row 2"
        Exit Sub
    End If

End With
'start the loop
For i = startrow To endrow
Pct = (i - startrow + 1) / (endrow - startrow + 1)

Call UpdateProgress(Pct)

' This is where your workbook does many things that take a bit of time
    startTime = Timer ' Capture the current time
    Do
    Loop Until Timer - startTime >= 0.1 ' Advance after 1/10th of a second

' This is where your workbook has finished an itteration of work
Next i
Unload UserForm_v1
myScrollTest.Select
MsgBox "Report generation is complete" & vbLf & vbLf _
    & "Please retrieve your report from the printer", vbInformation
Application.ScreenUpdating = True
Application.DisplayAlerts = True
End Sub
Procedure “UpdateProgress” v1
Sub UpdateProgress(Pct)
With UserForm_v1
    .FrameProgress.Caption = Format(Pct, "0%")
    .LabelProgress.Width = Pct * (.FrameProgress.Width - 10)

    .Repaint

End With
DoEvents
End Sub
Full Code for Version 2
Procedure “GetMyForm_v2”
Sub GetMyForm_v2()
Load UserForm_v2
With UserForm_v2
  .StartUpPosition = 0
  .Left = Application.Left + (0.5 * Application.Width) - (0.5 * .Width)
  .Top = Application.Top + (0.5 * Application.Height) - (0.5 * .Height)
  .Show
End With
End Sub
Procedure “UserForm Activate” (v2)
Private Sub UserForm_Activate()
Dim startrow As Integer
Dim endrow As Integer
Dim i As Integer
Dim myScrollTest As Object
Set mainbook = ThisWorkbook
Application.ScreenUpdating = False
Application.DisplayAlerts = False
Set myScrollTest = Worksheets("ScrollTest_v2")
mylabel = Worksheets("ScrollTest_v2").Range("A2").Value
With myScrollTest
    'where to start
    startrow = .Range("A1").Row + 1

    'where to end
    endrow = .Range("A1").End(xlDown).Row

    If .Range("A2").Value = "" Then
        MsgBox "Please paste your entity codes starting from Row 2"
        Exit Sub
    End If

End With
'start the loop
For i = startrow To endrow
Pct = (i - startrow + 1) / (endrow - startrow + 1)
Call UpdateProgress(Pct)

' This is where your workbook does many things that take a bit of time
    startTime = Timer ' Capture the current time
    Do
    Loop Until Timer - startTime >= 0.1 ' Advance after 1/10th of a second

' This is where your workbook has finished an itteration of work
Next i

Unload UserForm_v2
myScrollTest.Select
MsgBox "Report generation is complete" & vbLf & vbLf & "Please retrieve your report from the printer", vbInformation
Application.ScreenUpdating = True
Application.DisplayAlerts = True
End Sub
Procedure “UpdateProgress” v2
Sub UpdateProgress(Pct)
With UserForm_v2
    .Complete.Caption = Format(Pct, "0%") ' Percentage displayed to user as numeric

    .LabelProgress.Width = 218 - Pct * 218 ' Shortens the mask
    .LabelProgress.Left = 218 - .LabelProgress.Width + 12 ' Repositions the mask
    .Repaint
End With
DoEvents
End Sub
Published on: April 15, 2020
Last modified: February 26, 2023


Leila Gharani
I’m a 5x Microsoft MVP with over 15 years of experience implementing and professionals on Management Information Systems of different sizes and nature.
My background is Masters in Economics, Economist, Consultant, Oracle HFM Accounting Systems Expert, SAP BW Project Manager. My passion is teaching, experimenting and sharing. I am also addicted to learning and enjoy taking online courses on a variety of topics.
Хитрости »
26 Февраль 2016 56330 просмотров
Отобразить процесс выполнения
Часто при создании кодов в VBA используется обращение к ячейкам, листам, книгам и т.д. и их обработка в циклах. Пара примеров подобных циклов:
- Просмотреть все файлы в папке — цикл по файлам в папке — Do While sFiles <> «» и For Each objFile In objFolder.Files
- Массовая замена слов — цикл по ячейкам(массивам) — For lr = 1 To UBound(avArr, 1)
- Не работают/пропали меню — цикл по всем панелям — For Each cmdBar In Application.CommandBars
Если операция в цикле выполняется за пару секунд — это вполне приемлемо и отражать графически подобные действия нет нужды. Но, если циклы «крутятся» по полчаса — вполне неплохо иметь возможность видеть на какой стадии цикл. Здесь есть один нюанс: циклы могут быть как с заранее известным кол-вом итераций, так и без этого понимания.
Цикл Do While из первого кода статьи Просмотреть все файлы в папке является циклом условия. Т.е. заранее неизвестно сколько файлов будет обработано и следовательно невозможно отразить прогресс выполнения задачи в процентах.
Циклы вроде For Each и For … Next как правило дают возможность определить общее кол-во элементов к обработке, т.к. применяются как правило к коллекциям и объектам, у которых есть свойство .Count. Углубляться в этой статье не стану — это лишь предисловие, чтобы было ясно, почему и зачем далее в статье продемонстрированы разные подходы отображения процесса выполнения.
Отобразить же процесс можно двумя способами:
- Использование Application.StatusBar
- Использование UserForm
Использование Application.StatusBar
Самый простой вариант отображения процесса выполнения кода. Он может быть без проблем использован на любом ПК.
Application.StatusBar
— это специальный элемент интерфейса, расположенный в левой нижней части окна Excel и который может показывать дополнительную информацию в зависимости от действий пользователя. Все не раз видели его в работе. Например, после того как мы скопировали ячейки StatusBar покажет нам доп.информацию:

И из VBA есть доступ к этому элементу. Чтобы написать слово привет в StatusBar надо выполнить всего одну строку кода:
Application.StatusBar = "Привет"
Чтобы сбросить значения StatusBar и передать управление им обратно самому Excel необходимо выполнить строку:
Application.StatusBar = False
делать это обязательно, т.к. в противном случае вместо системных доп.сообщений будет постоянно показываться то значение, которое мы задали. Конечно, можно перезапустить Excel, но куда правильнее дописать в код строку, приведенную выше.
Как я уже упоминал — циклы могут быть с заранее неизвестным кол-вом итераций. В таких случаях очень удобно показывать стадию выполнения хотя бы из тех побуждений, чтобы пользователь видел, что программа не «зависла». на примере кода из статьи Просмотреть все файлы в папке:
Sub Get_All_File_from_Folder()
    Dim sFolder As String, sFiles As String
    'диалог запроса выбора папки с файлами
    With Application.FileDialog(msoFileDialogFolderPicker)
        If .Show = False Then Exit Sub
        sFolder = .SelectedItems(1)
    End With
    sFolder = sFolder & IIf(Right(sFolder, 1) = Application.PathSeparator, "", Application.PathSeparator)
    'отключаем обновление экрана, чтобы наши действия не мелькали
    Application.ScreenUpdating = False
    sFiles = Dir(sFolder & "*.xls*")
    Do While sFiles <> ""
        'показываем этап выполнения
        Application.StatusBar = "Обрабатывается файл '" & sFiles & "'"
        'открываем книгу
        Workbooks.Open sFolder & sFiles
        'действия с файлом
        'Запишем на первый лист книги в ячейку А1 - www.excel-vba.ru
        ActiveWorkbook.Sheets(1).Range("A1").Value = "www.excel-vba.ru"
        'Закрываем книгу с сохранением изменений
        ActiveWorkbook.Close True 'если поставить False - книга будет закрыта без сохранения
        sFiles = Dir
    Loop
    'возвращаем ранее отключенное обновление экрана
    Application.ScreenUpdating = True
    'сбрасываем значение статусной строки
    Application.StatusBar = False
End Sub
Если запустить код, то перед открытием каждой книги в строке StatusBar будет показано какой именно файл отрывается и обрабатывается. И так с каждым файлом:

В случае же с циклами, количество итераций которых есть возможность определить, можно показывать этап выполнения в процентах. Например, цикл по всем выделенным ячейкам:
Sub ShowProgressBar()
    Dim lAllCnt As Long, lr as Long
    Dim rc As Range
    'кол-во ячеек в выделенной области
    lAllCnt = Selection.Count
    'цикл по всем ячейкам в выделенной области
    For Each rc In Selection
        'прибавляем 1 при каждом шаге
        lr = lr + 1
        Application.StatusBar = "Выполнено: " & Int(100 * lr / lAllCnt) & "%"
        DoEvents 'чтобы форма перерисовывалась
    Next
    'сбрасываем значение статусной строки
    Application.StatusBar = False
End Sub
В строке статуса это будет выглядеть так:
![]()
Но можно показывать информацию и в чуть более изощренных формах:
Вариант отображения % и блоками-цифрами от 1 до 10(1 = 10% выполнения)
![]()
Sub StatusBar1()
    Dim lr As Long, lrr As Long, lp As Double
    Dim lAllCnt As Long 'кол-во итераций
    Dim s As String
    lAllCnt = 10000
    'основной цикл
    For lr = 1 To lAllCnt
        lp = lr  100 'десятая часть всего массива
        s = ""
        'формируем строку символов(от 1 до 10)
        For lrr = 10102 To 10102 + lp  10
            s = s & ChrW(lrr)
        Next
        'выводим текущее состояние выполнения
        Application.StatusBar = "Выполнено: " & lp & "% " & s: DoEvents
        DoEvents
    Next
    'очищаем статус-бар от значений после выполнения
    Application.StatusBar = False
End Sub
Вариант отображения % и стрелками ->(1 стрелка = 10% выполнения)
![]()
Sub StatusBar2()
    Dim lr As Long, lp As Double
    Dim lAllCnt As Long 'кол-во итераций
    Dim s As String
    lAllCnt = 10000
    For lr = 1 To lAllCnt
        lp = lr  100 'десятая часть всего массива
        'формируем строку символов(от 1 до 10)
        s = String(lp  10, ChrW(10152)) & String(11 - lp  10, ChrW(8700))
        Application.StatusBar = "Выполнено: " & lp & "% " & s: DoEvents
        DoEvents
    Next
    'очищаем статус-бар от значений после выполнения
    Application.StatusBar = False
End Sub
Вариант отображения % и квадратами (кол-во квадратов можно изменять. Если lMaxQuad=20 — каждый квадрат одна 20-я часть всего массива)
![]()
Sub StatusBar3()
    Dim lr As Long
    Dim lAllCnt As Long 'кол-во итераций
    Const lMaxQuad As Long = 20 'сколько квадратов выводить
    lAllCnt = 10000

    For lr = 1 To lAllCnt
        Application.StatusBar = "Выполнено: " & Int(100 * lr / lAllCnt) & "%" & String(CLng(lMaxQuad * lr / lAllCnt), ChrW(9632)) & String(lMaxQuad - CLng(lMaxQuad * lr / lAllCnt), ChrW(9633))
        DoEvents
    Next
    'очищаем статус-бар от значений после выполнения
    Application.StatusBar = False
End Sub
Этот вариант мне нравится больше всего.
При желании можно сделать и иные варианты — главное найти символы, которые будут показываться и определить их числовой код.
Использование UserForm
Использование стандартного элемента ProgressBar
Для Userform можно использовать стандартный контрол ProgressBar, но я лично не люблю добавлять на формы элементы, которые надо подключать отдельно. Потому как впоследствии контрол может отказаться работать, т.к. нужной версии не окажется на конечном ПК пользователя. Например в моем офисе 2010 для 64-битных систем его нет.
Поэтому про него кратко и в файле примере его нет. Как его создать:
- создаем UserForm (в меню VBE —Insert —UserForm. Подробнее про вставку модулей и форм — Что такое модуль? Какие бывают модули?)
- отображаем окно конструктора(если не отображено): View —Toolbox
- далее в меню Tools —Additional Controls
- там ищем что-то имеющее в названии ProgressBar и отмечаем его. Жмем Ок.
Теперь в окне Toolbox появится элемент ProgressBar. Просто перетаскиваем его на форму. В свойствах можно задать цвет и стиль отображения полосы прогресса. Останется лишь при необходимости программно показывать форму и задавать для элемента ProgressBar значения минимума и максимума. Примерно это выглядеть будет так:
Практический код
Например, надо обработать все выделенные ячейки. Если форма называется UserForm1, а ProgressBar — ProgressBar1, то код будет примерно такой:
Sub ShowProgressBar()
    Dim lAllCnt As Long
    Dim rc As Range
    'кол-во ячеек в выделенной области
    lAllCnt = Selection.Count
    'показываем форму прогресс-бара
    UserForm1.Show
    UserForm1.ProgressBar1.Min = 1
    UserForm1.ProgressBar1.Max = lAllCnt
    'цикл по всем ячейкам в выделенной области
    For Each rc In Selection
        'прибавляем 1 при каждом шаге
        UserForm1.ProgressBar1.Value = UserForm1.ProgressBar1.Value + 1
        DoEvents 'чтобы форма перерисовывалась
    Next
    'закрываем форму
    Unload UserForm1
End Sub
Использование своего собственного прогресс-бара
Я использую в своих приложениях свой прогресс-бар с процентами. Для этого я использую стандартную UserForm, на которой располагаю два элемента Caption. Первый отвечает за визуальную составляющую в виде синей полосы заполнения, а так же за отображение процентов белыми цифрами на синем фоне. Второй Caption прозрачный и на нем в том же месте, что и у первого, отображаются проценты цифрами, но уже черным шрифтом. В результате в работе это выглядит так:

Как использовать эту форму и коды
Первоначально надо скачать файл, приложенный к статье, и в свой проект перенести форму frmStatusBar и модуль mCustomProgressBarModule.
Далее просто внедряем нужные строки в свои коды с циклами:
- До начала цикла необходимо вызывать процедуру инициализации формы:
Call Show_PrBar_Or_No(lAllCnt, «Обрабатываю данные…»)
первым аргументом задается общее кол-во обрабатываемых элементов, а вторым заголовок формы. Если второй аргумент не указан, то по умолчанию будет показан заголовок «Выполнение…». Так же внутри кодов есть кусок кода, отвечающий за минимальное кол-во элементов к обработке. По умолчанию задано 10. Это значит, что если обрабатывается менее 10 ячеек, то форма прогресс-бара показана не будет. Нужно для случаев, когда производятся разные действия над ячейками, но неизвестно сколько их будет. Но зато известно, что с ними будет делать код. Часто для кол-ва ячеек менее 100 нет смысла отображать прогресс выполнения, т.к. это и так секундное дело.
Чтобы изменить минимальное кол-во достаточно в строке bShowBar = (lCnt > 10) заменить 10 на нужное число. - Далее в каждом проходе цикла вызвать перерисовку формы под новое значение цикла:
If bShowBar Then Call MyProgresBar - и в конце не забыть закрыть форму, чтобы не висела:
If bShowBar Then Unload frmStatusBar
Пример применения формы:
Sub Test_ProgressForm()
    Dim lr As Long
    Dim lAllCnt As Long 'кол-во итераций
    lAllCnt = 10000
    'инициализируем форму прогресс-бара
    Call Show_PrBar_Or_No(lAllCnt, "Обрабатываю данные...")
    'сам цикл
    For lr = 1 To lAllCnt
        If bShowBar Then Call MyProgresBar
    Next

    'закрываем форму, если она была показана
    If bShowBar Then Unload frmStatusBar
End Sub
Так же все описанные примеры и коды можно найти в приложенном файле:
Скачать пример:
 Tips_ShowProgressBar.xls (79,0 KiB, 6 153 скачиваний)
Статья помогла? Поделись ссылкой с друзьями!
![]() Видеоуроки
Видеоуроки
Поиск по меткам
Access
apple watch
Multex
Power Query и Power BI
VBA управление кодами
Бесплатные надстройки
Дата и время
Записки
ИП
Надстройки
Печать
Политика Конфиденциальности
Почта
Программы
Работа с приложениями
Разработка приложений
Росстат
Тренинги и вебинары
Финансовые
Форматирование
Функции Excel
акции MulTEx
ссылки
статистика
Excel VBA Progress Bar in Excel
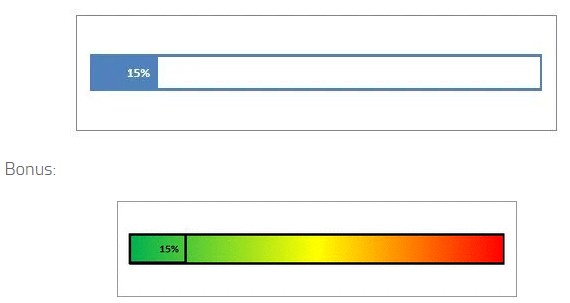
Progress Bar shows us how much of a process has been done or finished. For example, when we run large sets of codes that require a larger execution time, we use the progress bar in VBA to show the user the status of the process. Or, if we have multiple processes running in a single code, we use the progress bar to show which process has progressed and how much.
A progress bar shows the percentage of tasks completed when the actual task is running behind the screen with a set of instructions given by the code.
When the VBA code takes a considerable amount of time to execute, it is the user’s anxiety to know how soon it can finish. By default, we need to wait for the full time to complete the task, but by inserting the progress bar, we get to know the progress of the VBA codeVBA code refers to a set of instructions written by the user in the Visual Basic Applications programming language on a Visual Basic Editor (VBE) to perform a specific task.read more.
In almost all computer software, we see a progress bar chart that shows the progress of the task we are performing, just like the below image.
In Excel, we can create a progress bar by using VBA coding. If you have ever wondered how we can create a progress bar, this is the tailor-made article for you.
You can download this VBA Progress Bar Template here – VBA Progress Bar Template
Table of contents
- Excel VBA Progress Bar in Excel
- Create Your Own Progress Bar
- Recommended Articles
Create Your Own Progress Bar
To create a progress bar, we need to follow several steps. Below are the steps to involve while creating the progress bar chart.
Step 1: Create or Insert a new UserForm.

As soon as you click on the option above, you will see a UserForm like the one below.

Step 2: Press the F4 key to see the VBA Properties window.

In this Properties tab, we need to change the properties of the VBA UserformIn VBA, userforms are customized user-defined forms that are designed to accept user input in the form of a form. It has various sets of controls to add such as text boxes, checkboxes, and labels.read more we have inserted.
Step 3: Change the name of the UserForm to UFProgressBar.

Now, we can refer to this UserForm with the name “UFProgressBar” while coding.
Step 4: Change the “Show Modal” property of the UserForm to “FALSE.”

Step 5: Now, adjust the user’s alignment to fit your needs. We have changed the height of the UserForm to 120 and the width to 300.


Step 6: Change the “Caption” of the UserForm to “Progress Bar.”

Step 7: Now, from the toolbox of the UserForm, insert LABEL to the UserForm at the top.

With this label, we need to set the properties of the label. First, delete the caption, make it blank, and adjust the width of the label.


Step 8: Change the “Name” of the label to “ProgessLabel.”

Step 9: Take the frame from the toolbox and draw just below the label we inserted in the previous steps. Make sure the frame is at the center of the UserForm.

Step 10: We need to change some of the frame’s properties to make it look the same as the UserForm we have inserted.
Property 1: Change the “Name” of the frame to “ProgressFrame.”

Property 2: Delete the “Caption” and make it blank.

Property 3: Change the “SpecialEffect” of the frame to 6 – fmSpecialEffectBump.

After all these changes, our UserForm should look like this.

Step 11: Now, insert one more label. This time insert the label just inside the frame we have inserted.

While inserting the label, ensure the left side of the label exactly fits the frame we have inserted, as shown in the above image.
Step 12: After inserting the label, change the label’s properties as follows.
Property 1: Change the “Name” of the label to “MainProgressLabel.”

Property 2: Delete the “Caption.”

Property 3: Change the background color as per your wish

Now, we have completed setting up the progress bar. At this point, it looks like this.

Now, we need to enter codes to make this work perfectly.
Step 13: To make the framework add the below macro in excelA macro in excel is a series of instructions in the form of code that helps automate manual tasks, thereby saving time. Excel executes those instructions in a step-by-step manner on the given data. For example, it can be used to automate repetitive tasks such as summation, cell formatting, information copying, etc. thereby rapidly replacing repetitious operations with a few clicks.
read more.
Code:
Sub InitUFProgressBarBar()

With UFProgressBar
.Bar.Width = 0
.Text.Caption = "0%"
.Show vbModeless
End With

Note: “UFProgressBar” is the name given to the UserForm, “Bar” is the name given to the frame we have created, and “Text” is the name given to the label inside the frame.
Now, if you run this code manually or through the F5 key, we should see the progress bar like this.

Step 14: We need to create a Macro to perform our task. We are performing the task of inserting serial numbers from 1 to 5,000. We also need to configure the progress bar chart along with this code. The code is tailor-made code for you.
Code:
Sub ProgressBar_Chart()

Dim i As Long
Dim CurrentUFProgressBar As Double
Dim UFProgressBarPercentage As Double
Dim BarWidth As Long

i = 1

Call InitUFProgressBarBar

Do While i <= 5500

Cells(i, 1).Value = i

CurrentUFProgressBar = i / 2500
BarWidth = UFProgressBar.Border.Width * CurrentUFProgressBar
UFProgressBarPercentage = Round(CurrentUFProgressBar * 100, 0)

UFProgressBar.Bar.Width = BarWidth
UFProgressBar.Text.Caption = UFProgressBarPercentage & "% Complete"

DoEvents

i = i + 1

Loop

Unload UFProgressBar

End Sub

Recommended Articles
This article is a guide to VBA Progress Bar. Here, we learn how to create a progress bar chart, practical examples, and a downloadable template. Below you can find some useful Excel VBA articles: –
- VBA ArrayList in Excel
- VBA UCase Function
- VBA ENUM
- Integer in VBA
Excel-VBA-ProgressBar
Flexible Progress Bar for Excel

Related Code Review question
The Progress Bar from this project has the following features:
- Works on both Windows and Mac
- The user can cancel the displayed form via the X button (or the Esc key), if the
AllowCancelproperty is set toTrue - The form displayed can be Modal but also Modeless, as needed (see
ShowTypeproperty) - The progress bar calls a ‘worker’ routine which:
- can return a value if it’s a
Function - accepts a variable number of parameters and can change them
ByRefif needed - can accept the progress bar instance at a specific position in the parameter list but not required
- can be a macro in a workbook (see
RunMacro) or a method on an object (seeRunObjMethod)
- can return a value if it’s a
- Has the ability to show how much time has elapsed and an approximation of how much time is left if the
ShowTimeproperty is set toTrue - The userform module has a minimum of code (just events that are going to get raised) and has no design time controls which makes it easily reproducible
Installation
Just import the following code modules in your VBA Project:
- ProgressBar.cls
- ProgressForm.frm (you will also need the ProgressForm.frx when you import) — Alternatively, this can be easily recreated from scratch in 3 easy steps:
- insert new form
- rename it to
ProgressForm - add the following code:
Option Explicit

Public Event Activate()
Public Event QueryClose(Cancel As Integer, CloseMode As Integer)

Private Sub UserForm_Activate()
    RaiseEvent Activate
End Sub
Private Sub UserForm_QueryClose(Cancel As Integer, CloseMode As Integer)
    RaiseEvent QueryClose(Cancel, CloseMode)
End Sub
You will also need:
- LibMemory from the submodules folder or you can try the latest version here
Note that LibMemory is not available in the Zip download. If cloning via GitHub Desktop the submodule will be pulled automatically by default. If cloning via Git Bash then use something like:
$ git clone https://github.com/cristianbuse/Excel-VBA-ProgressBar
$ git submodule init
$ git submodule update
or:
$ git clone --recurse-submodules https://github.com/cristianbuse/Excel-VBA-ProgressBar
Demo
Import the following code modules:
- Demo.bas — run
DemoMain - DemoClass.cls
There is also a Demo Workbook available for download.
License
MIT License
Copyright (c) 2022 Ion Cristian Buse
Permission is hereby granted, free of charge, to any person obtaining a copy of this software and associated documentation files (the «Software»), to deal in the Software without restriction, including without limitation the rights to use, copy, modify, merge, publish, distribute, sublicense, and/or sell copies of the Software, and to permit persons to whom the Software is furnished to do so, subject to the following conditions:
The above copyright notice and this permission notice shall be included in all copies or substantial portions of the Software.
THE SOFTWARE IS PROVIDED «AS IS», WITHOUT WARRANTY OF ANY KIND, EXPRESS OR IMPLIED, INCLUDING BUT NOT LIMITED TO THE WARRANTIES OF MERCHANTABILITY, FITNESS FOR A PARTICULAR PURPOSE AND NONINFRINGEMENT. IN NO EVENT SHALL THE AUTHORS OR COPYRIGHT HOLDERS BE LIABLE FOR ANY CLAIM, DAMAGES OR OTHER LIABILITY, WHETHER IN AN ACTION OF CONTRACT, TORT OR OTHERWISE, ARISING FROM, OUT OF OR IN CONNECTION WITH THE SOFTWARE OR THE USE OR OTHER DEALINGS IN THE SOFTWARE.