
Excel Programming (Table of Contents)
- Introduction to Programming in Excel
- How to Program in Excel?
Introduction to Programming in Excel
Have you ever been tired of doing a task in Excel which you feel can be automated and save your time? Most of the time, you must have encountered such tasks. However, in order to automate any task, you first need to have programming skills for that particular language. In Excel, you can do programming with the help of Visual Basic for Application (VBA) which is Excel’s own programming language that can help you to automate the tasks. In this article, we will see how we can do programming in Excel VBA. VBA can be used to write a program that can automate the task for you. The piece of lines we write under VBA is called Macro, which is written in such a way that they instruct the Excel system about what to be done.
How to Program in Excel?
Let’s understand how to Program in excel with few illustrations.
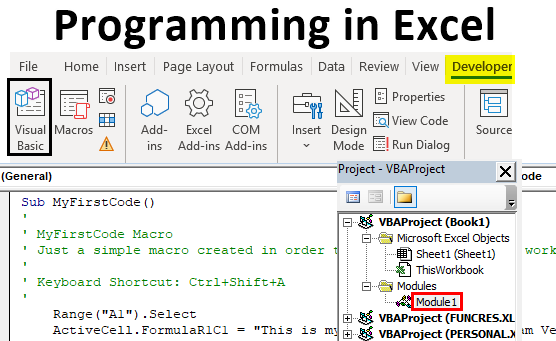
Enabling Developer Tab
The first thing that comes is enabling the developer tab that helps you to record and store a macro (VBA Code). Let us see how we can get that enabled.
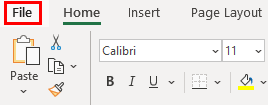
- Navigate to the File menu in your excel file and click on it.
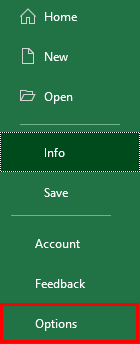
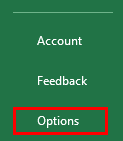
- Within the File menu, click on Options, and it will load a new window with all excel options available.
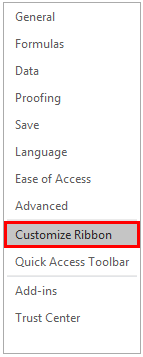
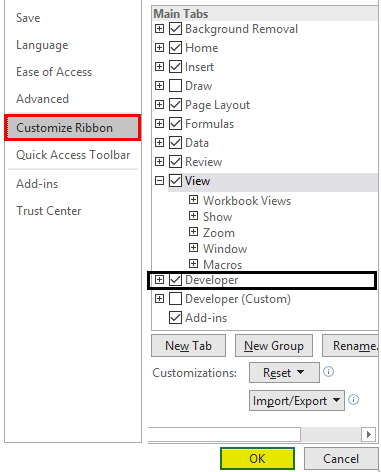
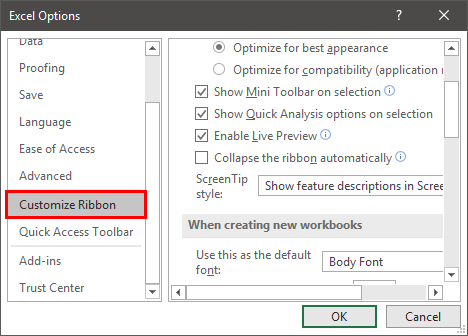
- In the new window that popped up named Excel Options, click on the Customize Ribbon tab. You can see all the customization options you can use for Excel Ribbon, which appears at the top of your Excel file.
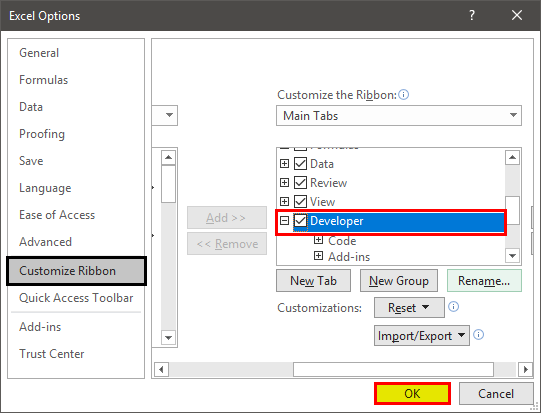
- Enable Developer option under Main Tabs dropdown within Customize the Ribbon: section. You can check (tick-mark) the Developer tab to enable it. Click the OK button placed at the bottom right of the Excel Options tab, and that’s it.
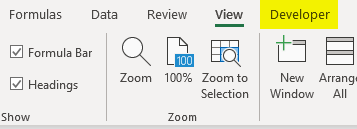
- You have successfully enabled the Developer option within your excel. If you check the Excel Ribbon in your file now, you’ll be able to see a new tab added there with the name Developer on it.
This is the first step you need to follow before you start writing macros in Excel. Because the Developer tab is needed to record and run the macro, this option tab is not by default enabled, which is why we tried enabling it here first.
Recording a Macro
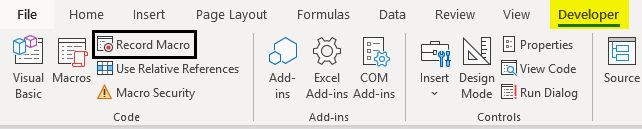
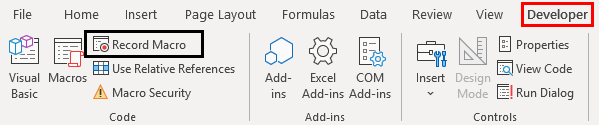
- Open the Excel file. Navigate towards the Developer tab you just enabled and then click on the Record Macro button, categorized and can be seen under the Code section.
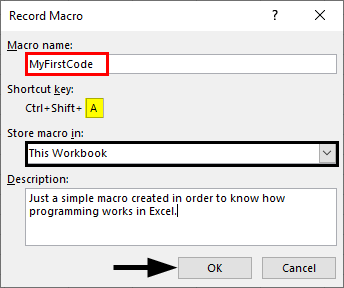
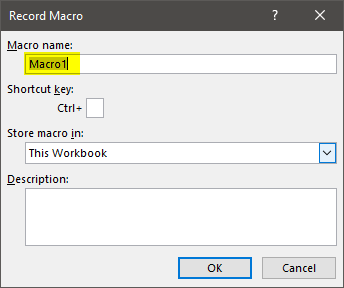
- As soon as you click on the Record Macro button, you’ll see a window popping up; in that window, you must have to assign a name to the macro; you can also assign a shortcut key for this macro to run. Can you add the description, if any, for this macro you are creating? Once you are done with all this, you can click on the OK button placed at the right bottom of the window. See the screenshot below for your reference.
As soon as you click OK, the system starts recording the macro and all the tasks you perform will be recorded and converted to Excel Program in the backend.
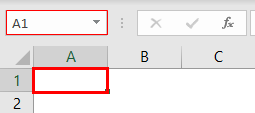
- Try typing the sentence “This is my first VBA code, and I am very happy!” in cell A1 within the Excel sheet and press Enter key. These steps will be recorded in the backend of the macro.

- Under the Code section, you might have observed that the Record Macro button has changed to Stop Recording. This is like Play and Stop. Record Macro Works as Play button and Stop Recording work as Stop button. Click on the Stop Recording button to stop the recording.
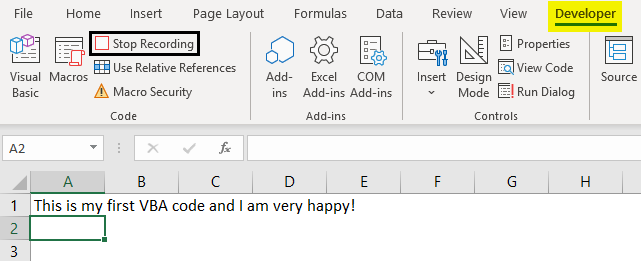
The magic behind all this is, Excel has recorded my steps here and converted those into pieces of code so that this task can be automated. It means, every single step, selecting cell A1, inputting the text as “This is my first VBA code, and I am happy!”, clicking Enter to go to the next cell. All these steps are converted into a VBA code. Let’s check the code now.
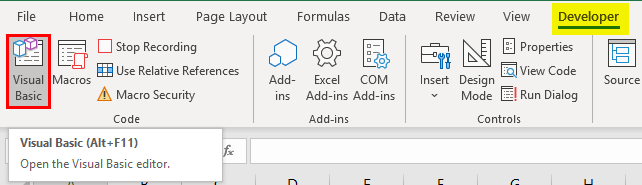
- In order to go to Visual Basic Editor, you can click on the Visual Basic option under the Code category in the Developer tab, or you can use Alt + F11 as a shortcut for the same.
- Navigate towards the Modules section under VBAProject and click on the plus button under it to see the list of active modules in VBA.
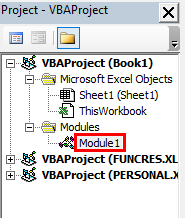
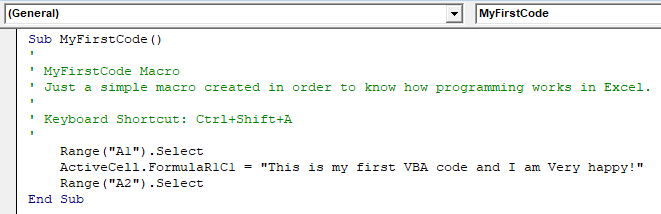
- Inside the Modules folder, you can see Module1 as soon as you click on the plus sign. You can double click on Module1; it is where your code for the task we performed in previous steps (Step 3 and 4) are recorded. Save this code, and you can run it every time to get the same output. See the screenshot below:
Conclusion
- We can record a macro in Excel to automate day to day small tasks, which are simpler for the system to manipulate programmatically.
- The cool thing about it is you don’t need to dig your head deep for the logic behind each step you perform. Excel VBA does it for you.
- For some complex tasks, such as the one which involves looping and conditional statements, you need to write code manually under VBA.
Things to Remember About Programming in Excel
- The Developers tab is not by default enabled and visible to you in Excel Ribbon. You need to enable it through Excel Options.
- Recording a macro works on simple tasks that are repeating, and you need those to be automated. However, for complex tasks which involve looping or Conditional Inputs and Outputs are still need to be coded manually under VBA.
- You need to save the file as an Excel-Macro Enable file format in order to be able to read and run the code again on your excel.
Recommended Articles
This is a guide to Programming in Excel. Here we discuss how to Program in Excel along with practical examples and a downloadable excel template. You can also go through our other suggested articles –
- Ribbon in Excel
- TRIM Formula in Excel
- Project Management Template in Excel
- COUNTIFS in Excel
What is Programming in Excel?
Programming refers to writing a set of instructions that tell Excel to perform one or more tasks. These instructions are written in the Visual Basic for Applications (VBA) as this is the language understandable to Excel. To write an instruction, one can either write a code in VBA or record a macro in Excel. A macro is recorded to automate repetitive tasks. When a macro is recorded, VBA generates a code in the background.
For example, to submit an Excel report, a table needs to undergo the same set of tasks each time. These tasks include applying a pre-defined border, color, alignment, and font. To program in Excel, a macro can be recorded for performing all these tasks.
The purpose of programming in Excel is to save the user from performing the same tasks again and again. Moreover, it helps accomplish multiple tasks at a great speed that would have taken a lot of time, had they been performed manually.
Table of contents
- What is Programming in Excel?
- Stages of Programming in Excel VBA
- Stage 1–Enable the Developer Tab in Excel
- Stage 2–Record a Macro in Excel
- Stage 3–View and Examine the VBA Code Generated by the Recorded Macro
- Stage 4–Test the VBA Code of the Recorded Macro
- Stage 5–Save the Recorded Macro (or the VBA Code)
- Frequently Asked Questions
- Recommended Articles
- Stages of Programming in Excel VBA
Stages of Programming in Excel VBA
Programming in Excel VBA is carried out in the following stages:
- Enable the Developer tab in Excel
- Record a macro in Excel
- View and examine the VBA code generated by the recorded macro
- Test the VBA code of the recorded macro
- Save the recorded macro (or the VBA code)
Further in this article, every stage of programming ine xcel has been discussed one by one. The steps to be performed in each stage are also listed.
Stage 1–Enable the Developer Tab in Excel
Let us understand how to enable the Developer tabEnabling the developer tab in excel can help the user perform various functions for VBA, Macros and Add-ins like importing and exporting XML, designing forms, etc. This tab is disabled by default on excel; thus, the user needs to enable it first from the options menu.read more in Excel. This tab is enabled to record a macro and access VBA. When the Developer tab is enabled, it appears on the Excel ribbonRibbons in Excel 2016 are designed to help you easily locate the command you want to use. Ribbons are organized into logical groups called Tabs, each of which has its own set of functions.read more. However, by default, Excel does not display the Developer tab.
Note: To know an alternate method to record a macro and access VBA, refer to the “alternative to step 1” in stages 2 and 3.
The steps to enable the Developer tab in Excel are listed as follows:
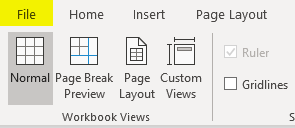
Step 1: Go to the File tab displayed on the Excel ribbon.
Step 2: Select “options” shown in the following image.
Step 3: The “Excel options” window opens, as shown in the following image. Select “customize ribbon” displayed on the left side of this window.
Step 4: Under “choose commands from” (on the left side of the window), ensure that “popular commands” is selected. Under “customize the ribbon” (on the right side of the window), choose “main tabs” from the drop-down list.
Next, select the checkbox of “developer” and click “Ok.” This checkbox is shown in the following image.
Step 5: The Developer tab appears on the Excel ribbon, as shown in the following image.

Stage 2–Record a Macro in Excel
Let us learn how to record a macroRecording macros is a method whereby excel stores the tasks performed by the user. Every time a macro is run, these exact actions are performed automatically. Macros are created in either the View tab (under the “macros” drop-down) or the Developer tab of Excel.
read more in Excel. When a macro is recorded, all tasks performed by the user (within the workbook) are stored in the Macro Recorder until the “stop recording” option is clicked. Apart from Microsoft Excel, a macro can be recorded for all Office applications that support VBA.
The steps to record a macro in Excel are listed as follows:
Step 1: From the Developer tab, click “record macro” from the “code” group.
Alternative to step 1: One can also click “record macro” from the “macros” group of the View tab of Excel.
Step 2: The “record macro” window opens, as shown in the following image. In this window, one can name the macro before recording it. The default macro name given by Excel is “macro1.”
The rules governing a macro name are stated as follows:
- It should not contain any space ( ), period (.) or exclamation point (!).
- It cannot contain any special characters (like $, @, ^, #, *, &) except the underscore (_).
- It should not begin with a numerical value. Rather, it must start with a letter.
- It cannot exceed 255 characters in length.
Note: It is recommended to use short and meaningful names for macros. Further, one must assign a unique name to each macro. In VBA, two macros within the same code module cannot have the same names.
Step 3: In the “macro name” box, we have entered the name “recording_macro.”
Notice that an underscore has been used as a separator between the two strings (recording and macro) of the name. No spaces, periods or special characters have been used in this name.
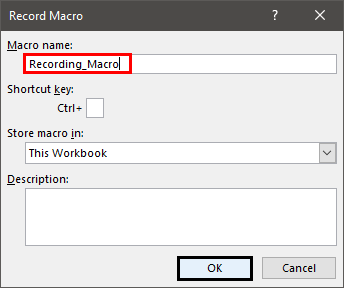
Step 4: Click “Ok” to start recording the macro. Once “Ok” is clicked in the preceding window, the “record macro” button (in the Developer tab or the View tab) changes to the “stop recording” button.
Next, carry out the tasks to be recorded in the macro “recording_macro.”
Note: Since the Macro Recorder records every action performed by the user, ensure that the actions are executed in the right sequence. If the recorded sequence is correct, Excel will perform the tasks efficiently each time the macro is run.
However, if a sequencing error occurs, one must either re-record the actions or edit the VBA codeVBA code refers to a set of instructions written by the user in the Visual Basic Applications programming language on a Visual Basic Editor (VBE) to perform a specific task.read more manually. If one is recording the macro for the first time, it is recommended to keep a copy of the workbook to prevent any undesired changes to the stored data.
In the following steps (step 4a to step 4c), the tasks to be recorded have been performed.
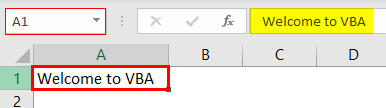
Step 4a: Select cell A1 of the worksheet. This is the first task that is recorded. The selection is shown in the following image.
Step 4b: Type “welcome to VBA” in cell A1. This is the second task that is recorded. Exclude the beginning and ending double quotation marks while typing.
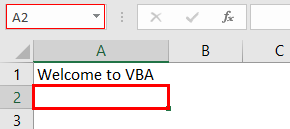
Step 4c: Press the “Enter” key. As a result, the selection shifts from cell A1 to cell A2. This becomes the third task that is recorded.
The selection is shown in the following image.
Step 5: Click “stop recording” in the “code” group of the Developer tab. By clicking this option, Excel is told to refrain from recording any further tasks.
The “stop recording” option is shown in the following image.

Stage 3–View and Examine the VBA Code Generated by the Recorded Macro
Let us observe and study the VBA code generated by the macro recorded in stage 2. Remember that one can either directly write a code in the Visual Basic Editor (VBE or VB Editor) or let a macro do the same.
The VBE is a tool or program where VBA codes are written, edited, and maintained. When a macro is recorded, a code is automatically written in a new module of VBE. Note that VBA is the programming language of Excel.
The steps to view and study the code generated by the recorded macro are listed as follows:
Step 1: Click “visual basic” from the “code” group of the Developer tab. This option is shown in the following image.
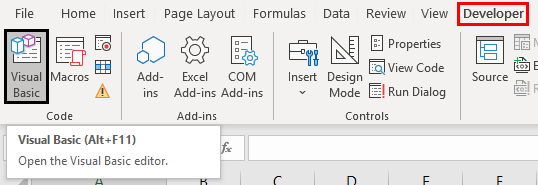
Alternative to step 1: As a substitute for the preceding step, press the keys “Alt+F11” together. This is the shortcutAn Excel shortcut is a technique of performing a manual task in a quicker way.read more to open the VBE window.
Note: “Alt+F11” is a toggle key which when pressed repeatedly, helps to switch between VBE and Excel.
![]()
Step 2: The Visual Basic Editor window opens, as shown in the following image.
To the left of the VBE window, the worksheet, workbook, and module are shown. This window on the left (named “Project-VBAProject”) is also known as the Project window or the Project Explorer of VBE.
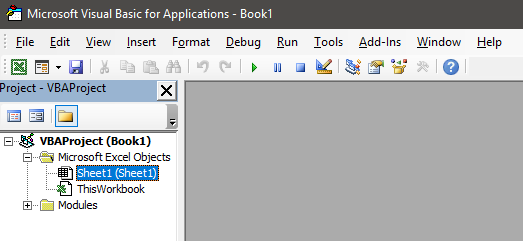
Step 3: Double-click “modules” shown in the following image.
Note: “Modules” are folders shown in the Project window after recording a macro. They are not shown prior to recording a macro. “Modules” are also shown when a module is inserted manually from the Insert tab of the VBE.
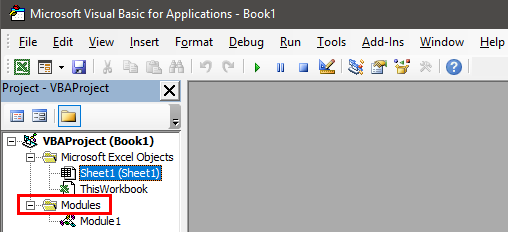
Step 4: Double-click “module1” under modules. A code appears on the right side of the VBE window. This window on the right [named “Book1-Module1 (Code)”] is known as the module code window.
The code is displayed in the following image.
Note: The code generated by recording a macro can be checked in the “modules” folder (in the module code window). In a module code window, one can also write a code manually or copy-paste it from another source.

In the following steps (step 4a to step 4d), the code generated by the recorded macro has been studied.
Step 4a: The first word of the code is “Sub.” “Sub” stands for subroutine or procedure. At the start of the code, the word “Sub,” the macro name (recording_macro), and a pair of empty parentheses are displayed. This is followed by the statements to be executed by the code. These statements are:
ActiveCell.FormulaR1C1 = “Welcome to VBA”
Range (“A2”). Select
The code ends with “End Sub.”
The start or head [Sub Recording_Macro ()] and the end or tail [End Sub] of the code are shown in the following image.
Note 1: The words “macro” and “code” are often used interchangeably by several Excel users. However, some users also distinguish between these two words.
A VBA code is a command created either by writing a code directly in VBE or by recording a macro in Excel. In contrast, a macro consists of instructions that automate tasks in Excel. According to one’s choice, one can decide whether or not to differentiate between the two words.
Note 2: The “Sub” can be preceded by the words “Private,” “Public,” “Friend,” or “Static.” All these words set the scope of the subroutine. The default subroutine used in VBA is “Public Sub.” So, when “Sub” is written in a code, it implies “Public Sub.”
A “Public Sub” can be initiated by subroutines of different modules. However, a “Private Sub” cannot be initiated by subroutines of other modules.

Step 4b: The first activity we performed (in step 4a of stage 2) was to select cell A1. Accordingly, the following statement of the code tells Excel that the active cell is R1C1.
ActiveCell.FormulaR1C1
When a macro is recorded, VBA uses the R1C1 style for referring to cells. In this style, the letter R is followed by the row number and the letter C is followed by the column number. So, cell R1C1 implies that the row number is 1 and the column number is also 1. In other words, cell R1C1 is the same as cell A1 of Excel.
Step 4c: The second activity we performed (in step 4b of stage 2) was to type “welcome to VBA” in cell A1. So, the following statement of the code tells Excel that the value in cell R1C1 is “welcome to VBA.”
ActiveCell.FormulaR1C1 = “Welcome to VBA”
Step 4d: The third activity we performed (in step 4c of stage 2) was to press the “Enter” key. By pressing this key, the selection had shifted from cell A1 to cell A2. Therefore, the following statement tells Excel to select cell A2.
Range (“A2”). Select
This is the way VBA generates a code for all the activities performed under stage 2 of programming in Excel. Examining the code line-by-line makes it easier to interpret it.
Stage 4–Test the VBA Code of the Recorded Macro
Let us test the code when it is run multiple times. Note that a macro (or code) can be run as many times as one wants. Each time it runs, it performs the recorded tasks in Excel.
The steps to test the code that we examined in stage 3 are listed as follows:
Step 1: Delete the string “welcome to VBA” from cell A1 of Excel. Let A1 remain as a blank, selected cell. The following image shows the empty cell A1.
Note: To go back from VBE to Excel, press the toggle key “Alt+F11.”
Step 2: Go to VBE again by pressing the key “Alt+F11.” Click anywhere within the code. Next, click the “Run Sub/UserForm (F5)” button. This button is shown within a blue box in the following image.
Note: Alternatively, one can press the key F5 to run the VBA code.

Step 3: The output is shown in the following image. The preceding code enters the string “welcome to VBA” in cell A1. Thereafter, the selection shifts to cell A2. The string “welcome to VBA” has been entered in cell A1 because this cell was selected (in step 1) before running the code.
Each time the code is run, the currently selected cell (or the active cell) is filled with the string “welcome to VBA.” Then, the selection shifts to cell A2. So, if cell M10 is the active cell, running the code fills this cell with the stated string and selects cell A2 at the end.
However, had cell A2 been selected, running the code would have filled this cell with the string “welcome to VBA.” Moreover, in the end, cell A2 would have remained the selected cell.

Stage 5–Save the Recorded Macro (or the VBA Code)
Let us learn how to save a workbook containing a recorded macro. If a macro is saved, its VBA code is also saved.
The steps to save a workbook containing a macro (or a VBA code) are listed as follows:
- Click “save as” from the File tab of Excel. The “save as” dialog box opens, as shown in the following image.
- Assign a name to the Excel workbook in the “file name” box. We have entered the name “macro class.”
- Save the workbook with the “.xlsm” extension. So, in the “save as type” box, choose “Excel macro-enabled workbook.”
- Click “save” to save the workbook.
A workbook containing a macro should always be saved with the “.xlsm” extension. This extension ensures that the macro is saved and can be reused the next time the workbook is opened.
Note 1: The “save as” command is used when a workbook is saved for the first time. It is also used when a new copy of the workbook is to be created and, at the same time, the original copy is to be retained as well.
Note 2: If the workbook containing a macro is saved as a regular workbook (with the “.xlsx” extension), the macro will not be saved. Further, one may lose the code of the recorded macro.

Frequently Asked Questions
1. What is programming and how is it carried out in Excel?
Programming refers to instructing Excel to perform one or more tasks. To instruct Excel, either a code can be written in the Visual Basic for Applications (VBA) or a macro can be recorded in Excel. Each time a macro is recorded, a code is generated by VBA in the background.
The steps to carry out programming in Excel are listed as follows:
a. Enable the Developer tab in Excel.
b. Record a macro in Excel. For recording, perform each activity in the sequence in which it should be recorded.
c. Save the code generated by the recorded macro and run it whenever required.
One can also carry out programming by writing a code manually and then saving and running it.
Note: To learn the details of programming in Excel, refer to the description of the different stages given in this article.
2. How to write a code for programming in Excel?
For programming in Excel, a code is written in Visual Basic Editor (VBE), which is a tool of VBA. The steps to write a code in VBE are listed as follows:
a. Open a blank Excel workbook.
b. Press the keys “Alt+F11” to open VBE.
c. Select any worksheet from “Microsoft Excel Objects” listed in the “Project-VBA Project window.”
d. Click the Insert tab and choose “module.” A folder named “modules” and an object named “module1” are created in the “Project-VBA Project window.” At the same time, a window opens on the right, which is titled “Book1-Module1 (Code).”
e. Enter the code in the “Book1-Module1 (Code)” window that has opened in the preceding step.
f. Click anywhere within the code once it has been written entirely.
g. Run the code by pressing F5 or clicking the “Run Sub/UserForm (F5)” button.
If the code has been entered correctly in step “e,” Excel will perform the tasks it has been instructed to. However, if there is an error in the code, an error message will appear.
Note: For saving a code, refer to stage 5 of programming in Excel given in this article.
3. How to learn programming in Excel?
To learn programming, one can learn how to record a macro in Excel. It is easier to learn macro recording than to create a code manually in VBE. Moreover, macro recording can be done even if one does not know VBA coding.
However, each time a macro is recorded, examine the generated code carefully. As one becomes proficient in macro recording, the codes too will become understandable. In this way, learning programming in Excel will no longer be a complicated task.
Recommended Articles
This has been a guide to Programming in Excel. Here we discuss how to record VBA macros along with practical examples and downloadable Excel templates. You can learn more from the following articles–
- Create Button Macro in ExcelA Macro is nothing but a line of code to instruct the excel to do a specific task. Once the code is assigned to a button control through VBE you can execute the same task any time in the workbook. By just clicking on the button we can execute hundreds of line, it also automates the complicated Report.read more
- What is VBA Macros?
- Excel MacroA macro in excel is a series of instructions in the form of code that helps automate manual tasks, thereby saving time. Excel executes those instructions in a step-by-step manner on the given data. For example, it can be used to automate repetitive tasks such as summation, cell formatting, information copying, etc. thereby rapidly replacing repetitious operations with a few clicks.
read more - Code in Excel VBAVBA code refers to a set of instructions written by the user in the Visual Basic Applications programming language on a Visual Basic Editor (VBE) to perform a specific task.read more
Содержание
- Programming with the C API in Excel
- Excel Programming Interfaces
- When to Use the C API
- Writing High-Performance User-Defined Worksheet Functions
- Accessing Multithreaded Servers by Using XLL Worksheet Functions
- Customizing the Excel User Interface
- Creating Applications that Can Be Accessed on the Internet
- Controlling Excel from External Applications
- Asynchronous Calling of Excel
- C API and Its Relation to XLM
- Excel VBA Tutorial – How to Write Code in a Spreadsheet Using Visual Basic
- Introduction
- Prerequisites
- Learning Objectives
- Important Concepts
- What is VBA?
- Why use VBA in Excel?
- Getting Set Up to Write VBA in Excel
- Developer Tab
- VBA Editor
- Excel VBA Examples
- Example #1: Display a Message when Users Open the Excel Workbook
- How is it doing that?
- When could I use this?
- Real World Examples
- Example #2: Allow User to Execute another Procedure
- How is it doing that?
- When could I use this?
- Real World Examples
- Example #3: Add Numbers to a Range with a For-Next Loop
- How is it doing that?
- When could I use this?
- Real World Examples
- Conclusion
Programming with the C API in Excel
Applies to: Excel 2013 | Office 2013 | Visual Studio
You can use the Microsoft Excel 2013 XLL Software Development Kit and the C API to create high-performance worksheet functions for Excel 2013. The upgrades to the Excel 2013 C API reflect ongoing support for users for whom the performance of third-party or in-house functionality is critical.
Excel Programming Interfaces
Excel provides several options for developing applications that interface with it. The Excel programming interfaces were added to earlier versions in the following order:
XLM macro language: The first user-accessible language for the extension of Excel and the basis of the C API. Although still supported in Excel 2010, XLM has long been superseded by Visual Basic for Applications (VBA).
C API and XLLs: DLLs that are integrated with Excel. These DLLs provide the most direct and fastest interface for the addition of high-performance worksheet functions, although at the cost of some complexity compared with later technologies.
VBA: Visual Basic code objects that are associated with Excel workbook objects. VBA allows event trapping, customization, and the addition of user-defined functions and commands. VBA is the most commonly used and most easily available of the extensibility options.
COM: The interoperability standard for Windows-based applications, through which Excel exposes its events and objects. VBA uses COM to interact with Excel. Excel exports COM type libraries that can help you create C++ COM code resources and applications that can control Excel externally.
The Microsoft .NET Framework: The multi-language managed code environment designed for rapid application development for distributed environments. The primary programming language for code that is based on the .NET Framework is C#, although many languages can be compiled to the Microsoft intermediate language (MSIL). Excel 2013 can access code resources contained within .NET Framework assemblies.
When to Use the C API
The primary reason for writing XLLs and using the C API is to create high-performance worksheet functions. Although XLL functions are frequently referred to as user-defined functions, the investment in time to obtain the understanding and skills that are required to write XLLs make this a technology impractical for most users. Nevertheless, the applications of high-performance functions—and, in Excel 2013, the ability to write multithreaded interfaces to powerful server resources—make this a very important part of Excel extensibility.
The revision of the C API that was introduced in Excel 2007 is mainly concerned with the aspects relating to high-performance calculations, rather than features such as the user interface.
Writing High-Performance User-Defined Worksheet Functions
The Excel C API is the ideal choice when you want to create high-performance worksheet functions by creating XLL add-ins. The C API provides you with the most direct access to worksheet data. XLLs provide Excel with the most direct access to the DLL resources. The performance of XLLs is further enhanced in Excel 2013 by the addition of new data types and, most importantly, support for running user-defined functions on clustered servers.
Working with XLLs comes at a cost: The C API has none of the higher-level rapid development features of VBA, COM, or the .NET Framework. Memory management is low level and, therefore, puts greater responsibility on the developer. Many Excel features that are exposed via COM, making them available through VBA and the .NET Framework, are not exposed to the C API.
Accessing Multithreaded Servers by Using XLL Worksheet Functions
Multithreaded recalculation (MTR), which was introduced in Excel 2007, enables you to create thread-safe XLL worksheet functions. You can use these functions to access multithreaded servers. Later sections describe more fully how this can dramatically increase the performance observed by the user. For Excel users who sometimes need access to a lot of processing power, the combination of an XLL that uses MTR and a powerful calculation server provides the highest-performance solution.
Customizing the Excel User Interface
For many versions of Excel, the C API has not been the best choice for customizing the user interface. VBA has superior access to Excel objects and events. The user interface introduced in Excel 2007 is significantly different from earlier versions both in appearance and underlying technology. You can best customize this interface by using managed code resources.
Creating Applications that Can Be Accessed on the Internet
Excel Services, introduced with the 2007 Microsoft Office system, provides the best way to give users access to workbooks and Excel functionality by using standard Web browser tools. Together with .NET Framework development languages and resources, these technologies represent an important part of Excel deployment to users in the future.
Controlling Excel from External Applications
Excel exposes its objects, methods, and events through the COM interface. You can, therefore, use COM to create stand-alone applications that can start and control an Excel session or control an existing Excel session. You can access the COM-exposed Excel interface within several development languages, including C++ and VBA. C# and the .NET Framework similarly provide an interface to Excel that enables remote access to and control of Excel.
Asynchronous Calling of Excel
Excel allows XLLs to call the C API only when Excel has passed control to the XLL. A worksheet function that is called by Excel can call back into Excel by using the C API. An XLL command that is called by Excel can call the C API. DLL and XLL functions and commands that are called by VBA when VBA has itself been called by Excel can call the C API. You cannot, for example, set a timed Windows callback into your XLL and call the C API from it, and you cannot call the C API from a background thread created by your XLL. Calling Excel asynchronously by using COM from a DLL or XLL is not recommended.
This is very limiting because there may be applications in which you want Excel to react to an event asynchronously. For example, you might want Excel to retrieve a piece of data on the Internet and recalculate whenever that data changes. Or you might want a background thread to perform a calculation and have Excel recalculate when it is finished.
You can do this by having Excel actively poll for changes, but this is inefficient and limiting because it involves Excel frequently interrupting its regular activity. You can set up repeated timed command using the C API or VBA, although this is not an ideal solution.
Ideally you would want a more efficient external process to check for the change in data, and for that external process to trigger Excel to retrieve the update and perform a recalculation. You can do this by using an application that interfaces to Excel by using COM. COM is not restricted in the same manner as the C API to making calls only when Excel has explicitly passed it control. COM applications can invoke Excel methods whenever Excel is in a ready state, although these method calls might be ignored if dialog boxes are being displayed, menus are pulled down, or when a macro is executing.
C API and Its Relation to XLM
The Excel macro (XLM) language was the first user-accessible programming environment provided in Excel. It enabled users to create custom commands and functions on special macro sheets that look like ordinary worksheets. XLM macro sheets are still supported in Excel 2013. You can use all the usual worksheet functions like SUM and LOG on a macro sheet, in addition to the following items that cannot be entered on a worksheet:
Workspace information functions such as GET.CELL and GET.WORKBOOK.
Command-equivalent functions that enable automation of ordinary user operations such as DEFINE.NAME and PASTE.
Functions that relate to add-ins such as REGISTER.
Command-equivalent event traps such as ON.ENRTY and ON.TIME.
Macro function-specific operations such as ARGUMENT and VOLATILE.
Flow-control operations such as GOTO and RETURN.
A limited version of the C API existed in Excel version 3. However, in Excel version 4, the XLM language was mapped to the C API. Since then, DLLs have been able to call all worksheet functions, macro sheet information functions, and commands, and to set event traps. DLLs cannot call XLM flow control functions from within the C API. These macro-sheet functions and commands are documented in the Help file XLMacr8.hlp (formerly named Macrofun.hlp). To obtain this help file, go to the Microsoft Download Center and search for «XLMacr8.hlp».
Windows Vista and Windows 7 do not directly support .hlp files, but you can download the Windows Help program (WinHlp32.exe) for Windows Vista or the Windows Help program (WinHlp32.exe) for Windows 7 from Microsoft that enables them to be opened.
DLLs call C API equivalents of these functions and commands by using the callback functions Excel4, Excel4v, Excel12, and Excel12v (the last two were introduced in Excel 2007). Enumerated constants that correspond to each function and command are defined in a header file and passed as one of the arguments to these callbacks. For example, GET.CELL is represented by xlfGetCell, REGISTER by xlfRegister, and DEFINE.NAME by xlcDefineName.
In addition to providing the worksheet functions and macro-sheet functions and commands, the C API provides function and command enumerations that can be called only by using these callbacks from within a DLL. For example, xlGetName enables the DLL to find out its own the full path and file name, which is required when you register functions and commands with Excel.
Since the introduction of Visual Basic for Applications (VBA) sheets in Excel version 5, and the Visual Basic Editor (VBE) in version 8 (Excel 97), the easiest way for users to customize Excel is to use VBA instead of XLM. Consequently, much of the new functionality introduced in later versions of Excel is available through VBA, but not through XLM or the C API. For example, several commands, event traps, and enhanced dialog box capabilities are available through VBA, but not through XLM or the C API.
Источник
Excel VBA Tutorial – How to Write Code in a Spreadsheet Using Visual Basic

Introduction
This is a tutorial about writing code in Excel spreadsheets using Visual Basic for Applications (VBA).
Excel is one of Microsoft’s most popular products. In 2016, the CEO of Microsoft said «Think about a world without Excel. That’s just impossible for me.” Well, maybe the world can’t think without Excel.
- In 1996, there were over 30 million users of Microsoft Excel (source).
- Today, there are an estimated 750 million users of Microsoft Excel. That’s a little more than the population of Europe and 25x more users than there were in 1996.
We’re one big happy family!
In this tutorial, you’ll learn about VBA and how to write code in an Excel spreadsheet using Visual Basic.
Prerequisites
You don’t need any prior programming experience to understand this tutorial. However, you will need:
- Basic to intermediate familiarity with Microsoft Excel
- If you want to follow along with the VBA examples in this article, you will need access to Microsoft Excel, preferably the latest version (2019) but Excel 2016 and Excel 2013 will work just fine.
- A willingness to try new things
Learning Objectives
Over the course of this article, you will learn:
- What VBA is
- Why you would use VBA
- How to get set up in Excel to write VBA
- How to solve some real-world problems with VBA
Important Concepts
Here are some important concepts that you should be familiar with to fully understand this tutorial.
Objects: Excel is object-oriented, which means everything is an object — the Excel window, the workbook, a sheet, a chart, a cell. VBA allows users to manipulate and perform actions with objects in Excel.
If you don’t have any experience with object-oriented programming and this is a brand new concept, take a second to let that sink in!
Procedures: a procedure is a chunk of VBA code, written in the Visual Basic Editor, that accomplishes a task. Sometimes, this is also referred to as a macro (more on macros below). There are two types of procedures:
- Subroutines: a group of VBA statements that performs one or more actions
- Functions: a group of VBA statements that performs one or more actions and returns one or more values
Note: you can have functions operating inside of subroutines. You’ll see later.
Macros: If you’ve spent any time learning more advanced Excel functionality, you’ve probably encountered the concept of a “macro.” Excel users can record macros, consisting of user commands/keystrokes/clicks, and play them back at lightning speed to accomplish repetitive tasks. Recorded macros generate VBA code, which you can then examine. It’s actually quite fun to record a simple macro and then look at the VBA code.
Please keep in mind that sometimes it may be easier and faster to record a macro rather than hand-code a VBA procedure.
For example, maybe you work in project management. Once a week, you have to turn a raw exported report from your project management system into a beautifully formatted, clean report for leadership. You need to format the names of the over-budget projects in bold red text. You could record the formatting changes as a macro and run that whenever you need to make the change.
What is VBA?
Visual Basic for Applications is a programming language developed by Microsoft. Each software program in the Microsoft Office suite is bundled with the VBA language at no extra cost. VBA allows Microsoft Office users to create small programs that operate within Microsoft Office software programs.
Think of VBA like a pizza oven within a restaurant. Excel is the restaurant. The kitchen comes with standard commercial appliances, like large refrigerators, stoves, and regular ole’ ovens — those are all of Excel’s standard features.
But what if you want to make wood-fired pizza? Can’t do that in a standard commercial baking oven. VBA is the pizza oven.

Why use VBA in Excel?
Because wood-fired pizza is the best!
A lot of people spend a lot of time in Excel as a part of their jobs. Time in Excel moves differently, too. Depending on the circumstances, 10 minutes in Excel can feel like eternity if you’re not able to do what you need, or 10 hours can go by very quickly if everything is going great. Which is when you should ask yourself, why on earth am I spending 10 hours in Excel?
Sometimes, those days are inevitable. But if you’re spending 8-10 hours everyday in Excel doing repetitive tasks, repeating a lot of the same processes, trying to clean up after other users of the file, or even updating other files after changes are made to the Excel file, a VBA procedure just might be the solution for you.
You should consider using VBA if you need to:
- Automate repetitive tasks
- Create easy ways for users to interact with your spreadsheets
- Manipulate large amounts of data
Getting Set Up to Write VBA in Excel
Developer Tab
To write VBA, you’ll need to add the Developer tab to the ribbon, so you’ll see the ribbon like this.

To add the Developer tab to the ribbon:
- On the File tab, go to Options > Customize Ribbon.
- Under Customize the Ribbon and under Main Tabs, select the Developer check box.
After you show the tab, the Developer tab stays visible, unless you clear the check box or have to reinstall Excel. For more information, see Microsoft help documentation.
VBA Editor
Navigate to the Developer Tab, and click the Visual Basic button. A new window will pop up — this is the Visual Basic Editor. For the purposes of this tutorial, you just need to be familiar with the Project Explorer pane and the Property Properties pane.

Excel VBA Examples
First, let’s create a file for us to play around in.
- Open a new Excel file
- Save it as a macro-enabled workbook (. xlsm)
- Select the Developer tab
- Open the VBA Editor
Let’s rock and roll with some easy examples to get you writing code in a spreadsheet using Visual Basic.
Example #1: Display a Message when Users Open the Excel Workbook
In the VBA Editor, select Insert -> New Module
Write this code in the Module window (don’t paste!):
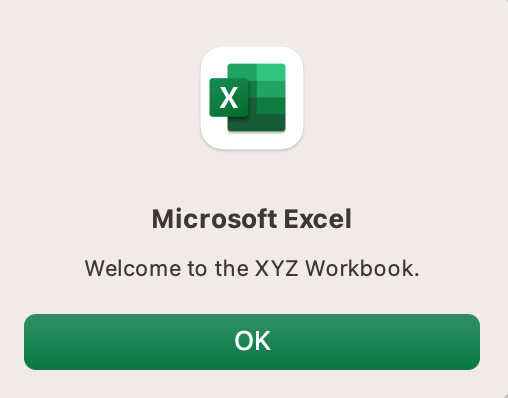
Sub Auto_Open()
MsgBox («Welcome to the XYZ Workbook.»)
End Sub
Save, close the workbook, and reopen the workbook. This dialog should display.
How is it doing that?
Depending on your familiarity with programming, you may have some guesses. It’s not particularly complex, but there’s quite a lot going on:
- Sub (short for “Subroutine): remember from the beginning, “a group of VBA statements that performs one or more actions.”
- Auto_Open: this is the specific subroutine. It automatically runs your code when the Excel file opens — this is the event that triggers the procedure. Auto_Open will only run when the workbook is opened manually; it will not run if the workbook is opened via code from another workbook (Workbook_Open will do that, learn more about the difference between the two).
- By default, a subroutine’s access is public. This means any other module can use this subroutine. All examples in this tutorial will be public subroutines. If needed, you can declare subroutines as private. This may be needed in some situations. Learn more about subroutine access modifiers.
- msgBox: this is a function — a group of VBA statements that performs one or more actions and returns a value. The returned value is the message “Welcome to the XYZ Workbook.”
In short, this is a simple subroutine that contains a function.
When could I use this?
Maybe you have a very important file that is accessed infrequently (say, once a quarter), but automatically updated daily by another VBA procedure. When it is accessed, it’s by many people in multiple departments, all across the company.
- Problem: Most of the time when users access the file, they are confused about the purpose of this file (why it exists), how it is updated so often, who maintains it, and how they should interact with it. New hires always have tons of questions, and you have to field these questions over and over and over again.
- Solution: create a user message that contains a concise answer to each of these frequently answered questions.
Real World Examples
- Use the MsgBox function to display a message when there is any event: user closes an Excel workbook, user prints, a new sheet is added to the workbook, etc.
- Use the MsgBox function to display a message when a user needs to fulfill a condition before closing an Excel workbook
- Use the InputBox function to get information from the user
Example #2: Allow User to Execute another Procedure
In the VBA Editor, select Insert -> New Module
Write this code in the Module window (don’t paste!):
Sub UserReportQuery()
Dim UserInput As Long
Dim Answer As Integer
UserInput = vbYesNo
Answer = MsgBox(«Process the XYZ Report?», UserInput)
If Answer = vbYes Then ProcessReport
End Sub
Sub ProcessReport()
MsgBox («Thanks for processing the XYZ Report.»)
End Sub
Save and navigate back to the Developer tab of Excel and select the “Button” option. Click on a cell and assign the UserReportQuery macro to the button.
Now click the button. This message should display:
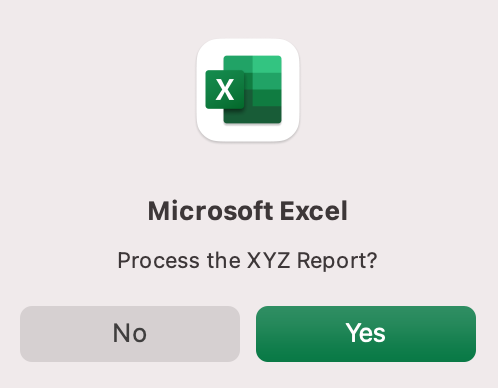
Click “yes” or hit Enter.
Once again, tada!
Please note that the secondary subroutine, ProcessReport, could be anything. I’ll demonstrate more possibilities in example #3. But first.
How is it doing that?
This example builds on the previous example and has quite a few new elements. Let’s go over the new stuff:
- Dim UserInput As Long: Dim is short for “dimension” and allows you to declare variable names. In this case, UserInput is the variable name and Long is the data type. In plain English, this line means “Here’s a variable called “UserInput”, and it’s a Long variable type.”
- Dim Answer As Integer: declares another variable called “Answer,” with a data type of Integer. Learn more about data types here.
- UserInput = vbYesNo: assigns a value to the variable. In this case, vbYesNo, which displays Yes and No buttons. There are many button types, learn more here.
- Answer = MsgBox(“Process the XYZ Report?”, UserInput): assigns the value of the variable Answer to be a MsgBox function and the UserInput variable. Yes, a variable within a variable.
- If Answer = vbYes Then ProcessReport: this is an “If statement,” a conditional statement, which allows us to say if x is true, then do y. In this case, if the user has selected “Yes,” then execute the ProcessReport subroutine.
When could I use this?
This could be used in many, many ways. The value and versatility of this functionality is more so defined by what the secondary subroutine does.
For example, maybe you have a file that is used to generate 3 different weekly reports. These reports are formatted in dramatically different ways.
- Problem: Each time one of these reports needs to be generated, a user opens the file and changes formatting and charts; so on and so forth. This file is being edited extensively at least 3 times per week, and it takes at least 30 minutes each time it’s edited.
- Solution: create 1 button per report type, which automatically reformats the necessary components of the reports and generates the necessary charts.
Real World Examples
- Create a dialog box for user to automatically populate certain information across multiple sheets
- Use the InputBox function to get information from the user, which is then populated across multiple sheets
Example #3: Add Numbers to a Range with a For-Next Loop
For loops are very useful if you need to perform repetitive tasks on a specific range of values — arrays or cell ranges. In plain English, a loop says “for each x, do y.”
In the VBA Editor, select Insert -> New Module
Write this code in the Module window (don’t paste!):
Sub LoopExample()
Dim X As Integer
For X = 1 To 100
Range(«A» & X).Value = X
Next X
End Sub
Save and navigate back to the Developer tab of Excel and select the Macros button. Run the LoopExample macro.
This should happen:
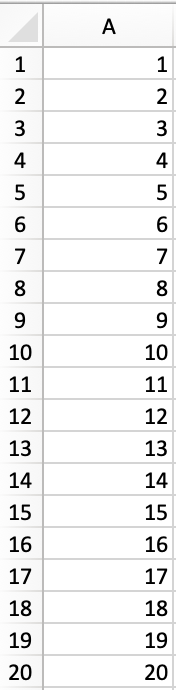
Etc, until the 100th row.
How is it doing that?
- Dim X As Integer: declares the variable X as a data type of Integer.
- For X = 1 To 100: this is the start of the For loop. Simply put, it tells the loop to keep repeating until X = 100. X is the counter. The loop will keep executing until X = 100, execute one last time, and then stop.
- Range(«A» & X).Value = X: this declares the range of the loop and what to put in that range. Since X = 1 initially, the first cell will be A1, at which point the loop will put X into that cell.
- Next X: this tells the loop to run again
When could I use this?
The For-Next loop is one of the most powerful functionalities of VBA; there are numerous potential use cases. This is a more complex example that would require multiple layers of logic, but it communicates the world of possibilities in For-Next loops.
Maybe you have a list of all products sold at your bakery in Column A, the type of product in Column B (cakes, donuts, or muffins), the cost of ingredients in Column C, and the market average cost of each product type in another sheet.
You need to figure out what should be the retail price of each product. You’re thinking it should be the cost of ingredients plus 20%, but also 1.2% under market average if possible. A For-Next loop would allow you to do this type of calculation.
Real World Examples
- Use a loop with a nested if statement to add specific values to a separate array only if they meet certain conditions
- Perform mathematical calculations on each value in a range, e.g. calculate additional charges and add them to the value
- Loop through each character in a string and extract all numbers
- Randomly select a number of values from an array
Conclusion
Now that we’ve talked about pizza and muffins and oh-yeah, how to write VBA code in Excel spreadsheets, let’s do a learning check. See if you can answer these questions.
- What is VBA?
- How do I get set up to start using VBA in Excel?
- Why and when would you use VBA?
- What are some problems I could solve with VBA?
If you have a fair idea of how to you could answer these questions, then this was successful.
Whether you’re an occasional user or a power user, I hope this tutorial provided useful information about what can be accomplished with just a bit of code in your Excel spreadsheets.
Источник
Introduction
This is a tutorial about writing code in Excel spreadsheets using Visual Basic for Applications (VBA).
Excel is one of Microsoft’s most popular products. In 2016, the CEO of Microsoft said «Think about a world without Excel. That’s just impossible for me.” Well, maybe the world can’t think without Excel.
- In 1996, there were over 30 million users of Microsoft Excel (source).
- Today, there are an estimated 750 million users of Microsoft Excel. That’s a little more than the population of Europe and 25x more users than there were in 1996.
We’re one big happy family!
In this tutorial, you’ll learn about VBA and how to write code in an Excel spreadsheet using Visual Basic.
Prerequisites
You don’t need any prior programming experience to understand this tutorial. However, you will need:
- Basic to intermediate familiarity with Microsoft Excel
- If you want to follow along with the VBA examples in this article, you will need access to Microsoft Excel, preferably the latest version (2019) but Excel 2016 and Excel 2013 will work just fine.
- A willingness to try new things
Learning Objectives
Over the course of this article, you will learn:
- What VBA is
- Why you would use VBA
- How to get set up in Excel to write VBA
- How to solve some real-world problems with VBA
Important Concepts
Here are some important concepts that you should be familiar with to fully understand this tutorial.
Objects: Excel is object-oriented, which means everything is an object — the Excel window, the workbook, a sheet, a chart, a cell. VBA allows users to manipulate and perform actions with objects in Excel.
If you don’t have any experience with object-oriented programming and this is a brand new concept, take a second to let that sink in!
Procedures: a procedure is a chunk of VBA code, written in the Visual Basic Editor, that accomplishes a task. Sometimes, this is also referred to as a macro (more on macros below). There are two types of procedures:
- Subroutines: a group of VBA statements that performs one or more actions
- Functions: a group of VBA statements that performs one or more actions and returns one or more values
Note: you can have functions operating inside of subroutines. You’ll see later.
Macros: If you’ve spent any time learning more advanced Excel functionality, you’ve probably encountered the concept of a “macro.” Excel users can record macros, consisting of user commands/keystrokes/clicks, and play them back at lightning speed to accomplish repetitive tasks. Recorded macros generate VBA code, which you can then examine. It’s actually quite fun to record a simple macro and then look at the VBA code.
Please keep in mind that sometimes it may be easier and faster to record a macro rather than hand-code a VBA procedure.
For example, maybe you work in project management. Once a week, you have to turn a raw exported report from your project management system into a beautifully formatted, clean report for leadership. You need to format the names of the over-budget projects in bold red text. You could record the formatting changes as a macro and run that whenever you need to make the change.
What is VBA?
Visual Basic for Applications is a programming language developed by Microsoft. Each software program in the Microsoft Office suite is bundled with the VBA language at no extra cost. VBA allows Microsoft Office users to create small programs that operate within Microsoft Office software programs.
Think of VBA like a pizza oven within a restaurant. Excel is the restaurant. The kitchen comes with standard commercial appliances, like large refrigerators, stoves, and regular ole’ ovens — those are all of Excel’s standard features.
But what if you want to make wood-fired pizza? Can’t do that in a standard commercial baking oven. VBA is the pizza oven.
Yum.
Why use VBA in Excel?
Because wood-fired pizza is the best!
But seriously.
A lot of people spend a lot of time in Excel as a part of their jobs. Time in Excel moves differently, too. Depending on the circumstances, 10 minutes in Excel can feel like eternity if you’re not able to do what you need, or 10 hours can go by very quickly if everything is going great. Which is when you should ask yourself, why on earth am I spending 10 hours in Excel?
Sometimes, those days are inevitable. But if you’re spending 8-10 hours everyday in Excel doing repetitive tasks, repeating a lot of the same processes, trying to clean up after other users of the file, or even updating other files after changes are made to the Excel file, a VBA procedure just might be the solution for you.
You should consider using VBA if you need to:
- Automate repetitive tasks
- Create easy ways for users to interact with your spreadsheets
- Manipulate large amounts of data
Getting Set Up to Write VBA in Excel
Developer Tab
To write VBA, you’ll need to add the Developer tab to the ribbon, so you’ll see the ribbon like this.
To add the Developer tab to the ribbon:
- On the File tab, go to Options > Customize Ribbon.
- Under Customize the Ribbon and under Main Tabs, select the Developer check box.
After you show the tab, the Developer tab stays visible, unless you clear the check box or have to reinstall Excel. For more information, see Microsoft help documentation.
VBA Editor
Navigate to the Developer Tab, and click the Visual Basic button. A new window will pop up — this is the Visual Basic Editor. For the purposes of this tutorial, you just need to be familiar with the Project Explorer pane and the Property Properties pane.
Excel VBA Examples
First, let’s create a file for us to play around in.
- Open a new Excel file
- Save it as a macro-enabled workbook (. xlsm)
- Select the Developer tab
- Open the VBA Editor
Let’s rock and roll with some easy examples to get you writing code in a spreadsheet using Visual Basic.
Example #1: Display a Message when Users Open the Excel Workbook
In the VBA Editor, select Insert -> New Module
Write this code in the Module window (don’t paste!):
Sub Auto_Open()
MsgBox («Welcome to the XYZ Workbook.»)
End Sub
Save, close the workbook, and reopen the workbook. This dialog should display.
Ta da!
How is it doing that?
Depending on your familiarity with programming, you may have some guesses. It’s not particularly complex, but there’s quite a lot going on:
- Sub (short for “Subroutine): remember from the beginning, “a group of VBA statements that performs one or more actions.”
- Auto_Open: this is the specific subroutine. It automatically runs your code when the Excel file opens — this is the event that triggers the procedure. Auto_Open will only run when the workbook is opened manually; it will not run if the workbook is opened via code from another workbook (Workbook_Open will do that, learn more about the difference between the two).
- By default, a subroutine’s access is public. This means any other module can use this subroutine. All examples in this tutorial will be public subroutines. If needed, you can declare subroutines as private. This may be needed in some situations. Learn more about subroutine access modifiers.
- msgBox: this is a function — a group of VBA statements that performs one or more actions and returns a value. The returned value is the message “Welcome to the XYZ Workbook.”
In short, this is a simple subroutine that contains a function.
When could I use this?
Maybe you have a very important file that is accessed infrequently (say, once a quarter), but automatically updated daily by another VBA procedure. When it is accessed, it’s by many people in multiple departments, all across the company.
- Problem: Most of the time when users access the file, they are confused about the purpose of this file (why it exists), how it is updated so often, who maintains it, and how they should interact with it. New hires always have tons of questions, and you have to field these questions over and over and over again.
- Solution: create a user message that contains a concise answer to each of these frequently answered questions.
Real World Examples
- Use the MsgBox function to display a message when there is any event: user closes an Excel workbook, user prints, a new sheet is added to the workbook, etc.
- Use the MsgBox function to display a message when a user needs to fulfill a condition before closing an Excel workbook
- Use the InputBox function to get information from the user
Example #2: Allow User to Execute another Procedure
In the VBA Editor, select Insert -> New Module
Write this code in the Module window (don’t paste!):
Sub UserReportQuery()
Dim UserInput As Long
Dim Answer As Integer
UserInput = vbYesNo
Answer = MsgBox(«Process the XYZ Report?», UserInput)
If Answer = vbYes Then ProcessReport
End Sub
Sub ProcessReport()
MsgBox («Thanks for processing the XYZ Report.»)
End Sub
Save and navigate back to the Developer tab of Excel and select the “Button” option. Click on a cell and assign the UserReportQuery macro to the button.
Now click the button. This message should display:
Click “yes” or hit Enter.
Once again, tada!
Please note that the secondary subroutine, ProcessReport, could be anything. I’ll demonstrate more possibilities in example #3. But first…
How is it doing that?
This example builds on the previous example and has quite a few new elements. Let’s go over the new stuff:
- Dim UserInput As Long: Dim is short for “dimension” and allows you to declare variable names. In this case, UserInput is the variable name and Long is the data type. In plain English, this line means “Here’s a variable called “UserInput”, and it’s a Long variable type.”
- Dim Answer As Integer: declares another variable called “Answer,” with a data type of Integer. Learn more about data types here.
- UserInput = vbYesNo: assigns a value to the variable. In this case, vbYesNo, which displays Yes and No buttons. There are many button types, learn more here.
- Answer = MsgBox(“Process the XYZ Report?”, UserInput): assigns the value of the variable Answer to be a MsgBox function and the UserInput variable. Yes, a variable within a variable.
- If Answer = vbYes Then ProcessReport: this is an “If statement,” a conditional statement, which allows us to say if x is true, then do y. In this case, if the user has selected “Yes,” then execute the ProcessReport subroutine.
When could I use this?
This could be used in many, many ways. The value and versatility of this functionality is more so defined by what the secondary subroutine does.
For example, maybe you have a file that is used to generate 3 different weekly reports. These reports are formatted in dramatically different ways.
- Problem: Each time one of these reports needs to be generated, a user opens the file and changes formatting and charts; so on and so forth. This file is being edited extensively at least 3 times per week, and it takes at least 30 minutes each time it’s edited.
- Solution: create 1 button per report type, which automatically reformats the necessary components of the reports and generates the necessary charts.
Real World Examples
- Create a dialog box for user to automatically populate certain information across multiple sheets
- Use the InputBox function to get information from the user, which is then populated across multiple sheets
Example #3: Add Numbers to a Range with a For-Next Loop
For loops are very useful if you need to perform repetitive tasks on a specific range of values — arrays or cell ranges. In plain English, a loop says “for each x, do y.”
In the VBA Editor, select Insert -> New Module
Write this code in the Module window (don’t paste!):
Sub LoopExample()
Dim X As Integer
For X = 1 To 100
Range(«A» & X).Value = X
Next X
End Sub
Save and navigate back to the Developer tab of Excel and select the Macros button. Run the LoopExample macro.
This should happen:
Etc, until the 100th row.
How is it doing that?
- Dim X As Integer: declares the variable X as a data type of Integer.
- For X = 1 To 100: this is the start of the For loop. Simply put, it tells the loop to keep repeating until X = 100. X is the counter. The loop will keep executing until X = 100, execute one last time, and then stop.
- Range(«A» & X).Value = X: this declares the range of the loop and what to put in that range. Since X = 1 initially, the first cell will be A1, at which point the loop will put X into that cell.
- Next X: this tells the loop to run again
When could I use this?
The For-Next loop is one of the most powerful functionalities of VBA; there are numerous potential use cases. This is a more complex example that would require multiple layers of logic, but it communicates the world of possibilities in For-Next loops.
Maybe you have a list of all products sold at your bakery in Column A, the type of product in Column B (cakes, donuts, or muffins), the cost of ingredients in Column C, and the market average cost of each product type in another sheet.
You need to figure out what should be the retail price of each product. You’re thinking it should be the cost of ingredients plus 20%, but also 1.2% under market average if possible. A For-Next loop would allow you to do this type of calculation.
Real World Examples
- Use a loop with a nested if statement to add specific values to a separate array only if they meet certain conditions
- Perform mathematical calculations on each value in a range, e.g. calculate additional charges and add them to the value
- Loop through each character in a string and extract all numbers
- Randomly select a number of values from an array
Conclusion
Now that we’ve talked about pizza and muffins and oh-yeah, how to write VBA code in Excel spreadsheets, let’s do a learning check. See if you can answer these questions.
- What is VBA?
- How do I get set up to start using VBA in Excel?
- Why and when would you use VBA?
- What are some problems I could solve with VBA?
If you have a fair idea of how to you could answer these questions, then this was successful.
Whether you’re an occasional user or a power user, I hope this tutorial provided useful information about what can be accomplished with just a bit of code in your Excel spreadsheets.
Happy coding!
Learning Resources
- Excel VBA Programming for Dummies, John Walkenbach
- Get Started with VBA, Microsoft Documentation
- Learning VBA in Excel, Lynda
A bit about me
I’m Chloe Tucker, an artist and developer in Portland, Oregon. As a former educator, I’m continuously searching for the intersection of learning and teaching, or technology and art. Reach out to me on Twitter @_chloetucker and check out my website at chloe.dev.
Learn to code for free. freeCodeCamp’s open source curriculum has helped more than 40,000 people get jobs as developers. Get started
 Programming in Excel is simpler than you may think. The VBA editor and built in programming functions in Excel make creating your own routines and programs easy. This tutorial will show you how to create your own Inventory Input form so that a user can add stock to the worksheet. This tutorial requires a basic knowledge of Excel. For a great introduction to Excel, enroll in the Microsoft Excel 2013 Basics course now. This course contains lessons that will teach you how to identify parts of the worksheet. You will learn how to select cells and enter data. The course will show you how to change column widths and row heights. You will learn to work with various elements of the worksheet and you will learn to work with charts.
Let’s start by creating our button to launch our form.
Programming in Excel – Creating a Command Button
Command buttons are a great way to launch programs you create for your Excel spreadsheets. They are also a great way to launch the VBA editor. To create a command button, click the Developer tab on the main Excel ribbon and select “Insert” and choose “Command Button” under the ActiveX controls.
Drag your Command button using the handles to size the button. When you are happy with the size and shape, make sure you have “Design Mode” clicked and then double click the button to launch the VBA editor panel within Excel.
Create the Stock Entry Form
We are going to create a Stock Entry form for our worksheet. To create a new form, select “Insert” and then select “UserForm” to insert a new user form:

When you add a new form, a new Toolbox opens to allow you to add your own controls to the form. This toolbox allows you to add labels, text boxes, combo boxes and other controls that you use to control the information on your form:

The form and each control or element on the form has properties. These properties allow you to change the appearance of the element as well as other properties:

Notice that in the above properties we have renamed the form to “StockForm.” It is important to name all of your elements with clearly defined names to make it easier when you start to create your Excel program.
Let’s add some controls and elements to our stock form.
Add the Input Boxes to Your Stock Form
Our stock form will allow users to add stock to an inventory form. Our form will require the user to enter the date, the user name, the item and the number of stock items so we will add input boxes for each of them.
To create an input box for the date, insert a text box and call it “newDate.” Insert a label for the text box and change the caption property of the label to date:

Create a combo box for the Item to be entered. A combo box will allow the user to either enter a stock item or choose a stock item from a drop down list. To create the drop down list, define the row source property of the combo box as a named range from your worksheet. For the tutorial we named the items as Inventory and then specified “Inventory” under the row source property:

Don’t forget to name the Item Combo box “newItem.”
Now add a combo box for the user. Change the user element name to “newUser” and use “Users” as a named range to create a row source for the users in the worksheet.
We will add a text box element for the number of stock items. Name the text box “newTotal.”
Now we can add another command button to allow users to add the items to the worksheet. Create a command button on the form. Double click the button to open the VBA editor for the button.
Sign up for the Excel 2013 for Dummies Video Training, Deluxe Edition course and take your skills from Excel beginner to Excel master. The Excel for Dummies course is a comprehensive course offering over 106 lessons and over 19 hours of content to make sure you are comfortable working in Excel. The course includes lessons on Excel VBA and even includes an Excel VBA cheat sheet.
Add the Code
To add each new inventory item to the list, we first need to find the next new row in our worksheet. If we don’t search for the next new row, then our button will add the information to the same line over and over again and overwrite the information.
To find the next new row, use the following code:
newRow = Sheet2.Cells(Rows.Count, 1).End(xlUp).Offset(1, 0).Row
The above code finds the next row in a worksheet and stores the value in the variable called “newRow.” We are going to use this value to enter the new inventory using the following code:
Cells(newRow, 1).Value = newDate.Text
Cells(newRow, 2).Value = newUser.Text
Cells(newRow, 3).Value = newItem.Text
Cells(newRow, 4).Value = newTotal.Text
The above code inserts the values from the form into the cell with the address (newRow,1) to (newRow,4).
This is what our worksheet looks like:

When the user clicks the “Add Stock” button the following form will open:

The combo box works like this:

And when the user clicks add, a new row is added to the worksheet:

Add Forms to Your Worksheets
Forms are a great way to allow users to enter data into worksheets. Start learning how to harness the power of programming in Excel today. Join over four thousand students who are learning how to go from Excel beginner to pro with Learn Microsoft Excel 2013 – Advanced. This course offers over 52 lectures and 12.5 hours of content designed to teach you advanced Excel concepts. The course will teach you how to work with dates and times. You will learn about percentiles, averages and LINEST functions. The course will show you how to calculate depreciation and payments and you will learn to insert and format tables in your workbooks. You will be taught how to work with sparklines, data bars and pivot charts.