
 Power Spreadsheets focuses on Microsoft Excel.
However, I’ve written several tutorials (such as here and here) that have to do with PDF and, more particularly, with the topic of converting PDF files to Excel.
The reason why I write about PDF is relatively straightforward: PDF is one of the most widely used file formats.
This particular Excel tutorial also focuses on the topic of working with Excel and PDF files. More precisely, I explain in detail how you can save Excel files as PDF using VBA, and provide 10 examples of VBA code that you can start using immediately.
In fact, in this blog post, I go much further than simply showing you how to simply convert Excel files to PDF. Among others, I also:
- Provide a thorough introduction to how you can use Visual Basic for Applications for purposes of adjusting the page setup attributes.
- Introduce some different ways in which you can specify the filename of the PDF file that results after the Excel to PDF conversion.
- Explain how you can save each worksheet from an Excel workbook in a separate PDF file.
The following table of contents lists the different sections of this blog post.
This Excel VBA Save as PDF Tutorial is accompanied by files containing the data and macros I use in the examples below. You can get immediate free access to these example files by clicking the button below.

The basic VBA method you use for converting Excel files to PDF is ExportAsFixedFormat. Therefore, let’s start this blog post by taking a look at it:
How To Save An Excel File As PDF Using VBA: The ExportAsFixedFormat Method
The main purpose of the ExportAsFixedFormat method is to export a particular Excel object (such as a file, worksheet, cell range or chart) to another file format, usually PDF.
You can apply the ExportAsFixedFormat method to several Excel objects. To be more precise, you’ll generally be working with 1 of the following versions of this method, depending on which particular object you want to save as PDF.
- The Workbook.ExportAsFixedFormat method, when saving an Excel workbook as PDF.
- The Worksheet.ExportAsFixedFormat method, if you’re saving a worksheet as PDF.
- The Range.ExportAsFixedFormat method, when working with a Range object.
- The Chart.ExportAsFixedFormat method, if saving a chart as PDF.
The basic syntax of the ExportAsFixedFormat method is generally as follows:
expression.ExportAsFixedFormat (Type, Filename, Quality, IncludeDocProperties, IgnorePrintAreas, From, To, OpenAfterPublish)
For these purposes, “expression” is a variable representing a Workbook, Worksheet, Chart or Range object, depending on the particular version of the method you’re working with. In other words, “expression” is the placeholder for the object that you want to actually save as PDF.
This particular VBA method has 9 different parameters. Let’s take a look at each of them:
Parameter #1: Type
You use the Type parameter to specify the type of file format to which the Excel file must be exported to. In other words, you determine in which file format the new (resulting) file is saved by specifying it in the Type parameter.
In order to specify the type of file you want to convert the Excel file to, you use the xlFixedFormatType enumeration. There are 2 types of file formats you can choose from:
- File Type #1: xlTypePDF, represented by the value of 0. xlTypePDF corresponds to PDF files, the subject of this Excel tutorial.
- File Type #2: xlTypeXPS, whose value is 1. xlTypeXPS corresponds to XPS files, Microsoft’s alternative to PDF.
The purpose of this Excel tutorial is to explain how you can use Visual Basic for Applications to save an Excel file as PDF. Therefore, whenever using the Type parameter in this blog post, I only use xlTypePDF.
Furthermore, XPS never seemed to gain much traction. Therefore, you’re unlikely to encounter (or have to work with) many XPS files.
Type is the only required parameter of the ExportAsFixedFormat method.
Parameter #2: Filename
As implied by its name, you use the Filename parameter of the ExportAsFixedFormat method for purposes of specifying the filename of the new (converted) file.
When specifying the Filename parameter, you have 2 broad options:
- Option #1: You can specify the full path and filename of the resulting file.
- Option #2: You can omit the full file path and, instead, just include the filename. In this case, Excel simply saves the converted file in the current default folder.
Filename is a string.
Parameter #3: Quality
You have the option of choosing the quality of the resulting PDF file (standard or minimum).
For these purposes, you use the Quality parameter of the ExportAsFixedFormat method. More precisely, you can choose 1 of the 2 xlFixedFormatQuality options:
- Quality Option #1: xlQualityStandard, whose value is 0. This is, simply, standard file quality.
- Quality Option #2: xlQualityMinimum (value is 0). This represents minimum file quality.
Parameter #4: IncludeDocProperties
The IncludeDocProperties parameter of the ExportAsFixedFormat method allows you to determine whether the document properties are included in the converted PDF file or not.
To make this choice, you simply need to set the IncludeDocProperties parameter to True or False as follows:
- True: Includes the document properties.
- False: Doesn’t include the document properties.
Parameter #5: IgnorePrintAreas
By using the IgnorePrintAreas parameter of the ExportAsFixedFormat method, you can specify whether Visual Basic for Applications should ignore (or not) the print areas that have been set for the relevant Excel file.
To specify whether the print areas should (or shouldn’t) be ignored, set the IgnorePrintAreas parameter to True or False as follows:
- True: Ignore print areas.
- False: Don’t ignore print areas.
Parameters #6 And #7: From And To
The From and To parameters of the ExportAsFixedFormat method allow you to specify the pages at which the publishing to PDF should begin and end. More precisely:
- From is the number of the page at which Visual Basic for Applications starts to publish. If the From argument is omitted, VBA starts at the beginning.
- To is the number of the last page that VBA publishes. If you omit the To argument, publishing goes on until the last page.
Parameter #8: OpenAfterPublish
By using the OpenAfterPublish parameter of the ExportAsFixedFormat method, you can determine whether the converted PDF file should be displayed in the PDF viewer as soon as the export process is completed.
You specify whether the file is displayed or not by setting the OpenAfterPublish parameter to True or False, as follows:
- True: Display file in PDF viewer after conversion.
- False: Don’t display file in PDF viewer after conversion.
Parameter #9: FixedFormatExtClassPtr
The FixedFormatExtClassPtr parameter of the ExportAsFixedFormat method is a pointer to the FixedFormatExt class.
How To Save An Excel File As PDF Using VBA: Basic Code Examples (Examples #1 And #2)
Now that you are familiar with the ExportAsFixedFormat VBA method, let’s take a look at some code examples.
For purposes of this example, I have prepared a sample Excel workbook. This workbook contains 2 worksheets. Each worksheet includes a table that lists 100 persons and their contact details, along with (i) their food preferences, and (ii) their favorite animal and the name of their pet.


How To Save An Excel File As PDF Using VBA: Code Example #1
As I explain above when introducing the ExportAsFixedFormat VBA method, the only required parameter is Type. Therefore, strictly speaking, you can create a very simple macro for purposes of saving an Excel file as a PDF.
The following sample macro (named Save_Excel_As_PDF_1) is, probably, one of the simplest way to save an Excel worksheet as PDF using VBA.

This macro consists of a single simple statement:
ActiveSheet.ExportAsFixedFormat Type:=xlTypePDF
This statement, can be separated in the following 3 items:

Let’s take a closer look at each of these elements:
Item #1: ActiveSheet
As I explain when introducing the Worksheet.ExportAsFixedFormat method above, the reference to the method must be preceded by a variable representing a Worksheet object.
In the case of the sample Save_Excel_As_PDF_1 macro above, the Application.ActiveSheet property is used for these purposes. More precisely, ActiveSheet return an object representing the active sheet within the active (or specified) workbook.
You can, as a general matter, also for any of the following:
- Make reference to a Workbook object, and use the Workbook.ExportAsFixedFormat method.
- Use a variable that represents a Range object, and use the Range.ExportAsFixedFormat method.
- Use a representation of a Chart object, and work with the Chart.ExportAsFixedFormat method.
Item #2: ExportAsFixedFormat
The ExportAsFixedFormat method is the main subject of this Excel tutorial. The purpose of this method is to save the relevant object (a worksheet returned by ActiveSheet in the example above) as a PDF file.
In this particular case, ExportAsFixedFormat uses a single parameter, which is…
Item #3: Type:=xlTypePDF
Type is the only required parameter of the ExportAsFixedFormat method. Its purpose is to specify the type of file format to which the relevant worksheet should be exported to.
You specify the relevant file type by choosing the appropriate value from the XLFixedFormatType enumeration. xlTypePDF is 1 of the 2 values in such enumeration.
For the reasons that I explain above, most (if not all) of your macros whose purpose is to save Excel files as PDF will set the Type parameter to be xlTypePDF (or 0). Therefore, you’re likely to use this particular line of VBA code often when creating such VBA Sub procedures.
Excel To PDF Conversion Results: Example #1
The sample Save_Excel_As_PDF_1 macro is very simple and relatively easy to follow. However, this doesn’t mean that you should be using this macro to convert all of your Excel files to PDF.
The reason for this is that, as I show below, the macro (literally) just saves the active worksheet to a PDF file. Since it doesn’t make any adjustment prior to the conversion, the results aren’t necessarily the best.
For purposes of this example, I have executed the Save_Excel_As_PDF_1 macro to save 1 of the worksheets within the sample Excel file that accompanies this tutorial as PDF. The following image shows the resulting PDF file:

As first glance, the resulting PDF files looks OK. However, there are several things that can be improved. The following are 2 examples:
- The resulting page layout is not accurate.
Notice how there’s 1 column (corresponding to the Favorite Food Ingredient) missing in the image above. Within the resulting PDF, this column appears by itself in separate pages. The following screenshot shows how this looks like:

- The converted PDF file is saved automatically to the default local file location (in this example, the Documents folder) and the file name is the same as that of the original Excel workbook (in this case, Book1).


I show you how to solve several of these issues in the other VBA code examples within this Excel tutorial.
Let’s start to tackle some of these problems by using the additional arguments of the ExportAsFixedFormat method:
How To Save An Excel File As PDF Using VBA: Code Example #2
The sample Save_Excel_As_PDF_1 macro above used the Worksheet.ExportAsFixedFormat method with its only required parameter (Type). However, as I explain further above, the ExportAsFixedFormat method has 9 parameters that allow you to further specify how Visual Basic for Applications carries out the conversion from Excel to PDF.
Therefore, in this second example, I include most of the parameters that you can use when working with the ExportAsFixedFormat method.
Let’s start by taking a look at the VBA code behind the macro (which is called Save_Excel_As_PDF_2):

The statements within the body of this new macro are as follows:
ActiveSheet.ExportAsFixedFormat _
    Type:=xlTypePDF, _
    Filename:="Sample Excel File Saved As PDF", _
    Quality:=xlQualityStandard, _
    IncludeDocProperties:=False, _
    IgnorePrintAreas:=False, _
    From:=1, _
    To:=5, _
    OpenAfterPublish:=True
Let’s take a closer look at each of these lines of VBA code:
Lines #1 And #2: ActiveSheet.ExportAsFixedFormat Type:=xlTypePDF
This new macro (Save_Excel_As_PDF_2) is simply an extension of the first sample macro I provide above (Save_Excel_As_PDF_1).
These first 2 lines are the whole body of that previous macro. In this particular case, they have the same purpose as that which I explain above. Namely:
- Tell VBA that the ExportAsFixedFormat method should be applied to the current active worksheet.
- Set PDF as the file format to which the worksheet should be exported to.
Line #3: Filename:=”Sample Excel File Saved As PDF”
This line uses the Filename parameter of the ExportAsFixedFormat method for purposes of specifying the name of the final PDF file.
As I explain above, the previous sample macro simply used the name of the active Excel workbook to name the PDF file that was created after executing the ExportAsFixedFormat method. By using the Filename parameter, you can choose a different filename.
In this particular case, the filename that I’m using is quite simple and only includes the actual filename. Therefore, the PDF file is saved in the default file location.
However, as I explain above, you can use this same parameter for purposes of determining the full path of the converted PDF file.
Line #4: Quality:=xlQualityStandard
This line of VBA code determines the quality of the published PDF file. The Quality parameter of the ExportAsFixedFormat can be set to either of 2 values:
- xlQualityStandard (or 0), as in this case, which specifies standard quality.
- xlQualityMinimum (or 1), which represents minimum quality.
Line #5: IncludeDocProperties:=False
You can use the IncludeDocProperties parameter of the ExportAsFixedFormat VBA method for purposes of determining whether the document properties are included or not. IncludeDocProperties can be set to either of the following 2 values:
- True indicates that the document properties should be included in the resulting file.
- False (as in this case) indicates that the document properties shouldn’t be included.
Line #6: IgnorePrintAreas:=False
The purpose of the IgnorePrintAreas parameter of the ExportAsFixedFormat method is to determine whether any print areas that are set when publishing should be ignored or not. Just as the previous parameter (IncludeDocProperties), IgnorePrintAreas can be set to either True or False.
- If IgnorePrintAreas is set to True, the macro ignores any print areas.
- If you set IgnorePrintAreas to False (as in this example) the macro uses the print areas set when publishing.
Lines #7 And #8: From:=1, To:=5
You can use the From and To parameters of the ExportAsFixedFormat VBA method for purposes of setting the first and last pages that are published in the converted file. More precisely:
- From allows you to set the page at which publishing begins.
- To allows you to determine the last page that is published.
In the case of the sample Save_Excel_As_PDF_2 macro, I use the From and To parameters for establishing that only pages 1 (From) through 5 (To) should be published. Had I omitted any of these parameters, the effect would have been as follows:
- If the omitted parameter is From, publishing begins at the beginning.
Notice how, in the case we’re analyzing, I’ve set the value of From to 1 (the beginning). Therefore, I can omit the From parameter from the Save_Excel_As_PDF_2 macro while continuing to obtain the same results.
- If you omit the To parameter, publishing goes all the way to the last page.
In the Save_Excel_As_PDF_2 macro, I’ve set the To parameter to 5. This isn’t the last page.
Therefore, if I omit the To parameter, the conversion results differ. Instead of stopping the publishing process at page 5 (as the sample VBA code above does), Visual Basic for Applications would only end publishing at the last page.
Line #9: OpenAfterPublish:=True
The purpose of this line of VBA code is to display the resulting PDF file in the PDF viewer once the conversion process has been completed.
You can also set OpenAfterPublish to False. In this case, the published PDF file isn’t displayed.
Excel To PDF Conversion Results: Example #2
For purposes of comparing the results obtained by the first 2 macro examples (this and example #1 above), I convert the same Excel worksheet of the sample workbook using the Save_Excel_As_PDF_2 macro.
The following image shows how the results look like.

At first glance, this looks very similar to the results obtained when executing the Save_Excel_As_PDF_1 macro above. However, notice some of the effects of the additional parameters that I included in this second macro:
- The name of the file, as determined by the Filename parameter is “Sample Excel File Saved As PDF”.

- Publishing goes from pages 1 through 5, as specified using the From and To parameters.

- The PDF file is displayed automatically when the macro is executed and immediately after the conversion process is completed.


Overall, the explanations and examples in the sections above show most of what you need to know about the ExportAsFixedFormat VBA method.
You may notice, however, that there are a few things that you can’t fix with the ExportAsFixedFormat method alone. This includes, among others, one that I mention above:
The page layout isn’t properly adjusted. Therefore, the resulting PDF file only shows the first 4 columns of the table within the original Excel source file. The last column (which corresponds to Favorite Food Ingredient in the example above) is missing.


There are many ways in which you can use other VBA constructs to create more complex and sophisticated macros to save Excel files as PDF. I show you some of the constructs you can use in the following sections, along with some further examples.
Let’s start by taking a look at how you can solve the issue I mention above: How to adjust the page layout of the Excel file you’re going to convert to PDF using VBA.
To do this, you must understand…
How To Adjust The Page Setup To Save An Excel File As PDF Using VBA: The PageSetup Object
Within Excel, whenever you need to manually adjust the page setup before printing an Excel file or saving it as PDF, you go to the Page Setup dialog box.

Whenever you’re working with Visual Basic for Applications, you can use the Page Setup object for purposes of modifying any page setup attributes. The reason for this is that, as explained at the Microsoft Dev Center (in the webpage I link to above), the Page Setup object:
- “Represents the page setup description”; and
- Contains all of the page setup attributes. Each of these page setup attributes is a property of the Page Setup object.
As a consequence of this, the list of properties that are members of the Page Setup object is quite extensive. Let’s take a look at it:
The PageSetup Object: Properties
By my count, the PageSetup object has the 48 properties that I introduce in the table below.
The purpose of this table is simply to introduce these properties and their main purpose. Some of these properties aren’t relevant for the purpose of this Excel tutorial on how to save an Excel file as PDF using VBA. However, I explain some of the properties you may want to explore when working with the ExportAsFixedFormat method below.
| Property | Purpose |
| CenterHorizontally | Specifies whether the sheet is centered horizontally when printed. |
| CenterVertically | Specifies whether the sheet is centered vertically when printed. |
| DifferentFirstPageHeaderFooter | Determines whether the header or footer on the first page is different. |
| OddAndEvenPagesHeaderFooter | Specifies whether there are different headers and footers for odd and even pages. |
| CenterFooter | Returns or sets the center section of the footer. |
| CenterHeader | Returns or sets the center section of the header. |
| LeftFooter | Returns or sets the left section of the footer. |
| LeftHeader | Returns or sets the left section of the header. |
| RightFooter | Returns or sets the right section of the footer. |
| RightHeader | Returns or sets the right section of the header. |
| CenterFooterPicture | Returns a Graphic object representing the picture in the center section of the footer. Use the properties of CenterFooterPicture to set the attributes of the picture. |
| CenterHeaderPicture | Returns a Graphic object representing the picture in the center section of the header. Use the properties of CenterHeaderPicture to set the attributes of the picture. |
| LeftFooterPicture | Returns a Graphic object representing the picture in the left section of the footer. Use the properties of LeftFooterPicture to set the attributes of the picture. |
| LeftHeaderPicture | Returns a Graphic object representing the picture in the left section of the header. Use the properties of LeftHeaderPicture to set the attributes of the picture. |
| RightFooterPicture | Returns a Graphic object representing the picture in the right section of the footer. Use the properties of RightFooterPicture to set the attributes of the picture. |
| RightHeaderPicture | Returns a Graphic object representing the picture in the right section of the header. Use the properties of RightHeaderPicture to set the attributes of the picture. |
| BottomMargin | Returns or sets the bottom margin. |
| FooterMargin | Returns or sets the margin between the bottom of the page and the footer. |
| HeaderMargin | Returns or sets the margin between the top of the page and the header. |
| LeftMargin | Returns or sets the left margin. |
| RightMargin | Returns or sets the right margin. |
| TopMargin | Returns or sets the top margin. |
| AlignMarginsHeaderFooter | Determines whether to align the header and the footer with the margins. |
| Application | When you use it with an object qualifier, returns an Application object representing the creator of that object. |
| BlackAndWhite | Specifies whether the document is printed in black and white. |
| Creator | Returns a 32-bit integer indicating the application in which the relevant object was created. |
| Draft | Specifies whether a sheet is printed without graphics. |
| EvenPage | Returns or sets the text alignment for the even pages of an Excel workbook (or a section). |
| FirstPage | Returns or sets the text alignment for the first page of an Excel workbook (or a section). |
| FirstPageNumber | Returns or sets the first page number to be used when a sheet is printed. |
| FitToPagesTall | Returns or sets the number of pages (tall) to which an Excel worksheet is scaled to when printed. |
| FitToPagesWide | Returns or sets the number of pages (wide) to which an Excel worksheet is scaled to when printed. |
| Order | Returns or sets the value representing the order that Excel uses to number pages when printing large worksheets. |
| Orientation | Returns or sets the value representing portrait or landscape printing mode. |
| Pages | Returns or sets the count or item number of the pages within the Pages collection. |
| PaperSize | Returns or sets the size of the paper. |
| Parent | Returns the parent object for the relevant object. |
| PrintArea | Returns or sets the range to be printed. |
| PrintComments | Returns or sets the way comments are printed. |
| PrintErrors | Returns or sets the constant specifying the type of print error displayed. |
| PrintGridlines | Determines whether cell gridlines are printed. |
| PrintHeadings | Determines whether row and column headings are printed. |
| PrintNotes | Determines whether cell notes are printed as end notes. |
| PrintQuality | Returns or sets the print quality. |
| PrintTitleColumns | Returns or sets the columns to be repeated on the left side of each page. |
| PrintTitleRows | Returns or sets the rows to be repeated at the top of each page. |
| ScaleWithDocHeaderFooter | Returns or sets whether the header and footer should (also) be scaled with the rest of the Excel file when the size changes. |
| Zoom | Returns or sets a value representing the percentage by which Excel scales the Excel worksheet for printing. |
Let’s take a look at how you can use the PageSetup VBA object to improve the results obtained when saving an Excel file as PDF with the ExportAsFixedFormat method.
How To Save An Excel File As PDF Using VBA: Code Example #3
The previous 2 macro examples within this Excel tutorial focus on how you can use the ExportAsFixedFormat method for purposes of saving an Excel file as PDF using VBA.
This third example builds on those 2 examples (in particular example #2 above) to show how you can improve the results you obtain when carrying out an Excel to PDF conversion using VBA.
Let’s start by taking a look at the VBA code behind the sample macro which, in this case, is called Save_Excel_As_PDF_3:

The statements in the body of this macro are the following:
With ActiveSheet.PageSetup
    .CenterHeader = "Sample Excel File Saved As PDF"
    .Orientation = xlPortrait
    .PrintArea = "$B$5:$F$105"
    .PrintTitleRows = ActiveSheet.Rows(5).Address
    .Zoom = False
    .FitToPagesTall = False
    .FitToPagesWide = 1
End With

ActiveSheet.ExportAsFixedFormat _
    Type:=xlTypePDF, _
    Filename:="Sample Excel File Saved As PDF 2", _
    Quality:=xlQualityStandard, _
    IncludeDocProperties:=False, _
    IgnorePrintAreas:=False, _
    From:=1, _
    To:=5, _
    OpenAfterPublish:=True
Notice that the second part of the VBA Sub procedure (the block that starts with “ActiveSheet.ExportAsFixedFormat”) is exactly the same as the body of macro example #2 above (Save_Excel_As_PDF_2), which I have explain in detail there.
Therefore, in this particular section, I only explain (line-by-line) the first section of the macro. In other words, the With… End With block.

Let’s take a look at each of the rows in this With… End With block:
Row #1: With ActiveSheet.PageSetup
The With statement allows you to execute a series of statements on a particular object (ActiveSheet.PageSetup in this case) without having to repeat the object qualification every single time.
In other words, all of the statements within the With… End With block (rows #2 to #8 below) make reference to the object that appears on the opening statement (ActiveSheet.PageSetup). The With… End With block ends on row #9, with the End With statement.
The object that appears on the opening statement is the page setup description of the active sheet. The object is obtained by using the Worksheet.PageSetup property. In this particular situation, the Worksheet object is the active sheet (ActiveSheet).
Row #2: .CenterHeader = “Sample Excel File Saved As PDF”
The PageSetup.CenterHeader property allows you to set what appears in the center section of the page header.
You specify the text that you want to appear in this section as a string. In the example above, the text that I specify as header is “Sample Excel File Saved As PDF”.
You can generally apply the syntax and explanation I provide here for the CenterHeader property to the following (roughly equivalent) properties:
- The PageSetup.CenterFooter property.
- The PageSetup.LeftFooter property.
- The PageSetup.LeftHeader property.
- The PageSetup.RightFooter property.
- The PageSetup.RightHeader property.
Row #3: .Orientation = xlPortrait
You can use the PageSetup.Orientation property for purposes of setting the xlPageOrientation value that specifies the page orientation. The Orientation property can take the following 2 values:
- xlPortrait or 0, which (as in this example) represents portrait mode.
- xlLandscape or 1, which represents landscape mode.
Row #4: .PrintArea = “$B$5:$F$105”
By using the PageSetup.PrintArea property, you can set the print area.
You generally specify the relevant range using A1-style references and as a string. Under the A1-style cell referencing style, you use letters for column headings and numbers for rows.
In the case of the sample macro Save_Excel_As_PDF_3, I use the PrintArea property to specify the range to be converted to PDF. This range is from cells B5 to F105.
Row #5: .PrintTitleRows = ActiveSheet.Rows(5).Address
The PageSetup.PrintTitleRows property allows you to specify that a particular row (or set of rows) should be repeated at the top of each page.
Generally, you specify the rows to be repeated as a string using A1-style references. In this particular example, I don’t explicitly type A1-style references in the code. Let’s take a look at what “ActiveSheet.Rows(5).Address” does:
- ActiveSheet.Rows(5): Here, I use the Worksheet.Rows property to represent Row 5 of the active worksheet.
- Address: This makes reference to the Range.Address property, which returns a string representing the relevant range reference.
In other words, “ActiveSheet.Rows(5).Address” also returns an A1-style address as a string, which is precisely what the PrintTitleRows property requires.
You can generally use the same principles and syntax that I explain here in connection with the (roughly equivalent) PageSetup.PrintTitleColumns property.
Row #6: .Zoom = False
By using the PageSetup.Zoom property, you can determine how Excel scales the relevant Excel worksheet for printing or, in this case, conversion to PDF.
As a general rule, you specify the zoom as a Variant value between 10 and 400 percent.
However, notice that in the sample Save_Excel_As_PDF_3 macro, I set the Zoom property to False. Whenever PageSetup.Zoom is set to False, the properties that determine how Excel scales the Excel worksheet are PageSetup.FitToPagesWide and PageSetup.FitToPagesTall. At the same time, if the PageSetup.Zoom property is True, both the FitToPagesWide and FitToPagesTall properties are ignored.
This leads us to…
Row #7: .FitToPagesTall = False
You can use the PageSetup.FitToPagesTall property for purposes of setting the number of pages tall to which the relevant Excel worksheet is scaled to when printing or, in the case of the example in this tutorial, converted to PDF.
In the example we’re taking a look at, I set the FitToPagesTall property to False. In such cases, Excel scales the worksheet in accordance with the FitToPagesWide property. This is done in…
Row #8: .FitToPagesWide = 1
The syntax and purpose of the PageSetup.FitToPagesWide property is roughly the same as that of the FitToPagesTall property above.
In other words, you use the FitToPagesWide property to specify the number of pages wide the relevant Excel worksheet is scaled to when printing or converting to PDF (as in this example). In the sample Save_Excel_As_PDF_3 macro, I set this value to 1 (page wide).
Row #9: End With
As anticipated above, this End With statement simply ends the With… End With block that we’ve just analyzed.
Excel To PDF Conversion Results: Example #3
The Save_Excel_As_PDF_3 uses the ExportAsFixedFormat method in exactly the same way as the previous example #2 (Save_Excel_As_PDF_2), to the point that the relevant block of VBA code is exactly the same.
As I show in this example, you can make several changes or adjustments that influence the resulting PDF file by using the PageSetup object. Let’s take a look at the results of executing the Save_Excel_As_PDF_3 macro on the same Excel worksheet and note down the main differences:

Note the effects of each of the properties of the PageSetup object that the sample Save_Excel_As_PDF_3 macro uses:
- The center section of the header says “Sample Excel File Saved As PDF”, as required by the PageSetup.CenterHeader property in row #2 above.

- The printed area doesn’t include the Power Spreadsheets logo, the preliminary title of this blog post or the hyperlinked text to this page which appear in the first 3 rows of the Excel worksheet. This is a direct consequence of using the PageSetup.PrintArea property to specify the range from cells B5 to F105 as the print area, as done in row #4 above.

- The header row of the Excel table is repeated in all of the pages within the converted PDF file. This is achieved by the appropriate use of the PageSetup.PrintTitleRows property in row #5 above.
- All of the columns in the original Excel table appear in an appropriate manner. In other words, the table that appears in the PDF file has been scaled in such a way that it is 1 page wide.
If you go back up, you’ll notice that both previous examples (macro #1 and macro #2) didn’t fit the print area appropriately to the page. The fifth column (Favorite Food Ingredient) was left out (in macro example #2) or published by itself in the last pages of the PDF file (in macro example #1). This problem is solved by using the Zoom, FitToPagesTall and (particularly) FitToPagesWide properties of the PageSetup object. You can go back to rows #6, #7 and #8 above to see how the VBA code looks like.


How To Change The Filename When Saving An Excel File As PDF Using VBA: How To Work With The Filename Parameter Of The ExportAsFixedFormat Method
Parameter #2 of the ExportAsFixedFormat method that I explain above is Filename. You can use this parameter to set the filename of the resulting PDF file. Visual Basic for Applications allows you to do either of the following:
- Specify the full path and filename of the file.
- Specify just the filename. In this case, the file is saved in the current default folder.
In the previous macro examples, I’ve not done much with the Filename parameter. More precisely:
- In the first macro example, I didn’t even include the Filename parameter (it’s optional).

- In the (slightly more sophisticated) macros #2 (Save_Excel_As_PDF_2) and #3 (Save_Excel_As_PDF_3), I only included the filename (without the path).


This resulted in the converted PDF files being saved in the default folder (the Documents folder, in my case).


The use of the Filename that I make in these first 3 examples may work for you in certain circumstances. After all, the material structure of those macros is enough to help you save Excel worksheets, workbooks, ranges or charts as PDF files.
However, in several situations, you’ll want to use the Filename parameter in a slightly different way for purposes of creating more sophisticated macros that save Excel files as PDF. Let’s take a look at some different ways you can use the Filename parameter:
Use #1 (Examples #4, #5, #6 And #7): How To Specify The Full Path And Name Of A PDF File Using The Filename Parameter Of The ExportAsFixedFormat Method
If you’re creating a macro to save Excel files as PDF, and those PDF files must always be saved in the same folder, you can simply hard-code the relevant file path and name using the Filename parameter of ExportAsFixedFormat.
Take a look, for example, at the VBA Sub procedure, named Save_Excel_As_PDF_4, which appears below.
This is, substantially, the same as example #3 above (Save_Excel_As_PDF_3). Notice, however, how I’ve specified the full path of the file using the Filename argument.

The consequence of this change is that the resulting PDF file is no longer saved in the default folder. Instead, the PDF is saved in the folder that you specify with the Filename argument. In the example above, the file is saved to a OneDrive folder called Power Spreadsheets.

You don’t necessarily need to hard-code all of the details in the Filename parameter. You can, for example, concatenate different items for purposes of building a more flexible filename structure.
The following macro (named Save_Excel_As_PDF_5) example shows the possibilities you have when doing this. Notice how the only difference between this macro and the previous example (Save_Excel_As_PDF_4) is in the Filename parameter.

The consequence of including the statement “ActiveWorkbook.Path &” prior to the actual filename (“Sample Excel File Saved As PDF 4”) is that, now, Visual Basic for Applications saves the resulting PDF file in the same folder as the active workbook. In other words, if you use this Filename structure, the new PDF file is saved in the same folder as the source Excel workbook.
The reason for this is that the Workbook.Path property returns a string with the complete path to the relevant workbook. In the case of the example above, the relevant workbook is the active Excel workbook (returned by the Application.ActiveWorkbook property).
I use the ampersand operator (&) to concatenate the file path to the active workbook and the filename, which is surrounded by quotations (“”).
You can take this flexibility even further.
For example, the macro below (Save_Excel_As_PDF_6) uses the name of the active worksheet as the name of the converted PDF file.
Notice how the only difference with the previous macro (Save_Excel_As_PDF_5) is the concatenation of the Worksheet.Name property (using the Application.ActiveSheet property to return the name of the active worksheet) as the actual filename within the Filename parameter. The file path continues to be provided by the Workbook.Path property.

As a final example for this particular section, let’s take a look at the following macro (Save_Excel_As_PDF_7), which saves the active Excel worksheet as a PDF named after the value in cell F5 of the active sheet.

In this particular case, the macro uses (i) the Application.ActiveSheet and Worksheet.Range properties to return cell F5, and (ii) the Range.Value property to return the value in that cell.
You can achieve similar results using slightly different structures. This includes, for example, naming the (converted) PDF file by concatenating several strings of text.
In some cases (such as when concatenating several strings of text to specify the PDF filename), it may be more appropriate to declare a variable at the beginning of the procedure to store the applicable string.
Whenever you use a worksheet cell as the source for the PDF filename (as in the example above), make sure that the cell contains no forbidden characters. If the cell from which you take the filename contains characters such as , /, :, ^, ?, “, <, > or |, the macro may not work properly.
The VBA code samples that I provide in this section are just some of the examples of the different ways you can work with (and generate) the Filename argument of the ExportAsFixedFormat method. As you can see, Visual Basic for Applications provides significant flexibility in this regard.
In this blog post, I explain how to save an Excel workbook using VBA. Even though the topic isn’t precisely the same as that of this blog post, some of the principles and examples I provide there may be helpful to you when working with the Filename parameter of the ExportAsFixedFormat VBA method.
Use #2 (Example #8): How To Name A PDF File Using The Application.GetSaveAsFilename Method
You can use the Application.GetSaveAsFilename method to allow your PDF-saving macro to get a filename from the user. This allows the user of your VBA application to specify the full path and filename.
I cover the Application.GetSaveAsFilename method in detail in my Excel tutorial about the topic (I link to it above). For purposes of this macro example, it’s enough to know that the GetSaveAsFilename method:
- Displays the Save As dialog box.
- Gets the filename that the user enters in the Save As dialog box.
- Doesn’t actually save or export a file.
This is the reason why, as shown below, you must anyway use the ExportAsFixedFormat method for purposes of saving an Excel workbook as PDF.

The following sample macro (Save_Excel_As_PDF_8) shows how you can use the Application.GetSaveAsFilename method to provide the Filename parameter when using the ExportAsFixedFormat method:

Let’s take a closer look at the VBA code behind the Save_Excel_As_PDF_8 macro to understand what’s going on:
First, notice that 2 blocks of VBA code look are quite familiar:

The 2 blocks of code I highlight in the image above are substantially the same as those that appear in other examples of VBA code within this Excel tutorial. More precisely:
- Block #1 is a With… End With block that appears in macro examples #3 (where I explain each line of code), #4, #5, #6 and #7.
- Block #2, which uses the Worksheet.ExportAsFixedFormat method, is substantially the same as the equivalent blocks of code in macro examples #2 (where it is explained in detail), #3, #4, #5, #6 and #7.
The only difference is in the Filename parameter, which is the topic we’re focusing on in this section.

Considering that I explain each of these 2 blocks of VBA code in detail in the previous sections of this Excel tutorial, we can now go through each of the blocks of code in the Save_Excel_As_PDF_8 macro:
Block #1: Dim PdfFilename As Variant
The purpose of this line is to declare a variable called PdfFilename.
I cover the topic of VBA variables in more detail here and here. A variable is simply a storage location that you pair with a name. You use the variable to represent a certain value.
In this example, I use the PdfFilename variable for purposes of storing the filename that the user enters into the Save As dialog box (displayed by the Application.GetSaveAsFilename method in block #3 below). The variable is later used in the Filename parameter of the ExportAsFixedFormat in block #3 below.
The PdfFilename variable is of the Variant data type. Variant:
- Is the default data type; and
- Changes (the exact) type depending on the particular scenario.
Even though Variant isn’t the most efficient data type, it’s probably the most desirable for this particular case. The reason for this is that the GetSaveAsFilename method can return different types. For example:
- If the user cancels the Save As dialog box displayed by the GetSaveAsFilename method, the returned value is a Boolean (False).
- If the user provides the filename that should be used to save the converted PDF file, GetSaveAsFilename returns a String.
Variant is able to handle both of these situations and allows your macro to be more flexible.
Block #2: PdfFilename = Application.GetSaveAsFilename( InitialFileName:=”Sample Excel File Saved As PDF 5″, FileFilter:=”PDF, *.pdf”, Title:=”Save As PDF”)
This statement assigns a value to the PdfFilename variable declared in block #1 above.
The value that is assigned to PdfFilename is the file name provided by the user through the Save As dialog. This Save As dialog box is displayed by the Application.GetSaveAsFilename method.
In this particular example, the GetSaveAsFilename method uses the following 3 parameters:
- InitialFileName: Specifies a suggested/default filename. In this example, the default filename is “Sample Excel File Saved As PDF 5”.
- FileFilter: Specifies the file filtering criteria. In the example above, the only file filter makes reference to PDF files.
- Title: Determines the title of the Save As dialog box that is actually displayed. In the sample Save_Excel_As_PDF_8 macro, the title of the dialog box is “Save As PDF”.
The following screenshot shows the Save As dialog box that is displayed by the GetSaveAsFilename method that uses the parameters above. Notice the effect of each of the arguments that I list above:

Block #3: If… Then Statement
The third main block of VBA code within the sample Save_Excel_As_PDF_8 macro is an If… Then statement.

From a broad perspective, an If… Then statement does 2 things:
- Step #1: Tests whether a condition is met.
- Step #2: If the condition is met, performs one action. If the condition isn’t met, performs no action.
The If… Then statement within the example macro above can be broken down into the 3 following sections:
Section #1: If PdfFilename <> False Then.
The condition tested by this particular statement is whether the variable PdfFilename is different from False.
If the condition is met (PdfFilename isn’t False), the statements within the If… Then block are executed. These statements are the ones that adjust the page setup (as explained in macro example #3 above) and export the active worksheet to a PDF file (as I explain in macro examples #1 and #2 above).

If the condition isn’t met (PdfFilename is False), the statements within the If… Then block aren’t executed. In such a case, execution of the macro ends without the Excel worksheet being converted to PDF.
As I explain above, if the user of the VBA application cancels the Save As dialog box, the GetSaveAsFilename method returns False. Therefore, PdfFilename is False whenever the user cancels the Save As dialog box. In such cases, you probably don’t want to proceed with the process of saving the Excel file as PDF.
Section #2: With… End With Statement And Worksheet.ExportAsFixedFormat Method.
These statements are executed when the condition tested by the If… Then statement above (PdfFilename <> False) is met.

I explain all of these statements in great detail within the previous macro examples (here and here).
One of these rows of VBA code is, however, not exactly the same as in the previous examples:
Filename:=PdfFilename

This is the line that specifies the value of the Filename parameter of the ExportAsFixedFormat method. In other words, this line is the one that specifies the filename of the PDF file that results from the conversion.
In this particular case, the filename that is assigned to the PDF file is the value of the PdfFilename variable. In turn, the value of the PdfFilename is determined by the Application.GetSaveAsFilename method in block #2 above.
As a consequence of this, the filename is simply the one that is specified by the user of the application by using the Save As dialog displayed by the GetSaveAsFilename method.
For example, in the situation displayed in the following screenshot, if you press the Save button (on the lower right corner of the dialog box), the PDF file is saved under the filename “Sample Excel File Saved As PDF 5”.

Section #3: End If.
The last row of the If… Then statement (and the sample macro in general) signals the end of the If… Then statement.

How To Save Each Worksheet As A Separate PDF Using VBA: How To Use Loops With The ExportAsFixedFormat Method (Examples #9 And #10)
As a general rule, whenever you want to save all of the worksheets within an Excel workbook, you can simply use the Workbook.ExportAsFixedFormat method. The explanations I provide throughout this Excel tutorial (particularly the first section) are generally applicable to the Workbook.ExportAsFixedFormat method.
For example, the following (very simple) macro (Save_Excel_As_PDF_9) is the equivalent to the one in example #1 above.

The difference between the 2 macros is that:
- The macro in example #1 uses (i) the Application.ActiveSheet property to return the active sheet and (ii) the Worksheet.ExportAsFixedFormat method to export the worksheet to a PDF file.
- The example in this section uses (i) the Application.ActiveWorkbook property to return the active sheet and (ii) the Workbook.ExportAsFixedFormat method to convert the whole workbook to PDF.
However, when you use the Workbook.ExportAsFixedFormat method, all the worksheets are exported to the same PDF file. This may be what you want in certain situations.
However, in other situations, you may want to save each worksheet within a workbook in a separate file. You can achieve this by working with the Worksheet.ExportAsFixedFormat method and loops.
In the context of the ExportAsFixedFormat method and saving Excel files as PDF, the following 2 are the main things you must understand in connection to loops:
- The term looping, in very broad terms, makes reference to the execution of certain statements several (more than 1) time.
- Loops help you to save each worksheet as a separate PDF file because of the way they proceed. More precisely, such a loop proceeds (very roughly) as follows:
- Step #1: Executes all of the statements that save an Excel worksheet as PDF.
- Step #2: Moves on to the next worksheet.
- Step #3: Goes back to step #1 above. In other words, executes (again) all of the statements that save the Excel worksheet as PDF.
When properly structured, a loop allows your VBA code to go through every single worksheet and saves it as a separate PDF file.
Let’s take a look at a macro that combines the ExportAsFixedFormat method with loops in order to save each worksheet as a separate PDF file:

Notice how most of the VBA code in the sample Save_Excel_As_PDF_10 macro is (once more) substantially the same as that of previous macro examples in this tutorial. The following screenshot shows the new items, which I explain further below.

Let’s take a closer look at each of the rows that contain new items within this sample macro:
Row #1: Dim iCounter As Integer
This statement declares a variable called iCounter. The selected data type is Integer which, as explained in this tutorial, can store integers between -32,768 and 32,767.
The iCounter variable is used as a loop counter, a topic I explain further when covering the following rows.
Row #2: For iCounter = 1 To Worksheets.Count
This is the opening statement for the loop. In this particular example, I use a For… Next loop.
This is, however, not the only type of loop you can use for these purposes. You can, for example, (also) use the For Each… Next loop when exporting each worksheet to a separate PDF file.
The initial value of the counter is 1 (iCounter = 1). The end value of the counter, which determines when the looping stops, is specified by the Sheets.Count property. The value returned by Worksheets.Count is the number of worksheets.
Each time the VBA code goes through the loop, the value of the iCounter variable increases by 1.
As a consequence of the above, the macro loops a number of times equal to the number of worksheets in the active workbook.
Row #3: With Worksheets(iCounter).PageSetup
As I explain above, this is the opening statement of the With… End With block that adjusts the page setup. All of the statements within a With… End With block (rows #4 to #10) make reference to the object that appears in this statement (Worksheets(iCounter).PageSetup).
In previous examples, this statement made reference to the page setup settings of the active sheet by making reference to “ActiveSheet.PageSetup” instead of “Worksheets(iCounter).PageSetup”.
The difference between both statements is, therefore, on the specific Worksheet object used within the syntax of the Worksheet.PageSetup property.
- ActiveSheet makes reference to the current active worksheet.
- Worksheets(iCounter) makes reference to the iCounter-th element of the Worksheets collection. The iCounter variable in the statement above is a worksheet index number. The specific number is determined by how many times the VBA code has gone through the loop. Therefore:
- On the first loop, iCounter is equal to 1. Therefore, Worksheets(iCounter) makes reference to the first worksheet in the workbook (Worksheets(1)).
- The second time, iCounter is equal to 2. In such a case, Worksheets(iCounter) is the equivalent of Worksheets(2) and refers to the second worksheet within the workbook.
- … and so on, until…
- On the last loop, iCounter is equal to the number of worksheets in the workbook. Therefore, Worksheets(iCounter) makes reference to the last worksheet in the workbook.
Rows #4 To #11: With… End With Block
I explain Rows #4 to #11 in example #3 above.

The purpose of this block is to adjust the relevant properties of the PageSetup object for the relevant worksheet (as determined by the loop).
Rows #12 To #20: Worksheets(iCounter).ExportAsFixedFormat
I explain, in detail, this statement and all the parameters of the ExportAsFixedFormat method used therein in a previous section of this tutorial.

There are, however, 2 rows that differ from what appears in the previous examples:
- Row #12: Worksheets(iCounter).ExportAsFixedFormat.
- Row #14: Filename:=ActiveWorkbook.Path & “” & Worksheets(iCounter).Name.
In both cases, the difference is in the use of the Worksheets collection and an index (Worksheets(iCounter)) to refer to the relevant worksheet.

The reason for this is, as I explain above, related to the For… Next loop. More precisely:
- The statement “Worksheets(iCounter).ExportAsFixedFormat” exports the relevant sheet (as determined by the current loop number) to PDF.
- The use of “Worksheets(iCounter).Name” within the value of the Filename parameter sets the name of the resulting PDF file to be equal to the name of the current worksheet (which depends on the current loop number). This is very similar to the Filename parameter value used in example #6 above, where the name of the active sheet is used to name the relevant PDF file. However, in this particular macro (Save_Excel_As_PDF_10), the use of a loop means that each worksheet is saved under its own worksheet name.
Conclusion
After reading this Excel tutorial, you’re ready to start creating macros for purposes of saving Excel files as PDF.
This Excel VBA Save as PDF Tutorial is accompanied by files containing the data and macros I use in the examples above. You can get immediate free access to these example files by clicking the button below.
In addition to having a very good understanding of the ExportAsFixedFormat VBA method, you’ve also seen how you can:
- Combine the ExportAsFixedFormat method with the PageSetup object in order to adjust the page setup attributes prior to the Excel to PDF conversion.
- Use different methods for determining the filename of the PDF file you save.
- Use loops for purposes of saving each worksheet as a separate PDF file.
In addition to the above, you’ve seen 10 different examples of VBA code that allow you to save Excel files as PDF using several different settings and parameters.
As with most topics related to Excel and VBA, I’ve not exhausted the topic despite writing this very comprehensive tutorial. You can use the knowledge and ideas you’ve gained here in order to create different macros that achieve similar purposes.
-
— By
Sumit Bansal
*This is a guest post by Ryan Wells, a fellow blogger, and a brilliant VBA developer.*
If you work with Excel, you undoubtedly have been asked to create summaries of your work.
Sales reports, invoices, forecasts, schedules, you name it.
You know what all these documents have in common? They look great in PDF form. You know what else? Management loves PDFs!
Convert Excel to PDF
In this tutorial, I’ll show you how to use Excel VBA to convert all kinds of Excel objects to PDFs:
I’m going to present each of the macros with some commentary. That way, you’ll be able to quickly find them, copy them to your VBA editor and use them.
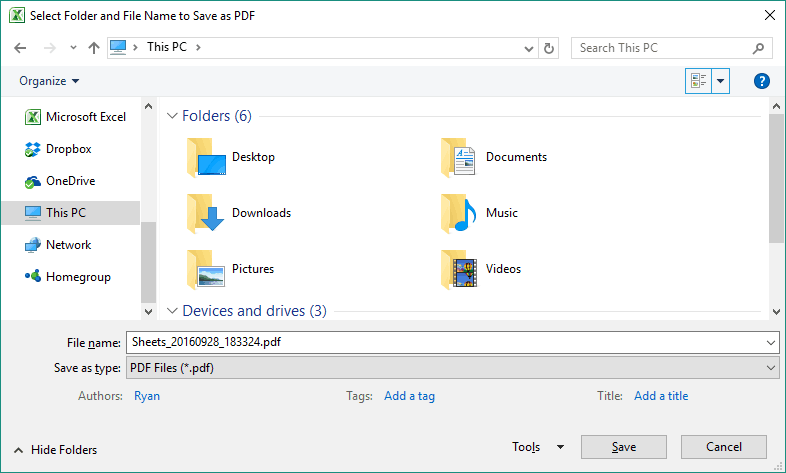
When you run any of these macros, a Save As dialog box will appear asking you where you want to save your PDF. The default name includes the date and timestamp when you executed the macro in yyyymmdd_hhmmss format.
Let’s get right to it.
Here are the macros:
Print Selection To PDF
This one is my personal favorite. This macro will convert the cells you actively have selected into a PDF.
If you only have one cell selected, the VBA macro is smart enough to realize that you probably don’t want to convert just one cell so it asks you to select the range you want to convert:

Sub PrintSelectionToPDF()
'SUBROUTINE: PrintSelectionToPDF
'DEVELOPER: Ryan Wells
'DESCRIPTION: Print your currently selected range to a PDF

Dim ThisRng As Range
Dim strfile As String
Dim myfile As Variant

If Selection.Count = 1 Then
Set ThisRng = Application.InputBox("Select a range", "Get Range", Type:=8)
Else
Set ThisRng = Selection
End If
'Prompt for save location
strfile = "Selection" & "_" _
& Format(Now(), "yyyymmdd_hhmmss") _
& ".pdf"
strfile = ThisWorkbook.Path & "" & strfile

myfile = Application.GetSaveAsFilename _
(InitialFileName:=strfile, _
FileFilter:="PDF Files (*.pdf), *.pdf", _
Title:="Select Folder and File Name to Save as PDF")

If myfile <> "False" Then 'save as PDF
ThisRng.ExportAsFixedFormat Type:=xlTypePDF, Filename:= _
myfile, Quality:=xlQualityStandard, IncludeDocProperties:=True, _
IgnorePrintAreas:=False, OpenAfterPublish:=True
Else
MsgBox "No File Selected. PDF will not be saved", vbOKOnly, "No File Selected"
End If

End Sub
Once you select the range and click OK, it will show a dialog box where you can select where you want to save the PDF.
It will automatically pick the date and time from your system’s clock and add it to the file name.
Print One Table To PDF
A lot of Excel power users store their data into organized tables. As a matter of fact, Sumit Bansal himself likes Excel tables so much he calls them a hidden treasure in Excel.
This macro prints a table of your choosing to a PDF. When you run the macro, it will prompt you for the name of the table you want to save.

Sub PrintTableToPDF()
'SUBROUTINE: PrintTableToPDF
'DEVELOPER: Ryan Wells
'DESCRIPTION: Print a table of your choosing to a PDF

Dim strfile As String
Dim myfile As Variant
Dim strTable As String, r As Range
Application.ScreenUpdating = False

'Enter the table name you want to save
strTable = InputBox("What's the name of the table you want to save?", "Enter Table Name") 'Table you want to save
If Trim(strTable) = "" Then Exit Sub
'Prompt for save location
strfile = strTable & "_" _
& Format(Now(), "yyyymmdd_hhmmss") _
& ".pdf"
strfile = ThisWorkbook.Path & "" & strfile

myfile = Application.GetSaveAsFilename _
(InitialFileName:=strfile, _
FileFilter:="PDF Files (*.pdf), *.pdf", _
Title:="Select Folder and File Name to Save as PDF")

If myfile <> "False" Then 'save as PDF
Range(strTable).ExportAsFixedFormat Type:=xlTypePDF, Filename:=myfile, Quality:=xlQualityStandard, _
IncludeDocProperties:=True, IgnorePrintAreas:=False, OpenAfterPublish:=True
Else
MsgBox "No File Selected. PDF will not be saved", vbOKOnly, "No File Selected"
End If

Application.DisplayAlerts = False

LetsContinue:
With Application
.ScreenUpdating = True
.DisplayAlerts = True
End With
Exit Sub
End Sub
Once you enter the name of the table and click OK, it will show a dialog box where you can select where you want to save the PDF.
It will automatically pick the date and time from your system’s clock and add it to the file name.
Print All Tables To Separate PDFs
If your spreadsheet has several tables and you need to save each one to a separate PDF, you can run this VBA code.
When you run this macro, a dialog box will appear asking you to select the folder where you want to save your PDFs.

Once you pick your folder, the macro will save each table to a PDF with the table name conveniently appearing in the title of the PDF.
Sub PrintAllTablesToPDFs()
'SUBROUTINE: PrintAllTablesToPDFs
'DEVELOPER: Ryan Wells
'DESCRIPTION: Print each table in your spreadsheet to a different PDF
Dim strTables() As String
Dim strfile As String
Dim ch As Object, sh As Worksheet
Dim icount As Integer
Dim myfile As Variant
Dim tbl As ListObject
Dim sht As Worksheet

With Application.FileDialog(msoFileDialogFolderPicker)
.Title = "Where do you want to save your PDF?"
.ButtonName = "Save Here"
.InitialFileName = ThisWorkbook.Path
If .Show = -1 Then ' if OK is pressed
sfolder = .SelectedItems(1)
Else
End
End If
End With

For Each sht In ThisWorkbook.Worksheets
For Each tbl In sht.ListObjects
myfile = ThisWorkbook.Name & "" & tbl.Name & "" _
& Format(Now(), "yyyymmdd_hhmmss") _
& ".pdf"
myfile = sfolder & "" & myfile
sht.Range(tbl.Name).ExportAsFixedFormat Type:=xlTypePDF, Filename:= _
myfile, Quality:=xlQualityStandard, IncludeDocProperties:=True, _
IgnorePrintAreas:=False, OpenAfterPublish:=True
Next tbl
Next sht

End Sub
Print All Sheets To One PDF
I don’t know about you, but in my line of work, we have to retain PDF copies of almost all our spreadsheets. We append the PDF copies of our spreadsheets to our design calculations. These PDFs used to be converted to microfiche and vaulted for long-term retention. You know, in case the apocalypse happened.
If you find yourself in a similar situation, it’s nice to be able to automatically convert all the sheets in your spreadsheet into one PDF. Here’s a VBA macro that will do just that:
Sub PrintAllSheetsToPDF()
'SUBROUTINE: PrintAllSheetsToPDF
'DEVELOPER: Ryan Wells
'DESCRIPTION: Combine all your worksheets into one PDF
Dim strSheets() As String
Dim strfile As String
Dim sh As Worksheet
Dim icount As Integer
Dim myfile As Variant

'Save Chart Sheet names to an Array
For Each sh In ActiveWorkbook.Worksheets
If sh.Visible = xlSheetVisible Then
ReDim Preserve strSheets(icount)
strSheets(icount) = sh.Name
icount = icount + 1
End If
Next sh

If icount = 0 Then 'No charts found. Punch error
MsgBox "A PDF cannot be created because no sheets were found.", , "No Sheets Found"
Exit Sub
End If

'Prompt for save location
strfile = "Sheets" & "_" _
& Format(Now(), "yyyymmdd_hhmmss") _
& ".pdf"
strfile = ThisWorkbook.Path & "" & strfile

myfile = Application.GetSaveAsFilename _
(InitialFileName:=strfile, _
FileFilter:="PDF Files (*.pdf), *.pdf", _
Title:="Select Folder and File Name to Save as PDF")

If myfile <> "False" Then 'save as PDF
ThisWorkbook.Sheets(strSheets).Select

ActiveSheet.ExportAsFixedFormat Type:=xlTypePDF, Filename:= _
myfile, Quality:=xlQualityStandard, IncludeDocProperties:=True, _
IgnorePrintAreas:=False, OpenAfterPublish:=True
Else
MsgBox "No File Selected. PDF will not be saved", vbOKOnly, "No File Selected"
End If

End Sub
Print Chart Sheets To PDF
This macro converts all your Chart Sheets into one PDF – but not your chart objects! By chart sheets, I mean the charts that have their own tab in your list of spreadsheet tabs:

Sub PrintChartSheetsToPDF()
'SUBROUTINE: PrintChartSheetsToPDF
'DEVELOPER: Ryan Wells
'DESCRIPTION: Combine all chart sheets into one PDF

Dim strSheets() As String
Dim strfile As String
Dim ch As Object, sh As Worksheet
Dim icount As Integer
Dim myfile As Variant

'Save Chart Sheet names to an Array
For Each ch In ActiveWorkbook.Charts
ReDim Preserve strSheets(icount)
strSheets(icount) = ch.Name
icount = icount + 1
Next ch

If icount = 0 Then 'No charts found. Punch error
MsgBox "A PDF cannot be created because no Chart Sheets were found.", , "No Chart Sheets Found"
Exit Sub
End If

'Prompt for save location
strfile = "Charts" & "_" _
& Format(Now(), "yyyymmdd_hhmmss") _
& ".pdf"
strfile = ThisWorkbook.Path & "" & strfile

myfile = Application.GetSaveAsFilename _
(InitialFileName:=strfile, _
FileFilter:="PDF Files (*.pdf), *.pdf", _
Title:="Select Folder and File Name to Save as PDF")

If myfile <> "False" Then 'save as PDF
ThisWorkbook.Sheets(strSheets).Select

ActiveSheet.ExportAsFixedFormat Type:=xlTypePDF, Filename:= _
myfile, Quality:=xlQualityStandard, IncludeDocProperties:=True, _
IgnorePrintAreas:=False, OpenAfterPublish:=True
Else
MsgBox "No File Selected. PDF will not be saved", vbOKOnly, "No File Selected"
End If

End Sub
Print Chart Objects To PDF
This macro saves all your normal charts – chart objects – into a single PDF. Regardless of which worksheet your chart is on, it will be grabbed and saved to a PDF.
There will only be one chart per page in the final PDF.
Sub PrintChartsObjectsToPDF()
'SUBROUTINE: PrintChartsObjectsToPDF
'DEVELOPER: Ryan Wells
'DESCRIPTION: Combine all chart objects into one PDF

Dim ws As Worksheet, wsTemp As Worksheet
Dim chrt As ChartObject
Dim tp As Long
Dim strfile As String
Dim myfile As Variant

Application.ScreenUpdating = False

Set wsTemp = Sheets.Add

tp = 10

With wsTemp
For Each ws In ActiveWorkbook.Worksheets
If ws.Name = wsTemp.Name Then GoTo nextws:
For Each chrt In ws.ChartObjects
chrt.Copy
wsTemp.Range("A1").PasteSpecial
Selection.Top = tp
Selection.Left = 5
If Selection.TopLeftCell.Row > 1 Then
ActiveSheet.Rows(Selection.TopLeftCell.Row).PageBreak = xlPageBreakManual
End If
tp = tp + Selection.Height + 50
Next
nextws:
Next ws
End With

'Prompt for save location
strfile = "Charts" & "_" _
& Format(Now(), "yyyymmdd_hhmmss") _
& ".pdf"
strfile = ActiveWorkbook.Path & "" & strfile

myfile = Application.GetSaveAsFilename _
(InitialFileName:=strfile, _
FileFilter:="PDF Files (*.pdf), *.pdf", _
Title:="Select Folder and File Name to Save as PDF")

If myfile <> False Then 'save as PDF
wsTemp.ExportAsFixedFormat Type:=xlTypePDF, Filename:=myfile, Quality:=xlQualityStandard, _
IncludeDocProperties:=True, IgnorePrintAreas:=False, OpenAfterPublish:=True
'Else
' MsgBox "No File Selected. PDF will not be saved", vbOKOnly, "No File Selected"
End If

Application.DisplayAlerts = False
wsTemp.Delete

With Application
.ScreenUpdating = True
.DisplayAlerts = True
End With
Exit Sub
End Sub
If you have any questions, drop them in the comments section, where Ryan and I will be waiting there for you.
You May Also Like the Following Excel Tutorials:
- How to Embed a PDF File in an Excel Worksheet.
- Excel VBA Loops: For Next, Do While, Do Until, For Each (with Examples).
- How to Record a Macro in Excel
- How to Combine Multiple Workbooks into One Excel Workbook.
- How to Run a Macro in Excel.
- How to Create and Use an Excel Add-in.
- Excel VBA Error Handling
- Split Each Excel Sheet Into Separate Files
- How to Import XML File into Excel | Convert XML to Excel
About the author: Ryan Wells is a Nuclear Engineer and professional VBA Developer. He publishes his easy to understand Excel VBA tutorials to help others write better macros. In addition to teaching VBA, Ryan is the lead developer of several Excel add-ins. You can find his tutorials on WellsR.com.
Get 51 Excel Tips Ebook to skyrocket your productivity and get work done faster
14 thoughts on “How to Convert Excel to PDF Using VBA”
-
i am using window 10 64 bit error on this syntex:……
1.
ThisRng.ExportAsFixedFormat Type:=xlTypePDF, Filename:= _
myfile, Quality:=xlQualityStandard, IncludeDocProperties:=True, _
IgnorePrintAreas:=False, OpenAfterPublish:=True2. automatically pick name from cell value & save in predefine location(d:/jobcard/*.pdf
thanks for help in advance
-
Hello, I am desperatly looking for a way to export a form to PDF without using any plugins or external software. Is this in anyway possible?
-
hello, i have a sheet that has a pivot and that pivot pulls in multiple different products with information below, is there a macro where i can name all of the products and it will create a pdf for every single product off the pivot without have to go one by one?
-
I have a invoice Template with VBA code as below which Prints 4 Copies of Invoice With Changing Cell value (L1) in each sheet with Array as defined in Macro.
I need to save this as PDF file as wellafter printing with all these 4 Sheet in a single PDF file with continuous 4 pages each having cell value(L1) as defined by Array.
Any Advice in this regard shall be highly appreciated.
Syed.
Sub PrintINVOICEQuadtriplicate()
Dim i As Integer
Dim VList As VariantVList = Array(“ORIGINAL FOR RECIPIENT”, “DUPLICATE FOR TRANSPORTER”, “TRIPLICATE FOR SELLER”, “”)
For i = LBound(VList) To UBound(VList)
Range(“L1”) = VList(i)
ActiveSheet.PrintOut
NextEnd Sub
-
Hi,
Is there a way to have a predetermined set of cells selected already as opposed to being prompted? and also have all that fit in one page as either landscape or portrait.
Thank you in Advance
-
Option Explicit
Sub GeneratePDF_Click()
Dim thisWb As Workbook: Set thisWb = ThisWorkbook
Dim thisWs As Worksheet: Set thisWs = thisWb.Worksheets(“Invoice”) ‘replace with relevant name
Dim newBook As Workbook
Dim newws As Worksheet
Dim pathToNewWb As String
Dim uKeys(1 To 3) As Variant
Dim currentPath, columnWithKey, numCols, numRows, dataStartRow, uKey, columnKeyName
Dim i As Integer
Dim rng As Range, Option1 As Range
Dim Filename As String
Dim dropdown1 As DropDown
Dim C As StringFilename = “Test”
Dim wksAllSheets As Variant
Dim wksSheet1 As WorksheetDim shtAry()
‘nobody likes flickering screens
Application.ScreenUpdating = False
‘remove any filter applied to the data
thisWs.AutoFilterMode = False‘get the path of the workbook folder
currentPath = Application.ThisWorkbook.Path‘Set the stage
‘###Hardcode###
‘columnKeyName = “Facility” ‘name of the column with the facility values
dataStartRow = 7 ‘this is a pure guess, correct as relevenat. Use the header row index
pathToNewWb = currentPath & “/Business Plans.xlsx” ‘ where to put the new excel, if you want a saveas prompt you should google “Application.FileDialog(msoFileDialogSaveAs)”
‘dropdown1 = “F7”
i = 1
Set rng = Evaluate(Range(“F7”).Validation.Formula1)
‘Set rng = Range(“F7”)
For Each Option1 In rng
uKeys(i) = Option1.Value
i = i + 1
Next Option1
For i = LBound(uKeys) To UBound(uKeys)
Debug.Print uKeys(i)
Next i‘uKeys = Range(“C2:C5”).Value
‘###Hardcode End###
‘columnWithKey = thisWs.Range(dataStartRow & “:” & dataStartRow).Find(what:=columnKeyName, LookIn:=xlFormulas).ValuenumCols = thisWs.UsedRange.Columns.Count
‘extract the index of the last used row in the worksheet
numRows = thisWs.UsedRange.Rows.Count‘create the new workbook
Set newBook = Workbooks.Add‘loop the facilities, and do the work
For Each uKey In uKeys‘Filter the keys column for a unique key
‘thisWs.Range(thisWs.Cells(7, 6), thisWs.Cells(numRows, numCols)).AutoFilter field:=”F7″, Criteria1:=uKey
‘thisWs.Range(thisWs.Cells(7, 6)).Select‘Range(“F7”).Value = Range(Range(“F7”).Validation.Formula1)(2).Value
Cells(7, 6) = uKey
‘copy the sheet
thisWs.UsedRange.Copy‘Create a new ws for the facility, and paste as values
Set newws = newBook.Worksheets.Add
ActiveWindow.Zoom = 90
With newws
ActiveWindow.Zoom = 90
.Name = uKey ‘I assume the name of the facility is the relevant sheet name
ActiveWindow.Zoom = 90.Range(“B1:F25”).PasteSpecial xlPasteValues
.Range(“B1:F25”).PasteSpecial Paste:=xlPasteColumnWidths
.Range(“B1:F25”).PasteSpecial Paste:=xlPasteFormats
‘.Range(“B1:F27”).PasteSpecial Paste:=xlPasteFormulasAndNumberFormats
‘.Range(“B1:F27”).PasteSpecial Paste:=xlPasteAllUsingSourceTheme, Operation:=xlNone, _
SkipBlanks:=False, Transpose:=False.Rows(3).Select
Selection.RowHeight = 43.5
.Rows(4).Select
Selection.RowHeight = 69
.Rows(5).Select
Selection.RowHeight = 33
.Rows(6).Select
Selection.RowHeight = 24.75
.Rows(7).Select
Selection.RowHeight = 27.75
.Rows(9).Select
Selection.RowHeight = 24.75
.Rows(12).Select
Selection.RowHeight = 19.5
.Rows(13).Select
Selection.RowHeight = 49.5
.Rows(14).Select
Selection.RowHeight = 34
.Rows(15).Select
Selection.RowHeight = 34
.Rows(16).Select
Selection.RowHeight = 34
.Rows(17).Select
Selection.RowHeight = 34.Rows(22).Select
Selection.RowHeight = 33.Rows(23).Select
Selection.RowHeight = 45.75
.Rows(24).Select
Selection.RowHeight = 14.75
.Rows(25).Select
Selection.RowHeight = 15.75
With ActiveSheet.PageSetup
.LeftMargin = Application.InchesToPoints(0.3)
.RightMargin = Application.InchesToPoints(0.3)
.TopMargin = Application.InchesToPoints(1)
.BottomMargin = Application.InchesToPoints(0)
.HeaderMargin = Application.InchesToPoints(0)
.FooterMargin = Application.InchesToPoints(0)
‘.Orientation = xlLandscape
.Orientation = xlPortrait
.PaperSize = xlPaperLetter
.Zoom = False
.FitToPagesWide = 1
.FitToPagesTall = 1
End With
End With‘remove autofilter (paranoid parrot)
thisWs.AutoFilterMode = FalseNext uKey
‘save the new workbook
newBook.SaveAs pathToNewWbWith ActiveSheet.PageSetup
ReDim shtAry(3) ‘ this is an array of length 2
For i = 1 To 4
shtAry(i – 1) = Sheets(i).Name
Debug.Print Sheets(i).Name
Next i
Sheets(shtAry).Select
Debug.Print ThisWorkbook.Path & “”
.LeftMargin = Application.InchesToPoints(0.3)
.RightMargin = Application.InchesToPoints(0.3)
.TopMargin = Application.InchesToPoints(1)
.BottomMargin = Application.InchesToPoints(0)
.HeaderMargin = Application.InchesToPoints(0)
.FooterMargin = Application.InchesToPoints(0)
‘.Orientation = xlLandscape
.Orientation = xlPortrait
.PaperSize = xlPaperLetter
.Zoom = False
.FitToPagesWide = 1
.FitToPagesTall = 1
End WithActiveSheet.ExportAsFixedFormat xlTypePDF, ThisWorkbook.Path & “/” & Filename & “.pdf”, Quality:=xlQualityStandard, IncludeDocProperties:=True, IgnorePrintAreas:=False, OpenAfterPublish:=False
newBook.Close
End Sub -
‘uKeys = Range(“C2:C5”).Value
‘###Hardcode End###
‘columnWithKey = thisWs.Range(dataStartRow & “:” & dataStartRow).Find(what:=columnKeyName, LookIn:=xlFormulas).ValuenumCols = thisWs.UsedRange.Columns.Count
‘extract the index of the last used row in the worksheet
numRows = thisWs.UsedRange.Rows.Count‘create the new workbook
Set newBook = Workbooks.Add‘loop the facilities, and do the work
For Each uKey In uKeys‘Filter the keys column for a unique key
‘thisWs.Range(thisWs.Cells(7, 6), thisWs.Cells(numRows, numCols)).AutoFilter field:=”F7″, Criteria1:=uKey
‘thisWs.Range(thisWs.Cells(7, 6)).Select‘Range(“F7”).Value = Range(Range(“F7”).Validation.Formula1)(2).Value
Cells(7, 6) = uKey
‘copy the sheet
thisWs.UsedRange.Copy‘Create a new ws for the facility, and paste as values
Set newws = newBook.Worksheets.Add
ActiveWindow.Zoom = 90
With newws
ActiveWindow.Zoom = 90
.Name = uKey ‘I assume the name of the facility is the relevant sheet name
ActiveWindow.Zoom = 90.Range(“B1:F25”).PasteSpecial xlPasteValues
.Range(“B1:F25”).PasteSpecial Paste:=xlPasteColumnWidths
.Range(“B1:F25”).PasteSpecial Paste:=xlPasteFormats
‘.Range(“B1:F27”).PasteSpecial Paste:=xlPasteFormulasAndNumberFormats
‘.Range(“B1:F27”).PasteSpecial Paste:=xlPasteAllUsingSourceTheme, Operation:=xlNone, _
SkipBlanks:=False, Transpose:=False.Rows(3).Select
Selection.RowHeight = 36
.Rows(4).Select
Selection.RowHeight = 69
.Rows(5).Select
Selection.RowHeight = 33
.Rows(6).Select
Selection.RowHeight = 24.75
.Rows(9).Select
Selection.RowHeight = 24.75
.Rows(10).Select
Selection.RowHeight = 18
.Rows(11).Select
Selection.RowHeight = 18
.Rows(12).Select
Selection.RowHeight = 19.5
.Rows(13).Select
Selection.RowHeight = 49.5
.Rows(14).Select
Selection.RowHeight = 34
.Rows(15).Select
Selection.RowHeight = 34
.Rows(16).Select
Selection.RowHeight = 34
.Rows(17).Select
Selection.RowHeight = 34.Rows(22).Select
Selection.RowHeight = 33.Rows(23).Select
Selection.RowHeight = 45.75
.Rows(24).Select
Selection.RowHeight = 14.75
.Rows(25).Select
Selection.RowHeight = 15.75
With ActiveSheet.PageSetup
.LeftMargin = Application.InchesToPoints(0.5)
.RightMargin = Application.InchesToPoints(0.5)
.TopMargin = Application.InchesToPoints(1.5)
.BottomMargin = Application.InchesToPoints(0)
.HeaderMargin = Application.InchesToPoints(0)
.FooterMargin = Application.InchesToPoints(0)
‘.Orientation = xlLandscape
.Orientation = xlPortrait
.PaperSize = xlPaperLetter
.Zoom = False
.FitToPagesWide = 1
.FitToPagesTall = 1
End With
End With‘remove autofilter (paranoid parrot)
thisWs.AutoFilterMode = FalseNext uKey
‘save the new workbook
newBook.SaveAs pathToNewWbWith ActiveSheet.PageSetup
ReDim shtAry(3) ‘ this is an array of length 2
For i = 1 To 4
shtAry(i – 1) = Sheets(i).Name
Debug.Print Sheets(i).Name
Next i
Sheets(shtAry).Select
Debug.Print ThisWorkbook.Path & “”
.LeftMargin = Application.InchesToPoints(0.5)
.RightMargin = Application.InchesToPoints(0.5)
.TopMargin = Application.InchesToPoints(1.5)
.BottomMargin = Application.InchesToPoints(0)
.HeaderMargin = Application.InchesToPoints(0)
.FooterMargin = Application.InchesToPoints(0)
‘.Orientation = xlLandscape
.Orientation = xlPortrait
.PaperSize = xlPaperLetter
.Zoom = False
.FitToPagesWide = 1
.FitToPagesTall = 1
End WithActiveSheet.ExportAsFixedFormat xlTypePDF, ThisWorkbook.Path & “/” & Filename & “.pdf”, Quality:=xlQualityStandard, IncludeDocProperties:=True, IgnorePrintAreas:=False, OpenAfterPublish:=False
newBook.Close
End Sub -
Option Explicit
Sub GeneratePDF_Click()
Dim thisWb As Workbook: Set thisWb = ThisWorkbook
Dim thisWs As Worksheet: Set thisWs = thisWb.Worksheets(“Invoice”) ‘replace with relevant name
Dim newBook As Workbook
Dim newws As Worksheet
Dim pathToNewWb As String
Dim uKeys(1 To 3) As Variant
Dim currentPath, columnWithKey, numCols, numRows, dataStartRow, uKey, columnKeyName
Dim i As Integer
Dim rng As Range, Option1 As Range
Dim Filename As String
Dim dropdown1 As DropDown
Dim C As StringFilename = “Test”
Dim wksAllSheets As Variant
Dim wksSheet1 As WorksheetDim shtAry()
‘nobody likes flickering screens
Application.ScreenUpdating = False
‘remove any filter applied to the data
thisWs.AutoFilterMode = False‘get the path of the workbook folder
currentPath = Application.ThisWorkbook.Path‘Set the stage
‘###Hardcode###
‘columnKeyName = “Facility” ‘name of the column with the facility values
dataStartRow = 7 ‘this is a pure guess, correct as relevenat. Use the header row index
pathToNewWb = currentPath & “/Business Plans.xlsx” ‘ where to put the new excel, if you want a saveas prompt you should google “Application.FileDialog(msoFileDialogSaveAs)”
‘dropdown1 = “F7”
i = 1
Set rng = Evaluate(Range(“F7”).Validation.Formula1)
‘Set rng = Range(“F7”)
For Each Option1 In rng
uKeys(i) = Option1.Value
i = i + 1
Next Option1
For i = LBound(uKeys) To UBound(uKeys)
Debug.Print uKeys(i)
Next i -
Option Explicit
Sub GeneratePDF_Click()
Dim thisWb As Workbook: Set thisWb = ThisWorkbook
Dim thisWs As Worksheet: Set thisWs = thisWb.Worksheets(“Test”) ‘replace with relevant name
Dim newBook As Workbook
Dim newws As Worksheet
Dim pathToNewWb As String
Dim uKeys(1 To 4) As Variant
Dim currentPath, columnWithKey, numCols, numRows, uKey, dataStartRow, columnKeyName
Dim i As Integer
Dim rng As Range, cel As Range
Dim Filename As String
Filename = “Test”Dim shtAry()
‘nobody likes flickering screens
Application.ScreenUpdating = False
‘remove any filter applied to the data
thisWs.AutoFilterMode = False‘get the path of the workbook folder
currentPath = Application.ThisWorkbook.Path‘Set the stage
‘###Hardcode###
columnKeyName = “Facility” ‘name of the column with the facility values
dataStartRow = 1 ‘this is a pure guess, correct as relevenat. Use the header row index
pathToNewWb = currentPath & “/Business Plans.xlsx” ‘ where to put the new excel, if you want a saveas prompt you should google “Application.FileDialog(msoFileDialogSaveAs)”i = 1
Set rng = Range(“C2:C5”)
For Each cel In rng
uKeys(i) = cel.Value
i = i + 1
Next cel
For i = LBound(uKeys) To UBound(uKeys)
Debug.Print uKeys(i)
Next i-
‘uKeys = Range(“C2:C5”).Value
‘###Hardcode End###
columnWithKey = thisWs.Range(dataStartRow & “:” & dataStartRow).Find(what:=columnKeyName, LookIn:=xlValues).Column
numCols = thisWs.UsedRange.Columns.Count‘extract the index of the last used row in the worksheet
numRows = thisWs.UsedRange.Rows.Count‘create the new workbook
Set newBook = Workbooks.Add‘loop the facilities, and do the work
For Each uKey In uKeys‘Filter the keys column for a unique key
thisWs.Range(thisWs.Cells(dataStartRow, 1), thisWs.Cells(numRows, numCols)).AutoFilter field:=columnWithKey, Criteria1:=uKey‘copy the sheet
thisWs.UsedRange.Copy‘Create a new ws for the facility, and paste as values
Set newws = newBook.Worksheets.Add
With newws
.Name = uKey ‘I assume the name of the facility is the relevant sheet name
.Range(“A1”).PasteSpecial xlPasteValues
End With‘remove autofilter (paranoid parrot)
thisWs.AutoFilterMode = FalseNext uKey
‘save the new workbook
newBook.SaveAs pathToNewWb
-
-
Is there a way, when exporting as PDF. to have a print title row (which I currently have put into all the pages of the .pdf), appear on all of the pages EXCEPT the final page?
I’ve tried to run this by defining “xPages” as the total count of pages (and then going for xpages -1 – 1) but am unable to run this within the settings for the .pdf export…
Is this possible?
-
Hi! if you could add a video as demo -it would be good
-
to continue, it looks too good and useful, but very scaring for a guy like me without VBA knowledge 🙂
-
-
I have an Invoice program, which I had made with LibreOffice. In this program, there are two workbooks. First one is a stock file, where I keep the records of each item in the inventory such as description, cost, selling price, Tariff Code, etc.
Second workbook has a link to the first one so if I make any changes, it automatically updates with the new values. In the second workbook, I simply enter order code and quantities and it fills the invoice template. For each page, there are 25 entries. So if the invoice has more than 25 items, it automatically goes to second page. That way, I made the design up to 10 pages.
Also in this workbook, in another sheet, there is the sales contract, which is automatically filled again according to the date, customer id, and invoice number.
What I want to ask you is, I can make this program in Excel, too. Can you offer a VBA code, which will understand how many pages of the invoice is filled and convert to PDF accordingly along with adding the Sales Contract sheet automatically ?
Comments are closed.
Сохранение в PDF книги Excel, группы листов, одного листа или отдельного диапазона с помощью кода VBA. Метод ExportAsFixedFormat. Примеры экспорта.
Метод ExportAsFixedFormat
Метод ExportAsFixedFormat сохраняет рабочую книгу Excel или выбранную группу листов этой книги в один PDF-файл. Чтобы экспортировать каждый лист в отдельный файл, необходимо применить метод ExportAsFixedFormat к каждому сохраняемому листу.
Синтаксис
|
Expression.ExportAsFixedFormat (Type, FileName, Quality, IncludeDocProperties, IgnorePrintAreas, From, To, OpenAfterPublish, FixedFormatExtClassPtr) |
Expression – это выражение, представляющее объект Workbook, Worksheet или Range.
Параметры
Единственный обязательный параметр – Type, остальные можно не указывать – в этом случае будут применены значения по умолчанию.
| Параметр | Описание |
|---|---|
| Type | Задает формат файла для экспорта книги или листа: xlTypePDF(0) – сохранение в файл PDF; xlTypeXPS(1) – сохранение в файл XPS*. |
| FileName | Задает имя файла. При указании полного пути, файл будет сохранен в указанную папку, при указании только имени – в папку по умолчанию (в Excel 2016 – «Документы»). Если имя не задано (по умолчанию), файл будет сохранен с именем экспортируемой книги. |
| Quality | Задает качество сохраняемых электронных таблиц: xlQualityMinimum(1) – минимальное качество; xlQualityStandard(0) – стандартное качество (по умолчанию). |
| IncludeDocProperties | Включение свойств документа Excel в PDF: True(1) – включить; False(0) – не включать; мне не удалось обнаружить разницу и значение по умолчанию. |
| IgnorePrintAreas | Указывает VBA, следует ли игнорировать области печати, заданные на листах файла Excel: True(1) – игнорировать области печати; False(0) – не игнорировать области печати (по умолчанию). |
| From** | Задает номер листа книги Excel, с которого начинается экспорт. По умолчанию сохранение в PDF начинается с первого листа книги. |
| To** | Задает номер листа книги Excel, на котором заканчивается экспорт. По умолчанию сохранение в PDF заканчивается на последнем листе книги. |
| OpenAfterPublish | Указывает VBA на необходимость открыть созданный файл PDF средством просмотра: True(1) – открыть файл PDF для просмотра; False(0) – не открывать файл PDF для просмотра (по умолчанию). |
| FixedFormatExtClassPtr | Указатель на класс FixedFormatExt (игнорируем этот параметр). |
* XPS – это редко использующийся фиксированный формат файлов, разработанный Microsoft, который похож на PDF, но основан на языке XML.
** Применимо только к книге (Workbook.ExportAsFixedFormat), при экспорте листа (Worksheet.ExportAsFixedFormat) указание параметров From и/или To приведет к ошибке.
Сохранение в PDF книги Excel
Экспорт всей книги
|
Sub Primer1() ThisWorkbook.ExportAsFixedFormat Type:=xlTypePDF, Filename:=«C:Testfile1.pdf», OpenAfterPublish:=True End Sub |
Если вы указываете путь к файлу, он должен существовать, иначе VBA сохранит файл с именем и в папку по умолчанию («ИмяКниги.pdf» в папку «Документы»).
Экспорт части книги
Этот способ позволяет сохранить в PDF группу листов, расположенных подряд:
|
Sub Primer2() ThisWorkbook.ExportAsFixedFormat Type:=xlTypePDF, Filename:=«C:Testfile2.pdf», _ From:=2, To:=4, OpenAfterPublish:=True End Sub |
Сохранение в PDF рабочих листов
Экспорт одного листа
|
Sub Primer3() ActiveSheet.ExportAsFixedFormat Type:=xlTypePDF, Filename:=«C:Testfile3.pdf», OpenAfterPublish:=True End Sub |
Экспорт диапазона
|
Sub Primer2() Лист4.Range(«A1:F6»).ExportAsFixedFormat Type:=xlTypePDF, Filename:=«C:Testfile4.pdf», OpenAfterPublish:=True End Sub |
Если экспортируемый диапазон расположен на активном листе, имя листа указывать не обязательно.
Экспорт группы листов
Этот способ удобен тем, что экспортировать в PDF можно листы, расположенные не подряд:
|
Sub Primer5() Sheets(Array(«Лист2», «Лист3», «Лист5»)).Select Selection.ExportAsFixedFormat Type:=xlTypePDF, Filename:=«C:Testfile5.pdf», OpenAfterPublish:=True End Sub |
Since Excel 2010, it has been possible to save Excel as PDF. The PDF format was then and continues to be, one of the most common file formats for distributing documents.
The code examples below provide the VBA macros to automate the creation of PDFs from Excel using the ExportAsFixedFormat method. This means you do not require a PDF printer installed, as Excel can print directly to a PDF document.
The example codes can be used independently or as part of a larger automation process. For example, check out this post to see an example of how to loop through a list and print a PDF for each item: Create multiple PDFs based on a list
Rather than going from Excel to PDF, you might want to go the other way; from PDF to Excel. Check out these posts for possible solutions for that scenario:
- How to Import PDF Files into Excel with Power Query
- Get data from PDF into Excel
Download the example file: Click the link below to download the example file used for this post:
Saving Excel workbooks, sheets, charts, and ranges as PDF
This section contains the base code to save Excel as PDF from different objects (workbooks, worksheets, ranges, and charts). From a VBA perspective, it is the ExportAsFilxedFormat method combined with the Type property set to xlTypePDF that creates a PDF.
Save active sheet as PDF
The following code saves the selected sheets as a single PDF.
Sub SaveActiveSheetsAsPDF()

'Create and assign variables
Dim saveLocation As String
saveLocation = "C:UsersmarksOneDriveDocumentsmyPDFFile.pdf"

'Save Active Sheet(s) as PDF
ActiveSheet.ExportAsFixedFormat Type:=xlTypePDF, _
    Filename:=saveLocation

End Sub
Save active workbook as PDF
Use the following macro to save all the visible sheets from a workbook.
Sub SaveActiveWorkbookAsPDF()

'Create and assign variables
Dim saveLocation As String
saveLocation = "C:UsersmarksOneDriveDocumentsmyPDFFile.pdf"

'Save active workbook as PDF
ActiveWorkbook.ExportAsFixedFormat Type:=xlTypePDF, _
    Filename:=saveLocation

End Sub
Save selection as PDF
Sometimes, we only want to save a small part of a worksheet to a PDF. The following code prints only the selected cells.
Sub SaveSelectionAsPDF()

'Create and assign variables
Dim saveLocation As String
saveLocation = "C:UsersmarksOneDriveDocumentsmyPDFFile.pdf"

'Save selection as PDF
Selection.ExportAsFixedFormat Type:=xlTypePDF, _
    Filename:=saveLocation

End Sub
Save a range as PDF
The macro below saves a specified range as a PDF.
Sub SaveRangeAsPDF()

'Create and assign variables
Dim saveLocation As String
Dim ws as Worksheet
Dim rng As Range

saveLocation = "C:UsersmarksOneDriveDocumentsmyPDFFile.pdf"
Set ws = Sheets("Sheet1")
Set rng = ws.Range("A1:H20")

'Save a range as PDF
rng.ExportAsFixedFormat Type:=xlTypePDF, _
Filename:=saveLocation

End Sub
Save a chart as PDF
The VBA code below saves a specified chart as a PDF.
Sub SaveChartAsPDF()

'Create and assign variables
Dim saveLocation As String
Dim ws As Worksheet
Dim cht As Chart

saveLocation = "C:UsersmarksOneDriveDocumentsmyPDFFile.pdf"
Set ws = Sheets("Sheet1")
Set cht = ws.ChartObjects("Chart 1").Chart

'Save a chart as PDF
cht.ExportAsFixedFormat Type:=xlTypePDF, _
    Filename:=saveLocation

End Sub
Rather than naming a specific chart, the macro could run based on the active chart. Change this:
Set cht = ws.ChartObjects("Chart 1").ChartTo this:
Set cht = ActiveChartAdapting the code to your scenario
To adapt the code examples to your specific needs, you should adjust certain lines of code.
Change the save location
To save the file in the correct location, change this list of code:
saveLocation = "C:UsersmarksOneDriveDocumentsmyPDFFile.pdf"If you would prefer the save location to be included in a cell, change the code to reference the sheet and cell containing the file path.
saveLocation = Sheets("Sheet1").Range("B2").ValueChange the worksheet
In this line of code, change the text “Sheet1” to the sheet name in your workbook.
Set ws = Sheets("Sheet1")Change the range
The following line of codes references the range to be printed to PDF.
Set rng = ws.Range("A1:H20")Change the chart
To print a chart to PDF, change the chart’s name in the following line of code.
Set cht = ws.ChartObjects("Chart 1").ChartIf you are unsure of the chart name, it is shown in the Name box when the chart is selected.
Notes for saving PDF documents
While the Filename property is optional, it is important to know where the file is saved.
- If the Filename property is not provided, the PDF saves in your default folder location using the Excel workbook’s name with the .pdf file extension.
- Where a file name is provided, but not a file path, the document saves in your default folder location with the name provided.
- When the .pdf file extension is not provided, the suffix is added automatically.
- If a PDF exists in the specified save location, the existing file is overwritten. Therefore, it may be necessary to include file handling procedures to prevent overwriting existing documents and handling errors.
- To save as an XPS document format, change xlTypePDF for xlTypeXPS.
Selecting specific worksheets before saving as PDF
If more than one worksheet is active, the PDF created includes all the active sheets. The following code selects multiple worksheets from an array before saving the PDF.
Sub SelectSheetsAndSaveAsPDF()

'Create and assign variables
Dim saveLocation As String
Dim sheetArray As Variant

saveLocation = "C:UsersmarksOneDriveDocumentsmyPDFFile.pdf"
sheetArray = Array("Sheet1", "Sheet2")

'Select specific sheets from workbook, the save all as PDF
Sheets(sheetArray).Select
ActiveSheet.ExportAsFixedFormat Type:=xlTypePDF, _
    Filename:=saveLocation

End Sub
In the code above, an array is used to select the specific sheets. Alternatively, the Split array function with a text string could provide a more dynamic solution. This method is covered here: VBA Arrays.
Looping and saving as separate PDFs
To save multiple PDFs quickly, we can use VBA to loop through sheets or charts and save each individually.
Loop through sheets
The following macro loops through each worksheet in the active workbook and saves each as its own PDF. Each PDF is saved in the same folder as the workbook, where each PDF’s name is based on the worksheet’s name.
Sub LoopSheetsSaveAsPDF()

'Create variables
Dim ws As Worksheet

'Loop through all worksheets and save as individual PDF in same folder
'as the Excel file
For Each ws In ActiveWorkbook.Worksheets

    ws.ExportAsFixedFormat Type:=xlTypePDF, _
        Filename:=ThisWorkbook.Path & "/" & ws.Name & ".pdf"

Next

End Sub
Loop through selected sheets
The following macro loops through only the selected worksheets in the active workbook and saves each as its own PDF.
Sub LoopSelectedSheetsSaveAsPDF()

'Create variables
Dim ws As Worksheet
Dim sheetArray As Variant

'Capture the selected sheets
Set sheetArray = ActiveWindow.SelectedSheets

'Loop through each selected worksheet
For Each ws In sheetArray

    ws.Select

    ws.ExportAsFixedFormat Type:=xlTypePDF, _
        Filename:=ThisWorkbook.Path & "/" & ws.Name & ".pdf"

Next ws

'Reselect the selected sheets
sheetArray.Select

End Sub
Loop through charts
The following code loops through each chart on the active sheet and saves each as a separate PDF.
Sub LoopChartsSaveAsPDF()

'Create and assign variables
Dim chtObj As ChartObject
Dim ws As Worksheet

Set ws = ActiveSheet

'Loop through all charts and save as individual PDF in same folder
'as the Excel file
For Each chtObj In ws.ChartObjects

    chtObj.Chart.ExportAsFixedFormat Type:=xlTypePDF, _
        Filename:=ThisWorkbook.Path & "/" & chtObj.Name & ".pdf"

Next chtObj

End Sub
Other PDF print options
When using ExportAsFixedFormat, there are other optional settings available:
'Open the document after it is saved - options are True / False
OpenAfterPublish:=False

'Include the Excel document properties into the PDF - options are True / False
IncludeDocProperties:=True

'Does the created PDF adhere to the Print Areas already set in the
'worksheet - options are True / False
IgnorePrintAreas:=False

'Set the output quality of the created document - options are
'xlQualityMinimum / xlQualityStandard
Quality:=xlQualityStandard

'The page to start printing. If excluded, will start from the first page
From:=1

'The page to print to. If excluded, will go to the last page
To:=2
VBA Save to PDF Example using all the options
The code below demonstrates how to use all the options within a single macro. These options can be flexed to meet your requirements.
Sub SaveAsPDFOptions()

Dim saveLocation As String
saveLocation = "C:UsersmarksDocumentsmyPDFFile.pdf"

'Example using all the options
ActiveSheet.ExportAsFixedFormat _
    Type:=xlTypePDF, _
    Filename:=saveLocation, _
    OpenAfterPublish:=False, _
    IncludeDocProperties:=True, _
    IgnorePrintAreas:=False, _
    Quality:=xlQualityStandard, _
    From:=1, To:=2

End Sub
Other fixed formats available (xlTypeXPS)
The Type property can also create XPS documents when it is set to xlTypeXPS rather than xlTypePDF. XPS is Microsoft’s fixed file format; it is similar to PDF but based on the XML language. It is rarely used in the real world but is an option if required.
Conclusion
Learning how to save Excel as PDF is a good time investment. Each of these code snippets on its own is useful. However, the code examples above can be used in other automation to create even more time-saving.
Related posts:
- Excel – Create multiple PDFs based on a list
- Loop through selected sheets with VBA
- How to loop through each item in Data Validation list with VBA

About the author
Hey, I’m Mark, and I run Excel Off The Grid.
My parents tell me that at the age of 7 I declared I was going to become a qualified accountant. I was either psychic or had no imagination, as that is exactly what happened. However, it wasn’t until I was 35 that my journey really began.
In 2015, I started a new job, for which I was regularly working after 10pm. As a result, I rarely saw my children during the week. So, I started searching for the secrets to automating Excel. I discovered that by building a small number of simple tools, I could combine them together in different ways to automate nearly all my regular tasks. This meant I could work less hours (and I got pay raises!). Today, I teach these techniques to other professionals in our training program so they too can spend less time at work (and more time with their children and doing the things they love).
Do you need help adapting this post to your needs?
I’m guessing the examples in this post don’t exactly match your situation. We all use Excel differently, so it’s impossible to write a post that will meet everybody’s needs. By taking the time to understand the techniques and principles in this post (and elsewhere on this site), you should be able to adapt it to your needs.
But, if you’re still struggling you should:
- Read other blogs, or watch YouTube videos on the same topic. You will benefit much more by discovering your own solutions.
- Ask the ‘Excel Ninja’ in your office. It’s amazing what things other people know.
- Ask a question in a forum like Mr Excel, or the Microsoft Answers Community. Remember, the people on these forums are generally giving their time for free. So take care to craft your question, make sure it’s clear and concise. List all the things you’ve tried, and provide screenshots, code segments and example workbooks.
- Use Excel Rescue, who are my consultancy partner. They help by providing solutions to smaller Excel problems.
What next?
Don’t go yet, there is plenty more to learn on Excel Off The Grid. Check out the latest posts:
Return to VBA Code Examples
This tutorial will demonstrate how to save / print to a PDF in Excel VBA.
Print to PDF
This simple procedure will print the ActiveSheet to a PDF.
Sub SimplePrintToPDF()

ActiveSheet.ExportAsFixedFormat Type:=xlTypePDF, Filename:="demo.pdf", Quality:=xlQualityStandard, _
  IncludeDocProperties:=False, IgnorePrintAreas:=False, OpenAfterPublish:=True

End Sub
I’ve also created a function with error handling, etc. that will print the ActiveSheet to a PDF:
Sub PrintPDF()
    Call Save_PDF
End Sub


Function Save_PDF() As Boolean  ' Copies sheets into new PDF file for e-mailing
    Dim Thissheet As String, ThisFile As String, PathName As String
    Dim SvAs As String

Application.ScreenUpdating = False

' Get File Save Name
    Thissheet = ActiveSheet.Name
    ThisFile = ActiveWorkbook.Name
    PathName = ActiveWorkbook.Path
    SvAs = PathName & "" & Thissheet & ".pdf"

'Set Print Quality
    On Error Resume Next
    ActiveSheet.PageSetup.PrintQuality = 600
    Err.Clear
    On Error GoTo 0

' Instruct user how to send
    On Error GoTo RefLibError
    ActiveSheet.ExportAsFixedFormat Type:=xlTypePDF, Filename:=SvAs, Quality:=xlQualityStandard, IncludeDocProperties:=False, IgnorePrintAreas:=False, OpenAfterPublish:=True
    On Error GoTo 0

SaveOnly:
    MsgBox "A copy of this sheet has been successfully saved as a  .pdf  file: " & vbCrLf & vbCrLf & SvAs & _
        "Review the .pdf document. If the document does NOT look good, adjust your printing parameters, and try again."

    Save_PDF = True
    GoTo EndMacro

RefLibError:
    MsgBox "Unable to save as PDF. Reference library not found."
    Save_PDF = False
EndMacro:
End Function
The function returns TRUE or FALSE if the print to PDF was successful or not.
Save and Email PDF Function
This function will save the ActiveSheet as a PDF and (optionally) attach the PDF to an email (assuming you have Outlook installed):
Sub Test_Save_PDF()
    Call Send_PDF("SendEmail")
End Sub


Function Send_PDF(Optional action As String = "SaveOnly") As Boolean  ' Copies sheets into new PDF file for e-mailing
    Dim Thissheet As String, ThisFile As String, PathName As String
    Dim SvAs As String

Application.ScreenUpdating = False

' Get File Save Name
    Thissheet = ActiveSheet.Name
    ThisFile = ActiveWorkbook.Name
    PathName = ActiveWorkbook.Path
    SvAs = PathName & "" & Thissheet & ".pdf"

'Set Print Quality
    On Error Resume Next
    ActiveSheet.PageSetup.PrintQuality = 600
    Err.Clear
    On Error GoTo 0

' Instruct user how to send
    On Error GoTo RefLibError
    ActiveSheet.ExportAsFixedFormat Type:=xlTypePDF, Filename:=SvAs, Quality:=xlQualityStandard, IncludeDocProperties:=False, IgnorePrintAreas:=False, OpenAfterPublish:=True
    On Error GoTo 0

' Send Email
    If action = "SendEmail" Then
        On Error GoTo SaveOnly
        Set olApp = CreateObject("Outlook.Application")
        Set olEmail = olApp.CreateItem(olMailItem)

        With olEmail
            .Subject = Thissheet & ".pdf"
            .Attachments.Add SvAs
            .Display
        End With
        On Error GoTo 0
        GoTo EndMacro
    End If

SaveOnly:
    MsgBox "A copy of this sheet has been successfully saved as a  .pdf  file: " & vbCrLf & vbCrLf & SvAs & _
        "Review the .pdf document. If the document does NOT look good, adjust your printing parameters, and try again."

    Send_PDF = True
    GoTo EndMacro

RefLibError:
    MsgBox "Unable to save as PDF. Reference library not found."
    Send_PDF = False
EndMacro:
End Function
VBA Coding Made Easy
Stop searching for VBA code online. Learn more about AutoMacro — A VBA Code Builder that allows beginners to code procedures from scratch with minimal coding knowledge and with many time-saving features for all users!

Learn More!
In my earlier post I explained how to save an Excel sheet as PDF manually. If you want to know how to do it, then check this post.
Save an Excel Sheet as PDF Manually
Today I’m going to teach you how to convert an Excel sheet to PDF automatically. We need this type of functionality, when we develop applications which output reports. Because lot of users need their reports as PDF files. Here is one such report generated by an Excel application.

Now let’s learn how to convert this to a PDF file. First we need to define our variables.
Dim FileName As String
Dim FilePath As String
I’m going to convert the activesheet to PDF. So I will assign activesheet to WS variable.
Next we need to give the name to the PDF file
Also we should select the orientation. You should select portrait or landscape according to the length and width of your excel sheet. I will choose portrait for this example.
WS.PageSetup.Orientation = xlPortrait
If you need landscape then you should replace xlPortrait with xlLandscape. Now we have to select the saving location. In this example I will select the same folder where the application is.
FilePath = ThisWorkbook.Path
Or else you can assign specific file path like this.
FilePath = «C:UsersEVSDocumentsPDF Reports»
We have assign the values to all our variables. And have set the orientation. So now we can convert the sheet as follows.
WS.ExportAsFixedFormat Type:=xlTypePDF, FileName:=FilePath & «» & FileName & «.pdf», _
Quality:=xlQualityStandard, IncludeDocProperties:=True, IgnorePrintAreas:=False
Next we show the confirmation message.
MsgBox «Completed», vbInformation, «»
And here is the complete code to do the job.
Dim WS As Worksheet
Dim FileName As String
Dim FilePath As String
Set WS = ActiveSheet
FileName = «Result PDF»
WS.PageSetup.Orientation = xlPortrait
FilePath = ThisWorkbook.Path
WS.ExportAsFixedFormat Type:=xlTypePDF, FileName:=FilePath & «» & FileName & «.pdf», _
Quality:=xlQualityStandard, IncludeDocProperties:=True, IgnorePrintAreas:=False
MsgBox «Completed», vbInformation, «»
End Sub
When you run above code, result file will be created like this.

Often clients need PPT files as PDFs. It helps to view on any device. Use below VBA Macro to convert PowerPoint files from a folder and save them as PDF in the same folder.
Implementation:
Follow the below steps to convert multiple PowerPoint files into PDFs using Excel VBA:
Step 1: Open Excel.
Step 2: Type text “Folder Path” in cell “B5” (Image 1).
Step 3: Enter your folder full path in cell “C5” (Image 1). Here we have a folder “D:Excel29.ppt2pdfppt” with two PPT files (Image 2).
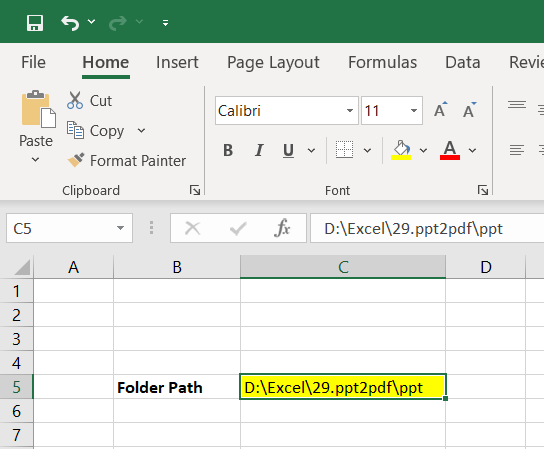
Image 1

Image 2
Step 4: Write below VBA code in your VBE module
Sub ppt2pdf_Macro()
Dim oPPTApp As PowerPoint.Application
Dim oPPTFile As PowerPoint.Presentation
Dim onlyFileName As String, folderPath As String, pptFiles As String, removeFileExt As Long

Application.ScreenUpdating = False
- Initialize variables
folderPath = Range("C5").Text & ""
pptFiles = Dir(folderPath & "*.pp*")
- Check and exit macro if no ppt files are in the folder
If pptFiles = "" Then
    MsgBox "No files found"
    Exit Sub
End If

Do While pptFiles <> ""
- Assign PowerPoint application to variable
    Set oPPTApp = CreateObject("PowerPoint.Application")
    oPPTApp.Visible = msoTrue

    On Error Resume Next
- Assign PowerPoint presentation to variable
    Set oPPTFile = oPPTApp.Presentations.Open(folderPath & pptFiles)

    On Error GoTo 0
- Remove file extension and assign an only file name to a variable
    removeFileExt = InStr(1, oPPTFile.Name, ".") - 1
    onlyFileName = Left(oPPTFile.Name, removeFileExt)

    On Error Resume Next
- Save ppt file to pdf file
    oPPTFile.ExportAsFixedFormat oPPTFile.Path & "" & onlyFileName & ".pdf", ppFixedFormatTypePDF, ppFixedFormatIntentPrint
    oPPTFile.Close
- Iterate to the next file in the folder
    pptFiles = Dir()
Loop
- Close PPT Application and release memory
oPPTApp.Quit

Set oPPTFile = Nothing
Set oPPTApp = Nothing

Application.ScreenUpdating = True

MsgBox " Successfully converted"
End Sub
Step 5: To Run VBA Code:
- Press “Alt + F8” – to popup Macro dialog box.
- Select Macro “ppt2pdf_Macro” and click “RUN”.
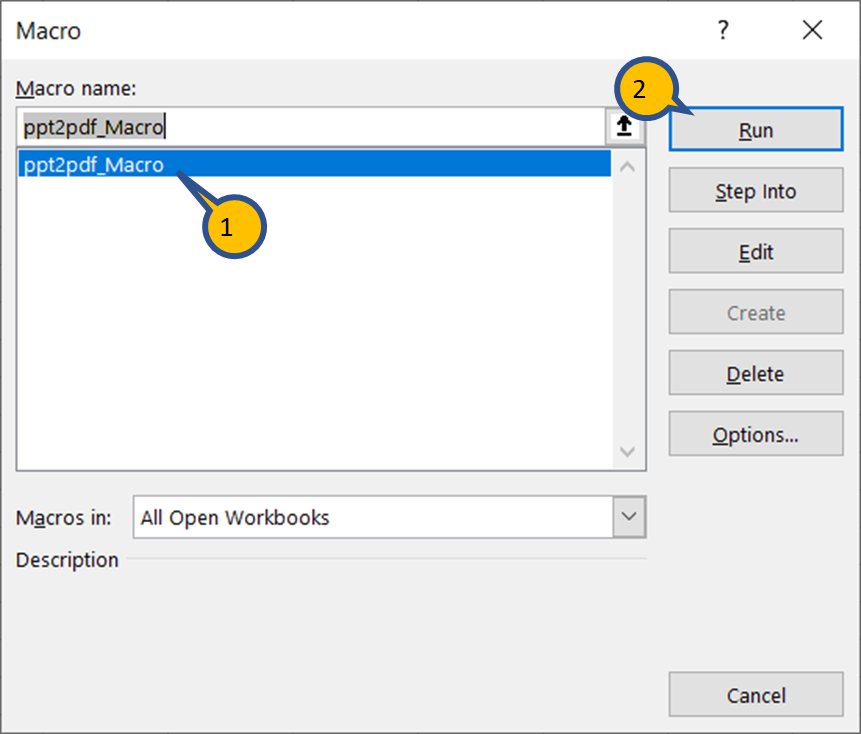
Step 6: Macro convert all PPT files from the folder to PDF and popup a below message
Output:
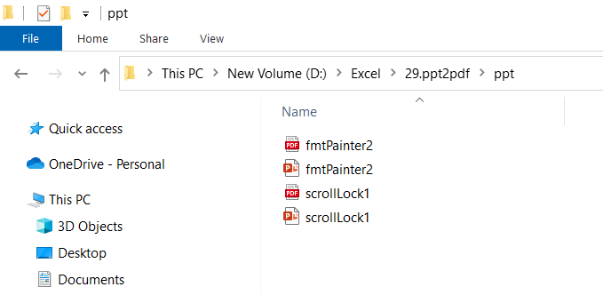
To save a selected range in excel (say a receipt) as PDF in Excel using VBA use below syntax.
The Generic Code
Sub SaveRangeAsPDF()
        Range.ExportAsFixedFormat Type:=xlTypePDF, Filename:= _
        "C:Usersfile_name", Quality:=xlQualityStandard, _
        IncludeDocProperties:=True, IgnorePrintAreas:=False, OpenAfterPublish:=True
End Sub
The above code is a generic code to save a fixed range as a PDF document. When your record macro while you export excel to PDF, a similar code will appear.
Range: It can be a fixed range, a dynamic range or a selection. You need to define it.
Filename: This is the fully qualified name of pdf. Define it as a string.
The rest of the variables can be left as it is. I have explained them after example.
Example: Print Excel receipt as a PDF using VBA
Let’s say you have to print and send receipts in Excel on a regular basis. In that case, you would like to have it automated. You wouldn’t want to do the export excel to pdf over and over again. If you can just use a button to do this it would be helpful, isn’t it?
Here, I have designed this receipt format. I want to print/save/export it as a pdf using the button «Create PDF».
 This receipt covers the range «A2:L21». I have already set the print area.
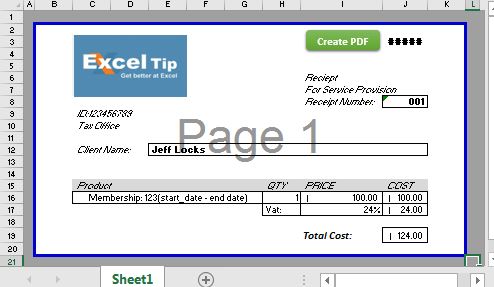
To save on this excel range as PDF, we will use the above mentioned generic VBA code of exporting excel sheet to pdf. We will adjust the code as per our requirement.
Sub PrintSelectionToPDF()
Dim invoiceRng As Range
Dim pdfile As String
'Setting range to be printed
Set invoiceRng = Range("A1:L21")
'setting file name with a time stamp.
pdfile = "invoice" & "_" & Format(Now(), "yyyymmdd_hhmmss") & ".pdf"
'setting the fulli qualified name. The resultent pdf will be saved where the main file exists.
pdfile = ThisWorkbook.Path & strfile
invoiceRng.ExportAsFixedFormat Type:=xlTypePDF, _
Filename:= pdfile, _
Quality:= xlQualityStandard, _
IncludeDocProperties:=True, _
IgnorePrintAreas:=False, _
OpenAfterPublish:=False
End Sub
Using The Code:
Copy the above code in your receipt file by opening the VBA editor ( use Alt+F11). Adjust the range and the file path (if you want to) in the code that you want to print. You can download the working file below.
![]() Save Excel Range as PDF using VBA
Save Excel Range as PDF using VBA
Explanation:
Dim invoiceRng As Range
Dim pdfile As String
The code is simple. First, we have created two variables. «InvoiceRng as Range» for the range/sheet that we want to save as pdf. strFile for the fully qualified filename of the resultant PDF.
Set invoiceRng = Range("A1:L21")
Since our printing range is fixed, we set the invoice range as Range(«A1:L21»).
pdfile = "invoice" & "_" & Format(Now(), "yyyymmdd_hhmmss") & ".pdf"
pdfile = ThisWorkbook.Path & strfile
In the above two lines, we first name the file with a timestamp and then add to the path of the main file. As a result, pdfile contains the fully qualified name of the resultant pdf file.
invoiceRng.ExportAsFixedFormat _
Type:=xlTypePDF, _
Filename:= pdfile, _
Quality:= xlQualityStandard, _
IncludeDocProperties:=True, _
IgnorePrintAreas:=True, _
OpenAfterPublish:=False
Finally, we use the ExpoortAsFixedFormat method of Range class to print the defined Excel range as PDF. We define type as xlTypePDF. Another choice is xlTypeXPS, which will save the selected range as XPS file.
We set the Filename as pdfile, which contains the string of the fully qualified name of the pdf file. You can write a hardcoded text here or customize it as per your need.
Next, we set the quality of the pdfile as xlQualityStandard. We have another choice as xlQualityMinimum.
Next, we set the IncludeDocProperties as True. It means that the resultant PDF will have the properties of a Document.
Then we set the IgnorePrintAreas as True. It means it will ignore any print area already set.
Finally, we set OpenAfterPublish as False. It means that the file you create will not open automatically. I set it false because I create 100s of files using a loop, and I don’t want them to open. If you want to open the file after creating using excel, set it True.
Usage of printing selected range as pdf
One basic use is to print the selected range by just clicking on one button. But the best use is to use it in a loop where you need to create multiple receipts for different clients. Create a sub for filling data and then use this code to print the selected range in a loop.
So yeah guys, this how you can save selected range as pdf. I hope it was useful for you. If you still have any doubt or query regarding print in excel using VBA, ask in the comments section below.
Related Articles:
Print multiple selections on one sheet using VBA in Microsoft Excel | Select multiple ranges and print each range in a different sheet using VBA.
Print all workbooks in a folder using VBA in Microsoft Excel | Use this VBA code to print and save each excel workbook in a folder using.
Popular Articles:
Split Excel Sheet Into Multiple Files Based On Column Using VBA | This VBA code split excel sheet base on unique values in a specified column. Download the working file.
Turn Off Warning Messages Using VBA In Microsoft Excel 2016 | To turn off warning messages that interrupt the running VBA code, we use the Application class.
Add And Save New Workbook Using VBA In Microsoft Excel 2016 | To add and save workbooks using VBA we use Workbooks class. Workbooks.Add adds new workbook easily, however…