
As of now, there is no built-in command like CSV (Export-CSV) to export output to the excel file but we can use the Out-File command to export data to excel or any other file format.
Let’s use Out-File to export the output of the Get-Processes command to an excel file.
Get-Process | Out-File C:Tempprocesses.xls
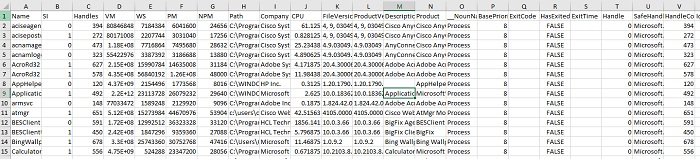
The above command will get all the running processes on the local system to the excel file. Let’s check the output of the excel file. You can see that the output is not in the proper excel format.

One other way is to install the ImportExcel module for excel. It is a very popular module to work with excel files.
To install the ImportExcel module, you need to run the below command to get it installed from the PowerShell gallery.
Install-Module ImportExcel -AllowClobber -Force
Once you install it, you need to import the module in the current PowerShell session if not imported.
Get-Module ImportExcel -ListAvailable | Import-Module -Force -Verbose
Once you have this module loaded in PowerShell, you can run the below command to export output into the excel format.
Get-Process | Export-Excel -Path C:TempProcesses.xlsx
Output
Содержание
- Out-File
- Syntax
- Description
- Examples
- Example 1: Send output and create a file
- Example 2: Prevent an existing file from being overwritten
- Example 3: Send output to a file in ASCII format
- Example 4: Use a provider and send output to a file
- Example 5: Set file output width for entire scope
- Parameters
- -Append
- -Confirm
- -Encoding
- -FilePath
- -Force
- -InputObject
- -LiteralPath
- -NoClobber
- -NoNewline
- -WhatIf
- -Width
- Inputs
- Outputs
- Notes
- Out-File
- Синтаксис
- Описание
- Примеры
- Пример 1. Отправка выходных данных и создание файла
- Пример 2. Предотвращение перезаписи существующего файла
- Пример 3. Отправка выходных данных в файл в формате ASCII
- Пример 4. Использование поставщика и отправка выходных данных в файл
- Пример 5. Установка ширины выходных данных файла для всей области
- Параметры
- -Append
- -Confirm
- -Encoding
- -FilePath
- -Force
- -InputObject
- -LiteralPath
- -NoClobber
- -NoNewline
- -WhatIf
- -Width
- Входные данные
- Выходные данные
- Примечания
Out-File
Sends output to a file.
Syntax
Description
The Out-File cmdlet sends output to a file. It implicitly uses PowerShell’s formatting system to write to the file. The file receives the same display representation as the terminal. This means that the output may not be ideal for programmatic processing unless all input objects are strings. When you need to specify parameters for the output, use Out-File rather than the redirection operator ( > ). For more information about redirection, see about_Redirection.
Examples
Example 1: Send output and create a file
This example shows how to send a list of the local computer’s processes to a file. If the file does not exist, Out-File creates the file in the specified path.
The Get-Process cmdlet gets the list of processes running on the local computer. The Process objects are sent down the pipeline to the Out-File cmdlet. Out-File uses the FilePath parameter and creates a file in the current directory named Process.txt. The Get-Content command gets content from the file and displays it in the PowerShell console.
Example 2: Prevent an existing file from being overwritten
This example prevents an existing file from being overwritten. By default, Out-File overwrites existing files.
The Get-Process cmdlet gets the list of processes running on the local computer. The Process objects are sent down the pipeline to the Out-File cmdlet. Out-File uses the FilePath parameter and attempts to write to a file in the current directory named Process.txt. The NoClobber parameter prevents the file from being overwritten and displays a message that the file already exists.
Example 3: Send output to a file in ASCII format
This example shows how to encode output with a specific encoding type.
The Get-Process cmdlet gets the list of processes running on the local computer. The Process objects are stored in the variable, $Procs . Out-File uses the FilePath parameter and creates a file in the current directory named Process.txt. The InputObject parameter passes the process objects in $Procs to the file Process.txt. The Encoding parameter converts the output to ASCII format. The Width parameter limits each line in the file to 50 characters so some data might be truncated.
Example 4: Use a provider and send output to a file
This example shows how to use the Out-File cmdlet when you are not in a FileSystem provider drive. Use the Get-PSProvider cmdlet to view the providers on your local computer. For more information, see about_Providers.
The Set-Location command uses the Path parameter to set the current location to the registry provider Alias: . The Get-Location cmdlet displays the complete path for Alias: . Get-ChildItem sends objects down the pipeline to the Out-File cmdlet. Out-File uses the FilePath parameter to specify the complete path and filename for the output, C:TestDirAliasNames.txt. The Get-Content cmdlet uses the Path parameter and displays the file’s content in the PowerShell console.
Example 5: Set file output width for entire scope
This example uses $PSDefaultParameterValues to set the Width parameter for all invocations of Out-File and the redirection operartors ( > and >> ) to 2000. This ensures that everywhere within the current scope that you output table formatted data to file, PowerShell uses a line width of 2000 instead of a line width determined by the PowerShell host’s console width.
For more information about $PSDefaultParameterValues , see about_Preference_Variables.
Parameters
-Append
Adds the output to the end of an existing file.
| Type: | SwitchParameter |
| Position: | Named |
| Default value: | None |
| Accept pipeline input: | False |
| Accept wildcard characters: | False |
-Confirm
Prompts you for confirmation before running the cmdlet.
| Type: | SwitchParameter |
| Aliases: | cf |
| Position: | Named |
| Default value: | False |
| Accept pipeline input: | False |
| Accept wildcard characters: | False |
-Encoding
Specifies the type of encoding for the target file. The default value is utf8NoBOM .
The acceptable values for this parameter are as follows:
- ascii : Uses the encoding for the ASCII (7-bit) character set.
- bigendianunicode : Encodes in UTF-16 format using the big-endian byte order.
- bigendianutf32 : Encodes in UTF-32 format using the big-endian byte order.
- oem : Uses the default encoding for MS-DOS and console programs.
- unicode : Encodes in UTF-16 format using the little-endian byte order.
- utf7 : Encodes in UTF-7 format.
- utf8 : Encodes in UTF-8 format.
- utf8BOM : Encodes in UTF-8 format with Byte Order Mark (BOM)
- utf8NoBOM : Encodes in UTF-8 format without Byte Order Mark (BOM)
- utf32 : Encodes in UTF-32 format.
Beginning with PowerShell 6.2, the Encoding parameter also allows numeric IDs of registered code pages (like -Encoding 1251 ) or string names of registered code pages (like -Encoding «windows-1251» ). For more information, see the .NET documentation for Encoding.CodePage.
UTF-7* is no longer recommended to use. As of PowerShell 7.1, a warning is written if you specify utf7 for the Encoding parameter.
| Type: | Encoding |
| Accepted values: | ASCII, BigEndianUnicode, BigEndianUTF32, OEM, Unicode, UTF7, UTF8, UTF8BOM, UTF8NoBOM, UTF32 |
| Position: | 1 |
| Default value: | UTF8NoBOM |
| Accept pipeline input: | False |
| Accept wildcard characters: | False |
-FilePath
Specifies the path to the output file.
| Type: | String |
| Aliases: | Path |
| Position: | 0 |
| Default value: | None |
| Accept pipeline input: | False |
| Accept wildcard characters: | False |
-Force
Overrides the read-only attribute and overwrites an existing read-only file. The Force parameter does not override security restrictions.
| Type: | SwitchParameter |
| Position: | Named |
| Default value: | None |
| Accept pipeline input: | False |
| Accept wildcard characters: | False |
-InputObject
Specifies the objects to be written to the file. Enter a variable that contains the objects or type a command or expression that gets the objects.
| Type: | PSObject |
| Position: | Named |
| Default value: | None |
| Accept pipeline input: | True |
| Accept wildcard characters: | False |
-LiteralPath
Specifies the path to the output file. The LiteralPath parameter is used exactly as it is typed. Wildcard characters are not accepted. If the path includes escape characters, enclose it in single quotation marks. Single quotation marks tell PowerShell not to interpret any characters as escape sequences. For more information, see about_Quoting_Rules.
| Type: | String |
| Aliases: | PSPath, LP |
| Position: | Named |
| Default value: | None |
| Accept pipeline input: | True |
| Accept wildcard characters: | False |
-NoClobber
NoClobber prevents an existing file from being overwritten and displays a message that the file already exists. By default, if a file exists in the specified path, Out-File overwrites the file without warning.
| Type: | SwitchParameter |
| Aliases: | NoOverwrite |
| Position: | Named |
| Default value: | None |
| Accept pipeline input: | False |
| Accept wildcard characters: | False |
-NoNewline
Specifies that the content written to the file does not end with a newline character. The string representations of the input objects are concatenated to form the output. No spaces or newlines are inserted between the output strings. No newline is added after the last output string.
| Type: | SwitchParameter |
| Position: | Named |
| Default value: | None |
| Accept pipeline input: | False |
| Accept wildcard characters: | False |
-WhatIf
Shows what would happen if the cmdlet runs. The cmdlet is not run.
| Type: | SwitchParameter |
| Aliases: | wi |
| Position: | Named |
| Default value: | False |
| Accept pipeline input: | False |
| Accept wildcard characters: | False |
-Width
Specifies the number of characters in each line of output. Any additional characters are truncated, not wrapped. If this parameter is not used, the width is determined by the characteristics of the host. The default for the PowerShell console is 80 characters. If you want to control the width for all invocations of Out-File as well as the redirection operators ( > and >> ), set $PSDefaultParameterValues[‘out-file:width’] = 2000 before using Out-File .
| Type: | Int32 |
| Position: | Named |
| Default value: | None |
| Accept pipeline input: | False |
| Accept wildcard characters: | False |
Inputs
You can pipe any object to this cmdlet.
Outputs
None
This cmdlet returns no output.
Notes
Input objects are automatically formatted as they would be in the terminal, but you can use a Format-* cmdlet to explicitly control the formatting of the output to the file. For example, Get-Date | Format-List | Out-File out.txt
To send a PowerShell command’s output to the Out-File cmdlet, use the pipeline. Alternatively, you can store data in a variable and use the InputObject parameter to pass data to the Out-File cmdlet.
Out-File saves data to a file but it does not produce any output objects to the pipeline.
Источник
Out-File
Отправляет выходные данные в файл.
Синтаксис
Описание
Командлет Out-File отправляет выходные данные в файл. Он неявно использует систему форматирования PowerShell для записи в файл. Файл получает то же отображаемое представление, что и терминал. Это означает, что выходные данные не могут быть идеальными для программной обработки, если только все входные объекты не являются строками. Если необходимо указать параметры для выходных данных, используйте Out-File вместо оператора перенаправления ( > ). Дополнительные сведения о перенаправлении см. в разделе about_Redirection.
Примеры
Пример 1. Отправка выходных данных и создание файла
В этом примере показано, как отправить список процессов локального компьютера в файл. Если файл не существует, Out-File создает файл по указанному пути.
Командлет Get-Process получает список процессов, выполняемых на локальном компьютере. Объекты Process отправляются по конвейеру в Out-File командлет . Out-File использует параметр FilePath и создает файл в текущем каталоге с именемProcess.txt. Команда Get-Content получает содержимое из файла и отображает его в консоли PowerShell.
Пример 2. Предотвращение перезаписи существующего файла
В этом примере предотвращается перезапись существующего файла. По умолчанию Out-File перезаписывает существующие файлы.
Командлет Get-Process получает список процессов, выполняемых на локальном компьютере. Объекты Process отправляются по конвейеру в Out-File командлет . Out-File использует параметр FilePath и пытается выполнить запись в файл в текущем каталоге с именемProcess.txt. Параметр NoClobber предотвращает перезапись файла и отображает сообщение о том, что файл уже существует.
Пример 3. Отправка выходных данных в файл в формате ASCII
В этом примере показано, как кодировать выходные данные с определенным типом кодирования.
Командлет Get-Process получает список процессов, выполняемых на локальном компьютере. Объекты Process хранятся в переменной $Procs . Out-File использует параметр FilePath и создает файл в текущем каталоге с именемProcess.txt. Параметр InputObject передает объекты процесса в $Procs файл Process.txt. Параметр Encoding преобразует выходные данные в формат ASCII . Параметр Width ограничивает каждую строку в файле 50 символами, поэтому некоторые данные могут быть усечены.
Пример 4. Использование поставщика и отправка выходных данных в файл
В этом примере показано, как использовать Out-File командлет, если вы не находитесь на диске поставщика файловой системы . Get-PSProvider Используйте командлет для просмотра поставщиков на локальном компьютере. Дополнительные сведения см. в разделе about_Providers.
Команда Set-Location использует параметр Path , чтобы задать текущее расположение для поставщика Alias: реестра . Командлет Get-Location отображает полный путь для Alias: . Get-ChildItem отправляет объекты вниз по конвейеру командлету Out-File . Out-File использует параметр FilePath , чтобы указать полный путь и имя файла для выходных данных ,C:TestDirAliasNames.txt. Командлет Get-Content использует параметр Path и отображает содержимое файла в консоли PowerShell.
Пример 5. Установка ширины выходных данных файла для всей области
В этом примере используется $PSDefaultParameterValues , чтобы задать Width для параметра для всех вызовов и операторов Out-File перенаправления ( > и >> ) значение 2000. Это гарантирует, что везде в текущей области, в которую вы выводите данные в формате таблицы в файл, PowerShell использует ширину линии 2000, а не ширину линии, определяемую шириной консоли узла PowerShell.
Дополнительные сведения о $PSDefaultParameterValues см. в разделе about_Preference_Variables.
Параметры
-Append
Добавляет выходные данные в конец существующего файла.
| Type: | SwitchParameter |
| Position: | Named |
| Default value: | None |
| Accept pipeline input: | False |
| Accept wildcard characters: | False |
-Confirm
Запрос подтверждения перед выполнением командлета.
| Type: | SwitchParameter |
| Aliases: | cf |
| Position: | Named |
| Default value: | False |
| Accept pipeline input: | False |
| Accept wildcard characters: | False |
-Encoding
Указывает тип кодировки для целевого файла. Значение по умолчанию — utf8NoBOM .
Ниже приведены допустимые значения для этого параметра.
- ascii : использует кодировку для 7-разрядной кодировки ASCII.
- bigendianunicode : кодирует в формате UTF-16 с использованием порядка байтов с большим байтом.
- bigendianutf32 : кодирует в формате UTF-32 с использованием порядка байтов с большим байтом.
- oem : использует кодировку по умолчанию для MS-DOS и консольных программ.
- unicode : кодирует в формате UTF-16 с использованием порядка байтов с маленьким порядком байтов.
- utf7 : кодирует в формате UTF-7.
- utf8 : кодирует в формате UTF-8.
- utf8BOM : кодирует в формате UTF-8 с меткой порядка байтов (BOM)
- utf8NoBOM : кодирует в формате UTF-8 без метки порядка байтов (BOM)
- utf32 : кодирует в формате UTF-32.
Начиная с PowerShell 6.2, параметр Encoding также разрешает числовые идентификаторы зарегистрированных кодовых страниц (например -Encoding 1251 , ) или строковые имена зарегистрированных кодовых страниц (например -Encoding «windows-1251» , ). Дополнительные сведения см. в документации по .NET для Encoding.CodePage.
UTF-7* больше не рекомендуется использовать. В PowerShell 7.1 выдается предупреждение, если вы указываете utf7 для параметра Encoding .
| Type: | Encoding |
| Accepted values: | ASCII, BigEndianUnicode, BigEndianUTF32, OEM, Unicode, UTF7, UTF8, UTF8BOM, UTF8NoBOM, UTF32 |
| Position: | 1 |
| Default value: | UTF8NoBOM |
| Accept pipeline input: | False |
| Accept wildcard characters: | False |
-FilePath
Указывает путь к выходному файлу.
| Type: | String |
| Aliases: | Path |
| Position: | 0 |
| Default value: | None |
| Accept pipeline input: | False |
| Accept wildcard characters: | False |
-Force
Переопределяет атрибут только для чтения и перезаписывает существующий файл, доступный только для чтения. Параметр Force не переопределяет ограничения безопасности.
| Type: | SwitchParameter |
| Position: | Named |
| Default value: | None |
| Accept pipeline input: | False |
| Accept wildcard characters: | False |
-InputObject
Указывает объекты, которые нужно записать в файл. Введите переменную, которая содержит объекты, или команду или выражение, которое возвращает объекты.
| Type: | PSObject |
| Position: | Named |
| Default value: | None |
| Accept pipeline input: | True |
| Accept wildcard characters: | False |
-LiteralPath
Указывает путь к выходному файлу. Параметр LiteralPath используется точно так же, как он типизированный. Подстановочные знаки не принимаются. Если путь содержит escape-символы, заключите его в одинарные кавычки. Одинарные кавычки предписывают PowerShell не интерпретировать какие-либо символы как escape-последовательности. Дополнительные сведения см. в разделе about_Quoting_Rules.
| Type: | String |
| Aliases: | PSPath, LP |
| Position: | Named |
| Default value: | None |
| Accept pipeline input: | True |
| Accept wildcard characters: | False |
-NoClobber
NoClobber предотвращает перезапись существующего файла и отображает сообщение о том, что файл уже существует. По умолчанию, если файл существует по указанному пути, Out-File он перезаписывается без предупреждения.
| Type: | SwitchParameter |
| Aliases: | NoOverwrite |
| Position: | Named |
| Default value: | None |
| Accept pipeline input: | False |
| Accept wildcard characters: | False |
-NoNewline
Указывает, что содержимое, записанное в файл, не заканчивается символом новой строки. Строковые представления входных объектов объединяются для формирования выходных данных. Пробелы или новые строки не вставляются между выходными строками. После последней выходной строки новая строка не добавляется.
| Type: | SwitchParameter |
| Position: | Named |
| Default value: | None |
| Accept pipeline input: | False |
| Accept wildcard characters: | False |
-WhatIf
Показывает, что произойдет при запуске командлета. Командлет не выполняется.
| Type: | SwitchParameter |
| Aliases: | wi |
| Position: | Named |
| Default value: | False |
| Accept pipeline input: | False |
| Accept wildcard characters: | False |
-Width
Указывает количество символов в каждой строке выходных данных. Все остальные знаки отсекаются, а не переносятся на следующую строку. Если этот параметр не используется, ширина определяется характеристиками узла. По умолчанию для консоли PowerShell используется 80 символов. Если вы хотите управлять шириной для всех вызовов , а также операторов Out-File перенаправления ( > и >> ), задайте $PSDefaultParameterValues[‘out-file:width’] = 2000 перед использованием Out-File .
| Type: | Int32 |
| Position: | Named |
| Default value: | None |
| Accept pipeline input: | False |
| Accept wildcard characters: | False |
Входные данные
В этот командлет можно передать любой объект.
Выходные данные
None
Этот командлет не возвращает выходные данные.
Примечания
Входные объекты автоматически форматируются в окне терминала, но можно использовать Format-* командлет для явного управления форматированием выходных данных в файле. Например Get-Date | Format-List | Out-File out.txt .
Чтобы отправить выходные данные команды PowerShell в Out-File командлет, используйте конвейер . Кроме того, можно сохранить данные в переменной и использовать параметр InputObject для передачи данных в Out-File командлет .
Out-File сохраняет данные в файл, но не создает выходные объекты в конвейере.
Источник
I’m trying to export a complete CSV to Excel by using Powershell. I stuck at a point where static column names are used. But this doesn’t work if my CSV has generic unknown header names.
Steps to reproduce
Open your PowerShell ISE and copy & paste the following standalone code. Run it with F5
«C:Windowssystem32WindowsPowerShellv1.0powershell_ise.exe»
Get-Process | Export-Csv -Path $env:tempprocess.csv -NoTypeInformation

$processes = Import-Csv -Path $env:tempprocess.csv
$Excel = New-Object -ComObject excel.application
$workbook = $Excel.workbooks.add()

$i = 1
foreach($process in $processes)
{
 $excel.cells.item($i,1) = $process.name
 $excel.cells.item($i,2) = $process.vm
 $i++
}
Remove-Item $env:tempprocess.csv
$Excel.visible = $true
What it does
- The script will export a list of all active processes as a CSV to your temp folder. This file is only for our example. It could be any CSV with any data
- It reads in the newly created CSV and saves it under the
$processesvariable - It creates a new and empty Excel workbook where we can write data
- It iterates through all rows (?) and writes all values from the
nameandvmcolumn to Excel
My questions
- What if I don’t know the column headers? (In our example
nameandvm). How do I address values where I don’t know their header names? - How do I count how many columns a CSV has? (after reading it with
Import-Csv)
I just want to write an entire CSV to Excel with Powershell
asked Jul 16, 2013 at 23:09
![]()
nixdanixda
2,59711 gold badges48 silver badges82 bronze badges
Ups, I entirely forgot this question. In the meantime I got a solution.
This Powershell script converts a CSV to XLSX in the background
Gimmicks are
- Preserves all CSV values as plain text like
=B1+B2or0000001.
You don’t see#Nameor anything like that. No autoformating is done. - Automatically chooses the right delimiter (comma or semicolon) according to your regional setting
- Autofit columns
PowerShell Code
### Set input and output path
$inputCSV = "C:somefolderinput.csv"
$outputXLSX = "C:somefolderoutput.xlsx"

### Create a new Excel Workbook with one empty sheet
$excel = New-Object -ComObject excel.application
$workbook = $excel.Workbooks.Add(1)
$worksheet = $workbook.worksheets.Item(1)

### Build the QueryTables.Add command
### QueryTables does the same as when clicking "Data » From Text" in Excel
$TxtConnector = ("TEXT;" + $inputCSV)
$Connector = $worksheet.QueryTables.add($TxtConnector,$worksheet.Range("A1"))
$query = $worksheet.QueryTables.item($Connector.name)

### Set the delimiter (, or ;) according to your regional settings
$query.TextFileOtherDelimiter = $Excel.Application.International(5)

### Set the format to delimited and text for every column
### A trick to create an array of 2s is used with the preceding comma
$query.TextFileParseType  = 1
$query.TextFileColumnDataTypes = ,2 * $worksheet.Cells.Columns.Count
$query.AdjustColumnWidth = 1

### Execute & delete the import query
$query.Refresh()
$query.Delete()

### Save & close the Workbook as XLSX. Change the output extension for Excel 2003
$Workbook.SaveAs($outputXLSX,51)
$excel.Quit()
![]()
answered Jan 16, 2014 at 18:01
![]()
nixdanixda
2,59711 gold badges48 silver badges82 bronze badges
7
I am using excelcnv.exe to convert csv into xlsx and that seemed to work properly.
You will have to change the directory to where your excelcnv is. If 32 bit, it goes to Program Files (x86)
Start-Process -FilePath 'C:Program FilesMicrosoft OfficerootOffice16excelcnv.exe' -ArgumentList "-nme -oice ""$xlsFilePath"" ""$xlsToxlsxPath"""
answered May 16, 2019 at 0:06
![]()
WinstonKyuWinstonKyu
2012 silver badges9 bronze badges
4
Why would you bother? Load your CSV into Excel like this:
$csv = Join-Path $env:TEMP "process.csv"
$xls = Join-Path $env:TEMP "process.xlsx"

$xl = New-Object -COM "Excel.Application"
$xl.Visible = $true

$wb = $xl.Workbooks.OpenText($csv)

$wb.SaveAs($xls, 51)
You just need to make sure that the CSV export uses the delimiter defined in your regional settings. Override with -Delimiter if need be.
Edit: A more general solution that should preserve the values from the CSV as plain text. Code for iterating over the CSV columns taken from here.
$csv = Join-Path $env:TEMP "input.csv"
$xls = Join-Path $env:TEMP "output.xlsx"

$xl = New-Object -COM "Excel.Application"
$xl.Visible = $true

$wb = $xl.Workbooks.Add()
$ws = $wb.Sheets.Item(1)

$ws.Cells.NumberFormat = "@"

$i = 1
Import-Csv $csv | ForEach-Object {
  $j = 1
  foreach ($prop in $_.PSObject.Properties) {
    if ($i -eq 1) {
      $ws.Cells.Item($i, $j++).Value = $prop.Name
    } else {
      $ws.Cells.Item($i, $j++).Value = $prop.Value
    }
  }
  $i++
}

$wb.SaveAs($xls, 51)
$wb.Close()

$xl.Quit()
[System.Runtime.Interopservices.Marshal]::ReleaseComObject($xl)
Obviously this second approach won’t perform too well, because it’s processing each cell individually.
answered Jul 16, 2013 at 23:49
![]()
Ansgar WiechersAnsgar Wiechers
190k23 gold badges244 silver badges319 bronze badges
8
This topic really helped me, so I’d like to share my improvements.
All credits go to the nixda, this is based on his answer.
For those who need to convert multiple csv’s in a folder, just modify the directory. Outputfilenames will be identical to input, just with another extension.
Take care of the cleanup in the end, if you like to keep the original csv’s you might not want to remove these.
Can be easily modifed to save the xlsx in another directory.
$workingdir = "C:data*.csv"
$csv = dir -path $workingdir
foreach($inputCSV in $csv){
$outputXLSX = $inputCSV.DirectoryName + "" + $inputCSV.Basename + ".xlsx"
### Create a new Excel Workbook with one empty sheet
$excel = New-Object -ComObject excel.application
$excel.DisplayAlerts = $False
$workbook = $excel.Workbooks.Add(1)
$worksheet = $workbook.worksheets.Item(1)

### Build the QueryTables.Add command
### QueryTables does the same as when clicking "Data » From Text" in Excel
$TxtConnector = ("TEXT;" + $inputCSV)
$Connector = $worksheet.QueryTables.add($TxtConnector,$worksheet.Range("A1"))
$query = $worksheet.QueryTables.item($Connector.name)

### Set the delimiter (, or ;) according to your regional settings
### $Excel.Application.International(3) = ,
### $Excel.Application.International(5) = ;
$query.TextFileOtherDelimiter = $Excel.Application.International(5)

### Set the format to delimited and text for every column
### A trick to create an array of 2s is used with the preceding comma
$query.TextFileParseType  = 1
$query.TextFileColumnDataTypes = ,2 * $worksheet.Cells.Columns.Count
$query.AdjustColumnWidth = 1

### Execute & delete the import query
$query.Refresh()
$query.Delete()

### Save & close the Workbook as XLSX. Change the output extension for Excel 2003
$Workbook.SaveAs($outputXLSX,51)
$excel.Quit()
}
## To exclude an item, use the '-exclude' parameter (wildcards if needed)
remove-item -path $workingdir -exclude *Crab4dq.csv
answered Aug 30, 2016 at 12:24
![]()
obiwankobanobiwankoban
1432 silver badges6 bronze badges
3
If you want to convert CSV to Excel without Excel being installed, you can use the great .NET library EPPlus (under LGPL license) to create and modify Excel Sheets and also convert CSV to Excel really fast!
Preparation
- Download the latest stable EPPlus version
- Extract EPPlus to your preferred location (e.g. to
$HOMEDocumentsWindowsPowerShellModulesEPPlus) - Right Click EPPlus.dll, select Properties and at the bottom of the General Tab click «Unblock» to allow loading of this dll. If you don’t have the rights to do this, try
[Reflection.Assembly]::UnsafeLoadFrom($DLLPath) | Out-Null
Detailed Powershell Commands to import CSV to Excel
# Create temporary CSV and Excel file names
$FileNameCSV = "$HOMEDownloadstest.csv"
$FileNameExcel = "$HOMEDownloadstest.xlsx"

# Create CSV File (with first line containing type information and empty last line)
Get-Process | Export-Csv -Delimiter ';' -Encoding UTF8 -Path $FileNameCSV

# Load EPPlus
$DLLPath = "$HOMEDocumentsWindowsPowerShellModulesEPPlusEPPlus.dll"
[Reflection.Assembly]::LoadFile($DLLPath) | Out-Null

# Set CSV Format
$Format = New-object -TypeName OfficeOpenXml.ExcelTextFormat
$Format.Delimiter = ";"
# use Text Qualifier if your CSV entries are quoted, e.g. "Cell1","Cell2"
$Format.TextQualifier = '"'
$Format.Encoding = [System.Text.Encoding]::UTF8
$Format.SkipLinesBeginning = '1'
$Format.SkipLinesEnd = '1'

# Set Preferred Table Style
$TableStyle = [OfficeOpenXml.Table.TableStyles]::Medium1

# Create Excel File
$ExcelPackage = New-Object OfficeOpenXml.ExcelPackage
$Worksheet = $ExcelPackage.Workbook.Worksheets.Add("FromCSV")

# Load CSV File with first row as heads using a table style
$null=$Worksheet.Cells.LoadFromText((Get-Item $FileNameCSV),$Format,$TableStyle,$true)

# Load CSV File without table style
#$null=$Worksheet.Cells.LoadFromText($file,$format)

# Fit Column Size to Size of Content
$Worksheet.Cells[$Worksheet.Dimension.Address].AutoFitColumns()

# Save Excel File
$ExcelPackage.SaveAs($FileNameExcel)

Write-Host "CSV File $FileNameCSV converted to Excel file $FileNameExcel"
answered Dec 29, 2014 at 15:37
![]()
Florian FeldhausFlorian Feldhaus
5,4322 gold badges39 silver badges45 bronze badges
1
This is a slight variation that worked better for me.
$csv = Join-Path $env:TEMP "input.csv"
$xls = Join-Path $env:TEMP "output.xlsx"

$xl = new-object -comobject excel.application
$xl.visible = $false
$Workbook = $xl.workbooks.open($CSV)
$Worksheets = $Workbooks.worksheets

$Workbook.SaveAs($XLS,1)
$Workbook.Saved = $True

$xl.Quit()
answered Jan 16, 2014 at 16:04
![]()
mackmack
2,6238 gold badges39 silver badges66 bronze badges
2
I had some problem getting the other examples to work.
EPPlus and other libraries produces OpenDocument Xml format, which is not the same as you get when you save from Excel as xlsx.
macks example with open CSV and just re-saving didn’t work, I never managed to get the ‘,’ delimiter to be used correctly.
Ansgar Wiechers example has some slight error which I found the answer for in the commencts.
Anyway, this is a complete working example. Save this in a File CsvToExcel.ps1
param (
[Parameter(Mandatory=$true)][string]$inputfile,
[Parameter(Mandatory=$true)][string]$outputfile
)

$excel = New-Object -ComObject Excel.Application
$excel.Visible = $false

$wb = $excel.Workbooks.Add()
$ws = $wb.Sheets.Item(1)

$ws.Cells.NumberFormat = "@"

write-output "Opening $inputfile"

$i = 1
Import-Csv $inputfile | Foreach-Object {
    $j = 1
    foreach ($prop in $_.PSObject.Properties)
    {
        if ($i -eq 1) {
            $ws.Cells.Item($i, $j) = $prop.Name
        } else {
            $ws.Cells.Item($i, $j) = $prop.Value
        }
        $j++
    }
    $i++
}

$wb.SaveAs($outputfile,51)
$wb.Close()
$excel.Quit()
write-output "Success"
Execute with:
.CsvToExcel.ps1 -inputfile "C:TempXdata.csv" -outputfile "C:TempXdata.xlsx"
answered May 22, 2016 at 14:04
![]()
Gil RoittoGil Roitto
3252 silver badges8 bronze badges
I found this while passing and looking for answers on how to compile a set of csvs into a single excel doc with the worksheets (tabs) named after the csv files. It is a nice function. Sadly, I cannot run them on my network  so i do not know how well it works.
Function Release-Ref ($ref)
{
    ([System.Runtime.InteropServices.Marshal]::ReleaseComObject(
    [System.__ComObject]$ref) -gt 0)
    [System.GC]::Collect()
    [System.GC]::WaitForPendingFinalizers()
    }
    Function ConvertCSV-ToExcel
    {
    <#
    .SYNOPSIS
    Converts     one or more CSV files into an excel file.

    .DESCRIPTION
    Converts one or more CSV files into an excel file. Each CSV file is imported into its own worksheet with the name of the
    file being the name of the worksheet.

    .PARAMETER inputfile
    Name of the CSV file being converted

    .PARAMETER output
    Name of the converted excel file

    .EXAMPLE
    Get-ChildItem *.csv | ConvertCSV-ToExcel -output ‘report.xlsx’

    .EXAMPLE
    ConvertCSV-ToExcel -inputfile ‘file.csv’ -output ‘report.xlsx’

    .EXAMPLE
    ConvertCSV-ToExcel -inputfile @(“test1.csv”,”test2.csv”) -output ‘report.xlsx’

    .NOTES
    Author:     Boe Prox
    Date Created: 01SEPT210
    Last Modified:

    #>

    #Requires -version 2.0
    [CmdletBinding(
    SupportsShouldProcess = $True,
    ConfirmImpact = ‘low’,
    DefaultParameterSetName = ‘file’
    )]
    Param (
    [Parameter(
    ValueFromPipeline=$True,
    Position=0,
    Mandatory=$True,
    HelpMessage=”Name of CSV/s to import”)]
    [ValidateNotNullOrEmpty()]
    [array]$inputfile,
    [Parameter(
    ValueFromPipeline=$False,
    Position=1,
    Mandatory=$True,
    HelpMessage=”Name of excel file output”)]
    [ValidateNotNullOrEmpty()]
    [string]$output
    )

    Begin {
    #Configure regular expression to match full path of each file
    [regex]$regex = “^w:\”

    #Find the number of CSVs being imported
    $count = ($inputfile.count -1)

    #Create Excel Com Object
    $excel = new-object -com excel.application

    #Disable alerts
    $excel.DisplayAlerts = $False

    #Show Excel application
    $excel.V    isible = $False

    #Add workbook
    $workbook = $excel.workbooks.Add()

    #Remove other worksheets
    $workbook.worksheets.Item(2).delete()
    #After the first worksheet is removed,the next one takes its place
    $workbook.worksheets.Item(2).delete()

    #Define initial worksheet number
    $i = 1
    }

    Process {
    ForEach ($input in $inputfile) {
    #If more than one file, create another worksheet for each file
    If ($i -gt 1) {
    $workbook.worksheets.Add() | Out-Null
    }
    #Use the first worksheet in the workbook (also the newest created worksheet is always 1)
    $worksheet = $workbook.worksheets.Item(1)
    #Add name of CSV as worksheet name
    $worksheet.name = “$((GCI $input).basename)”

    #Open the CSV file in Excel, must be converted into complete path if no already done
    If ($regex.ismatch($input)) {
    $tempcsv = $excel.Workbooks.Open($input)
    }
    ElseIf ($regex.ismatch(“$($input.fullname)”)) {
    $tempcsv = $excel.Workbooks.Open(“$($input.fullname)”)
    }
    Else {
    $tempcsv = $excel.Workbooks.Open(“$($pwd)$input”)
    }
    $tempsheet = $tempcsv.Worksheets.Item(1)
    #Copy contents of the CSV file
    $tempSheet.UsedRange.Copy() | Out-Null
    #Paste contents of CSV into existing workbook
    $worksheet.Paste()

    #Close temp workbook
    $tempcsv.close()

    #Select all used cells
    $range = $worksheet.UsedRange

    #Autofit the columns
    $range.EntireColumn.Autofit() | out-null
    $i++
    }
    }

    End {
    #Save spreadsheet
    $workbook.saveas(“$pwd$output”)

    Write-Host -Fore Green “File saved to $pwd$output”

    #Close Excel
    $excel.quit()

    #Release processes for Excel
    $a = Release-Ref($range)
    }
}
![]()
answered Oct 14, 2020 at 13:44
![]()
1
I have found the custom lists in a particular site and I want to print the names to Excel. How do I do it?
![]()
asked Jun 16, 2014 at 11:27
![]()
2
Use the following Command:
$spWeb = Get-SPWeb SiteUrl
$spWeb.Lists | select Title | Export-CSV c:Lists.csv
answered Jun 16, 2014 at 11:39
![]()
AanchalAanchal
7,8651 gold badge14 silver badges20 bronze badges
You can pipe the output from your command to an .csv file:
FileToExecute.ps1 | Out-File C:output.csv
Make sure you in your script file uses Write-Outputand not Write-Host when printing your output.
answered Jun 16, 2014 at 11:31
![]()
Robert LindgrenRobert Lindgren
24.5k12 gold badges52 silver badges79 bronze badges
0
You can export any output of the powershell to a CSV. This is a built in function.
Export-CSV
answered Jun 16, 2014 at 11:31
![]()
Stefan BauerStefan Bauer
2,74615 silver badges19 bronze badges
Try if this works:
Install-Module importexcel
If it works, then after that you can use export-excel command.
![]()
Ganesh Sanap
37.1k19 gold badges30 silver badges54 bronze badges
answered Jan 22, 2021 at 9:56
![]()
You wanna use the Export-Csv parameter. I also found this easy example.
SharePoint list to .csv file
Export-Csv
$MyWeb = WebUrl
$MyList = MyWeb.Lists["ListName"]
$MyItems = $MyList.Items
$MyItems | Select Fields.. | Export-Csv -path C:exampleexcel.csv
$MyWeb.Dispose()
answered Jun 16, 2014 at 11:34
![]()
ChristofferChristoffer
9,5712 gold badges35 silver badges53 bronze badges
Using the Export-CSV as usual way we can export the SharePoint list items to a csv file, and using the below code we can convert the particular csv file to excel file:
### Set input and output path
$inputCSV = "C:somefolderinput.csv"
$outputXLSX = "C:somefolderoutput.xlsx"

### Create a new Excel Workbook with one empty sheet
$excel = New-Object -ComObject excel.application
$workbook = $excel.Workbooks.Add(1)
$worksheet = $workbook.worksheets.Item(1)

### Build the QueryTables.Add command
### QueryTables does the same as when clicking "Data » From Text" in Excel
$TxtConnector = ("TEXT;" + $inputCSV)
$Connector = $worksheet.QueryTables.add($TxtConnector,$worksheet.Range("A1"))
$query = $worksheet.QueryTables.item($Connector.name)

### Set the delimiter (, or ;) according to your regional settings
$query.TextFileOtherDelimiter = $Excel.Application.International(5)

### Set the format to delimited and text for every column
### A trick to create an array of 2s is used with the preceding comma
$query.TextFileParseType  = 1
$query.TextFileColumnDataTypes = ,2 * $worksheet.Cells.Columns.Count
$query.AdjustColumnWidth = 1

### Execute & delete the import query
$query.Refresh()
$query.Delete()

### Save & close the Workbook as XLSX. Change the output extension for Excel 2003
$Workbook.SaveAs($outputXLSX,51)
$excel.Quit()
Reference URL:
How to export a CSV to Excel using Powershell
Note:
- There is no direct inbuilt function to export in excel using PowerShell as like Export-CSV, so first we need to export to csv file, then we have to convert that file to excel.
answered Jan 14, 2020 at 18:19
![]()
SP 2022SP 2022
3,9432 gold badges10 silver badges25 bronze badges
Saving data to files is a very common task when working with PowerShell. There may be more options than you realize. Let’s start with the basics and work into the more advanced options.
Index
- Index
- Working with file paths
- Test-Path
- Split-Path
- Join-Path
- Resolve-Path
- Saving and reading data
- Basic redirection with Out-File
- Save text data with Add-Content
- Import data with Get-Content -Raw
- Save column based data with Export-CSV
- -NoTypeInformation
- Save rich object data with Export-CliXml
- Save structured data with ConvertTo-Json
- Other options and details
- Get-Content -ReadCount
- Faster reads with System.IO.File
- Writes with System.IO.StreamWriter
- Saving XML
- Quick note on encoding
- Wrapping up
Working with file paths
We are going to start this off by showing you the commands for working with file paths.
Test-Path
Test-Path is one of the more well known commands when you start working with files. It allows you to test for a folder or a file before you try to use it.
If( Test-Path -Path $Path )
{
    Do-Stuff -Path $Path
}
Split-Path
Split-Path will take a full path to a file and gives you the parent folder path.
PS:> Split-Path -Path 'c:userskevin.marquettedocuments'
c:userskevin.marquette
If you need the file or folder at the end of the path, you can use the -Leaf argument to get it.
PS:> Split-Path -Path 'c:userskevin.marquettedocuments' -Leaf
documents
Join-Path
Join-Path can join folder and file paths together.
PS:> Join-Path -Path $env:temp -ChildPath testing
C:Userskevin.marqueteAppDataLocalTemptesting
I use this anytime that I am joining locations that are stored in variables. You don’t have to worry about how to handle the backslash becuse this takes care of it for you. If your variables both have backslashes in them, it sorts that out too.
Resolve-Path
Resolve-Path will give you the full path to a location. The important thing is that it will expand wildcard lookups for you. You will get an array of values if there are more than one matche.
Resolve-Path -Path 'c:users*documents'

Path
----
C:userskevin.marquetteDocuments
C:usersPublicDocuments
That will enumerate all the local users document folders.
I commonly use this on any path value that I get as user input into my functions that accept multiple files. I find it as an easy way to add wildcard support to parameters.
Saving and reading data
Now that we have all those helper CmdLets out of the way, we can talk about the options we have for saving and reading data.
I use the $Path and $Data variables to represent your file path and your data in these examples. I do this to keep the samples cleaner and it better reflects how you would use them in a script.
Basic redirection with Out-File
PowerShell was introduced with Out-File as the way to save data to files. Here is what the help on that looks like.
Get-Help Out-File
<#
SYNOPSIS
    Sends output to a file.
DESCRIPTION
    The Out-File cmdlet sends output to a file. You can use this cmdlet instead of the redirection operator (>) when you need to use its parameters.
#>
For anyone coming from batch file, Out-File is the basic replacement for the redirection operator >. Here is a sample of how to use it.
'This is some text' | Out-File -FilePath $Path
It is a basic command and we have had it for a long time. Here is a second example that shows some of the limitations.
 Get-ChildItem |
     Select-Object Name, Length, LastWriteTime, Fullname |
     Out-File -FilePath $Path
The resulting file looks like this when executed from my temp folder:
Name
Length  LastWriteTime          FullName
----
------  -------------          --------
3A1BFD5A-88A6-487E-A790-93C661B9B904                 9/6/2016 10:38:54 AM   C:Userskevin.marqu...
acrord32_sbx                                         9/4/2016 10:18:18 AM   C:Userskevin.marqu...
TCD789A.tmp                                          9/8/2016 12:27:29 AM   C:Userskevin.marqu...
You can see that the last column of values are cut short. Out-File is processing objects for the console but redirects the output to a file. All the issues you have getting something to format in the console will show up in your output file. The good news is that we have lots of other options for this that I will cover below.
Save text data with Add-Content
I personally don’t use Out-File and prefer to use the Add-Content and Set-Content commands. There is also a Get-Content command that goes with them to read file data.
$data | Add-Content -Path $Path
Get-Content -Path $Path
Add-Content will create and append to files. Set-Content will create and overwrite files.
These are good all-purpose commands as long as performance is no a critical factor in your script. They are great for individual or small content requests. For large sets of data where performance matters more than readability, we can turn to the .Net framework. I will come back to this one.
Import data with Get-Content -Raw
Get-Content is the goto command for reading data. By default, this command will read each line of the file. You end up with an array of strings. This also passes each one down the pipe nicely.
The -Raw parameter will bring the entire contents in as a multi-line string. This also performs faster because fewer objects are getting created.
Get-Content -Path $Path -Raw
Save column based data with Export-CSV
If you ever need to save data for Excel, Export-CSV is your starting point. This is good for storing an object or basic structured data that can be imported later. The CSV format is comma separated values in a text file. Excel is often the default viewer for CSV files.
If you want to import Excel data in PowerShell, save it as a CSV and then you can use Import-CSV. There are other ways to do it but this is by far the easiest.
$data | Export-CSV -Path $Path
Import-CSV -Path $Path
-NoTypeInformation
Export-CSV will insert type information into the first line of the CSV. If you don’t want that, then you can specify the -NoTypeInformation parameter.
$data | Export-CSV -Path $Path -NoTypeInformation
Save rich object data with Export-CliXml
The Export-CliXml command is used to save full objects to a file and then import them again with Import-CliXml. This is for objects with nested values or complex datatypes. The raw data will be a verbose serialized object in XML. The nice thing is that you can save a an object to the file and when you import it, you will get that object back.
Get-Date | Export-Clixml date.clicml
$date = Import-Clixml .date.clicml
$date.GetType()

IsPublic IsSerial Name                                     BaseType
-------- -------- ----                                     --------
True     True     DateTime                                 System.ValueType
This serialized format is not intened for be viewd or edited directly. Here is what the date.clixml file looks like:
<Objs Version="1.1.0.1" xmlns="http://schemas.microsoft.com/powershell/2004/04">
    <Obj RefId="0">
        <DT>2017-03-17T00:00:00.3522798-07:00</DT>
        <MS>
            <Obj N="DisplayHint" RefId="1">
                <TN RefId="0">
                    <T>Microsoft.PowerShell.Commands.DisplayHintType</T>
                    <T>System.Enum</T>
                    <T>System.ValueType</T>
                    <T>System.Object</T>
                </TN>
                <ToString>DateTime</ToString>
                <I32>2</I32>
            </Obj>
        </MS>
    </Obj>
</Objs>
Don’t worry about trying to understand it. You are not intended to be digging into it.
This is another command that I don’t find myself using often. If I have a nested or hierarchical dataset, then JSON is my goto way to save that information.
Save structured data with ConvertTo-Json
When my data is nested and I may want to edit it by hand, then I use ConvertTo-Json to convert it to JSON. ConvertFrom-Json will convert it back into an object. These commands do not save or read from files on their own. You will have to turn to Get-Content and Set-Content for that.
$Data = @{
    Address = @{
        Street = '123 Elm'
        State  = 'California'
    }
}

$Data | ConvertTo-Json | Add-Content  -Path $Path
$NewData = Get-Content -Path $Path -Raw | ConvertFrom-Json
$NewData.Address.State
There is one important thing to note on this example. I used a [hashtable] for my $Data but ConvertFrom-Json returns a [PSCustomObject] instead. This may not be a problem but there is not an easy fix for it.
Also note the use of the Get-Content -Raw in this example. ConvertFrom-Json expects one string per object.
Here is the contents of the JSON file from above:
{
    "Address":  {
        "State":  "California",
        "Street":  "123 Elm"
    }
}
You will notice that this is similar the original hashtable. This is why JSON is a popular format. It is easy to read, understand and edit if needed. I use this all the time for configuration files in my own projects.
Other options and details
All of those CmdLets are easy to work with. We also have some other parameters and access to .Net for more options.
Get-Content -ReadCount
The -ReadCount parameter on Get-Content defines how many lines that Get-Content will read at once. There are some situations where this can improve the memory overhead of working with larger files.
This generally includes piping the results to something that can process them as they come in and don’t need to keep the input data.
$dataset = @{}
Get-Content -Path $path -ReadCount 15 |
    Where-Object {$PSItem -match 'error'} |
    ForEach-Object {$dataset[$PSItem] += 1}
This example will count how many times each error shows up in the $Path. This pipeline can process each line as it is read from the file.
You may not have code that leverages this often but this is a good option to be aware of.
Faster reads with System.IO.File
That ease of use that the CmdLets provide can come at a small cost in raw performance. It is small enough that you will not notice it for most of the scripting that you do. When that day comes that you need more speed, you will find yourself turning to the native .Net commands. Thankfully they are easy to work with.
[System.IO.File]::ReadAllLines( ( Resolve-Path $Path ) )
This is just like Get-Content -Path $Path in that you will end up with a collection full of strings. You can also read the data as a multi-line string.
[System.IO.File]::ReadAllText( ( Resolve-Path $Path ) )
The $Path must be the full path or it will try to save the file to your C:WindowsSystem32 folder. This is why I use Resolve-Path in this example.
Here is an example Cmdlet that I built around these .Net calls: Import-Content
Writes with System.IO.StreamWriter
On that same note, we can also use System.IO.StreamWriter to save data. It is not always faster than the native Cmdlets. This one clearly falls into the rule that if performance matters, test it.
System.IO.StreamWriter is also a little bit more complicated than the native CmdLets.
try
{
    $stream = [System.IO.StreamWriter]::new( $Path )
    $data | ForEach-Object{ $stream.WriteLine( $_ ) }
}
finally
{
    $stream.close()
}
We have to open a StreamWriter to a $path. Then we walk the data and save each line to the StreamWriter. Once we are done, we close the file. This one also requires a full path.
I had to add error handling around this one to make sure the file was closed when we were done. You may want to add a catch in there for custom error handling.
This should work very well for string data. If you have issues, you may want to call the .ToString() method on the object you are writing to the stream. If you need more flexibility, just know that you have the whole .Net framework available at this point.
Saving XML
If you are working with XML files, you can call the Save() method on the XML object.
$Xml = [xml]"<r><data/></r>"
$Path = (join-path $pwd 'File.xml')
$Xml.Save($Path)
Just like the other .Net methods in System.IO, you need to specify the full path to the file. I use $pwd in this example because it is an automatic variable that contains the result of Get-Location (local path).
Quick note on encoding
The file encoding is the way the data is transformed into binary when saved to disk. Most of the time it just works unless you do a lot of cross platform work.
If you are running into issues with encoding, most of the CmdLets support specifying the encoding. If you want to default the encoding for each command, you can use the $PSDefaultParameterValues hashtable like this:
# Create default values for any parameter
# $PSDefaultParameterValues["Function:Parameter"]  = $value

# Set the default file encoding
$PSDefaultParameterValues["Out-File:Encoding"]    = "UTF8"
$PSDefaultParameterValues["Set-Content:Encoding"] = "UTF8"
$PSDefaultParameterValues["Add-Content:Encoding"] = "UTF8"
$PSDefaultParameterValues["Export-CSV:Encoding"]  = "UTF8"
You can find more on how to use PSDefaultParameterValues in my post on Hashtables.
Wrapping up
Working with files is such a common task that you should take the time to get to know these options. Hopefully you saw something new and can put this to use in your own scripts.
Here are two functions that implements the ideas that we talked about