
PLX-DAQ
Parallax Data Acquisition tool (PLX-DAQ) software add-in for Microsoft Excel acquires up to 26 channels of data from any Parallax microcontrollers and drops the numbers into columns as they arrive. PLX-DAQ provides easy spreadsheet analysis of data collected in the field, laboratory analysis of sensors and real-time equipment monitoring.
Download Version & Details
Release 2B
All the features of the original. Requires Windows 10 and current Excel; no .exe installer. Includes Help file in PDF format, and the addition of a Propeller BlocklyProp example program for the LaserPING distance sensor.
PLX-DAQ
PLX-DAQ is a Parallax microcontroller data acquisition add-on tool for Microsoft Excel. Any of our microcontrollers connected to any sensor and the serial port of a PC can now send data directly into Excel. PLX-DAQ has the following features:
- Plot or graph data as it arrives in real-time using Microsoft Excel
- Record up to 26 columns of data
- Mark data with real-time (hh:mm:ss) or seconds since reset
- Read/Write any cell on a worksheet
- Read/Set any of 4 checkboxes on control the interface
- Example code for the BS2, SX (SX/B) and Propeller available
- Baud rates up to 128K
- Supports Com1-15
System Requirements
- Microsoft Windows 98
- Microsoft Office/Excel 2000 to 2003
- May not work with newer software; no longer supported
Attached Files

Сегодняшняя статья будет небольшим продолжением старой наработки – термометра, который измеряет температуру в помещении и на улице. На примере температуры я хочу показать, как можно выводить данные не только на индикаторах и дисплеях, но и на мониторе компьютера. Чтобы вывод данных был интересней, можно построить график или диаграмму.
В среде разработки arduino ide уже есть готовый интерфейс, для приема данных с микроконтроллера – монитор порта. Чтобы передать данные с МК достаточно просто вывести информацию с помощью набора функций Serial. Они служат для передачи данных через порты ввода/вывода RX и TX или USB. Подобно монитору порта из среды arduino ide, получать данные можно и с помощью своих десктопных программ или скриптов, которые будут читать данные с com-портов.
Но в этой статье мы не будем писать обработку портов, а воспользуемся уже готовым макросом для excel – PLX DAQ, который умеет считывать данные с порта и выводить их в ячейки таблицы. Скачать дополнение можно тут: скачать. А почитать подробнее о макросе можно тут: ссылка.
Настройка PLX DAQ для excel
После установки дополнения PLX DAQ, на рабочем столе появится ярлык «PLX-DAQ Spreadsheet». Нужно его запустить, тогда откроется лист excel с уже запущенным макросом. Для связи с arduino достаточно указать, какой нужно слушать com-порт, и на какой скорости происходит передача данных. Скорость передачи должна соответствовать той, что указана в arduino: Serial.begin(9600);
После настройки порта и скорости передачи данных нужно нажать кнопку «connect» и сразу же начнется получение и вывод данных из arduino. Пример работы можно посмотреть на скриншоте ниже.

Что использовалось в проекте:
- Arduino (я использовал arduino uno, но можно любую другую). Покупал тут: arduino uno
Тестовый скетч для передачи данных в Excel из arduino
Ниже приведен скетч с подробными комментариями, а также его можно скачать себе на компьютер: скачать.
int row_excel = 0; // количество строк
int test = 123; // тестовая переменная, которая будет передана excel
int test_2 = 456; // вторая тестовая переменная, которая будет передана excel

void setup(){
  Serial.begin(9600); // скорость передачи данных
  Serial.println("CLEARDATA"); // очистка листа excel
  Serial.println("LABEL,Time,Test 1, Test 2, Num Rows"); // заголовки столбцов
}

void loop(){
  row_excel++; // номер строки + 1
  Serial.print("DATA,TIME,"); // запись в excel текущей даты и времени
  Serial.print(test);
  Serial.print(",");
  Serial.print(test_2);
  Serial.print(",");
  Serial.println(row_excel);

  // если строк больше 50, то начинаем заполнять строки по новой
  if (row_excel > 50){
    row_excel = 0;
    Serial.println("ROW,SET,2");
  }
  delay(1000); // задержка
}
Послесловие
И в заключение приведу короткий ролик, который показывает, как в экселе выводятся данные, полученные от термометра. И на их основе строится график с двумя переменными – для комнатной и уличной температуры:
Инженеры и разработчики всегда полагаются на собранные данные для проектирования или улучшения системы. Запись данных и их анализ является обычной практикой в большинстве отраслей промышленности и в этой статье мы рассмотрим проект регистратора данных на основе платы Arduino (Arduino Data Logger), в котором мы будем регистрировать (записывать) данные через определенные интервалы времени. В этом проекте плата Arduino будет считывать определенные данные (температура, влажность, дата и время) и сохранять их на SD-карте и компьютере одновременно.

Сохраненные данные затем можно будет легко открыть в листе Excel для дальнейшего анализа. Для получения информации о дате и времени мы будем использовать хорошо известный модуль часов реального времени DS3231 RTC (RTC — англ. Real Time Clock), а для измерения температуры и влажности – датчик DHT11.
В конце работы над проектом вы узнаете:
1. Как записать на SD-карту данные даты и времени, а также значения с датчиков.
2. Как записать данные непосредственно в лист Excel на компьютер с помощью последовательной связи.
Необходимые компоненты
- Плата Arduino Uno (купить на AliExpress) (или любая другая).
- Датчик температуры и влажности DHT11 (купить на AliExpress).
- Модуль часов реального времени DS3231 RTC (купить на AliExpress).
- Модуль для чтения SD карт (купить на AliExpress).
- SD карта.
- Макетная плата.
- Соединительные провода.
- Компьютер/ноутбук.

Работа схемы
Схема устройства представлена на следующем рисунке.
 Как можно видеть, соединения на схеме достаточно простые и перечислены в следующих таблицах:
| контакт Arduino | контакт датчика температуры и влажности DHT11 |
| Vcc | 5V |
| Gnd | Gnd |
| Nc | Nc |
| Pin 7 | Out |
| контакт Arduino | контакт DS3231 RTC |
| 5V | Vcc |
| Gnd | Gnd |
| Pin A5 | SCL |
| Pin A4 | SDA |
| контакт Arduino | контакт модуля для чтения SD карт |
| 5V | Vcc |
| Gnd | Gnd |
| Pin 12 | MISO |
| Pin 11 | MOSI |
| Pin 13 | SCK |
| CS | CS |
Вы можете заменить датчик DHT11 в схеме на любой другой аналогичный, например, LM35. Модуль RTC DS3231 подключается к плате Arduino по протоколу I2C (SCL, SDA), а модуль чтения SD карт – по протоколу SPI (MISO, MOSI, SCK, CS). Контакты 4 и 7 платы Arduino подключаются к контактам CS и Out модуля чтения SD карт и датчика DHT11 соответственно, при желании вы их можете сменить на любые другие контакты. Ранее подключение модуля чтения SD карт к плате Arduino мы рассматривали в проекте аудиоплеера на Arduino.
В программе для Arduino мы должны сделать следующие вещи:
- Считывать данные с датчика DTH11 (или с любого другого датчика, данные с которого мы хотим регистрировать).
- Инициализировать шину I2C чтобы считывать данные от часов реального времени (RTC module).
- Инициализировать шину SPI чтобы подключить модуль чтения SD карт к плате Arduino.
- Сохранить дату, время, температуру и влажность на SD карту.
- Сохранить дату, время, температуру и влажность в лист Excel на компьютере.
Все перечисленные вещи легко осуществить когда мы скачаем необходимые библиотеки для Arduino, которые будут делать всю работу за нас. Скачать их можно по следующим ссылкам:
- DHT11 Sensor Library (библиотека для работы с датчиком температуры и влажности) с GitHub.
- DS3231 RTC module library (библиотека для работы с часами реального времени) с Rinky-Dink Electronics.
Когда вы скачаете эти библиотеки, добавьте их в вашу Arduino IDE с помощью инструкции вида (или с помощью аналогичного пункта меню в Arduino IDE):
Sketch->Include Library -> Add .ZIP Library
Чтобы передавать данные с Arduino в лист Excel на вашем компьютере установите программное обеспечение под названием PLX-DAQ, разработанное компанией Parallax Inc. Скачайте его по приведенной ссылке и установите его на ваш компьютер. В результате этой операции на вашем компьютере должна появиться папка с названием PLS-DAQ.
После того как вы скачали и установили обе приведенные библиотеки и программное обеспечение PLX-DAQ вы можете загружать полный код программы (приведенный в конце статьи) в плату Arduino и тестировать его работу. Здесь же мы обсудим работу наиболее важных участков этого кода.
1. Чтение данных с модуля DS3231
DS3231 представляет собой модуль часов реального времени (RTC, Real Time Clock). Он используется для поддержания/хранения даты и времени во многих электронных проектах. Модуль имеет свой собственный источник питания (батарейку), поэтому сохраняет значения даты и времени даже когда питание всего устройства (в котором он стоит) выключается или когда устройство подвергается аппаратному сбросу. Поэтому стоит нам один раз выставить в нем правильную дату и время и он будет хранить/поддерживать их все время (до тех пор пока не разрядится его батарейка).
Работать с этим модулем очень просто благодаря специальной библиотеке, присутствующей в Arduino.
|
// инициализируем модуль DS3231 используя аппаратный интерфейс DS3231 rtc(SDA, SCL); void Initialize_RTC() { // инициализируем rtc объект rtc.begin(); //#### следующие строки необходимо извлечь из комментариев чтобы установить дату и время в модуле в первый раз### /* rtc.setDOW(FRIDAY); // устанавливаем день недели rtc.setTime(18, 46, 45); // устанавливаем время 12:00:00 (24hr format) rtc.setDate(6, 30, 2017); // устанавливаем дату – 1 января 2014 года */ } |
Примечание: когда вы используете этот модуль в первый раз вы должны установить в нем дату и время. Для этого раскоментарьте (снимите комментарий) со строк, приведенных выше (установите в них необходимые вам дату и время). После этого снова поставьте комментарии к этим строкам и заново загрузите программу в плату Arduino иначе (если вы оставите их раскомментированными), то каждый раз при запуске программы в модуль будут записываться эти дата и время. Также вы можете использовать модуль часов реального времени RTC IC DS1307 для считывания времени в плату Arduino.
2. Считывание данных с датчика DHT11
DHT11 представляет собой датчик температуры и влажности. Он передает значения температуры и влажности по 8 бит последовательно через свой выходной контакт. С помощью библиотеки мы считываем эти данные в Arduino в последовательном формате.
|
#define DHT11_PIN 7 //выход датчика подсоединен к контакту 7 dht DHT; //даем имя датчику — DHT void Read_DHT11() { int chk = DHT.read11(DHT11_PIN); } |
В данном проекте мы подключили выходной контакт датчика DHT11 к контакту 7 платы Arduino, однако вы можете использовать любой другой контакт, поддерживаемый библиотекой последовательной связи (Software Serial Library). Функция DHT.read(pin number); считывает значения температуры и влажности и сохраняет их в переменных DHT.temperature и DHT.Humidity соответственно. Более подробно об этом вы можете прочитать в статье про подключение датчика DHT11 к плате Arduino.
3. Инициализация модуля чтения SD карт
|
1 2 3 4 5 6 7 8 9 10 11 12 13 14 15 16 17 18 |
void Initialize_SDcard() { // смотрим на месте ли карта и можно ли ее инициализировать if (!SD.begin(chipSelect)) { Serial.println(«Card failed, or not present»); // больше ничего не делаем поскольку работа с картой невозможна return; } // открываем файл. Примечание: только один файл может быть открыт в один момент времени // поэтому вам необходимо закрыть этот файл перед тем как открывать следующий File dataFile = SD.open(«LoggerCD.txt», FILE_WRITE); // если файл доступен, записываем в него if (dataFile) { dataFile.println(«Date,Time,Temperature,Humidity»); //записываем первую строку excel файла dataFile.close(); } } |
Работа с SD картами так проста потому что в Arduino IDE по умолчанию присутствует библиотека для работы с SD картами. В рассмотренной функции инициализации SD карты мы создали текстовый файл с именем “LoggerCD.txt” и записали туда первую строку нашего контента (содержимого). Мы будем разделять данные с помощью символа “,” – запятая будет выступать в качестве разделителя. То есть запятая будет обозначать переход к следующей ячейке в листе Excel.
4. Запись данных на SD карту
|
1 2 3 4 5 6 7 8 9 10 11 12 13 14 15 16 17 18 19 20 21 22 23 24 25 26 |
void Write_SDcard() { // открываем файл. Примечание: только один файл может быть открыт в один момент времени // поэтому вам необходимо закрыть этот файл перед тем как открывать следующий File dataFile = SD.open(«LoggerCD.txt», FILE_WRITE); // если файл доступен, записываем в него if (dataFile) { dataFile.print(rtc.getDateStr()); //сохраняем дату на SD карту dataFile.print(«,»); //переходим к следующей ячейке (столбцу) с помощью «,» dataFile.print(rtc.getTimeStr()); // сохраняем время на SD карту dataFile.print(«,»); //переходим к следующей ячейке (столбцу) с помощью «,» dataFile.print(DHT.temperature); // сохраняем температуру на SD карту dataFile.print(«,»); //переходим к следующей ячейке (столбцу) с помощью «,» dataFile.print(DHT.humidity); // сохраняем влажность на SD карту dataFile.print(«,»); //переходим к следующей ячейке (столбцу) с помощью «,» dataFile.println(); //конец строки, переходим к следующей строке dataFile.close(); //закрываем файл } else Serial.println(«OOPS!! SD card writing failed»); } |
Мы сохраняем значения даты, времени, температуры и влажности на SD карту с помощью библиотек для DS3231 и DHT11. Операторы (переменные) для получения этих данных представлены в следующей таблице:
| Date (дата) | rtc.getDateStr()); |
| Time (время) | rtc.getTimeStr()); |
| Temperature (температура) | DHT.temperature |
| Humidity (влажность) | DHT.humidity |
Для сохранения этих данных на SD карту мы используем оператор вида:
|
dataFile.print(parameter); |
Вы могли заметить что каждый параметр разделяется с помощью запятой чтобы сделать его удобочитаемым, а функция dataFile.println(); используется для обозначения конца строки.
5. Запись данных в PLX-DAQ
PLX-DAQ представляет собой специальный плагин для приложения Microsoft Excel, который помогает нам записывать данные от Arduino непосредственно в Excel файл на вашем компьютере. Мы выбрали этот плагин исходя из следующих причин:
- Вы можете записывать и просматривать данные одновременно, также их можно построить в виде графа.
- С использованием данного плагина у вас нет необходимости задействовать модуль часов реального времени DS3231 чтобы отслеживать дату и время – в этом случае вы можете непосредственно считывать их из вашего компьютера и сохранять их в Excel.
Для использования данного плагина вы с помощью Arduino должны передавать данные последовательно по специальному образцу (подобно отображению данных в окне монитора последовательной связи).
|
1 2 3 4 5 6 7 8 9 10 11 12 13 14 15 16 17 18 19 20 21 22 23 24 25 |
void Initialize_PlxDaq() { Serial.println(«CLEARDATA»); //очищаем все данные оставшиеся от предыдущих проектов Serial.println(«LABEL,Date,Time,Temperature,Humidity»); //всегда записывайте LABEL, чтобы индицировать что это первая строка } void Write_PlxDaq() { Serial.print(«DATA»); //всегда записывайте «DATA» чтобы индицировать что будете записывать данные Serial.print(«,»); //переход к следующей ячейке (столбцу) с использованием «,» Serial.print(«DATE»); //сохраняем данные в Excel Serial.print(«,»); // переход к следующей ячейке (столбцу) с использованием «,» Serial.print(«TIME»); // сохраняем данные в Excel Serial.print(«,»); // переход к следующей ячейке (столбцу) с использованием «,» Serial.print(DHT.temperature); // сохраняем данные в Excel Serial.print(«,»); // переход к следующей ячейке (столбцу) с использованием «,» Serial.print(DHT.humidity); // сохраняем данные в Excel Serial.print(«,»); // переход к следующей ячейке (столбцу) с использованием «,» Serial.println(); //конец строки, переходим к следующей строке } |
Программа PLX_DAQ может распознавать такие слова как LABEL, DATA, TIME, DATE и т.д. Как показано в приведенном фрагменте кода мы используем слово “LABEL” чтобы начать первую строку на листе Excel. Далее мы используем слово “DATA” чтобы дать понять программе что затем мы будем передавать ей данные. Для перехода к следующему столбцу мы используем запятую (“,”). Для обозначения конца строки мы используем Serial.println();.
Для получения данных о дате и времени с вашего компьютера мы используем слова “DATE” и “TIME”.
Примечание: не используйте монитор последовательной связи во время использования программного обеспечения PLX_DAQ.
Объяснение работы проекта
Работа нашего регистратора данных (логгера) на Arduino достаточно проста. После того как вы соберете всю схему и загрузите программу в плату Arduino значения даты, времени, температуры и влажности начнут сохраняться в файл на SD карте. Для того, чтобы задействовать PLX-DAQ для записи данных в лист Excel на вашем компьютере, вы должны выполнить следующую последовательность действий.
Шаг 1: Откройте файл “Plx-Daq Spreadsheet” который был создан на вашем рабочем столе во время установки этого программного обеспечения.
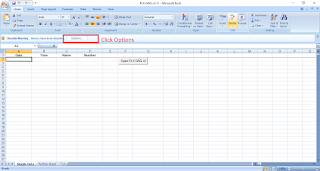
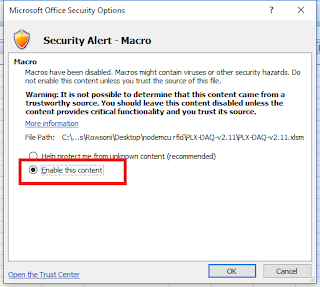
Шаг 2: Если Excel показывает вам ограничение на запись данных, то кликните Options->Enable the content -> Finish -> OK чтобы получить следующий экран.
 Шаг 3: Выберите бодовую скорость “9600” на том последовательном порту, к которому подключена плата Arduino и нажмите на Connect. Ваши данные должны начать записываться как показано на следующем рисунке.

Вы можете оставить этот лист Excel открытым и смотреть как записываются данные. Те же самые данные в это же время записываются и на SD карту. Чтобы проверить это извлеките SD карту из собранного устройства и вставьте ее в ваш компьютер. Вы должны найти на ней файл “LoggerCD.txt”. Когда вы откроете его, он будет выглядеть примерно так, как показано на следующем рисунке:

Но в таком виде их трудно будет анализировать. Поэтому мы можем открыть этот файл в Excel в формате CSV (Comma separated values – данные, разделенные запятыми) чтобы сделать анализ этот данных более удобным. Чтобы открыть его в Excel выполните следующую последовательность действий:
- Откройте Excel. Кликните на File->Open и выберите “All file” в правом нижнем углу, затем выберите файл “LoggerCD” на вашей SD карте. Запустится мастер импорта текста.
- Кликните на “Next” и выберите запятую (comma) в качестве разделителя. Кликните на “Next” снова, затем на Finish.
- После этого ваши данные будут открыты в Excel файле как показано на следующем рисунке:

В этом проекте мы записываем данные каждые 5 секунд – но вы можете изменить это время на любое необходимое вам внеся небольшие изменения в программу.

Беспроводная регистрация данных (лог) с помощью Arduino
Если у вас все получилось, то вы можете внести ряд усовершенствований в этот проект. Просто подсоедините к плате Arduino Bluetooth устройство (например, модуль HC-05) и передавайте данные в программу PLX-DAQ при помощи технологии Bluetooth, а не по последовательному порту. В этом случае в программе вам необходимо заменить Serial.print(parameter); на BluetoothName.print(parameter); и соединить ваш компьютер/лэптоп к HC-05 по Bluetooth – для этого необходимо будет выбрать COM порт, к которому подсоединен Bluetooth на вашем компьютере/лэптопе. И все – ваш беспроводной логгер (регистратор) данных на основе Arduino будет готов.
Исходный код программы
|
1 2 3 4 5 6 7 8 9 10 11 12 13 14 15 16 17 18 19 20 21 22 23 24 25 26 27 28 29 30 31 32 33 34 35 36 37 38 39 40 41 42 43 44 45 46 47 48 49 50 51 52 53 54 55 56 57 58 59 60 61 62 63 64 65 66 67 68 69 70 71 72 73 74 75 76 77 78 79 80 81 82 83 84 85 86 87 88 89 90 91 92 93 94 95 96 97 98 99 100 101 102 103 104 105 106 107 108 109 110 111 112 113 114 115 116 117 118 119 120 121 122 123 124 125 126 127 128 129 130 131 132 133 134 135 136 137 138 139 140 141 142 143 144 145 146 147 148 149 150 151 152 153 154 155 156 157 158 159 160 161 162 |
/* * Program to demonstrate Data Logging/Visualisation using Arduino * * ###Connection with SD card module### * Vcc->5V * Gnd->Gnd * MISO->pin 12 * MOSI->pin 11 * SCK-> pin 13 * CS-> pin 4 * * ###Connection with DS3231### * Vcc->5V * Gns->Gnd * SCL->pin A5 * SDA-> pin A4 * * ###Connection with DT11### * Vcc->5V * Gnd->Gnd * Out-> pin 7 * * */ #include <DS3231.h> //Library for RTC module (Download from Link in article) #include <SPI.h> //Library for SPI communication (Pre-Loaded into Arduino) #include <SD.h> //Library for SD card (Pre-Loaded into Arduino) #include <dht.h> //Library for dht11 Temperature and Humidity sensor (Download from Link in article) #define DHT11_PIN 7 //Sensor output pin is connected to pin 7 dht DHT; //Sensor object named as DHT const int chipSelect = 4; //SD card CS pin connected to pin 4 of Arduino // Init the DS3231 using the hardware interface DS3231 rtc(SDA, SCL); void setup() { // Setup Serial connection Serial.begin(9600); Initialize_SDcard(); Initialize_RTC(); Initialize_PlxDaq(); } void loop() { Read_DHT11(); Write_SDcard(); Write_PlxDaq(); delay(5000); //Wait for 5 seconds before writing the next data } void Write_PlxDaq() { Serial.print(«DATA»); //always write «DATA» to Indicate the following as Data Serial.print(«,»); //Move to next column using a «,» Serial.print(«DATE»); //Store date on Excel Serial.print(«,»); //Move to next column using a «,» Serial.print(«TIME»); //Store date on Excel Serial.print(«,»); //Move to next column using a «,» Serial.print(DHT.temperature); //Store date on Excel Serial.print(«,»); //Move to next column using a «,» Serial.print(DHT.humidity); //Store date on Excel Serial.print(«,»); //Move to next column using a «,» Serial.println(); //End of Row move to next row } void Initialize_PlxDaq() { Serial.println(«CLEARDATA»); //clears up any data left from previous projects Serial.println(«LABEL,Date,Time,Temperature,Humidity»); //always write LABEL, to indicate it as first line } void Write_SDcard() { // open the file. note that only one file can be open at a time, // so you have to close this one before opening another. File dataFile = SD.open(«LoggerCD.txt», FILE_WRITE); // if the file is available, write to it: if (dataFile) { dataFile.print(rtc.getDateStr()); //Store date on SD card dataFile.print(«,»); //Move to next column using a «,» dataFile.print(rtc.getTimeStr()); //Store date on SD card dataFile.print(«,»); //Move to next column using a «,» dataFile.print(DHT.temperature); //Store date on SD card dataFile.print(«,»); //Move to next column using a «,» dataFile.print(DHT.humidity); //Store date on SD card dataFile.print(«,»); //Move to next column using a «,» dataFile.println(); //End of Row move to next row dataFile.close(); //Close the file } else Serial.println(«OOPS!! SD card writing failed»); } void Initialize_SDcard() { // see if the card is present and can be initialized: if (!SD.begin(chipSelect)) { Serial.println(«Card failed, or not present»); // don’t do anything more: return; } // open the file. note that only one file can be open at a time, // so you have to close this one before opening another. File dataFile = SD.open(«LoggerCD.txt», FILE_WRITE); // if the file is available, write to it: if (dataFile) { dataFile.println(«Date,Time,Temperature,Humidity»); //Write the first row of the excel file dataFile.close(); } } void Initialize_RTC() { // Initialize the rtc object rtc.begin(); //#### The following lines can be uncommented to set the date and time for the first time### /* rtc.setDOW(FRIDAY); // Set Day-of-Week to SUNDAY rtc.setTime(18, 46, 45); // Set the time to 12:00:00 (24hr format) rtc.setDate(6, 30, 2017); // Set the date to January 1st, 2014 */ } void Read_DHT11() { int chk = DHT.read11(DHT11_PIN); } /*void Read_DateTime() { // Send date Serial.print(rtc.getDateStr()); Serial.print(» — «); // Send time Serial.println(rtc.getTimeStr()); }*/ /*void Read_TempHum() { Serial.print(«Temperature = «); Serial.println(DHT.temperature); Serial.print(«Humidity = «); Serial.println(DHT.humidity); // delay(1000); }*/ |
Видео, демонстрирующее работу логгера данных
![]() Загрузка…
Загрузка…
12 905 просмотров
Introduction: Sending Data From Arduino to Excel (and Plotting It)
I’ve searched extensively for a way that I could plot my Arduino sensor reading in real time. Not only plot, but also display and store the data for further experimentation and corrections.
The simplest solution I’ve found was to use excel, but with a twist.
A PROGRAM THAT DOESN’T REQUIRE EXCEL TO PLOT DATA CAN BE FOUND HERE
https://www.instructables.com/id/Plot-Live-Arduino-Data-and-Save-It-to-Excel/
Also if you find this instructable interesting, perhaps you’ll like another one I’ve made (about displaying live Arduino sensor readings on a Nokia 5110 LCD):
https://www.instructables.com/id/Arduinonokia-lcd-…
Step 1: What You’ll Need
For this you will need:
-Windows (tested on xp)
-Arduino IDE
-Microsoft office (tested on 2010)
-PLX-DAQ (expansion for excel)
-Arduino (tested on UNO, but any board should work)
I am assuming that you’ve already got an Arduino, Windows, Arduino IDE and Excel. Here’s the link to download PLX-DAQ:
https://www.parallax.com/downloads/plx-daq
You only need to download and install it, it should work fine. After installation, it will automatically create a folder named PLX-DAQ on your Desktop in which you will find a shortcut named PLX-DAQ Spreadsheet.
When you want to use your Arduino to send data to excel, just open up the shortcut.
Step 2: Arduino Part
Now that we’ve got all that downloaded and installed, let’s start with the Arduino part.
Here’s a basic template I created that will display the time in column A and your sensor measurements in column B.
Of course, this is just a basic template, which is pretty straight forward and you can tweak it to suit your needs.
I’ve added explanations in the Arduino code so you (and I, after not working with it for a while) know which part of the code does what.
Here’s the sketch:
//always starts in line 0 and writes the thing written next to LABEL
void setup() {
Serial.begin(9600); // the bigger number the better
Serial.println(«CLEARDATA»); //clears up any data left from previous projects
Serial.println(«LABEL,Acolumn,Bcolumn,…»); //always write LABEL, so excel knows the next things will be the names of the columns (instead of Acolumn you could write Time for instance)
Serial.println(«RESETTIMER»); //resets timer to 0
}
void loop() {
Serial.print(«DATA,TIME,TIMER,»); //writes the time in the first column A and the time since the measurements started in column B
Serial.print(Adata);
Serial.print(Bdata);
Serial.println(…); //be sure to add println to the last command so it knows to go into the next row on the second run
delay(100); //add a delay
}
Obviously if you upload this code, it won’t work on it’s own!
You need to add a formula for Adata, Bdata and … . This template is just for reference so you know how to use the program. Just add Serial.read() function, name it Adata, Bdata and … and it should work.
Step 3: Sending the Data to Excel
Of course PLX-DAQ has more functions, which you can explore on your own by reading the instructions in the rar folder that you downloaded.
If you want excel to graph your data but can’t be bothered to read the instructions, here’s a short version of what you can do:
-use the (modified) code from my instructable
-connect your Arduino as you normally would
-DO NOT OPEN THE SERIAL MONITOR in Arduino IDE, it will not work with excel if you do
-open the shortcut to your PLX-DAQ Spreadsheet
-excel will say “This application is about to initialize ActiveX…”, just click OK
-a new window named Data Acquisition for Excel will appear
-select the usb port your Arduino is connected to (if it doesn’t work at first, go through the list of ports)
-where it says Baud, just select the number you put in your code at Serial.begin(), in my case that would be 9600
-create an empty graph
-select which columns of data you want on the graph for the x and y axis (the way to do this is a little different depending on your version of excel, but it’s not too hard to figure out)
-click collect data on PLX-DAX and it should start collecting the data
-excel will plot the information as it gets sent from the Arduino to excel in real time
Depending on how precise you want your graph to be, you can change the characteristics of the graph. You can closely examine a section of the graph by shutting down data collecting, right click on the x or y axis and set it to a smaller frame. (normally it’s set to automatic)
You can also right click on the curve that connects the points on your chart and select the color and thickness of the curve.
That’s it for the basics. I hope I’ve helped a few of you out by writing this. I know it took me quite some time to find this and to get it working.
P.S.
If you liked this instructable, perhaps you’ll like another one I’ve made: https://www.instructables.com/id/Arduinonokia-lcd-d…
If you enjoyed this Instructable, consider visiting my Fundrazr page here. And of course, share.
10 People Made This Project!
Recommendations
About the program and its use
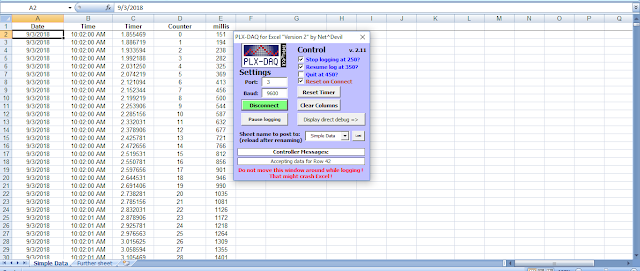
PLX DAQ v2 is a program used to establish an easy communication between Microsoft Excel on a Windows Computer and any device that supports serial port protocol. It was intentionally written to allow communication between Arduino and Excel.
You can, for example, measure temperature data with your Arduino, send the results to Excel every 10 seconds, printed the data on a sheet and draw a graph with all information. All communication will be done by Serial.println commands just like the commands you use to send from Arduino to monitor in your Arduino IDE Serial Monitor.
The output of
void loop() { Serial.println( (String) «DATA,DATE,TIME,» + millis() ); delay(100); }
Finally looks like the following in Excel:
How to use
The program uses two parts to work: the special Microsoft Excel Spreadsheet with the PLX DAQ v2 UI and commands plus any Arduino device that sends special commands for communication. The latest Excel Spreadsheet can be downloaded on the Arduino forum Click Here;( please always download the latest version!), the Arduino code can be written by everyone themselves with below guideline.
The Excel UI part
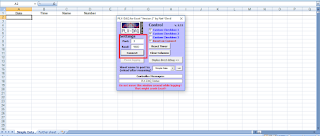
After opening the Excel Spreadsheet please allow running the macro (yellow warning message at the top). Afterwards you can see the PLX DAQ v2 UI. In case not please click the button “Open PLX DAQ UI” on the “Simple Data” sheet.
The UI offers the following options

a. Port: set to Arduino port (same as in Arduino IDE => Tools => Port, e.g., 4 for COM4
b. Baud: set to the baud rate you run your Arduino on (e.g., 9600 if you are using Serial.begin(9600); in your Arduino code)
c. Connect: connects to your Arduino and starts logging
d. Pause logging/resume logging: when connected will pause the logging of data
e. Reset Timer: will set the Timer to 0. The Timer can be used to measure how long Excel is already logging
f. Clear Columns: will delete all logged data from the sheet. Won’t clear the labels of the columns
g. Display/Hide direct debug: will show or hide the text field on the right. The Direct Debug Window can be used to manually monitor commands received by PLX DAQ v2 in Excel
h. Sheet name to post to: this will list all sheets in the Excel workbook. Whatever sheet you select in the dropdown the logged data will be posted to it. This sheet will be referred to as the “ActiveSheet” throughout this document.
Note: after adding / deleting sheets please press the small “Load” button on the left side of the dropdown box for the sheet list to be updated
i. Controller Messages: in the field below the most recent commands and status information will be shown. Most likely the information is changing way too fast for you to read, thus use the Direct Debug Window J
j. Reset on Connect: the checkbox should be ticked at all time. If ticket the first command from Excel to Arduino will be to restart, thus your code starts from the beginning as well. This way you can have a fresh session. If you want to connect to your Arduino without restarting it just untick the box
k. Custom Checkbox 1/2/3: these can be used to control your Arduino during run in any way you want. There are commands to label the Checkboxes by your Arduino and to query the state of the boxes. You could for example label one box “Measure humidity as well?” and check on demand in Excel if you want your Arduino to measure humidity with a second sensor next to only measure e.g., temperature. There are special commands Arduino can use to query the status of the checkboxes. More detail on these can be found below.
l. Log incoming data? checkbox: information received from Arduino will be displayed in the direct debug window. Hint: disable if you experience performance issues
m. Log outgoing data? checkbox: information send to your Arduino will be displayed in the direct debug window. Hint: disable if you experience performance issues
n. Log system messages? checkbox: information from Excel will be display in the direct debug window (e.g., errors) . Hint: disable if you experience performance issues
o. Add timestamp? checkbox: will add a timestamp to every information logged in the direct debug window. This is handy for debugging.
p. =>: will increase the size of the direct debug window to a certain maximum
q. <=: will decrease the size of the direct debug window to a certain minimum
r. Clear: will clear all information in the direct debug window
The Arduino part — overview
For PLX DAQ v2 to work correctly your Arduino needs to send specially formatted commands. All commands need to be send from Arduino to the PC using the Serial.println commands. These commands can include parameters, variables and functions to send to as well. These parameters need to be separated by commas. This can be done like this:
Serial.println( (String) «DATA,DATE,TIME,» + millis() );
These commands can be split up into different categories:
a. Basic setup and communication:
Commands here are used to format the sheet to log to and to send data to the sheet
b. Specific communication and manipulation:
Commands here are used to work with further parameters, jump on or between sheets, and using checkboxes for “communication” to your Arduino
c. Excel workbook commands:
Commands here are used to control the logging process or even saving workbooks in window
Miscellaneous commands:
Everything that is not really crucial or does not have any benefit (anymore)
The Arduino part — Basic setup and communication
a. CLEARSHEET:
This command clears all data the ActiveSheet (including labels!). It should be the first command on every sketch.
Syntax: Serial.println(“CLEARSHEET”);
b. CLEARDATA:
This commands clears only logged data on the ActiveSheet (starting at row 2)
Syntax: Serial.println(“CLEARDATA”);
c. LABEL:
With this command you can set the labels for the top most row of the ActiveSheet
Syntax: Serial.println(“LABEL,1st Column,2nd Column,Third one!”);
d. DATA:
This is the most basic and crucial command of PLX DAQ v2. It is used to send data from your Arduino to Excel and have it printed on the ActiveSheet. You can send anything you want but you should make sure you split the data up by commas and match the number of columns you defined with the LABEL command.
The reserved code words DATE, TIME and TIMER will be recognized by PLX DAQ and will be replaced with values.
DATE will be switched to the current Windows computer’s date (e.g., 12.03.2017)
TIME will be switched to the current Windows computer’s time (e.g., 18:17:42)
TIMER will be switched to the time the logging is already active (e.g., 1,365 seconds)
You can add the keyword AUTOSCROLL_20 to your string. This information will make PLX DAQ to automatically scroll your Excel window down with every new line of data that is received. The number (e.g., 20) indicates how many lines should be shown above the latest line that is scrolled to automatically.
i. Syntax 1 – this can be used to make you code more readable but works for static info only:
Serial.println(«DATA,DATE,TIME”);
ii. Syntax 2 – this can be used to include function calls or variables in the same line:
Serial.println( (String) «DATA,DATE,TIME,» + millis() ); Syntax 3 – this is a way to present the code with rather more lines but with a better readability if you use many variables in one line. Please note that only the print command is used and println is only used at the end to send the fully build up string:
Serial.print(«DATA,DATE,TIME,”);
Serial.print(myVariableA);
Serial.print(«,”);
Serial.print(millis());
Serial.print(«,”);
Serial.println(myVariableB);
The Arduino part — specific communication and
manipulation
a. CELL,SET
By this command you can set the value of any cell in the Excel workbook with any value you want. This can either be done on the ActiveSheet or on any other sheet.
Syntax to set a value on the ActiveSheet:
Serial.println(«CELL,SET,C9,MyValue”);
Syntax to set a value on a named sheet somewhere in the workbook:
Serial.println(«CELL,SET, ONSHEET,AnySheet,C,9,MyValue”);
PLEASE NOTE !! è there might occur problems at higher baud rates with the CELL,SET command. It might happen that values are not transferred correctly – instead “0” might be transmitted. In these cases please either decrease your baud rate or insert small delay before to your CELL,SET command (e.g., delay(3);). Typically values between 3 and 100 should do the trick. In case you make excessive use of CELL,SET or CELL,GET please increase the delay value even further in case you continue receiving wrong values.
b. CELL,GET
With this command values from the Excel sheet (either ActiveSheet or named sheet) can be queried and read by Arduino. For example you could put a value for the delay duration in cell J9, query it every loop iteration and control how long your Arduino should pause between each loop. The value in J9 can be changed by you during runtime at any time.
Please note: you need to read the value on your Arduino. This can be done by Integer or String. You should take care to only send integers when you are reading integers and vice versa.
Use Serial.readStringUntil(10);
or Serial.readStringUntil(10).toInt();
or Serial.readStringUntil(10).toFloat();
The number 10 is important as ASCII char 10 represents the end of a line to read.
With the following command you could read the value in J9 for the example above:
void loop() {
int myDelayValue;
Serial.println(«CELL,GET,J9»);
myDelayValue = Serial.readStringUntil(10).toInt();
Serial.println( (String) «Read value is: » + myDelayValue);
delay(myDelayValue);
}
To read a value from any other named sheet please use the following syntax:
Serial.println(«CELL,GET,FROMHEET,AnySheet,C,9”);
PLEASE NOTE !! è there might occur problems at higher baud rates with the CELL,GET command. It might happen that values are not transferred correctly – instead “0” might be transmitted. In these cases please either decrease your baud rate or insert small delay before to your CELL,GET command (e.g., delay(3);). Typically values between 3 and 100 should do the trick. In case you make excessive use of CELL,SET or CELL,GET please increase the delay value even further in case you continue receiving wrong values.
c. ROW
You can set the row on which data should be logged to manually. Thus after e.g., having logged 20 data sets you can reset the row counter to “2” and start from the beginning again. Or you can read the row that is currently logged to (please note you need Serial.readStringUntil(10).toInt() command afterwards in Arduino)
Syntax:
Serial.println(«ROW,SET,2”);
Syntax:
Serial.println(«ROW,GET”);
myRow = Serial.readStringUntil(10).toInt();
d. CUSTOMBOX1 / CUSTOMBOX2 / CUSTOMBOX3
You can set a label to the checkboxes on the PLX DAQ UI, set the values to the checkboxes (ticked or not ticked) and read the value of the checkboxes (into bool).
Syntax for example:
Serial.println(«CUSTOMBOX1,LABEL,Measure humidity as well?”);
Serial.println(“CUSTOMBOX1,GET”);
myBoolValue = Serial.readStringUntil(10).toInt();
e. CLEARRANGE
Other than Cleardata or Clearsheet this command will only clear a certain range on the ActiveSheet. Data will be deleted in a rectangle from top left to bottom right.
Syntax: Serial.println(“CLEARRANGE,B,10,D,20”);
f. RESETTIMER
It will reset the timer that is used to count the time PLX DAQ is already logging
Syntax: Serial.println(“RESETTIMER”);
The Arduino part — Excel workbook commands
a. PAUSELOGGING / RESUMELOGGING / STOPLOGGING
Basically these commands explain themselves. Use to pause PLX DAQ to post logged data to the sheet. Of course PLX DAQ will still listen to incoming commands (to recognize RESUMELOGGING after PAUSELOGGING) but it won’t be printed to ActiveSheet. In case you want to see what information is received use the Direct Debug Window. STOPLOGGING will completely stop the logging process. No more data can be received afterwards! You have to restart the logging process manually by clicking the connect button!
Syntax: Serial.println(“PAUSELOGGING”);
b. SAVEWORKBOOK
Will just save the workbook by its current name. This is useful if you are logging for a long time and want to save your data every now and then.
Syntax: Serial.println(“SAVEWORKBOOK”);
c. SAVEWORKBOOKAS
Will save the workbook by any given name. The new workbook will be saved in the same folder as the currently open workbook (except if you include subfolders in the name to be saved).
Syntax: Serial.println(“SAVEWORKBOOKAS,MyNewWorkbookName”);
Syntax: Serial.println(“SAVEWORKBOOKAS,SubfolderWorkbookname”);
d. FORCEEXCELQUIT
This is a heavy command! It will force quit Excel.
!! PLEASE NOTE TO SAVE YOUR WORKBOOK FIRST !!
Syntax: Serial.println(“FORCEEXCELQUIT”);
The Arduino part — Miscellaneous commands
a. BEEP
Will simply make a beep noise in Excel. Good if you want to be notified by your Arduino e.g., after a certain threshold is past on a value you measure (room temperature or other)
Syntax: Serial.println(“BEEP”);
b. MSG
Can be used to put a string on the Controller Message label on the PLX DAQ UI
Syntax: Serial.println(“MSG,Put your text here”);
c. DONE
Will flush the Serial port on Excel side. Can be used to send data which might be in the buffer on Excel
Syntax: Serial.println(“DONE”);
d. GETRANDOM
Will return a random number from Excel to Arduino. This is useful because Arduino can’t create true random numbers. Arduino’s random function requires prior initialization by randomSeed(value). If value is not unique (e.g., user input) the number sequence return by Arduino’s random will always be the same. To get a unique value for randomSeed’s value you can therefore query Excel.
Syntax:
Serial.println(«GETRANDOM,-31313,32323»);
int rndseed = Serial.readStringUntil(10).toInt();
randomSeed(rndseed);
Serial.println( (String) “1st number: “ + random(0, 50));
Serial.println( (String) “2nd number: “ + random(0, 50));
Serial.println( (String) “3rd number: “ + random(0, 50));
2. Doing your own stuff
Each and every one – including you (!!) – is allowed and should and can see the full source code of PLX DAQ v2, read it, learn from it and adjust it in any way you want or need. The source code can be viewed by pressing Alt+F11 in Excel. I deeply hope I managed to write the code as clear as possible. Generally, all you need to know is that in the sub “DataReady” you can add new commands. Simply copy & paste an old one, give it your name and go for it!
You could also use the CustomDevPoints that I included in the code. These functions are called at different times during the run. E.g., every time a new line is read from PLX DAQ (thus after each Serial.println();), after a new line with DATA is read (thus after each Serial.println(“DATA,……”);) or after this data is added to the sheet.
Upgrading PLX DAQ v2 Excel versions
If you want to use the new version of PLX DAQ v2 but want to keep all your configured sheets in old Excel version of PLX DAQ try the following steps to copy all sheets, references and formulas easily to the new version.
PLEASE NOTE !! è it is NOT possible to copy the sheet “Simple Data” from the old version to the new version. Excel would automatically copy the old version of PLX DAQ as well ….
a. Download new PLX DAQ Excel and open, open your Excel as well.
b. In your old Excel select first sheet, then hold shift key and select last sheet, right click first sheet and select «Move or Copy»
c. Select new PLX DAQ Excel in the dropdown, select «move to end», select «Create a copy» and press OK.
d. It should copy all selected sheets to the new version.
Full blown demo
Last but not least here is a fully working demo sketch that is using most of the above mentioned commands and should give you a fair overview on how to program your Arduino to communicate with Excel using PLX DAQ v2.
Enjoy !!
And thanks for reading and sharing.
Greetings
Jonathan Arndt (aka Net^Devil)
int i = 0;
void setup() {
//
open serial connection
Serial.begin(9600);
//Serial.println(«CLEARDATA»);
// clears starting at row 2
Serial.println(«CLEARSHEET»); //
clears starting at row 1
//
define 5 columns named «Date», «Time», «Timer»,
«Counter» and «millis»
Serial.println(«LABEL,Date,Time,Timer,Counter,millis»);
//
set the names for the 3 checkboxes
Serial.println(«CUSTOMBOX1,LABEL,Stop logging at 250?»);
Serial.println(«CUSTOMBOX2,LABEL,Resume log at 350?»);
Serial.println(«CUSTOMBOX3,LABEL,Quit at 450?»);
//
check 2 of the 3 checkboxes (first two to true, third to false)
Serial.println(«CUSTOMBOX1,SET,1»);
Serial.println(«CUSTOMBOX2,SET,1»);
Serial.println(«CUSTOMBOX3,SET,0»);
}
void loop() {
//
simple print out of number and millis
//
output «DATA,DATE,TIME,TIMER,4711,13374,AUTOSCROLL_20»
Serial.println( (String) “DATA,DATE,TIME,TIMER,” + i++ + “,” +
millis() + “,AUTOSCROLL_20”);
//
clear some cells in Excel (rectangle range from B10 to D20)
if(i==100)
Serial.println(«ClearRange,B,10,D,20»);
//
do a simple beep in Excel on PC
if(i==150)
Serial.println(«BEEP»);
//
read a value (in this case integer) from a sheet by name
if(i==200)
//Serial.println(«CELL,GET,E4»);
==> active sheet in Excel
Serial.println(«CELL,GET,FROMSHEET,Simple Data,E,4»); //named sheet
int readvalue =
Serial.readStringUntil(10).toInt();
// result
displayed in Excel DirectDebugWindow to double check
Serial.println( (String) «Value
of cell E4 is: “ + readvalue);
}
//
check value of custombox1 on PLX DAQ in Excel and if
// checkbox
is checked then send the command to pause logging
if(i==250)
{
Serial.println(«CUSTOMBOX1,GET»);
int stoplogging = Serial.readStringUntil(10).toInt();
// this
information can be seen in the
//
direct debug window on PLX DAQ in Excel
Serial.print(«Value
of stoplogging/checkbox is: «);
Serial.println(stoplogging);
if(stoplogging) {
Serial.println(«PAUSELOGGING»);
}
}
//
get a true random number from the computer
if(i==300)
{
Serial.println(«GETRANDOM,-4321,12345»); // between -4321 to 12345
int rndseed =
Serial.readStringUntil(10).toInt();
Serial.println( (String)
«Got random value ‘» + rndseed + «‘» );
// Note:
this information is not posted to Excel: «DATA» is missing
//
instead this information can be seen in the direct debug window
}
//
and now resume logging
if(i==350)
{
Serial.println(«CUSTOMBOX2,GET»);
int resumelogging = Serial.readStringUntil(10).toInt();
if(resumelogging) {
Serial.println(«RESUMELOGGING»);
}
}
//
post to specific cells on defaul sheet and named sheet
if(i==400)
{
//
default sheet active in PLX DAQ Excel
Serial.println(«CELL,SET,G10,400 test 1 string»);
//
named sheet available in PLX DAQ Excel
Serial.println(«CELL,SET,ONSHEET,Simple Data,G,11,400 test
2”);
}
//
and for forced quit of Excel with saving the file first
if(i==450)
{
Serial.println(«CUSTOMBOX3,GET»);
if(Serial.readStringUntil(10).toInt())
{
Serial.println(«SAVEWORKBOOKAS,450-Lines-File»);
Serial.println(«FORCEEXCELQUIT»);
}
else
Serial.println(«No
forced Excel quit requested!»);
}
}