Word for Microsoft 365 Word for Microsoft 365 for Mac Word 2021 Word 2021 for Mac Word 2019 Word 2019 for Mac Word 2016 Word 2016 for Mac Word 2013 Word 2010 Word 2013 Developer Word Starter 2010 More…Less
Sometimes, putting a border around text will work better in your document than inserting a text box or a one-cell table, to achieve a similar look.
-
Select a word, line, or paragraph.
-
Go to Home > Borders, and then open the menu of border choices.

-
Choose the type of border you want:
Customize the border
-
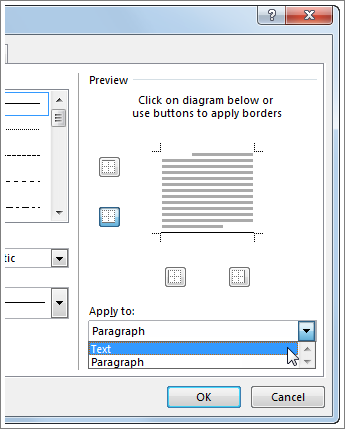
After you’ve selected your text and found the basic type of border you’d like, open the Borders menu again, and choose Borders and Shading.
-
Make your choices for style, color, and width, and then apply the choice with the buttons in the Preview section of the dialog box. When the preview is the way you want it, click OK.
Note: Make sure that the Apply to box has the correct setting: Text or Paragraph.
See Also
Add, change, or delete borders from documents or pictures
You can add a border to an individual word, a line of text, or an entire paragraph. You can make borders as plain or fancy as you want.
You can also add a border to a picture, put a border around a table, add a border to an individual page.
Add a border to selected text
-
Select a word, line, or paragraph.
-
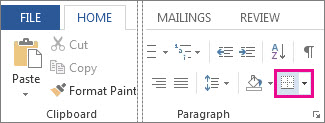
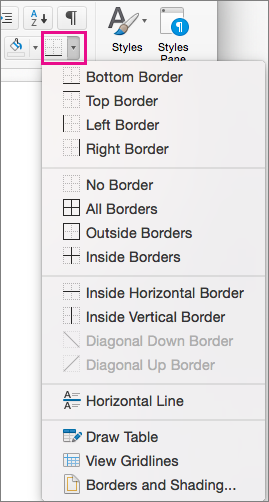
On the Home tab, click the arrow next to the Borders button.
-
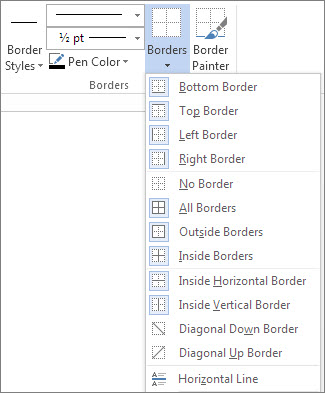
In the Borders gallery, click the border style that you want to apply.
Customize the text border
-
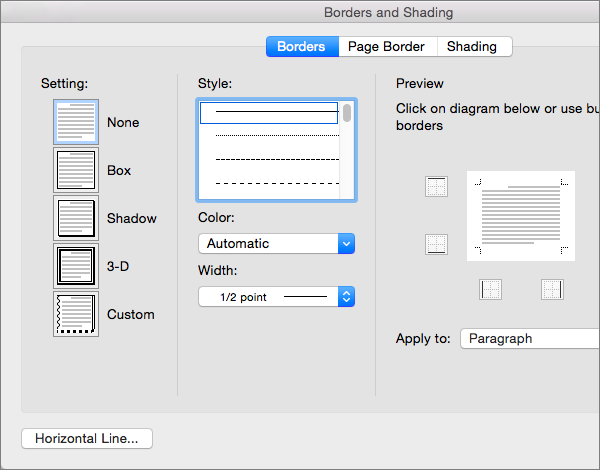
After you’ve selected your text and found the basic type of border you’d like, click the arrow next to the Borders button again, and then click Borders and Shading.
-
In the Borders and Shading dialog box, change Setting, Style, Color, and Width to create the border style that you want.
Note: To make sure the border style is correctly applied, set Apply to to Text or Paragraph. If you haven’t selected any text, you can only set Apply to to Paragraph.
-
Click OK to apply your selected border styles.
Tip: You can also fill the area of your selected text with color. In the Borders and Shading dialog box, click Shading to select a color and patterns. The color you pick in the Fill list fills the rectangular area; the color you select from the Color menu is applied to the rectangular area in a pattern you select from the Style list.
See Also
Add, change, or delete borders from documents or pictures
Add a border to a table
Need more help?

Contents
- 1 How to Add a Basic Border in Word
- 2 How to Set Alternate Microsoft Word Border Styles and Formatting
- 3 How to Insert a Border in Word for a Single Page
- 4 How to Delete a Page in Word or Add Line Numbers
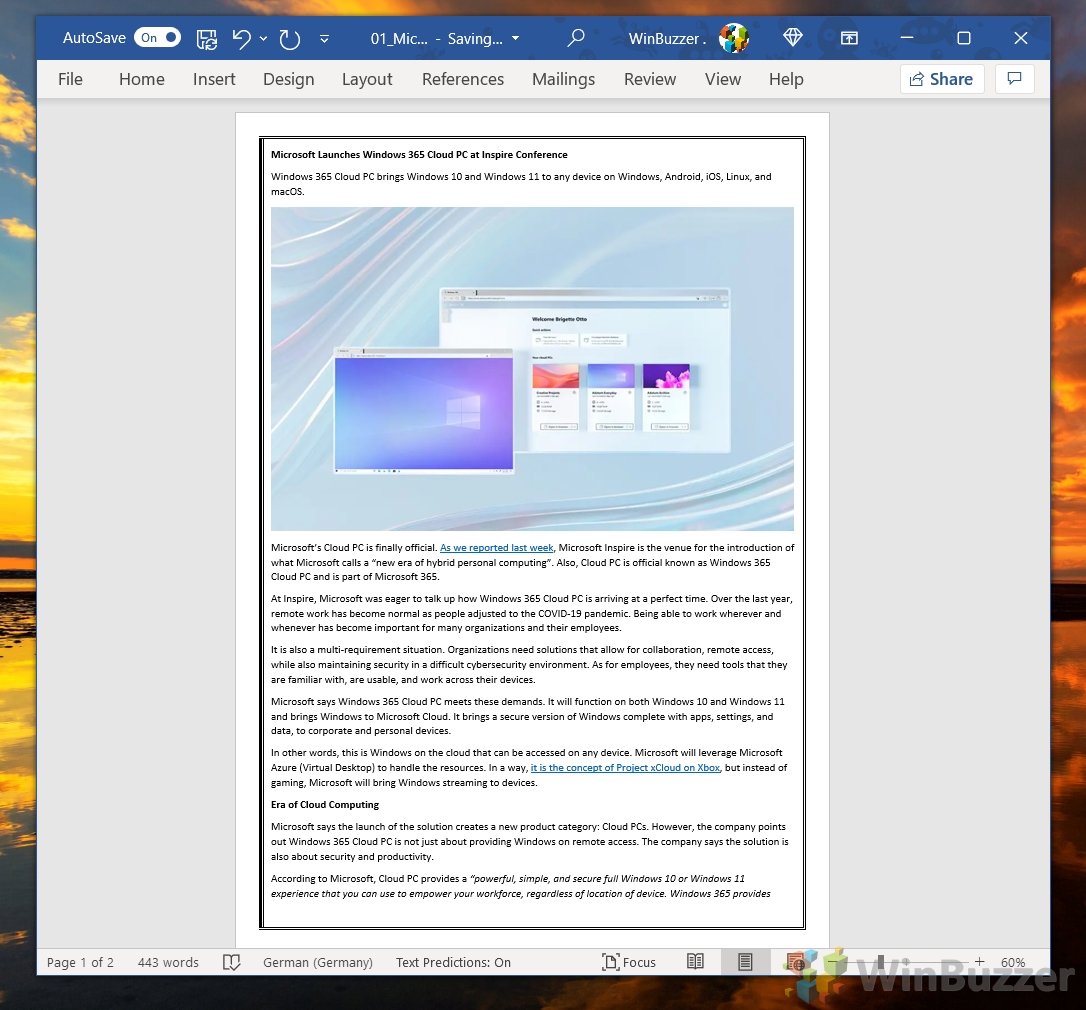
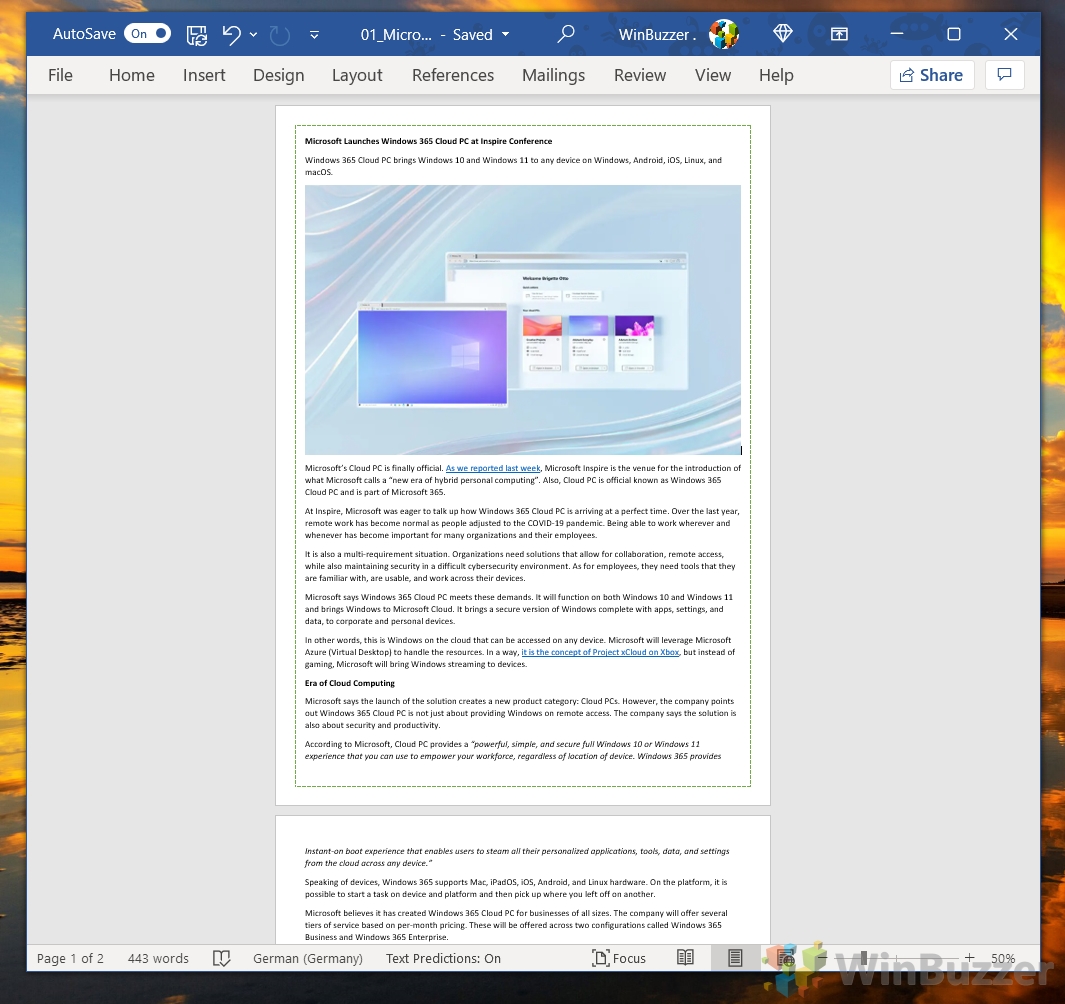
Page borders are a useful tool. They make your document stand out without looking tacky, while providing a guide should somebody want to staple or hole punch. Today we’re going to show you how to add a border in Word, which has various pre-built design options to spice up your document.
Setting page borders in Word differs by version
The process to create Microsoft Word borders will vary slightly depending on your version. We’re going to assume you have an Office 365 subscription or Office 2019. If you have an older version, look to the layout or page layout tab instead.
In newer versions of Word, there are three in-built page border variants: box, shadow, and 3-D. You can also set custom borders if you wish. The first is the most suitable for an enterprise setting, but the others can be a bit of fun. We’ll show you how to choose between them to suit your preference. Let’s get started:
If you came here for a plain, black border, this section is for you. You can get from blank page to professional-looking border for Word in just a few clicks:
- Open the “Design” tab and click “Page Borders”

- Select “Box” and click “OK”

- Check your new page borders in Word page view
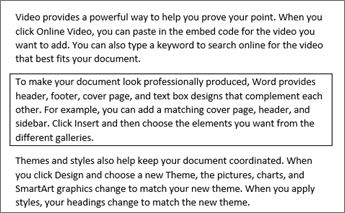
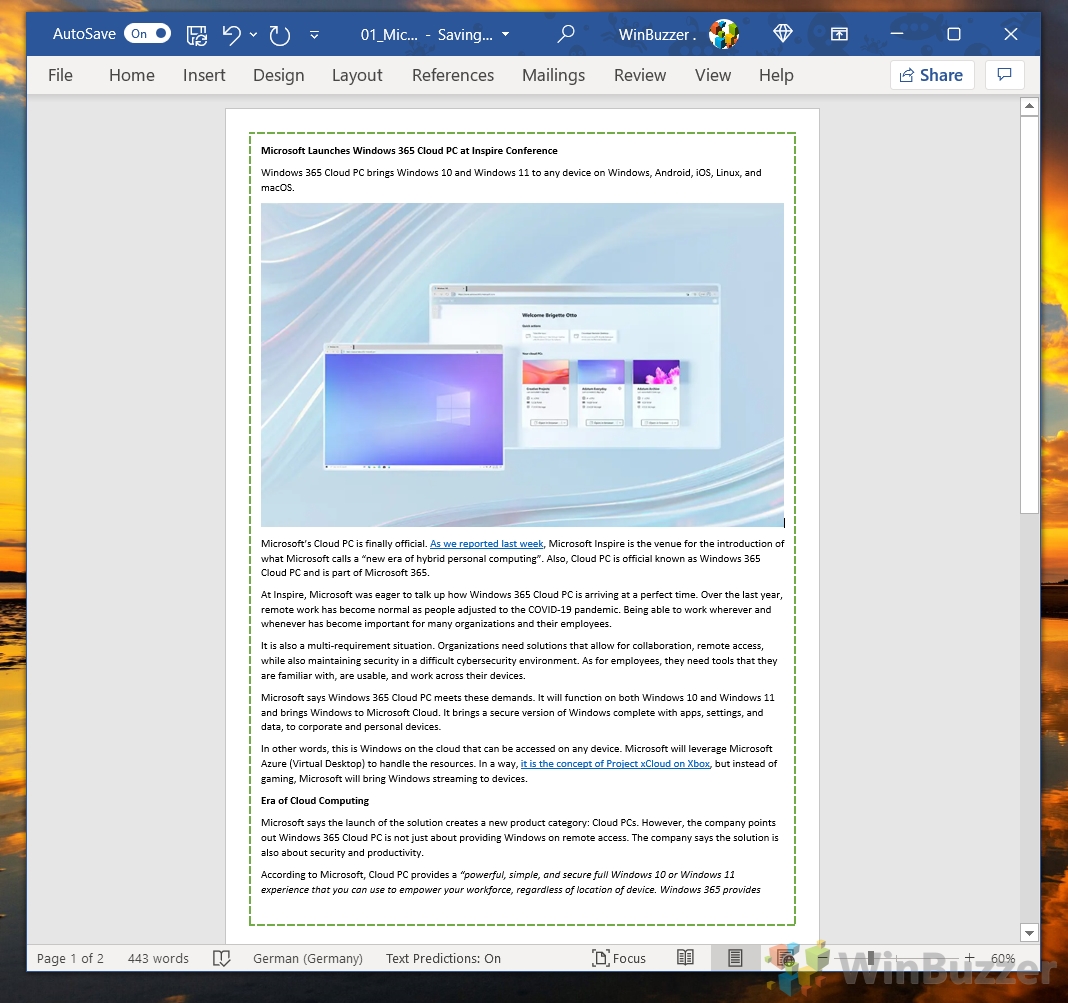
You should see that the border neatly hugs the edge of your text and images without overlapping.


How to Set Alternate Microsoft Word Border Styles and Formatting
If a plain black line is a little too boring for you, you can make use of the Word page border options to customize the shadow, thickness, line style, and more.
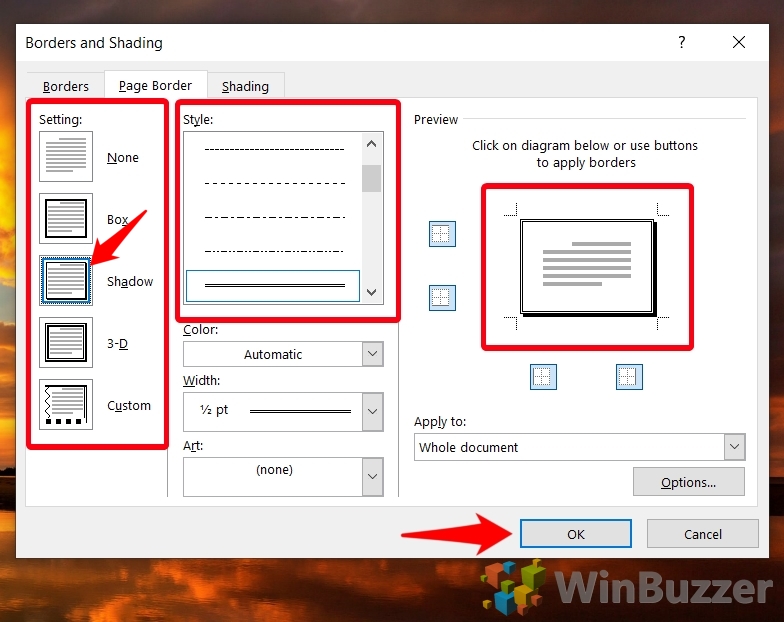
- Switch to another border setting and change line style
Instead of choosing a lined “Box” as borders for pages, you can use “None” for the standard invisible border design, or choose “Shadow” or “3-D” for a 3-D effect. “Custom” allows defining your own page border design. Border line style, color and thickness can also be changed. Press “OK” to apply the changes.

- Preview your page borders in your main document window

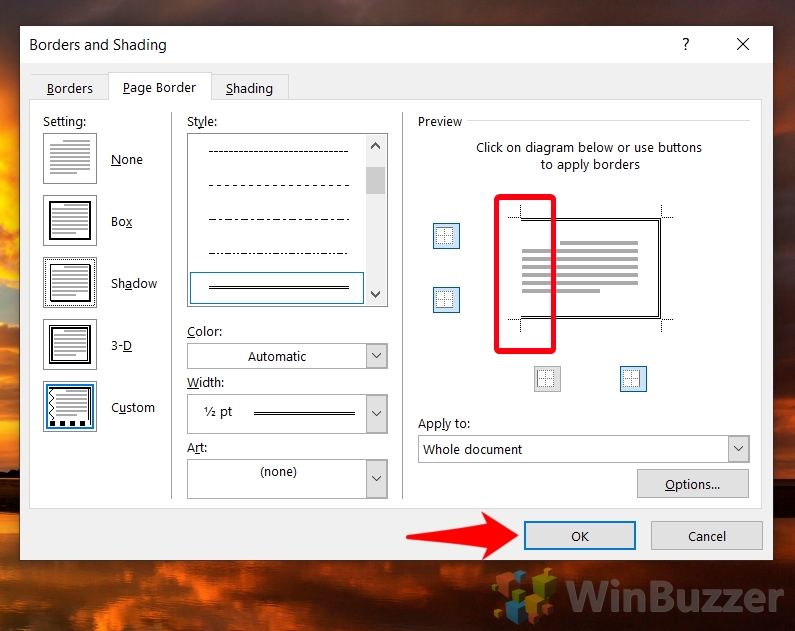
- Remove an individual border line
If you’d like to remove a specific border line, you can do so by clicking it in the preview on the right-hand side and then pressing “OK”.

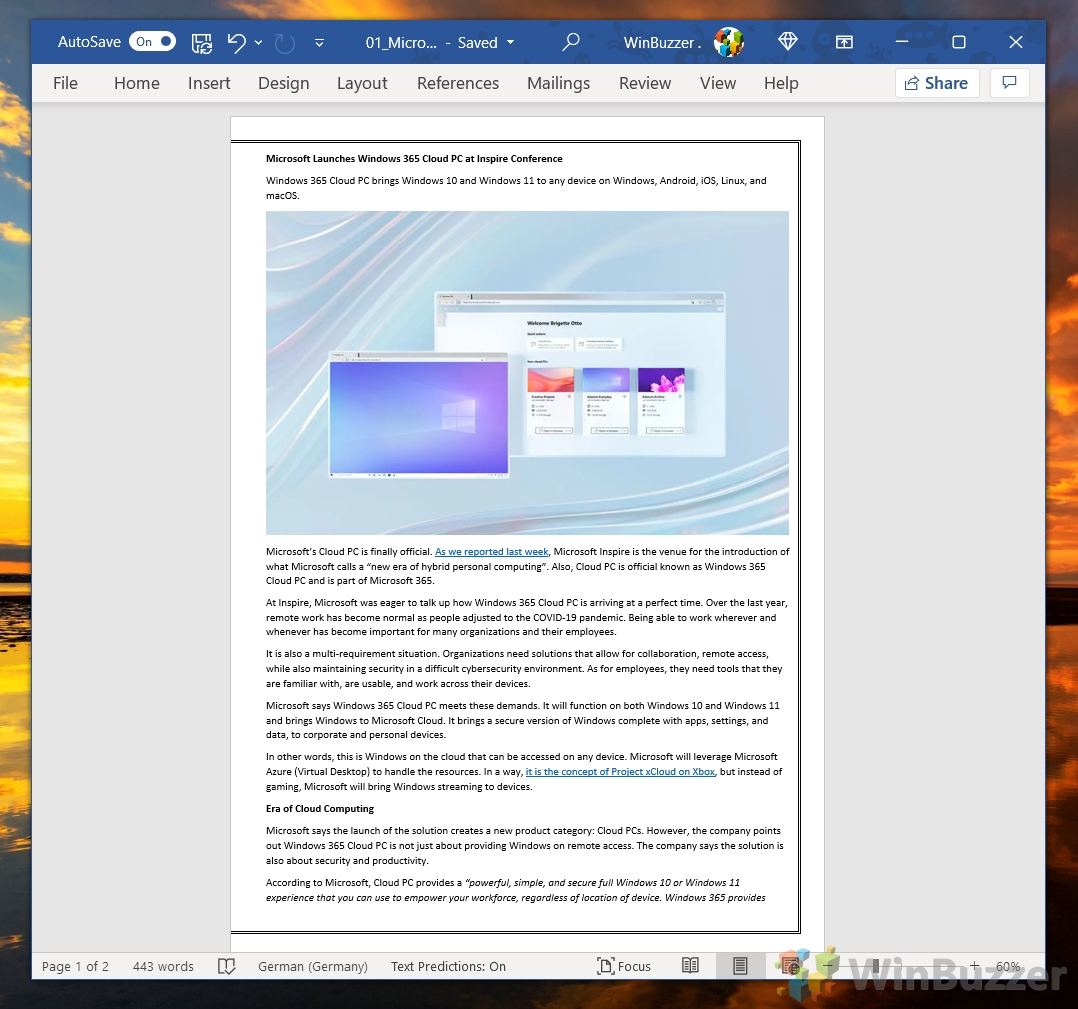
- Check your page borders in Word page view
You should see that border you selected is completely gone and the line instead reaches right to the edge of the page.

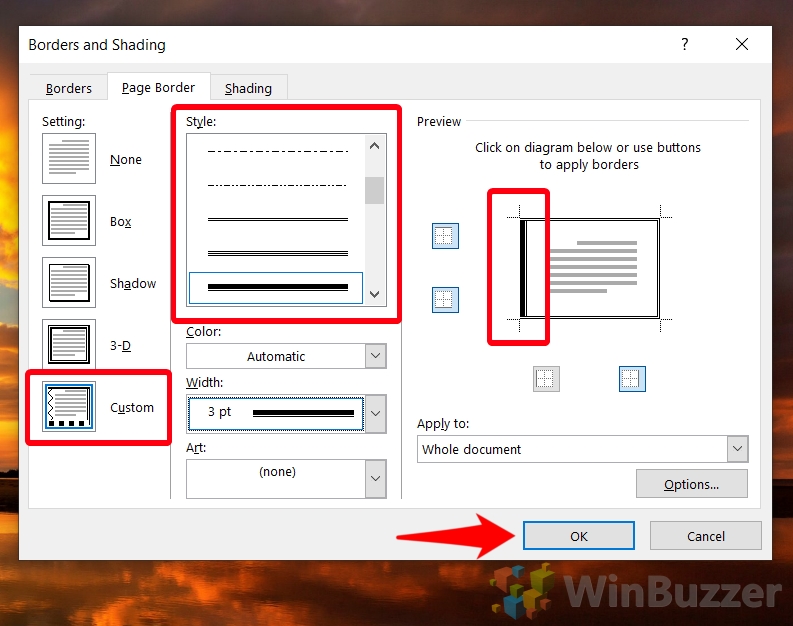
- Modify the style of a specific Word border line
If you want a single border to be in a different style, you can instead click “Custom”, select a line style, and then click on the border you want to change in the preview window. Press “OK” to apply the changes to your document.

- Check your border line’s new style

7. How to change the colour and width of page borders in Word
If you have a dark document background or black is too boring, you can change your border color and width in the same menu.
Click on the “Color” and “Width” dropdown to do so, then click “OK” to apply the changes. This works for both your border as a whole and a specific border line.
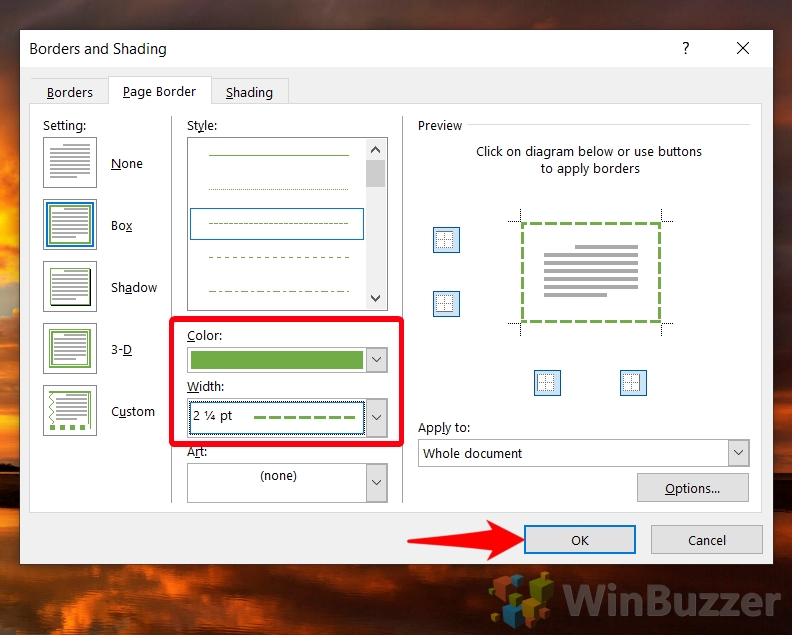
8. View your new border colour and width and adjust as necessary
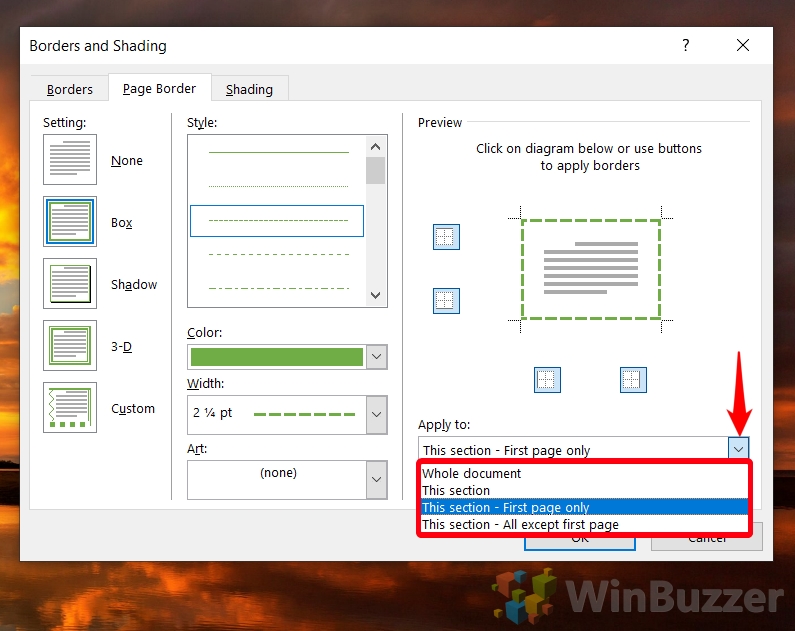
How to Insert a Border in Word for a Single Page
Quite often it makes sense to only have a border on the first page – for use on a cover page for example. Here’s how you can do that:
- Click the dropdown underneath “Apply to” and choose “This section – First page only”
Selecting this option will apply the border to your first page only. If you want to apply it to a different page, you can click on the page in your document and choose “This section” instead.Alternatively, if you want a border everywhere but the first page, choose “This section – All except first page”.
Press “OK” to apply the changes.
- Make sure the page border in Word applied correctly

How to Delete a Page in Word or Add Line Numbers
Now that you’ve applied your borders, you may notice a blank page at the end of your document with a border around it. You can follow our how to delete a page in Word tutorial to remedy this.
Or, if you want to make your document even more useful, why not learn how to add or remove line numbers? This way, readers can reference any part of your document with ease.
Updated: 05/16/2020 by
Microsoft Word gives you hundreds of page border options, allowing you to surround a page with a clean or fancy border, like a frame for a picture. You can also set a border to provide a shadow or 3D effect.
Add a border
- Open Microsoft Word.
- Click the Page Layout tab. In Word 2013 and 2016, click the Design tab instead.
- In the Page Background group, click the Page Borders option.
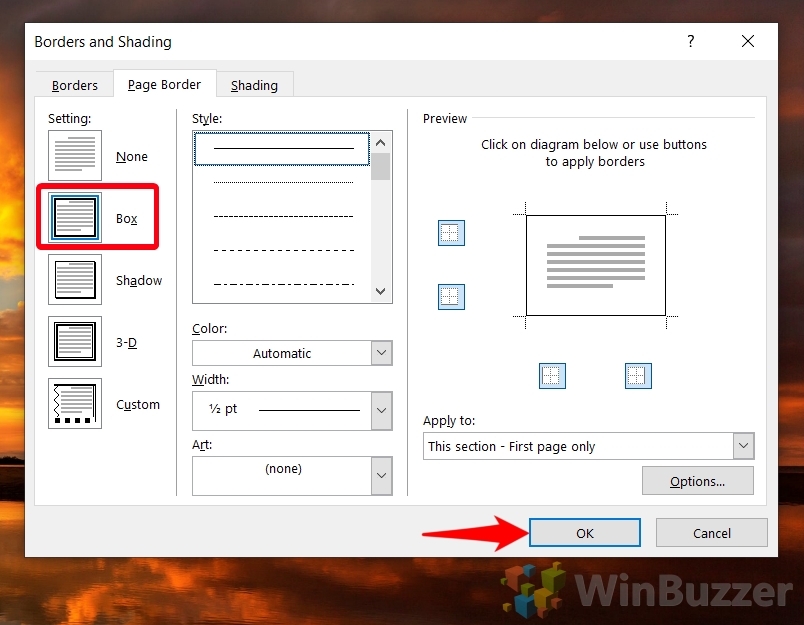
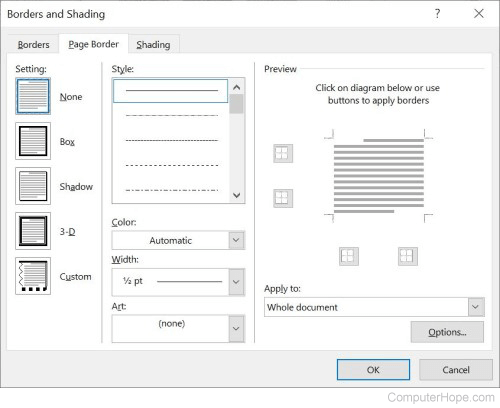
- In the Borders and Shading window (shown below), if not already selected, click the Page Border tab.
- Select Box if you want a square border around your page.
- Select the Style of border you want on the page, which can be solid, dotted, or dashed. Select the Color and Width of the border. If you want to select artwork to use as the border, click the down arrow for the Art drop-down menu. In the example below, we’re using the hearts art as a border.

Tip
By default, the borders are applied to the whole document, which means every page has the same border. Clicking the down arrow on Apply to gives you the option to select the first page only, selected page, all pages but the first page, and other options.
- Once you’ve selected all the border options you want to use in your document, click the OK button to apply the border.
Modify a border
- Open Microsoft Word.
- Click the Page Layout tab. In Word 2013 and 2016, click the Design tab instead.
- In the Page Background group, click the Page Borders option.
- In the Borders and Shading window (shown below), if not already selected, click the Page Border tab.
- Make the desired changes to the border that is currently set for the document or page. You can change the type of border in the Settings section, choosing from Box, Shadow, 3-D, or Custom. You can also change the style, color, and width of the order, and add or change art used in the border.
- When you have finished making the desired changes to the border, click the OK button to apply the changes.
Remove a border
- Open Microsoft Word.
- Click the Page Layout tab. In Word 2013 and 2016, click the Design tab instead.
- In the Page Background group, click the Page Borders option.
- In the Borders and Shading window (shown below), if not already selected, click the Page Border tab.
- Select None to remove any border on the page.
- Click the OK button to remove the border.
![]()
Download Article
Learn how to insert a lined or art border in Microsoft Word documents on desktop
![]()
Download Article
- Adding a Page Border (Windows)
- Adding a Page Border (Mac)
- Adding a Text Border
- Q&A
|
|
|
Do you want to make an outside border in your Microsoft Word documents? You can easily add a solid or dotted border to an entire page or selected content. You can also use Microsoft Word’s included designs to create an artistic border for themed event flyers. This wikiHow will show you how to create a border around text, images, or pages in Microsoft Word using your Windows or Mac computer.
Things You Should Know
- To add a page border, click «Design» → «Page Borders». Select a border setting, style, and page application. Click «OK».
- To add a border around text or images, select the content. Click the «Home» tab and click the arrow next to the border icon. Click «Borders and Shading…»
- Select a border setting, style, and page application. Click «OK».
-
1
Open a project in Microsoft Word. This looks like a W on top of a blue square. Microsoft Word is available to install for Windows.[1]
- You must have a subscription to use Office 365.
- Use this method to add a lined border around a Microsoft Word document. This is different from changing the margins.
-
2
Click Design. This will be in the top toolbar, between Draw and Layout.
Advertisement
-
3
Click Page Borders. You can find this at the left side of the Design section, next to Page Color. It will have an icon of a page with a yellow border.
- A new window will open.
-
4
Click Page Border. This is the middle tab on the Borders and Shading window. You may already be on this tab.
-
5
Select a border setting. In the left-most column, click the border option that you want to use. Select from: None, Box, Shadow, 3-D, and Custom.
- If you want a simple border to go all the way around your page, select Box.
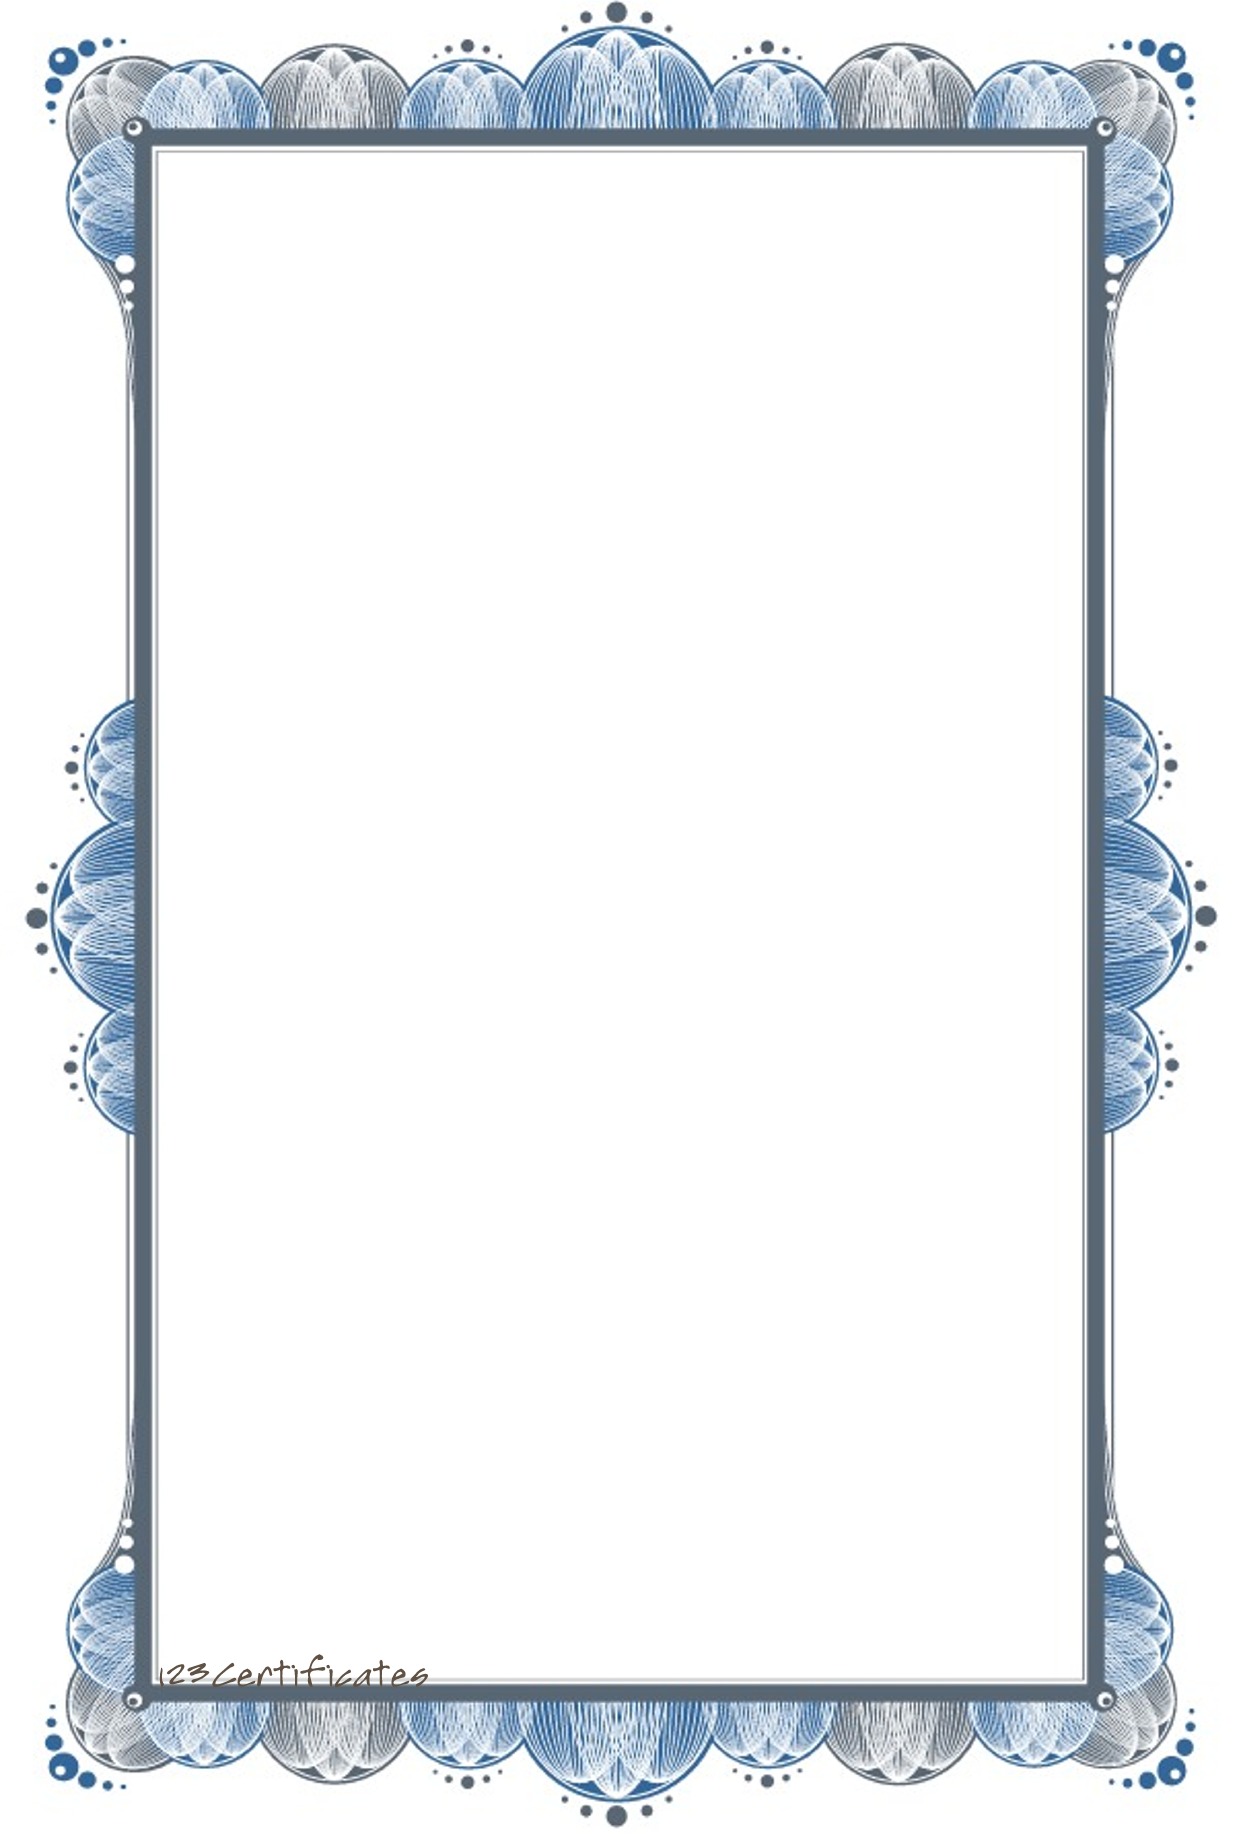
- To add a border with fun images, click the Art drop-down menu and select from Word’s art gallery. This border can be used for themed flyers for holidays and events.
-
6
Select a border style. In the «Style» column, scroll down until you find the border style you want to use, then click the style. Select from the various solid and dotted line styles.
- If needed, you can also change the border’s color and width from the Color and Width drop-down menus, respectively.
-
7
Select pages to use. If you created a new section earlier in this method, click the «Apply to» drop-down box, then click the section to which you want to apply the border in the resulting drop-down menu.
- To apply the border to the first page of your section, click This section — first page only in the drop-down menu.
-
8
Click OK. It’s at the bottom of the page. This will apply the border to your document’s specified page(s).

Advertisement
-
1
Open a project in Microsoft Word. This looks like a W on top of a blue square. Microsoft Word is available to install for Mac.[2]
- You must have a subscription to use Office 365.
-
2
Click Design. This will be in the top toolbar, between Draw and Layout.
-
3
Click Page Borders. You can find this at the left side of the Design section, next to Page Color. It will have an icon of a page with a yellow border.
- The Borders and Shading window will open, set to the Page Border tab. If it isn’t already on the Page Border tab, click it now.
-
4
Select a border setting. In the left-most column, click the border option that you want to use. Select from: None, Box, Shadow, 3-D, and Custom.
- If you want a simple border to go all the way around your page, select Box.
- To add a border with fun images, click the Art drop-down menu and select from Word’s art gallery. This border can be used for themed flyers for holidays and events.
-
5
Select a border style. In the «Style» column, scroll down until you find the border style you want to use, then click the style. Select from the various solid and dotted line styles.
- If needed, you can also change the border’s color and width from the Color and Width drop-down menus, respectively.
-
6
Select pages to use. If you created a new section earlier in this method, click the «Apply to» drop-down box, then click the section to which you want to apply the border in the resulting drop-down menu.
- To apply the border to the first page of your section, click This section — first page only in the drop-down menu.
-
7
Click OK. This is the blue button. This will apply the border to your document’s specified page(s).
Advertisement
-
1
Open a project in Microsoft Word. This looks like a W on top of a blue square.
-
2
Click Home. This is in the top toolbar, between File and Insert.
-
3
Select content. Click and drag your mouse across the text or image(s) around which you want to place a border.
- This method will place a border around an entire selection of images and text together.
- If you want to place a border around a single image, double-click the image. Select a preset style from the Picture Styles section, or click Picture Border to set the color, weight, and design of the border.[3]
-
4
Click
next to the «Borders» button. The Borders button resembles a square divided into four smaller squares; you’ll find it in the «Paragraph» section of options in the toolbar, just right of the paint bucket icon. A drop-down menu will open.
- On a Mac, click the Format menu item at the top of the screen instead.
-
5
Click Borders and Shading…. It’s at the bottom of the drop-down menu. A new window will open.
- On a Mac, you’ll find this option in the middle of the Format drop-down menu.
-
6
Select a border setting. In the left-most column, click the border option that you want to use. Select from: None, Box, Shadow, 3-D, and Custom.
- If you want a simple border to go all the way around your text, select Box.
-
7
Select a border style. In the «Style» column, scroll down until you find the border style you want to use, then click the style. Select from the various solid and dotted line styles.
- If needed, you can also change the border’s color and width from the Color and Width drop-down menus, respectively.
- To add a border with images, click the Art drop-down menu and select a design.
-
8
Select pages to use. If you created a new section earlier in this method, click the «Apply to» drop-down box, then click the section to which you want to apply the border in the resulting drop-down menu.
- To apply the border to the first page of your section, click This section — first page only in the drop-down menu.
-
9
Click OK. This will apply the border to your document’s specified page(s).
- Be sure to save your document when you’re finished.
- You can also use Microsoft Word to create a booklet or another handout flyer.


Advertisement
Add New Question
-
Question
How can I place a border around a picture I’ve inserted into a document?

You do what is shown above, but instead, you click on the picture before you go through the steps.
-
Question
How do I put a border around a table in Microsoft Word?
Go into Format —> Borders and Shading. There you’ll find options for borders you can apply to the table.
-
Question
What three options can I set regarding a picture border?
The three option you can set are: small, medium and large.
Ask a Question
200 characters left
Include your email address to get a message when this question is answered.
Submit
Advertisement
Thanks for submitting a tip for review!
About This Article
Thanks to all authors for creating a page that has been read 971,538 times.
Is this article up to date?
Collection of Free Border Templates (40)
certificate templates
swirl border
black and white page border design

gift certificate template border

elegant blue border design

powerpoint border png
printable borders for certificate
employee of the week certificate

border clip art
fish clipart border
clipart vintage frames

indication of chest physiotherapy

frames for wedding invitation

flower border design landscape
ppt borders for kids

simple border design black and white
clip art
certificate border template plant
certificate border formal
plain border for certificate

border design for menu card

My Little Pony Friendship is Magic

frame for power point
screenshot

printable wedding invitation border

background design for word documents
motif
free clip art borders

black and white striped border
achievement certificate for badminton tournament
free floral border templates word

clip art school border
page border designs for documents
christmas star border
clip art
printable scroll template

old book cover vector free download
green certificate border png

financial advising certificate john oliver

Vector graphics

Other Popular Clip Arts
Showcase Cliparts Skelington

Bowling

Pictures Of Cartoons For Kids

Valentine’s Reading Cliparts

Llama Clipart

Culture Cliparts

Fast-Flying Cliparts

Pic Nic Pictures
Mickey Silhouette Png

Flying Dragon Silhouette

Heart With Arrow Silhouette
![]()
Campfire Black And White Clipart