
Insert a header or footer

-
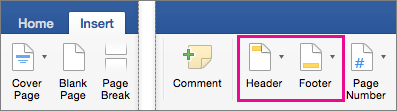
Go to Insert > Header or Footer.
-
Choose the header style you want to use.
Tip: Some built-in header and footer designs include page numbers.
-
Add or change text for the header or footer. For more info on things you can do with headers, see Edit your existing headers and footers. To edit a header or footer that’s been already created, double-click on it.
-
To eliminate a header—like deleting it on the title page—select it and then check the Different First Page box.
-
Select Close Header and Footer or press Esc to exit.
To delete, select Insert > Header (or Footer) > Remove Header (or Remove Footer).
Add a standard or customized header or footer
-
Go to Insert > Header or Footer.

-
Choose from a list of standard headers or footers, go to the list of Header or Footer options, and select the header or footer that you want.
Or, create your own header or footer by selecting Edit Header or Edit Footer.
-
When you’re done, select Close Header and Footer or press Esc.
Important:
Office for Mac 2011 is no longer supported. Upgrade to Microsoft 365 to work anywhere from any device and continue to receive support.
Upgrade now
-
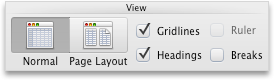
On the Layout tab, under View, click Page Layout.
-
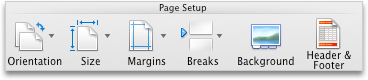
On the Layout tab, under Page Setup, click Header & Footer.
-
Choose from a list of standard headers or footers by going to the Header or Footer pop-up menu, and clicking the header or footer that you want.
Or, create your own header or footer by clicking Customize Header or Customize Footer and following the instructions.
Note: When you customize your header or footer, you can add images, page numbers, date, time, sheet name, file name and path, and more.
-
Go to Insert > Header & Footer.
-
Add or header or footer text.
-
Use the Options menu for additional customization.
-
To exit, select Close Header and Footer or press Esc.
-
To delete, select Insert > Header (or Footer) > Remove Header (or Remove Footer).
For more on headers and footers, see Headers and footers in Word.
Need more help?
 When I first wrote this blog post, Word 2003 was still the predominant version of the program, more commonly used than Word 2007. (And Word 2010 was just a gleam in some Microsoft programmer’s eye…) So I basically wrote the post for users of 2003 and then just posted a brief explanation where to find the same functions in 2007, which was the first version to use ribbons instead of dropdown menus. Over the years, this has been one of the most popular T4L posts but now that 2007 and 2010 are more widely used, I’ve decided to spell out the steps for those versions in full. You can still find the instructions for Word 2003 and earlier versions later in the post.
NOTE: I’ve never had Office 2013, so I can’t say if there are any differences for that version, but I now have Office 2016 and the process is exactly the same, so it’s a good bet that it is for 2013 as well. (If you have Word 2013 and there is any difference, please post a comment below and I’ll add that info here.)
Both sets of instructions are for creating different sections in an MS-Word document so you can change the header for each section. For example, you might want to have different headers with each chapter name to help readers find the section they’re looking for more quickly.
Note: The same techniques work for creating separate footers, which you might want to do to start Page 1 after a Table of Contents, for example.
Section Break vs. Page Break
You may already know that you can force a page break by placing your cursor in front of the text you want to start on the next page and pressing Ctrl + Enter on your keyboard. (And if you don’t know that, consider this a bonus tip!) 🙂
However, that won’t work for our purpose. We don’t want to just move the text to the next page; we want to start a new section so we can create a new header.
Instructions for Word 2007, 2010, 2013, and 2016
Put your cursor at the start of the text you want to start a new section.
On the Page Layout ribbon, click the down arrow beside the Breaks button. (In Word 2016, the ribbon is just called Layout. I don’t know which one it is in 2013.)

Select Section Breaks > Next Page.
Now the text is at the top of the next page.
Move your cursor near the top of the page and double-click to display the Header area.

NOTE: Some readers have reported that if they create a Header section using the Insert > Header command and choose anything other than the Blank option, the instructions don’t work. I’m not sure why this is as it works for me, but if you are still having problems after following these steps, try changing the Header format to Blank.
The Header and Footer Tools Design ribbon has opened at the top of the page. You can see that the Link to Previous button is depressed, meaning the two sections will have the same header. (You can also see a Same to Previous tab on the bottom border of the header section.)

Click the Link to Previous button.

The Same as Previous tab is now gone from the header section.
Type “Section 2 Header” in the header area.
Double-click in the main text area of the page.
This will close the header section and remove the toolbar. The new header appears at the top of the page.

Now, if you scroll back up to the first page, you can see that the header is still blank, because the two headers are no longer linked. You could also enter text into the header area and it wouldn’t change the header on the next page.
![]()
Simply repeat these steps for each new section and you can have as many different headers as you want.
Instructions for Word 2003 and Earlier Versions
Note: The screenshots below show a document I used when I wrote the original post. I no longer have it and I no longer have Word 2003, so I can’t update the document. But the dialog boxes should look the same.
Put your cursor at the start of the text you want to start a new section.
From the Insert menu, select Break.
In the dialog box that comes up, select the “Next page” radio button from the “Section break types” area.

Now the text is at the top of the next page. You can tell it’s also the beginning of a new section by looking at the status line at the bottom left of the Word window.

From the View menu, click Header and Footer.
The header section of the page will display and the Header and Footer toolbar also appears.

You’ll notice, above the header box, it says “Same as previous.” This is the default option for when you create a header, and that’s what we need to change.
Click the Same as Previous button on the toolbar.
You can mouse over the buttons to see the names of them. You want to click it so it doesn’t look like it’s depressed.

The “Same as previous” text is now gone from the header box at the top of the page.

Type “Section 2 Header” in the header area.
Double-click in the main text area of the page.
This will close the header section and remove the toolbar.

Now, if you scroll back up to the first page, you can see the header is still blank, because the two headers are no longer linked.
![]()
Simply repeat these steps for each new section and you can have as many different headers as you want.
You may also be interested in:
Save Text Snippets to Easily Reuse in Microsoft Word
Four Formatting Tips for Excel
Microsoft Products: News, Views, & How-Tos
Filed Under: Formatting, How To, MS-Word, Popular, Top Ten, Updates
If you found this post helpful, maybe your friends will too (hint, hint)!
To receive future blog posts in your Inbox, please fill out the form below.

This tutorial shows how to insert headers and footers in Microsoft Word. We’ll also look at how to edit and delete existing headers and footers.
Quick Links:
- How to Insert Headers and Footers
- How to Edit Headers and Footers
- How to Delete Headers and Footers
If you want to insert page numbers in headers or footers, please see “How to Add Page Numbers in Microsoft Word.”
If you want to insert headers or footers in specific chapters or sections, please see “How to Insert Headers and Footers on Specific Pages in Microsoft Word (PC & Mac).”
This tutorial is available as a YouTube video showing all the steps in real time.
Watch more than 200 other writing-related software tutorials on my YouTube channel.
The images below are from Word for Microsoft 365. These steps will also work in Word 2021, Word 2019, Word 2016, Word 2013, and Word 2010. However, your interface may look slightly different in those earlier versions of the software.
Please note that Word provides many ways to work with headers and footers. Therefore, this tutorial is limited to the steps I believe will be the most useful for the majority of people.
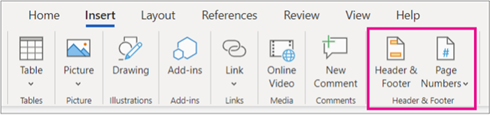
- Select the Insert tab in the ribbon.

- Select the Header or Footer button in the Header & Footer group.

- Select a built-in style from the drop-down menu.

After you select a style, Word will automatically switch from the Insert tab to the Header & Footer tab. This tab only appears when you are working with headers or footers.
- Select the placeholder text, and then type your header or footer information over the placeholder text.
Alternatively, select Date & Time in the Insert group to insert an automatically updating date and time.

- (Optional) Select Different First Page in the Options group to create a different header or footer or no header or footer on the first page.
5.a. Type the information into the First Page Header space. You can also select the Header or Footer button to select a built-in style (see figure 3).
5.b. Leave the space blank if you don’t want a header or footer on the first page.

- (Optional) Select Different Odd & Even Pages in the Options group to create different headers or footers on odd and even pages.

6.a. Select the Next and Previous buttons in the Navigation group to toggle between odd and even pages.
6.b. Type the information into the Odd Page Header and Even Page Header spaces. You can also select the Header or Footer buttons to choose different built-in styles for odd and even pages (see figure 3).

- (Optional) Enter new numbers into the Header from Top and Footer from Bottom text boxes in the Position group to customize the amount of space above the header or below the footer.

Pro Tip: Tabs for Headers and Footers
Tabs placed on the ruler while working on headers or footers won’t appear on the ruler for the body content after you close the Header & Footer tab.

- Select the Close Header & Footer button when you are finished.

The Header & Footer tab will no longer be visible.
- Double-click the header or footer to open the Header & Footer tab. Alternatively, you can right-click the header or footer and select the Edit Header or Edit Footer button.

- The Header & Footer tab will open, and your cursor will automatically move into the header or footer space where you can make adjustments, as necessary.
- Double-click the header or footer you want to delete (i.e., First Page, Odd Pages, or Even Pages). Alternatively, you can right-click the header or footer and select the Edit Header or Edit Footer button (see figure 11).
- Select the Header or Footer button in the Header & Footer tab. (Note that these buttons are in a different location in the Header & Footer tab than in the Insert tab.)

- Select Remove Header or Remove Footer from the drop-down menu.

This method will only delete the type of header or footer that you selected. For example, if your document has different headers on odd and even pages and you selected a header on an odd page, only the odd page headers will be deleted. However, if your document has the same header on every page, all the headers will be removed.
Related Resources
How to Add Headers and Footers to PDFs in Adobe Acrobat
How to Insert Footnotes and Endnotes in Microsoft Word
How to Insert Citations in Microsoft Word
Updated January 21, 2023
You can get a lot out of headers and footers in Microsoft Word. We show you how to use them in a document.

Headers and footers are simple to use in Microsoft Word, but there is much more to them than catches the eye. Learn how to get more out of headers and footers in Word.
In Microsoft Word, the top margin of a page is called its header, and the bottom margin is called the footer. Headers and footers are especially useful for including information that you want to display on every page, or specific pages. This information could be the page number, the chapter title, or anything else.
The main difference between a header and a footer is where they’re positioned in the document. So, what works for the header also works for the footer. That being said, let’s start with inserting something to the header in Word.
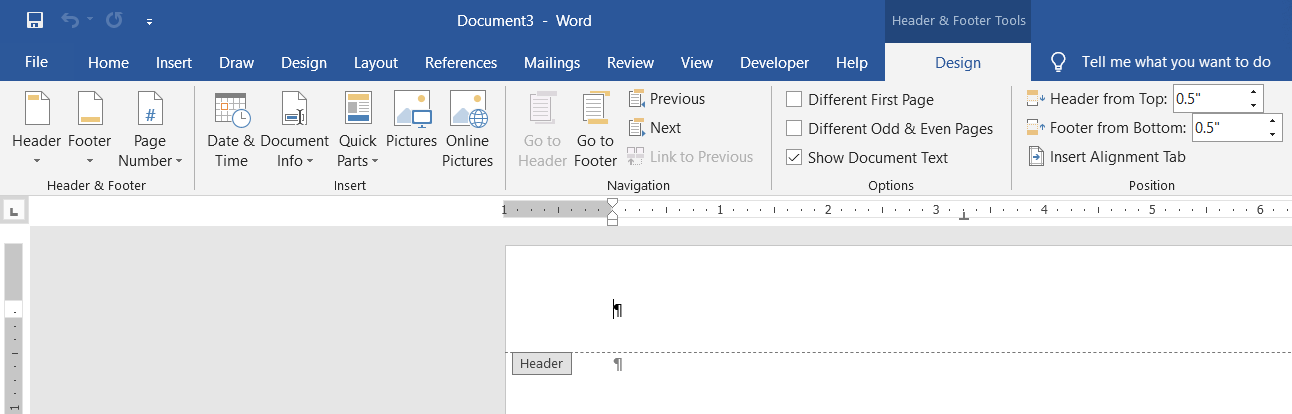
- Go to the Insert tab.
- Select Header. This will bring up a dropdown menu with some options in it. These are all presets for the header, provided by Microsoft. For now, select the first option which is Blank. This will take you to the header and also activate the Header & Footer Tools in the Design tab.


If you’ve more than a single page in your document, you’ll notice that once you add something in the header, it’s going to appear on top of every page in your document. This makes the header an excellent location to place document info.
A quicker way to access the header is to double-click on the top margin of the page. Double-clicking the bottom margin will bring up the footer.
The Header & Footer Tools tab activates whenever you’re editing the header or the footer of a page. This tab allows you to change options related to the header and also insert components other than plain text to it.
Different First Page
So far, anything that you add to the header will appear on every other page but what if you don’t want the header on your first page to appear on every page in the document? You might want to have other content in the header of other pages or anything else. This can effortlessly be resolved:
- Double-click on the header.
- In the Header & Footer Tools tab, in the Options section, check Different First Page.
Once you check this option, the stuff you put in the header of the first page won’t appear on other pages and conversely, if you change the header of any other page it won’t affect the first page.
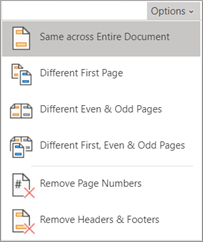
Different Odd and Even Pages
You probably have seen this one in different documents and even books. As a familiar example, you could have the document title in the odd page header and the heading title on the even pages. You need to check only one option to have different headers on odd & even pages:
- Double-click on the header.
- In the Header & Footer Tools tab, check Different Odd & Even Pages.
Now, when you edit the header of an odd page it will apply to all odd pages but it won’t affect the even pages. This also works the other way around.
You can also have different headers for different sections. To do this, you need to create sections in your document first. To create sections:
- Select where you want to create a section by placing your cursor there.
- Go to the Layout tab and then click on Breaks.
- In the bottom half of the menu, you can see the Section Breaks.
- Select Continous from the menu. This will create a Section Break right where you had placed the cursor.

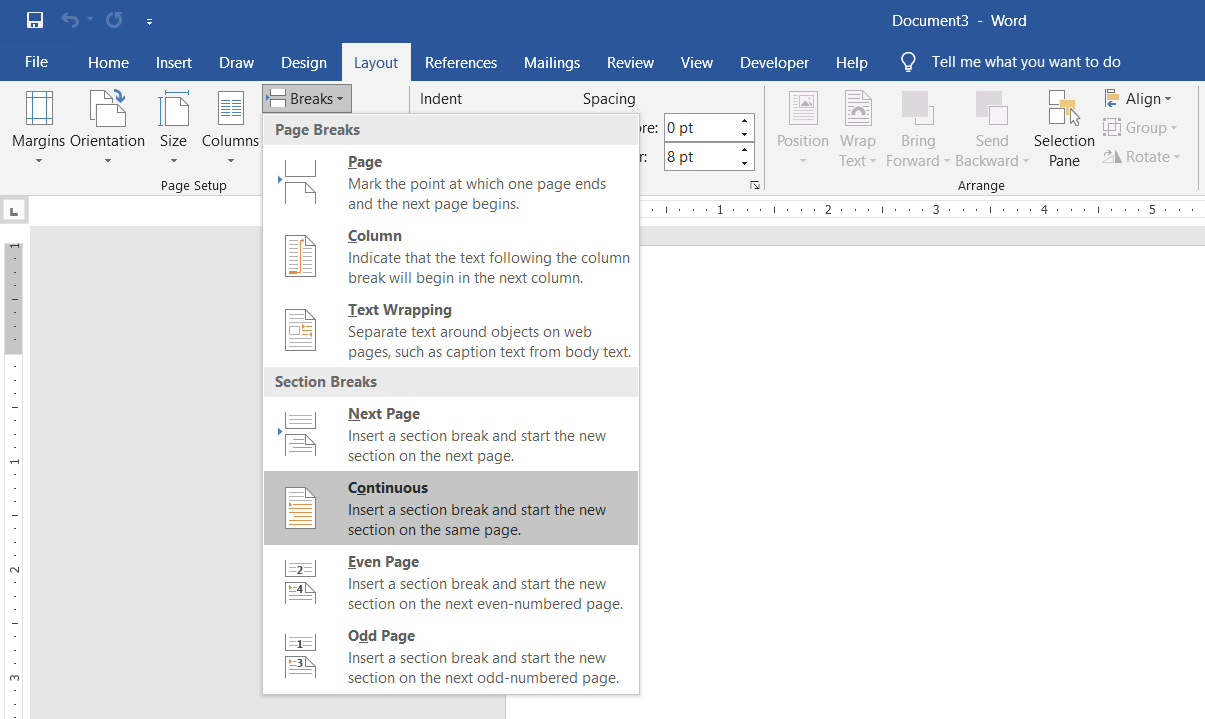
Once you create sections in your document, you can have different headers for each section. You can read our article on creating and removing page breaks to learn more about breaks.
To have different headers for a section:
- Double-click on the header and go to the Header & Footer Tools tab.
- Click on Link to Previous and disable it. Keeping this option enabled will use the same header and footer as the previous one for this section.
There you have it! With these, you can have unique headers for any page in your document.
Numbering Pages in Word
Headers and footers in Word provide a display area for page numbers in your document. Adding page numbers to longer documents makes them easier to navigate for readers. To add page numbers:
- Go to the Insert tab.
- In the Header & Footer section click Page Number.
- In the menu, you will have four choices for the location. Choose one and then select the styling you want.

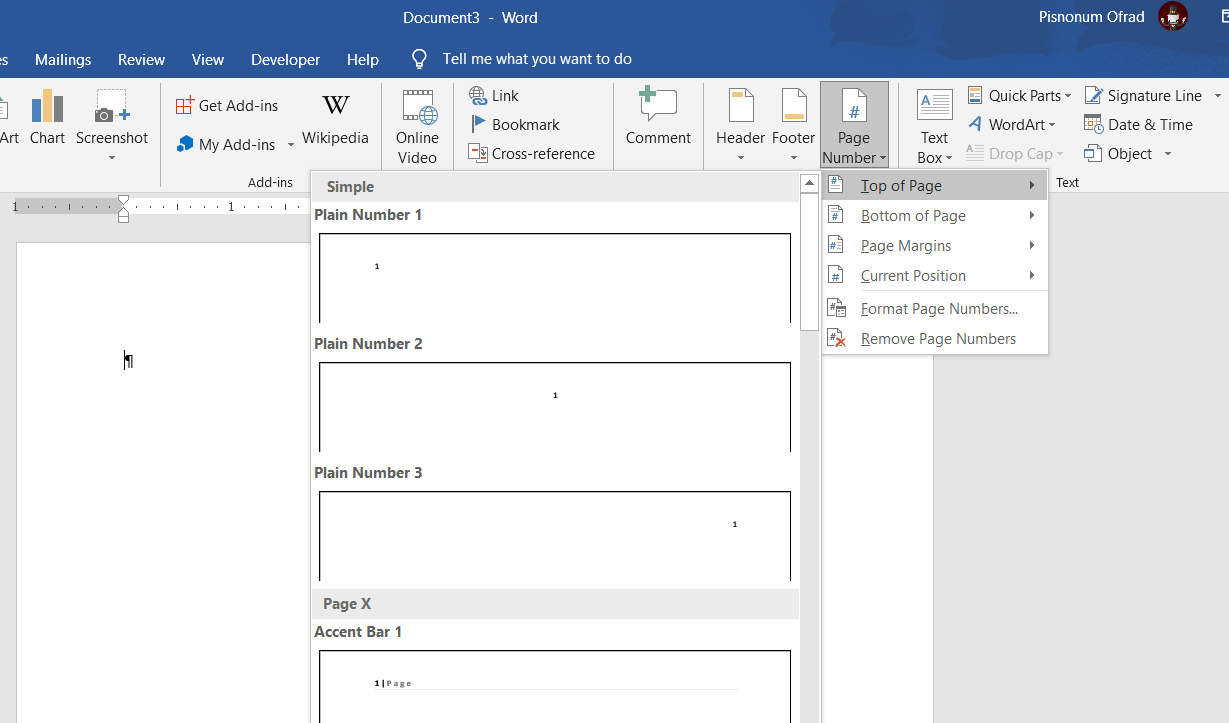
Top of Page and Bottom of Page will display the page number in the header and the footer respectively, but you can show the page number in areas other than these two.
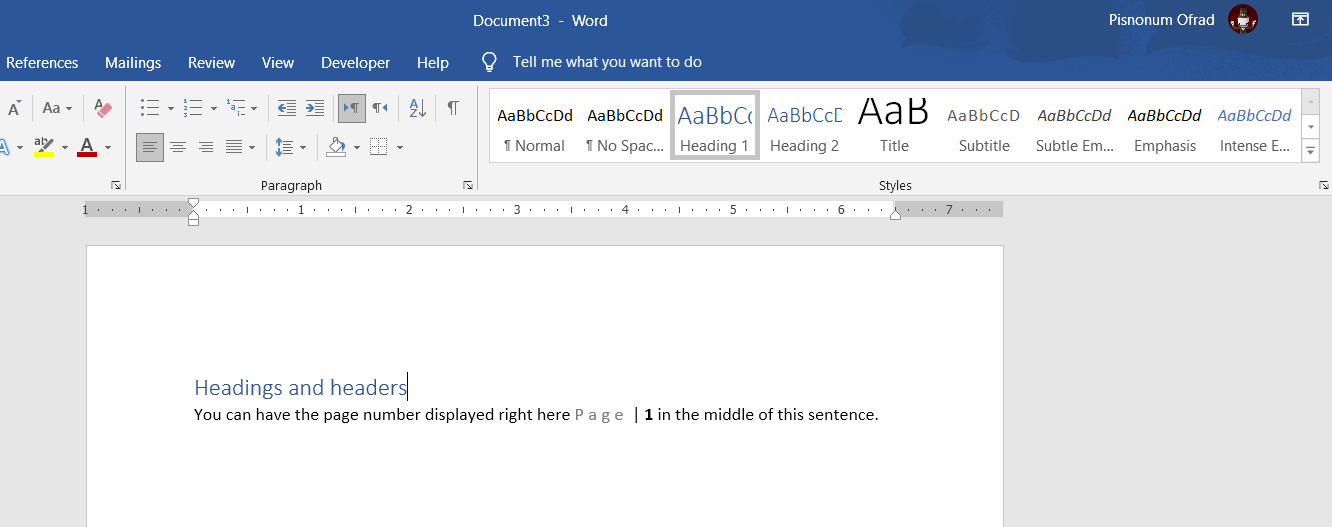
Selecting Page Margins will display the page number on the right or left side of the page. What’s more, is that you can show the page number anywhere within the page. To do this:
- Place your cursor where you want to display the page number.
- Go to Insert and then select Page Number.
- From the menu, select Current Position then select a style.

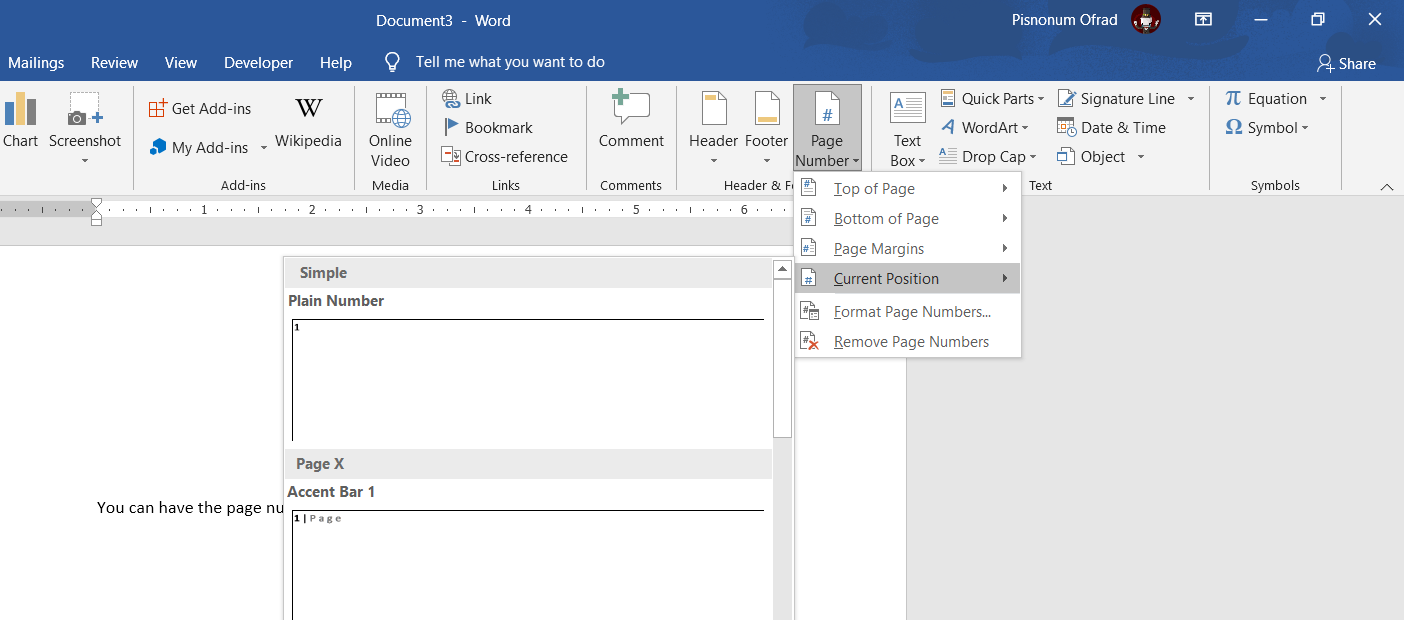
This will add the page number right where your cursor was. Keep in mind that this won’t show the page number on every page, it will appear only where the cursor was.
For an in-depth guide on numbering pages in Word documents, read our article on how to number your Word document.
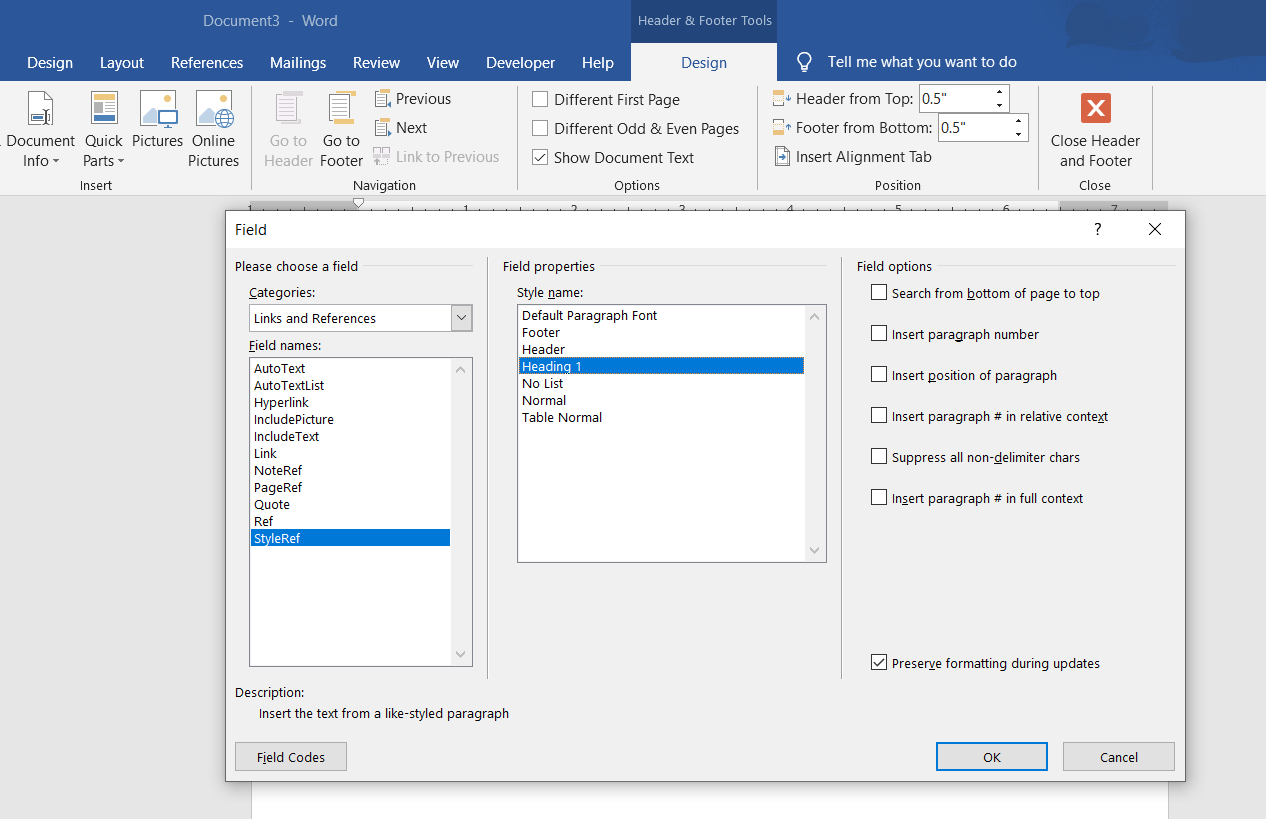
You can make your document more dynamic by utilizing Fields in Microsoft Word. Fields are dynamic components that add auto-updating variables to your document. For example, you could insert a field in your header to display a heading on every page. This way you don’t have to type the heading on top of each page.
Note: Headers and headings are similar in name, but they’re different in nature. A header is the top margin of the document while a heading is a document element that allows you to define different sections and build a table of content for your document.)
Let’s work on the example we mentioned to add the heading to the top of each page. To do this, you’ve to first create some headings for your document.
- Go to the Home tab.
- In the Styles section, select a heading. For now, let’s go with Heading 1.
- Next, type something in your heading so that it’s not blank.

Once you’ve your headings set out, it’s time to display their names in the header.
- Double-click the header and then go to the Header & Footer Tools tab.
- Click on Quick Parts and then select Field… . Here you can see the various fields you can add to the header.
- From the Categories menu, select Links and References.
- In the Field names select StyleRef.
- Finally, in the Style name box, select Heading 1.
- Check the additional options that you might want in Field options and once you’re done, click OK.

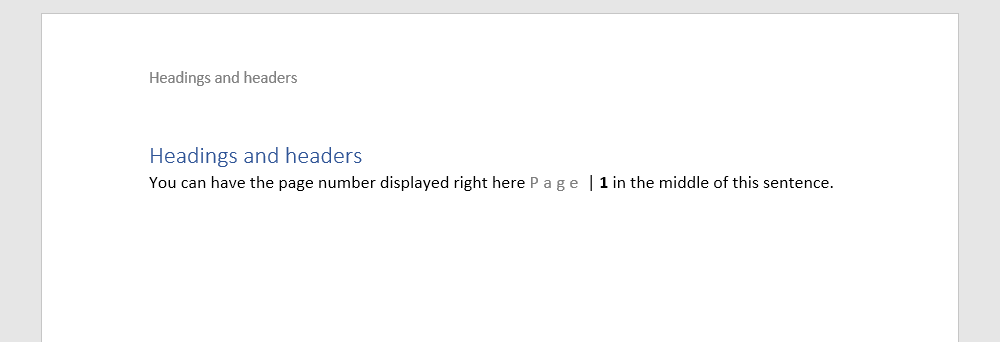
Now you can see the headings displayed in the header of the page. It will show the same heading until a new heading is used on a page.
There are many fields that you can use in your document. Fields aren’t exclusive to the header or the footer and you can use them anywhere else in your document as well. You can access fields from the Insert tab:
- Go to the Insert tab.
- On the right side, click Quick Parts and then select Fields.


Now that you’ve read through all these, you can achieve a lot more from the top and bottom margins of your document. However, this is just one of the many things you can do to improve your document.