
Radio button can be used in a Form to capture user’s feedback. Following is a simple example that shows the usage of a radio button also known as Option button.

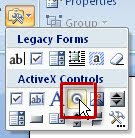
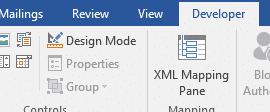
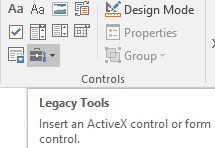
- On the Word Ribbon, under the tab Developer, within the group Controls, click the Legacy Tools icon. A drop-down list appears.
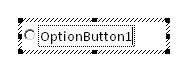
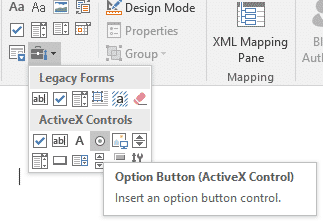
- From the drop-down list, under the section ActiveX Controls, click the icon Option Button (ActiveX Control). Word creates something like the following.
- By default, the radio button appears in Design Mode. Click the Design Mode option available within group Controls to switch to normal mode, so that the radio button becomes clickable.
- To change the caption of the radio button,
- Click the radio button and then click Design Mode from the Controls group.
- Right-click the radio button and click option Properties from the right-click menu.
- On the Properties sheet, under the tab Alphabetic, look for the row with the heading Caption. On the adjacent cell of Caption, double-click to delete the default caption i.e. OptionButton 1 and enter a new caption. Alternatively, you can delete the default caption to retain only radio button. Later, you can resize the button by dragging the resize handles.
The next challenge is to group the radio buttons under different sections.
This is important for each group of buttons to behave independently. Otherwise, all the buttons in the document would behave as one group (by default) and only one feedback could be captured.
For example, in the above example form, each question contains two radio buttons (Yes/No) to capture feedback. Each pair of buttons must be grouped to capture feedback for individual question.
To group radio buttons
- Switch to design mode by selecting the radio button and then clicking the Design Mode option from within the group Controls.
- Once you are in Design Mode, right-click the radio button and select option Properties from the right-click menu. The Properties sheet appears.
- On the Properties sheet, under the tab Alphabetic, look for the row with the heading GroupName. Click the adjacent cell to enter a group name.
- Now you need to keep the same group name for the rest of the radio buttons, which you want to keep as one group. You are done.
Note: Before you share a document containing Radio button or any other controls, you should to protect your document to prevent editing of the document. To know how to protect a document, read the following articles:
https://wordknowhow.wordpress.com/2013/06/25/how-to-insert-text-fields-check-boxes-drop-down-lists-etc-in-a-word-document-to-create-a-form/
https://wordknowhow.wordpress.com/2014/04/03/how-to-create-or-add-checkboxes-checkbox-controls-to-your-word-document/

About wordknowhowhttp://wordknowhow.comThis blog site was started to help people with Microsoft Word. I use Word a lot at work, and I understand that some features are difficult to use. There were no simplified instructions online to help me use these features. It is for this reason that this site exists; to make your life easier with Word.
Feel free to post your comments, queries, suggestions, etc. I will do my best to help you!
Download PC Repair Tool to quickly find & fix Windows errors automatically
A Radio button or Options button is a graphical control element in Microsoft Word that allows users to select a response from preformatted options. The radio buttons are often used in forms or surveys to capture customer or audience feedback.
Follow the steps below to insert a clickable Radio button in Microsoft Word:
- Launch Word.
- Click the Developer tab.
- Click the Legacy button in the Controls group, then select the Radio button or Options button from the menu.
- The radio button is inserted into the document.
- To edit the Radio button, right-click the Radio button and select OptionButton Object, then click Edit from the context menu.
- Now the Radio or options button is editable, type the text you want.
- Follow the step above to insert more radio buttons.
- Click the Design button to exit the Design Mode.
- Now, the buttons are clickable.
Launch Word.
Click the Developer tab.

Click the Legacy button in the Controls group, then select the Radio button or Options button from the menu.
The radio button is inserted into the document.
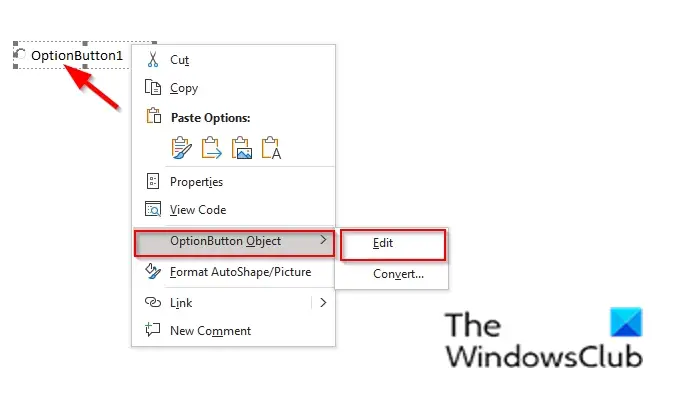
To edit the Radio button, right-click the Radio button and select OptionButton Object, then click Edit from the context menu.
Now the Radio or options button is editable, type the text you want.
Follow the step above to insert more radio buttons.
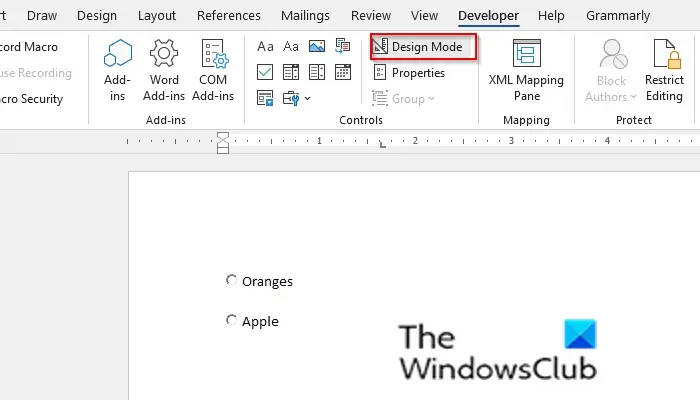
Click the Design Mode button to exit the Design Mode.
Now, the buttons are clickable.
How do I group Radio buttons in Word?
In Microsoft Word, you can group your Radio buttons; Follow the steps below to group the Radio buttons.
- In the Design Mode, right-click the Radio button and select Option Properties from the context menu.
- The Properties sheet will appear.
- On the Properties sheet under the tab Alphabetic, look for the row with the heading GroupName.
- Click the neighboring cell and enter a group name.
- Keep the group name for the rest of the radio buttons, which you want to keep as one group.
- Close the Properties window.
What can I use instead of a Radio button?
If you do not want to use Radio buttons on your surveys or forms, you can use alternatives such as checkboxes and drop-down boxes, which function the same.
We hope this tutorial helps you understand how to use the insert Radio button in a Microsoft Word document; if you have questions about the tutorial, let us know in the comments.

Shantel has studied Data Operations, Records Management, and Computer Information Systems. She is quite proficient in using Office software. Her goal is to become a Database Administrator or a System Administrator.
How to Add Radio Buttons to MS Word 2007 Documents
Radio buttons, or option buttons as Microsoft now refers to them, are used in online questionnaires, and forms that require users to make a selection.
This tutorial demonstrates how to insert radio buttons into a document in Microsoft Word 2007, using a PC with Windows XP or Vista. The tutorial consists of two tasks:
- Adding the Developer tab to the ribbon
- Inserting option buttons into an MS Word document
For the remainder of this tutorial, the term «option button» will be used instead of «radio button.»
To add the Developer tab to the ribbon:
1. Open Microsoft Word 2007.
2. In the upper left corner, click the Microsoft Office Button.

3. Click the Word Options button.

4. In the Word Options dialog box that appears, select Popular.

Note: Popular is the default selection.
5. Click the check box next to Show Developer tab in the Ribbon.

Note: you want the check box enabled, i.e., with a check mark.
6. Click OK.
The Developer tab now appears in the Microsoft Windows 2007 ribbon.
To insert option buttons into an MS Word document:
1. Click the Developer tab.

2. In the Controls group, click the Design Mode button.

Note: you want the Design Mode button enabled. When it is enabled, it is highlighted in orange.
3. In the Controls group, click the Legacy Tools button.

Tip: When you click the Legacy Tools button, if you have not already clicked the Design Mode button, the Design Mode button will now be enabled.
4. Under Active X Controls, click Option Button.
Result: An option button now appears in the MS Word document.
5. Hover your cursor inside the option button, right click, and point to OptionButton Object, and click Edit.

Result: the colour of the option button changes, which indicates that you can now edit the text.
6. Use the left arrow backspace key on your keyboard to delete the default text, and change the text to suit your preference.

Tip: if the text you want to add exceeds the default size of the option button text box, click on the black square on the right side of the box so that a double sided arrow appears, and drag to the right.

7. Click outside the option button.
8. Click the Design Mode button so that it is disabled.
The radio button is now active—i.e., you can click it and a dark circle will appear inside, indicating that it is the option that you have selected. Add as many more option boxes as you like, and preface the series of options with a question, statement, or instructions.
If you are creating Word forms using the Developer ribbon, it is very straightforward to create checkboxes for respondents to select choices. However, they can select as many checkboxes as they like.
Sometimes you may only want them to make one choice, for example, they can only sign up for one category of membership, e.g. Bronze, Silver or Gold. In that case, you can ensure they only opt for one by using Option buttons and grouping them together.
From the Developer tab, in the Controls group, click on the Legacy Tools dropdown and then in the ActiveX section, click the Option  button.
Click Properties then type the name for the button in the Caption section.

Type a GroupName for the button, e.g. MembershipType. Repeat this process for all required option buttons but using the same GroupName.
Users can then only make one choice.
Find out more about our Microsoft Word training Sydney, Australia or Microsoft Word training, London, Middlesex, Surrey or our Microsoft Word training Dorset, Hampshire, Wiltshire UK.

About jdonbavand
I am a trainer of Microsoft Office, Microsoft Project and Crystal Reports. I have called my blog «If Only I’d Known That….» because I hear it so many times in training sessions. In fact, if only I had a £100 for every time someone says «If only I’d known that.» ….
How to insert Radio button in Word document
Details: WebIn Microsoft Word, you can group your Radio buttons; Follow the steps below to group the Radio buttons. In the Design Mode, right-click the Radio button and select Option Properties from the radio buttons in word 2016
› Verified 5 days ago
› Url: Thewindowsclub.com View Details
› Get more: Radio buttons in word 2016Detail Excel
How to add radio buttons (option buttons) in MS Word
Details: WebRight-click the radio button and click option Properties from the right-click menu. On the Properties sheet, under the tab Alphabetic, look for the row with the … microsoft word option button
› Verified Just Now
› Url: Wordknowhow.blog View Details
› Get more: Microsoft word option buttonDetail Excel
How to Add Option Buttons in Word : Using Microsoft …
Details: WebHow to Add Option Buttons in Word : Using Microsoft Word — YouTube 0:00 / 2:36 How to Add Option Buttons in Word : Using Microsoft Word eHowTech … insert buttons in word
› Verified 3 days ago
› Url: Youtube.com View Details
› Get more: Insert buttons in wordDetail Excel
Option buttons in Word — Microsoft Community
Details: WebThe way to do that is to use ActiveX Option buttons that you can insert from the Legacy Controls folder in the Controls section of the Developer tab of the ribbon … no options tab in word
› Verified 4 days ago
› Url: Answers.microsoft.com View Details
› Get more: No options tab in wordDetail Excel
Insert a group of option buttons — Microsoft Support
Details: WebUnder Insert controls, click Option Button. In the Option Button Binding dialog box, select the field in which you want to store the option button data, and then click OK. Note: If you are binding the option buttons to a … ms access option button
› Verified 2 days ago
› Url: Support.microsoft.com View Details
› Get more: Ms access option buttonDetail Excel
option, option button — Microsoft Style Guide Microsoft …
Details: WebRefer to an option by its UI label only. If you must provide a descriptor, use option. Use the exact label text, including its capitalization, but don’t capitalize the word … excel option button
› Verified 2 days ago
› Url: Learn.microsoft.com View Details
› Get more: Excel option buttonDetail Excel
Radio Buttons In MS Word — Microsoft Community
Details: WebIn reply to Henry F. Ong’s post on May 7, 2017. Select each radio button in turn and then click on the Properties button in the Controls section of the Developer tab … word options button windows 10
› Verified 6 days ago
› Url: Answers.microsoft.com View Details
› Get more: Word options button windows 10Detail Excel
OptionButton control Microsoft Learn
Details: WebYou can also use an OptionButton inside a group box to select one or more of a group of related items. For example, you can create an order form with a list of …
› Verified 4 days ago
› Url: Learn.microsoft.com View Details
› Get more: ExcelDetail Excel
Use voting buttons in messages — Microsoft Support
Details: WebOn the Optionstab, in the Trackinggroup, click Use Voting Buttons. Choose one of the following: Approve;Reject Use when you need an authorization for an action. For …
› Verified Just Now
› Url: Support.microsoft.com View Details
› Get more: ExcelDetail Excel
How to Add Check Boxes to Word Documents — How …
Details: WebOption 1: Use Word’s Developer Tools to Add the Check Box Option for Forms. In order to create fillable forms that include checkboxes, you first need to enable the “Developer” tab on the Ribbon. …
› Verified 4 days ago
› Url: Howtogeek.com View Details
› Get more: ExcelDetail Excel
Insert a button — Microsoft Support
Details: WebInsert a button On the form template, place the cursor where you want to insert the control. If the Controls task pane is not visible, click More Controls on the Insert menu, or press …
› Verified 5 days ago
› Url: Support.microsoft.com View Details
› Get more: ExcelDetail Excel
Keyboard shortcuts in Word — Microsoft Support
Details: WebPress the Alt key to display the ribbon shortcuts, called Key Tips, as letters in small images next to the tabs and options as shown in the image below. Note: Add-ins and other …
› Verified 6 days ago
› Url: Support.microsoft.com View Details
› Get more: ExcelDetail Excel
How to use option buttons to change a value in a Word 2016 table
Details: Web1 Answer Sorted by: 0 You appear to be using both formfields and ActiveX controls. It would be far simpler to use just formfields and, instead of having radio buttons, a simple …
› Verified 9 days ago
› Url: Stackoverflow.com View Details
› Get more: ExcelDetail Excel
Use a command button to start an action or a series of actions
Details: WebBy using the Command Button Wizard, you can quickly create command buttons that do a variety of tasks, such as closing the form, opening a report, finding a record, or running a …
› Verified 2 days ago
› Url: Support.microsoft.com View Details
› Get more: ExcelDetail Excel
Enable selection through choice controls (check and list boxes)
Details: WebSelect an option button. Under Control Tools, on the Properties tab, click Control Properties. Indicate the desired value that should be returned when the option button is …
› Verified 1 days ago
› Url: Support.microsoft.com View Details
› Get more: ExcelDetail Excel
How to Create Buttons on Word Documents Techwalla
Details: WebUsing the Word program, you can easily create your own buttons that you need by using the provided tools. Step 1 Launch the Microsoft Word application and create a new …
› Verified 4 days ago
› Url: Techwalla.com View Details
› Get more: ExcelDetail Excel
How to add a button to a Word document and assign its Click …
Details: WebStart a new document in Word. Press Alt+F11 to go to the Visual Basic Editor. On the Tools menu, click References. Select the reference for Microsoft Visual …
› Verified 7 days ago
› Url: Learn.microsoft.com View Details
› Get more: ExcelDetail Excel
How to Add Option Buttons in Word — YouTube
Details: WebOpen Microsoft Word or the Word file you need. Go to Developer tab at the top panel. Click on Legacy forms icon. It looks like a briefcase. Select Option Button from the list. Right …
› Verified 3 days ago
› Url: Youtube.com View Details
› Get more: ExcelDetail Excel
Mutually Exclusive Content Control Option Buttons
Details: WebOption buttons (mandatory selection). One option button «must» be selected. User is presented with a fill-in field. Options buttons (optional selection). User …
› Verified 7 days ago
› Url: Gregmaxey.com View Details
› Get more: ExcelDetail Excel
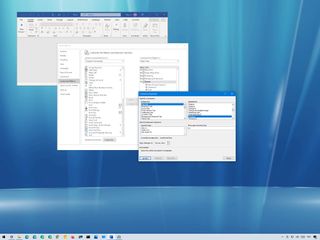
(Image credit: Windows Central)
Microsoft Word allows you to create custom keyboard shortcuts to quickly use a combination of keys to execute a command or macro, apply a style, and insert a symbol without the need of extra steps utilizing a mouse.
In addition to creating new shortcuts, whether you use the version of Office from Microsoft 365 or Office 2019, Microsoft Word also lets you modify existing shortcuts or remove those you do not want.
In this Windows 10 guide, we will walk you through the steps of creating a custom keyboard shortcut for your most frequent Word commands. In addition, we will also outline the steps of removing a specific shortcut and resetting all custom settings to their defaults.
- How to create custom keyboard shortcut in Word
- How to remove custom keyboard shortcut in Word
- How to reset custom keyboard shortcut settings in Word
How to create custom keyboard shortcut in Word
To assign a custom keyboard shortcut to a command or item in Word, use these steps:
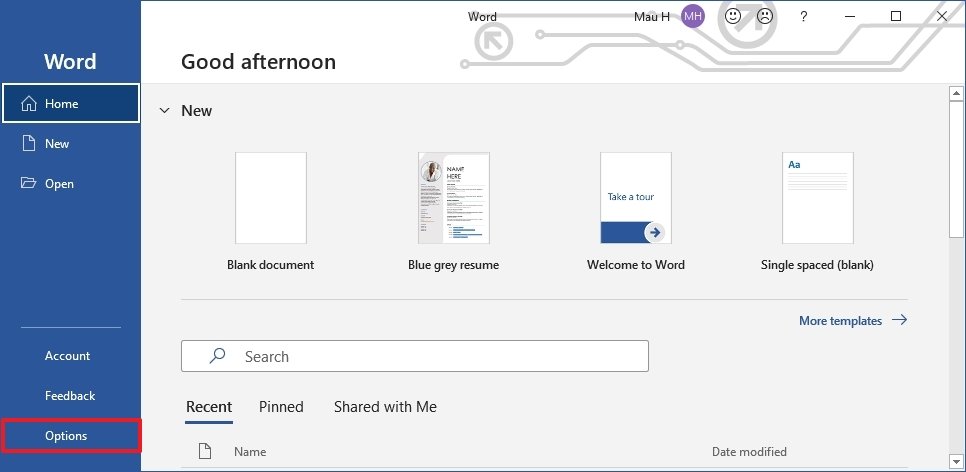
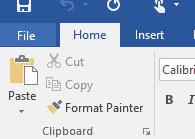
- Open Microsoft Word.
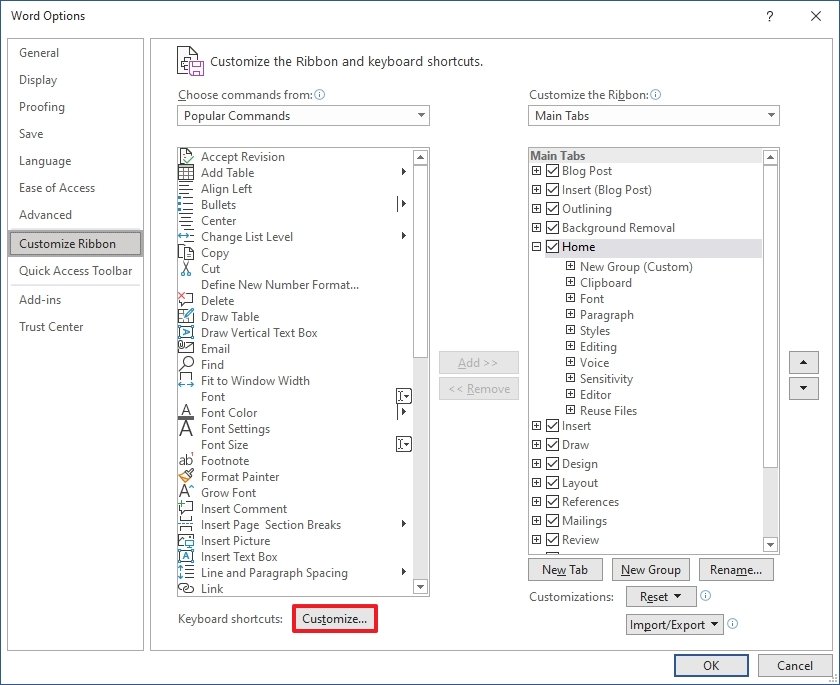
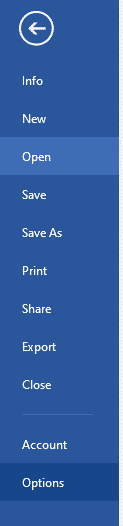
- Click on Options from the bottom-left corner.Quick note: If you have a blank document open, click the File menu to access the Options button. Alternatively, you can also right-click anywhere in the Ribbon and select the Customize the Ribbon option to access the settings.
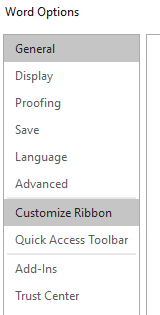
- Click on Customize Ribbon.
- Under the «Customize the Ribbon and keyboard shortcuts» section, click the Customize button for «Keyboard shortcuts.»
- In the Categories section, select the category that contains the command, macro, or style you want to customize.
- In the Command section, select the item to which you want to add a custom keyboard shortcut.Quick note: If the command has a shortcut already assigned, it will be listed under the «Current keys» section. You can always add more shortcuts for the same command or remove shortcuts as needed (see steps below).
- In the Press new shortcut key box, confirm the keyboard shortcut you want to use.Quick tip: You can use a number of key combinations. For example, you can use a function key, such as F3 and F4, Alt and/or Ctrl + other keys like Alt + Ctrl + F7. If the shortcut is already in use, you can still use it, but the keyboard shortcut will no longer be available for the other item.
- In the «Save changes in» option, select the Normal.dotm option to make the keyboard available for all documents.
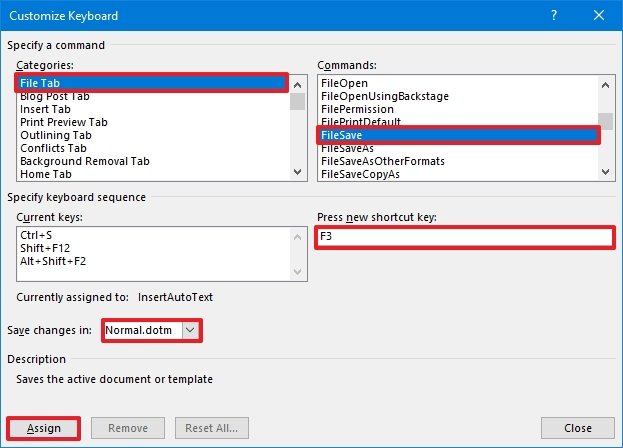
- Click the Assign button.
- Click the Close button.
Once you complete the steps, you can now start using the keyboard shortcut to quickly run command, macro, style, font, or symbol.
While the ability to customize shortcuts is available in older versions, you should consider upgrading to Office from Microsoft 365. The subscription-based service offers a free upgrade and other benefits, such as sharing the apps with up to six family members and friends, and you get access to services like Microsoft Teams, Family Safety, Microsoft Editor, and 1TB of OneDrive storage.
 Get subscribed
Microsoft 365 gives you full access to all the Office apps and benefits like 1TB OneDrive storage and Skype minutes. You can also install Word, Excel, PowerPoint, Outlook, and other apps on up to five devices, and depending on the subscription, you can share the account with up to six people.
How to remove custom keyboard shortcut in Word
To remove a keyboard shortcut in Word, use these steps:
- Open Microsoft Word.
- Click on Options from the bottom-left corner.
- Click on Customize Ribbon.
- Under the «Customize the Ribbon and keyboard shortcuts» section, click the Customize button for «Keyboard shortcuts.»
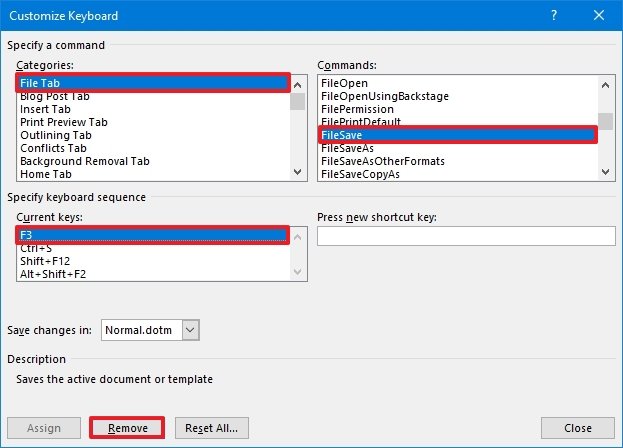
- In the Categories section, select the category that contains the command you want to customize.
- In the Command section, select the item from which you want to remove a custom keyboard shortcut.
- Under the «Current keys» section, select the shortcut you want to remove.
- Click the Remove button.
- Click the Close button.
After you complete the steps, the shortcut will no longer be available in Microsoft Word.
How to reset custom keyboard shortcut settings in Word
To reset all the shortcut settings in Word, use these steps:
- Open Microsoft Word.
- Click on Options from the bottom-left corner.
- Click on Customize Ribbon.
- Under the «Customize the Ribbon and keyboard shortcuts» section, click the Customize button for «Keyboard shortcuts.»
- Click the Reset All button.
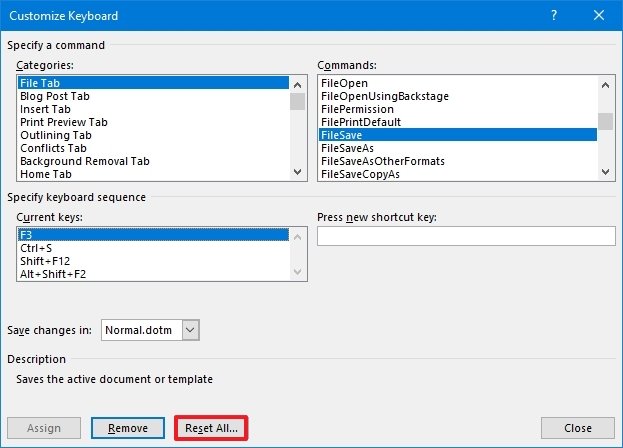
- Click the Yes button.
- Click the Close button.
Once you complete the steps, the keyboard settings will reset to their original configuration.
More Windows 10 resources
For more helpful articles, coverage, and answers to common questions about Windows 10, visit the following resources:
- Windows 10 on Windows Central — All you need to know
- Windows 10 help, tips, and tricks
- Windows 10 forums on Windows Central
All the latest news, reviews, and guides for Windows and Xbox diehards.
Mauro Huculak is technical writer for WindowsCentral.com. His primary focus is to write comprehensive how-tos to help users get the most out of Windows 10 and its many related technologies. He has an IT background with professional certifications from Microsoft, Cisco, and CompTIA, and he’s a recognized member of the Microsoft MVP community.
As a word processing program, Microsoft Word has a wide variety of text editing features. In addition to text editing, you can easily add images, charts, shapes, tables and even insert text on a picture all in a Microsoft Word document.
Microsoft Word allows you to create an interactive survey for your audience with controls and form tools such as; check boxes, list boxes as well as the radio button.
Using radio buttons in a Microsoft Word document survey provides your readers with the opportunity to select a response from pre-formatted options.
How to add a radio button in a Microsoft Word document
The radio button, also known as the Option button is used in Microsoft Word to capture the audience’s feedback.
Here is how you can insert a radio button in a Microsoft Word document:
Step 1. Place the cursor where you would like to insert a radio button and then click File in the top left corner of your Microsoft Word document.
Step 2. Click Option to open the Word Options dialog box.
Step 3. In the Word Option dialog box, click Customize Ribbon
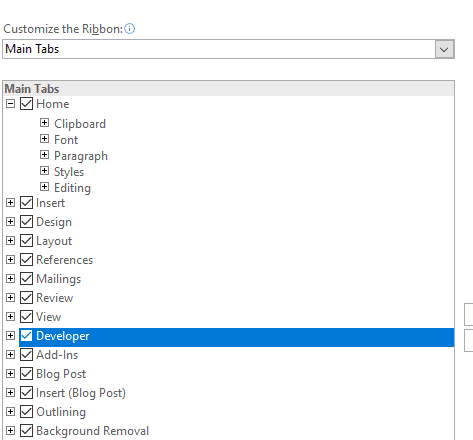
Step 4. Having clicked Customize Ribbon, two boxes will pop up under the Word Option dialog box. Check the Developer option in the right box, then click OK at the bottom right corner of the Word Option dialog box.
Step 5. Then go ahead to click Developer.
Step 6. Click Legacy Tools highlighted grey below.
Step 7. Select the Option Button highlighted grey under ActiveX Controls.
Step 8. A radio button is inserted in the Microsoft Word document where your cursor was placed in the beginning. Right click it, and select Option Button Object > Edit from the context menu, in case the need to edit the radio button arises.

Why you need Simul Docs to execute your tasks as a team
Collaborating on a Microsoft Word document as a team can prove to be challenging, with back and forth emails that may result into disorganization and delays in the working process.
Simul Docs is a collaboration tool and version control that makes it easy for individuals working with organisations and companies to efficiently work together on Microsoft Word documents.
Having uploaded your original Microsoft Word document to Simul Docs, you and your work collegueaus can easily access the document to make changes at the same time, even when working remotely from different locations.
Simul Docs also recognises when multiple collaborators are making changes at the same time, and saves each person’s changes in different versions to avoid having anything overridden or deleted.
With Simul Docs, each author’s changes are marked up as tracked changes in Microsoft Word, allowing you to easily identify the differences, and accept or reject the changes.
Having reached a final draft of your document, you can merge all the changes made into one Microsoft Word document with just one click of your mouse.
Employing Simul Docs as part of your day to day process ensures creation of a secure database of your working process, with all the changes made being recorded and saved.
Being able to keep track of the changes made to your Microsoft word document in real time, is another great perk that comes with working with Simul Docs. It becomes easy to make comparisons of different versions of a Microsoft word document, whether or not the tracked changes were turned on. This has proven to be an efficient way to monitor what changes were made, who made them and when.
Reverting to the previous versions of the Microsoft Word document in the event that the need arises to restore the original version is easy courtesy of Simul Docs. Simul Docs has also proved very helpful in taking content from the previous versions and adding it to the latest Microsoft Word document.
When it comes to sharing the final document with others, unaware of Simul Docs, you can simply download the latest version of your Word document, and share it via email. You can also export the document using cloud storage tools, for example: SharePoint, Dropbox, Google Drive to mention but a few.
In conclusion, working with Simul Docs is not only effective, efficient and time saving, it is also the best way to have multiple members working on a project to easily execute tasks in Microsoft Word that would otherwise prove difficult. Create a better and much simplified working experience with Simul Docs today.