В этой статье описаны сочетания клавиш и функциональные клавиши в Word для Windows.
Примечания:
-
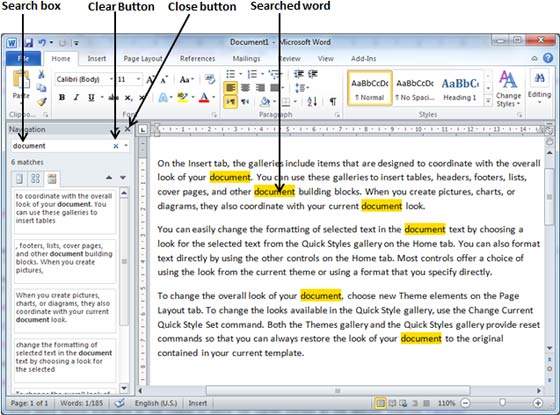
Чтобы быстро найти ярлык в этой статье, можно использовать поиск. Нажмите CTRL+F, а затем введите слова поиска.
-
Если для часто используемого действия не предусмотрено сочетание клавиш, вы можете создать его, записав макрос. Инструкции см. в разделах Создание или запуск макросаили Использование средства чтения с экрана для создания макроса в Word.
-
Если вы используетеMicrosoft #x1 Starter, имейте в виду, что не все функции, перечисленные для Word, поддерживаются в Word Starter. Дополнительные сведения о функциях, доступных в Word Starter, см. в статье Функции Word, которые не полностью поддерживаются в Word Starter.
-
Получите эти сочетания клавиш в документе Word по следующей ссылке: Word 2016 для сочетаний клавиш Windows.
В этом разделе
-
Часто используемые сочетания клавиш
-
Сочетания клавиш для ленты
-
Навигация по документу
-
Предварительный просмотр и печать документов
-
Выделение текста и рисунков
-
Редактирование текста и рисунков
-
Работа с веб-содержимым
-
Работа с таблицами
-
Рецензирование документа
-
Работа со ссылками, ссылками и индексированием
-
Работа с слиянием и полями
-
Работа с текстом на других языках
-
Работа с представлениями документов
-
Использование сочетаний клавиш с функциональными клавишами
Часто используемые сочетания клавиш
В этой таблице показаны наиболее часто используемые сочетания клавиш вMicrosoft #x1 .
|
Действие |
Клавиши |
|---|---|
|
Открытие документа. |
CTRL+O |
|
Создание документа. |
CTRL+N |
|
Сохраните документ. |
CTRL+S |
|
Закройте документ. |
CTRL+W |
|
Вырезайте выбранное содержимое в буфер обмена. |
CTRL+X |
|
Скопируйте выбранное содержимое в буфер обмена. |
CTRL+C |
|
Вставить содержимое буфера обмена. |
CTRL+V |
|
Выберите все содержимое документа. |
CTRL+A |
|
Применение полужирного шрифта к тексту. |
CTRL+B |
|
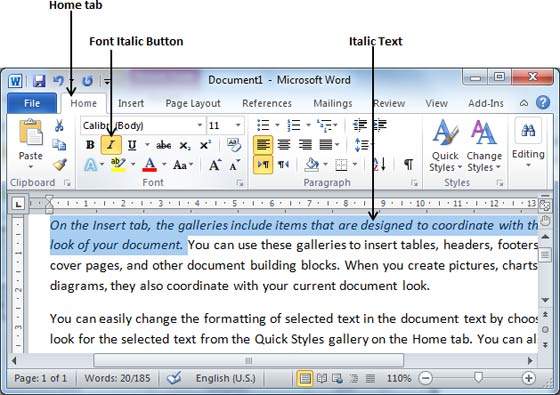
Примените к тексту курсивное форматирование. |
CTRL+I |
|
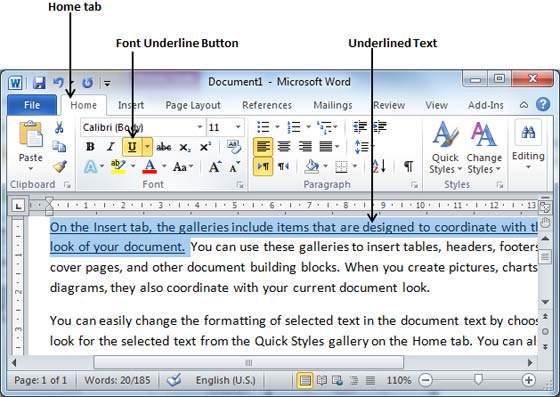
Применение форматирования подчеркивания к тексту. |
CTRL+U |
|
Уменьшение размера шрифта на один пункт. |
CTRL+Левая скобка ([) |
|
Увеличение размера шрифта на один пункт. |
CTRL+Правая скобка (]) |
|
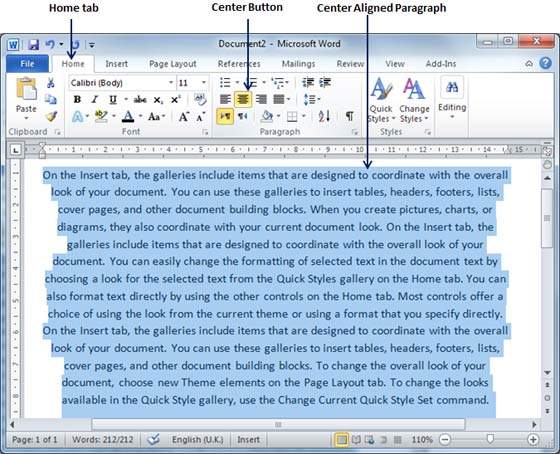
По центру текста. |
CTRL+E |
|
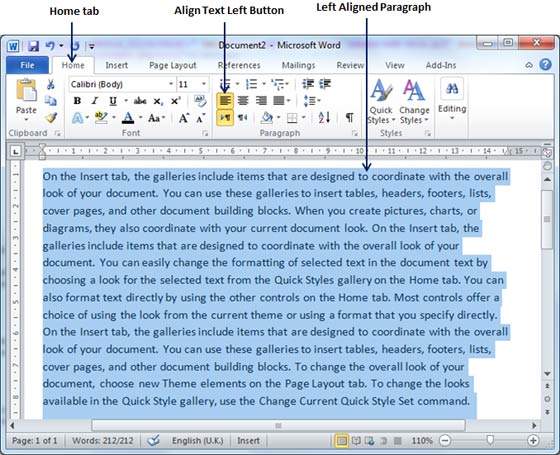
Выравнивание текста по левому краю. |
CTRL+L |
|
Выравнивание текста по правому краю. |
CTRL+R |
|
Отмена команды. |
ESC |
|
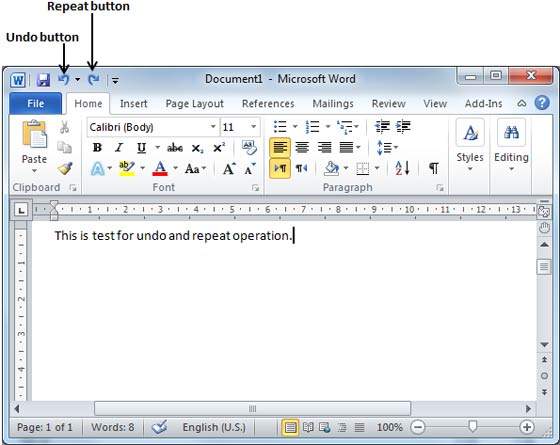
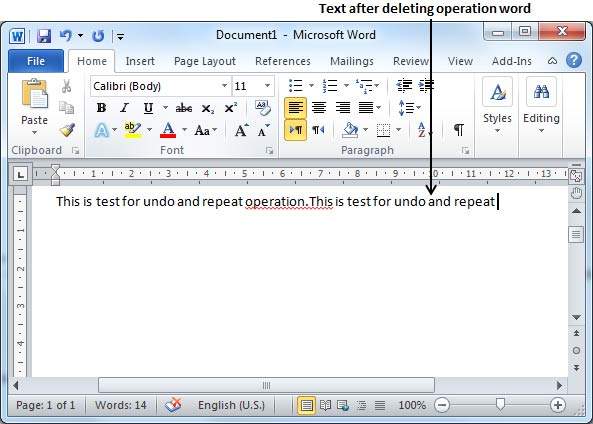
Отмените предыдущее действие. |
CTRL+Z |
|
По возможности повторите предыдущее действие. |
CTRL+Y |
|
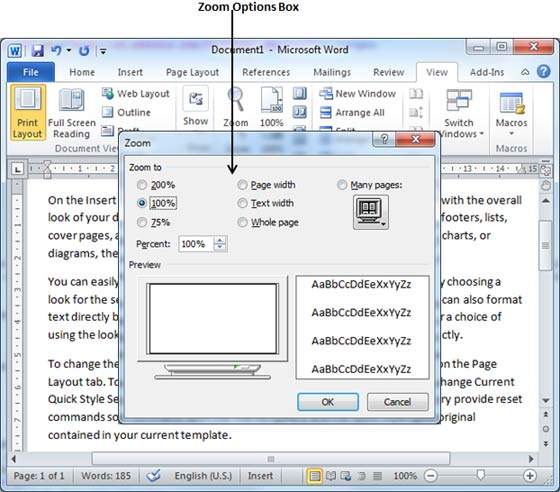
Настройте увеличение масштаба. |
Alt+W, Q, а затем используйте клавишу TAB в диалоговом окне Масштаб , чтобы перейти к нужному значению. |
|
Разделение окна документа. |
CTRL+ALT+S |
|
Снятие разделения окна документа. |
ALT+SHIFT+C или CTRL+ALT+S |
К началу страницы
Закрытие области задач
Чтобы закрыть область задач с помощью клавиатуры, выполните следующие действия:
-
Нажимайте клавишу F6, пока не будет выбрана область задач.
-
Нажмите клавиши CTRL+ПРОБЕЛ.
-
С помощью клавиш со стрелками выберите команду Закрыть, затем нажмите клавишу ВВОД.
Сочетания клавиш для ленты
Лента группирует связанные параметры на вкладках. Например, на вкладке Главная группа Шрифт включает параметр Цвет шрифта . Нажмите клавишу ALT, чтобы отобразить сочетания клавиш на ленте, называемые подсказками клавиш, в виде букв на небольших изображениях рядом с вкладками и параметрами, как показано на изображении ниже.

Примечание: Надстройки и другие программы могут добавлять новые вкладки на ленту и предоставлять ключи доступа для этих вкладок.
Вы можете объединить буквы подсказок клавиш с клавишей ALT, чтобы использовать сочетания клавиш, называемые клавишами доступа, для параметров ленты. Например, нажмите клавиши ALT+H, чтобы открыть вкладку Главная , и ALT+Q, чтобы перейти в поле Подскажите илиПоиск . Нажмите клавишу ALT еще раз, чтобы просмотреть подсказки клавиш для параметров выбранной вкладки.
В зависимости от используемой версии Microsoft 365 текстовое поле Поиск в верхней части окна приложения может называться Помощник. Оба варианта в основном похожи, но некоторые параметры и результаты поиска могут отличаться.
В Office 2013 и Office 2010 по-прежнему работает большая часть сочетаний с клавишей ALT из предыдущих версий программы. Однако необходимо знать полную последовательность клавиш. Например, нажмите клавишу ALT и одну из старых клавиш меню: E (Рецензирование), V (Вид), I (Вставка) и т. д. Появится уведомление о том, что вы используете клавишу доступа из предыдущей версии Microsoft 365. Если вы знаете полную последовательность клавиш, используйте ее. Если вы не помните последовательность, вместо этого нажмите клавишу ESC и руководствуйтесь подсказками клавиш.
Использование ключей доступа для вкладок на ленте
Чтобы перейти к вкладке на ленте, нажмите одну из указанных ниже клавиш доступа. В зависимости от выбранного значения в документе могут появиться дополнительные вкладки.
|
Действие |
Клавиши |
|---|---|
|
Перейдите в поле «Подскажите мне » или «Поиск » на ленте, чтобы найти справку или содержимое справки. |
ALT+Q, затем ввести поисковый запрос. |
|
Откройте страницу Файл , чтобы использовать представление Backstage. |
ALT+F |
|
Откройте вкладку Главная , чтобы использовать стандартные команды форматирования, стили абзацев и средство поиска. |
ALT+H |
|
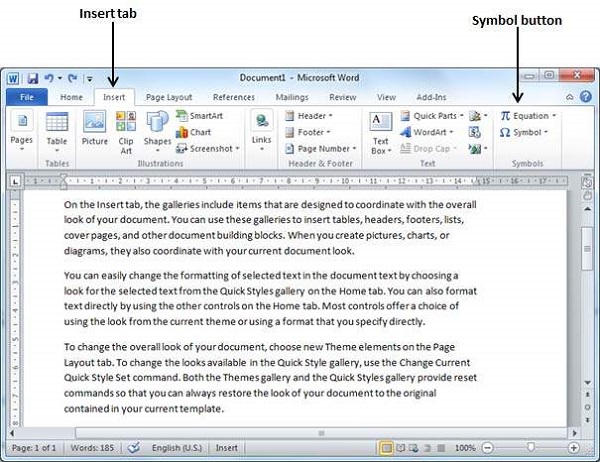
Откройте вкладку Вставка , чтобы вставить таблицы, рисунки и фигуры, заголовки или текстовые поля. |
ALT+N |
|
Откройте вкладку Конструктор , чтобы использовать темы, цвета и эффекты, например границы страниц. |
ALT+G |
|
Откройте вкладку Макет для работы с полями страницы, ориентацией страницы, отступами и интервалами. |
ALT+P |
|
Откройте вкладку Ссылки , чтобы добавить оглавление, сноски или таблицу ссылок. |
ALT+S |
|
Откройте вкладку Рассылки для управления задачами слияния и работы с конвертами и наклейками. |
ALT+M |
|
Откройте вкладку Рецензирование , чтобы использовать проверку орфографии, задать языки проверки правописания, а также отслеживать и проверять изменения в документе. |
ALT+R |
|
Откройте вкладку Вид , чтобы выбрать представление или режим документа, например режим чтения или представление структуры. Вы также можете настроить увеличение масштаба и управлять несколькими окнами документов. |
ALT+W |
К началу страницы
Работа с вкладками ленты с помощью клавиатуры
|
Действие |
Клавиши |
|---|---|
|
Выберите активную вкладку на ленте и активируйте ключи доступа. |
ALT или F10. Для перехода на другую вкладку используйте клавиши доступа или клавиши со стрелками. |
|
Перемещение фокуса к командам на ленте. |
TAB или SHIFT+TAB |
|
Перемещение между группами команд на ленте. |
КЛАВИША CTRL+СТРЕЛКА ВЛЕВО или СТРЕЛКА ВПРАВО |
|
Перемещение между элементами на ленте. |
Клавиши со стрелками |
|
Отображение подсказки для элемента ленты, который сейчас находится в фокусе. |
CTRL+SHIFT+F10 |
|
Активируйте выбранную кнопку. |
ПРОБЕЛ или ВВОД |
|
Откройте список для выбранной команды. |
Клавиша СТРЕЛКА ВНИЗ |
|
Откройте меню для выбранной кнопки. |
ALT+СТРЕЛКА ВНИЗ |
|
Переход к следующей команде в открытом меню или подменю. |
Клавиша СТРЕЛКА ВНИЗ |
|
Развертывание или свертывание ленты. |
CTRL+F1 |
|
Открыть контекстное меню. |
SHIFT+F10 Или на Windows клавиатуре клавиша Меню Windows (между правой клавишами ALT и правой клавишами CTRL). |
|
Переход к подменю в открытом или выбранном меню. |
Клавиша СТРЕЛКА ВЛЕВО |
К началу страницы
Навигация по документу
|
Действие |
Клавиши |
|---|---|
|
Переместите курсор на одно слово влево. |
CTRL+СТРЕЛКА ВЛЕВО |
|
Переместите курсор на одно слово вправо. |
CTRL+СТРЕЛКА ВПРАВО |
|
Перемещение курсора вверх на один абзац. |
CTRL+СТРЕЛКА ВВЕРХ |
|
Перемещение курсора вниз на один абзац. |
CTRL+СТРЕЛКА ВНИЗ |
|
Переместите курсор в конец текущей строки. |
END |
|
Переместите курсор в начало текущей строки. |
Домашняя страница |
|
Переместите курсор в верхнюю часть экрана. |
CTRL+ALT+PAGE UP |
|
Переместите курсор в нижнюю часть экрана. |
CTRL+ALT+PAGE DOWN |
|
Переместите курсор, прокрутив представление документа вверх на один экран. |
PAGE UP |
|
Переместите курсор, прокрутив представление документа вниз на один экран. |
PAGE DOWN |
|
Переместите курсор в начало следующей страницы. |
CTRL+Page down |
|
Переместите курсор в начало предыдущей страницы. |
CTRL+Page up |
|
Переместите курсор в конец документа. |
CTRL+END |
|
Переместите курсор в начало документа. |
CTRL+HOME |
|
Переместите курсор в расположение предыдущей редакции. |
SHIFT+F5 |
|
Переместите курсор в расположение последней редакции, выполненной до последнего закрытия документа. |
SHIFT+F5 сразу после открытия документа. |
|
Переключение между перемещаемыми фигурами, такими как текстовые поля или рисунки. |
CTRL+ALT+5, а затем многократное нажатие клавиши TAB |
|
Выход из режима навигации по перемещаемым фигурам и возврат к обычной навигации. |
ESC |
|
Отображение области задач Навигация для поиска в содержимом документа. |
CTRL+F |
|
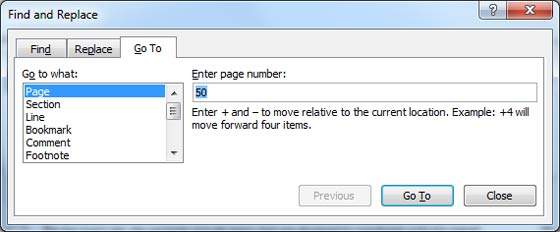
Отображает диалоговое окно Перейти к, чтобы перейти к определенной странице, закладке, сноске, таблице, примечания, рисунку или другому расположению. |
CTRL+G |
|
Циклически просматривает расположение четырех предыдущих изменений, внесенных в документ. |
CTRL+ALT+Z |
К началу страницы
Навигация по документу с помощью параметров просмотра в Word 2007 и 2010
В Word 2007 и 2010 годах документ можно просматривать с помощью объектов различных типов, таких как поля, сноски, заголовки и графика.
|
Действие |
Клавиши |
|---|---|
|
Откройте список параметров обзора, чтобы определить тип объекта для просмотра. |
CTRL+ALT+HOME |
|
Переход к предыдущему объекту определенного типа. |
CTRL+Page up |
|
Переход к следующему объекту определенного типа. |
CTRL+Page down |
К началу страницы
Предварительный просмотр и печать документов
|
Действие |
Клавиши |
|---|---|
|
Печать документа. |
CTRL+P |
|
Открытие окна предварительного просмотра. |
CTRL+ALT+I |
|
Перемещение по странице при увеличенном масштабе. |
Клавиши со стрелками |
|
Переход к предыдущей или следующей странице при уменьшенном масштабе. |
Страница вверх или вниз |
|
Переход к первой странице при уменьшенном масштабе. |
CTRL+HOME |
|
Переход к последней странице при уменьшенном масштабе. |
CTRL+END |
К началу страницы
Выделение текста и рисунков
|
Действие |
Клавиши |
|---|---|
|
Выделите текст. |
SHIFT+клавиши со стрелками |
|
Выделите слово слева. |
CTRL+SHIFT+СТРЕЛКА ВЛЕВО |
|
Выберите слово справа. |
CTRL+SHIFT+СТРЕЛКА ВПРАВО |
|
Выберите из текущей позиции в начало текущей строки. |
SHIFT+HOME |
|
Выберите из текущей позиции до конца текущей строки. |
SHIFT+END |
|
Выберите от текущего положения до начала текущего абзаца. |
CTRL+SHIFT+СТРЕЛКА ВВЕРХ |
|
Выберите от текущего положения до конца текущего абзаца. |
CTRL+SHIFT+СТРЕЛКА ВНИЗ |
|
Выберите из текущего положения в верхней части экрана. |
SHIFT+Page up |
|
Выберите из текущего положения в нижней части экрана. |
SHIFT+Page down |
|
Выберите от текущей позиции до начала документа. |
CTRL+SHIFT+HOME |
|
Выберите от текущей позиции до конца документа. |
CTRL+SHIFT+END |
|
Выберите из текущего положения в нижней части окна. |
CTRL+ALT+SHIFT+PAGE ВНИЗ |
|
Выберите все содержимое документа. |
CTRL+A |
К началу страницы
Расширение выделения
|
Действие |
Клавиши |
|---|---|
|
Начните расширение выделенного фрагмента. |
F8 В режиме расширения выделения щелчок расположения в документе расширяет текущее выделение до этого расположения. |
|
Выберите ближайший символ слева или справа. |
Клавиша F8, стрелка влево или стрелка вправо |
|
Разверните выделенный фрагмент. |
F8 несколько раз, чтобы развернуть выделенный фрагмент на все слово, предложение, абзац, раздел и документ. |
|
Уменьшение выделенного фрагмента. |
SHIFT+F8 |
|
Выделение вертикального блока текста. |
CTRL+SHIFT+F8, а затем нажмите клавиши со стрелками |
|
Прекратите расширение выделенного фрагмента. |
ESC |
К началу страницы
Редактирование текста и рисунков
|
Действие |
Клавиши |
|---|---|
|
Удаление одного слова слева от курсора |
CTRL+BACKSPACE |
|
Удаление одного слова справа от курсора |
CTRL+DELETE |
|
Откройте область задач Буфер обмена и включите буфер обмена Office, который позволяет копировать и вставлять содержимое между Microsoft 365 приложениями. |
Alt+H, F, O |
|
Вырезайте выбранное содержимое в буфер обмена. |
CTRL+X |
|
Скопируйте выбранное содержимое в буфер обмена. |
CTRL+C |
|
Вставить содержимое буфера обмена. |
CTRL+V |
|
Перемещение выбранного содержимого в определенное расположение. |
F2, переместите курсор в место назначения и нажмите клавишу ВВОД. |
|
Скопируйте выбранное содержимое в определенное расположение. |
SHIFT+F2, переместите курсор в место назначения и нажмите клавишу ВВОД. |
|
Определите блок автотекста с выбранным содержимым. |
ALT+F3 |
|
Вставка блока автотекста. |
Первые несколько символов блока Автотекст, а затем нажмите клавишу ВВОД, когда появится подсказка. |
|
Вырезайте выбранное содержимое до пикового значения. |
CTRL+F3 |
|
Вставьте содержимое элемента Spike. |
CTRL+SHIFT+F3 |
|
Скопируйте выбранное форматирование. |
CTRL+SHIFT+C |
|
Вставьте выбранное форматирование. |
CTRL+SHIFT+V |
|
Копирование верхнего или нижнего колонтитула из предыдущего раздела документа. |
ALT+SHIFT+R |
|
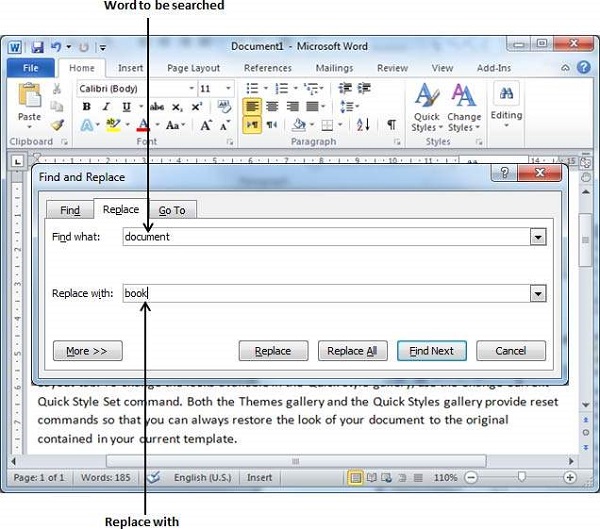
Отображение диалогового окна Замена для поиска и замены текста, определенного форматирования или специальных элементов. |
CTRL+H |
|
Откройте диалоговое окно Объект , чтобы вставить объект файла в документ. |
Alt+N, J, J |
|
Вставка рисунка SmartArt. |
Alt+N, M |
|
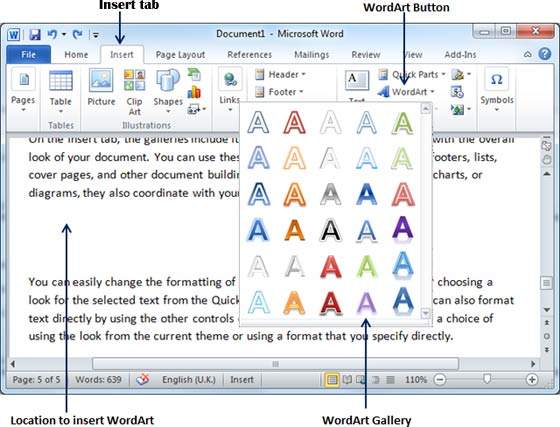
Вставка графического элемента WordArt. |
Alt+N, W |
К началу страницы
Выравнивание и форматирование абзацев
|
Действие |
Клавиши |
|---|---|
|
По центру абзаца. |
CTRL+E |
|
Обоснуйте абзац. |
CTRL+J |
|
Выравнивание абзаца по левому краю. |
CTRL+L |
|
Выравнивание абзаца по правому краю. |
CTRL+R |
|
Отступ абзаца. |
CTRL+M |
|
Удаление отступа абзаца. |
CTRL+SHIFT+M |
|
Создание выступа. |
CTRL+T |
|
Удалите висячий отступ. |
CTRL+SHIFT+T |
|
Удалить форматирование абзаца. |
CTRL+Q |
|
Примените к абзацу один интервал. |
CTRL+1 |
|
Примените к абзацу двойной интервал. |
CTRL + 2 |
|
Примените к абзацу интервал в 1,5 строки. |
CTRL+5 |
|
Добавление или удаление пробела перед абзацем. |
CTRL+0 (ноль) |
|
Включите автоформат. |
CTRL+ALT+K |
|
Примените обычный стиль. |
CTRL+SHIFT+N |
|
Примените стиль Заголовок 1 . |
CTRL+ALT+1 |
|
Примените стиль Заголовок 2 . |
CTRL+ALT+2 |
|
Примените стиль Заголовок 3 . |
CTRL+ALT+3 |
|
Отображение области задач Применение стилей . |
CTRL+SHIFT+S |
|
Отображение области задач Стили . |
CTRL+ALT+SHIFT+S |
К началу страницы
Форматирование знаков
|
Действие |
Клавиши |
|---|---|
|
Отобразить диалоговое окно Шрифт. |
CTRL+D или CTRL+SHIFT+F |
|
Увеличение размера шрифта. |
CTRL+SHIFT+ПРАВАЯ УГЛОВАЯ СКОБКА (>) |
|
Уменьшение размера шрифта. |
CTRL+SHIFT+ЛЕВАЯ УГЛОВАЯ СКОБКА (<) |
|
Увеличение размера шрифта на один пункт. |
CTRL+Правая скобка (]) |
|
Уменьшение размера шрифта на один пункт. |
CTRL+Левая скобка ([) |
|
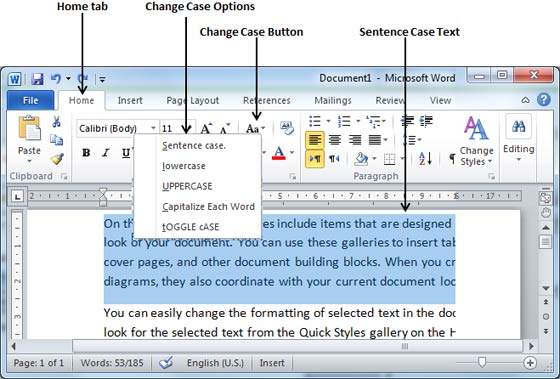
Переключение текста между верхним, строчным и заголовком. |
SHIFT+F3 |
|
Измените текст на все верхние буквы. |
CTRL+SHIFT+A |
|
Скрыть выделенный текст. |
CTRL+SHIFT+H |
|
Применение полужирного начертания. |
CTRL+B |
|
Добавьте маркированный список. |
CTRL+SHIFT+L |
|
Применение подчеркивания. |
CTRL+U |
|
Примените форматирование подчеркивания к словам, но не к пробелам. |
CTRL+SHIFT+W |
|
Примените форматирование двойного подчеркивания. |
CTRL+SHIFT+D |
|
Применение курсивного начертания. |
CTRL+I |
|
Примените форматирование с небольшими ограничениями. |
CTRL+SHIFT+K |
|
Применение форматирования подстрока. |
CTRL+знак равенства ( = ) |
|
Применение надстрочного форматирования. |
CTRL+SHIFT+ПЛЮС (+) |
|
Снятие примененного вручную форматирования с выделенных знаков. |
CTRL+ПРОБЕЛ |
|
Измените выделенный текст на шрифт Symbol. |
CTRL+SHIFT+Q |
К началу страницы
Управление форматированием текста
|
Действие |
Клавиши |
|---|---|
|
Отображение всех непечатных символов. |
CTRL+SHIFT+8 (не используйте цифровую клавиатуру) |
|
Отображение области задач Отображение форматирования . |
SHIFT+F1 |
К началу страницы
Вставка специальных знаков
|
Действие |
Клавиши |
|---|---|
|
Вставить разрыв строки. |
SHIFT+ВВОД |
|
Вставка разрыва страницы. |
CTRL + ВВОД |
|
Вставка разрыва столбца. |
CTRL+SHIFT+ВВОД |
|
Вставка тире em (—). |
CTRL+ALT+знак минус (на цифровой клавиатуре) |
|
Вставьте тире (–). |
CTRL+знак минус (на цифровой клавиатуре) |
|
Вставьте дополнительный дефис. |
CTRL+ДЕФИС (-) |
|
Вставка неразрывного дефиса. |
CTRL+SHIFT+ДЕФИС (-) |
|
Вставка неразрывного пространства. |
CTRL+SHIFT+ПРОБЕЛ |
|
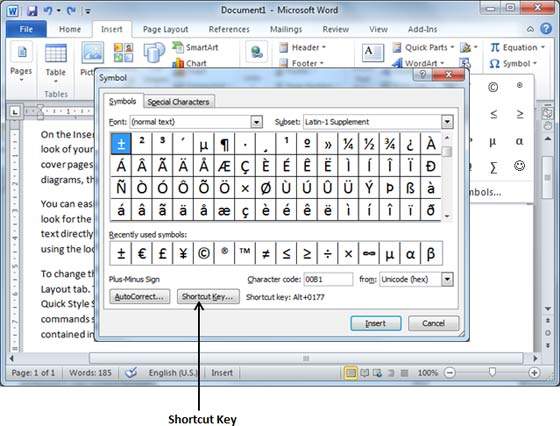
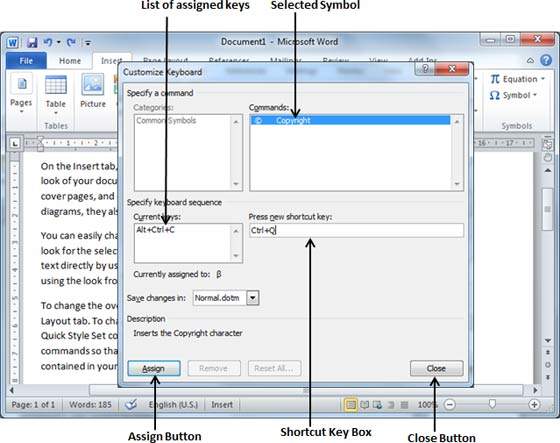
Вставка символа авторского права (©). |
CTRL+ALT+C |
|
Вставка символа зарегистрированного товарного знака (®). |
CTRL+ALT+R |
|
Вставка символа товарного знака (™). |
CTRL+ALT+T |
|
Вставка многоточия (…) |
CTRL+ALT+Точка (.) |
|
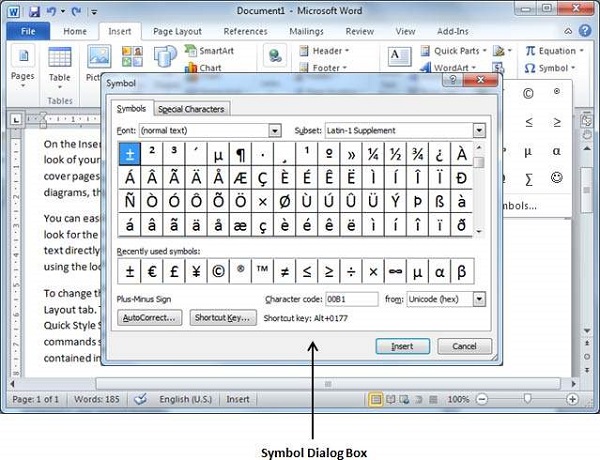
Вставка знака Юникода, который соответствует указанному шестнадцатеричному коду. Например, чтобы вставить символ валюты евро ( Совет: Чтобы узнать код символа Юникода для выбранного символа, нажмите клавиши ALT+X. |
Код символа, а затем нажмите клавиши ALT+X. |
|
Вставка знака ANSI для указанного кода (десятичное число) знака ANSI. Например, чтобы вставить знак «евро», наберите на цифровой клавиатуре 0128, удерживая нажатой клавишу ALT. |
ALT+код знака (на цифровой клавиатуре) |
К началу страницы
Работа с веб-содержимым
|
Действие |
Сочетание клавиш |
|---|---|
|
Вставка гиперссылки. |
CTRL+K |
|
Переход назад на одну страницу. |
ALT+СТРЕЛКА ВЛЕВО |
|
Переход вперед на одну страницу. |
ALT+СТРЕЛКА ВПРАВО |
|
Обновите страницу. |
F9 |
К началу страницы
Работа с таблицами
Перемещение по таблице
|
Действие |
Клавиши |
|---|---|
|
Перейдите к следующей ячейке в строке и выделите ее содержимое. |
Клавиша TAB |
|
Перейдите к предыдущей ячейке в строке и выделите ее содержимое. |
SHIFT+TAB |
|
Перейдите к первой ячейке в строке. |
ALT+HOME |
|
Переход к последней ячейке в строке. |
ALT+END |
|
Переход к первой ячейке столбца. |
ALT+Page up |
|
Переход к последней ячейке в столбце. |
ALT+Page down |
|
Переход к предыдущей строке. |
Клавиша СТРЕЛКА ВВЕРХ |
|
Переход к следующей строке |
Клавиша СТРЕЛКА ВНИЗ |
|
Перемещение на одну строку вверх. |
ALT + SHIFT + СТРЕЛКА ВВЕРХ |
|
Перемещение на одну строку вниз. |
ALT+SHIFT+СТРЕЛКА ВНИЗ |
К началу страницы
Выбор содержимого таблицы
|
Действие |
Клавиши |
|---|---|
|
Выделите содержимое в следующей ячейке. |
Клавиша TAB |
|
Выделите содержимое в предыдущей ячейке. |
SHIFT+TAB |
|
Выделение нескольких соседних ячеек. |
SHIFT+клавиши со стрелками |
|
Выделение столбца. |
Выберите верхнюю или нижнюю ячейку столбца, а затем нажмите клавиши SHIFT+СТРЕЛКА ВВЕРХ или СТРЕЛКА ВНИЗ. |
|
Выделение строки |
Выделите первую или последнюю ячейку в строке, а затем нажмите клавиши SHIFT+ALT+END или Главная. |
|
Выделите всю таблицу. |
ALT+5 на цифровой клавиатуре с выключенной цифровой блокировкой |
К началу страницы
Вставка знаков абзаца и табуляции в таблицу
|
Действие |
Клавиши |
|---|---|
|
Вставка нового абзаца в ячейку. |
ВВОД |
|
Вставка символа табуляции в ячейку. |
CTRL+TAB |
К началу страницы
Рецензирование документа
|
Действие |
Сочетание клавиш |
|---|---|
|
Вставка примечания. |
Ctrl+Alt+M |
|
Включение и отключение режима записи исправлений. |
CTRL+SHIFT+E |
|
Закройте область рецензирования. |
ALT+SHIFT+C |
К началу страницы
Работа со ссылками, ссылками и индексированием
Используйте следующие сочетания клавиш для добавления ссылок на документ, таких как оглавление, сноски и ссылки.
|
Действие |
Сочетание клавиш |
|---|---|
|
Пометка элемента оглавления. |
ALT+SHIFT+O |
|
Пометка элемента таблицы ссылок. |
ALT+SHIFT+I |
|
Выберите параметры цитирования. |
Сочетание клавиш Alt + Shift + F12, пробел |
|
Пометка элемента предметного указателя. |
ALT+SHIFT+X |
|
Вставка обычной сноски. |
CTRL+ALT+F |
|
Вставка концевой сноски. |
CTRL+ALT+D |
|
Перейдите к следующей сноске. |
ALT+SHIFT+Правая угловая скобка (>) |
|
Перейдите к предыдущей сноске. |
ALT+SHIFT+Левая угловая скобка (<) |
К началу страницы
Работа с слиянием и полями
Чтобы использовать следующие сочетания клавиш, необходимо выбрать вкладку ленты Рассылки . Чтобы открыть вкладку Рассылки , нажмите клавиши ALT+M.
Выполнение слияния
|
Действие |
Клавиши |
|---|---|
|
Предварительный просмотр слияния. |
ALT+SHIFT+K |
|
Слияние документов. |
ALT+SHIFT+N |
|
Печать объединенного документа. |
ALT+SHIFT+M |
|
Изменение источника данных слияния. |
ALT+SHIFT+E |
|
Вставка поля слияния. |
ALT+SHIFT+F |
К началу страницы
Работа с полями
|
Действие |
Сочетание клавиш |
|---|---|
|
Вставка поля DATE. |
ALT+SHIFT+D |
|
Вставка поля LISTNUM. |
CTRL+ALT+L |
|
Вставка поля PAGE. |
ALT+SHIFT+P |
|
Вставка поля TIME. |
ALT+SHIFT+T |
|
Вставка пустого поля. |
CTRL+F9 |
|
Обновите связанные сведения в исходном документеWord. |
CTRL+SHIFT+F7 |
|
Обновление выделенных полей. |
F9 |
|
Разрыв связи с полем. |
CTRL+SHIFT+F9 |
|
Переключение между кодом выделенного поля и его значением. |
SHIFT+F9 |
|
Переключение между кодами всех полей и их значениями. |
ALT+F9 |
|
Запустите GOTOBUTTON или MACROBUTTON из поля, отображающего результаты поля. |
ALT+SHIFT+F9 |
|
Переход к следующему полю. |
F11 |
|
Переход к предыдущему полю. |
SHIFT+F11 |
|
Блокировка поля. |
CTRL+F11 |
|
Снятие блокировки поля. |
CTRL+SHIFT+F11 |
К началу страницы
Работа с текстом на других языках
Настройка языка проверки правописания
У каждого документа есть язык по умолчанию (как правило, он совпадает с языком по умолчанию операционной системы). Если документ также содержит слова или фразы на другом языке, рекомендуется задать язык правописания для этих слов. Это не только позволяет проверять орфографию и грамматику для этих фраз, но и позволяет специальным технологиям, таким как средства чтения с экрана, обрабатывать их соответствующим образом.
|
Действие |
Клавиши |
|---|---|
|
Отобразите диалоговое окно Язык , чтобы задать язык проверки правописания. |
ALT, И, 5, Я |
|
Задайте языки по умолчанию. |
ALT, И, ПЕ |
К началу страницы
Вставка международных символов
Чтобы ввести символ в нижнем регистре, используя сочетание клавиш, включающее клавишу SHIFT, одновременно удерживайте клавиши CTRL+SHIFT+СИМВОЛы, а затем отпустите их перед вводом буквы.
Примечание: Если вы много вводите текст на другом языке, вы можете переключиться на другую клавиатуру.
|
Знак |
Сочетание клавиш |
|---|---|
|
à, è, м, ò, ù, |
CTRL+Гройв (‘), буква |
|
á, é, í, ó, ú, ý |
CTRL+Одна кавычка (‘), буква |
|
â, ê, î, ô, ū |
CTRL+SHIFT+Курсор (^), буква |
|
ã, ñ, õ |
CTRL+SHIFT+Тильда (~), буква |
|
ä, ë, ï, ö, ü, ä, |
CTRL+SHIFT+ДВОЕТОЧИЕ (:), буква |
|
å, Å |
CTRL+SHIFT+At sign (@), a или A |
|
æ, Æ |
CTRL+SHIFT+Ampersand (&), a или A |
|
1, 1 |
CTRL+SHIFT+Ampersand (&), o или O |
|
ç, Ç |
CTRL+Запятая (,), c или C |
|
м, Щ |
CTRL+Одна кавычка (‘), d или D |
|
ø, Ø |
CTRL+Косая черта (/), o или O |
|
¿ |
CTRL+ALT+SHIFT+Вопросительный знак (?) |
|
¡ |
CTRL+ALT+SHIFT+Восклицательный знак (!) |
|
ß |
CTRL+SHIFT+Ampersand (&), s |
К началу страницы
Использование редакторов методов ввода для языков Восточной Азии
|
Действие |
Клавиши |
|---|---|
|
Переключитесь в редактор метода ввода на японском языке (IME) для клавиатуры с 101 клавишами, если она доступна. |
ALT+Тильда (~) |
|
Переключитесь в редактор метода ввода (IME) корейского языка для 101-клавишной клавиатуры, если она доступна. |
Правая клавиша ALT |
|
Переключитесь в редактор метода ввода на китайском языке (IME) для 101-клавишной клавиатуры, если она доступна. |
CTRL+ПРОБЕЛ |
К началу страницы
Работа с представлениями документов
Word предлагает несколько различных представлений документа. Каждый из них предназначен для выполнения определенных задач. Например, режим чтения позволяет просматривать документ в виде горизонтальной последовательности страниц, которую можно быстро просмотреть с помощью клавиш со стрелками влево и вправо.
Переключение представления документа
|
Действие |
Клавиши |
|---|---|
|
Переключитесь в режим чтения . В Word 2007 и 2010 годах это называется режимом полноэкранного чтения . |
ALT, О, Е |
|
Переключитесь в режим разметки . |
CTRL+ALT+P |
|
Переключитесь в представление Структура . |
CTRL+ALT+O |
|
Переключитесь в представление Черновик . |
CTRL+ALT+N |
К началу страницы
Изменение структуры документа
Эти сочетания клавиш применяются только в том случае, если документ находится в представлении Структура .
|
Действие |
Клавиши |
|---|---|
|
Повышение уровня абзаца. |
ALT+SHIFT+СТРЕЛКА ВЛЕВО |
|
Понижение уровня абзаца. |
ALT+SHIFT+СТРЕЛКА ВПРАВО |
|
Понижение абзаца до основного текста. |
CTRL+SHIFT+N |
|
Перемещение выделенных абзацев вверх. |
ALT + SHIFT + СТРЕЛКА ВВЕРХ |
|
Перемещение выделенных абзацев вниз. |
ALT+SHIFT+СТРЕЛКА ВНИЗ |
|
Разверните текст под заголовком. |
ALT+SHIFT+ПЛЮС (+) |
|
Свернуть текст под заголовком. |
ALT+SHIFT+Знак минус (-) |
|
Развертывание или свертывание всего текста либо всех заголовков. |
ALT+SHIFT+A |
|
Скрытие или отображение форматирования символов. |
Косая черта (/) (на цифровой клавиатуре) |
|
Переключение между отображением первой строки основного текста и отображением всего основного текста. |
ALT+SHIFT+L |
|
Показать все заголовки в стиле Заголовок 1 . |
ALT+SHIFT+1 |
|
Показать все заголовки с указанным уровнем заголовка. |
ALT+SHIFT+Номер уровня заголовка |
|
Вставка знака табуляции. |
CTRL+TAB |
К началу страницы
Перемещение по документу в режиме чтения
|
Действие |
Клавиши |
|---|---|
|
Переход к началу документа. |
Домашняя страница |
|
Перемещение в конец документа. |
END |
|
Перейдите на определенную страницу. |
Введите номер страницы, а затем нажмите клавишу ВВОД. |
|
Выйдите из режима чтения. |
ESC |
К началу страницы
Использование сочетаний клавиш с функциональными клавишами
|
Клавиша |
Описание |
|---|---|
|
F1 |
|
|
F2 |
|
|
F3 |
|
|
F4 |
|
|
F5 |
|
|
F6 |
|
|
F7 |
|
|
F8 |
|
|
F9 |
|
|
F10 |
|
|
F11 |
|
|
F12 |
|
К началу страницы
См. также
Центр справки Word
Выполнение основных задач в Word с помощью средства чтения с экрана
Знакомство с Word и навигация с помощью средства чтения с экрана
Поддержка средства чтения с экрана для Word
В этой статье описаны сочетания клавиш и функциональные клавиши в Word для Mac.
Примечания:
-
Параметры в некоторых версиях операционной системы Mac (OS) и некоторых программах могут конфликтовать с сочетаниями клавиш и операциями функциональных клавиш в Microsoft 365 для Mac. Сведения об изменении назначения клавиш для сочетания клавиш см. в статье Справка Mac для вашей версии macOS, служебное приложение или см. в статье Конфликты сочетаний клавиш.
-
Если вы не нашли сочетание клавиш, которое вам необходимо, вы можете создать собственное сочетание клавиш. Инструкции можно найти в статье Создание настраиваемых сочетаний лавиш для Office для Mac.
-
Многие сочетания клавиш ctrl на клавиатуре Windows также работают с клавишей Control в Word для Mac. Однако существуют исключения.
-
Чтобы быстро найти ярлык в этой статье, можно использовать поиск. Нажмите клавиши COMMAND+F и введите слова поиска.
Для оптимального использования клавиатуры с лентой включите на клавиатуре доступ ко всем элементам управления.
-
Чтобы открыть системные параметры, нажмите
+ПРОБЕЛ, введите системные параметры и нажмите клавишу RETURN.
-
Чтобы перейти в раздел Параметры клавиатуры, введите клавиатуру и нажмите клавишу RETURN.
-
На вкладке Сочетания клавиш нажмите клавиши CONTROL+F7, чтобы изменить параметр Полный доступ с клавиатуры с текстовых полей и списков только на Все элементы управления.
В этом разделе
-
Часто используемые сочетания клавиш
-
Конфликты сочетаний клавиш
-
Навигация по документу
-
Выделение текста и рисунков
-
Редактирование текста и рисунков
-
Работа с таблицами
-
Рисование
-
Работа с полями
-
Изменение структуры документа
-
Рецензирование документа
-
Использование обычных и концевых сносок
-
Работа с языками справа налево
-
Использование сочетаний клавиш с функциональными клавишами
Часто используемые сочетания клавиш
В этой таблице перечислены часто используемые сочетания клавиш в Word для Mac.
|
Действие |
Клавиши |
|---|---|
|
Отмените предыдущее действие. |
|
|
По возможности повторите предыдущее действие. |
|
|
Вырезайте выбранное содержимое в буфер обмена. |
|
|
Скопируйте выбранное содержимое в буфер обмена. |
|
|
Вставить содержимое буфера обмена. |
|
|
Вывод контекстного меню для выбранного элемента. * |
SHIFT+F10 |
|
Отображение диалогового окна Перейти к . |
|
|
Отображение диалогового окна Правописание и грамматика . |
|
|
Включите режим расширенного выбора. |
F8 |
|
Переход к следующему окну |
|
|
Переход к предыдущему окну |
|
|
Вывод диалогового окна Сохранение документа. |
|
|
Поиск текста (перемещение фокуса в поле Поиск в документе ). |
|
|
Отображение области «Поиск и замена «. |
Control+H |
|
Отображение диалогового окна Печать . |
|
|
Закройте текущий документ. |
|
|
Разверните или сверните ленту. |
|
|
Найдите следующую орфографическую или грамматическую ошибку. Должна быть включена функция Проверять орфографию по мере ввода . |
Option+F7 |
|
Откройте словарь. |
В Word 2011, OPTION+SHIFT+F7 |
К началу страницы
Конфликты сочетаний клавиш
Некоторые Word для Mac сочетания клавиш конфликтуют с сочетаниями клавиш macOS по умолчанию. Такие сочетания клавиш в этой статье отмечены звездочкой ( * ). Чтобы использовать эти сочетания клавиш, может потребоваться изменить параметры клавиатуры Mac, чтобы изменить сочетание клавиш.
Изменение параметров системы для сочетаний клавиш
-
В меню Apple выберите Системные настройки.
-
Выберите пункт Клавиатура.
-
Откройте вкладку Сочетание клавиш.
-
Выберите Управление миссией.
-
Снимите флажок для сочетания клавиш, конфликтующего с Word для Mac, которое вы хотите использовать.
Навигация по документу
|
Действие |
Клавиши |
|---|---|
|
Переместите курсор на одно слово влево. |
OPTION+СТРЕЛКА ВЛЕВО |
|
Переместите курсор на одно слово вправо. |
OPTION+СТРЕЛКА ВПРАВО |
|
Перемещение курсора вверх на один абзац. |
|
|
Перемещение курсора вниз на один абзац. |
|
|
Переместите курсор в начало текущей строки. |
Домашняя страница |
|
Переместите курсор в конец текущей строки. |
END |
|
Переместите курсор в начало предыдущей страницы. |
В MacBook нажмите клавиши |
|
Переместите курсор в начало следующей страницы. |
В MacBook нажмите клавишу |
|
Переместите курсор в начало документа. |
В MacBook нажмите клавишу |
|
Переместите курсор в конец документа. |
В MacBook нажмите клавиши |
|
Переместите курсор в предыдущую точку вставки. |
SHIFT+F5 |
|
Переместите курсор, прокрутив представление документа вверх на один экран. |
PAGE UP |
|
Переместите курсор, прокрутив представление документа вниз на один экран. |
PAGE DOWN |
К началу страницы
Выделение текста и рисунков
Совет: Для выделения текста в основном используются те же сочетания клавиш, что и для перемещения курсора, но при этом необходимо удерживать нажатой клавишу SHIFT. Например, 

|
Действие |
Клавиши |
|---|---|
|
Выберите несколько элементов, которые не находятся рядом друг с другом. |
Выберите первый нужный элемент, удерживая нажатой клавишу |
|
Выделите текст. |
SHIFT+клавиши со стрелками |
|
Выделите слово слева. |
SHIFT+OPTION+СТРЕЛКА ВЛЕВО |
|
Выберите слово справа. |
SHIFT+OPTION+СТРЕЛКА ВПРАВО |
|
Выберите из текущей позиции в начало текущей строки. |
SHIFT+HOME |
|
Выберите из текущей позиции до конца текущей строки. |
SHIFT+END |
|
Выберите от текущего положения до начала текущего абзаца. |
|
|
Выберите от текущего положения до конца текущего абзаца. |
|
|
Выберите из текущего положения в верхней части экрана. |
SHIFT+Page up |
|
Выберите из текущего положения в нижней части экрана. |
SHIFT+Page down |
|
Выберите от текущей позиции до начала документа. |
|
|
Выберите от текущей позиции до конца документа. |
|
|
Выберите из текущего положения в нижней части окна. |
|
|
Выберите все содержимое документа. |
|
К началу страницы
Расширение выделения
|
Действие |
Клавиши |
|---|---|
|
Начните расширение выделенного фрагмента. * |
F8 В режиме расширения выделения щелчок расположения в документе расширяет текущее выделение до этого расположения. |
|
Выберите ближайший символ слева. |
F8, клавиша со стрелкой влево |
|
Выберите ближайший символ справа. |
F8, клавиша стрелка вправо |
|
Разверните выделенный фрагмент. |
F8 несколько раз, чтобы развернуть выделенный фрагмент на все слово, предложение, абзац, раздел и документ. |
|
Уменьшение выделенного фрагмента. * |
SHIFT+F8 |
|
Выделение вертикального блока текста. |
|
|
Прекратите расширение выделенного фрагмента. |
ESC |
К началу страницы
Редактирование текста и рисунков
|
Действие |
Клавиши |
|---|---|
|
Вырезайте выбранное содержимое в буфер обмена. |
F2 |
|
Скопируйте выбранное содержимое в буфер обмена. |
F3 |
|
Вставить содержимое буфера обмена. |
F4 |
|
Отображение диалогового окна Специальная вставка . |
|
|
Вырезайте выбранное содержимое до пикового значения. |
|
|
Вставьте содержимое элемента Spike. |
|
|
Скопируйте выбранное форматирование. |
|
|
Вставьте скопированное форматирование. |
|
|
Создайте запись автотекста. |
Option+F3 |
К началу страницы
Выравнивание и форматирование абзацев
|
Действие |
Клавиши |
|---|---|
|
По центру абзаца. |
|
|
Обоснуйте абзац. |
|
|
Выравнивание абзаца по левому краю. |
|
|
Выравнивание абзаца по правому краю. |
|
|
Отступ абзаца. |
CONTROL+SHIFT+M |
|
Удаление отступа абзаца. |
|
|
Создание выступа. |
|
|
Удалите висячий отступ. |
|
|
Примените к абзацу один интервал. |
|
|
Примените к абзацу двойной интервал. |
|
|
Примените к абзацу интервал в 1,5 строки. |
|
|
Включите автоформат. |
|
|
Примените обычный стиль. |
|
|
Примените стиль Заголовок 1 . |
|
|
Примените стиль Заголовок 2 . |
|
|
Примените стиль Заголовок 3 . |
|
|
Примените стиль списка . |
|
|
Вставка неразрывного пространства. |
Option+ПРОБЕЛ |
К началу страницы
Форматирование знаков
|
Действие |
Клавиши |
|---|---|
|
Увеличение размера шрифта. |
|
|
Уменьшение размера шрифта. |
|
|
Увеличение размера шрифта на один пункт. |
|
|
Уменьшение размера шрифта на один пункт. |
|
|
Отобразить диалоговое окно Шрифт. |
|
|
Переключение текста между верхним, строчным и заголовком. |
SHIFT+F3 |
|
Измените текст на все верхние буквы. |
|
|
Применение полужирного начертания. |
|
|
Добавьте маркированный список. |
|
|
Применение подчеркивания. |
|
|
Примените форматирование подчеркивания к словам, но не к пробелам. |
|
|
Примените форматирование двойного подчеркивания. |
|
|
Применение форматирования курсивом. |
|
|
Примените форматирование с небольшими ограничениями. |
|
|
Применение зачеркивного форматирования. |
|
К началу страницы
Вставка специальных знаков
|
Действие |
Клавиши |
|---|---|
|
Вставка пустого поля. |
|
|
Вставка разрыва строки. |
SHIFT+RETURN |
|
Вставка разрыва страницы. |
|
|
Вставка разрыва столбца. |
|
|
Вставка неразрывного дефиса. |
|
|
Вставка символа зарегистрированного товарного знака (®). |
Option+R |
|
Вставка символа товарного знака (™). |
OPTION+2 |
К началу страницы
Работа с таблицами
Перемещение по таблице
|
Действие |
Клавиши |
|---|---|
|
Перейдите к следующей ячейке и выделите ее содержимое. |
Клавиша TAB |
|
Перейдите к предыдущей ячейке и выделите ее содержимое. |
SHIFT+TAB |
|
Переход к следующей строке |
Клавиша СТРЕЛКА ВНИЗ |
|
Переход к предыдущей строке. |
Клавиша СТРЕЛКА ВВЕРХ |
|
Перейдите к первой ячейке в строке. |
Control+Home |
|
Переход к последней ячейке в строке. |
Control+End |
|
Переход к первой ячейке столбца. |
Control+Page up |
|
Переход к последней ячейке в столбце. |
Control+Page down |
|
Добавьте новую строку в нижнюю часть таблицы. |
Клавиша TAB в конце последней строки |
|
Вставка строки. |
|
К началу страницы
Выбор содержимого таблицы
|
Действие |
Клавиши |
|---|---|
|
Выделите содержимое в следующей ячейке. |
Клавиша TAB |
|
Выделите содержимое в предыдущей ячейке. |
SHIFT+TAB |
|
Выделение нескольких соседних ячеек. |
SHIFT+клавиши со стрелками |
|
Выделение строки |
Выделите первую или последнюю ячейку в строке, а затем нажмите клавиши SHIFT+ALT+END или Главная. |
К началу страницы
Изменение размера столбцов таблицы с помощью линейки
|
Действие |
Клавиши |
|---|---|
|
Сохраните размеры столбцов справа и измените ширину таблицы. |
Перетащите границу столбца в линейку |
|
Перемещение одной строки столбца и сохранение ширины таблицы. |
SHIFT+Перетаскивание границы столбца в линейке |
|
Равномерно измените размер всех столбцов вправо и сохраните ширину таблицы. |
|
|
Пропорционально измените размер всех столбцов вправо и сохраните ширину таблицы. |
|
К началу страницы
Изменение ширины столбцов непосредственно в таблице
Совет: Чтобы точно отрегулировать ширину столбца и отобразить измерения столбца в линейке при изменении размера столбца, отключите функцию привязки, нажав клавишу OPTION с помощью сочетания клавиш.
|
Действие |
Клавиши |
|---|---|
|
Перемещение одной строки столбца и сохранение ширины таблицы. |
Перетащите границу столбца |
|
Сохраните размеры столбцов справа и измените ширину таблицы. |
SHIFT+Перетаскивание границы столбца |
|
Равномерно измените размер всех столбцов вправо и сохраните ширину таблицы. |
|
|
Пропорционально измените размер всех столбцов вправо и сохраните ширину таблицы. |
|
К началу страницы
Вставка знаков абзаца и табуляции в таблицу
|
Действие |
Клавиши |
|---|---|
|
Вставка нового абзаца в ячейку. |
RETURN |
|
Вставка символа TAB в ячейку. |
Option+TAB |
К началу страницы
Рисование
|
Действие |
Клавиши |
|---|---|
|
Переключение режима рисования. |
|
К началу страницы
Работа с полями
|
Действие |
Сочетание клавиш |
|---|---|
|
Вставка поля DATE. |
CONTROL+SHIFT+D |
|
Вставка поля LISTNUM. |
|
|
Вставка поля PAGE. |
CONTROL+SHIFT+P |
|
Вставка поля TIME. |
CONTROL+SHIFT+T |
|
Вставка пустого поля. |
|
|
Обновление выделенных полей. * |
F9 |
|
Переключение между кодами полей и их значениями. * |
SHIFT+F9 |
|
Переключение между кодами всех полей и их значениями. |
Option+F9 |
|
Запустите GOTOBUTTON или MACROBUTTON из поля, отображающего результаты поля. |
OPTION+SHIFT+F9 |
|
Блокировка поля. |
|
|
Снятие блокировки поля. |
|
К началу страницы
Изменение структуры документа
Эти сочетания клавиш применяются только в том случае, если документ находится в представлении Структура .
|
Действие |
Клавиши |
|---|---|
|
Повышение уровня абзаца. |
КЛАВИША CONTROL+SHIFT+СТРЕЛКА ВЛЕВО |
|
Понижение уровня абзаца. |
КЛАВИША CONTROL+SHIFT+СТРЕЛКА ВПРАВО |
|
Понижение абзаца до основного текста. |
|
|
Перемещение выделенных абзацев вверх. * |
КЛАВИША CONTROL+SHIFT+СТРЕЛКА ВВЕРХ |
|
Перемещение выделенных абзацев вниз. * |
Клавиша CONTROL+SHIFT+СТРЕЛКА ВНИЗ |
|
Разверните текст под заголовком. |
Control+SHIFT+Знак плюса (+) |
|
Свертывание текста под заголовком. * |
Control+SHIFT+Минус (-) |
|
Развернуть весь основной текст и заголовки или свернуть весь основной текст. |
CONTROL+SHIFT+A |
|
Переключение между отображением первой строки основного текста и отображением всего основного текста. |
CONTROL+SHIFT+L |
|
Показать все заголовки с указанным уровнем заголовка. |
Control+SHIFT+Номер уровня заголовка |
К началу страницы
Рецензирование документа
|
Действие |
Сочетание клавиш |
|---|---|
|
Вставка примечания. |
|
|
Включение и отключение режима записи исправлений. |
|
|
Переход к началу комментария. |
Домашняя страница |
|
Перемещение в конец комментария. |
END (Клавиша End доступна не на всех клавиатурах.) |
|
Перейдите в начало списка комментариев. |
|
|
Перейдите в конец списка комментариев. |
|
К началу страницы
Использование обычных и концевых сносок
|
Действие |
Клавиши |
|---|---|
|
Вставка обычной сноски. |
|
|
Вставка концевой сноски. |
|
К началу страницы
Работа с языками справа налево
Word поддерживает функции справа налево для языков, которые работают в среде справа налево или в комбинированной среде справа налево, слева направо для написания, редактирования и отображения текста. В этом контексте язык с написанием справа налево обозначает любую систему письма, в которой текст записывается справа налево, включая языки, требующие контекстного написания, например арабский, и языки, не требующие такового.
Прежде чем использовать указанные здесь сочетания клавиш, убедитесь, что они включены для нужно языка.
-
Перейдите в меню Apple и последовательно выберите пункты Системные настройки > Клавиатура.
-
На вкладке Источники ввода выберите язык, для которого хотите включить сочетания клавиш.
-
В правой части вкладки установите флажок для включения сочетаний клавиш.
|
Действие |
Клавиши |
|---|---|
|
Переключите направление записи справа налево. |
Control+ |
|
Переключите направление записи влево направо. |
Control+ |
К началу страницы
Использование сочетаний клавиш с функциональными клавишами
Word для Mac использует функциональные ключи для общих команд, включая копирование и вставку. Для быстрого доступа к этим командам вы можете изменить системные настройки Apple, чтобы вам каждый раз не приходилось нажимать клавишу FN при использовании сочетаний клавиш с функциональными клавишами.
Примечание: Изменение настроек системных функциональных клавиш влияет на работу функциональных ключей на компьютере Mac, а не только в Word. После этого вы также сможете использовать специальные возможности, обозначенные на функциональных клавишах. Просто нажмите клавишу Fn. Например, чтобы изменить громкость с помощью клавиши F12, нажмите клавиши Fn+F12.
Если функциональная клавиша не работает надлежащим образом, одновременно с ней нужно нажать клавишу FN. Если вы не хотите нажимать клавишу Fn каждый раз, вы можете изменить параметры системы Apple. Инструкции см. в разделе Изменение настроек ключа функции.
В следующей таблице приведены сочетания клавиш функций для Word для Mac.
|
Клавиша |
Описание |
|---|---|
|
F1 |
|
|
F2 |
|
|
F3 |
|
|
F4 |
|
|
F5 |
|
|
F6 |
|
|
F7 |
|
|
F8 |
|
|
F9 |
|
|
F10 |
|
|
F11 |
|
К началу страницы
Изменение параметров ключа функции
-
В меню Apple выберите Системные настройки.
-
Выберите пункт Клавиатура.
-
На вкладке Клавиатура установите флажок Использовать клавиши F1, F2 и т. д. как стандартные функциональные клавиши.
См. также
Центр справки Word
Выполнение основных задач в Word с помощью средства чтения с экрана
Знакомство с Word и навигация с помощью средства чтения с экрана
Поддержка средства чтения с экрана для Word
В этой статье описаны сочетания клавиш в Word в Интернете.
Примечания:
-
Если вы используете Экранный диктор в Windows 10 Fall Creators Update, для изменения документов, электронных таблиц или презентаций в Microsoft 365 для Интернета вам понадобится отключить режим сканирования. Дополнительные сведения см. в статье Отключение виртуального режима или режима просмотра в средствах чтения с экрана в Windows 10 Fall Creators Update.
-
Чтобы быстро найти ярлык в этой статье, можно использовать поиск. Нажмите CTRL+F, а затем введите слова поиска.
-
Рекомендуется использовать Word в Интернете в веб-браузере Microsoft Edge. Word в Интернете работает в веб-браузере, поэтому сочетания клавиш немного отличаются от тех, которые используются в классической программе. Например, для перехода в область команд и выхода из нее вместо клавиши F6 используются клавиши CTRL+F6. Кроме того, такие распространенные сочетания клавиш, как F1 (справка) и CTRL+O (открыть), относятся к командам веб-браузера, а не Word в Интернете.
В этом разделе
-
Часто используемые сочетания клавиш
-
Сочетания клавиш для ленты
-
Навигация по документу
-
Изменение и форматирование документа
-
Работа с примечаниями
Часто используемые сочетания клавиш
В этой таблице перечислены наиболее часто используемые сочетания клавиш в Word в Интернете.
Совет: Чтобы быстро создать документ в Word в Интернете, откройте браузер, введите Word.new в адресной строке и нажмите клавишу ВВОД.
|
Действие |
Клавиши |
|---|---|
|
В режиме чтения откройте представление на основе PDF с тегами для работы с средствами чтения с экрана. |
Нажимайте клавишу TAB, пока не дойдете до кнопки Режим специальных возможностей , а затем нажмите клавишу ВВОД. |
|
Поиск текста в режиме чтения. |
CTRL+F или F3 |
|
Поиск текста в режиме редактирования. |
CTRL+F или CTRL+G |
|
Поиск и замена текста в режиме редактирования. |
CTRL+H |
|
Скрытие области задач, если она открыта. |
ESC |
|
Переключитесь на элемент управления Масштаб . |
ALT+ПЕРИОД, W, затем Q или ALT+клавиша с логотипом Windows, W, затем Q |
|
Печать документа. |
CTRL+P |
|
Перейдите к следующему региону ориентира. |
CTRL+F6 |
|
Перейдите в текстовое поле «Подскажите мне » или «Поиск «. |
ALT+Q |
К началу страницы
Сочетания клавиш для ленты
Word в Интернете предлагает сочетания клавиш, называемые ключами доступа для навигации по ленте. Если вы использовали ключи доступа для экономии времени на Word для настольных компьютеров, ключи доступа будут очень похожи в Word в Интернете.
На Windows компьютере все ключи доступа начинаются с alt+period (.) или ALT+клавиша с логотипом Windows, а затем добавьте букву для вкладки ленты. Например, чтобы перейти на вкладку Рецензирование , нажмите клавиши ALT+ПЕРИОД, R или ALT+Windows, R.
Если вы используете Word в Интернете на компьютере Mac, нажмите клавиши CONTROL+PERIOD (.) для запуска.
-
Чтобы открыть ленту, нажмите клавиши ALT+Период или ALT+Windows. Кроме того, можно нажать клавиши CTRL+F6, пока не перейдете на вкладку Главная .
-
Для перехода между вкладками ленты нажимайте клавишу TAB.
-
Чтобы скрыть ленту, чтобы у вас было больше места для работы, нажмите клавиши CTRL+F3. Чтобы снова отобразить ленту, повторите это действие.
Использование клавиш доступа для ленты
Чтобы перейти к вкладке на ленте, нажмите одну из указанных ниже клавиш доступа.
|
Действие |
Клавиши |
|---|---|
|
Откройте текстовое поле «Сообщите мне» или «Поиск » на ленте, чтобы ввести условие поиска. |
ALT+ПЕРИОД, Q или ALT+клавиша с логотипом Windows, Q |
|
Откройте вкладку Файл , чтобы использовать представление Backstage. |
ALT+PERIOD, F или ALT+клавиша с логотипом Windows, F |
|
Откройте вкладку Главная , чтобы отформатировать текст и используйте инструмент Найти . |
ALT+ПЕРИОД, H или ALT+клавиша с логотипом Windows, H |
|
Откройте вкладку Вставка , чтобы вставить рисунок, ссылку, комментарий, верхний или нижний колонтитул или номер страницы. На этой же вкладке можно открыть коллекцию Символ. |
ALT+PERIOD, N или ALT+клавиша с логотипом Windows, N |
|
Откройте вкладку Макет страницы , чтобы задать поля страницы, ориентацию и размер, а также интервал между абзацами. |
ALT+ПЕРИОД, A или ALT+клавиша с логотипом Windows, A |
|
Откройте вкладку Ссылки , чтобы вставить оглавление, сноски или концевые сноски. |
ALT+PERIOD, S или ALT+клавиша с логотипом Windows, S |
|
Откройте вкладку Рецензирование , чтобы проверить орфографию, добавить комментарии или отслеживать и проверять изменения в документе. |
ALT+ПЕРИОД, R или ALT+клавиша с логотипом Windows, R |
|
Откройте вкладку Вид , чтобы выбрать представление, откройте область навигации , измените верхний & нижний колонтитул и измените масштаб представления документа. |
ALT+ПЕРИОД, W или ALT+клавиша с логотипом Windows, W |
К началу страницы
Использование поиска
Чтобы быстро найти нужный параметр или выполнить определенное действие, воспользуйтесь текстовым полем Поиск. Чтобы узнать больше о функции поиска, ознакомьтесь со статьей о том, как искать нужную информацию с помощью Поиска (Майкрософт).
Примечание: В зависимости от используемой версии Microsoft 365 текстовое поле Поиск в верхней части окна приложения может называться Помощник. Оба варианта в основном похожи, но некоторые параметры и результаты поиска могут отличаться.
-
Откройте презентацию, документ или электронную таблицу, для которой необходимо выполнить определенное действие, или выделите нужный элемент.
-
Нажмите клавиши ALT+Q, чтобы перейти в поле Поиск.
-
Введите ключевые слова для действия, которое вы хотите выполнить. Например, если нужно добавить маркированный список, введите маркеры.
-
С помощью клавиши СТРЕЛКА ВНИЗ выберите нужный пункт в результатах поиска.
-
Затем нажмите клавишу ВВОД, чтобы выбрать элемент или выполнить действие.
Работа с вкладками и меню ленты
Следующие сочетания клавиш позволяют сэкономить время при работе с вкладками ленты и меню ленты.
|
Действие |
Клавиши |
|---|---|
|
Выбор активной вкладки на ленте и активация клавиш доступа. |
Alt+Period или ALT+клавиша с логотипом Windows. Для перехода на другую вкладку используйте клавишу доступа или клавишу TAB. |
|
Если выбрана вкладка ленты, переместите фокус на команды вкладки. |
Введите, а затем — клавишу TAB или SHIFT+TAB. |
|
Активация выбранной кнопки. |
ПРОБЕЛ или ВВОД |
|
Открытие списка для выбранной команды. |
ПРОБЕЛ или ВВОД |
|
Открытие меню для выбранной кнопки. |
ALT+СТРЕЛКА ВНИЗ |
|
Переход к следующей команде в открытом меню или подменю. |
Клавиша СТРЕЛКА ВНИЗ |
|
Свернуть или развернуть ленту. |
CTRL+F3 |
К началу страницы
Навигация по документу
|
Действие |
Клавиши |
|---|---|
|
Перемещение курсора вправо на одно слово. |
CTRL+СТРЕЛКА ВПРАВО |
|
Переместите курсор влево на одно слово. |
CTRL+СТРЕЛКА ВЛЕВО |
|
Перемещение курсора вверх на один абзац. |
CTRL+СТРЕЛКА ВВЕРХ |
|
Перемещение курсора вниз на один абзац. |
CTRL+СТРЕЛКА ВНИЗ |
|
Переместите курсор в начало текущей строки. |
Домашняя страница |
|
Переместите курсор в конец текущей строки. |
END |
|
Переместите курсор в начало документа. |
CTRL+HOME |
|
Переместите курсор в конец документа. |
CTRL+END |
|
Выделите текст. |
SHIFT+клавиши со стрелками |
|
Выберите слово справа. |
SHIFT+CTRL+СТРЕЛКА ВПРАВО |
|
Выделите слово слева. |
SHIFT+CTRL+СТРЕЛКА ВЛЕВО |
|
Выберите абзац выше. |
SHIFT+CTRL+СТРЕЛКА ВВЕРХ |
|
Выберите абзац ниже. |
SHIFT+CTRL+СТРЕЛКА ВНИЗ |
|
Выберите из текущей позиции в начало строки. |
SHIFT+HOME |
|
Выберите из текущей позиции в конец строки. |
SHIFT+END |
|
Выберите от текущей позиции до начала документа. |
SHIFT+CTRL+HOME |
|
Выберите от текущей позиции до конца документа. |
SHIFT+CTRL+END |
|
Выберите все содержимое документа. |
CTRL+A |
К началу страницы
Изменение и форматирование документа
|
Действие |
Клавиши |
|---|---|
|
Вырезайте выбранное содержимое в буфер обмена. |
CTRL+X |
|
Скопируйте выбранное содержимое в буфер обмена. |
CTRL+C |
|
Вставьте содержимое из буфера обмена. |
CTRL+V |
|
Отмените предыдущее действие. |
CTRL+Z |
|
Повторите предыдущее действие. |
CTRL+Y |
|
Сожмите размер шрифта. |
CTRL+Левая скобка ([) |
|
Увеличение размера шрифта. |
CTRL+Правая скобка (]) |
|
Применение полужирного начертания к выделенному тексту |
CTRL+B |
|
Применение курсивного начертания к выделенному тексту |
CTRL+I |
|
Подчеркнуть выделенный текст. |
CTRL+U |
|
Выравнивание абзаца по левому краю. |
CTRL+L |
|
Выравнивание абзаца по правому краю. |
CTRL+R |
|
По центру абзаца. |
CTRL+E |
|
Обоснуйте абзац. |
CTRL+J |
|
Создайте маркированный список. |
CTRL+ТОЧКА (.) |
|
Создание нумерованного списка. |
CTRL+КОСАЯ ЧЕРТА (/) |
К началу страницы
См. также
Центр справки Word
Выполнение основных задач в Word с помощью средства чтения с экрана
Знакомство с Word и навигация с помощью средства чтения с экрана
Поддержка средства чтения с экрана для Word
Текст
— это
напечатанная, написанная или изображенная
на экране дисплея последовательность
букв (информационная часть сообщения).
Обработка
текста — это
его редактирование
(подготовка, вставка, замена, удаление,
сохранение) и форматирование
(по размерам листа и отступам, по жирности,
курсиву, подчеркиванию, по типу
используемых шрифтов, по центрированию,
выравниванию слева, справа, а также
использование колонтитулов, вставок,
нумерации страниц, эффектов и т.д.).
Редактор
текстов —
это программа, обеспечивающая
редактирование текстов документов в
соответствии с задаваемыми командами.
Он позволяет — создать
новый файл (открыть существующий),
работать
с символом, словом, строкой, блоком
текста (ввод с клавиатуры, вставка,
удаление, вырезание, копирование,
перемещение, работа через буфер обмена
или через копилку), сохранять
файлы в разных форматах с тем же или с
новым именем, печатать
документы
на принтере.
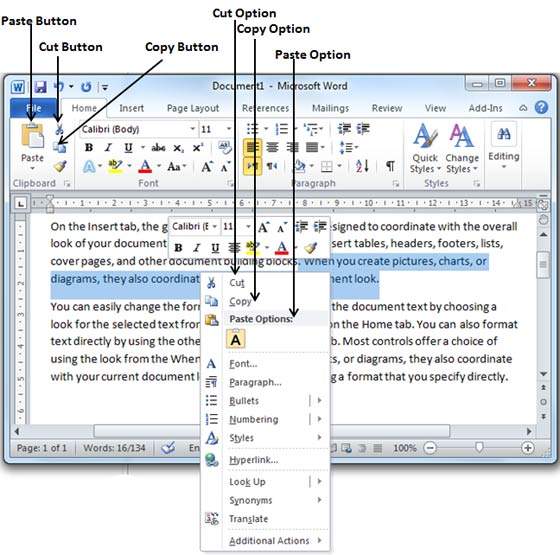
Текстовый
редактор MS
Word 2010 – это
программа,
предназначенная
для создания, просмотра, редактирования
и форматирования документов.
Этот
редактор остается самым популярным
среди текстовых редакторов в мире. Он
имеет все современные компоненты и
режимы для оформления документов.
Позволяет применять различные шрифты,
вставлять в документ электронные
таблицы, диаграммы, сложные математические
формулы, графические иллюстрации и
звуковые комментарии, обеспечивает
проверку орфографии, ориентирован на
технологии Интернет. Обеспечена (почти
в полном объеме) совместимость версий
MS
Word
7/97/2000/2003/2010.
Редактор работает как самостоятельная
программа (пакет) или в составе офисной
системы MS
Office
2010 под управлением
ОС Windows
7.
Для
установки и работы MS
Word
2010
требуется ПК с установленной ОС Windows
7, не менее 200 Мб свободного места на
винчестере. Дистрибутив поставляется
на CD-ROM.
Установка
производится по одому из четырех
вариантов — минимальная, типичная (имеет
большинство функций), полная, выборочная
(здесь пользователь сам определяет, что
ему нужно для дальнейшей работы —
графическая библиотека, вставка диаграмм,
редактор формул и т.д.).
Все
настройки MS
Word
2010 после его установки по умолчанию
хранятся в файле Normal.dot.
Создаваемые файлы документов имеют по
умолчанию расширение .doc
(.docx).
3. Интерфейс программы ms Word 2010
Лента
в Word
2010 содержит
команды и другие пункты меню, которые
раньше располагались в меню и на панелях
инструментов в Word
2003. Расположение часто используемых
команд на ленте показано ниже (см. рис.
18 — 24).
Рис.
18. Интерфейс программы Word
2010
Рис.
19. Вкладка «Главная»
Рис.
20. Вкладка «Вставка»
Рис.
21. Вкладка «Разметка
страницы»
Рис.
22. Вкладка «Ссылки»
Рис.
23. Вкладка «Рецензирование»
Рис.
24. Вкладка «Вид»
4. Редактирование текста и сервисные операции
Создание
документов начинается
с открытия
нового документа и начала ввода текста.
Для некоторых особых документов можно
использовать шаблоны. 1)
Открыть новый документ и начать ввод
текста (Откройте
вкладку Файл. Нажмите кнопку Создать.
Дважды щелкните элемент Новый документ).
2) Создание
документа на основе шаблона
возможно на сайте Office.com при подключении
к Интернету. 3)
Удаление документа
(Откройте вкладку Файл. Нажмите кнопку
Открыть. Найдите файл, который нужно
удалить. Щелкните файл правой кнопкой
мыши, а затем выберите команду Удалить
в контекстном меню). 4)
Редактирование документа
(После создания документа можно изменить
его форматирование, добавить заголовок,
изменить интервалы между строками или
абзацами, вставлять разрывы страниц,
вставлять рисунки или картинки, вставлять
и создавать таблицы, добавлять колонтитулы
и номера страниц, делать оглавления,
применять темы к документам Word, добавлять
титульную страницу и т.д.
Редактирование
текста –
это внесение каких-либо изменений в
существующий документ. Элементарные
операции
редактирования сводятся к вставке или
удалению символа.
Сложные операции
предполагают работу с фрагментами
документа, которые могут содержать
рисунки, таблицы, кадры и другие объекты.
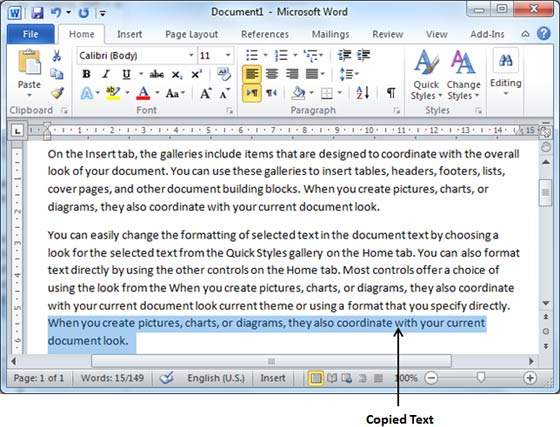
В MS
Word 2010 можно перемещать, копировать и
удалять фрагменты документа. Однако
прежде чем приступить к операциям с
фрагментами, необходимо уметь выделить
фрагмент в документе. Для выделения
текста можно использовать мышку или
клавиатуру. В качестве фрагмента могут
выступать единичный символ, слово,
предложение, абзац, несколько абзацев.
Выделенный в документе фрагмент можно
удалить, переместить, копировать. Для
этого можно использовать, например,
«быстрые клавиши».
Для
сохранения документа
его необходимо записать в файл на жесткий
диск, воспользовавшись соответствующей
командой. Файлу нужно дать имя и определить
папку для хранения файла. Возможно
автоматическое сохранения файла с
документом и его защита. При работе с
документом MS
Word
2010 обеспечивает
выполнение большого количества сервисных
операций.
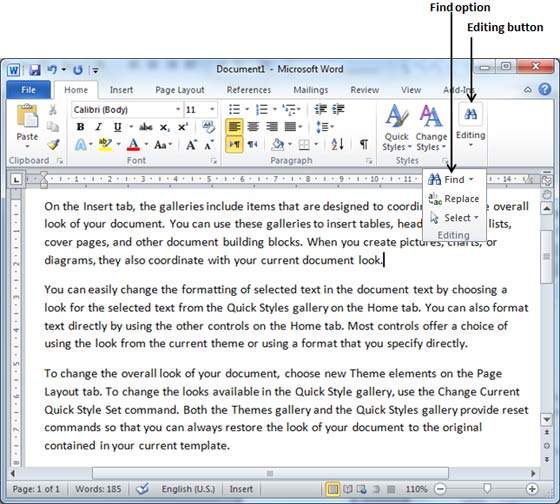
Среди них — поиск и замена текста, проверка
орфографии (ручная или автоматическая),
автоформат, введение сносок и спецэффектов,
работа с кадрами, с колонками, с
колонтитулами, с графикой, с автофигурами,
с таблицами, с формулами, с макрокомандами.
Среди
специальных
операций
можно отметить работу
с копилкой
для перемещения текста и рисунков.
Копилка в MS
Word
2010 обеспечивает
перенесение нескольких объектов из
разных частей одного или нескольких
документов и вставки их единой группой
в другое место документа. Алгоритм
следующий: выделите текст или рисунок,
который следует поместить в копилку, а
затем нажмите клавиши CTRL+F3; повторите
этот шаг для каждого объекта, который
следует поместить в копилку; установите
курсор в документе туда, куда следует
вставить содержимое копилки; для вставки
содержимого копилки с ее одновременной
очисткой нажмите клавиши CTRL+SHIFT+F3.
Стиль
— это совокупность параметров форматирования
в MS
Word
2010, имеющая свое название. Использование
стилей позволяет повысить эффективность
и ускорить выполнение работы. Форматирование
с помощью стилей сводится к выделению
нужных фрагментов текста и выбору из
списка требуемого стиля для данного
фрагмента. Для удобства использования
стили, доступные во всех шаблонах,
сведены в библиотеку стилей, которая
доступна через одноименное окно диалога.
Параметры
форматирования,
входящие в понятие стиля
абзаца, — это шрифт
(которым написан текст абзаца), отступы
и интервалы (установленные для данного
стиля абзаца), позиции табуляции
(установленные в абзаце), обрамление
вокруг абзаца текста, язык абзаца,
нумерация строк в абзаце. Методика
использования стилей
сводится к следующему:
-
Старайтесь
не изменять стандартные стили MS
Word
2010 (особенно
в файле normal.dot). -
Сначала
создайте стили, а потом начинайте
создавать документы. -
Создайте
типовые стили и шаблоны для Вашей
организации (недопустимо чтобы каждый
сотрудник тратил время на оформление
каждого нового документа).
Для
изменения разметки и форматирования
одной или нескольких страниц документа
используются разрывы
раздела. В
каждом разделе документа можно разметить
часть страницы с разным количеством
колонок; сделать нужную нумерацию
страниц; задать разные колонтитулы.
Используются варианты
разрывов разделов:
1) Со следующей страницы – удобно в
случаях, когда требуется начать новую
главу. 2) На текущей странице — используется
для изменения форматирования на текущей
странице, например для изменения числа
колонок. 3) С четной страницы или С
нечетной страницы — если необходимо,
чтобы главы документа всегда начинались
с четной или нечетной страницы.
Соседние файлы в предмете [НЕСОРТИРОВАННОЕ]
- #
- #
- #
- #
- #
- #
- #
- #
- #
- #
- #
Getting Started Word 2010
In this chapter, we will discuss how to get started with Word 2010. We will understand how to start a Word 2010 application in simple steps. Assuming you have Microsoft Office 2010 installed in your PC, to start the Word application, follow these steps −
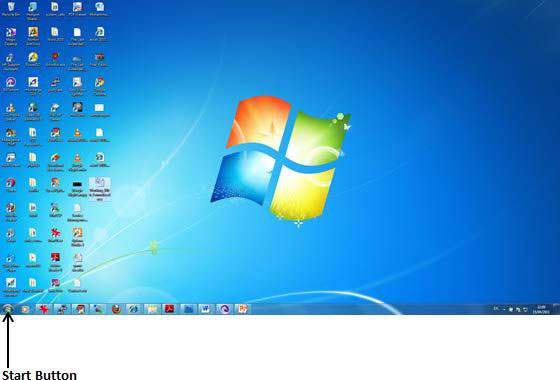
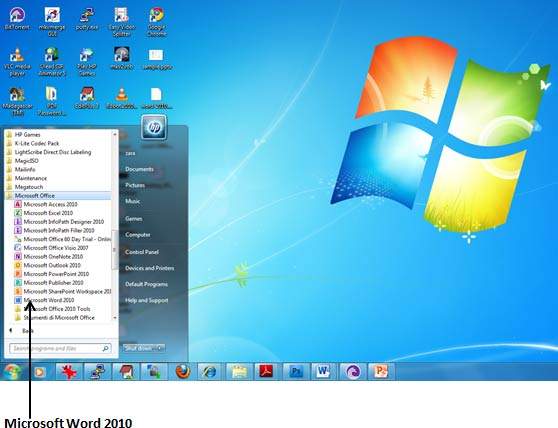
Step 1 − Click the Start button.
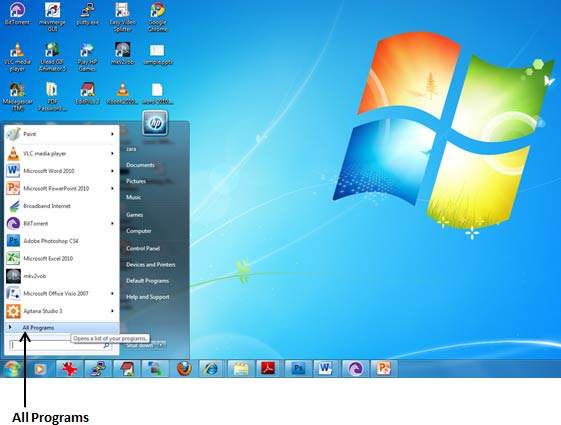
Step 2 − Click the All Programs option from the menu.
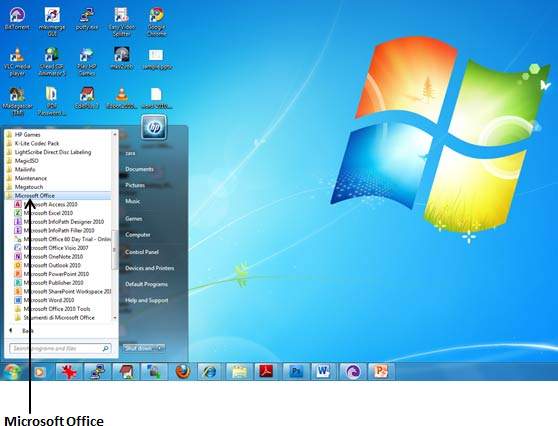
Step 3 − Search for Microsoft Office from the submenu and click it.
Step 4 − Search for Microsoft Word 2010 from the submenu and click it.
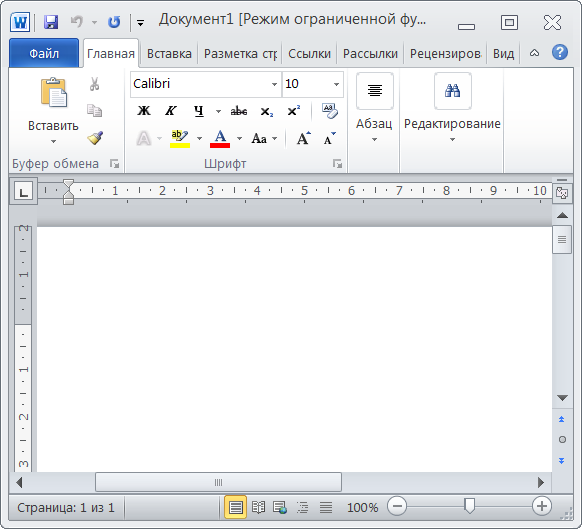
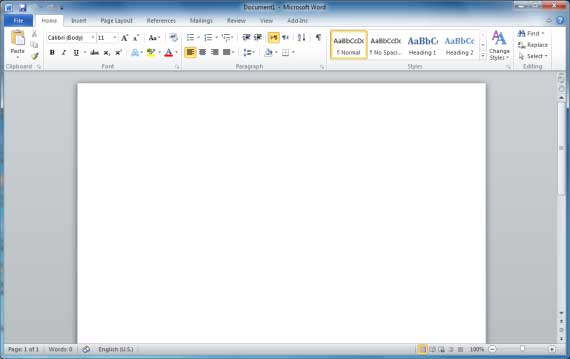
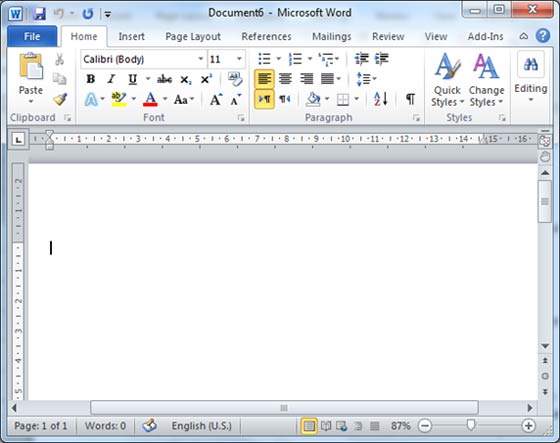
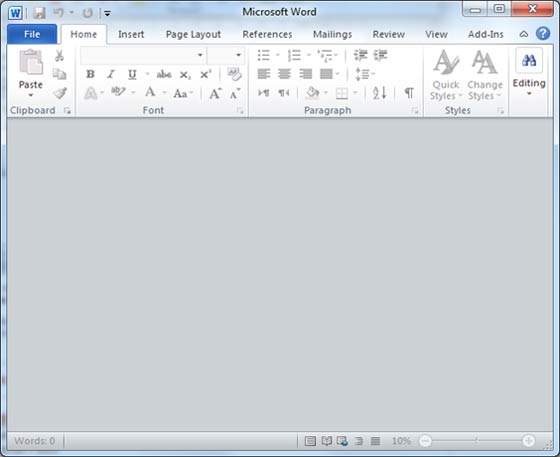
This will launch the Microsoft Word 2010 application and you will see the following window.
Explore Window in Word 2010
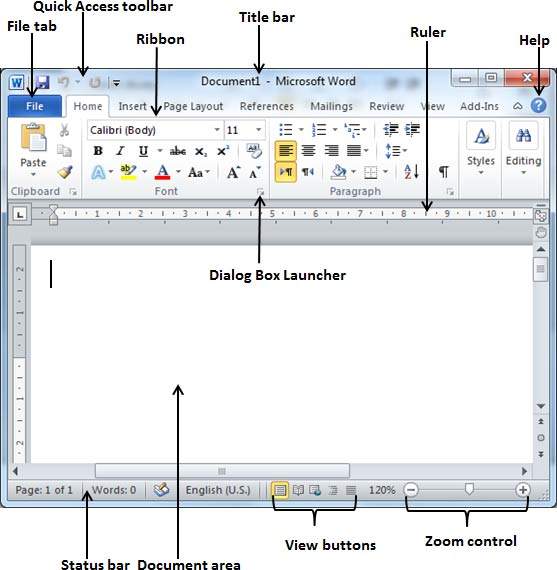
In this chapter, we will understand how to explore Window in Word 2010. Following is the basic window which you get when you start the Word application. Let us understand the various important parts of this window..
File Tab
The File tab replaces the Office button from Word 2007. You can click it to check the Backstage view. This is where you come when you need to open or save files, create new documents, print a document, and do other file-related operations.
Quick Access Toolbar
This you will find just above the File tab. This is a convenient resting place for the mostfrequently used commands in Word. You can customize this toolbar based on your comfort.
Ribbon
Ribbon contains commands organized in three components −
-
Tabs − These appear across the top of the Ribbon and contain groups of related commands. Home, Insert, Page Layout are examples of ribbon tabs.
-
Groups − They organize related commands; each group name appears below the group on the Ribbon. For example, group of commands related to fonts or group of commands related to alignment, etc.
-
Commands − Commands appear within each group as mentioned above.
Title bar
This lies in the middle and at the top of the window. Title bar shows the program and document titles.
Rulers
Word has two rulers — a horizontal ruler and a vertical ruler. The horizontal ruler appears just beneath the Ribbon and is used to set margins and tab stops. The vertical ruler appears on the left edge of the Word window and is used to gauge the vertical position of elements on the page.
Help
The Help Icon can be used to get word related help anytime you like. This provides nice tutorial on various subjects related to word.
Zoom Control
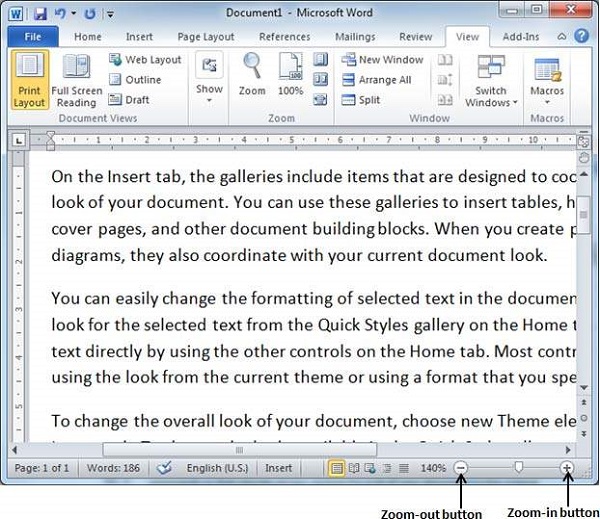
Zoom control lets you zoom in for a closer look at your text. The zoom control consists of a slider that you can slide left or right to zoom in or out; you can click the + buttons to increase or decrease the zoom factor.
View Buttons
The group of five buttons located to the left of the Zoom control, near the bottom of the screen, lets you switch through the Word’s various document views.
-
Print Layout view − This displays pages exactly as they will appear when printed.
-
Full Screen Reading view − This gives a full screen view of the document.
-
Web Layout view − This shows how a document appears when viewed by a Web browser, such as Internet Explorer.
-
Outline view − This lets you work with outlines established using Word’s standard heading styles.
-
Draft view − This formats text as it appears on the printed page with a few exceptions. For example, headers and footers aren’t shown. Most people prefer this mode.
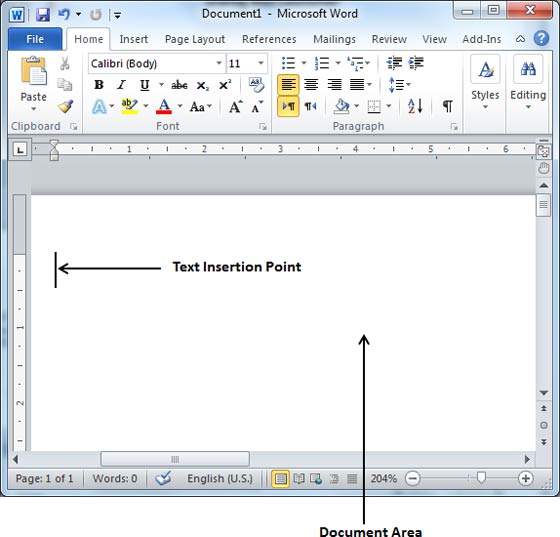
Document Area
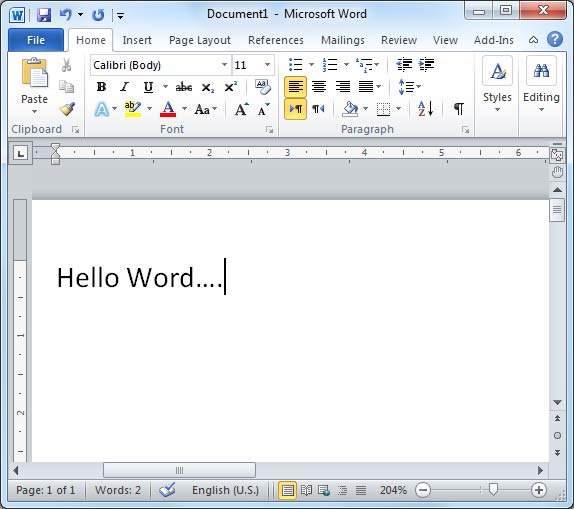
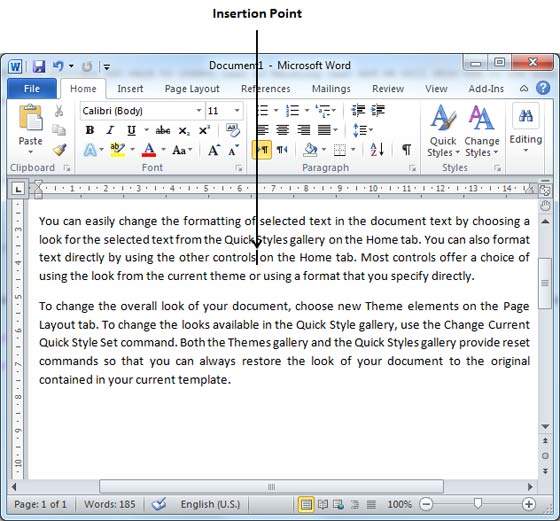
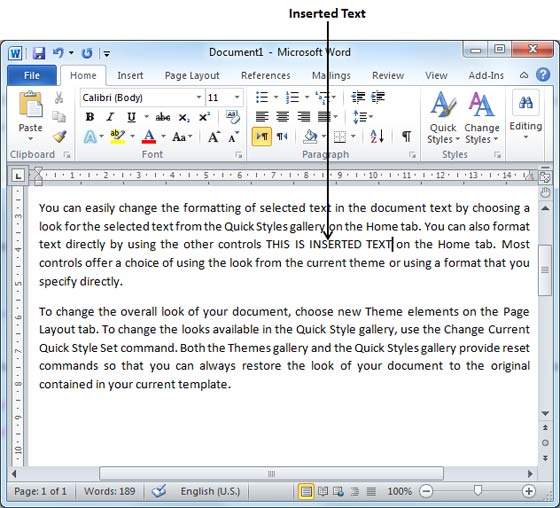
This is the area where you type. The flashing vertical bar is called the insertion point and it represents the location where text will appear when you type.
Status Bar
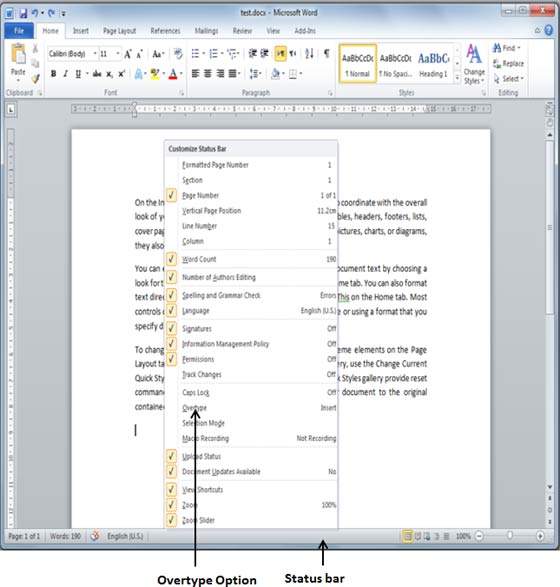
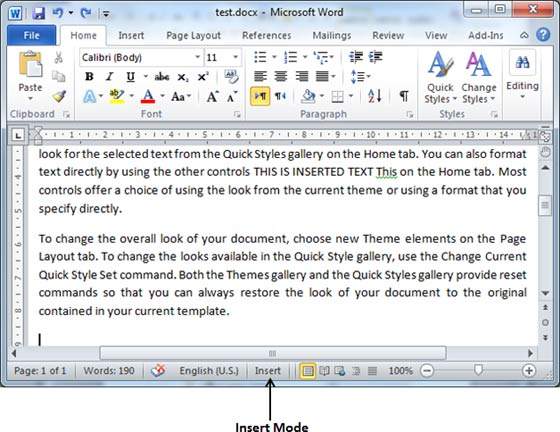
This displays the document information as well as the insertion point location. From left to right, this bar contains the total number of pages and words in the document, language, etc.
You can configure the status bar by right-clicking anywhere on it and by selecting or deselecting options from the provided list.
Dialog Box Launcher
This appears as very small arrow in the lower-right corner of many groups on the Ribbon. Clicking this button opens a dialog box or task pane that provides more options about the group.
Backstage View in Word 2010
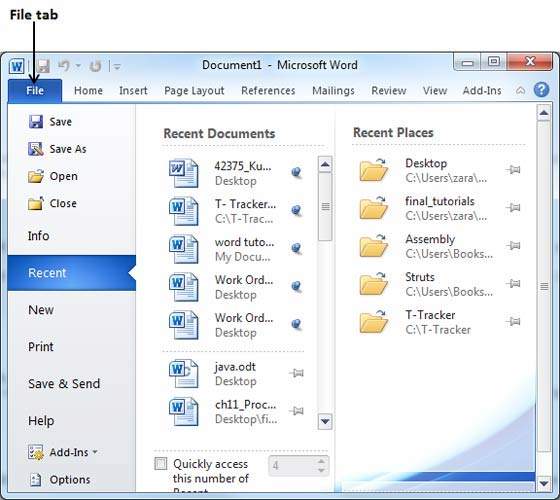
In this chapter, we will discuss the Backstage View in Word 2010. The Backstage view was introduced in Word 2010. This acts as the central place for managing your documents. The backstage view helps in creating new documents, saving and opening documents, printing and sharing documents, and so on.
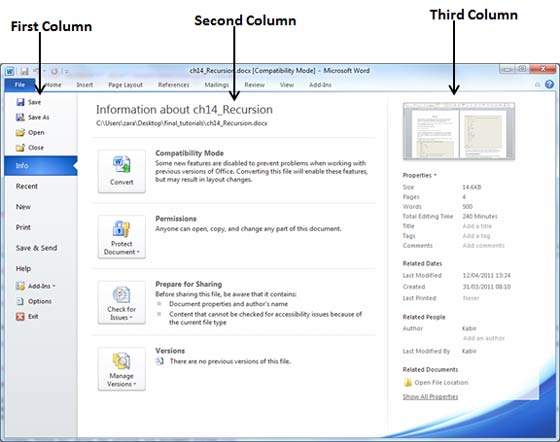
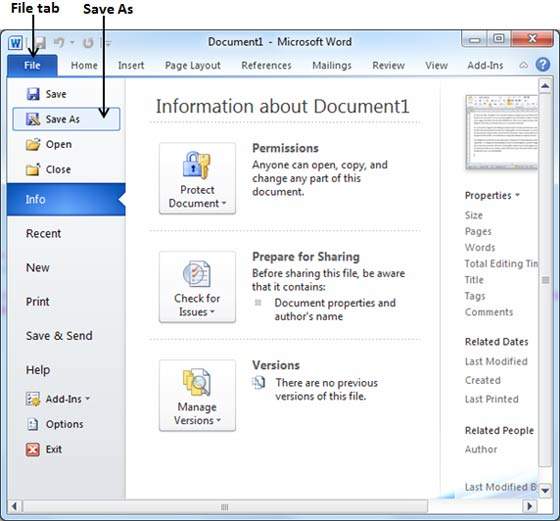
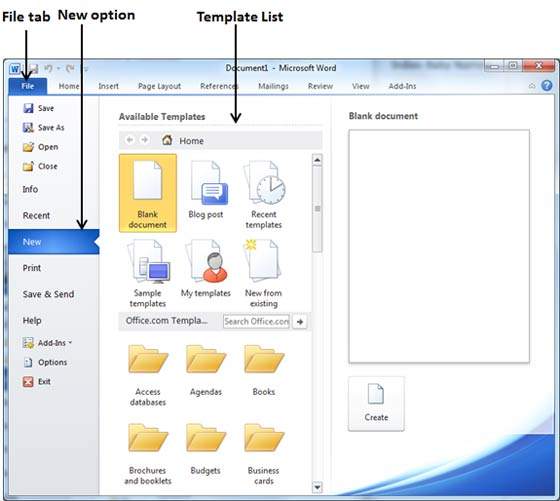
Getting to the Backstage View is easy: Just click the File tab, located in the upper-left corner of the Word Ribbon. If you already do not have any opened document, then you will see a window listing down all the recently opened documents as follows −
If you already have an opened document, then it will display a window showing detail about the opened document as shown below. Backstage view shows three columns when you select most of the available options in the first column.
The first column of the backstage view will have following options −
| S.No | Option & Description |
|---|---|
| 1 |
Save If an existing document is opened, it will be saved as is, otherwise it will display a dialogue box asking for the document name. |
| 2 |
Save As A dialogue box will be displayed asking for document name and document type, by default it will save in word 2010 format with extension .docx. |
| 3 |
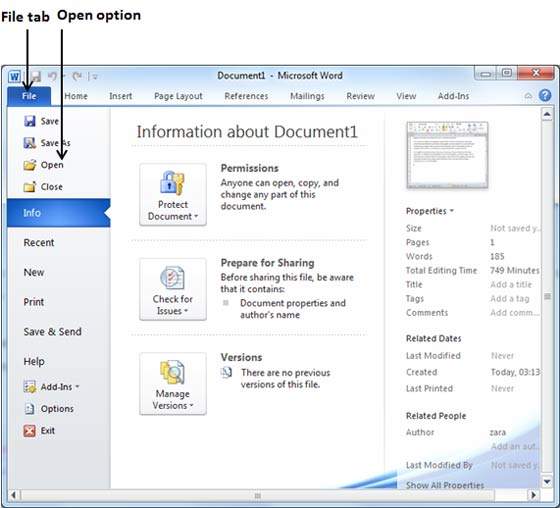
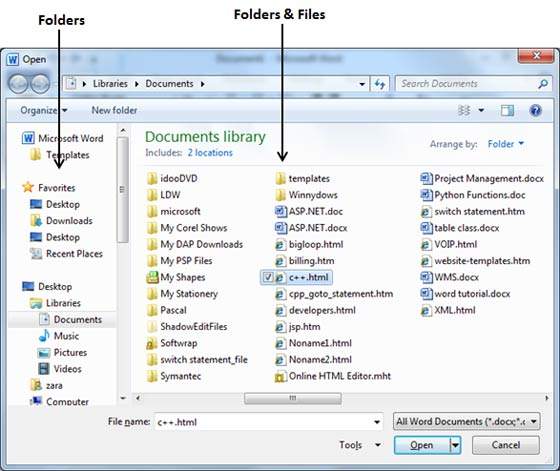
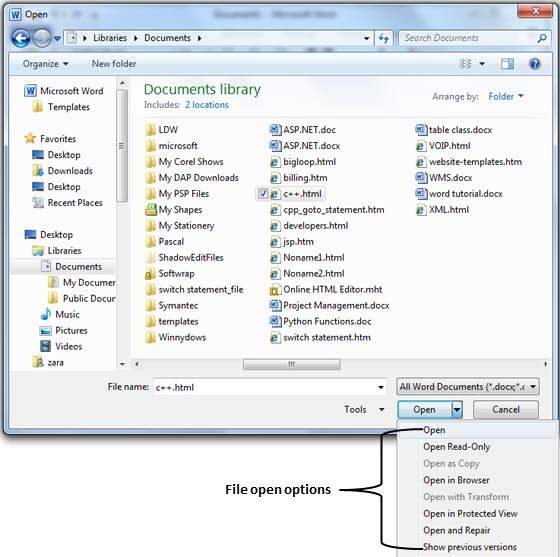
Open This option is used to open an existing word document. |
| 4 |
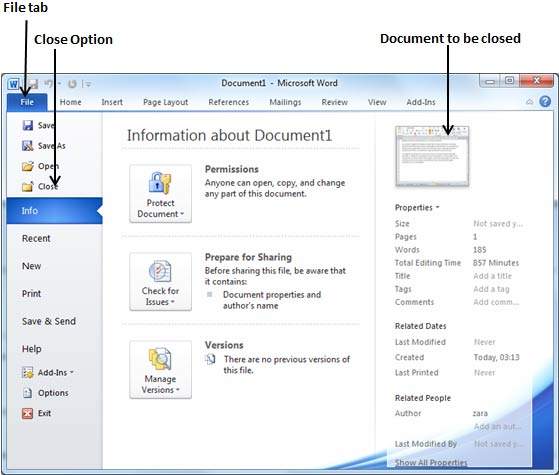
Close This option is used to close an open document. |
| 5 |
Info This option displays information about the opened document. |
| 6 |
Recent This option lists down all the recently opened documents |
| 7 |
New This option is used to open a new document. |
| 8 |
This option is used to print an open document. |
| 9 |
Save & Send This option will save an open document and will display options to send the document using email, etc. |
| 10 |
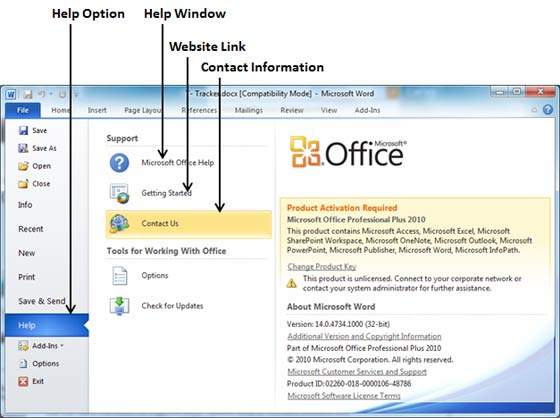
Help This option is used to get the required help about Word 2010. |
| 11 |
Options This option is used to set various option related to Word 2010. |
| 12 |
Exit Use this option to close the document and exit. |
Document Information
When you click the Info option available in the first column, it displays the following information in the second column of the backstage view −
-
Compatibility Mode − If the document is not a native Word 2007/2010 document, a Convert button appears here, enabling you to easily update its format. Otherwise, this category does not appear.
-
Permissions − You can use this option to protect your word document. You can set a password so that nobody can open your document, or you can lock the document so that nobody can edit your document.
-
Prepare for Sharing − This section highlights important information you should know about your document before you send it to others, such as a record of the edits you made as you developed the document.
-
Versions − If the document has been saved several times, you may be able to access the previous versions of it from this section.
Document Properties
When you click the Info option available in the first column, it displays various properties in the third column of the backstage view. These properties include the document size, the number of pages in the document, the total number of words in the document, the name of the author etc.
You can also edit various properties by clicking on the property value and if the property is editable, then it will display a text box where you can add your text like title, tags, comments, Author.
Exit Backstage View
It is simple to exit from the Backstage View. Either click on the File tab or press the Esc button on the keyboard to go back to the working mode of Word.
Entering Text — Microsoft Word 2010
In this chapter, let us discuss how to enter text with Microsoft Word 2010. Let us see how easy it is to enter text in a Word document. We assume you know that when you start Word, it displays a new document by default as shown below −
Document area is the area where you type your text. The flashing vertical bar is called the insertion point and it represents the location where the text will appear when you type. keep the cursor at the text insertion point and start typing the text. We typed only two words «Hello Word» as shown below. The text appears to the left of the insertion point as you type −
The following are the two important points that will help you while typing −
-
You do not need to press Enter to start a new line. As the insertion point reaches the end of the line, Word automatically starts a new one. You will need to press Enter, to add a new paragraph.
-
When you want to add more than one space between words, use the Tab key instead of the spacebar. This way you can properly align text by using the proportional fonts.
Move Around in Word 2010
In this chapter, we will discuss how to move around in Word 2010. Word provides a number of ways to move around a document using the mouse and the keyboard.
To begin with, let us create some sample text. To create a sample text, there is a short cut available. Open a new document and type =rand() and press Enter. Word will create the following content for you −
Moving with Mouse
You can easily move the insertion point by clicking in your text anywhere on the screen. There may be instances when a document is big and you cannot see a place where you want to move. Here, you will have to use the scroll bars, as shown in the following screenshot −
You can scroll through your document by rolling your mouse wheel, which is equivalent to clicking the up-arrow or down-arrow buttons in the scroll bar.
Moving with Scroll Bars
As shown in the above screenshot, there are two scroll bars: one for moving vertically within the document, and one for moving horizontally. Using the vertical scroll bar, you may −
-
Move upward by one line by clicking the upward-pointing scroll arrow.
-
Move downward by one line by clicking the downward-pointing scroll arrow.
-
Move one next page, using the next page button (footnote).
-
Move one previous page, using the previous page button (footnote).
-
Use the Browse Object button to move through the document, going from one chosen object to the next.
Moving with Keyboard
The following keyboard commands, used for moving around your document, also move the insertion point −
| Keystroke | Where the Insertion Point Moves |
|---|---|
 |
Forward one character |
 |
Back one character |
 |
Up one line |

|
Down one line |
| PageUp | To the previous screen |
| PageDown | To the next screen |
| Home | To the beginning of the current line |
| End | To the end of the current line |
You can move word by word or paragraph by paragraph. You would have to hold down the Ctrl key while pressing an arrow key, which moves the insertion point as described here −
| Key Combination | Where the Insertion Point Moves |
|---|---|
Ctrl +  |
To the next word |
Ctrl +  |
To the previous word |
Ctrl +  |
To the start of the previous paragraph |
Ctrl +  |
To the start of the next paragraph |
| Ctrl + PageUp | To the previous browse object |
| Ctrl + PageDown | To the next browse object |
| Ctrl + Home | To the beginning of the document |
| Ctrl + End | To the end of the document |
| Shift + F5 | To the last place you changed in your document. |
Moving with Go To Command
Press the F5 key to use the Go To command. This will display a dialogue box where you will have various options to reach to a particular page.
Normally, we use the page number, the line number or the section number to go directly to a particular page and finally press the Go To button.
Save Document in Word 2010
In this chapter, we will discuss how to save a document in Word 2010.
Saving New Document
Once you are done with typing in your new Word document, it is time to save your document to avoid losing work you have done on a Word document. Following are the steps to save an edited Word document −
Step 1 − Click the File tab and select the Save As option.
Step 2 − Select a folder where you will like to save the document, Enter the file name which you want to give to your document and Select the Save As option, by default it is the .docx format.
Step 3 − Finally, click on the Save button and your document will be saved with the entered name in the selected folder.
Saving New Changes
There may be an instance when you open an existing document and edit it partially or completely, or an instance where you may like to save the changes in between editing of the document. If you want to save this document with the same name, then you can use either of the following simple options −
-
Just press the Ctrl + S keys to save the changes.
-
Optionally you can click on the floppy icon available at the top left corner and just above the File tab. This option will also help you save the changes.
-
You can also use the third method to save the changes, which is the Save option available just above the Save As option as shown in the above screenshot.
If your document is new and it was never saved so far, then with either of the three options, Word will display a dialogue box to let you select a folder, and enter the document name as explained in case of saving new document.
Opening a Document in Word 2010
In this chapter, we will discuss how to open a document in Word 2010.
Opening New Document
A new, blank document always opens when you start Microsoft Word. Suppose you want to start another new document while you are working on another document, or you closed an already opened document and want to start a new document. Here are the steps to open a new document −
Step 1 − Click the File tab and select the New option.
Step 2 − When you select the New option from the first column, it will display a list of templates in the second column. Double-click on the Blank document; this is the first option in the template list. We will discuss the other templates available in the list in the following chapters.
You should have your blank document as shown below. The document is now ready for you to start typing your text.
You can use a shortcut to open a blank document anytime. Try using the Ctrl + N keys and you will see a new blank document similar to the one in the above screenshot.
Opening Existing Document
There may be a situation when you open an existing document and edit it partially or completely. Follow the steps given below to open an existing document −
Step 1 − Click the File tab and select the Open option.
Step 2 − This will display the following file Open dialog box. This lets you navigate through different folders and files, and also lets you select a file which you want to open.
Step 3 − Finally, locate and select a file which you want to open and click the small triangle available on the Open button to open the file. You will have different options to open the file, but simply use the Open option.
This will open your selected file. You can use the Open Read-Only option if you are willing just to read the file and you have no intention to modify, i.e., edit the file. Other options can be used for advanced usage.
Closing a Document in Word 2010
In this chapter, we will understand how to close a document in Word 2010. When you finish working with a document, you will proceed to close the document. Closing a document removes it from your computer screen and if you had other documents open, Word displays the last document you used otherwise, you see a blank Word window. Here are simple steps to close an opened document −
Step 1 − Click the File tab and select the Close option.
Step 2 − When you select the Close option and if the document is not saved before closing, it will display the following Warning box asking whether the document should be saved or not.
Step 3 − To save the changes, click Save, otherwise click Don’t Save. To go back to the document, click Cancel. This will close the document and if you have other documents open, Word displays the last document you used, otherwise, you see a blank Word window as shown below −
Context Help in Word 2010
In this chapter, we will discuss Context Help in Word 2010. Microsoft Office provides more than one method for calling up Help when you need it. We will discuss a few important methods in this chapter −
Context Sensitive Help
This is the easiest way of getting help about any of the options available at word screen. You just need to bring your mouse pointer over an option and wait for 2 seconds, MS Word will pop-up a small balloon help giving you detail about the operation. If word has additional help for that option, then it gives the option Press F1 for more help as shown below when you bring your mouse pointer over the color fill option. You can press the F1 key to get further help on this option.
Using F1 Key
You can press the F1 key when you are in the middle of doing something and Office will display the various categories of help as shown below. You can either search a keyword using the Search option or you can browse the listed categories to go through a topic in detail −
Using Help Icon
You can also have similar help window as shown above, by clicking the Help icon located just above the right edge of the ribbon as shown below −
Using Help Option
You can communicate with Microsoft using the Help option available under the File tab.
As shown above, you can use Microsoft Office Help to launch the Help window, or Getting Started link to go to Microsoft’s official website, otherwise use the Contact us option to contact Microsoft via email or phone.
Insert Text in Word 2010
In this chapter, we will discuss how to insert text in Word 2010. Many times it is required to go back and insert additional text in an existing line. Microsoft Word provides two ways to insert text in existing text and we will show how to use both the methods of inserting text −
Insert and Add Text
First we will see how inserted text will be added into the existing content without replacing any existing content.
Step 1 − Click the location where you wish to insert text; you can also use the keyboard arrows to locate the place where the text needs to be inserted.
Step 2 − Start typing the text that needs to be inserted. Word inserts the text to the left of the insertion point, moving the existing text to the right
Insert and Replace Text
In the Insertion mode, text will be added into the existing content but same time it will over write all the content which comes in its way.
Step 1 − Right-click the status bar and select the Overtype option from the displayed menu.
When you select the Overtype option, the status bar will show the insert mode as shown below −
Step 2 − Click on the Insert text available at the status bar and it will switch to the Overtype mode as shown below −
Step 3 − Now click the location where the text needs to be inserted or you can use the keyboard arrows to locate the place where the text needs to be inserted.
Step 4 − Start typing the text that needs to be inserted. Word will replace the existing text with the newly typed text without moving the position of the exiting test.
Note − Microsoft Word 2010 disabled the functionality of the Insert key and it does nothing, so you will have to follow-up with the above mentioned procedure to turn-on or turn-off the Insert mode.
Select Text in Word 2010
In this chapter, we will discuss how to select text in Word 2010. Selecting a text is one of the most important skills required while editing a word document. You can perform various operations on a selected text; you can delete the selected text, copy it, move it, apply formatting to it, change its capitalization, etc.
The most common method of selecting a text is to click and drag the mouse over the text you want to select. Following table lists down a few other simple methods that will help you in selecting text in different scenarios −
| S.No | Component & Selection Method |
|---|---|
| 1 |
Selecting text between two points Click at the start of the block of text, hold down Shift, and click at the end of the block. |
| 2 |
Selecting a single word Double-click anywhere on the word you want to select. |
| 3 |
Selecting a paragraph Triple-click anywhere on the paragraph you want to select. |
| 4 |
Selecting a sentence Hold down the Ctrl key and click anywhere in the sentence you want to select. |
| 5 |
Selecting a column of text Hold down Alt, click and hold the mouse button, and drag over the column you want to select. |
Note that only one part of the document can be in the selected state. If you have one portion of the document in selected state and as soon as you try to select any other part of the document, previous part will automatically be de-selected.
Using the Selection Bar
The black shaded area in the following screen shot is called the selection bar. When you bring your cursor in this area, it turns into a rightward-pointing arrow.
You can use the selection bar to select the various components of a document as described in the following table −
| S.No | Component & Selection Method |
|---|---|
| 1 |
Selecting a line Bring your mouse in the selection bar area and click in front of the line you want to select. |
| 2 |
Selecting a paragraph Bring your mouse in the selection bar area and double click in front of the paragraph you want to select. |
| 3 |
Selecting the document Bring your mouse in the selection bar area and triple-click. |
Using the Keyboard
Keyboard provides very good support when you want to select various components of the document as described in the following table −
| S.No | Key & Selection Method Selecting Text |
|---|---|
| 1 |
Ctrl + A Press Ctrl + A keys to select the entire document. |
| 2 |
Shift Keep pressing the Shift key and use any of the arrow keys to select the portion of text. |
| 3 |
F8 Press F8 and then use any of the arrows keys to select the portion of text. |
| 4 |
Ctrl + Shift + F8 Press Ctrl + Shift + F8 and then use any of the arrows keys to select column of the text. |
Delete Text in Word 2010
In this chapter, we will discuss how to delete text in Word 2010. It is very common to delete text and retype the content in your Word document. You might type something you did not want to type or there is something extra which is not required in the document. Regardless of the reason, Word offers you various ways of deleting the text in partial or complete content of the document.
Using Backspace & Delete Keys
The most basic deletion technique is to delete characters one at a time by pressing either the backspace key or the delete key. Following table describes how you can delete single character or a whole word by using either of these two keys −
| S.No | Keys & Deletion Methods |
|---|---|
| 1 |
Backspace Keep the insertion point just after the character you want to delete and press the Backspace key. Word deletes the character immediately to the left of the insertion point. |
| 2 |
Ctrl + Backspace Keep the insertion point just after the word you want to delete and press Ctrl + Backspace key. Word deletes the whole word immediately to the left of the insertion point. |
| 3 |
Delete Keep the insertion point just before the character you want to delete and press the Delete key. Word deletes the character immediately to the right of the insertion point. |
| 4 |
Ctrl + Delete Keep the insertion point just before the word you want to delete and press Ctrl + Delete key. Word deletes the word immediately to the right of the insertion point. |
Using Selection Method
You have learnt how to select various parts of a Word document. You can make use of that learning to delete those selected parts as described in the following table −
| S.No | Component Selection & Delete Methods |
|---|---|
| 1 |
Deleting text between two points Click at the start of the block of text, hold down the Shift key, and click at the end of the block to select the portion of text and finally press either the Backspace key or the Delete key. |
| 2 |
Deleting a single word Double-click anywhere on the word you want to delete and finally press either the Backspace key or the Delete key. |
| 3 |
Deleting a paragraph Triple-click anywhere on the paragraph you want to delete and finally press either the Backspace key or the Delete key. |
| 4 |
Deleting a sentence Hold down the Ctrl key and click anywhere in the sentence you want to delete and finally press either the Backspace or the Delete key. |
| 5 |
Deleting a column of text Hold down the Alt key, click and hold the mouse button, and drag over the column you want to delete and finally press either the Backspace key or the Delete key. |
| 6 |
Deleting a line Bring your mouse in the selection bar area and click in front of the line you want to delete and finally press either the Backspace key or the Delete key. |
| 7 |
Deleting entire document content Press Ctrl + A keys to delete the entire document and finally press either the Backspace key or the Delete key. |
Note − The black shaded area in the following screen shot is called the selection bar. When you bring your cursor in this area, it turns into a rightward-pointing arrow.
Move Text in Word 2010
In this chapter, we will discuss how to move text in Word 2010. At times, it is required to move a text from one location to another location in the same document or in any another document. You can move text from one location in a document to another by using the drag-and-drop technique with the help of mouse. This tutorial will teach you how to use the drag and drop technique to move text.
Move within the same document
Step 1 − Select a portion of the text using any of the text selection methods.
Step 2 − Now take your mouse pointer over the selected text and hold the left button of the mouse and keep holding it while moving around the document.
Step 3 − Take your mouse pointer to the place where you want to move the selected text and release the mouse button. You will see that the selected text is moved to the desired location.
Move within different documents
You can move the selected text from one document to another document. Following are some simple steps which will help you in moving text from one document to another document.
Step 1 − Keep both the documents opened and to ensure that both documents are visible, click the Arrange All button on the View tab on the Ribbon.
This will display both the documents as shown below −
Step 2 − Now, select a portion of the text using any of the text selection methods.
Step 3 − Take your mouse pointer over the selected text and hold the left button of the mouse and keep holding it while moving around the document.
Step 4 − Take your mouse pointer at the place in the second document where you want to move the selected text and release the mouse button. You will see that the selected text is moved to the desired location in the second document.
Note − In case you have more than two documents, you can use the Alt + Tab keys to switch through the different documents and select the desired destination document.
Copy & Paste in Word 2010
In this chapter, we will discuss how to copy, cut and paste in Word 2010. In the previous chapter, we understood how we can select the desired text and move it to any other location in the same document or in any other document. This tutorial will teach you how to use copy, cut and paste techniques to duplicate a text leaving the original text intact or removing the original text completely.
To use copy and paste or cut and paste operations, Word makes use of a temporary memory which is called the clipboard. When you copy or cut a text, it stay on the clipboard temporarily and in the second step you can paste this content at the desired location.
Copy & Paste Operation
The Copy operation will just copy the content from its original place and create a duplicate copy of the content at the desired location without deleting the text from it’s the original location. Following is the procedure to copy the content in word −
Step 1 − Select a portion of the text using any of the text selection methods.
Step 2 − You have various options available to copy the selected text in clipboard. You can make use of any one of the options −
-
Using Right-Click − When you right-click on the selected text, it will display the copy option, click this option to copy the selected content in clipboard.
-
Using Ribbon Copy Button − After selecting text, you can use the copy button available at the ribbon to copy the selected content in clipboard.
-
Using Ctrl + c Keys − After selecting a text, just press Ctrl + c keys to copy the selected content in clipboard.
Step 3 − Finally click at the place where you want to copy the selected text and use either of these two simple options −
-
Using Ribbon Paste Button − Just click the Paste button available at the ribbon to paste the copied content at the desired location.
-
Using Ctrl + v Keys − This is simplest way of pasting the content. Just press Ctrl + v keys to paste the content at the new location.
Note − You can repeat the Paste operation as many times as you like to paste the same content.
Cut & Paste Operation
The Cut operation will cut the content from its original place and move the content from its original location to a new desired location. Following is the procedure to move the content in word −
Step 1 − Select a portion of the text using any of the text selection methods.
Step 2 − Now, you have various options available to cut the selected text and put it in the clipboard. You can make use of one of the options −
-
Using Right-Click − If right-click on the selected portion of text, it will display cut option, just click this option to cut the selected content and keep it in clipboard.
-
Using Ribbon Cut Button − After selecting a portion of text, you can use cut button available at the ribbon to cut the selected content and keep it in clipboard.
-
Using Ctrl + x Keys − After selecting a portion of text, just press Ctrl + x keys to cut the selected content and keep it in clipboard.
Step 3 − Finally, click at the place where you want to move the selected text and use either of these two simple options −
-
Using Ribbon Paste Button − Just click the Paste button available at the ribbon to paste the content at the new location.
-
Using Ctrl + v Keys − This is simplest way of pasting the content. Just press Ctrl + v keys to paste the content at the new location.
Note − You can repeat the Paste operation as many times as you like to paste the same content.
Copy, Cut & Paste in different documents
You can use the same procedure that we discussed above to copy and paste or cut and paste content from one document to another document. This is very simple, just copy or cut the desired content from one document and go into another document where you want to paste the content and use mentioned step to paste the content.
You can use the Alt + Tab keys to switch through the different documents and select the desired destination document.
Find & Replace in Word 2010
In this chapter, we will discuss the Find and Replace operation in Word 2010. While working on editing a document you come across a situation very frequently when you want to search a particular word in your document and many times you will be willing to replace this word with another word at a few or all the places throughout the document. Here, we will understand how to find a word or phrase in a word document and how to replace an existing word with any other word using simple steps.
Find Command
The Find command enables you to locate specific text in your document. Following are the steps to find a word document in the following screen −
Step 1 − Let us work out on a sample text available in our Word document. Just type =rand() and press Enter; the following screen will appear −
Step 2 − Click the Find option in the Editing group on the Home tab or press Ctrl + F to launch the Navigation pane −
Step 3 − Enter a word which you want to search in the Search box, as soon as you finish typing, Word searches for the text you entered and displays the results in the navigation pane and highlights the word in the document as in the following screenshot −
Step 4 − You can click the clear button (X) to clear the search and results and perform another search.
Step 5 − You can use further options while searching for a word. Click the option button to display the options menu and then click the Options option; this will display a list of options. You can select the options like match case to perform case-sensitive search.
Step 6 − Finally, if you are done with the Search operation, you can click the close button (X) to close the Navigation Pane.
Find & Replace Operation
We assume you are an expert in searching a word or phrase in a word document as explained above. This section will teach you how you can replace an existing word in your document. Following are the simple steps −
Step 1 − Click the Replace option in the Editing group on the Home tab or press Ctrl + H to launch the Find and Replace dialog box shown in Step 2 −
Step 2 − Type a word which you want to search. You can also replace the word using the Find and Replace dialog box as in the following screenshot −
Step 3 − Click the Replace button available on the Find and Replace dialog box and you will see the first occurrence of the searched word would be replaced with the replace with word. Clicking again on Replace button would replace next occurrence of the searched word. If you will click Replace All button then it would replace all the found words in one go. You can also use Find Next button just to search the next occurence and later you can use Replace button to replace the found word.
Step 4 − You can use More >> button available on the dialog box to use more options and to make your search more specific like case sensitive search or searching for whole word only etc.
Step 5 − Finally, if you are done with the Find and Replace operation, you can click the Close (X) or Cancel button of the dialog box to close the box.
Spell Check in Word 2010
In this chapter, we will discuss how to check spelling and grammar in Word 2010. Microsoft Word provides a decent Spelling and Grammar Checker which enables you to search for and correct all spelling and grammar mistakes in your document. Word is intelligent enough to identify misspelled or misused, as well as grammar errors and underlines them as follows.
- A red underline beneath spelling errors.
- A green underline beneath grammar errors.
- A blue line under correctly spelled but misused words.
Check Spelling and Grammar using Review tab
Here is the simple procedure to find out the spelling mistakes and fix them −
Step 1 − Click the Review tab and then click the Spelling & Grammar button.
Step 2 − A Spelling and Grammar dialog box will appear and will display the wrong spellings or errors in grammar. You will also get suggestions to correct as shown below −
Now you have following options to fix the spelling mistakes −
-
Ignore − If you are willing to ignore a word, then click this button and Word ignores the word throughout the document.
-
Ignore All − Like Ignore, but this ignores all occurrences of the same misspelling, not just once but throughout the document.
-
Add to Dictionary − Choose Add to Dictionary to add the word to the Word spelling dictionary.
-
Change − This will change the wrong word using the suggested correct word.
-
Change All − Like Change, but this changes all occurrences of the same misspelling, not just once but throughout the document.
-
AutoCorrect − If you select a suggestion, Word creates an AutoCorrect entry that automatically corrects this spelling error from now on.
Following are the different options in case you have grammatical mistake −
-
Next Sentence − You can click Next Sentence to direct the grammar checker to skip ahead to the next sentence.
-
Explain − The grammar checker displays a description of the rule that caused the sentence to be flagged as a possible error.
-
Options − This will open the Word Options dialog box to allow you to change the behavior of the grammar checker or spelling options.
-
Undo − This will undo the last grammar changed.
Step 3 − Select one of the given suggestions you want to use and click the Change option to fix the spelling or grammar mistake and repeat the step to fix all the spelling or grammar mistake.
Step 4 − Word displays a dialog box when it finishes checking for spelling and grammar mistakes, finally Click OK.
Check Spelling and Grammar using Right Click
If you will right-click the mouse button over a misspelled word, then it will show you the correct suggestions and the above mentioned options to fix the spelling or grammar mistake. Try it yourself.
Zoom In-Out in Word 2010
In this chapter, we will discuss how to zoom in and zoom out in Word 2010. Microsoft Word provides a functionality to apply zoom-in and zoom-out operations on a document. When we apply the zoom-in operation, it enlarges the size of text whereas applying the zoom-out operation reduces the size of text.
A zoom operation just changes the size of the font on-screen without impacting any other attribute of the document. You can apply the zoom operation in various ways as explained in this chapter.
Zoom-in & Zoom-out using view tab
Here is the simple procedure to apply the zoom-in or the zoom-out operations using the View tab −
Step 1 − Click the View tab and then click the Zoom button as shown below.
Step 2 − When you click the Zoom button, a Zoom dialog box will appear as shown below. This will display the zoom options box to select a value to reduce or increase the size of the document on-screen. By default, it will be 100%; you can select 200% to increase the size of the font or 75% to reduce the size of the font.
You can click the Many pages down arrow and select to display multiple pages.
Step 3 − Once you are done with selecting an option, click OK to apply the changes on the document.
Step 4 − Try different options available, for example Page Width and Text Width.
Zoom-in & Zoom-out using (+) and (-) Buttons
The following screenshot shows two buttons Zoom-out which is the (-) button and Zoom-in which is the (+) button.
Step 1 − Click the Zoom-out button, you will find that your document size will decrease by 10% each time you click the button. Similar way, if you click on Zoom-in button your document size will increase by 10% each time you click the button.
Step 2 − Try this simple operation with different values to see the difference. The above screenshot shows 140% zoom-in view of the document.
Special Symbols in Word 2010
In this chapter, we will discuss the use of special symbols in Word 2010. Your keyboard may not have many characters available but you want to use those characters in your document; in such situations, you have the option to insert Special Symbols the way we will further understand in this chapter.
To insert symbols that are occasionally used, follow the steps in this section. If you find yourself using a particular symbol frequently, you can assign a keyboard shortcut to it.
Insert Special Symbols
Here is a simple procedure to apply zoom-in or zoom-out operation using the View tab −
Step 1 − To insert a special symbol, bring your cursor at the place where you want to insert the symbol. Click the Insert tab. You will find two options under the symbol button (a) Equation and (b) Symbols. Click either of these two options based on your requirement. You will further use equations while preparing mathematical or scientific or any similar document. For now, we are going to understand the use of the Symbol button as shown below.
Step 2 − When you click the Symbol button, a small list of symbols will appear as shown below.
Step 3 − Now click on any of the available symbols in the box to insert that in your document at the selected location. If you do not find the desired symbol in this small box, then you can click at the More Symbols option to have a wide range of symbols as shown below in the symbol dialog box. You can select any of the symbol and then click the Insert button to insert the selected symbol.
Assign Shortcut Key
You can assign a keyboard shortcut to type any of the available symbol. Following are the steps to assign Ctrl + Q key to insert the © symbol which is one of the available symbols in the special symbols list −
Step 1 − Assume you already have the following symbol dialog box opened.
Step 2 − Click the symbol for which a shortcut key needs to be assigned. Now click Shortcut Key button which will display the following Customize Keyboard dialog box.
Step 3 − Now type the selected shortcut key in the shortcut key box. You press Ctrl + Q and then click the Assign button to assign the shortcut key. You will see that the selected key will be added in the list of assigned keys. Finally, use the Close button to close the dialog box.
Step 4 − Now try to type Ctrl + Q using the keyboard directly and you will find that you are able to type © symbol without going into the symbol dialog box.
Undo Changes in Word 2010
In this chapter, we will discuss how to undo and redo changes in Word 2010. Microsoft word provides two important features called the Undo and the Repeat or Redo. The Undo feature is used to undo the previous action and the Repeat or Redo feature is used to repeat the previous action.
For example, if you mistakenly delete text, you can use the Undo feature to recover it. In a similar way, if you delete a character and you want to delete more characters then you can use the Repeat operation.
How to use Undo & Repeat operations
You can access the Undo and Repeat buttons from the Quick Access toolbar. You should make a note that the Repeat button is also called Redo button and both the operations have the same meaning.
Here is the simple procedure to apply undo or repeat (redo) operations −
Step 1 − Let us type some text in a blank document. Now click the Repeat (Redo) button and you will see that Word will repeat the same operation for you.
Step 2 − Now to examine the undo operation, let us delete the last word operation character by character so that you have the following text remaining in the line.
Step 3 − Let us try to click the Undo button one by one. You will see that Word will recover all the deleted characters one by one after performing a few undo operations.
Shortcuts to use Undo & Repeat operations
Though you can access the Undo and Repeat commands from the Quick Access toolbar, but because these commands are the most frequently used commands, we recommend you memorize their keyboard shortcuts which are as follows −
| S.No | Shortcuts & Operation |
|---|---|
| 1 |
Ctrl + Z Undoes the previous action. |
| 2 |
Ctrl + Y Repeats the previous action. |
Note that if the previous action was Undo, Ctrl+Y redoes the Undone action.
Setting Text Fonts in Word 2010
In this chapter, we will discuss how to set the text fonts and size in Word 2010. Microsoft word allows you to use different fonts with different size. You can change your document’s appearance by changing the fonts and their size. Usually you use different fonts for paragraphs and headings. It is important to learn how to use different fonts. This chapter will teach you how to change a font and its size in simple steps.
Change the Font Type & Size
We will understand in brief the font buttons that we will further use in this tutorial. Following is a screenshot to show you a few font related buttons.
Step 1 − Select the portion of text the font of which needs to be changed and click the Home tab. Now click the Font Type button to list down all the fonts available as shown below.
Step 2 − Try to move the mouse pointer over the listed fonts. You will see that the text font changes when you move the mouse pointer over different fonts. You can use the Font Scroll Bar to display more fonts available. Finally select a desired font by clicking over the font name in the list. We have selected MV Boli as the font for our sample text.
Step 3 − Similar way, to change the font size, click over the Font Size button which will display a font size list. You will use the same procedure to select a desired font size that you have used while selecting a font type.
Use Shrink and Grow Buttons
You can use a quick way to reduce or enlarge the font size. As shown in the first screenshot, the Shrink Font button can be used to reduce the font size whereas the Grow Font button can be used to enlarge the font size.
Try to click either of these two buttons and you will see the effect. You can click a single button multiple times to apply the effect. Each time you click either of the buttons, it will enlarge or reduce the font size by 1 point.
Clear Formatting Options
All of the setting can be reset to plain text, or the default formatting. To reset text to default settings −
Step 1 − Select the portion of text that you want to reset.
Step 2 − Click the Clear Formatting button in the Home tab Font group, or simply use Ctrl + SPACEBAR.
Text Decoration in Word 2010
In this chapter, we will discuss text decoration in Word 2010. When we use the term decorate, it means decorate by putting the text in italics, underlining the text or making it bold to look more fancy and much more. In this chapter, we will also learn how we can strikethrough a text.
Making text bold
We use bold text to give more emphasis on the sentence. It is very simple to change a selected portion of text into bold font by following two simple steps −
Step 1 − Select the portion of text that the font of which needs to be made bold. You can use any of the text selection methods to select the portion of text.
Step 2 − Click the Font Bold [ B ] button in the Home tab Font group, or simply use Ctrl + B keys to make the selected portion of text bold.
Making Text Italic
An italic text appears with a small inclination and we use the italicized text to differentiate it from other text. It is very simple to change the selected text into italic font by following two simple steps −
Step 1 − Select the portion of text the font of which needs to be italicized. You can use any of the text selection methods to select the portion of text.
Step 2 − Click the Font Italic [ I ] button in the Home tab Font group, or simply use the Ctrl + I keys to convert the portion of text in italic font.
Underline the Text
An underlined portion of text appears with an underline and we use the underlined portion of text to make it more distinguished from other text. It is very simple to change the selected text into underlined font by following two simple steps −
Step 1 − Select the portion of text which needs to be underlined. You can use any of the text selection method to select the portion of text.
Step 2 − Click Font Underline [ U ] button in the Home tab Font group, or simply use the Ctrl + U keys to put an underline under the text.
Strikethrough the Text
Strikethrough portion of text will look as if a line has been drawn through the middle of it. A strikethrough portion of text indicates that it has been deleted and that the portion of text is not required any more. It is very simple to change a selected portion of text into a strikethrough portion of text by following two simple steps −
Step 1 − Select the portion of text that you want to change to a bold font. You can use any of the text selection method to select the portion of text.
Step 2 − Click Font Strikethrough [ abc ] button in the Home tab Font group to put a line in the middle of the text which is called strikethrough the text.
Change Text Case in Word 2010
In this chapter, we will discuss how to change text cases in Word 2010. You can also capitalize a character you are typing by pressing and holding the SHIFT key while you type. You can also press the CAPS LOCK to have every letter that you type capitalized, and then press the CAPS LOCK again to turn off capitalization.
Change Text to Sentence Case
A sentence case is the case where the first character of every sentence is capitalized. It is very simple to change the selected portion of text into sentence case by following two simple steps −
Step 1 − Select the portion of text that that needs to be put in sentence case. You can use any of the text selection methods to select the portion of text.
Step 2 − Click the Change Case button and then select the Sentence Case option to capitalize the first character of every selected sentence.
Change Text to Lowercase
Changing text to lowercase is where every word of a sentence is in lowercase. It is very simple to change a selected portion of text into lowercase by following two simple steps −
Step 1 − Select the portion of text that needs to be put in lowercase. You can use any of the text selection methods to select the portion of text.
Step 2 − Click the Change Case button and then select Lowercase option to display all the selected words in lowercase.
Change Text to Uppercase
This is where every word of a sentence is in uppercase. It is very simple to change selected text into uppercase by following two simple steps −
Step 1 − Select the portion of text that you want to change to a bold font. You can use any of the text selection method to select the portion of text.
Step 2 − Click the Change Case button and then select UPPERCASE option to display all selected words in all caps. All characters of every selected word will be capitalized.
Capitalize Text
A capitalize case is the case where every first character of every selected word is in capital. This is very simple to change selected text into capitalize by following two simple steps −
Step 1 − Select the portion of text that needs to be capitalized. You can use any of the text selection method to select the portion of text.
Step 2 − Click the Change Case button and then select the Capitalize Each Word option to put a leading cap on each selected word.
Toggle the Text
The Toggle operation will change the case of every character in reverse way. A capital character will become a character in lower case and a character in lower case will become a character in upper case. It is very simple to toggle case of the text by following two simple steps −
Step 1 − Select the portion of text that you want to change to a bold font. You can use any of the text selection method to select the portion of text.
Step 2 − Click the Change Case button and then select the tOGGLE cASE option to change all the words in lowercase into words in uppercase; the words in uppercase words change to words in lowercase.
Change Text Color in Word 2010
In this chapter, we will discuss how to change text colors in Word 2010. We will also understand how to mark text which should look like it was marked with a highlighter pen. In addition, we will learn how to apply different effects on portions of text.
Change Font Colors
The text that we type comes in black by default; you can always change the color of the font to a color of your choice. It is very simple to change the text color by following two simple steps −
Step 1 − Select the portion of text the font color of which needs to be changed. You can use any of the text selection method to select the portion of text.
Step 2 − Click the Font Color button triangle to display a list of colors. Try to move your mouse pointer over different colors and you will see the text color will change automatically. You can select any of the colors available by simply clicking over it.
If you click at the left portion of the Font Color button, the selected color gets applied to the text automatically; you need to click over the small triangle to display a list of colors.
If you do not find a color of your choice, you can use the More Colors option to display the color pallet box which allows you to select a color from a range of colors.
Highlight Text with Colors
You can highlight a selected portion of text using any color and it will look like it was marked with a highlighter pen. Usually we highlight a text using yellow color. It is very simple to highlight a portion of text with a color by following two simple steps
Step 1 − Select the portion of text that needs to be highlighted with color. You can use any of the text selection method to select the portion of text.
Step 2 − Click the Text Highlight Color button triangle to display a list of colors. Try to move your mouse pointer over different colors and you will see the text color changes automatically. You can select any of the colors available by simply clicking over it.
If you click at the left portion of the Text Highlight Color button, then the selected color gets applied to the portion of text automatically; you need to click over the small triangle to display a list of colors.
Apply Text Effects
Microsoft word provides a list of text effect which add to the beauty of your document, especially to the cover page or the headings of the document. This is very simple to apply various text effects by following two simple steps −
Step 1 − Select the portion of text that you want to change to a bold font. You can use any of the text selection method to select the portion of text.
Step 2 − Click the Text Effect button to display a list of effects including shadow, outline, glow, reflection etc. Try to move your mouse pointer over different effects and you will see the text effect will change automatically. You can select any of the text effect available by simply clicking over it.
Text Alignments in Word 2010
In this chapter, we will discuss text alignments in Word 2010. There are four types of paragraph alignment available in Microsoft Word — left-aligned, center-aligned, rightaligned, and justified.
Left-Aligned Text
A paragraph’s text is left aligned when it is aligned evenly along the left margin. Here is a simple procedure to make a paragraph text left-aligned.
Step 1 − Click anywhere on the paragraph you want to align and click the Align Text Left button available on the Home tab or simply press the Ctrl + L keys.
Center Aligned Text
A paragraph’s text will be said center aligned if it is in the center of the left and right margins. Here is a simple procedure to make a paragraph text center aligned.
Step 1 − Click anywhere on the paragraph you want to align and click the Center button available on the Home tab or simply press the Ctrl + E keys.
Right-Aligned Text
A paragraph’s text is right-aligned when it is aligned evenly along the right margin. Here is a simple procedure to make a paragraph text right-aligned.
Step 1 − Click anywhere on the paragraph you want to align and click the Align Text Right button available on the Home tab or simply press the Ctrl + R keys.
Justified Text
A paragraph’s text is justified when it is aligned evenly along both the left and the right margins. Following is a simple procedure to make a paragraph text justified.
Step 1 − Click anywhere on the paragraph you want to align and click the Justify button available on the Home tab or simply press the Ctrl + J keys.
When you click the Justify button, it displays four options, justify, justify low, justify high and justify medium. You need to select only the justify option. The difference between these options is that low justify creates little space between two words, medium creates a more space than low justify and high creates maximum space between two words to justify the text.
Indent Paragraphs in Word 2010
In this chapter, we will discuss the how to indent paragraphs in Word 2010. As you know the margin settings determine the blank space that appears on each side of a paragraph. You can indent paragraphs in your document from the left margin, the right margin, or both the margins. This chapter will teach you how to indent your paragraphs with or without the first line of the paragraphs.
Left Indentation
Left indentation means to move the left edge of the paragraph inward towards the center of the paragraph. Let us use the following steps to create left indentation.
Step 1 − Click anywhere on the paragraph you want to indent left and click the Increase Indent button available on the Home tab or simply press the Ctrl + M keys. You can click multiple times to create deeper indentation.
Step 2 − You can remove left indentation by clicking the Decrease Indent button available on Home tab or simply press Ctrl + Shift+ M keys. You can click multiple times to remove deeper indentation.
You can also use the Paragraph Dialog Box to set left and right indentations. We will see this dialog box in the last section of this chapter.
Right Indentation
Right indentation means to move the right edge of the paragraph inward towards the center of the paragraph. Let us use the following steps to create right indentation.
Step 1 − Click anywhere on the paragraph you want to indent and then click on the Increase Right Indent spinner available on the Page Layout tab. You can click on the spinner multiple times to create deeper indentation. You can use the Left Indent spinners as well to set left indentation from the same place.
Step 2 − You can remove right indentation by clicking the Decrease Right Indent spinner in the opposite direction.
You can also use the Paragraph Dialog Box to set the left and the right indentations. We will see this dialog box in the next section.
First Line Indentation
You can move the left side of the first line of a paragraph inward toward the center. Let us see the procedure to perform first line indentation.
Step 1 − Click anywhere on the paragraph you want to indent right and click the Paragraph Dialog Box launcher available on the Home tab.
Step 2 − Click the Before Text spinner to set left indentation and select the First Line Option to move the left side of the first line of a paragraph inward toward the center. You can control the movement by setting the Indentation Unit. A preview box will give only the idea and not the indentation status.
Hanging Indentation
You can move the left side of the first line of a paragraph leftward, away from the center which is called the hanging indentation. Let us see the procedure to perform hanging indentation.
Step 1 − Click anywhere on the paragraph you want to indent right and click the Paragraph Dialog Box launcher available on the Home tab.
Step 2 − Click the Before Text spinner to set left indentation and select Hanging Option to move the left side of the first line of a paragraph leftward, away from the center. You can control the movement by setting the Indentation Unit. A preview box will give only the idea and not the indentation status.
You can use the After Text spinner to set the right indentation. You can try it yourself.
Create Bullets in Word 2010
Microsoft word provides bullets and numbers to put a list of items in a nice order. This chapter will teach you simple steps to create either the bulleted or the numbered lists in simple steps.
Create a List from Existing Text
This is very simple to convert a list of lines into a bulleted or numbered list. Following are the simple steps to create either bulleted list or numbered list.
Step 1 − Select a list of text to which you want to assign bullets or numbers. You can use any of the text selection method to select the portion of text.
Step 2 − Click the Bullet Button triangle to display a list of bullets you want to assign to the list. You can select any of the bullet style available by simply clicking over it.
Step 3 − If you are willing to create a list with numbers, then click the Numbering Button triangle instead of the bullet button to display a list of numbers you want to assign to the list. You can select any of the numbering style available by simply clicking over it.
Create a List as You Type
You can create a bulleted list as you type. Word will automatically format it according to your text. Following are the simple steps to create bulleted list as you type.
Step 1 − Type *, and then either press the SPACEBAR or press the TAB key, and then type the rest of what you want in the first item of the bulleted list.
Step 2 − When you are done with typing, press Enter to add the item in the list automatically and go to add next item in the list.
Step 3 − Repeat Step 2 for each list item.
You can create a numbered list as you type. Word will automatically format it according to your text. Following are the simple steps to create numbered list as you type.
Step 1 − Type 1, and then either press the SPACEBAR or press the TAB key, and then type the rest of what you want in the first item of the numbered list.
Step 2 − When you are done with typing, press Enter to add the item in the list automatically and go to add next item in the list.
Step 3 − Repeat Step 2 for each list item.
You can create sub-lists. These sub-lists are called multi-lists. It is simple to create sublists; press the Tab key to put items in sub-list. You can try it yourself.
Set Line Spacing in Word 2010
In this chapter, let us discuss how to set line spacing in Word 2010. A line spacing is the distance between two lines in a Microsoft Word document. You can increase or decrease this distance as per your requirement by following a few simple steps. This chapter will explain how to set the distance between two lines as well as how to set the distance between two paragraphs.
Spacing between Lines
Following are the simple steps to adjust spacing between two lines of the document.
Step 1 − Select the paragraph or paragraphs for which you want to define spacing. You can use any of the text selection method to select the paragraph(s).
Step 2 − Click the Line and Paragraph Spacing Button triangle to display a list of options to adjust space between the lines. You can select any of the option available by simply clicking over it.
Spacing between Paragraphs
You can also set distance between two paragraphs. Following are the simple steps to set this distance.
Step 1 − Select the paragraph or paragraphs for which you want to define spacing and click the Paragraph Dialog Box launcher available on the Home tab.
Step 2 − Click the Before spinner to increase or decrease the space before the selected paragraph. Similar way, click the After spinner to increase or decrease the space after the selected paragraph. Finally, click the OK button to apply the changes.
You can use the Line Spacing option available at the dialog box to set line spacing as we have seen in previous example. You can try it yourself.
Borders and Shades in Word 2010
In this chapter, we will discuss how to work on borders and shades in Word 2010. Microsoft Word allows you to place a border on any or all of the four sides of selected text, paragraphs, and pages. You can also add different shades to the space occupied by the selected text, paragraphs, and pages. This chapter will teach you how to add any of the borders (left, right, top or bottom) around a text or paragraph or a page and how to add different shadows to them.
Add Borders to Text
Following are the simple steps to add border to any text or paragraph.
Step 1 − Select the portion of text or paragraph to which you want to add border. You can use any of the text selection method to select the paragraph(s).
Step 2 − Click the Border Button to display a list of options to put a border around the selected text or paragraph. You can select any of the option available by simply clicking over it.
Step 3 − Try to add different borders like left, right top or bottom by selecting different options from the border options.
Step 4 − To delete the existing border, simply select the No Border option from the border options.
Note − You can add a horizontal line by selecting the Horizontal Line option from the border options. Otherwise type — (three hyphens) and press ENTER. A single, light horizontal line will be created between the left and the right margins.
Add Borders to Page
You can add borders of your choice to word pages by following the steps given below.
Step 1 − Click the Border Button to display a list of options to put a border. Select the Border and Shading option available at the bottom of the list of options as shown in the above screenshot. This will display a Border and Shading dialog box. This dialog box can be used to set borders and shading around a selected text or page borders.
Step 2 − Click the Page Border tab which will display a list of border settings, styles and options whether this border should be applied to the whole document or just one page or the first page.
Step 3 − You can use the Preview section to disable or enable left, right, top or bottom borders of the page. Follow the instruction given in the preview section itself.
Step 4 − You can customize your border by setting its color, width by using different art available under the style section.
You can have similar or even better borders as given below.
Add Shades to Text
The following steps will help you understand how to add shades on a selected portion of text or a paragraph(s).
Step 1 − Click the Border Button to display a list of options to put a border. Select the Border and Shading option available at the bottom of the list of options as shown in the above screenshot. This will display a Border and Shading dialog box. This dialog box can be used to set borders and shading around a selected portion of text or page borders.
Step 2 − Click the Shading tab; this tab will display the options to select fill, color and style and whether this border should be applied to a paragraph or a portion of text.
Step 3 − You can use the Preview section to have an idea about the expected result. Once you are done, click the OK button to apply the result.
Set Tabs in Word 2010
In this chapter, we will discuss how to set tabs in Word 2010. Microsoft Word tabs help in setting up information properly within a column. Word enables you to set left, center, right, decimal, or bar tabs to line up columnar information. By default, Word places tabs every .5 inch across the page between the left and right margins.
| S.No | Tab & Description |
|---|---|
| 1 |
Left Left-aligns text at tab stop and this is the default tab. |
| 2 |
Center Centers text over tab stop. |
| 3 |
Right Right-aligns text at tab stop. |
| 4 |
Decimal Aligns numbers at decimal point over tab stop. |
| 5 |
Bar Creates a bar to separate the text. |
Setting a Tab
Following are the simple steps to set the center and the right tabs in a Word document. You can use similar steps but different tabs to set up decimal and bar tabs.
Step 1 − Type some text that you want to line up with the tab stops. Press the Tab key only once between each column of information you to want to line up. I typed the following three lines.
Step 2 − Select a tab type using the Tab button; assume the center tab and finally select the paragraph or paragraphs the tabs of which you want to set. Next click the ruler where you want the tab to appear, a tab will appear at the ruler where you just clicked and the selected portion of text will be adjusted in the center.
Step 3 − Now select the right tab using the Tab Button and click the ruler at the right side where you want to align the text at the right side. A right tab will appear at the ruler where you just clicked and the selected portion of text will be right-aligned.
Moving a Tab
You can move an already set tab at a particular location by following the steps given below.
Step 1 − Click just before the line for which you want to change the tab setting. Drag the tab sign available at the ruler to the left or right.
Step 2 − A vertical line marks its position as you drag and when you click and drag a tab, the text moves with the tab.
Apply Formatting in Word 2010
In this chapter, we will discuss how to copy and apply formatting in Word 2010. If you already have a well formatted portion of text and you want to apply similar formatting to another portion of text, then Microsoft Word provides a feature to copy and apply a format from one portion of text to another portion of text. This is very useful and a time saving operation.
Copy and Apply of text formatting works for various text attributes; for example, text fonts, text colors, margins, headings, etc.
Copy and Apply Text Formatting
The following steps will help you understand how to copy and apply text formatting from one portion of text in your document to another portion of text in your document.
Step 1 − Select the portion of text containing the formatting that you want to copy. I have selected a text which has bold and underlined font as shown below.
Step 2 − click the Home tab and click the Format Painter button to copy the format of the selected text. As soon as you click the format painter button, the mouse pointer changes to a paint brush when you move the mouse over your document.
Step 3 − Now you are ready to apply the copied text format to any of the selected text. So select a text using mouse where you want to apply the copied text format. While selecting a portion of text, you have to make sure that your mouse pointer is still in paint brush shape. After selecting the text, just release the right-click button of the mouse and you will see that newly selected text is changed to the format used for the original selection. You can click anywhere outside the selection to continue working on your document for further editing.
Copy and Apply Text Formatting multiple times
Step 1 − If you are intended to apply formatting at multiple places, then you will have to double-click the Format Painter button while copying the text format. Later on, you just keep selecting the text where you want to apply the text formatting.
Step 2 − When you are done with applying formatting at all the places, click Format Painter to come out of the format applying operation.
Adjust Page Margins in Word 2010
In this chapter, we will discuss how to adjust page margins in Word 2010. Margins are the space between the edge of the paper and the text. You can adjust the right, left, top, and bottom margins of your document. By default, Word sets all margins left, right, top, and bottom to 1 inch.
In the screenshot given below, I have shown top, left and right margins, if you will type the complete page, word will leave 1-inch bottom margin as well.
Adjust Margins
The following steps will help you understand how to set margins for an open document.
Step 1 − Open the document the margins of which need to be set. If you want the margins to be applied only to a selected part of a document, select that particular part.
Step 2 − Click the Page Layout tab, and click the Margins button in the Page Setup group. This will display a list of options to be selected but you have to click the Custom Margins option available at the bottom.
You can also select any of the predefined margins from the list, but using custom margins option you will have more control on all the settings.
Step 3 − You will have to display a Page Dialog Box as shown below where you can set top, left, right and bottom margins under the Margins Tab. Select the Apply to: option to apply the margin on selected text or complete document.
Step 4 − If you are going to bind the document and want to add an extra amount of space on one edge for the binding, enter that amount in the Gutter text box, and select the side the gutter is on with the Gutter Position drop-down list. After setting all the desired values for all the margins, click the OK button to apply the margins.
Header and Footer in Word 2010
In this chapter, we will discuss how to add header and footer in Word 2010. Headers and footers are parts of a document that contain special information such as page numbers and the total number of pages, the document title, company logo, any photo, etc. The header appears at the top of every page, and the footer appears at the bottom of every page.
Add Header and Footer
The following steps will help you understand how to add header and footer in a Word document.
Step 1 − Click the Insert tab, and click either the Header button or the Footer button that which needs to be added first. Assume you are going to add Header; when you click the Header button it will display a list of built-in Headers from where you can choose any of the headers by simply clicking on it.
Step 2 − Once you select any of the headers, it will be applied to the document in editable mode and the text in your document will appear dimmed, Header and Footer buttons appear on the Ribbon and a Close Header and Footer button will also appear at the top-right corner.
Step 3 − Finally, you can type your information whatever you want to have in your document header and once you are done, click Close Header and Footer to come out of the header insertion mode. You will see the final result as follows.
You can follow a similar procedure to add footer in your document.
Edit Header and Footer
The following steps will help you understand how to edit the existing header or footer of your document.
Step 1 − Click the Insert tab, and click either the Header button or Footer button or whatever you want to edit. Assume you are going to edit the Header, so when you click the Header button it will display a list of options including the Edit Header option.
Step 2 − Click on the Edit Header option and Word will display the editable header as shown in the following screenshot.
Step 3 − Now you can edit your document header and once you are done, click Close Header and Footer to come out of the edit header mode.
You can follow a similar procedure to edit the footer in your document.
Add Page Numbers in Word 2010
In this chapter, we will discuss how to add page numbers in Word 2010. Microsoft Word automatically assigns page numbers on the pages of your document. Typically, page numbers are printed either in header or footer but you have the option that can display the page number in the left or right margins at the top or the bottom of a page.
Add Page Numbers
Following are the simple steps to add page numbers in a Word document.
Step 1 − Click the Insert tab, and click the Page Number button available in the header and footer section. This will display a list of options to display the page number at the top, bottom, current position etc.
Step 2 − When you move your mouse pointer over the available options, it displays further styles of page numbers to be displayed. For example, when I take the mouse pointer at the Bottom of Page option it displays the following list of styles.
Step 3 − Finally, select any one of the page number styles. I selected the Accent Bar 1 style by clicking over it. You will be directed to the Page Footer modification mode. Click the Close Header and Footer button to come out of the Footer Edit mode.
You can format your page numbers using the Format Page Numbers option available under the listed options.
Remove Page Numbers
The following steps will help you remove page numbering from a Word document.
Step 1 − Click the Insert tab, and click the Page Number button available in the header and footer section. This will display a list of options to display page number at the top, bottom, current position, etc. At the bottom, you will have the Remove Page Numbers option. Just click this option and it will delete all the page numbers set in your document.
Insert Page Breaks in Word 2010
In this chapter, we will discuss how to insert page breaks in Word 2010. Microsoft Word automatically starts a new page when the current page fills with text but you can insert a page break to force Word to start text on a new page. You can insert a page break using either the mouse or the keyboard.
Insert Page Breaks
The following steps will help you insert page breaks in a Word document.
Step 1 − Bring your insertion point immediately before the text that has to appear on a new page.
Step 2 − Click the Insert tab, and click the Page Break button available in the Pages group.
Word inserts a page break and moves all text after the page break onto a new page. You can also use the Ctrl + Enter keys to create a page break at the pointed location.
Delete a Page Break
Just put the insertion point on the previous page of the page break that needs to be deleted. Press the Delete key multiple times until both the pages get merged.
Insert Blank Pages in Word 2010
In this chapter, let us discuss how to insert blank pages in Word 2010. A blank page is a page which does not have any text or any other content over it. This chapter will also make you understand how to delete a blank page from your Microsoft Word document.
Insert Blank Pages
Following are the simple steps to insert blank page in a word document.
Step 1 − Bring your insertion point immediately before the text where you want to insert a blank page.
Step 2 − Click the Insert tab, and click the Blank Page button available in the Pages group.
Word inserts a new blank page and moves all the text after the page break onto a new page.
Delete Blank Pages
The following steps will help you delete blank page from a Word document.
Step 1 − Click the Home tab, and click the Show/Hide ¶ paragraph marks button available in the Paragraph group or simply press the Ctrl + Shift + * keys. This will display all the page breaks as shown below −
Step 2 − Bring your cursor immediately before the Page Break mark available on the blank page and press the Delete Key. This will delete the blank page and again you can click the Show/Hide ¶ paragraph marks button to hide all the paragraph marks.
Cover Pages in Word 2010
In this chapter, we will discuss Almost all the good documents and books have an attractive first page that includes the document title, its subject, author and publisher name etc. This first page is is the Cover Page and Microsoft Word provides an easy way to add a cover page.
Add Cover Pages
Following are the simple steps to add a cover page in a Word document.
Step 1 − Click the Insert tab, and click the Cover Page button available in the Pages group. This will display a list of Built-in Cover Pages as shown below.
Step 2 − Choose a cover page from the options available in the gallery. The selected cover page will be added as the first page of your document which can later be modified according to the requirements. If you want to place the cover page elsewhere except the first page, right-click the cover page in the gallery and select the location you want from the menu that appears.
Delete Cover Pages
The following steps will help you understand how to delete an existing cover page from a Word document.
Step 1 − Click the Insert tab, and click the Cover Page button available in the Pages group. This will display a list of Built-in Cover Pages as shown below. You will find a Remove Current Cover Page option available at the bottom of the cover page gallery.
Step 2 − Click the Remove Current Cover Page option and your cover page will be deleted from your document.
Page Orientation in Word 2010
In this chapter, we will discuss page orientation in Word 2010. Page Orientation is useful when you print your pages. By default, Microsoft Word shows a page in portrait orientation and in this case the width of the page is less than the height of the page; the page will be 8.5 inches × 11 inches.
You can change the page orientation from portrait to landscape orientation. In such case, the width of the page will be more than the height of the page and page will be 11 inches × 8.5 inches.
Change Page Orientation
The following steps will help you understand how to change the page orientation of a word document.
Step 1 − Open the Word document the orientation of which needs to be changed. By default, orientation will be Portrait Orientation as shown below.
Step 2 − Click the Page Layout tab, and click the Orientation button available in the Page Setup group. This will display an Option Menu having both the options (Portrait & Landscape) to be selected.
Step 3 − Click any of the options you want to set to orientation. Because our page is already in portrait orientation, we will click the Landscape option to change my orientation to landscape orientation.
Create a Table in Word 2010
In this chapter, we will discuss how to create a table in Word 2010. A table is a structure of vertical columns and horizontal rows with a cell at every intersection. Each cell can contain text or graphics, and you can format the table in any way you want. Usually the top row in the table is kept as a table header and can be used to put some informative instruction.
Create a Table
The following steps will help you understand how to create a table in a Word document.
Step 1 − Click the Insert tab followed by the Table button. This will display a simple grid as shown below. When you move your mouse over the grid cells, it makes a table in the table that appears in the document. You can make your table having the desired number of rows and columns.
Step 2 − Click the square representing the lower-right corner of your table, which will create an actual table in your document and Word goes in the table design mode. The table design mode has many options to work with as shown below.
Step 3 − This is an optional step that can be worked out if you want to have a fancy table. Click the Table Styles button to display a gallery of table styles. When you move your mouse over any of the styles, it shows real time preview of your actual table.
Step 4 − To select any of the styles, just click the built-in table style and you will see that the selected style has been applied on your table.
Delete a Table
Following are the simple steps to delete an existing table from a word document.
Step 1 − Click anywhere in the table you want to delete.
Step 2 − Click the Layout tab, and click the Delete Table option under the Delete Table Button to delete the complete table from the document along with its content.
Rows & Columns in Word 2010
In this chapter, we will discuss how to work with rows and columns in Word 2010. As discussed in the previous chapter, a table is a structure of vertical columns and horizontal rows with a cell at every intersection. A Word table can contain as many as 63 columns but the number of rows is unlimited. This chapter will teach you how to add and delete rows and columns in a table.
Add a Row
Following are the simple steps to add rows in a table of a word document.
Step 1 − Click a row where you want to add an additional row and then click the Layout tab; it will show the following screen.
Step 2 − Now use the Row & Column group of buttons to add any row below or above to the selected row. If you click the Insert Below button, it will add a row just below the selected row as follows.
If you click the Insert Above button, it will add a row just above the selected row.
Delete a Row
The following steps will help you delete rows from a table of a Word document.
Step 1 − Click a row which you want to delete from the table and then click the Layout tab; it will show the following screen.
Step 2 − Click the Layout tab, and then click the Delete Rows option under the Delete Table Button to delete the selected row.
Add a Column
The following steps will help you add columns in a table of a Word document.
Step 1 − Click a column where you want to add an additional column and then click the Layout tab; it will show the following screen.
Step 2 − Now use the Row & Column group of buttons to add any column to the left or right of the selected column. If you click the Insert Left button, it will add a column just left to the selected column as follows.
If you click the Insert Right button, it will add a column just next to the selected column.
Delete a Column
Following are the simple steps to delete columns from a table of a word document.
Step 1 − Click a column which you want to delete from the table and then click the Layout tab; it will show the following screen.
Step 2 − Click the Layout tab, and click the Delete Column option under the Delete Table Button to delete the selected column.
Move a Table in Word 2010
In this chapter, we will discuss how to move a table in Word 2010. Microsoft Word allows to move a table from one location to another location along with its content. This chapter will give you simple steps to move a table within the same document, though you can move a table from one document to another document using the cut and paste operation.
Move a Table
The following steps will help you move a table within the same Word document.
Step 1 − Bring your mouse pointer over the table which you want to move from one location to another location. As soon as you bring your mouse pointer inside the table, a small Cross Icon will appear at the top-left corner of the table as shown below.
Step 2 − Click over the small Cross Icon which will select the whole table. Once the table is selected, use the Cut button or simply press the Ctrl + X keys to cut the table from its original location.
Step 3 − Bring your insertion point at the location where you want to move the table and use Paste button or simply press Ctrl + V keys to paste the table at the new location.
Resize a Table in Word 2010
In this chapter, we will discuss how to resize a table in Word 2010. Microsoft Word allows to resize a table to make it smaller and bigger as per your requirement.
Resize a Table
The following steps will help you resize a table available in a Word document.
Step 1 − Bring your mouse pointer over the table which you want to resize. As soon as you bring your mouse pointer inside the table, a small Cross Icon will appear at the top-left corner and a small Resize Icon will appear at the bottom-right corner of the table as shown below.
Step 2 − Bring the mouse pointer over the Resize Icon till it changes to a diagonal doublesided arrow and this is the time when you need to press the left mouse button and keep holding the button while resizing the table. Drag the table up to make it shorter or down to make it larger. You can drag the table diagonally to simultaneously change both the width and the height of the table.
Merging Cells in Word 2010
In this chapter, we will discuss how to merge table cells in Word 2010. Microsoft Word allows the merging of two or more cells to create one large cell. You will frequently need to merge columns of the top row to create the title of the table. You can merge cells either row-wise or column-wise, rather you cannot merge cells diagonally. This chapter will teach you how to merge multiple rows or columns.
Merging Cells
The following steps will help you merge table cells in a Word document.
Step 1 − Bring your mouse pointer position inside the first cell that you want to merge. Now press the Shift key and click the cells around the cell which you want to merge into the first cell. This will highlight the cells which you click and they will be ready to be merged.
Step 2 − Now click the Layout tab and then click the Merge Cells button which will merge all the selected cells.
After merging the cells, all the content of the cells will be scrambled which you can fix later as you like. For example, you can convert the merged cells text into title or some other description. For example, let us have center-aligned and bigger font text as follows on top of the table.
Split a Table in Word 2010
In this chapter, let us discuss how to split a table in Word 2010. Microsoft Word allows splitting a table into multiple tables but a single operation will always divide a table into two tables. This chapter will teach you how to split a table into two smaller tables.
Split a Table
Following are the simple steps to split a table into two tables in a Word document.
Step 1 − Bring your mouse pointer position anywhere in the row that should appear as the first row of the new table.
Step 2 − Now click the Layout tab and then click the Split Table button which will split the table into two tables and the selected row will become the first row of the lower table.
After splitting the table into two tables, you can further divide it into two parts and you can continue dividing the Word tables as long as a table has more than one row.
Split Cells in Word 2010
In this chapter, we will discuss how to split table cells in Word 2010. Microsoft Word allows splitting a cell into multiple cells. We will understand how to split a cell into multiple smaller sub-cells.
Split a Cell
The following steps will help you split a cell into two sub-cells of a table available in word document.
Step 1 − Bring your mouse pointer position inside the cell that has to be divided into multiple cells.
Step 2 − Now click the Layout tab and then click the Split Cells button; this will display a dialog box asking for the number of rows and columns to be created from the selected cell.
Step 3 − Select the desired number of rows and columns that have to go into the resultant cell and finally click the OK button to apply the result.
You can divide a cell into multiple cells either row-wise or column-wise or both.
Add Formula in Word 2010
In this chapter, we will discuss how to add formula to a table in Word 2010. Microsoft Word allows you to use mathematical formula in table cells which can be used to add numbers, to find the average of numbers, or find the largest or the smallest number in table cells you specify. There is a list of formulae, you can choose from the many based on the requirement. This chapter will teach you how to use formula in word tables.
Add a Formula
Following are the simple steps to add formula in a table cell available in Word document.
Step 1 − Consider the following table with the total number of rows. Click in a cell that should contain the sum of the rows.
Step 2 − Now click the Layout tab and then click the Formula button; this will display a Formula Dialog Box which will suggest a default formula, which is =SUM(LEFT) in our case. You can select a number format using Number Format List Box to display the result or you can change the formula using the Formula List Box.
Step 3 − Now click OK to apply the formula and you will see that the left cells have been added and the sum has been put in the total cell where we wanted to have it. You can repeat the procedure to have the sum of other two rows as well.
Cell Formulae
The Formula dialog box provides the following important functions to be used as formula in a cell.
| S.No | Formula & Description |
|---|---|
| 1 |
AVERAGE( ) The average of a list of cells |
| 2 |
COUNT( ) The number of items in a list of cells |
| 3 |
MAX( ) The largest value in a list of cells |
| 4 |
MIN( ) The smallest value in a list of cells |
| 5 |
PRODUCT( ) The multiplication of a list of cells |
| 6 |
SUM( ) The sum of a list of cells |
We assume you are familiar with how to create a spreadsheet program; you can construct your word cell formula. Word formulae uses a reference system to refer to an individual table cells. Each column is identified by a letter, starting with A for the first column, B for the second column, and so on. After the letter comes the row number. Thus, the first cell in the first row is A1, the third cell in the fourth row is C4, and so on.
Following are useful points to help you in constructing a word cell formula.
| S.No | Cell References and Description |
|---|---|
| 1 | A single cell reference, such as B3 or F7 |
| 2 | A range of cells, such as A4:A9 or C5:C13 |
| 3 | A series of individual cells, such as A3, B4, C5 |
| 4 | ABOVE, referring to all cells in the column above the current cell. |
| 5 | BELOW, referring to all cells in the column below the current cell. |
| 6 | LEFT, referring to all cells in the row to the left of the current cell |
| 7 | RIGHT, referring to all cells in the row to the right of the current cell |
You can also construct simple Math expressions, such as B3+B5*10 by using simple mathematical operators +, -, /, *, %.
Borders & Shades in Word 2010
In this chapter, we will discuss how to apply table borders and shades in Word 2010. Microsoft Word allows you to place a border on any or all of the four sides of a table very similar to text, paragraphs, and pages. You can also add shades to table rows and columns. This chapter will teach you how to add borders (left, right, top or bottom) around a table and how to add different shades to various rows and columns of the table.
Add Borders to Table
The following steps will help you add borders in a table cell available in Word document.
Step 1 − Select the table to which you want to add border. To select a table, click over the table anywhere which will make the Cross icon visible at the top-left corner of the table. Click this cross icon to select the table.
Step 2 − Click the Border button to display a list of options to put a border around the selected table. You can select any of the option available by simply clicking over it.
Step 3 − Try to add and remove different borders like left, right, top or bottom by selecting different options from the border options.
Step 4 − You can apply border to any of the selected row or column. You can try it yourself.
Step 5 − To delete the existing border, simply select the No Border option from the border options.
Using Border Options
You can add borders of your choice to word table by following the simple steps given below.
Step 1 − Click the Border button to display a list of options to put a border. Select the Border and Shading option available at the bottom of the list of options as shown in the above screenshot. This will display a Border and Shading dialog box. This dialog box can be used to set borders and shading around a selected table.
Step 2 − Click the Border tab; this will display a list of border settings, styles and options whether this border should be applied to the table or text or paragraph.
Step 3 − You can use the Preview section to disable or enable left, right, top or bottom borders of the selected table or row or column. Follow the given instructions in the preview section itself to design the border you like.
Step 4 − You can customize your border by setting its color, width by using different width thickness available under the style section.
Add Shades To Table
The following steps will help you add shades on a selected table or its rows or columns.
Step 1 − Select a row or column where you want to apply a shade of your choice.
Step 2 − Click the Border button to display a list of options to put a border. Select the Border and Shading option available at the bottom of the list of options. This will display a Border and Shading dialog box. This dialog box can be used to set borders and shading around selected row(s) or column(s).
Step 2 − Click the Shading tab which will display options to select fill, color and style and whether this border should be applied to cell or table or selected portion of text.
Step 3 − You can use the Preview section to have an idea about the expected result. Once you are done, click the OK button to apply the result.
Quick Styles in Word 2010
In this chapter, we will discuss how to apply quick styles in Word 2010. Microsoft Word provides a gallery of Quick Styles that you can apply to headings, titles, text, and lists. Quick styles come with canned formatting choices, such as font, boldface, and color which we will understand in this chapter.
Apply Quick Styles
The following steps will help you understand how to apply quick styles to a selected portion of text.
Step 1 − Select a portion of text to which you want to apply some style. Using style, you can change the selected portion of text as a heading or subheading or title of the document. You can try using different styles on your text based on your requirement.
Step 2 − Click the Home tab and then move your mouse pointer over the available styles in the Style Gallery. You will see that the selected portion of text will change its style based on the selected style. You can display more available styles by clicking the More Style button.
Step 3 − Finally, to apply a selected style, click over the style and you will find that it is has been applied on the selected portion of text.
You can bring a text to its normal appearance by selecting the Normal style available in the Style Gallery.
Change Styles
The Change Style function allows you to change the default font, color, paragraph spacing and style set for a document. The following steps will help you change the default style.
Step 1 − Open the document the style of which needs to be changed. Click the Home tab and then click the Change Styles button; this will show you all the options that can be changed. You can change the Style, the Font, the Color and the Spacing of the paragraph.
Step 2 − If the style set needs to be changed, click the Style Set option; this will display a submenu to select any of the available style set. When you move your mouse over the different style sets, you will get real time text preview to give an idea about the final result.
Step 3 − To apply a selected style set, click over the style set and you will find that it is has been applied on your document.
Similarly, you can try applying Font, Color and Paragraph Spacing. You can try these options yourself.
Use Templates in Word 2010
In this chapter, we will discuss how to use templates in Word 2010. Microsoft Word template is a collection of styles which defines paragraph styles for regular text paragraphs, a title, and different levels of headings. You can use any of the already existing templates for your Word document or you can design a template which can be used for all your company documents.
Using Existing Template
We will now understand how to use an already existing template for your newly created word document. A template is selected at the time when you create a new blank document.
Step 1 − To start a new document, click the File tab and then click the New option; this will display the Available Templates.
Step 2 − Microsoft Word provides a list of templates arranged under Sample Templates or you can download hundreds of templates from office.com which are arranged in different categories. We will use Sample Templates for our document. For this, we need to click over Sample Templates; this will display a gallery of templates. You can try using the office.com option to select a template based on your requirement.
Step 3 − You can browse a list of available templates and finally select one of them for your document by double-clicking over the template. We will select Equity Report template for our report requirement. While selecting a template for your document, you should select the Document Option available in the third column. This opens your document with predefined setting with which you can modify document title, author name, heading, etc. based on your document requirement.
Create New Template
You can create a fresh new template based on your requirement or you can modify an existing template and save it for later use as a template. A Microsoft Word template file has an extension of .dotx. The following steps will help you create a new template.
Step 1 − To create a new template using an existing template, click the File tab and then click the New option; this will display the Available Templates to be selected. Select any of the available template and open it with the Template Option turned on.
Step 2 − You can now modify an open template as per your requirements and once you are done, you can save this template with a .dotx extension which is a standard extension for Microsoft Word Templates.
You can create a template from a new document as well. Click the File button, and click New option to open a new document. Under Available Templates, double click Blank Document to create a new document template. Save the template with a unique name and .dotx extension.
You can save the created template anywhere you click and whenever you like to use this template, just double-click over the template file and it will open a new template based document for you.
Use Graphics in Word 2010
In this chapter, we will discuss how to use graphics in Word 2010. You can add beauty to your Microsoft Word documents by inserting a variety of graphics. This chapter will teach you two ways of adding graphics.
Adding Picture in Document
The following steps will help you add an existing picture in your word document. It is assumed that you already have a picture available on your machine before you add this picture in your Word document.
Step 1 − Click on your document where you want to add a picture.
Step 2 − Click the Insert tab and then click the Picture option available in illustrations group, which will display the Insert Picture dialog box.
Step 3 − You can select a required picture using the Insert Picture dialog box. When you will click the Insert button, selected picture will be inserted in your document. You can play with your inserted picture in different ways, like you can apply quick styles to your picture, you can resize it, or you can change its color too. To try it, just -lick your inserted image and Word will give you numerous options available under the Format tab to format your inserted graphics.
You can try yourself to insert other available graphics like Clipart, Different Shapes, Charts and SmartArt or Screenshots.
Adding WordArt in Document
WordArt provides a way to add fancy words in your Word document. You can document your text in a variety of ways. The following steps will help you add WordArt in your document.
Step 1 − Click in your document where you want to add WordArt.
Step 2 − Click the Insert tab and then click the WordArt option available in the Text group; this will display a gallery of WordArt.
Step 3 − You can select any of the WordArt style from the displayed gallery by clicking on it. Now you can modify the inserted text as per your requirement and you can make it further beautiful by using different options available. To try it, just double-click your inserted WordArt and Word will give you numerous options available from the Format tab to format your image. Most frequently used options are Shape Styles and WordArt Styles.
You can try yourself to apply different options on the inserted WordArt by changing its shape styles, colors, WordArt Styles, etc.
Auto Correction in Word 2010
In this chapter, we will discuss auto correction in Word 2010. The AutoCorrect feature automatically corrects common typographical errors when you make them. Let us learn how to use the auto correction option available in Microsoft Word 2010 to correct the spelling automatically as you type the words in your documents.
Setting AutoCorrect
The following steps will help to enable the AutoCorrect feature in Microsoft Word.
Step 1 − Click the File tab, click Options, and then click the Proofing option available in the left most column, it will display the Word Options dialog box.
Step 2 − Click the AutoCorrect Options button which will display the AutoCorrect dialog box and then click the AutoCorrect tab. Now you have to make sure all the options are enabled, especially the Replace Text as you type option. It is also recommended to be careful when you turn off an option.
Step 3 − Select from among the following options, depending on your preferences.
| S.No | Option and Description |
|---|---|
| 1 |
Show AutoCorrect Options Buttons This option will be used to display a small blue button or bar beneath text that was automatically corrected. Click this button to see a menu, where you can undo the correction or set AutoCorrect options. |
| 2 |
Correct TWo INitial CApitals This option changes the second letter in a pair of capital letters to lowercase. |
| 3 |
Capitalize first letter of sentences This option capitalizes the first letter following the end of a sentence. |
| 4 |
Capitalize first letter of table cells This option will be used to capitalize the first letter of a word in a table cell. |
| 5 |
Capitalize names of days This option will be used to capitalize the names of the days of the week. |
| 6 |
Correct accidental usage of cAPS LOCK key This option will be used to correct capitalization errors that occur when you type with the CAPS LOCK key depressed and turns off this key. |
| 7 |
Replace text as you type This option replaces typographical errors with the correct words as shown in the list beneath it. |
| 8 |
Automatically use suggestions from the spelling checker This option tells Word to replace spelling errors with words from the dictionary as you type. |
Although Word comes preconfigured with hundreds of AutoCorrect entries, you can also manually add entries using the following dialog box and use the Replace and With text boxes to add more entries. I added an entry for Markiting which should be replaced with Marketing. You can use the Add button to add multiple entries.
Step 4 − Click OK to close the AutoCorrect Options dialog box and again click OK to close the Word Options dialog box. Now try to type Markiting and as soon as you type this word, Microsoft Word autocorrects it with the correct word Marketing word.
Auto Formatting in Word 2010
In this chapter, we will discuss auto formatting in Word 2010. The AutoFormat feature automatically formats a document as you type it by applying the associated styles to text. Let us learn how to use the auto format option available in Microsoft Word 2010 to format the typed content. For example, if you type three dashes — and press enter, Word will automatically create a line for you. Similarly, Word will automatically format two dashes — into an em dash (—).
Setting AutoFormat
The following steps will help you set the AutoFormat feature in your Microsoft Word.
Step 1 − Click the File tab, click Options, and then click the Proofing option available in the left most column, it will display the Word Options dialog box.
Step 2 − Click the AutoCrrect Options button; this will display the AutoCorrect dialog box and then click the AutoFormat As You Type tab to determine what items Word will automatically format for you as you type.
Step 3 − Select from among the following options, depending on your preferences.
| S.No | Option and Description |
|---|---|
| 1 |
«Straight quotes» with “smart quotes” This option will be used to replace the plain quotation characters with curly quotation characters. |
| 2 |
Fractions (1/2) with fraction character (½) This option will be used to replace the fractions typed with numbers and slashes with fraction characters. |
| 3 |
*Bold* and _italic_ with real formatting This option will be used to format text enclosed within asterisks (*) as bold and text enclosed within underscores ( _ ) as italic. |
| 4 |
Internet and network paths with hyperlinks This option will be used to format e-mail addresses and URLs as clickable hyperlink fields. |
| 5 |
Ordinals (1st) with superscript This option will be used to format ordinal numbers with a superscript like 1st becomes 1st. |
| 6 |
Hyphens (—) with dash (—) This option will be used to replace a single hyphen with an en dash (.) and two hyphens with an em dash (—). |
| 7 |
Automatic bulleted lists This option will be used to apply bulleted list formatting to paragraphs beginning with *, o, or — followed by a space or tab character. |
| 8 |
Automatic numbered lists This option will be used to apply numbered list formatting to paragraphs beginning with a number or letter followed by a space or a tab character. |
| 9 |
Border lines This option will be used to apply paragraph border styles when you type three or more hyphens, underscores, or equal signs (=). |
| 10 |
Tables This option will be used to create a table when you type a series of hyphens with plus signs to indicate the column edges. Try with +——+——+ ) and then press Enter. |
| 11 |
Built-in heading styles This option will be used to apply heading styles to heading text. |
| 12 |
Format beginning of list item like the one before it This option will be used to replace plain quotation characters with curly quotation characters. |
| 13 |
Set left- and first-indent with tabs and backspaces This option sets left indentation on the tab ruler based on the tabs and backspaces you type. |
| 14 |
Define styles based on your formatting This option automatically creates or modifies styles based on manual formatting that you apply to your document. |
Step 4 − Finally click OK to close the AutoCorrect Options dialog box and again click OK to close the Word Options dialog box.
Table of Contents in Word 2010
In this chapter, we will discuss how to create table of contents in Word 2010. A table of contents (or TOC) is a list of headings in the order in which they appear in the document. You can set a list of headings which should be a part of the table of contents. Let us learn how to create a Table of Contents. A table of content helps in navigating through a Word document by providing associated page numbers and direct links to various headings available on those pages.
Create Table of Contents
The following will help you to create Table of Contents in your Microsoft Word using various levels of headings.
Step 1 − Consider a document having different levels of headings.
Step 2 − You can insert a table of content anywhere in the document, but the best place is always at the beginning of the document. So bring your insertion point at the beginning of the document and then click the References tab followed by the Table of Content button; this will display a list of Table of Contents options.
Step 3 − Select any of the displayed options by simply clicking on it. A table of content will be inserted at the selected location.
Step 4 − You can select number of levels of headings in your table of content. If you click on the Insert Table of Content option available in the option menu, then it will show you a dialog box where you can select the number of levels you want to have in your table of content. You can turn ON or turn OFF the Show Page Numbers option. Once done, click the OK button to apply the options.
Now if you press the Ctrl key and then click over the any link available in the table of content, it will take you directly to the associated page.
Update Table of Contents
When you work on a Word document, then number of pages and their content keep varying and accordingly you need to update your Table of Contents. Following are the simple steps to update an existing Table of Contents in your Microsoft Word.
Step 1 − Consider you already have a table of content as shown above. Click the References tab followed by the Update Table button; this will display the Update Table of Contents dialog box with two options.
Step 2 − If you want to update just the page numbers then select the first option Update page numbers only available in the dialog box but if you want to update page numbers as well, then select the second option Update entire table and you will find your table of content updated with all the latest changes.
Delete Table of Contents
The following steps will help you delete an existing Table of Contents from Microsoft Word.
Step 1 − Consider you already have a table of content as shown above. Click the References tab and next Table of Contents button which will display a list of Table of Contents options along with Remove Table of Contents option available at the bottom.
Step 2 − Click over the Remove Table of Contents option to delete the existing table of contents.
Preview Documents in Word 2010
In this chapter, we will discuss the preview of documents in Word 2010. When you are ready for printing your Word document, it is always recommended to preview the document before you send the document for final printing. During preview of the document you might discover that the set margin is not appropriate or many items may not look good after printing so better to fix them after having a preview of the document. You can also have the option to specify which pages to print, select a printer, specify the paper size on which you want to print, and set the other printing options.
Preview Documents
The following steps will help you preview your Microsoft Word Document.
Step 1 − Open the document the preview of which you want to see.
Step 2 − Click the File tab followed by the Print option; this will display a preview of the document in the right column. You can scroll up or scroll down your document to walk through the document using the given Scrollbar. In the next chapter, we will learn how to print the previewed document and how to set different printing options.
Step 3 − Once you are done with your preview, you can click the Home tab to go to the actual content of the document.
Printing Documents in Word 2010
In this chapter, we will discuss how to print documents in Word 2010. Consider you are done with previewing and proofing your document and ready for the final printing. This chapter will teach you how to print a part or a complete Microsoft Word document.
Printing Documents
The following steps will help you print your Microsoft Word document.
Step 1 − Open the document for which you want to see the preview. Next click the File tab followed by the Print option which will display a preview of the document in the right column. You can scroll up or scroll down your document to walk through the document using given Scrollbar. The middle column gives various options to be set before you send your document to the printer.
Step 2 − You can set various other printing options available. Select from among the following options, depending on your preferences.
| S.No | Option and Description |
|---|---|
| 1 |
Copies Set the number of copies to be printed; by default, you will have one copy of the document. |
| 2 |
Print Custom Range This option will be used to print a particular page of the document. Type the number in Pages option, if you want to print all the pages from 7 till 10 then you would have to specify this option as 7-10 and Word will print only 7th, 8th, 9th and 10th pages. |
| 3 |
Print One Sided By default, you print one side of the page. There is one more option where you will turn up your page manually in case you want to print your page on both sides of the page. |
| 4 |
Collated By default, multiple copies will print Collated; if you are printing multiple copies and you want the copies uncollated, select the Uncollated option. |
| 5 |
Orientation By default, page orientation is set to Portrait; if you are printing your document in landscape mode then select the Landscape mode. |
| 6 |
A4 By default, the page size is A4, but you can select other page sizes available in the dropdown list. |
| 7 |
Custom Margin Click the Custom Margins dropdown list to choose the document margins you want to use. For instance, if you want to print fewer pages, you can create narrower margins; to print with more white space, create wider margins. |
| 8 |
1 Page Per Sheet By default, the number of pages per sheet is 1 but you can print multiple pages on a single sheet. Select any option you like from the given dropdown list by clicking over the 1 Page Per Sheet option. |
Step 3 − Once you are done with your setting, click on the Print button which will send your document to the printer for final printing.
Email Documents using Word 2010
In this chapter, we will discuss how to email documents using Word 2010. Microsoft Word can be used to send a Word document in an email as an attachment directly at the given email address without opening your email program. This chapter will teach you simple ways of sending email in a variety of formats, including a Word document file (DOC) attachment or a PDF, among others.
Mailing Documents
Following are the simple steps to send a word document as an attachment at the given email address.
Step 1 − Open the document you want to send using e-mail as an attachment.
Step 2 − Click the File tab and then click the Save & Send option from the left most column; this will display a number of options to Save & Send, you will have to select the Send using Email option available in the middle column.
Step 3 − The third column will have various options to send email which allows you to send your document as an attachment in DOC format or you can send your Word document in a PDF format. Click a method to send the document. I’m going to send my document in PDF format.
When you click the Send as PDF option, it displays the following screen where you can type the email address to which you want to send your document, email subject and other additional messages as well. To send email to multiple recipients, separate each e-mail address with a semicolon (;) and a space.
Translate Word 2010 Document
In this chapter, we will discuss how to translate a Word 2010 document. Microsoft Word has an option to translate a complete Word document from one language to another language using simple step. Let us learn how we can translate document content from English to some other language (Spanish).
Translate Document Using Microsoft Translator
The following steps will help you translate a document from one language to another language.
Step 1 − Click the Review tab and then click the Translate button; this will display different options to be selected.
Step 2 − Select the Choose Translation Language option simply by clicking over it. This will display a Translation Language Options dialog box asking for selecting from and to languages. Here From is the source document’s language and To is the target document’s language.
Step 3 − After selecting From Language and To Language, click OK. Now again go to Review tab and then click Translate button which will display different options to be selected. Select top option Translate Document option from the given options, this will display Translate Whole Document dialog box asking for your permission to send your document over the internet to be translated by Microsoft Translator.
Step 4 − To translate your document, you can click the Send button. This will send your document over the internet to be translated and you will have your document translated in your target language.
Step 5 − Now you can copy your translated content manually in any other document and save it for final use.
Compare Documents in Word 2010
In this chapter, we will discuss how to compare documents in Word 2010. Sometime you modify a Microsoft Word document without turning on the Track Changes mode; in such cases, tracking the changes becomes difficult and you will have to compare the original document with the modified document word by word. But you do not need to compare it manually, Microsoft Word provides an option to compare two documents very easily. Let us see how it can be done.
Compare Two Documents
Let us have the following two documents, (a) Original document (b) Modified version of the same document as follows
Original Document
Modified Document
The following steps will help you compare the two documents.
Step 1 − Click the Review tab and then click the Compare button. This will display the two options to be selected.
Step 2 − Select the Compare option simply by clicking over it. This will display a Compare Documents dialog box asking for the two versions of the Word document that need to be compared with each other.
Step 3 − Select the Original Document and the Revised Document and click the OK button to display the differences in two documents. Left column on the screen would show all the changes done over the course of changes and you will see original as well as modified version of the document on the same screen. You can walk through these changes using the Previous & Next button available under the Review tab.
NOTE − While comparing two documents you can use the different settings available at the Compare Documents dialog box under the More button.
Document Security in Word 2010
Microsoft Word provides a high level of security for your word generated documents. You can set a password for a document to stop unauthorized reading and editing of the document or if you want someone just to read the document then you can set editing restriction on your word document. This chapter will teach you how to make your document password protected and restricted from editing and formatting.
Set Document Password
Once you set a password for a document then you will be able to open the document only if you know the password. If you forget your password, then there is no way to recover it and to open the document. So you need to be careful while setting a password for your important document.
The following steps will help you set a password for a Word document.
Step 1 − Open a Word document for which you want to set a password.
Step 2 − Click the File tab and then click the Info option and finally the Protect Document button which will display a list of options to be selected.
Step 3 − Select the Encrypt with Password option simply by clicking over it. This will display an Encrypt Document dialog box asking for a password to encrypt the document. The same dialog box will appear twice to enter the same password. After entering password each time, click the OK button.
Step 4 − Save the changes, and finally you will have your document password protected. Next time when someone tries to open this document, it will ask for the password before displaying the document content, which confirms that now your document is password protected and you need password to open the document.
Remove Document Password
You can remove a document password only after opening it successfully. The following steps will help you remove password protection from your Word document.
Step 1 − Open a Word document the password of which needs to be removed. You will need the correct password to open the document.
Step 2 − Click the File tab followed by the Info option and finally the Protect Document button which will display a list of options to be selected.
Step 3 − Select the Encrypt with Password option simply by clicking over it. This will display an Encrypt Document dialog box and password which will be in a dotted pattern. You need to remove this dotted pattern from the box and make it clear to remove the password from the document.
Now when you will open your document next time, Word will not ask you for any password because you have removed the password protection from the document.
Set Editing & Formatting Restrictions
The following steps will help you set editing restrictions in a Word document.
Step 1 − Open a Word document for which you want to set editing restrictions.
Step 2 − Click the File tab and then click the Info option and finally the Protect Document button which will display a list of options to be selected.
Step 3 − Select the Restrict Editing option simply by clicking over it. This will open the actual document and it will also give you the option to set editing restrictions in the Restrict Formatting and Editing area. Here you can set formatting as well as editing restrictions on the document.
Step 4 − One you are done with your setting, click the Yes, Start Enforcing Protection button which will display a Start Enforcing Protection dialog box asking for password so that no one else can change the setting. You can enter the password or you can leave it simply blank which means there is no password setting for this protection.
Step 5 − Finally click the OK button and you will find that your document is editing (or formatting if you applied) protected.
Remove Editing & Formatting Restrictions
You can remove the editing restriction from your document using these simple steps.
Step 1 − Open a Word document for which you want to remove the editing restriction.
Step 2 − Click the File tab and then click the Info option and finally the Protect Document button; this will display a list of options to be selected.
Step 3 − Select the Restrict Editing option simply by clicking over it. This will display the Restrict Formatting and Editing area as follows.
Step 4 − Now click the Stop Protection button. If you had set up a password at the time of setting the editing or formatting restrictions, then you will need the same password to remove the editing or formatting restrictions. Word will now ask for the same using the Unprotect Document Dialog box , otherwise it will simply remove the restrictions.
Set Watermark in Word 2010
In this chapter, we will discuss how to set watermark in a Word document. A watermark is a picture that shows up faintly behind the text on a Word document page. When you draft a document, you can watermark the document with Draft Copy stamp, or you can watermark a duplicate document with the Duplicate stamp. Microsoft Word allows you to stamp with watermark using simple steps explained in this chapter.
Set Standard Watermark
The following steps will help you set standard watermark in word document. A standard watermark is the one which is already defined by words and cannot modify their font or color etc.
Step 1 − Open a word document in which you want to add a watermark.
Step 2 − Click the Page Layout tab and then click the Watermark button to display a list of standard watermark options.
Step 3 − You can select any of the available standard watermarks by simply clicking over it. This will be applied to all the pages of the word. Assume we select the Confidential watermark.
Set Custom Watermark
The following steps will help you set custom watermark in word document. A custom watermark is the one which can be modified text and its font, color and size etc.
Step 1 − Open a Word document in which you want to add a watermark.
Step 2 − Click the Page Layout tab and then click the Watermark button to display a list of standard watermark options. At the bottom, you will find the Custom Watermark option.
Step 3 − Click over the Custom Watermark option; this will display the Printed Watermark dialog box.
Step 4 − Now you can set a picture as watermark or you can set predefined text as watermark; you can also type your text in the Text box available at Printed Watermark dialog box. We will set text watermark as DUPLICATE and also set its font color and font size. Once all the parameters are set, click the OK button to set the parameters.
Remove Watermark
The following steps will help you remove an existing watermark from a Word document.
Step 1 − Open a Word document the watermark of which needs to be deleted.
Step 2 − Click the Page Layout tab followed by the Watermark button to display a list of standard watermark options. At the bottom, you will find the Remove Watermark option.
Step 3 − Click Remove Watermark option; this will delete the existing watermark from the document.
Часто случается так, что пользователи по невнимательности делают изменения в документе, которые необходимо вернуть назад. В текстовом процессоре Microsoft Word существует возможность отмены действия и повтора последнего действия. Первая команда предназначена для того, чтобы отменить последние действия пользователя, а вторая — чтобы вновь, не совершая этих действий, отменить отмену действий. Непонятно? Тогда давайте разберемся с этими чрезвычайно важными функциями на простом примере.
Работа с документом в текстовом процессоре Microsoft Word похожа на прокрутку киноленты — каждое действие пользователя, будь то вставка изображения, набор символа или его удаление, подобно кадру фильма. И кадры эти программа Microsoft Word записывает. В любой момент пользователь может вернуться на некоторое количество кадров назад, а затем вернуться к последнему выполненному кадру.
В программе Microsoft Word для работы с функциями отмены и повтора действия пользователя существуют два варианта:
- первый — с помощью клавиатурных сочетаний. Для отмены последнего действия пользователя используйте сочетание клавиш Ctrl+Z, а для повтора уже выполненных и отмененных действий — сочетание Ctrl+Y;
- второй — использование специально предназначенных для этой цели кнопок на панели быстрого доступа, которые находятся в левой верхней части главного рабочего окна программы Microsoft Word. В этом случае для отмены последнего действия пользователя щелкните мышью по кнопке, а для повтора уже выполненных и ранее отмененных действий — по кнопке.
Текcтовый процессор Microsoft Word предлагает пользователям огромный функционал по работе с документами любого размера и сложности. Освоение приемов, описанных в этой статье, поможет работать с документами в несколько раз эффективнее, не отвлекаясь на форматирование, а это гарантия концентрации пользователя на содержании. Ниже дается несколько основных советов, которыми нужно пользоваться при перемещении по документу.
- Используйте разные режимы отображения документа для решения разных задач. В каждом из режимов специально убраны ненужные элементы интерфейса и сделан акцент на тех элементах, которые помогают решать конкретные задачи для каждого вида.
- Используйте «горячие» клавиши. Научившись оперировать сочетаниями клавиш, вы сможете существенно ускорить работу с текстовым процессором.
- Копируйте и вырезайте содержимое документа для перемещения и дублирования содержимого в разных местах документа. Если части документа похожи, проще создать копию и изменить небольшую часть, а не переписывать все заново.
- Используйте буфер обмена для работы сразу с несколькими отрывками содержимого документа. Даже при перемене мест расположения двух отрывков документа буфер обмена сократит количество операций.
- Используйте панель Навигация (Navigation) для просмотра и редактирования структуры будущего документа. Уникальная особенность новой версии Microsoft Word позволяет редактировать структуру документа простым щелчком мыши.
- Пользуйтесь поиском панели Навигация (Navigation) для поиска простых выражений и диалоговым окном Найти и заменить (Find and Replace) для сложных случаев.
Горячие клавиши Word 2010. Почти каждая компьютерная программа имеет свои «горячие клавиши». Многие работают только с мышью или с мышью и клавиатурой. Но гораздо быстрее и удобнее использовать сочетания клавиш. Если вы постоянно и подолгу работаете в текстовом редакторе Word, вы, вероятно, замечали, насколько сильно замедляется ваша работа, когда вы совмещаете ввод с помощью мыши и клавиатуры. Этот процесс можно упростить и ускорить. Достаточно распечатать и положить перед собой таблицу с самыми необходимыми командами, и уже через неделю вы будете работать в Word, как профессиональная машинистка. А если все-таки научиться работать на клавиатуре «вслепую», то это просто не будет стоить своей цены.Это первый инструмент для высокоскоростного ввода данных.
|
Команды, кнопки |
Ключи |
| Создавать | Control+N |
| Открыто | Ctrl+О |
| Экономить деньги | Ctrl+s |
| Сохранить как | F12 |
| Тюлень | Ctrl+р |
| Предварительный просмотр печати) | Ctrl+F2 |
| Экономить деньги | Ctrl+s |
| Отменить действие | Ctrl+z |
| Возврат ввода | Ctrl+y |
| Резать | Ctrl+Х |
| Копировать | Ctrl+c |
| Вставлять | Ctrl+v |
| Образец формата | Ctrl+Shift+С |
| Размер шрифта списка | Ctrl+Shift+P |
| Список источников | Ctrl+Shift+F |
| Жирная кнопка | Ctrl+b |
| Курсивная кнопка | Ctrl+I |
| Подчеркнутая кнопка | Контроль + U |
| Кнопка масштабирования | Ctrl+} |
| Кнопка уменьшения | Ctrl+{ |
| Кнопка подписки | Ctrl+= |
| Верхний индекс кнопки | Ctrl+Shift++ |
| Кнопка для открытия диалогового окна «Шрифт | Ctrl+D |
| Левый | Ctrl+L |
| По центру | Ctrl+е |
| Правильный | Ctrl+r |
| По ширине | Ctrl+J |
| Увеличить отступ | Ctrl+М |
| Уменьшить отступ | Ctrl+Shift+M |
| Показать все признаки | Ctrl+* |
| Встретиться | Ctrl+f |
| Заменять | Ctrl+h |
| Пойдем | Ctrl+g |
| Осталось одно слово | Ctrl+ |
| Одно слово вправо | Ctrl+ |
| Один абзац выше | Ctrl+ |
| Один абзац вниз | Ctrl+ |
| До конца строки | Конец |
| В начале строки | Дом |
| В начало следующей страницы | Alt+Ctrl+Страница+Вниз |
| В начало предыдущей страницы | Alt+Ctrl+страница вверх |
| До конца документа | Ctrl+конец |
| В начале документа | Ctrl+домой |
| Вернуться к предыдущей коррекции | Shift+F5 |
| Один символ вправо | Shift+ |
| Один символ слева | Shift+ |
| До конца слова | Ctrl+shift+ |
| Перед началом слова | Ctrl+shift+ |
| До конца строки | Shift+Конец |
| Перед началом линии | Shift+Домой |
| На одну строку вниз | Shift+ |
| Один ряд вверх | Shift+ |
| До конца текущего абзаца | Ctrl+shift+ |
| Перед началом текущего абзаца | Ctrl+shift+ |
| До конца документа | Ctrl+Shift+Конец |
| Перед началом документа | Ctrl+Shift+Домой |
| Весь документ | Ctrl+А |
| Закрыть текущий документ | Ctrl+W, Ctrl+F4 |
| Закрыть Microsoft Word | Alt+F4 |
| Повторить последнее действие | F4 |
| Восстановить размер окна | Ctrl+F5 |
| Перейти к предыдущему окну | Ctrl+Shift+F6 |
| Перейти к следующему окну | Ctrl+F6 |
| Развернуть окно документа | Ctrl+f10 |
| Развернуть окно Microsoft Word | Alt+F10 |
Я надеюсь, что вы найдете слово «горячие клавиши» полезным. Желаю вам «приручить» текстовый редактор Word и стать профессионалом в этом деле.

 ), введите
