
Multilevel numbering in Word is the #1 headache for many people working with large documents.
Believe it or not, it’s not complicated. It just takes somebody to lead the way and point out the pitfalls you need to avoid.
Today that pleasure falls to me!
Before I start, grab your free multilevel numbering troubleshooting guide that shows you the steps to get multilevel numbering working properly first time, every time, together with answers to over 20 FAQs and plenty of real client examples constructed step by step to help you fix what isn’t working with your numbering.

1. What Multi-level Numbering Looks Like
Often used in the legal profession or in large corporate documents, multilevel numbering creates a logical hierarchy and easy navigation within the document. The headings can also be summarised later on in a table of contents. Here is a simple example:

2. How to Set Up Multilevel Numbering
Here is the correct process:
1. Select the text that you want to number (this can be a section of text or the whole document).

2. Select the Home tab.
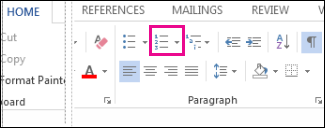
3. Click the multilevel numbering icon in the Paragraph group.
![]()
4. You can either select an existing layout from the list to use as a starting point, or you can create a new numbering system from scratch. As you hover over each thumbnail image, Word provides a larger image of the numbering system.
5. Choose Define New Multilevel List to display the control dialog.

The dialog box can be broken down as follows:
Step #1 Click level to modify
In the top left is a list of levels. As you select each level, the settings in the rest of the dialog box changes.
Level 1 is the highest level, i.e. the main headings such as chapter or section titles.
Level 2 is subordinate to level 1.
Level 3 is subordinate to level 2.

Step #2 Enter formatting for number
This is where the level number is constructed. If you include a previous level number, it will be displayed with a grey background, as will the number for the current level.
Type anything you wish to put in between the numbers such as dots, dashes, brackets etc.
Clear any text in the ‘Enter formatting for this number’ box.
Step #3 Include level number from
When creating a subordinate level (or child level), you can first specify the level number of the parent.
For example, for section 3.2
- ‘3’ is the parent level (level 1) and
- ‘2’ is the child level (level 2)

Step #4 Number style for this level
Each level can have its own number style. It may be a standalone style, e.g. 1, 2, 3 or a, b, c or continue on from a higher level, e.g. 1.1.1 or 1.a.i.
- When creating 1.1 numbering, this option is 1, 2, 3.
- When creating 1.a numbering, this option is a, b, c

Step #5 Font
Set the font formatting for the selected level, if you want.

Step #6 Position
What position from the left margin do you want items for each level of numbering. For example, level 1 items may be 0cm from the left margin, level 2, 1cm from the left margin and level 3, 2cm from the left margin.
Here’s what they mean:
- The Aligned At determines how far from the left margin the number appears.
- The Text indent at figure determines how far from the left margin the text following the number is.

6. Click OK to save all the settings and close the dialog box.
The text you selected in step 1 now looks like this.

The next part is where the magic happens …
3. How to Apply Multilevel Numbering
Once you have created your numbering system:
1. Position the cursor at the beginning of a line.

2. Press the TAB key to move the text down a level (demote).

3. Press the SHIFT and TAB keys together to move the text up a level (promote).

If you prefer, you can also click the indent icon to demote and the outdent icon to promote between levels.
![]()
4. How to Change Multilevel Settings
Once you have created your numbering system:
1. Reselect all text that is using the multilevel numbering.
2. Click the multilevel numbering icon and select Define New Multilevel List (yes, you choose this option even if you are modifying an existing multilevel list).

The original settings that you defined are redisplayed.
3. In the top-left box select the level that you wish to change, then change your settings.
4. Repeat for the other settings.
5. Click OK to save the settings. Your numbered list should now reflect your new settings.
5. Linking Multilevel Numbering to Styles
Each level of a multilevel numbering system can be linked to a style. This means that as you apply styles throughout the document, the numbering is applied appropriately and automatically. You can either use the built-in Heading 1, Heading 2, Heading 3 styles or use your own custom styles.
1. In the Numbering dialog box, click the MORE button in the bottom-left corner to expand the dialog box.
2. Select level to modify in the top-left box.
3. Open the Link level to style drop-down list and choose the style you wish to connect to the numbering level.

4. Click OK.
5. In the document, apply the Heading 1, Heading 2, Heading 3 styles where needed.
It’s a good idea to create a body text style and apply that where appropriate, so that the body text does not inadvertently get caught up in the multi-level numbering.
6. Select the whole document (or the portion of the document where you want to apply your numbered sections).
7. Click the icon in the Paragraph group (Home tab).
8. Select your custom numbering style from the gallery. The thumbnail image should show the linked styles.

6. How to Use Styles to Set Number Levels
1. Select all the text that you wish to apply the same number level to. Alternatively, if you wish to go line by line, you can place the cursor anywhere in a line of text.
2. In the Styles gallery, click the style that corresponds to the number level you wish to apply. For example, to apply the top level numbering click Heading 1 and for the third level numbering click Heading 3 (assuming those are the styles you assigned).
The numbering and all the numbering settings will be applied to the selected text or the paragraph in which the cursor was positioned.

And that, my friend, is how you do multilevel numbering in Word with no loose ends.
How to set up a dual-multilevel numbering system in Word
7. Two resources to help you
1. Grab your free multilevel numbering troubleshooting guide.

2. Watch over my shoulder as I set up multilevel numbering from scratch.

8. What next?
I hope you found plenty of value in this post. I’d love to hear your biggest takeaway in the comments below together with any questions you may have.
Have a fantastic day.


About the author
Jason Morrell
Jason loves to simplify the hard stuff, cut the fluff and share what actually works. Things that make a difference. Things that slash hours from your daily work tasks. He runs a software training business in Queensland, Australia, lives on the Gold Coast with his wife and 4 kids and often talks about himself in the third person!
SHARE
This tutorial shows two ways to create numbered lists in Microsoft Word. We will also look at how to change list levels, start with a different list number, and change the font, size, and color of list numbers.
Do you want to create bulleted lists? Please see my previous tutorial “How to Create Bulleted Lists in Microsoft Word.”
What about Lists Ordered by Letters?
For simplicity, this tutorial refers to “numbered lists” because Word organizes all ordered (hierarchical) list options in the Numbering Library. However, all the steps shown here also apply to lists organized by letters.
If you would like to learn more about ordered and unordered lists, please see “How to Write Vertical Lists (Ordered and Unordered).”
Table of Contents
- How to Create a Numbered List — Basic Method 1
- How to Create a Numbered List — Basic Method 2
- How to Change Numbered List Levels
- How to Start a List with a Different Number
- How to Change the Font, Size, and Color of List Numbers
Watch all the steps shown here in real time!
Explore more than 200 other writing-related software tutorials on my YouTube channel.
The images below are from Word for Microsoft 365. These steps also apply to Word 2021, Word 2019, Word 2016, and Word 2013.
The basic steps are similar in Word for Mac. However, the more advanced steps, such as starting a list with a different number, are different on Mac. So, we will cover this topic for Word for Mac in a separate tutorial.
How to Create a Numbered List — Basic Method 1
This is the basic method to create a numbered list in Word. This method requires you to type each item as you create the list. If you have already typed your list items, see Method Two below.
- Place your cursor where you want to start your list.
- Select the Home tab in the ribbon.

- Select the menu arrow next to the Numbering button.
![]()
- Choose a number style from the Numbering Library.

The number one will appear in your document.

- Type your first list item after the number, and then press the Enter key on your keyboard. The next number will appear.

Continue typing your list items and pressing the Enter key until your list is complete.
- After typing the final item, press the Enter key twice to remove your cursor from the list.
How to Create a Numbered List — Basic Method 2
This method is for existing text formatted vertically as a list.
- Select the text.

- Select the Home tab in the ribbon (see figure 1).
- Select the menu arrow next to the Numbering button (see figure 2).
- Choose a style from the Numbering Library (see figure 3).
Your selected items should become a numbered list.

How to Change Numbered List Levels
Word lets you create numbered lists with up to nine nested levels. Here are two ways to change the level of list items.
Change List Levels — Method 1
Important note: This method won’t work for the first item in your list.
- Select one or more list items (other than the first item).

- Select the Home tab in the ribbon (see figure 1).
- Select the Increase Indent button in the Paragraph group.

Each time you select the Increase Indent button, the item(s) will move one level and take on the appropriate format for that level (e.g., lowercase letters, roman numerals, etc.).

Pro Tip: To return the selected text to a previous level, select the Decrease Indent button to the left of the Increase Indent button.
Change List Levels — Method 2
- Select one or more list items (see figure 8).
- Select the Home tab in the ribbon (see figure 1).
- Select the menu arrow next to the Numbering button (see figure 2).
- Select Change List Level from the drop-down menu.

- Select a list level from the list-level menu.

Your list item(s) should move to the next level.
How to Start a List with a Different Number
You can start a list with a number other than one or continue the numbering from the previous list.
- Select the first list number or place your cursor within the first list item. If you select the list number, all numbers on that level should also be selected.

- Select the Home tab in the ribbon (see figure 1).
- Select the menu arrow next to the Numbering button (see figure 2).
- Select Set Numbering Value from the drop-down menu.

5.a. Enter the number you want to start with in the Set value to text box in the Set Numbering Value dialog box.

5.b. (Alternative Option) Select Continue from previous list if you want to continue the numbering from a previous list in your document.

- Select the OK button.

Your list should be renumbered according to your selections in the Set Numbering Value dialog box.
How to Change the Font, Size, and Color of List Numbers
By default, the font, size, and color of your list numbers will be the same as your normal text style. However, you can manually change the appearance of list numbers by selecting them separately from the text.
- Select one list number. All numbers on that level should also be selected.

- Select the Home tab in the ribbon (see figure 1).
- Select a new font, size, or color from the Font group.

Your list numbers should change to the new formatting. Repeat these steps for each level in your list, as necessary.

Related Resources
How to Write Run-In Lists
How to Create and Update a List of Tables or Figures in Microsoft Word
How to Create Numbered Lists in PowerPoint (PC & Mac)
Updated February 12, 2023
Word for Microsoft 365 Word 2021 Word 2019 Word 2016 Word 2013 Word 2010 Word 2007 More…Less
You can use the numbered list feature in Word to add numbers to cells in a table.
Note: If a table cell contains multiple lines of text, Word numbers each line in the cell.
-
Select the table cells that you want to number.
To number the beginning of each row, select only the first column in the table by clicking the column’s top border.

-
On the Home tab, in the Paragraph group, click Numbering.
Note: To select a different number format, right-click a number in the list, point to Numbering, click Define New Number Format, and then select the options that you want.

See also
Automatically number rows in Excel
Need more help?
Want more options?
Explore subscription benefits, browse training courses, learn how to secure your device, and more.
Communities help you ask and answer questions, give feedback, and hear from experts with rich knowledge.
Some users have experienced that numbering, headings, or styles in their Microsoft Word documents turn into black boxes when they created the table of contents, headings, or subheadings using the Multilevel List feature. This issue interferes with the numbering style in a Word document by converting some heading numbers into black rectangular boxes. Hence, it causes a lot of trouble for the users. If you are experiencing such an issue in your Word document, this article may help you fix it.

If you see black boxes in Numbering, Line, Heading styles, Paragraph formatting, Page break, erc. in Word documents on your Windows 11/10 PC, use these tips to fix the corrupted styles:
- Reapply the formatting style
- Recreate the Multilevel List
- Change the formatting style to None and then reapply the numbering format
- Run a macro in your Word document
Let’s see all these solutions in detail.
1] Reapply the formatting style
This problem interferes with the numbering style in a Word document. Therefore, you can try reapplying the formatting style and see if it fixes the problem.
The steps to reapply the formatting style are written below:
- Place the blinking cursor just after the black box.
- Press the left arrow key in order to select the black box completely. When you select the black box, it should turn gray.
- Now, press Ctrl + Shift + S keys. This will bring up the style popup window.
- Click Reapply.
Now, check if the issue is fixed.
2] Recreate the Multilevel List
Another solution to fix this problem is recreating the Multilevel List. The steps to do this are listed below:
- Place the blinking cursor just before the first heading.
- Click on the Home tab.
- Now, click on the Multilevel List drop-down under the Paragraph section and select the format you want.
This should fix the issue. If it does not work, repeat the first 2 steps and then click on the Multilevel List drop-down. After that, click Define New Multilevel List and customize your Multilevel List.
3] Change the formatting style to None and then reapply the numbering format
Change the formatting style of the black box to None. This will remove the numbering. After that, you can apply the numbering format again. The following instructions will help you with that:
- Place the blinking cursor just next to the blacked box and hit the left arrow key. This will select that black box.
- Press the Ctrl + Shift + S keys. This will open the Apply Styles popup window.
- Click Modify.
- Now, click on the Format button on the bottom left side and select Numbering. This will open the Numbering and Bullets window.
- Select None under the Numbering tab and click OK.
- Click OK again to close the Modify Style window.
This will remove the numbering format. Now, you can apply the numbering format again. To do so, go to the Home tab, click on the Multilevel List drop-down, and select the format under the Current List or select another format as per your requirement. If it causes disturbance in spacing, you can adjust it by moving the slider on the scale.
Read: Fix WINWORD.EXE Bad Image error.
4] Run a Macro in your Word document
If none of the above solutions work for you, running a Macro in Word may help. A lot of people found this solution helpful. You should also try this. To type a Macro in Word, first, you should enable the Developer tab. The following instructions will guide you on this:
Open Microsoft Word and go to “File > Options.”

Select the Customize Ribbon category from the left pane and then select the Developer checkbox. Now, click OK.

Now, select the Developer tab and click Macros. A Macro popup window will appear. Now, type the name of Macro and then click on the Create button. This will open the Microsoft Visual Editor.

In the Microsoft Visual Editor window, copy and paste the following code as shown in the above screenshot:
For Each templ In ActiveDocument.ListTemplates
For Each lev In templ.ListLevels
lev.Font.Reset
Next lev
Next templ
After typing the Macro, click on the Save button. Now, close the Microsoft Visual Editor window and open the affected document. Select the View tab and click on the Macros drop-down. Now, select the Macro that you have just created and then click on the Run button.
This should fix the problem.
Read: Fix Word experienced an error trying to open the file error.
Why is my numbering blacked out in Word?
This problem occurs when the font characteristics in Microsoft Word are corrupted. To fix this issue, you can reapply the formatting style. But according to some users, the problem reoccurs when they open the Word document again. Running a Macro in Microsoft Word can permanently fix this issue.
How do I get rid of the black box Numbering in Word?
To get rid of the black box Numbering in Word, you can reapply the formatting style or recreate the Multilevel List. If these solutions do not work for you, try running a Macro in Word. This solution has fixed the issue for many users. We have explained the process to run a Macro above in this article.
Hope this helps.
Read next: Microsoft Word keeps crashing on Windows.
Figure 1: To have Word magically number your figures for you
- Type the name of the figure.
- Click in front of the name of the figure.
- In Insert menu on top of screen, select Caption.
- Under Options: Label, select Figure.
- Click OK.
- Add a space and/or a colon if necessary. Be tidy and consistent.
Contents
- 1 How do you automatically number tables and figures in Word?
- 2 How do you add figure numbers?
- 3 How do you automatically update figure numbers in Word?
- 4 How do I manually change figure numbers in Word?
- 5 How do you annotate a figure in Word?
- 6 How do you add numbers to shapes in Word?
- 7 How do I insert a numbered circle in Word?
- 8 How do I update figure numbers in Word 2016?
- 9 What does F9 do in Word?
- 10 How do I change my figure number?
- 11 How do I reset figure numbers in Word?
- 12 How do you reference figures?
- 13 How do you use bookmarks in Word?
- 14 How do you reference a figure in text?
- 15 How do I annotate a PNG?
- 16 How do you annotate an image?
- 17 How do you annotate a painting?
- 18 How do you add a shape to a header in Word?
- 19 How do you draw shapes in Word?
- 20 How do I apply a shape style in Word?
How do you automatically number tables and figures in Word?
On the Home tab, in the Paragraph group, click Numbering. Note: To select a different number format, right-click a number in the list, point to Numbering, click Define New Number Format, and then select the options that you want.
How do you add figure numbers?
14. Type your caption or title after the label and number in the Caption text box. Pro Tip: Most of our primary style guides recommend placing a period after the figure or table number. However, Word doesn’t provide a way to add that period automatically, so remember to add it manually as you type each caption.
How do you automatically update figure numbers in Word?
Instead of searching and replacing all the figure numbers in the text, click “Edit” -> “Select All” (or, Ctrl + A), which select the entire document, then, press “F9”. This updates all the figure number automatically.
How do I manually change figure numbers in Word?
Changing Caption Numbering Styles
- Display the References tab of the ribbon.
- Click the Insert Caption tool, in the Captions group.
- Click on the Numbering button.
- Using the Format drop-down list, choose the format you want used for your caption numbers.
- Click on OK to close the Caption Numbering dialog box.
How do you annotate a figure in Word?
To annotate an image in Word, insert the image in a document, then draw a shape over the image.
- Go to the Insert tab and select Pictures.
- In the Insert Picture dialog box, select the file folder that contains the image.
- Choose the image, then select Insert.
How do you add numbers to shapes in Word?
To add a shape, click Insert, click Shapes, select a shape, and then click and drag to draw the shape. After you add one or more shapes, you can add text, bullets, and numbering to them, and you can change their fill, outline, and other effects on the Format tab.
How do I insert a numbered circle in Word?
You simply use Insert –>Shapes, select the circle shape, type a number inside the circle, and then drop the circle on top off the picture where you want to showcase something.
How do I update figure numbers in Word 2016?
Update caption numbers
- Click anywhere in the document and press CTRL+A to select the entire document.
- Right-click, and then choose Update Field on the shortcut menu. All of the captions in the document should now be updated.
What does F9 do in Word?
F9. F9: Update a field. This is the same as right-clicking a field and choosing the “Update Field” command.
How do I change my figure number?
Place your cursor in front of ANY automated caption number for ANY figure. Go to the References tab and click Insert Caption to open the Caption dialog box. Change the Label to Figure. Click Numbering to open the Caption Numbering dialog box.
How do I reset figure numbers in Word?
1 Answer
- Select the number in the caption you want to start the custom numbering at.
- Right-click and choose “Edit Field…”.
- Click the Options button.
- Choose the Field Specific Switches tab.
- Select the r switch, and click Add To Field.
- Type the number desired to restart the caption numbering after the r .
How do you reference figures?
The citation would normally be given after the title of the figure, table, diagram, etc.
- Example: Figure 1, A four pointed star (Jones, 2015, p. 54).
- Example: (Jones, 2015, p.33)
- Example:
- Example: (United Nations, 1975, cited in Smith, 2016, p.33)
How do you use bookmarks in Word?
Bookmark the location
- Select text, a picture, or a place in your document where you want to insert a bookmark.
- Click Insert > Bookmark.
- Under Bookmark name, type a name and click Add. Note: Bookmark names need to begin with a letter. They can include both numbers and letters, but not spaces.
How do you reference a figure in text?
All figures and tables must be mentioned in the text (a “callout”) by their number. Do not refer to the table/figure using either “the table above” or “the figure below.” Assign table/figure # in the order as it appears, numbered consecutively, in your paper – not the figure # assigned to it in its original resource.
How do I annotate a PNG?
How to annotate PNG documents online
- Click inside the file drop area to upload a PNG file or drag & drop a PNG file.
- File will be automatically rendered for you to view instantly.
- Scroll down to navigate between pages.
- Add annotations to the document.
- Download the annotated version of your PNG file.
How do you annotate an image?
For annotating an object, simply hover over the object in the selected image, click and drag to create a rectangular box of the intended size. After creating the bounding box, a new entry is added under Bounding Box column on the right. Click to select desired label for the object.
How do you annotate a painting?
Using annotation
- analyse the work of an inspirational artist or designer.
- record a technique.
- record ideas.
- explain the thinking behind an idea.
- analyse the success of a technique, idea or composition.
- explain how a particular artist or designer’s style or technique has influenced your work.
To add the shape, do the following:
- Open the footer by double-clicking the footer area. In Word 2003, choose Header and Footer from the View menu.
- While in the header, click the Insert tab.
- Click inside the footer and drag to create the shape.
- With the shape inserted, use the contextual Format tab to format the shape.
How do you draw shapes in Word?
Click in your document where you want to create the drawing. On the Insert tab, in the Illustrations group, click Shapes.
Add a drawing to a document
- Insert a shape.
- Change a shape.
- Add text to a shape.
- Group selected shapes.
- Draw in the document.
- Adjust the size of the shapes.
How do I apply a shape style in Word?
To change the shape style:
- Select the shape you want to change.
- On the Format tab, click the More drop-down arrow in the Shape Styles group.
- A drop-down menu of styles will appear. Select the style you want to use.
- The shape will appear in the selected style.
In the article bellow, we will show you 4 ways to create a multi-column bulleted or numbered list in your Word document.
When we start a bulleted or numbered list, each list entry is considered as a paragraph. And there is no direct way to create 2 paragraphs side by side in Word document. This seems creating a multi-column list is not possible, either.
True. There is no direct way. But, you can always find effectual workarounds in our article.
Method 1: Format Lists as Multi-column Texts
- First and foremost, finish entering list items and select the list.
- Then click “Page Layout” tab.
- Next click “Columns” command in “Page Setup” group.
- On its drop-down menu, choose a column number.

- Now you see all list entries are in the first column.

- Put cursor at the start of a list entry which you want to place in another column. For example, in this case, we position insertion pointer before the texts of the third list entry. Then click “Breaks” under “Page Layout” tab.
- And click “Column” on the drop-down menu of “Breaks”.

- This inserts a column break and distributes list entries to the second column.

- Repeat step 6 and 7 in case you have more than 2 columns and need to distribute list entries evenly. You can get a possible result as follows:


Method 2: Arrange a List in a Multi-column Table
- Firstly, put cursor at place where the multi-column list should go.
- Secondly, click “Insert” tab and click “Table”.
- Thirdly, click “Insert Table”.

- In the box open, enter the number of rows and columns.
- Click “OK”.

- Then select the table and click either “Bullets” or “Numbering” under “Home” tab. Each single cell will contain a bullet or be numbered in sequence.

- You can then enter one entry in a cell.
- Finally, remove table borders by clicking “Design” tab. Click to open the drop-down menu of “Borders” and choose “No Border”.


Method 3: Insert Text Boxes
- To begin with, click “Insert” tab and “Text Box”.

- Next click “Draw Text Box”.
- Then enter list entries into text boxes.
- Insert another text box in the same line with the previous one, following the first 3 steps.

- Lastly, remove the outline of all text boxes by clicking text box. Then click “Format” and “Shape Outline”. Choose “No Outline”.


Method 4: Insert Bullet Symbols
If you don’t need a live bulleted list, you can just use bullet symbols to create a seemingly like one.
- Click “Insert” tab then “Symbol”.
- Next choose “More Symbols”.

- In the “Symbol” dialog box, choose “General Punctuation” in the drop list of “Subset”.
- Then find and click the bullet symbol.
- Lastly, click “Insert” and close the box.
- Or you can also choose to press “Alt+ 0149” to quickly insert a bullet symbol.


Word Errors Exist
If you are an experienced user of Word, you must have encountered with errors some time. Different errors cast different levels of impact on your documents. In some luck day, a simple reopen action will be enough to address an issue. But in the rest of days, you find yourself in desperate need of a tool to recover doc. Under such scenario, you need to take time evaluating various products on the market before testing them on your document.
Author Introduction:
Vera Chen is a data recovery expert in DataNumen, Inc., which is the world leader in data recovery technologies, including excel corruption and pdf repair software products. For more information visit https://www.datanumen.com/
Organize your documents by numbering them
What to Know
- Select Layout > Page Setup > Line Numbers > choose option > select Apply to drop-down > Selected sections.
- Next, select Line Numbers > Add line numbering > OK.
This article explains how to add line numbers to documents in Word for Microsoft 365, Word 2019, 2016, 2013, 2010, and 2007.
How to Add Line Numbers to a Word Document
To include line numbers in a document:
-
Go to Layout > Page Setup > Line Numbers.
If the document is divided into sections and you want to add line numbers to the entire document, press Ctrl+A to select the entire document.
-
Choose one of the following options:
- Continuous: Allows consecutive numbering throughout the document.
- Restart Each Page: Starts each page with the number 1.
- Restart Each Section: Starts with number 1 after each section break.
- Line Numbering Options: Allows more advanced line numbering options, for example, to number at different intervals.
-
To add line numbers to a specific section or to multiple sections, choose Line Numbering Options to open the Page Setup dialog box, then select the Layout tab.
-
Select the Apply to drop-down arrow and choose Selected sections.
-
Select Line Numbers.
-
Select the Add line numbering check box.
-
Select any other options you want, then select OK to close the window.
-
Select OK to save your changes.
All About Line Numbers
Microsoft Word automatically numbers all lines except for a select few. It counts an entire table as one line. It also skips text boxes, headers and footers, and footnotes and endnotes.
Microsoft Word does count figures as one line, as well as a text box that has inline with text wrapping applied. However, the lines of text within the text box are not counted.
You decide how Word handles line numbers. For example, apply line numbers to specific sections, or number lines in increments such as every tenth line.
Then, when it’s time to finalize the document, remove the line numbers and you’re ready to go.
Thanks for letting us know!
Get the Latest Tech News Delivered Every Day
Subscribe
I have already published a range of posts on issues with comment boxes or comment balloons, including ones on comment boxes suddenly going tiny, or comment box text running in the wrong direction, changing the language in your comment balloons. This article covers what to do to add comment balloon numbering back in Word 2013 and 2016. Incidentally, this also signposts you to how to change the style of your comment balloon in general.
Where have the comment balloon numbers gone in Word?
In Word 2013 and 2016, the default setting is for comment balloons not to have numbers. Why? I honestly don’t know. Microsoft does have a habit of “simplifying” its Office interfaces, and the numbers do change with context (if you remove Comment 2, Comment 3 will be labelled Comment 2, etc.) but I have always found it useful to have numbers in my comment balloons.
Here’s what the default looks like:

and this is what I’m aiming for:

How do I change the comment balloon style and numbering?
We need to change the style of the comment balloons in order to add a number.
Click inside a comment balloon and press Ctrl+Shift+S (all at the same time, in that order) to display the Apply Styles pane:

This should be context-specific, but just check the style name is “Comment Text”.
Click the Modify button to access the Modify Style pane:

Look at the bottom of the dialogue box and click the Format button, which will give you a dropdown menu:

Click Numbering, which will allow you to select a numbering scheme:

Click on the numbering scheme you want to use so that it’s highlighted with a line, and then click OK.
If you want to use a numbering scheme that’s not on this screen, click on Define New Number Format instead:

Once you’ve clicked this, you will see some new options:

Click on OK here, which will take you back to the previous screen, OR click OK on the number format screen, then choose if you want Word to update this document (Automatically update) and to apply this default to all new documents from now on (New documents based on this template):

Click OK and your comment boxes will have numbers!
This article has shown you how to add numbers to your comment balloons / boxes / text in MS Word 2013 and 2016 for PC. You can use it to modify this setting in earlier versions of Word, but they will default to having numbers.
If you have found this article helpful, please add a comment and/or share it using the buttons below. Thank you!
Other related posts on this blog
What to do if your comment boxes go tiny in Word
What to do if your comment boxes start running from right to left
Changing the language in your comment balloons
Customising your comment boxes – everything you need to know
Customising Track Changes