
docxtemplater

docxtemplater is a library to generate docx/pptx documents from a docx/pptx template. It can replace {placeholders} with data and also supports loops and conditions. The templates can be edited by non-programmers, for example your clients.
docxtemplater is very robust because of the many fixed issues over the years, and the high quality of tests and code.
Features
Demo Site
- Replace a {placeholder} by a value
- Use loops: {#users} {name} {/users}
- Use loops in tables to generate columns
- Use conditions (if users.length>3) with angular Parsing
- Insert custom XML {@rawXml} (for formatted text for example)
Quickstart
- Get started with docxtemplater on nodejs
- Get started with docxtemplater in the browser (react, angular, vue, nextjs)
Documentation
The full documentation of the latest version can be found here.
See CHANGELOG.md for information about how to migrate from older versions.
Modules
Functionality can be added with the following paid modules :
- Image module to add a given image with the syntax:
{%image}; - Html Module to insert formatted text in a docx document with the syntax
{~html}; - XLSX Module to be able to do templating on Excel files (xlsx extension), also with loops and conditions;
- Chart Module to replace a chart by using data from the JSON object that you give with the syntax
{$chart}; - Html-Pptx Module to insert formatted text in a pptx document with the syntax
{~html}; - Error Location Module to show the errors in the template using Word comments
- Slides Module to create multiple slides dynamically with the syntax
{:users}; - Subtemplate Module to include an external docx file inside a given docx file with the syntax
{:include doc}; - Subsection Module to include subsections (headers/footers) from an other document with the syntax
{:subsection doc}; - Subtemplate-pptx Module to include an external pptx file inside a given pptx file with the syntax
{:include doc}; - Word-Run Module to include raw runs (<w:r>) inside the document with the syntax
{r@wrun}. This makes it possible to include styled text without having to remove the enclosing paragraph like in the {@rawXml} tag; - QrCode Module to replace an image, keeping any existing properties;
- Table Module to create tables from two dimensional data using the syntax
{:table data}; - Meta Module to make a document readonly, add a text watermark or update the margins;
- Styling Module restyle a paragraph, a cell or a table depending on some data using the syntax
{:stylepar style}; - Footnotes Module to be able to add footnotes to a document using the syntax
{:footnotes foot} - Paragraph Placeholder Module to simplify conditions that should show or hide a given paragraph using the syntax
{?tag}
About docxtemplater
Docxtemplater is my main job, and has been maintained for over 8 years. Expect to get great support if you buy any modules, and also good support on the open-source version.
In this guide we’ll look at how to create a docx template and fill out that document using JavaScript. We’ll do this by using the docxtemplater package. This works in both NodeJS and React.
- Installing Requirements
- The Code
- Filling out the Template with JavaScript
- Direct Values
- Styling
- Lists
- Table Rows
- Conditional Rendering
- Helpful Tips
- Too Much Spacing
- Error Finding 1
- Error Finding 2
- Tag Names
Installing Requirements
Install the docxtemplater & pizzip packages using the following command:
1 |
npm i docxtemplater pizzip |
The Code
The main code for all the below examples will stay the same. The only thing that will be changing is the dataToAdd Object (line 14). All other lines will stay the same.
1 2 3 4 5 6 7 8 9 10 11 12 13 14 15 16 17 18 19 20 21 22 23 24 25 26 27 28 29 30 31 32 33 34 35 36 |
const fs = require('fs'); const path = require('path'); const PizZip = require('pizzip'); const Docxtemplater = require('docxtemplater'); // Load the templated docx file const templateFile = fs.readFileSync(path.resolve(__dirname, 'template.docx'), 'binary'); const zip = new PizZip(templateFile); try { // Attempt to read all the templated tags let outputDocument = new Docxtemplater(zip); const dataToAdd = {}; // Set the data we wish to add to the document outputDocument.setData(dataToAdd); try { // Attempt to render the document (Add data to the template) outputDocument.render() // Create a buffer to store the output data let outputDocumentBuffer = outputDocument.getZip().generate({ type: 'nodebuffer' }); // Save the buffer to a file fs.writeFileSync(path.resolve(__dirname, 'OUTPUT.docx'), outputDocumentBuffer); } catch (error) { console.error(`ERROR Filling out Template:`); console.error(error) } } catch(error) { console.error(`ERROR Loading Template:`); console.error(error); } |
Filling out the Template with JavaScript
All of the data that will be added to the template will be contained within a single Object called dataToAdd.
Each key in the dataToAdd Object refers to a tag that was placed in the docx file. Let’s see how to do this:
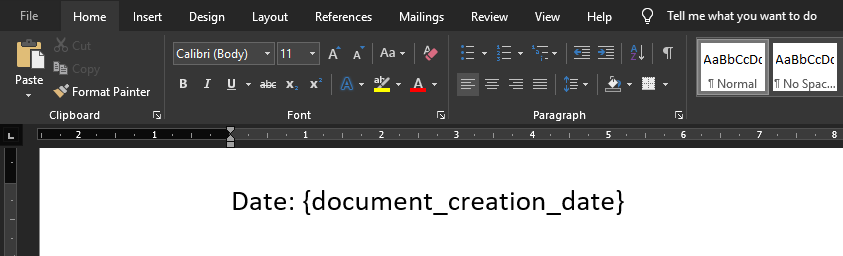
Direct Values
Direct values simply mean static values that we wish to insert into the document. Some examples would be the date, author, title. Simple text values you wish to add that may change with each document.
Docx File
The Code
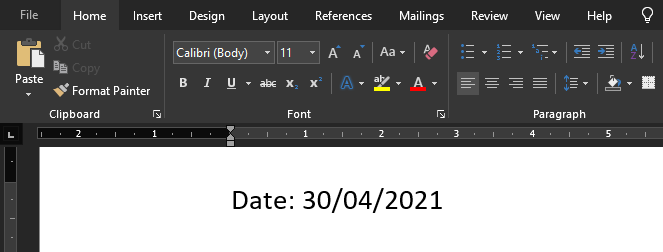
1 2 3 |
const dataToAdd = { document_creation_date: (new Date()).toLocaleDateString() }; |
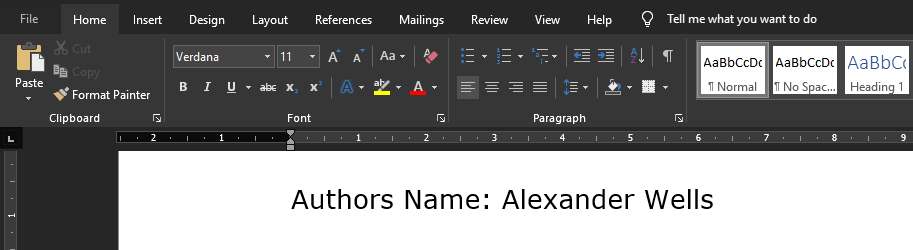
Results
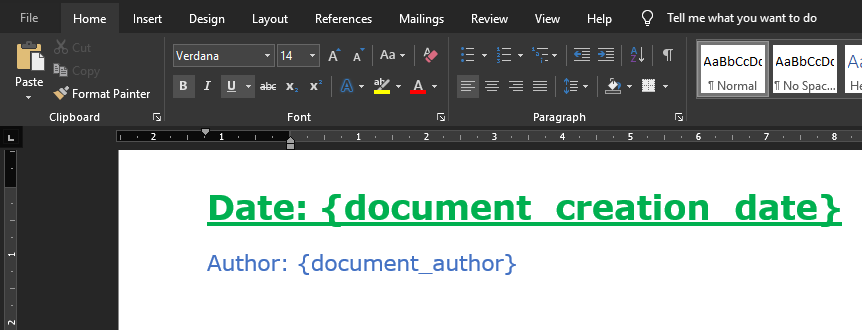
Styling
The style that is applied to the tag in the document will be inherited by the value that is inserted:
Docx File
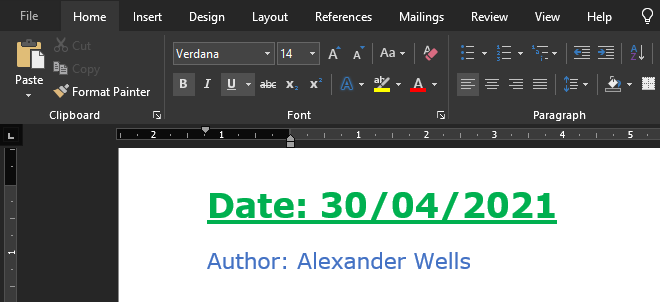
The Code
1 2 3 4 |
const dataToAdd = { document_creation_date: (new Date()).toLocaleDateString(), document_author: 'Alexander Wells', }; |
Results
Lists
A very useful feature is to be able to template repetitive sections. Perhaps the document is suppose to contain the profiles of some employees. Let’s see how we can use lists to do this:
Docx File
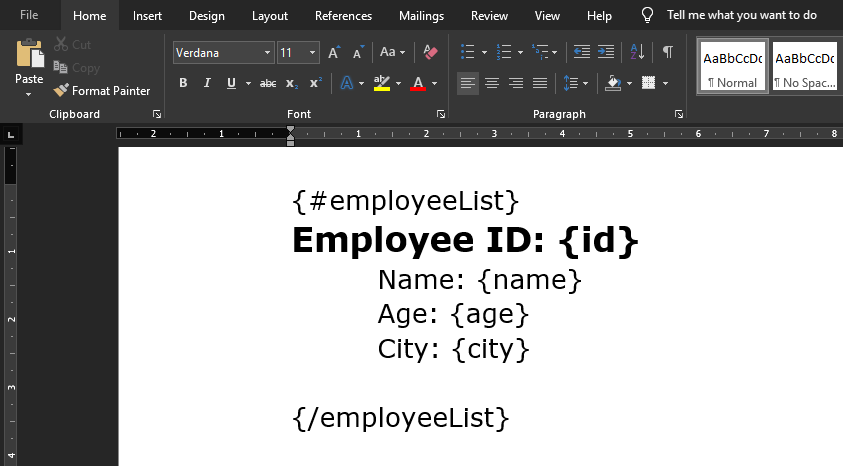
- Lists are prefixed with the
#character to start the list scope, and the/character to end the list scope.
The Code
1 2 3 4 5 6 |
const dataToAdd = { employeeList: [ { id: 28521, name: 'Frank', age: 34, city: 'Melbourne' }, { id: 84973, name: 'Chloe', age: 28, city: 'Perth' }, ] }; |
- When using lists, the value should be a list of Objects.
- The keys of each Object will refer to the tags used inside the List in the docx file (id, name, age, city).
Results
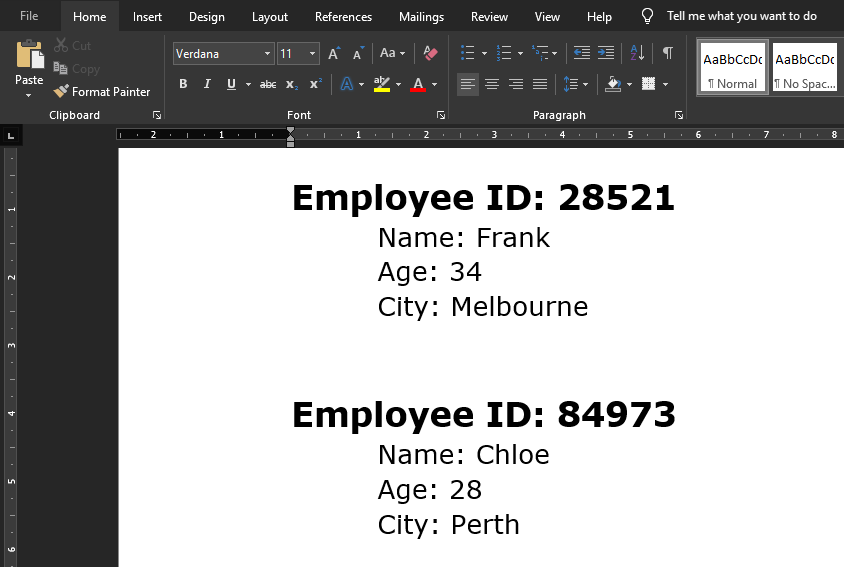
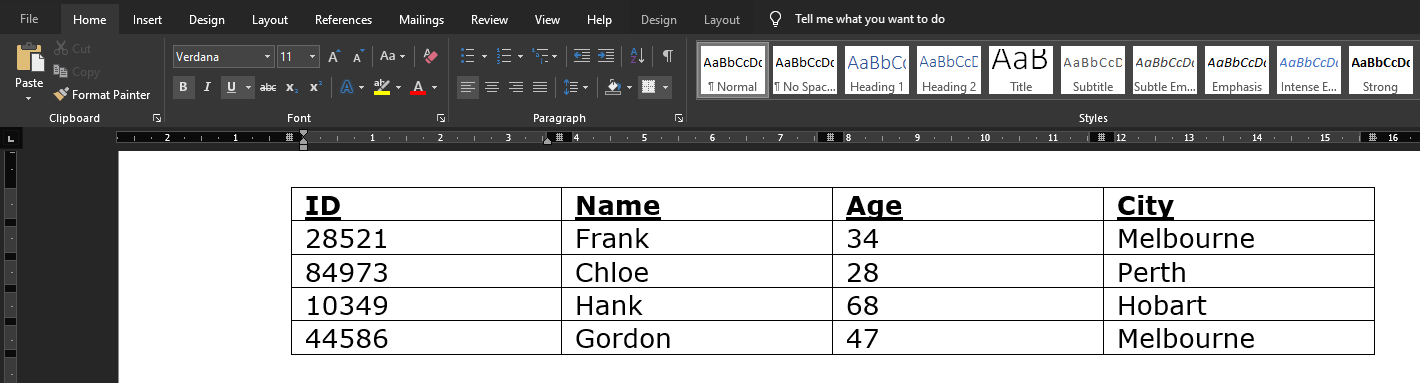
Table Rows
We can also use lists to create additional rows of a table. Let’s use the employee example again, but this time let’s use a table to represent the data:
Docx File
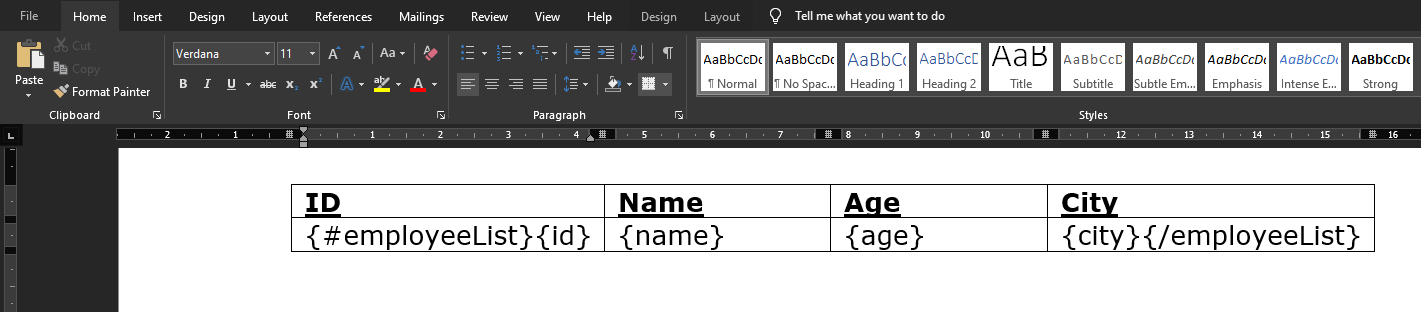
The Code
1 2 3 4 5 6 7 8 |
const dataToAdd = { employeeList: [ { id: 28521, name: 'Frank', age: 34, city: 'Melbourne' }, { id: 84973, name: 'Chloe', age: 28, city: 'Perth' }, { id: 10349, name: 'Hank', age: 68, city: 'Hobart' }, { id: 44586, name: 'Gordon', age: 47, city: 'Melbourne' }, ] }; |
Results
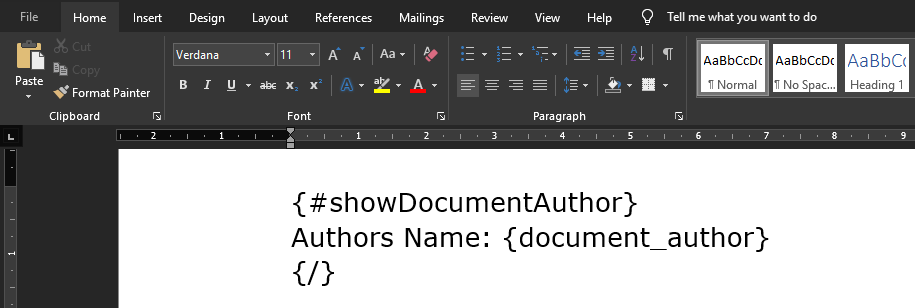
Conditional Rendering
Docx File
Another useful feature would be if we could only render certain things if a condition is met. Let’s see how we can do that:
The Code
1 2 3 4 |
const dataToAdd = { showDocumentAuthor: true, document_author: 'Alexander Wells', }; |
Results
Changing showDocumentAuthor to false means the data inside the conditional statement won’t be rendered.
Helpful Tips
Too Much Spacing
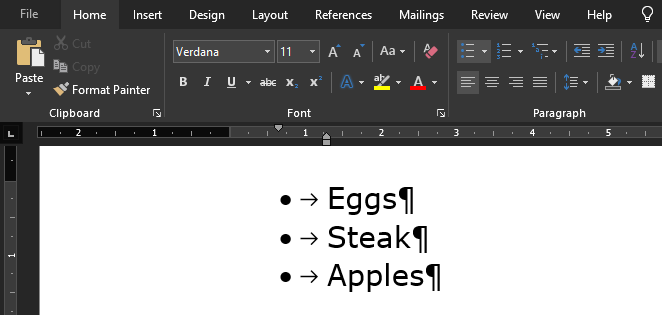
You may notice if you use loops that extra spacing gets added where you don’t want. Let’s look at an example where this is very clear:

1 2 3 4 5 6 7 |
const dataToAdd = { groceryList: [ { item: 'Eggs' }, { item: 'Steak' }, { item: 'Apples' } ], }; |
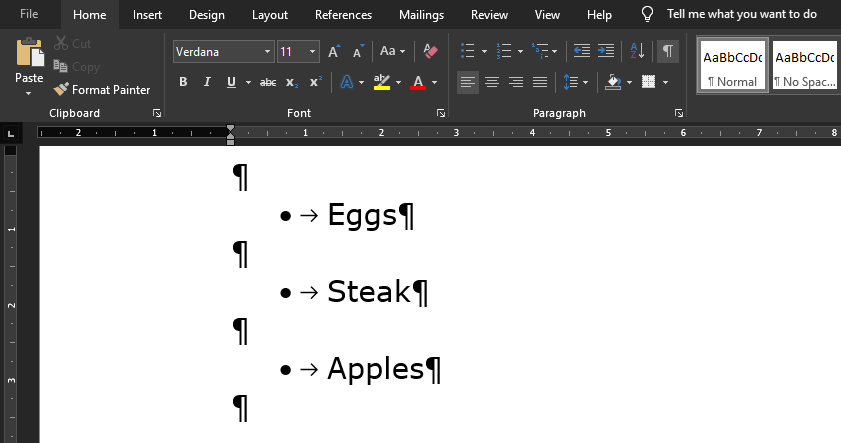
- With visible formatting enabled we can see the issue.
- An extra line has been inserted between each list element.
We can fix this by enabling by enabling paragraphLoop option when creating our output document:
1 |
let outputDocument = new Docxtemplater(zip, { paragraphLoop: true }); |
Error Finding 1
- One downside of this library is that error locations is actually a paid feature (yes I’m serious), look here.
- This is an inconvenience and nothing more.
- I STRONGLY suggest that you do templating in small batches. Add a few tags, test, add a few more, then test again.
- Please do not spend hours (or even an hour) templating before testing. It will save you a massive headache when the program just says
error, and you have to hunt through your document to find the issue.
Error Finding 2
- Ensure that your tags in the docx file do not contain spaces at the start or end.
- If you have a list tag called
{#employeeList}, ensure there is no whitespace like this{#employeeList }, as this can cause the program to fail. - Microsoft Word can automatically add spaces so be aware of that.
Tag Names
- USE GOOD TAG NAMES!
- Just like when programming you try and use good variable names, same goes here.
- A large document may have dozens or hundreds of tags. Using
datefor a tag name is BAD! - Using
document_creation_dateis much better as it’s clear exactly what date it’s referring to.
docxtemplater


docxtemplater is a library to generate docx/pptx documents from a docx/pptx template. It can replace {placeholders} with data and also supports loops and conditions. The templates can be edited by non-programmers, for example your clients.
docxtemplater is very robust because of the many fixed issues over the years, and the high quality of tests and code.
Features
Demo Site
- Replace a {placeholder} by a value
- Use loops: {#users} {name} {/users}
- Use loops in tables to generate columns
- Use conditions (if users.length>3) with angular Parsing
- Insert custom XML {@rawXml} (for formatted text for example)
Quickstart
- Get started with docxtemplater on nodejs
- Get started with docxtemplater in the browser (react, angular, vue, nextjs)
Documentation
The full documentation of the latest version can be found here.
See CHANGELOG.md for information about how to migrate from older versions.
Modules
Functionality can be added with the following paid modules :
- Image module to add a given image with the syntax:
{%image}; - Html Module to insert formatted text in a docx document with the syntax
{~html}; - XLSX Module to be able to do templating on Excel files (xlsx extension), also with loops and conditions;
- Chart Module to replace a chart by using data from the JSON object that you give with the syntax
{$chart}; - Html-Pptx Module to insert formatted text in a pptx document with the syntax
{~html}; - Error Location Module to show the errors in the template using Word comments
- Slides Module to create multiple slides dynamically with the syntax
{:users}; - Subtemplate Module to include an external docx file inside a given docx file with the syntax
{:include doc}; - Subsection Module to include subsections (headers/footers) from an other document with the syntax
{:subsection doc}; - Subtemplate-pptx Module to include an external pptx file inside a given pptx file with the syntax
{:include doc}; - Word-Run Module to include raw runs (<w:r>) inside the document with the syntax
{r@wrun}. This makes it possible to include styled text without having to remove the enclosing paragraph like in the {@rawXml} tag; - QrCode Module to replace an image, keeping any existing properties;
- Table Module to create tables from two dimensional data using the syntax
{:table data}; - Meta Module to make a document readonly, add a text watermark or update the margins;
- Styling Module restyle a paragraph, a cell or a table depending on some data using the syntax
{:stylepar style}; - Footnotes Module to be able to add footnotes to a document using the syntax
{:footnotes foot} - Paragraph Placeholder Module to simplify conditions that should show or hide a given paragraph using the syntax
{?tag}
About docxtemplater
Docxtemplater is my main job, and has been maintained for over 8 years. Expect to get great support if you buy any modules, and also good support on the open-source version.
If you’ve ever needed to generate a lot of documents, you probably know it’s not a quick task to manually create documents, pick the correct templates, format correctly, copy data into them and save in the correct locations. If you only need to do a few, doing it manually is fine but when you’re getting into the tens or hundreds of documents, some automation is needed.
Today, I’ll be showing you how to create documents in batches with data coming from a JSON array. Make sure you check my next post to take this further and create documents from data in an Oracle database.
Prerequisites
You only need a couple of things to get started — Node.js and a Word document to use as a template. I’d also recommend downloading Visual Studio Code as a code editor.
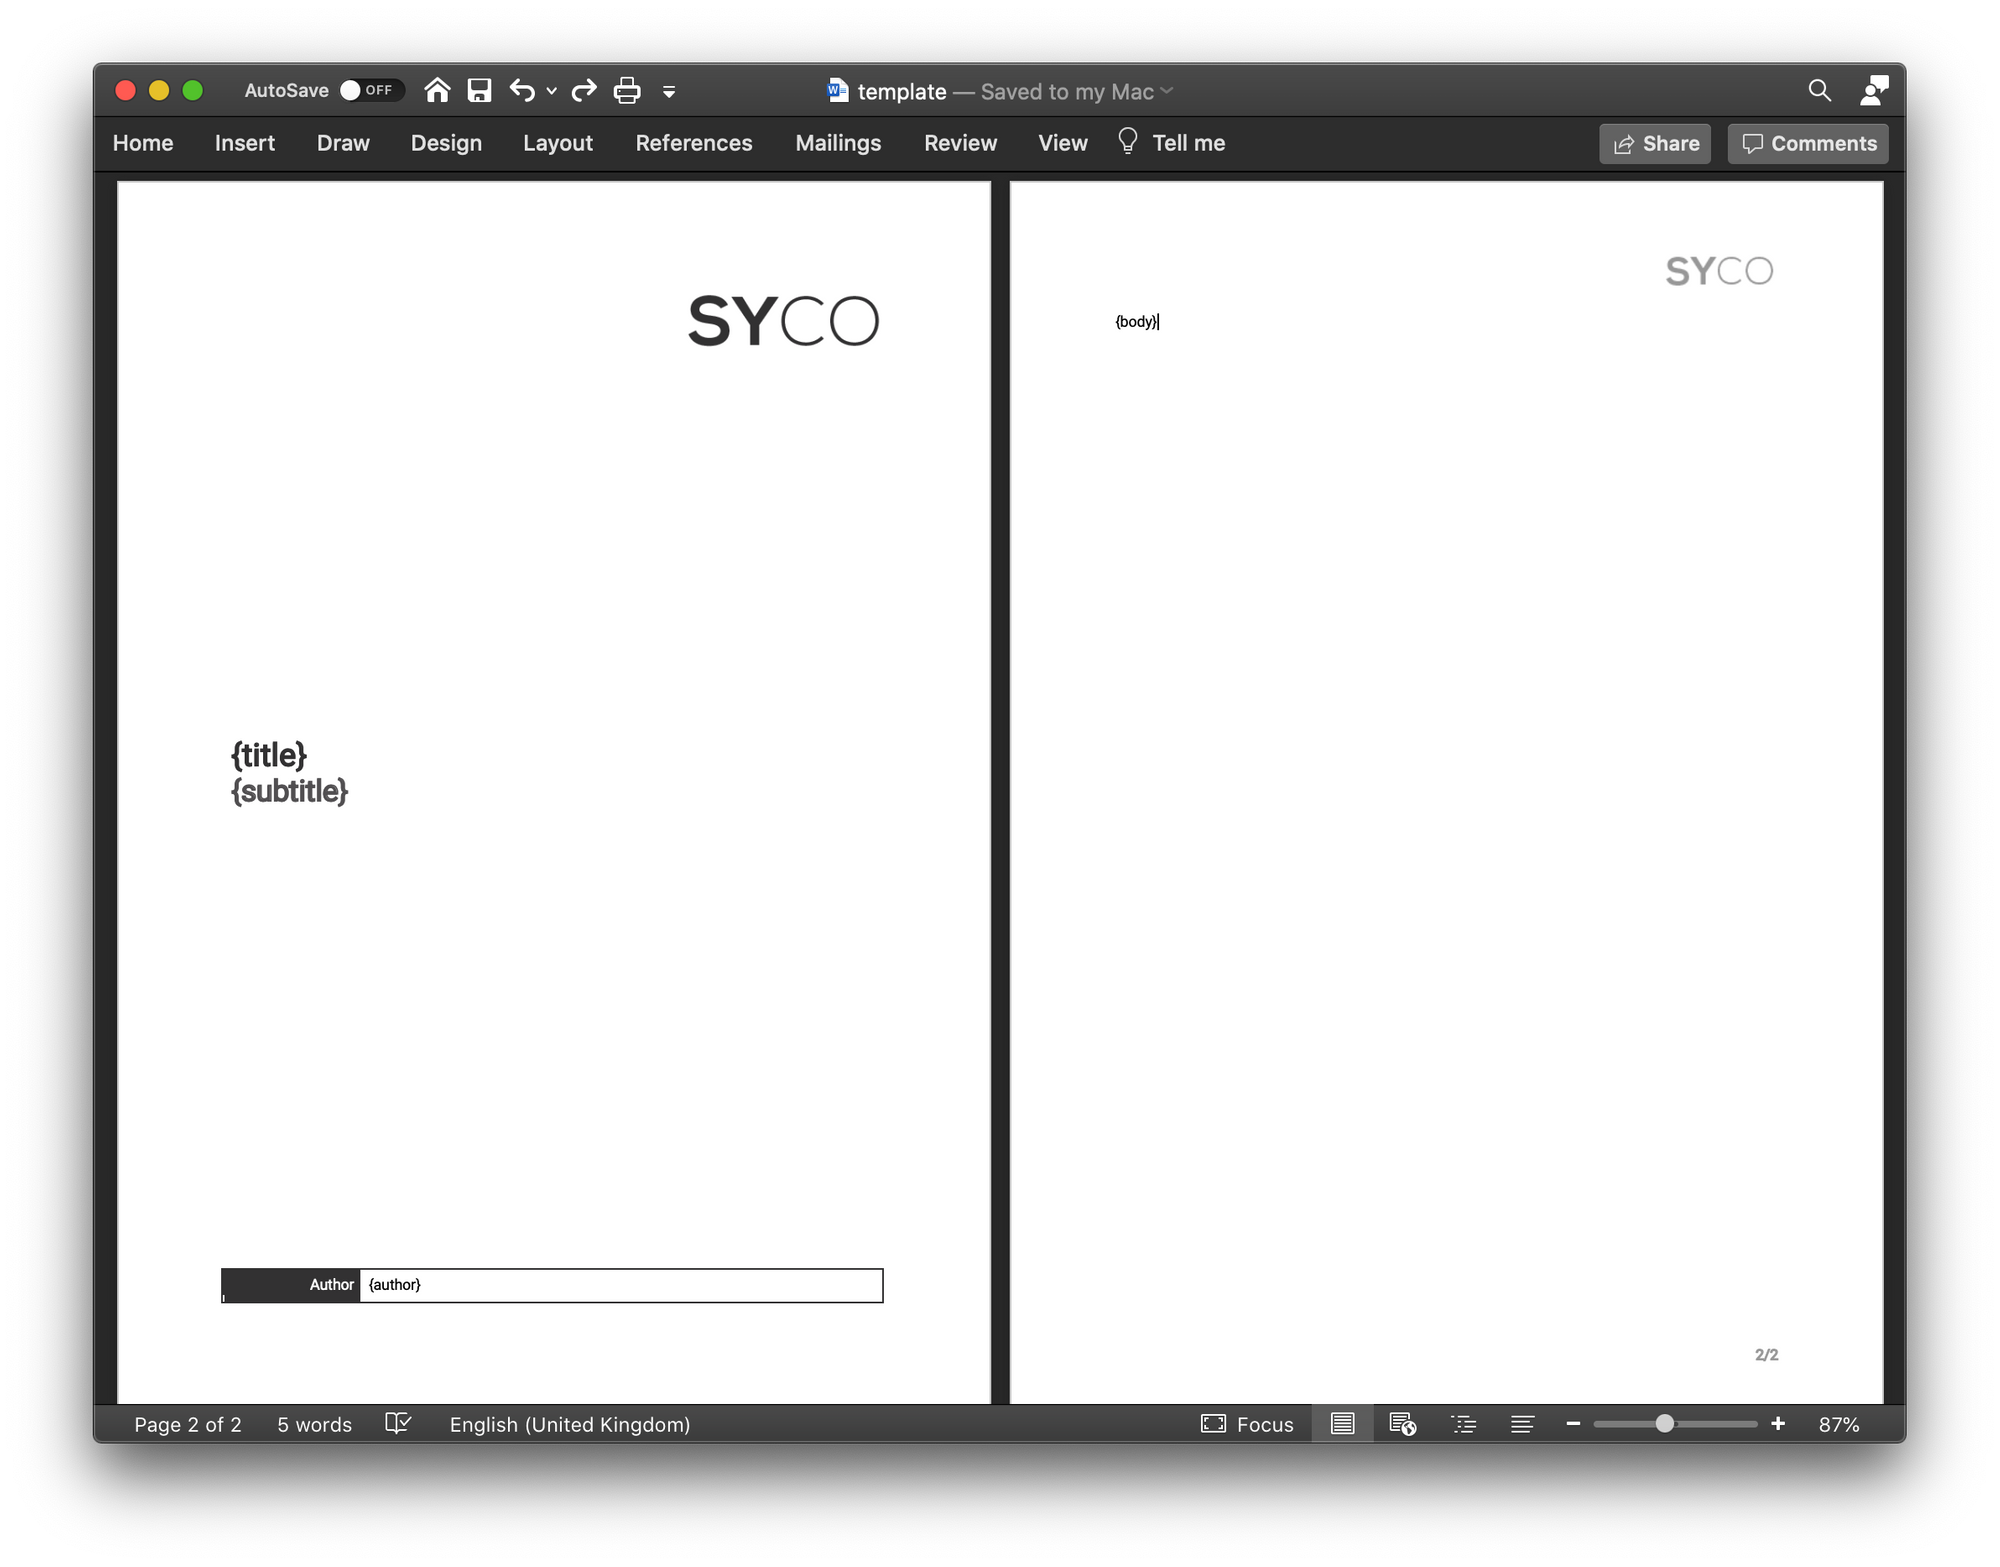
Word Document Template
Start by creating a new directory named WordDocumentGeneration and create a Word document named template.docx. This document will be the basis of all documents created automatically so make sure all the formatting is to your liking.
As part of the automation process, we’re going to replace tags in the document with data. These tags should be surrounded by curly brackets (or braces) and should identify what data to insert. For example, if I want to automatically set the title of a document, I’d create a tag called {title}, which will be replaced with the actual title later on, automatically. These tags can be formatted however you like and can be place anywhere in the document.
For this tutorial, I’ve modified my standard consultancy template to include {title}, {subtitle}, {author} and {body} tags.
Node.js
Node.js is an asynchronous event-driven JavaScript runtime and allows developers to quickly bootstrap ideas with code libraries (or «packages») from npm (Node Package Manager). To generate Word documents automatically, we’re going to be using the docxtemplater package.
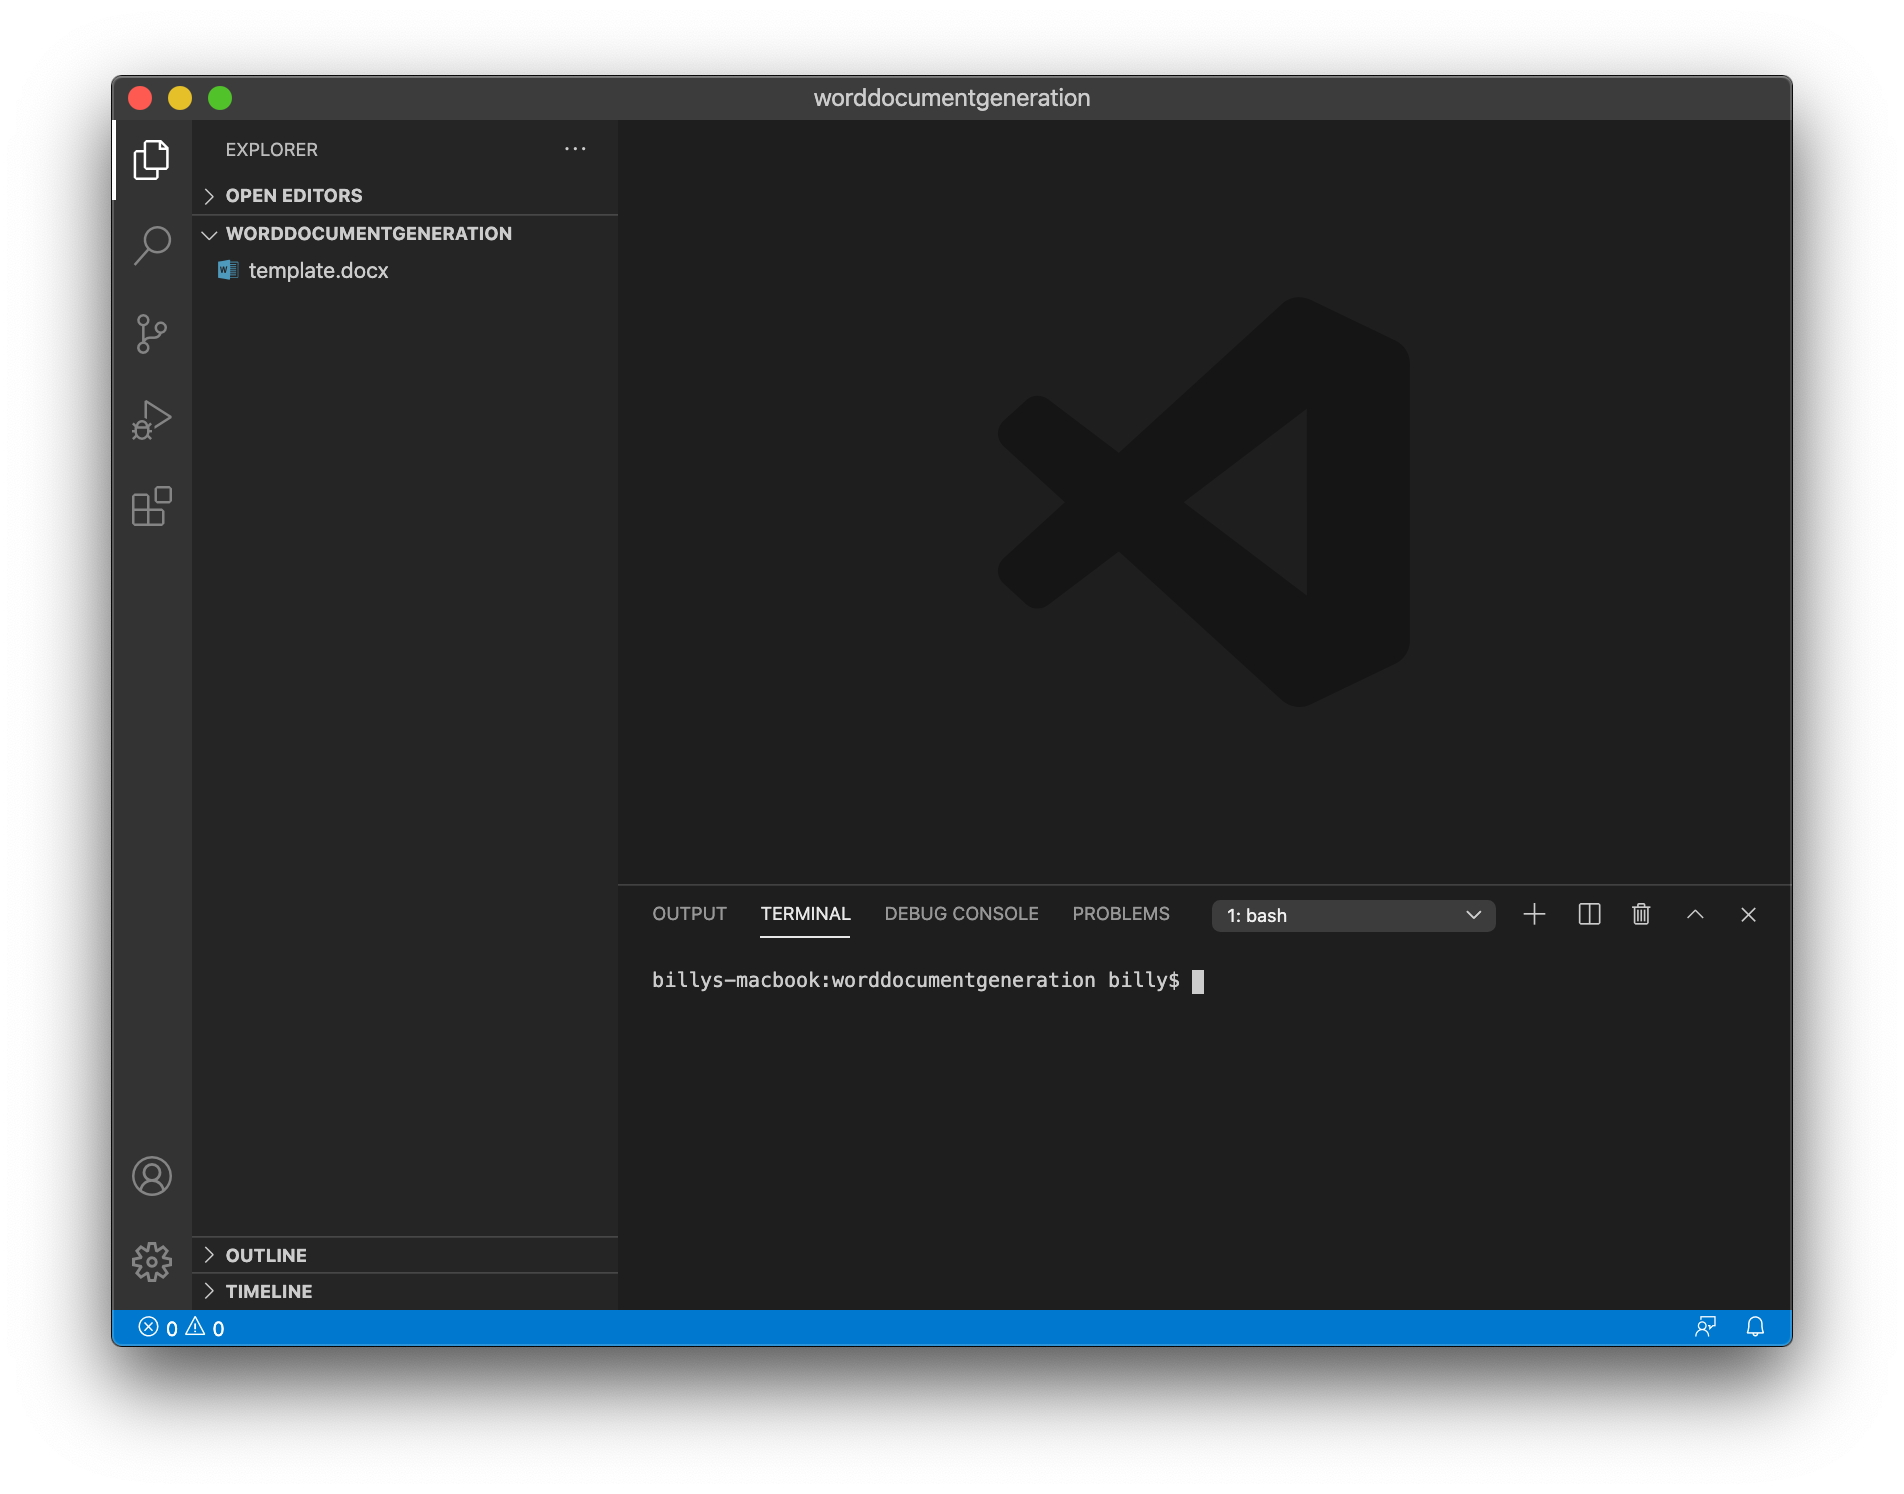
Getting Started
Open the directory you created earlier in Visual Studio Code and open the terminal. If you don’t have Visual Studio Code installed, the following steps can be run from a regular terminal or command line.
Start by executing the command npm init to initialise a new npm package. You’ll be asked to enter some details about your package but it’s ok just to leave them with their default values. Your terminal output should look something like below:
billys-macbook:WordDocumentGeneration billy$ npm init
This utility will walk you through creating a package.json file.
It only covers the most common items, and tries to guess sensible defaults.

See `npm help json` for definitive documentation on these fields
and exactly what they do.

Use `npm install <pkg>` afterwards to install a package and
save it as a dependency in the package.json file.

Press ^C at any time to quit.
package name: (worddocumentgeneration)
version: (1.0.0)
description:
entry point: (index.js)
test command:
git repository:
keywords:
author:
license: (ISC)
About to write to /Volumes/GoogleDrive/My Drive/WordDocumentGeneration/package.json:

{
    "name": "worddocumentgeneration",
    "version": "1.0.0",
    "description": "",
    "main": "index.js",
    "scripts": {
    "test": "echo "Error: no test specified" && exit 1"
    },
    "author": "",
    "license": "ISC"
}


Is this OK? (yes)
billys-macbook:WordDocumentGeneration billy$
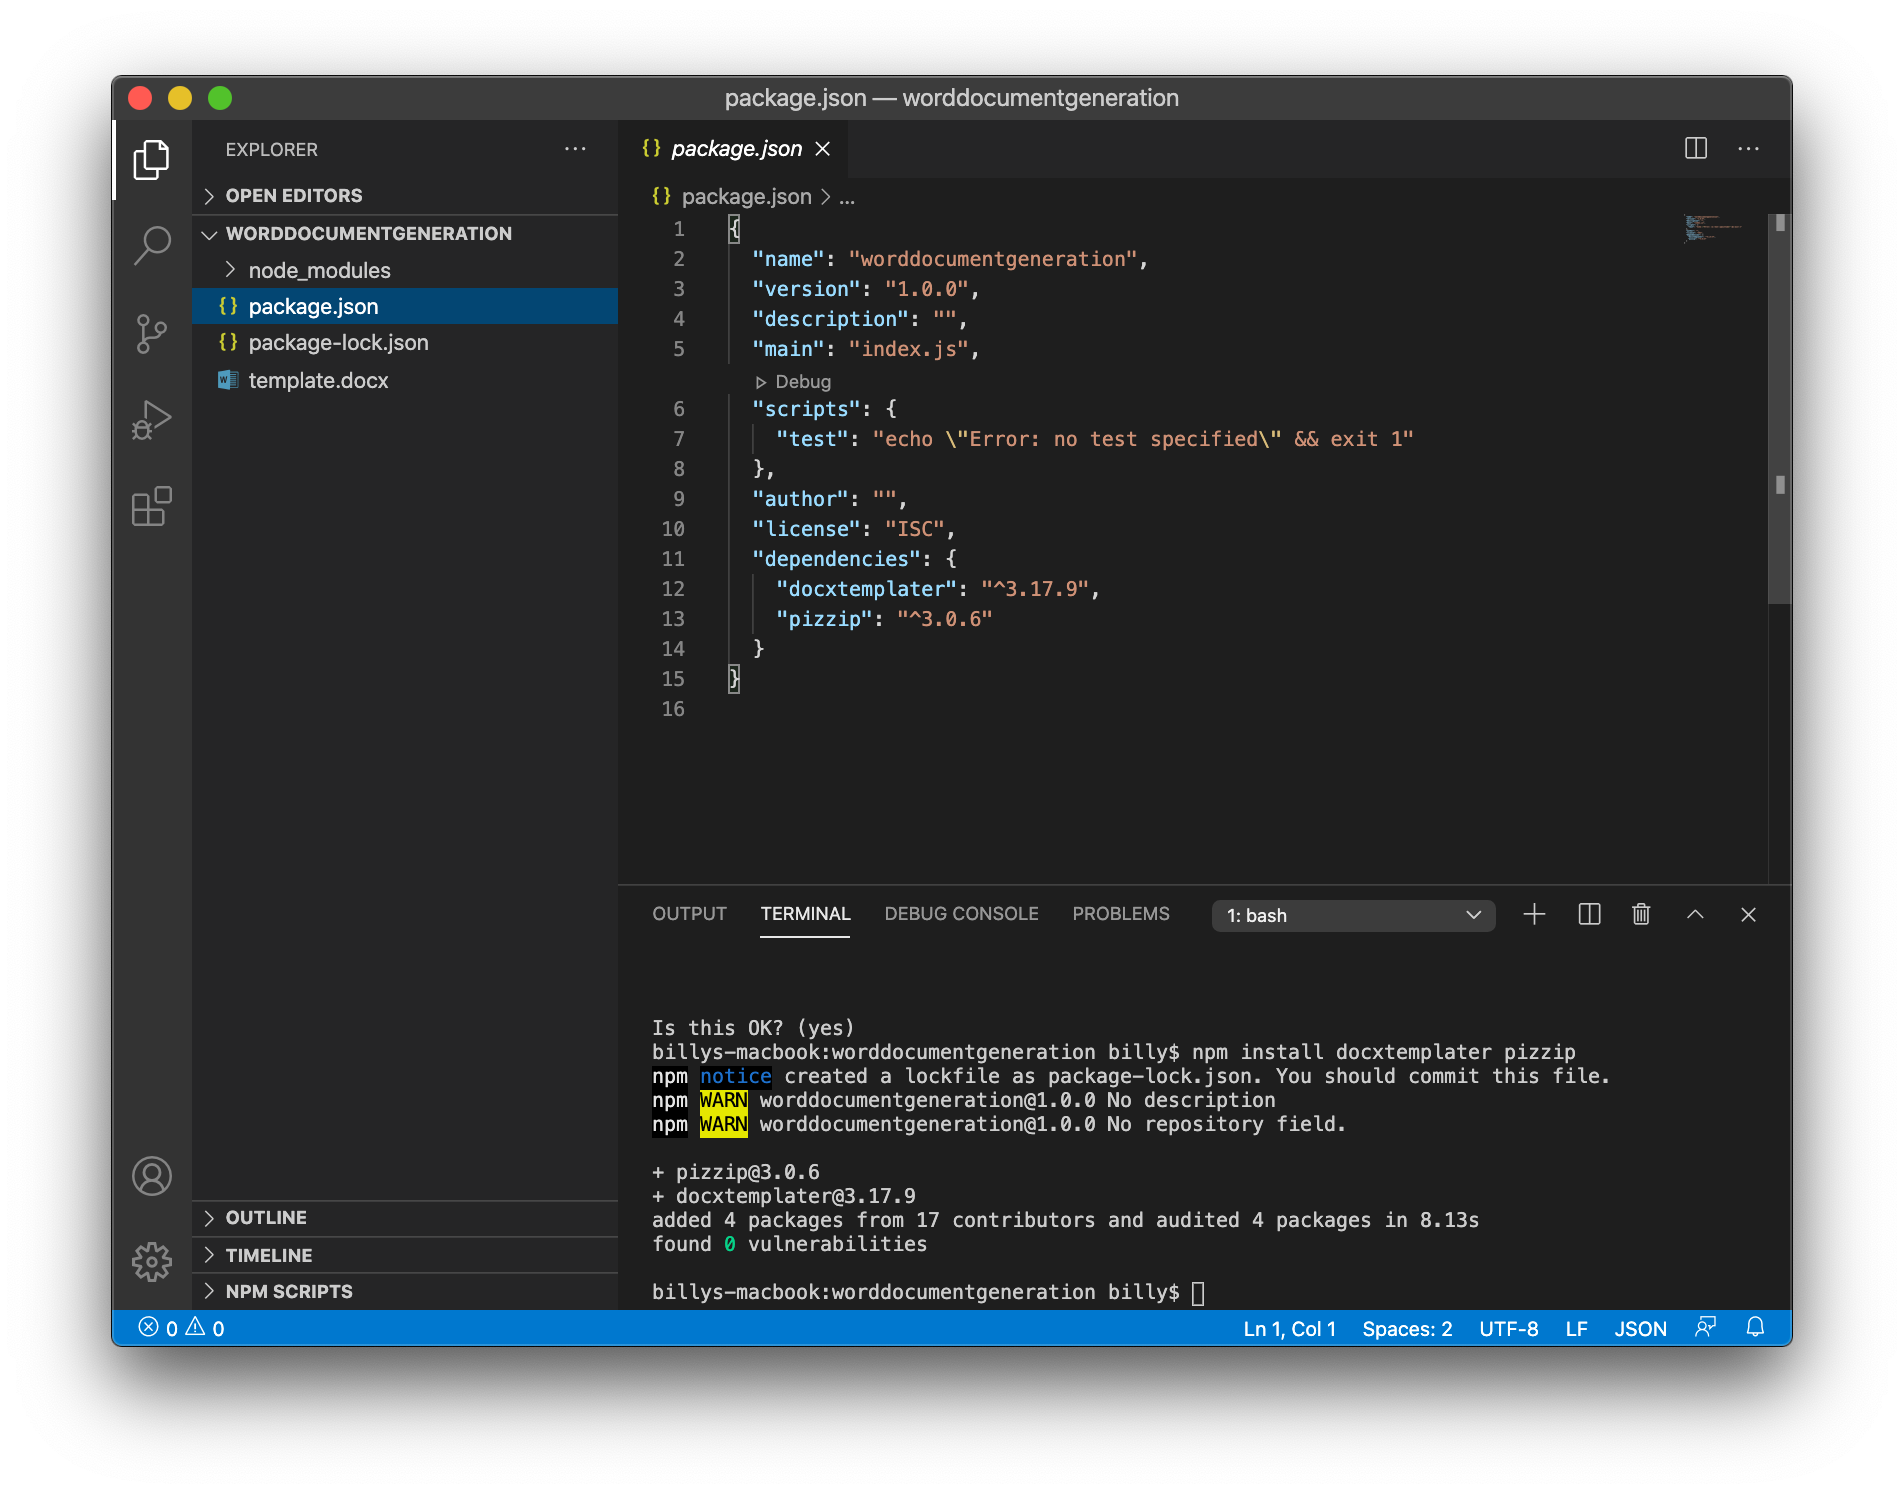
You’ll notice there is now a file named package.json in your directory. This file holds basic information about your new package, including any dependencies it requires. We need 2 dependencies, docxtemplater for variable substitution logic and pizzip to «unzip» and «rezip» the DOCX file.
Fun fact: a DOCX file is essentially a ZIP archive of XML files that make up a document. Try unzipping one in an application like 7-Zip to see.
To install the required dependencies, execute the following command in your terminal:
npm install docxtemplater pizzip
After the dependencies are downloaded, you should now see a new directory named node_modules, which contains the dependencies, and a new file named package-lock.json, which contains information about exactly what dependencies were installed and how. The package.json file will also have been updated with our dependencies.
Create a new file named index.js and we’re ready to start writing code. At the very top, we’ll import the dependencies we need. This includes the dependencies we installed and a couple of built-in dependencies to assist with file reading and writing.
const PizZip = require('pizzip');
const Docxtemplater = require('docxtemplater');
const fs = require('fs');
const path = require('path');
Once the dependencies are included, we’ll build a JSON array with the data we want to be included in our Word document. The keys for each object must match with the strings we used in our template. For example, {title} in our template will be replaced with title from the JSON object in the array.
const allData = [
    {
        title: 'Automating Word Document Generation',
        subtitle: 'A tutorial of how to generate Word documents using Node.js',
        author: 'Billy Syrett',
        body: 'Lorem ipsum dolor sit amet, consectetur adipiscing elit. Sed posuere diam sagittis, pellentesque tortor eget, ullamcorper arcu. Pellentesque non porttitor diam, vel aliquet lacus.'
    },
    {
        title: 'Debugging Data in IFS',
        subtitle: 'How to quickly and easily output debugging data in IFS.',
        author: 'Billy Syrett',
        body: 'Lorem ipsum dolor sit amet, consectetur adipiscing elit. Sed posuere diam sagittis, pellentesque tortor eget, ullamcorper arcu. Pellentesque non porttitor diam, vel aliquet lacus.'
    }
]
The docxtemplater documentation helpfully includes a couple of error handing functions, so we’ll include those. These will catch any compilation errors (e.g. misplaced tags) when using the docxtemplater package.
function replaceErrors(key, value) {
    if (value instanceof Error) {
        return Object.getOwnPropertyNames(value).reduce(function (error, key) {
            error[key] = value[key];
            return error;
        }, {});
    }
    return value;
}

function errorHandler(error) {
    console.log(JSON.stringify({ error: error }, replaceErrxors));
    if (error.properties && error.properties.errors instanceof Array) {
        const errorMessages = error.properties.errors.map(function (error) {
            return error.properties.explanation;
        }).join("n");
        console.log('errorMessages', errorMessages);
    }
    throw error;
}
Start by looping through all elements of our JSON array with a simple for loop, reading the template and initialising the docxtemplater function, catching any errors as we do so.
for (let i = 0; i < allData.length; i++) {
    const data = allData[i];
    const content = fs.readFileSync(path.resolve(__dirname, 'template.docx'), 'binary');
    const zip = new PizZip(content);
    var doc;
    try {
        doc = new Docxtemplater(zip);
    } catch (error) {
        errorHandler(error);
    }
While in our loop, pass in the data and render the document into a buffer.
    doc.setData(data);
    try {
        doc.render()
    }
    catch (error) {
        errorHandler(error);
    }
    const buf = doc.getZip().generate({ type: 'nodebuffer' });
Finally, write the contents of the buffer to a file on disk and output a confirmation to the terminal. I’m writing my file to an output directory (which must already exist), using the title key from the JSON object as the filename. You could easily add another key to your JSON object to specify a different filename and pass it in if needed.
   fs.writeFileSync(path.resolve(__dirname, 'output', `${data.title}.docx`), buf);
   console.log(`"${data.title}.docx" written to disk`);
}
To run the code, execute node . in the terminal and the documents will be generated.

Be sure to check out my next post where I take this a step further and generate documents from data in an Oracle database!
Also, docxtemplater has a load of more features than the one mentioned above, including loops, HTML replacement and images. Visit their site here.
Full Source Code
const PizZip = require('pizzip');
const Docxtemplater = require('docxtemplater');
const fs = require('fs');
const path = require('path');

const allData = [
    {
        title: 'Automating Word Document Generation',
        subtitle: 'A tutorial of how to generate Word documents using Node.js',
        author: 'Billy Syrett',
        body: 'Lorem ipsum dolor sit amet, consectetur adipiscing elit. Sed posuere diam sagittis, pellentesque tortor eget, ullamcorper arcu. Pellentesque non porttitor diam, vel aliquet lacus.'
    },
    {
        title: 'Debugging Data in IFS',
        subtitle: 'How to quickly and easily output debugging data in IFS.',
        author: 'Billy Syrett',
        body: 'Lorem ipsum dolor sit amet, consectetur adipiscing elit. Sed posuere diam sagittis, pellentesque tortor eget, ullamcorper arcu. Pellentesque non porttitor diam, vel aliquet lacus.'
    }
]

function replaceErrors(key, value) {
    if (value instanceof Error) {
        return Object.getOwnPropertyNames(value).reduce(function (error, key) {
            error[key] = value[key];
            return error;
        }, {});
    }
    return value;
}

function errorHandler(error) {
    console.log(JSON.stringify({ error: error }, replaceErrxors));
    if (error.properties && error.properties.errors instanceof Array) {
        const errorMessages = error.properties.errors.map(function (error) {
            return error.properties.explanation;
        }).join("n");
        console.log('errorMessages', errorMessages);
    }
    throw error;
}


for (let i = 0; i < allData.length; i++) {
    const data = allData[i];
    const content = fs.readFileSync(path.resolve(__dirname, 'template.docx'), 'binary');
    const zip = new PizZip(content);
    var doc;
    try {
        doc = new Docxtemplater(zip);
    } catch (error) {
        errorHandler(error);
    }

    doc.setData(data);
    try {
        doc.render()
    }
    catch (error) {
        errorHandler(error);
    }
    const buf = doc.getZip().generate({ type: 'nodebuffer' });

    fs.writeFileSync(path.resolve(__dirname, 'output', `${data.title}.docx`), buf);
    console.log(`"${data.title}.docx" written to disk`);
}
open-xml-templating / docxtemplater
Goto Github
PK
View Code? Open in Web Editor
NEW
78.0
321.0
27.31 MB
Generate docx, pptx, and xlsx from templates (Word, Powerpoint and Excel documents), from Node.js, the Browser and the command line / Demo: https://www.docxtemplater.com/demo. #docx #office #generator #templating #report #json #generate #generation #template #create #pptx #docx #xlsx #react #vuejs #angularjs #browser #typescript #image #html #table #chart
Home Page: https://www.docxtemplater.com
License: Other
JavaScript 97.56%
Shell 1.60%
TypeScript 0.68%
javascript
generate
template
powerpoint
microsoft
create
docx-generator
excel
office
pptx
word
xlsx
express
expressjs
vue
vuejs
angular
docxtemplater’s Introduction
docxtemplater is a library to generate docx/pptx documents from a docx/pptx template. It can replace {placeholders} with data and also supports loops and conditions. The templates can be edited by non-programmers, for example your clients.
docxtemplater is very robust because of the many fixed issues over the years, and the high quality of tests and code.
Features
Demo Site
- Replace a {placeholder} by a value
- Use loops: {#users} {name} {/users}
- Use loops in tables to generate columns
- Use conditions (if users.length>3) with angular Parsing
- Insert custom XML {@rawXml} (for formatted text for example)
Quickstart
- Get started with docxtemplater on nodejs
- Get started with docxtemplater in the browser (react, angular, vue, nextjs)
Documentation
The full documentation of the latest version can be found here.
See CHANGELOG.md for information about how to migrate from older versions.
Modules
Functionality can be added with the following paid modules :
- Image module to add a given image with the syntax:
{%image}; - Html Module to insert formatted text in a docx document with the syntax
{~html}; - XLSX Module to be able to do templating on Excel files (xlsx extension), also with loops and conditions;
- Chart Module to replace a chart by using data from the JSON object that you give with the syntax
{$chart}; - Html-Pptx Module to insert formatted text in a pptx document with the syntax
{~html}; - Error Location Module to show the errors in the template using Word comments
- Slides Module to create multiple slides dynamically with the syntax
{:users}; - Subtemplate Module to include an external docx file inside a given docx file with the syntax
{:include doc}; - Subsection Module to include subsections (headers/footers) from an other document with the syntax
{:subsection doc}; - Subtemplate-pptx Module to include an external pptx file inside a given pptx file with the syntax
{:include doc}; - Word-Run Module to include raw runs (<w:r>) inside the document with the syntax
{[email protected]}. This makes it possible to include styled text without having to remove the enclosing paragraph like in the {@rawXml} tag; - QrCode Module to replace an image, keeping any existing properties;
- Table Module to create tables from two dimensional data using the syntax
{:table data}; - Meta Module to make a document readonly, add a text watermark or update the margins;
- Styling Module restyle a paragraph, a cell or a table depending on some data using the syntax
{:stylepar style}; - Footnotes Module to be able to add footnotes to a document using the syntax
{:footnotes foot} - Paragraph Placeholder Module to simplify conditions that should show or hide a given paragraph using the syntax
{?tag}
About docxtemplater
Docxtemplater is my main job, and has been maintained for over 8 years. Expect to get great support if you buy any modules, and also good support on the open-source version.
docxtemplater’s People
docxtemplater’s Issues
Angular parsing and sections
It seems that sections don’t use the angular parsing.
Test:
var tags = {
  foo: {
    bar: true
  }
}
Document:
{#foo.bar} Hello {/foo.bar}
Output is nothing.
Template inside template
Hi.
Do you plan any mechanism to insert one template to another?
That mechanism might be implemented by the «insert raw xml» api and another function for example:
We would write something like:
var doc = new DocxGen().loadFromFile("xmlInsertionExample.docx");
var doc2 = new DocxGen().loadFromFile("littleTextBlock.docx");
doc.setTags({
    tag1: "Hello World",
    rawXmlTag: doc2.getDocumentBody()
});
...
What do you think about this feature?
Qr code replacing is not working
Qr code replacing is not working when I give image path in the following format : «/home/arun/img.png».
type options for jszip.generate
Hello,
i’am new to nodejs and i’am using docxtemplater on nodejs server.
I whant to pass to client docx file.
here’s my working sample —
var doc = doc.output({type:{base64:false}});
res.setHeader('Content-Type', 'application/vnd.openxmlformats');
res.setHeader("Content-Disposition", "attachment; filename=" + "avanc.docx");
res.status(200).end(doc, 'binary');
I’ve figured that if I put these changes into docxgen.js line 932
result = this.zip.generate(options.type)
, this work quite well, user gets the docx.
Maybe you can put these changes in your code, so we can pass options directly to jszip.generate.
Table Loop not working
I can’t get this to work correctly, even the demo doesn’t work properly (it just puts all of the content in one row).
HyperLink inside table using looping
I’m using docxtemplater in nodejs server to generate reports. I can generate the table using looping. But I want HyperLink elemants in the table, the hyparlink styling works fine. But all the HyperLinks are pointing to the same address, Is it possible to assign different address to each Hypelink using looping.
conditional statements
I looked briefly through the angular parsing and it looks like are ways to do conditional testing in templates, but don’t see any demos. Is there an easy way to implement something like:
{#if foo == bar} I show up only if foo equals bar {/if}
The above being more like Handlebars.
Something like {{ foo == bar | "I am showing up here" }} may also work for my needs, but ultimately I need to show / hide certain sections of a document template based on the input.
node.js api
Could you provide direct node.js api for this library ? It would be very useful !
Doesn’t work with JSZip 2.x
I suspect that the needed changes are minimal. But simply changing instances of files["test.txt"].data to files["test.txt"].asText() is not enough.
qr code replacing. image size
Replaced Images have the same size and aspect ratio equal to that of the qr code. Is it possible to keep the original image size.?
Line breaks result in corrupted docx file
I’m using docxtemplater in the latest version of Chrome and I’m passing in some strings that were originally HTML. When there are line breaks, the output docx file is corrupted, though works fine without line breaks. When I say corrupted, I mean this happens:

I can work around this by splitting on line breaks in Javascript and passing them to something like this in the template:
Is this is the recommended way, or is there something I can pass in that will convert line breaks into paragraphs in the docx template?
Doesn’t work with utf-8 symbols in template
If docx template file contains non-latin characters (for example cyrillic characters), they are converted into wrong symbols (something as «Ð�Ñ�овеÑ�ка»). This happens because of incorrect encoding/decoding in base64. How is it possible to fix it?
Text in variables inserted correctly.
Doesn’t work with documents containing SmartArt/Charts and qrcode test enabled
SmartArt objects, Charts are saved as separate xml files in docx. When docxtemplater tries to parse through these objects, it doesn’t find the actual object, but a reference to this objects in document.xml, causing it to throw exception «tagRiD undefined!».
Example? Use any docx file with a chart in it, even without any tag to be replaced, and «config.qrcode»:true in json.
Need the charts to be dynamic, so earlier workaround, #39, is of no use.
Support for IF ELSE
Is it possible to add IF ELSE in templating? For example I want to create a table where row formatting will depend on row data.
Permission denied in log
Hi,
I have this message in my log, but reports are correctly generated!
mkstemp(«/var/www/.execoooQbuRZL») failed: Permission denied
I have no idea how explain that.
Thanks,
html canvas and checkbox
Hi,
I have some questions, does docxtemplater support checkbox?
an other question it can be possible to pass canvas image (toDataURL) to a word document?
if so, how can i do this ?
Thanks
Doesn’t work with image in header/footer when QR code test enabled
When I try to put an image in the Header/Footer of my template, with QR code test enabled, it throws «Error : Rid is not an image».
Links in docx trigerred «no data found in json file»
Here is the error, I identified that this problem is triggered in documents with links included.
docxtemplater tmp2qudpp.json
<?xml version="1.0" encoding="UTF-8"?>
<Relationships xmlns="http://schemas.openxmlformats.org/package/2006/relationships"><Relationship Id="rId1" Type="http://schemas.openxmlformats.org/officeDocument/2006/relationships/styles" Target="styles.xml"/><Relationship Id="rId2" Type="http://schemas.openxmlformats.org/officeDocument/2006/relationships/image" Target="media/image15.png"/><Relationship Id="rId3" Type="http://schemas.openxmlformats.org/officeDocument/2006/relationships/image" Target="media/image16.png"/><Relationship Id="rId4" Type="http://schemas.openxmlformats.org/officeDocument/2006/relationships/image" Target="media/image17.png"/><Relationship Id="rId5" Type="http://schemas.openxmlformats.org/officeDocument/2006/relationships/image" Target="media/image18.png"/><Relationship Id="rId6" Type="http://schemas.openxmlformats.org/officeDocument/2006/relationships/image" Target="media/image19.png"/><Relationship Id="rId7" Type="http://schemas.openxmlformats.org/officeDocument/2006/relationships/image" Target="media/image20.png"/><Relationship Id="rId8" Type="http://schemas.openxmlformats.org/officeDocument/2006/relationships/image" Target="media/image21.png"/><Relationship Id="rId9" Type="http://schemas.openxmlformats.org/officeDocument/2006/relationships/image" Target="media/image22.png"/><Relationship Id="rId10" Type="http://schemas.openxmlformats.org/officeDocument/2006/relationships/image" Target="media/image23.png"/><Relationship Id="rId11" Type="http://schemas.openxmlformats.org/officeDocument/2006/relationships/image" Target="media/image24.png"/><Relationship Id="rId12" Type="http://schemas.openxmlformats.org/officeDocument/2006/relationships/image" Target="media/image25.png"/><Relationship Id="rId13" Type="http://schemas.openxmlformats.org/officeDocument/2006/relationships/header" Target="header1.xml"/><Relationship Id="rId14" Type="http://schemas.openxmlformats.org/officeDocument/2006/relationships/footer" Target="footer1.xml"/><Relationship Id="rId15" Type="http://schemas.openxmlformats.org/officeDocument/2006/relationships/image" Target="media/image26.png"/><Relationship Id="rId16" Type="http://schemas.openxmlformats.org/officeDocument/2006/relationships/image" Target="media/image27.png"/><Relationship Id="rId17" Type="http://schemas.openxmlformats.org/officeDocument/2006/relationships/image" Target="media/image28.png"/><Relationship Id="rId18" Type="http://schemas.openxmlformats.org/officeDocument/2006/relationships/hyperlink" Target="https://fr.wikipedia.org/wiki/" TargetMode="External"/><Relationship Id="rId19" Type="http://schemas.openxmlformats.org/officeDocument/2006/relationships/hyperlink" Target="mailto:[email protected]" TargetMode="External"/><Relationship Id="rId20" Type="http://schemas.openxmlformats.org/officeDocument/2006/relationships/header" Target="header2.xml"/><Relationship Id="rId21" Type="http://schemas.openxmlformats.org/officeDocument/2006/relationships/footer" Target="footer2.xml"/><Relationship Id="rId22" Type="http://schemas.openxmlformats.org/officeDocument/2006/relationships/numbering" Target="numbering.xml"/><RelationshipId="rId23" Type="http://schemas.openxmlformats.org/officeDocument/2006/relationships/fontTable" Target="fontTable.xml"/><Relationship Id="rId24" Type="http://schemas.openxmlformats.org/officeDocument/2006/relationships/settings" Target="settings.xml"/>
</Relationships>
could not decode

docxtemplaterclilibmain.js:61
    if (docX[docxFileName]==undefined) throw 'no data found in json file'
                                       ^
no data found in json file
{else} tag for loops
I saw #6, but I was hoping to inquire about the difficulty to add an {else} tag much like the Handlebars equivalent.
I have several variables that are laid out like is_foo_bar that are determined by a user form. While this is great for having conditional areas of content in a document, it becomes messy to try to check for the inverse of the variable. Especially if the variable is falsey to begin with.
Right now, for every variable I create a second variable that is the inverse of the first one, and prefix it with «not_».
For example (this is how I am doing things currently):
{#is_foo_bar}
  ... user picked foo is bar.
{/is_foo_bar}
{#not_is_foo_bar}
  ... user picked foo is not bar.
{/not_is_foo_bar}
What would be awesome:
{#is_foo_bar}
   ... user picked foo is bar.
{else}
  ... user picked foo is not bar.
{/is_foo_bar}
This would also come in handy if you want to display alternate content for when an array that is being looped is empty.
I would love to attempt to add this feature, but was hoping someone might be able to point me in the right direction to implement.
Changing the button value
I’m trying to print an invoice and a credit note using docxtemplater. Both buttons should appear in the same page, where one button says «invoice» and the other «credit». I tried modifying the js file, but the value of the button will always be either «invoice» or «credit». Can’t display both at the same time.Both buttons print the correct documents. It’s just the value of the buttons that can’t be changed. Can you please help me with this.
Thanks
doesn’t install
Hi! I have a problem again.
Module doesn’t install.
Error depends on jasmine.
If I try to install as my user
npm ERR! error rolling back Error: EACCES, unlink '/usr/bin/jasmine-node'
If I try to install as root
npm ERR! Error: Attempt to unlock jasmine-node, which hasn't been locked
Also. A co-worker of mine has tried install node.js and docxtemplater at the clean system. And docxtemplater didn’t install, but other modules (for example express) has been installed successfully.
Any suggestions?
Cyrillic characters coding problem
I’ve tried to use library to generate reports.
But I need to make reports in Russion for our clients.
So if I tried tags like these:
{
    'fields.director': "Пупкина В.И.",
}
It looks within document like this:
It’s coding problem.
Default binary doesn’t output any docx files
Hello again!
Don’t want to be too intrusive, but somehow I was unable to create any output. Although my OS is irrelevant, I’ve got this bug on MacBook Air with MacOS X 10.9.2. I tried installing from npm and manually from your sources.
I’ve found that the problem is with DocxGen.prototype.output: file is not created due to condition if (options.download), which is obviously false when calling output like this.output(true, outputFile) (as in main.js).
This happens because output is function(options), and options gets equal to true. Of course, after that your checks like this actually do nothing, because options is true:
if (options.download == null) {
        options.download = true;
}
Sadly, it seems like some kind of code inconsistence.
By the way, this bug is present in .coffee files as well.
table styling
I really like your tool.
How does one set conditional formatting for table cells?
Alternatively, is there a workaround to embed html-snippets to the result document?
- sr
Pushing HTML into template tag
Is it possible to push html formatted text into templates?
Examples path is hard coded
Why does the docxgen.js hard code to the examples folder:
DocUtils.config = {
«baseNodePath»: ‘../../examples/’,
«baseClientPath»: ‘../examples/’
};
node.js , get stream from docx , no file created
I don’t want to create a file in server . can I redirect docx stream to standard resp ?
@edi9999 thanks a lot .
&, « and other symbols
Hello again!
I’ve tried to use string like «s» – &@$ in my docx file, and I was unable to make it work correctly.
Specifically, if I pass «s» – &@$ in windows-1251, docx is outputted correctly except that dash is rendered as kind of garbage:
 .
.
If I use utf8, I get

The only difference is win1251/utf8 of string "text": "«s» – &@$" in Json.
Evidently, it is somehow related with #28.
Sadly, I don’t know what to do with this and consider it really, really critical bug. I tried to escape contents of json values with _.escape(), but no luck.
nested JSON objects
Great app! I have a need to be able to nested-object properties in my template. For example, I have a tag object that may look like this:
{
    "name": "Tom",
    "address" :
         {"state": "TX",
          "city": "Austin"}
 }
In my Word template I’d like to be able to use the following angular-like syntax:
I tried it with the latest version from npm and it didn’t appear to work — is this a feature that may be added in the future?
Callback for output method
Could you please add callback for output method because fs.writeFile is async.
output = function(download, name, callback) {
                        var result;
                        if (download == null) {
                            download = true;
                        }
                        if (name == null) {
                            name = "output.docx";
                        }

                        this.calcZip();
                        result = this.zip.generate();
                        if (download) {
                            if (env === 'node') {
                                fs.writeFile(process.cwd() + '/' + name, result, 'base64', function(err) {
                                    if (err) {
                                        throw err;
                                    }
                                    if (callback) {
                                        callback();
                                    }
                                    return console.log('file Saved');
                                });
                            } else {
                                document.location.href = "data:application/vnd.openxmlformats-officedocument.wordprocessingml.document;base64," + result;
                            }
                        }
                        return result;
                    };
Data filters
Hello again!
Just discovered that many developers with Django/AngularJS background find it useful to use data filters in their templates.
Here is angular example and an example from Django.
I think that would be pretty nice feature as it allows to specify some basic presentation logic right in the template and to take it away from business-logic and data representation.
For example, there may be few user-specified report templates in some system, and in one of them you want to have «March 21, 2014» in header and «21.03.2014, 13:50» in report’s entries. On the other hand, in another report template user may want to display dates and times in different representations.
It would not only be a disaster to send different strings by distinguishing templates in business logic, but it would just be impossible because you don’t know requirements for each new template.
Make the loadFromFile static
Make the loadFromFile static:
eg : DocXGen.loadFromFile("test.docx",options)
instead of new DocXGen().loadFromFile("test.docx",options)
If qrCode is true, normal pictures are broken
Array.prototype.max Bug
 Array.prototype.max = function() {
    return Math.max.apply(null, this);
  };

  Array.prototype.min = function() {
    return Math.min.apply(null, this);
  };
global change , this will made my iterator crash
Data filtering and transformation
Hi!
Have you considered Angular filters?
Must be awesome feature: the same data in different representation is very common case in templating, especially with dates.
I see that it can be done on my own, but that’s kind of very important feature used by too many developers — would be convenient to have angular filters by default, out of the box.
If matters, I use docxtemplater on server-side with Node, not on client. By the way, interesting for me, how typical is client-side usage of library?
Use Replace Variables and Raw Xml Insertion
Hi @edi9999 ,
I used code
docx.setTags(tags);
docx.applyTags({table:table,mytable:table1});
then tags show undefined . but following
docx.setTags(tags);
docx.applyTags();
docx.applyTags({table:table,mytable:table1});
instead , insert raw xml won’t work .
What should I do ? thanks a lot
Support for raw XML insertion
I use your library for newsfeed reports generation, and I think it would be great to allow users to substitute «{hisContents} tag with raw XML like this:
<w:r>
    <w:rPr>
        <w:highlight w:val="red"/>
    </w:rPr>
    <w:t>Some highlighted text</w:t>
</w:r>
It is especially useful when {content} is itself large (for example, news entry), because it makes possible for user to control underlying styles, colors and etc in some kind of large text entry. In fact, it is one of very few options for supporting such control over big runtime-generated text pieces.
If I try to do this now, my XML is surrounded by <w:r><w:t>myRawXmlHere/w:t/w:r, and MS Word obviously thinks that file is corrupt.
For distinguishing «raw» xml data I see 2 solutions: you may automatically detect XML by using something like XPath //w:r/w:t/w:r/w:t and act accordingly, or you may use some kind of special tag syntax like {@myXmlData}, which will prevent library from surrounding contents with <w:r><w:t></w:t></w:r>. I prefer latter option, because it has explicit behavior.
Although there is one problem with node replacing: it is possible that single text run contains not only you tag, but some extra data:
<w:r>
    <w:t>Your complex text i</w:t>
</w:r>
<w:r>
    <w:t>s {rawXmlText}.</w:t>
</w:r>
If we are to replace node, we will lose ‘s’ for ‘is’ and ‘.’ after our tag.
So, we have to split runs with tags like that: [left part, static] [middle part, dynamic] [right part, static], where left or right parts may be empty. After that we need to create separate run for left part (if it is non-empty), middle, and for right part. Also, we have to apply run-level formatting of the initial run to them. After that we can just replace initial run with the middle one’s XML. It will lose initial formatting, of course, but I am unsure if it is bad thing for control-seeking user. Maybe it should be an option, I don’t know. If it have to be there — we can just copy non-overlapping attributes from initial run to user-supplied one.
And I don’t know, but maybe the same for paragraphs?
Thank you for great library!
MS Windows’ line endings in global /usr/local/bin/docxtemplater
Hi!
While trying to launch global docxtemplater binary I get
env: noder: No such file or directory
Looks like MS Windows’ file ending ‘rn’.
When I changed line endings to unix style, error disappeared.
Also, I suggest to use path.join or even path.normalize in ./docxgenNode/bin/docxgen.js like this:
path = require('path')

require(path.join(__dirname, '/../../js/docxgen.js'));
require(path.join(__dirname, '/../lib/main.js'));
The reason is that string concatenation like
require(__dirname + '/../lib/main.js');
tends to be kind of dangerous in some cases (for example, when folder separators are not in place). Just to be sure.
Embed XML , use table
@edi9999 , HI
{complexXml:'<w:p><w:pPr><w:rPr><w:color w:val="FF0000"/></w:rPr></w:pPr><w:r><w:rPr><w:color w:val="FF0000"/></w:rPr><w:t>My custom</w:t></w:r><w:r><w:rPr><w:color w:val="00FF00"/></w:rPr><w:t>XML</w:t></w:r></w:p>'}
I used table’xml which you writed at stackoverflow replaced p’xml
<w:tbl>
<w:tblBorders>
  <w:top w:val="dotted" w:sz="18" w:space="0" w:color="C0504D" w:themeColor="accent2"/>
  <w:left w:val="dotted" w:sz="18" w:space="0" w:color="C0504D" w:themeColor="accent2"/>
  <w:bottom w:val="dotted" w:sz="18" w:space="0" w:color="C0504D" w:themeColor="accent2"/>
  <w:right w:val="dotted" w:sz="18" w:space="0" w:color="C0504D" w:themeColor="accent2"/>
  <w:insideH w:val="dotted" w:sz="18" w:space="0" w:color="C0504D" w:themeColor="accent2"/>
  <w:insideV w:val="dotted" w:sz="18" w:space="0" w:color="C0504D" w:themeColor="accent2"/>
</w:tblBorders>
</w:tbl>
but it doesn’t work , can you give a hand . thanks .
Support for non-png QR-code images
Hello!
What do you think about supporting non-png images (such as gif and jpg)?
I am unsure if it is very useful feature (I don’t think you want docxtemplater to become full-featured giant bloatware), but definetly something to consider.
Anyway, I think it is good idea to put clear and explicit description of format limitations in documentation (i.e., explicitly state in demos and docs that currently it works only with PNG). Now this restriction is unclear unless you look at the source code and see pngjs there.
npm installer assumes root user or non-root -g
Hi!
Just tried to install docxtemplater like this:
lr-pc:docx-report lr$ sudo npm -g install docxtemplater
npm http GET https://registry.npmjs.org/docxtemplater
npm http 200 https://registry.npmjs.org/docxtemplater
npm http GET https://registry.npmjs.org/docxtemplater/-/docxtemplater-0.5.2.tgz
npm http 200 https://registry.npmjs.org/docxtemplater/-/docxtemplater-0.5.2.tgz

> [email protected] preinstall /usr/local/lib/node_modules/docxtemplater
> npm install -g jasmine-node && npm install -g browserify
As you can see, it tries to execute npm install -g without root rights.
This is Ok in some cases, but sadly most people don’t own /usr/local/lib/node_modules, because that is how node installer works by default.
Not sure where it happens, because you don’t seem to have this preinstall in your package.json, but anyway it seems to be kind of little annoyance.
Interesting, this thing happens even if user owns /usr/local/lib/node_modules, but runs npm from sudo.
localImageCreator problem
Hi there,
My aim is to replace a qrcode within a loop with multiple images. The application is an Apache Cordova app and therefore I need a custom way to pass the image data to DocxTemplater. I’ve seen some documentation on localImageCreator which looks promising but when I try to add a simple console.log line to the defaultImageCreator function, it doesn’t get returned. I’ve added «gen:» to the beginning of my qrcode as suggested.
I was wondering if this function is still in use? Or is it dead code?
Is there any way to get around this problem?
Thank
David
Cant do anything
I want to do a simple cv constructor. I have a code. What i must to do with that issue. I cant do anything. So many examples i tryed, but nothing. What i need: to get the values from fields and than put it to the my file. I cant change nothing.

Here is a code:
<script language="javascript">
    /*<![CDATA[*/
        function load(){
            alert("JS on!");
        }
    /*]]>*/
</script>
Main information :
    <form>

        First name*  <input type="text" id="firstName" name="constructor"><br>

        Last name*  <input type="text" id="lastName" name="constructor"><br>

        Third name* <input type="text" id="thirdName" name="constructor"><br>

        Address* <input type="text" id="address" name="constructor"><br>

        Birthday*  <input type="text" id="birthday" name="constructor"><br>
        Email*  <input type="text" id="email" name="constructor"><br>
        Phone number*  <input type="text" id="phoneNumber" name="constructor"><br>
        Web-site  <input type="text" id="website" name="constructor"><br>
    </form>
    Goal*
    <form>
        <textarea rows="10" cols="50" maxlength="500" id="goal" name="constructor"></textarea>
    </form>
    About yourself*
    <form>
        <textarea rows="10" cols="50" maxlength="500" id="aboutYS" name="constructor"></textarea>
    </form>
    Education*
    <form>
        <textarea rows="10" cols="50" maxlength="500" id="education" name="constructor"></textarea>
    </form>
    Skills*
    <form>
        <textarea rows="10" cols="50" maxlength="500" id="skills" name="constructor"></textarea>
    </form>
    Languages*
    <form>
        <textarea rows="10" cols="50" maxlength="500" id="languages" name="constructor"></textarea>
    </form>
    Professional experience(if u have) :
    <form>
        Company <input type="text" id="company" name="constructor"><br>
        About company <input type="text" id="aboutCO" name="constructor"><br>
        Post <input type="text" id="post" name="constructor"><br>
        Web-site <input type="text" id="websiteCO" name="constructor"><br>
        Date <br>
        <input type="checkbox" id="isWork"> I am working here right now <br>
        Description <br>


        <textarea rows="10" cols="50" maxlength="500" id="description" name="constructor"></textarea>
    </form>
    <form>
        <input type="button" id="execute" onClick="constrCV();" value="Construct">
    </form>
    <h1 id="footer"></h1>
Please help. Thanks.
var imgData = docXData[«image.png»]; // imgData undefined
var imgData = docXData[«image.png»];
console.log(imgData);
///undefined printed
output.docx generated
what’s the problem ? thank you .
@edi9999 Is something wrong ? image in current dir .
Looping over images
I would like to add a variable amount of images to the docx file. Is this something that can be done at the moment that I’ve overlooked? Or something that could be added relatively simply?
I understand the imgManager.addImageRels function adds a new image. So the next step would just add to the document.xml file with the xml linking to that new image, right?
Any help would be much appreciated.
js error in complex table template
Hi edi9999,
This is a really useful stuff… but I’m not be able to make it works with templates a little bit more complex.
Check this example: http://94.46.241.129/docxtemplater/examples/demo.html
As you can see, in this case I’m using a for-loop and «stand-alone» values for the totals of the table. However, It seems that does not work fine, not all the tags are replaced and as a result there is a javascript error.
Thanks in advance
Invalid doc file if string contains ‘&’,
I tried to generate doc file with the string which has ‘&’ character. It generates the doc file and but when i tried to open the file, it says invalid file.
DocXTemplater + Express.js
Hi,
I’d like to use DocXTemplater with Express.js.
I create a route in this way:
var mime = require(‘mime’),
Docx = require(‘docxtemplater’);
exports.index = function(req, res) {
var file = __dirname + ‘/../assets/tagExample.docx’,
mimetype = mime.lookup( file );
res.setHeader(‘Content-disposition’, ‘attachment; filename=test.docx’);
res.setHeader(‘Content-type’, mimetype);
new Docx().loadFromFile( file, { async: true } ).success(function(docx) {
docx.setTags({
«first_name»:»Hipp»,
«last_name»:»Edgar»,
«phone» : «0652455478»,
«description» : «New Website»
});
res.write( docx.output(false) );
res.end();
});
};
but when I try to open the just downloaded file, it comply saying it’s a corrupted file. I can’t either open the file with WinZip.
Any ideas?
Thanks
ability to get a jsonschema from a template for auto creating forms.
Hi,
It would be very interesting if it would be possible to create json schema based on the tags in the template. This would mean you could input them into something like alpaca and have a instant form that can be used to fill the tags with.
An added advancement would then be to add optional types (boolean for instance) to the tags ( {{name:type}} ?) so the schema could be more specific.
Just put in a docx template and you’d end up with a form and a means to download a filled docx document.
Image from original document is lost when qrCode is true
Hello!
I have tried one of my templates in new version of docxtemplater and something strange happened: what perfectly worked in 0.2.0 is now broken.
You may download original report file and the processed one.
Now supply any first_name and be sure to set qrCode to true like this:
{
    "config.docxFile": "report1.docx",
    "config.outputFile": "output.docx",
    "config.qrcode": true,
    "first_name": "Edgar"
}
As you can see, image gets broken. However, if qrCode === false, everything works Ok.
And the most interesting part: this image + qrCode === true flawlessly worked in 0.2.0.
Docx-templates


Template-based docx report creation for both Node and the browser. (See the blog post).
Why?
- Write documents naturally using Word, just adding some commands where needed for dynamic contents
- Express your data needs (queries) in the template itself (
QUERYcommand), in whatever query language you want (e.g. in GraphQL). This is similar to the Relay way™: in Relay, data requirements are declared alongside the React components that need the data - Execute JavaScript snippets (
EXECcommand, or!for short) - Insert the result of JavaScript snippets in your document (
INS,=or just nothing) - Embed images, hyperlinks and even HTML dynamically (
IMAGE,LINK,HTML). Dynamic images can be great for on-the-fly QR codes, downloading photos straight to your reports, charts… even maps! - Add loops with
FOR/END-FORcommands, with support for table rows, nested loops, and JavaScript processing of elements (filter, sort, etc) - Include contents conditionally,
IFa certain JavaScript expression is truthy - Define custom aliases for some commands (
ALIAS) — useful for writing table templates! - Run all JavaScript in a separate Node VM or a user-provided sandbox.
- Include literal XML
- Written in TypeScript, so ships with type definitions.
- Plenty of examples in this repo (with Node, Webpack and Browserify)
- Supports
.docmtemplates in addition to regular.docxfiles.
Contributions are welcome!
Installation
$ npm install docx-templates
…or using yarn:
$ yarn add docx-templates
Node usage
Here is a simple example, with report data injected directly as an object:
import createReport from 'docx-templates';
import fs from 'fs';

const template = fs.readFileSync('myTemplate.docx');

const buffer = await createReport({
  template,
  data: {
    name: 'John',
    surname: 'Appleseed',
  },
});

fs.writeFileSync('report.docx', buffer)
You can also provide a sync or Promise-returning callback function (query resolver) instead of a data object:
const report = await createReport({
  template,
  data: query => graphqlServer.execute(query),
});
Your resolver callback will receive the query embedded in the template (in a QUERY command) as an argument.
Other options (with defaults):
const report = await createReport({
  // ...
  additionalJsContext: {
    // all of these will be available to JS snippets in your template commands (see below)
    foo: 'bar',
    qrCode: async url => {
      /* build QR and return image data */
    },
  },
  cmdDelimiter: '+++',
    /* default for backwards compatibility; but even better: ['{', '}'] */
  literalXmlDelimiter: '||',
  processLineBreaks: true,
  noSandbox: false,

  /**
   * Whether to fail on the first error encountered in the template. Defaults to true. Can be used to collect all errors in a template (e.g. misspelled commands) before failing.
   */
  failFast: true,

  /**
   * When set to `true`, this setting ensures createReport throws an error when the result of an INS, HTML, IMAGE, or LINK command turns out to be null or undefined,
   * as this usually indicates a mistake in the template or the invoking code (defaults to `false`).
   */
  rejectNullish: false,

  /**
   * MS Word usually autocorrects JS string literal quotes with unicode 'smart' quotes ('curly' quotes). E.g. 'aubergine' -> ‘aubergine’.
   * This causes an error when evaluating commands containing these smart quotes, as they are not valid JavaScript.
   * If you set fixSmartQuotes to 'true', these smart quotes will automatically get replaced with straight quotes (') before command evaluation.
   * Defaults to false.
   */
  fixSmartQuotes: false;
});
Check out the Node examples folder.
Deno usage
You can use docx-templates in Deno! Just follow the Browser guide and import the polyfilled docx-templates bundle, for example from unpkg:
// @deno-types="https://unpkg.com/docx-templates/lib/bundled.d.ts"
import { createReport } from 'https://unpkg.com/docx-templates/lib/browser.js';
Browser usage
You can use docx-templates in the browser (yay!). Just as when using docx-templates in Node, you need to provide the template contents as a Buffer-like object.
For example when the template is on your server you can get it with something like:
const template = await fetch('./template.docx').then(res => res.arrayBuffer())
Or if the user provides the template you can get a File object with:
<input type="file">
Then read this file in an ArrayBuffer, feed it to docx-templates, and download the result:
import createReport from 'docx-templates';

const onTemplateChosen = async () => {
  const template = await readFileIntoArrayBuffer(myFile);
  const report = await createReport({
    template,
    data: { name: 'John', surname: 'Appleseed' },
  });
  saveDataToFile(
    report,
    'report.docx',
    'application/vnd.openxmlformats-officedocument.wordprocessingml.document'
  );
};

// Load the user-provided file into an ArrayBuffer
const readFileIntoArrayBuffer = fd =>
  new Promise((resolve, reject) => {
    const reader = new FileReader();
    reader.onerror = reject;
    reader.onload = () => {
      resolve(reader.result);
    };
    reader.readAsArrayBuffer(fd);
  });
You can find an example implementation of saveDataToFile() in the Webpack example.
Check out the examples using Webpack and using Browserify or you can use the browserified bundle directly as discussed below.
Polyfilled browser-ready bundle
As this library depends on the internal NodeJS modules vm, stream, util, events and the Buffer global, your build tools have to polyfill these modules when using the library in the browser. We provide a browser build wich includes the required polyfills. Its file size is about 300K uncompressed or 85K / 70K with gzip / brotli compression).
You can import the library directly as a module using e.g. the unpkg.com CDN, like below, or you can host the /lib/browser.js bundle yourself.
import { createReport } from 'https://unpkg.com/docx-templates/lib/browser.js';
this is good for testing or prototyping but you should keep in mind that the browser.js is es2017 code wich is supported by only 95% of users. If you have to support IE or old browser versions, you are better off compiling it to your target. Also see the support table for es2017 here.
Browser template compatibility caveat
Note that the JavaScript code in your .docx template will be run as-is by the browser. Transpilers like Babel can’t see this code, and won’t be able to polyfill it. This means that the JS code in your template needs to be compatible with the browsers you are targeting. In other words: don’t use fancy modern syntax and functions in your template if you want older browsers, like IE11, to be able to render it.
Writing templates
You can find several template examples in this repo:
- SWAPI, a good example of what you can achieve embedding a template (GraphQL in this case) in your report, including a simple script for report generation. Uses the freak-ish online Star Wars GraphQL API.
- Dynamic images: with examples of images that are dynamically downloaded or created. Check out the images-many-tiles example for a taste of this powerful feature.
- Browser-based examples using Webpack and using Browserify.
Custom command delimiters
You can use different left/right command delimiters by passing an array to cmdDelimiter:
const report = await createReport({
  // ...
  cmdDelimiter: ['{', '}'],
})
This allows much cleaner-looking templates!
Then you can add commands and JS snippets in your template like this: {foo}, {project.name} {QUERY ...}, {FOR ...}.
When choosing a delimiter, take care not to introduce conflicts with JS syntax, especially if you are planning to use larger JS code snippets in your templates. For example, with ['{', '}'] you may run into conflicts as the brackets in your JS code may be mistaken for command delimiters. As an alternative, consider using multi-character delimiters, like {# and #} (see issue #102).
Supported commands
Currently supported commands are defined below.
QUERY
You can use GraphQL, SQL, whatever you want: the query will be passed unchanged to your data query resolver.
+++QUERY
query getData($projectId: Int!) {
  project(id: $projectId) {
    name
    details { year }
    people(sortedBy: "name") { name }
  }
}
+++
For the following sections (except where noted), we assume the following dataset:
const data = {
  project: {
    name: 'docx-templates',
    details: { year: '2016' },
    people: [{ name: 'John', since: 2015 }, { name: 'Robert', since: 2010 }],
  },
};
INS (=, or nothing at all)
Inserts the result of a given JavaScript snippet:
+++INS project.name+++ (+++INS project.details.year+++)
or...
+++INS `${project.name} (${$details.year})`+++
Note that the last evaluated expression is inserted into the document, so you can include more complex code if you wish:
+++INS
const a = Math.random();
const b = Math.round((a - 0.5) * 20);
`A number between -10 and 10: ${b}.`
+++
You can also use this shorthand notation:
+++= project.name+++ (+++= project.details.year+++)
+++= `${project.name} (${$details.year})`+++
Even shorter (and with custom cmdDelimiter: ['{', '}']):
{project.name} ({project.details.year})
You can also access functions in the additionalJsContext parameter to createReport(), which may even return a Promise. The resolved value of the Promise will be inserted in the document.
Use JavaScript’s ternary operator to implement an if-else structure:
+++= $details.year != null ? `(${$details.year})` : ''+++
EXEC (!)
Executes a given JavaScript snippet, just like INS or =, but doesn’t insert anything in the document. You can use EXEC, for example, to define functions or constants before using them elsewhere in your template.
+++EXEC
myFun = () => Math.random();
MY_CONSTANT = 3;
+++

+++! ANOTHER_CONSTANT = 5; +++
Usage elsewhere will then look like
+++= MY_CONSTANT +++
+++= ANOTHER_CONSTANT +++
+++= myFun() +++
A note on scoping:
When disabling sandbox mode (noSandbox: true), the scoping behaviour is slightly different. Disabling the sandbox will execute each EXEC snippet’s code in a with(this){...} context, where this is the ‘context’ object. This ‘context’ object is re-used between the code snippets of your template. The critical difference outside of sandbox mode is that you are not declaring functions and variables in the global scope by default. The only way to assign to the global scope is to assign declarations as properties of the context object. This is simplified by the with(context){} wrapper: all global declarations are actually added as properties to this context object. Locally scoped declarations are not. _The above examples should work in both noSandbox: true and noSandbox: false.
This example declares the test function in the context object, making it callable from another snippet.
test = () => {};
While the below example only declares test in the local scope of the snippet, meaning it gets garbage collected after the snippet has executed.
function test() {};
IMAGE
Includes an image with the data resulting from evaluating a JavaScript snippet:
+++IMAGE qrCode(project.url)+++
In this case, we use a function from additionalJsContext object passed to createReport() that looks like this:
  additionalJsContext: {
    qrCode: url => {
      const dataUrl = createQrImage(url, { size: 500 });
      const data = dataUrl.slice('data:image/gif;base64,'.length);
      return { width: 6, height: 6, data, extension: '.gif' };
    },
  }
The JS snippet must return an image object or a Promise of an image object, containing:
width: desired width of the image on the page in cm. Note that the aspect ratio should match that of the input image to avoid stretching.heightdesired height of the image on the page in cm.data: either an ArrayBuffer or a base64 string with the image dataextension: one of'.png','.gif','.jpg','.jpeg','.svg'.thumbnail[optional]: when injecting an SVG image, a fallback non-SVG (png/jpg/gif, etc.) image can be provided. This thumbnail is used when SVG images are not supported (e.g. older versions of Word) or when the document is previewed by e.g. Windows Explorer. See usage example below.alt[optional]: optional alt text.rotation[optional]: optional rotation in degrees, with positive angles moving clockwise.
In the .docx template:
+++IMAGE injectSvg()+++
In the createReport call:
additionalJsContext: {
  injectSvg: () => {
      const svg_data = Buffer.from(`<svg  xmlns="http://www.w3.org/2000/svg" xmlns:xlink="http://www.w3.org/1999/xlink">
                                  <rect x="10" y="10" height="100" width="100" style="stroke:#ff0000; fill: #0000ff"/>
                                </svg>`, 'utf-8');

      // Providing a thumbnail is technically optional, as newer versions of Word will just ignore it.
      const thumbnail = {
        data: fs.readFileSync('sample.png'),
        extension: '.png',
      };
      return { width: 6, height: 6, data: svg_data, extension: '.svg', thumbnail };
    }
  }
LINK
Includes a hyperlink with the data resulting from evaluating a JavaScript snippet:
+++LINK ({ url: project.url, label: project.name })+++
If the label is not specified, the URL is used as a label.
HTML
Takes the HTML resulting from evaluating a JavaScript snippet and converts it to Word contents (using altchunk):
+++HTML `
<meta charset="UTF-8">
<body>
  <h1>${$film.title}</h1>
  <h3>${$film.releaseDate.slice(0, 4)}</h3>
  <p>
    <strong style="color: red;">This paragraph should be red and strong</strong>
  </p>
</body>
`+++
FOR and END-FOR
Loop over a group of elements (resulting from the evaluation of a JavaScript expression):
+++FOR person IN project.people+++
+++INS $person.name+++ (since +++INS $person.since+++)
+++END-FOR person+++
Since JavaScript expressions are supported, you can for example filter the loop domain:
+++FOR person IN project.people.filter(person => person.since > 2013)+++
...
FOR loops also work over table rows:
----------------------------------------------------------
| Name                         | Since                   |
----------------------------------------------------------
| +++FOR person IN             |                         |
| project.people+++            |                         |
----------------------------------------------------------
| +++INS $person.name+++       | +++INS $person.since+++ |
----------------------------------------------------------
| +++END-FOR person+++         |                         |
----------------------------------------------------------
Finally, you can nest loops (this example assumes a different data set):
+++FOR company IN companies+++
+++INS $company.name+++
+++FOR person IN $company.people+++
* +++INS $person.firstName+++
+++FOR project IN $person.projects+++
    - +++INS $project.name+++
+++END-FOR project+++
+++END-FOR person+++

+++END-FOR company+++
IF and END-IF
Include contents conditionally (depending on the evaluation of a JavaScript expression):
+++IF person.name === 'Guillermo'+++
+++= person.fullName +++
+++END-IF+++
Similarly to the FOR command, it also works over table rows. You can also nest IF commands
and mix & match IF and FOR commands. In fact, for the technically inclined: the IF command
is implemented as a FOR command with 1 or 0 iterations, depending on the expression value.
ALIAS (and alias resolution with *)
Define a name for a complete command (especially useful for formatting tables):
+++ALIAS name INS $person.name+++
+++ALIAS since INS $person.since+++

----------------------------------------------------------
| Name                         | Since                   |
----------------------------------------------------------
| +++FOR person IN             |                         |
| project.people+++            |                         |
----------------------------------------------------------
| +++*name+++                  | +++*since+++            |
----------------------------------------------------------
| +++END-FOR person+++         |                         |
----------------------------------------------------------
Error handling
By default, the Promise returned by createReport will reject with an error immediately when a problem is encountered in the template, such as a bad command (i.e. it ‘fails fast’). In some cases, however, you may want to collect all errors that may exist in the template before failing. For example, this is useful when you are letting your users create templates interactively. You can disable fast-failing by providing the failFast: false parameter as shown below. This will make createReport reject with an array of errors instead of a single error so you can get a more complete picture of what is wrong with the template.
try {
  const report = await createReport({
    template,
    data: {
      name: 'John',
      surname: 'Appleseed',
    },
    failFast: false,
  });
} catch (errors) {
  if (Array.isArray(errors)) {
    // An array of errors likely caused by bad commands in the template.
    console.log(errors);
  } else {
    // Not an array of template errors, indicating something more serious.
    throw errors;
  }
}
Error types
The library exposes the following error types. See the errors.ts module for details.
NullishCommandResultError // thrown when rejectNullish is set to true and a command returns null or undefined
ObjectCommandResultError // thrown when the result of an `INS` command is an Object. This ensures you don't accidentally put `'[object Object]'` in your report.
CommandSyntaxError
InvalidCommandError
CommandExecutionError
ImageError
InternalError
TemplateParseError
Custom error handler
A custom error handler callback can be provided to handle any errors that may occur when executing commands from a template. The value returned by this callback will be inserted into the rendered document instead. The callback is provided with two arguments: the error that was caught and the raw code of the command.
  const report = await createReport({
    template,
    data: {
      name: 'John',
      surname: 'Appleseed',
    },
    errorHandler: (err, command_code) => {
      return 'command failed!';
    },
  });
Using a custom errorHandler in combination with rejectNullish = true allows users to intelligently replace the result of commands that returned null or undefined (make sure to check for NullishCommandResultError).
Inspecting templates
The listCommands function lets you list all the commands in a docx template using the same parser as createReport.
import { listCommands } from 'docx-templates';
const template_buffer = fs.readFileSync('template.docx');
const commands = await listCommands(template_buffer, ['{', '}']);

// `commands` will contain something like:
[
  { raw: 'INS some_variable', code: 'some_variable', type: 'INS' },
  { raw: 'IMAGE svgImgFile()', code: 'svgImgFile()', type: 'IMAGE' },
]
The getMetadata function lets you extract the metadata fields from a document, such as the number of pages or words. Note that this feature has a few limitations:
- Not all fields may be available, depending on the document.
- These metadata fields, including the number of pages, are only updated by MS Word (or LibreOffice) when saving the document. Docx-templates does not alter these metadata fields, so the number of pages may not reflect the actual size of your rendered document (see issue #240). Docx-templates can not reliably determine the number of pages in a document, as this requires a full-fledged docx renderer (e.g. MS Word).
    import { getMetadata } from 'docx-templates';
    const template = fs.readFileSync('template.docx');
    await getMetadata(template)
    // result:
      Object {
        "category": undefined,
        "characters": 24,
        "company": undefined,
        "created": "2015-08-16T18:55:00Z",
        "creator": "Someone Else",
        "description": undefined,
        "lastModifiedBy": "Grau Panea, Guillermo",
        "lastPrinted": undefined,
        "lines": 1,
        "modified": "2016-12-15T11:21:00Z",
        "pages": 1,
        "paragraphs": 1,
        "revision": "32",
        "subject": undefined,
        "template": "Normal.dotm",
        "title": undefined,
        "words": 4,
      }
Performance & security
Templates can contain arbitrary javascript code. Beware of code injection risks!
Obviously, this is less of an issue when running docx-templates in a browser environment.
Regardless of whether you are using sandboxing or not (noSandbox: true), be aware that allowing users to upload arbitrary templates to be executed on your server poses a significant security threat. Use at your own risk.
The library uses require('vm') as its default sandboxing environment. Note that this sandbox is explicitly not meant to be used as a security mechanism. You can provide your own sandboxing environment if you want, as shown in this example project.
Note that turning off the sandbox (noSandbox: true) is known to give significant performance improvements when working with large templates or datasets. However, before you do this, make sure you are aware of the security implications.
Changelog
Similar projects
-
docxtemplater (believe it or not, I just discovered this very similarly-named project after brushing up my old CS code for
docx-templatesand publishing it for the first time!). It provides lots of goodies, but doesn’t allow (AFAIK) embedding queries or JS snippets. -
docx and similar ones — generate docx files from scratch, programmatically. Drawbacks of this approach: they typically do not support all Word features, and producing a complex document can be challenging.
License (MIT)
Copyright (c) Guillermo Grau Panea 2016-now
Permission is hereby granted, free of charge, to any person obtaining a copy of this software and associated documentation files (the «Software»), to deal in the Software without restriction, including without limitation the rights to use, copy, modify, merge, publish, distribute, sublicense, and/or sell copies of the Software, and to permit persons to whom the Software is furnished to do so, subject to the following conditions:
The above copyright notice and this permission notice shall be included in all copies or substantial portions of the Software.
THE SOFTWARE IS PROVIDED «AS IS», WITHOUT WARRANTY OF ANY KIND, EXPRESS OR IMPLIED, INCLUDING BUT NOT LIMITED TO THE WARRANTIES OF MERCHANTABILITY, FITNESS FOR A PARTICULAR PURPOSE AND NONINFRINGEMENT. IN NO EVENT SHALL THE AUTHORS OR COPYRIGHT HOLDERS BE LIABLE FOR ANY CLAIM, DAMAGES OR OTHER LIABILITY, WHETHER IN AN ACTION OF CONTRACT, TORT OR OTHERWISE, ARISING FROM, OUT OF OR IN CONNECTION WITH THE SOFTWARE OR THE USE OR OTHER DEALINGS IN THE SOFTWARE.