
One way you can change the style of a document is by adding a new text font. To add a font to Word, download and install the font in Windows, where it will become available to all Microsoft 365 applications.
Fonts come as files, and there are many sites on the Internet where you can download free fonts, such as DaFont. You can also import font files from a CD, a DVD, or your organization’s network. TrueType (file extension .ttf) and OpenType (.otf) fonts both work fine.
Note: Before you download a font, make sure that you trust the source.
Add a font
-
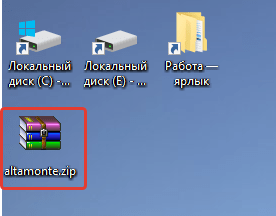
Download the font files. These often come compressed in .zip folders. In one .zip folder, you might find several variations on the same font, such as “light” and “heavy.” A .zip folder usually looks like this:

-
If the font files are zipped, unzip them by right-clicking the .zip folder and then clicking Extract. Now you’ll see the available TrueType and OpenType font files:
-
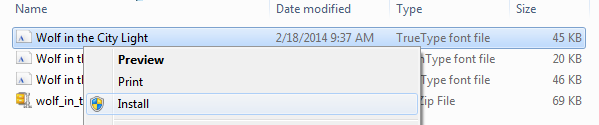
Right-click the fonts you want, and click Install.
-
If you’re prompted to allow the program to make changes to your computer, and if you trust the source of the font, click Yes.
Your new fonts will appear in the fonts list in Word.


Here are two other ways to install and manage fonts:
-
All fonts are stored in the C:WindowsFonts folder. You can also add fonts by simply dragging font files from the extracted files folder into this folder. Windows will automatically install them. If you want to see what a font looks like, open the Fonts folder, right-click the font file, and then click Preview.
-
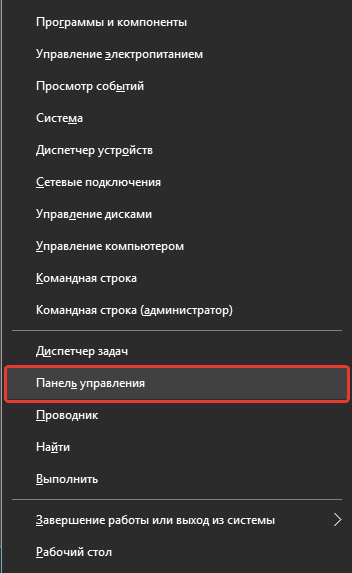
Another way to see your installed fonts is through Control Panel. In Windows 7 and Windows 10, go to Control Panel > Fonts. In Windows 8.1, go to Control Panel > Appearance and Personalization > Fonts.
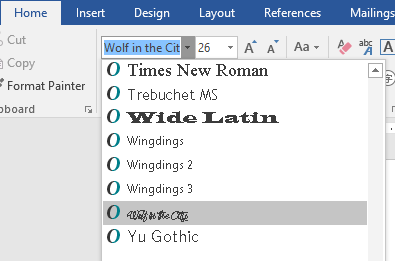
The next time you start Word, you’ll see the fonts you added in the Font list.
Need more help?
Office 2021 Office 2021 for Mac Office 2019 Office 2019 for Mac Office 2016 Office 2016 for Mac Office 2013 Office 2010 Word 2007 PowerPoint 2007 More…Less
Most applications (such as Microsoft Word, Excel, and PowerPoint) include fonts that are automatically installed when you install the software. For example, applications that are created especially for document design projects, such as Microsoft Publisher, often come with quite a few extra fonts that you can use with any other program on your computer.
However, sometimes you may want to install custom fonts that you’ve created, purchased or downloaded from somewhere else. In this article we’ll talk about how to install those fonts so you can use them in Microsoft Office.
Locate custom fonts on the Web
In addition to acquiring and using fonts installed with other applications, you can download fonts from the Internet. Some fonts on the Internet are sold commercially, some are distributed as shareware, and some are free. The Microsoft Typography site site provides links to other font foundries (the companies or individuals outside of Microsoft who create and distribute fonts) where you can find additional fonts.
After you find a font that you would like to use with an Office application, you can download it and install it through the operating system that you are currently using on your computer. Because fonts work with the operating system, they are not downloaded to Office directly. You should go through the system’s Fonts folder in Windows Control Panel and the font will work with Office automatically. On the Mac you use the Font Book to add the font and then copy it to the Windows Office Compatible folder.
Many third parties outside of Microsoft package their fonts in .zip files to reduce file size and to make downloading faster. If you have downloaded a font that is saved in .zip format double-click the zip file to open it.
Install a custom font you have downloaded
Once you’ve downloaded the font you want to install you need to install it in the operating system. Once the font is properly installed in the operating system Microsoft Office will be able to see and use it. For detailed instructions select the operating system you’re using from the drop-down box below.
-
Find the font file that you downloaded, keeping in mind that it may be contained within a .zip file. It’s probably located in your downloads folder.
-
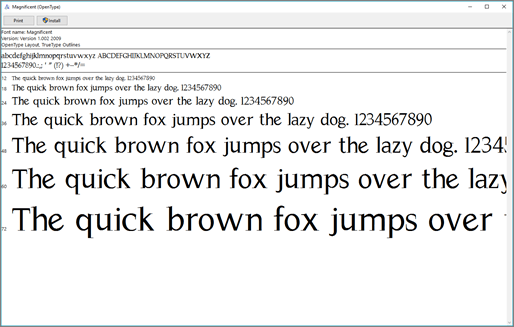
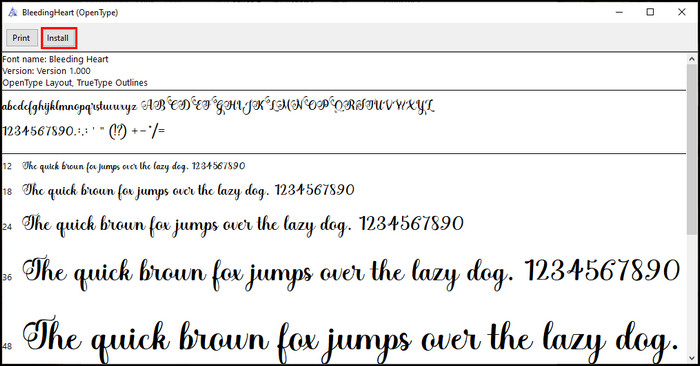
Double-click the font file to open it in the Font Previewer
-
If you’re satisfied that this is the font you want, click Install at the top left.
-
Close the Font Previewer, and open your Office program. You should now see your new font included on the font list.

-
Find the font file you downloaded — it likely has a .ttf or .otf extension and it’s probably in your downloads folder. Double-click on it.
Note: If the font file has a .zip extension you need to open that .zip file and open the font file from there.
-
It will open in the font previewer. Click Install Font. It will open in the Font Book.
-
Close the Font Book. Your font should now be available to Microsoft Office.
Note: If you’re using Office 2011 for Mac, you may need to drag and drop the font to the Windows Office Compatible collection in the Font Book to make it available to Microsoft Office.
Sharing files that contain non-standard fonts
When you install a custom font, each font will work only with the computer you’ve installed it on. Custom fonts that you’ve installed on your computer might not display the same way on a different computer. Text that is formatted in a font that is not installed on a computer will display in Times New Roman or the default font.
Therefore, if you plan to share Microsoft Office Word, PowerPoint, or Excel files with other people, you’ll want to know which fonts are native to the version of Office that the recipient is using. If it isn’t native, you may have to embed or distribute the font along with the Word file, PowerPoint presentation, or Excel spreadsheet. For more information about this see Fonts that are installed with Microsoft Office.
See also
-
Microsoft Typography
-
Change or set the default Font in Microsoft Office
-
Language Accessory Pack for Office
Do you have ideas for how we can improve Microsoft Office?
See How do I give feedback on Microsoft Office?
Need more help?
Inject some personality into your words
What to Know
- Easiest option for Windows: Right-click the .ttf or .otf file and select Install.
- Next easiest: Go to Start > Control Panel > Fonts. In another window, drag the .ttf or .otf file into the font folder you just opened.
- For Word for Mac, double-click the font file to open a preview > Install Font.
This article explains how to install fonts in Windows, Word for macOS, Microsoft Word Online, Word for Android, and Word for iOS. Instructions in this article apply to all versions of Word going back to 2011 as well for Windows 10, 8, and 7, macOS, Android, and iOS.
How to Install a Font on Windows
Let’s learn how to install a font on Windows so we can then add it to Word. Installing a font on Windows is the same from Windows 10 all the way back to Windows 7. There are 2 ways to install.
Method 1
-
If you don’t see a .ttf or .otf file, you may have to extract it from a zip file.
-
Once you have a .ttf or .otf file, right-click the file and select Install.
-
You will briefly see an installation progress window as it installs.
Method 2
-
Select Start > Control Panel > Fonts to open your system’s font folder.
-
In another window, find the font you want to install. If you downloaded the font from a website, then the file is probably in your Downloads folder. The font file will likely have a .ttf or .otf extension.
-
Drag the desired font into your system’s font folder. You can drop it into any white space between the other font icons in the font control panel.
Font sets are often contained within .zip files, so you must extract them before dragging the actual font files into your system’s Fonts folder. For guidance on how to extract, or unzip, a .zip file, see Zip Files: Unzip Them With the Right Software. If a .zip file contains multiple variations of a font, you must install each one individually.
-
Once the font is in the correct folder, it should install automatically. If it doesn’t, double-click the font file to open the Font Previewer, and click the Install button in the upper-left corner. The next time you open Word, the new font should appear as an option in the font list.
How to Add Fonts to Word for Mac
Before you can use new Microsoft Word fonts on Mac, you must add them to the app for managing fonts on macOS, the Font Book:
-
Locate your font file and double-click it to open the font preview window. You may need to unzip the file first.
-
Click Install Font near the bottom of the font preview window, which should open the Font Book.
-
If you’re using the 2011 version of Office for Mac, then you must also drag and drop the font file into the Windows Office Compatible collection, which can be found in the left sidebar of the Font Book.
-
After restarting your Mac, the font should be available in Word and most other apps including PowerPoint and Excel.
Fonts will only display properly in Word if they are installed on the user’s device. Text formatted with unsupported fonts will usually appear in a default font such as Times New Roman. If you plan on sharing your Word files with others, you may need to embed some fonts. You can only embed fonts in the Windows versions of Word, and the specific font must allow embedding. Check the list of Microsoft fonts supported by each version of MS Office to determine which fonts you might need to embed.
How to Add Fonts to Word Online
If you’re using the Microsoft Word Online app as part of Microsoft 365, you can make use of any font installed on your system. Just type the name of the font file minus the extension into the Font Options box.
When you save the document, the font name will appear in the font options box and display properly for any user who has that font installed on their device. Unfortunately, Word Online doesn’t let you embed fonts.
If I Add Fonts in Word, Do They Transfer Over to Excel or PowerPoint?
Yes. Once you add a font to your operating system and ensure that it’s compatible with Word, then you should be able to use it in any MS Office application including Microsoft Excel and PowerPoint.
How to Add Fonts to Microsoft Word for Android
Unfortunately, adding fonts to the newest version of MS Word for Android is much more difficult than it used to be. Before you begin, you’ll need root access to your device. Lifewire has an in-depth guide explaining how to root any Android device.
Rooting your device could void the warranty and cause hardware malfunctions. Before you attempt rooting, back up your important data using an app like Helium.
-
With your rooted Android device, download FX File Explorer and install the root add-on.
-
Open FX File Explorer and locate your font file.
-
Select the font file by holding your finger on it for a few seconds, and then tap Copy in the upper right corner of the screen. If successful, you’ll see a new icon in the upper right corner that says «1 copied.»
Use the FX File Explorer app to locate your font and copy it.
-
Now, close out FX File Explorer, locate the MS Word app and hold your finger on the file icon to make a menu pop up. If your device has been rooted, you should see an Explore data option in addition to Open and Uninstall.
-
Tap Explore data and find the font directory by navigating to Files > Data > Fonts.
-
Paste the font file inside the font directory by tapping the «1 copied» icon in the upper right of your screen and selecting Paste from the menu that appears.
-
The font will now appear as an option in MS Word.
How to Add Fonts to Microsoft Word for iOS
To add a font to an iPhone or iPad, you’ll need a font installer app such as AnyFont, which you can download from the App Store.
-
Move the desired font file into your iCloud.
-
From iCloud, tap the font file, and then tap Share > More (ellipsis) in the upper right corner of your screen.
-
From the Apps menu, tap AnyFont.
-
Once AnyFont opens, you should see your font file. Tap > next to the font on the right side.
-
Tap Install on the next screen that appears.
-
Tap Allow if prompted to allow a configuration profile download.
-
Go to Settings > General > Profiles,
-
Under Downloaded Profile, select the font.
-
Select Install on the top right corner.
-
Select Next.
-
Select Install on the Unsigned Profile window.
-
When asked for confirmation, select Install.
-
Select Done.
-
Open Word and select font under iOS Fonts.
Download Fonts for Microsoft Word
You can install any font file on any OS. You can find fonts online at Creative Market, Dafont, FontSpace, MyFonts, FontShop, and Awwwards. Some fonts are free while others must be purchased. When you download a font, it typically goes to your system’s Downloads folder unless you specify otherwise.
FAQ
-
How do I embed my Word fonts into a PDF?
On a Mac, select File > Print > PDF > Save as PDF > Save to convert the document to a PDF and embed all fonts. Windows machines should also automatically embed fonts when you convert a Word document to a PDF. To check, open the PDF in Acrobat Reader then select File > Properties > Fonts tab and make sure your fonts are embedded.
-
Why aren’t the correct fonts appearing in my PDF?
You might need to adjust your Acrobat conversion settings. In Word, select Acrobat > Preferences > Advanced Settings. Select the Fonts section and check Embed all fonts.
-
How do I remove fonts from Word?
In Windows, open the Control Panel and enter fonts into the search, then choose the font you don’t want and select Delete. On a Mac, open Font Book and pick the font you want to get rid of, then select File > Remove.
Thanks for letting us know!
Get the Latest Tech News Delivered Every Day
Subscribe
Содержание
- Установка нового шрифта в систему
- Установка нового шрифта в Word
- Внедрение шрифта в документ
- Вопросы и ответы

В последних версиях текстового редактора Microsoft Word имеется довольно большой набор встроенных шрифтов. Большинство из них, как и полагается, состоят из букв, но в некоторых вместо букв используются различные символы и знаки, что тоже весьма удобно и необходимо во многих ситуациях.
Урок: Как в Ворде поставить галочку
И все же, сколько бы в MS Word не было встроенных шрифтов, активным пользователям программы стандартного набора всегда будет мало, особенно, если хочется чего-то действительно необычного. Неудивительно, что на просторах интернета можно найти множество шрифтов для этого текстового редактора, созданных сторонними разработчиками. Именно поэтому в данной статье мы расскажем о том, как добавить шрифт в Ворд.
Важное предупреждение: Скачивайте шрифты, как и любое другое ПО, только с проверенных сайтов, так как во многих из них вполне могут содержаться вирусы и прочий вредоносный софт. Не забывайте о собственной безопасности и сохранности личных данных, не качайте шрифты, представленные в установочных файлах EXE, так как на самом деле распространяются они в архивах, внутри которых содержатся файлы форматов OTF или TTF, поддерживаемых ОС Windows.
Вот список безопасных ресурсов, с которых можно скачивать шрифты для MS Word и других совместимых программ:
www.dafont.com
www.fontsquirrel.com
www.fontspace.com
www.1001freefonts.com
Отметим, что все вышеперечисленные сайты крайне удобно реализованы и каждый из шрифтов там представлен наглядно и понятно. То есть, вы смотрите на картинку превью, решаете, нравиться ли вам этот шрифт и нужен ли он вам вообще, и только после этого качаете. Итак, приступим.

Установка нового шрифта в систему
1. Выберите на одном из предложенных нами сайтов (либо на другом, которому полностью доверяете) подходящий шрифт и скачайте его.
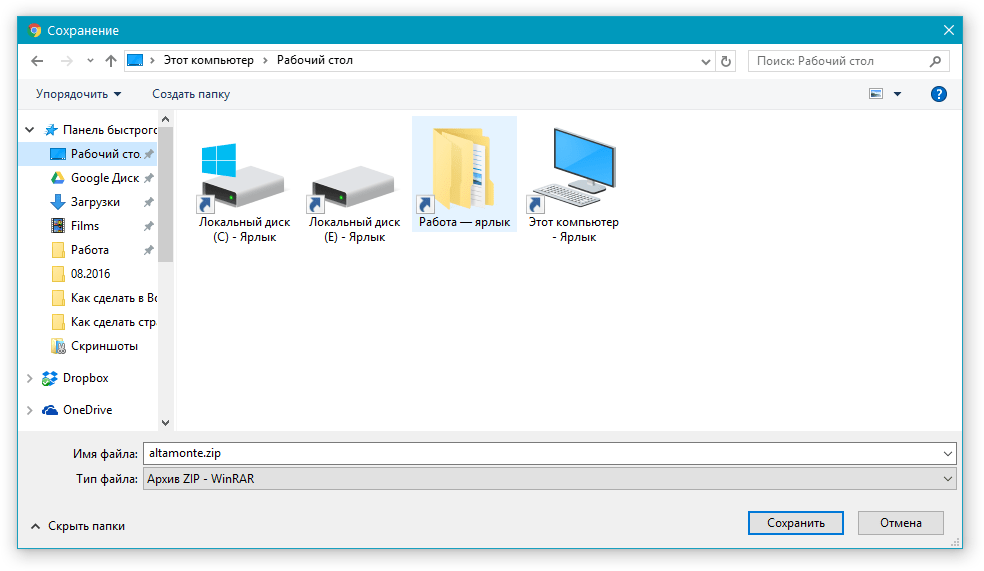
2. Перейдите в папку, в которую вы скачали архив (или просто файл) со шрифтом (шрифтами). В нашем случае это рабочий стол.
3. Откройте архив и извлеките его содержимое в любую удобную папку. Если вы скачали шрифты, не запакованные в архив, просто переместите их туда, откуда вам будет удобно к ним добраться. Не закрывайте эту папку.
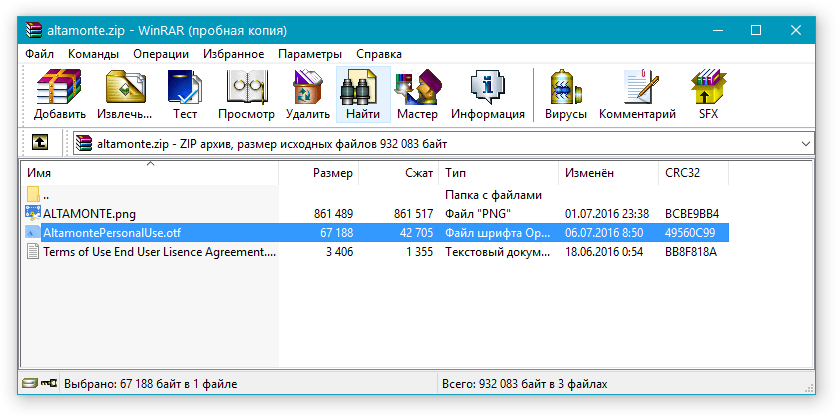

Примечание: В архиве со шрифтами помимо файла OTF или TTF могут также содержаться и файлы другого формата, к примеру, изображение и текстовый документ, как в нашем примере. Извлекать эти файлы отнюдь не обязательно.

4. Откройте “Панель управления”.
В Windows 8 — 10 сделать это можно с помощью клавиш Win+X, где в появившемся списке нужно выбрать “Панель управления”. Вместо клавиш также можно использовать клик правой кнопкой мышки по значку меню “Пуск”.
В Windows XP — 7 этот раздел находится в меню “Пуск” — “Панель управления”.

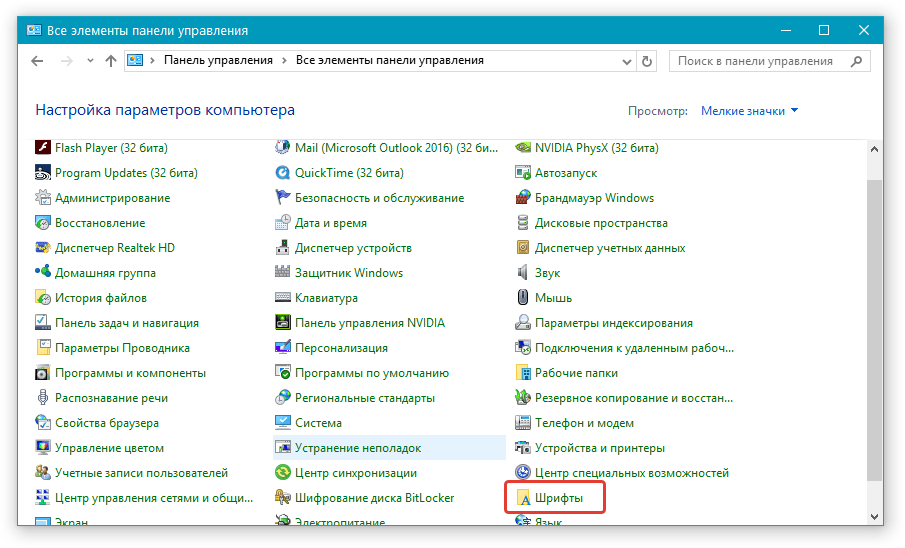
5. Если “Панель управления” находится в режиме просмотра “Категории”, как на нашем примере, переключитесь на режим отображения мелких значков — так вы сможете быстрее найти необходимый пункт.

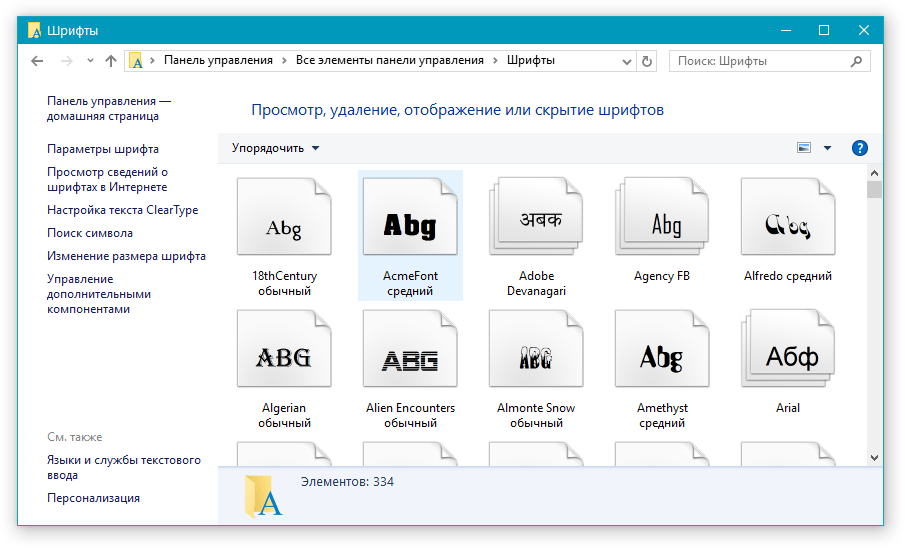
6. Найдите там пункт “Шрифты” (скорее всего, он будет одним из последних), и нажмите на него.
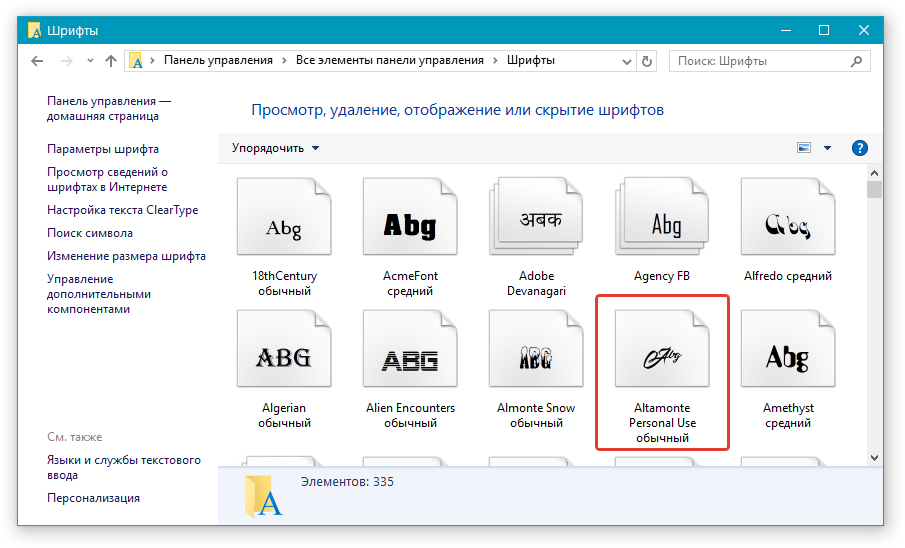
7. Откроется папка со шрифтами, установленными в ОС Windows. Поместите в нее файл шрифта (шрифтов), ранее скачанный и извлеченный из архива.
Совет: Вы можете просто перетащить его (их) мышкой из папки в папку или использовать команды Ctrl+C (копировать) или Ctrl+X (вырезать), а затем Ctrl+V (вставить).
8. После короткого процесса инициализации шрифт будет установлен в систему и появится в папке, в которую вы его переместили.
Примечание: Некоторые шрифты могут состоять из нескольких файлов (например, обычный, курсив и полужирный). В таком случае необходимо помещать в папку со шрифтами все эти файлы.
На данном этапе мы добавили новый шрифт в систему, теперь же нам необходимо добавить его и непосредственно в Ворд. О том, как это сделать, читайте ниже.
Установка нового шрифта в Word
1. Запустите Ворд и найдите новый шрифт в списке со стандартными, встроенными в программу.
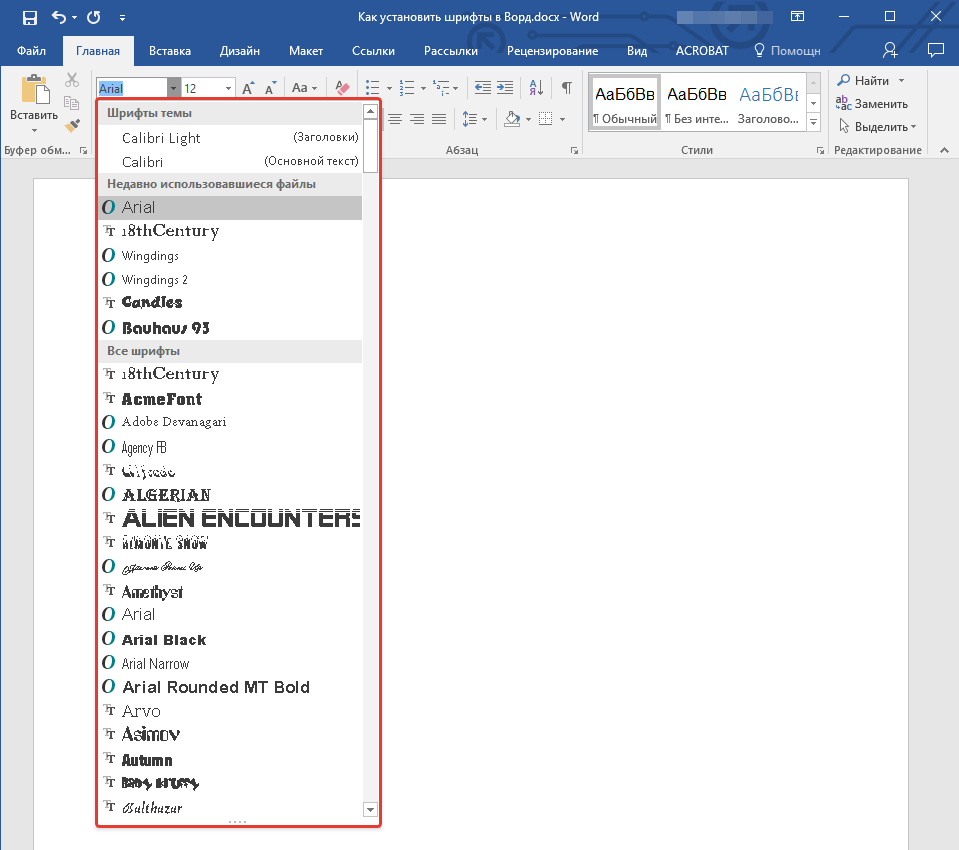
2. Зачастую, отыскать новый шрифт в списке не так просто, как может показаться: во-первых, их там и без того довольно много, во-вторых, его название, хоть и написано собственным шрифтом, но довольно мелкое.
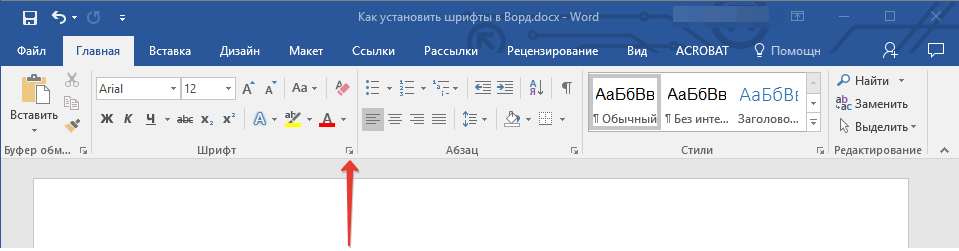
Чтобы быстро отыскать новый шрифт в MS Word и приступить к его использованию в наборе текста, откройте диалоговое окно группы “Шрифт”, нажав на небольшую стрелочку, расположенную в правом нижнем углу этой группы.
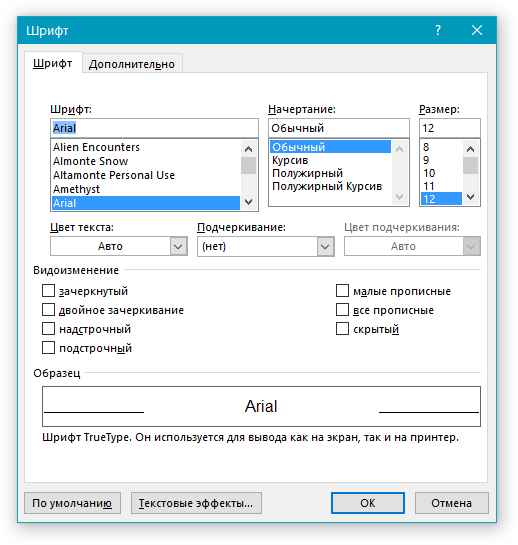
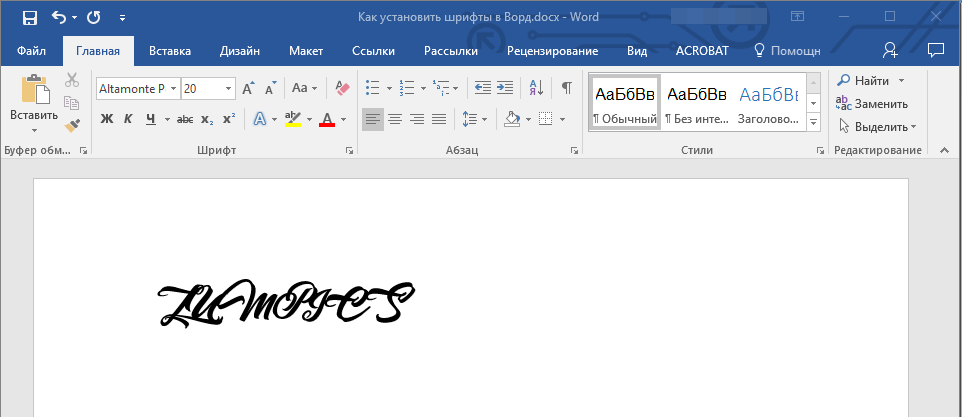
3. В списке “Шрифт” найдите название нового, установленного вами шрифта (в нашем случае это Altamonte Personal Use) и выберите его.
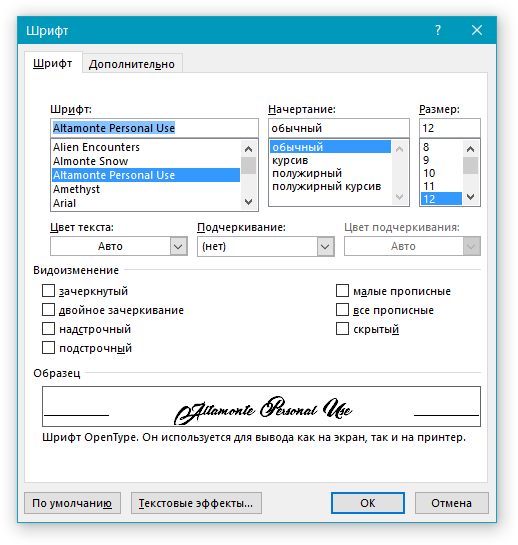
Совет: В окне “Образец” вы можете видеть то, как выглядит шрифт. Это поможет быстрее его найти, если вы не запомнили название шрифта, но запомнили его визуально.
4. После того, как вы нажмете “ОК” в диалоговом окне “Шрифт”, вы переключитесь на новый шрифт и сможете начать его использовать.
Внедрение шрифта в документ
После того, как вы установите новый шрифт на свой компьютер, использовать его вы сможете только у себя. То есть, если вы отправите текстовый документ, написанный новым шрифтом другому человеку, у которого этот шрифт не установлен в системе, а значит, и не интегрирован в Ворд, то у него он отображаться не будет.
Если вы хотите, чтобы новый шрифт был доступен не только на вашем ПК (ну и на принтере, точнее, уже на распечатанном листе бумаги), но и на других компьютерах, другим пользователям, его необходимо внедрить в текстовый документ. О том, как это сделать, читайте ниже.
Примечание: Внедрение шрифта в документ приведет к увеличению объема документа MS Word.
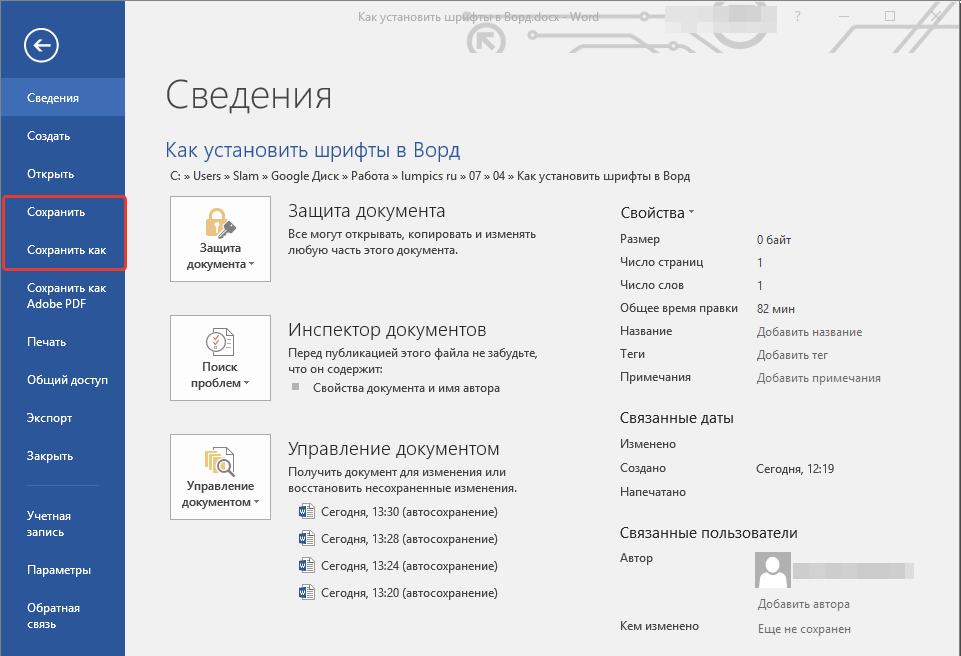
1. В вордовском документе перейдите во вкладку “Параметры”, открыть которую можно через меню “Файл” (Word 2010 — 2016) или кнопку “MS Word” (2003 — 2007).
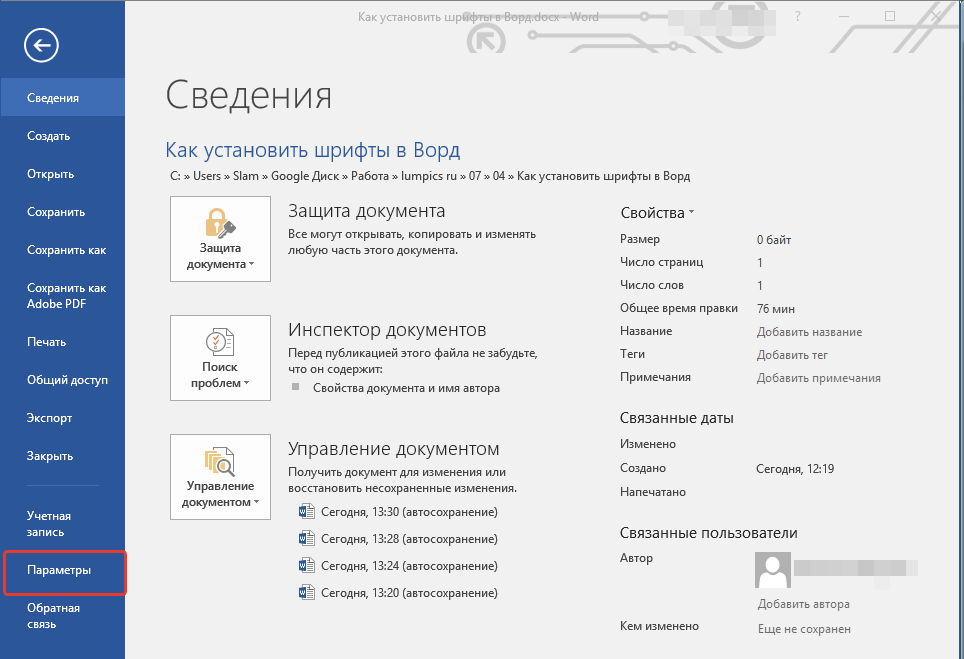
2. В диалоговом окне “Параметры”, которое перед вами откроется, перейдите к разделу “Сохранение”.

3. Установите галочку напротив пункта “Внедрить шрифты в файл”.

4. Выберите, хотите ли вы внедрить только знаки, которые используются в текущем документе (это уменьшит объем файла), хотите ли вы исключить внедрение системных шрифтов (по сути, оно и не нужно).
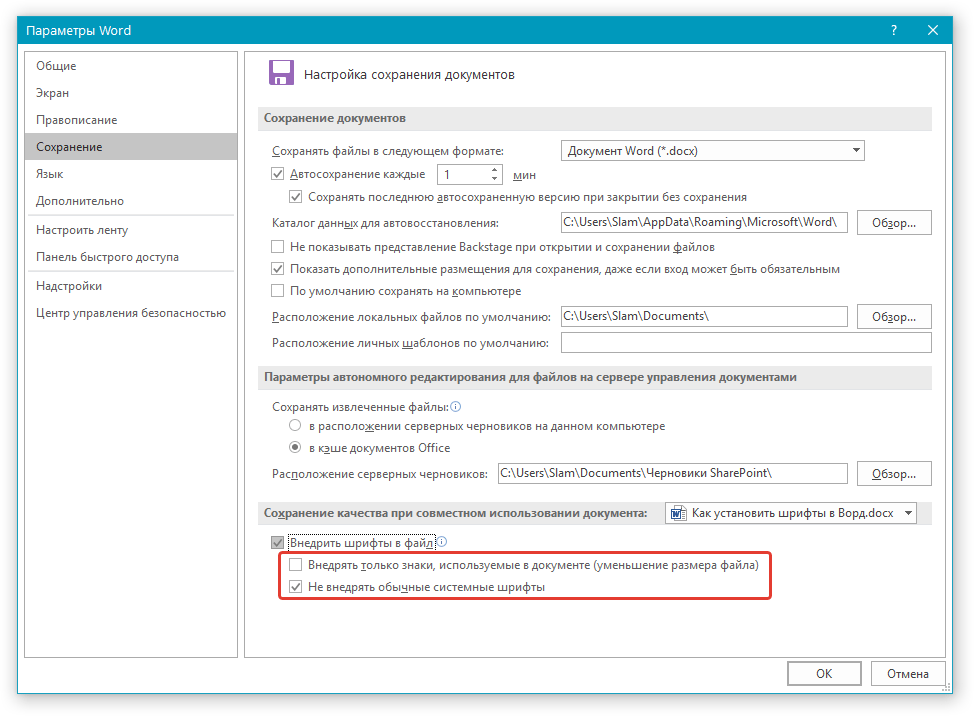
5. Сохраните текстовый документ. Теперь вы можете поделиться им с другими пользователями, ведь новый, добавленный вами шрифт будет отображаться и на их компьютере.
Собственно, на этом можно и закончить, ведь теперь вы знаете о том, как установить шрифты в Ворд, предварительно инсталлировав их в ОС Windows. Желаем вам успехов в освоении новых функций и безграничных возможностей программы Microsoft Word.
Microsoft Word is the ultimate tool to fulfill your writing requirements. It offers almost every possible function for a better user experience, except the ability to add a new font directly to Word documents.
Word has a ton of pre-installed fonts to choose from. However, you may need to add a font to your Word file to make the document more visually satisfying and appealing.
Though Word doesn’t have any option to add a font to the Word font list, you can install any font on your device and use them on Microsoft Word.
In this guide, I will walk you through the steps to installing or removing a new font for Word and other MS Office applications.
Tag Along!
Check out our separate post on how to Double Space in Microsoft Word
Adding fonts to MS Word is very straightforward. There are several ways to install fonts. On Windows, you can directly install a font by right-clicking on it, or you can use your Windows settings.
There are two types of font files; one of them is TrueType (.ttf), and the other one is OpenType (.otf). You can download font files from numerous websites, including Google Fonts, DaFont, or FontSpace.
Many more websites also offer a vast list of font collections. Before downloading any font, ensure the site is trusted; otherwise, you can download a file that contains viruses and malware.
After downloading the fonts, unzip the font folder if the folder is zipped. Now follow the below instructions to install the fonts on your system directly.
Also, check out our separate post on how to Fix: Microsoft Word Table Of Contents Not Updating
1. Install Fonts Using the Installer
Use the basic installer to install any font for word or other Office applications. Go through the subsequent instructions to successfully install a fond with the installer.
Here are the steps to install fonts using the installer:
- Open the File Explorer by pressing the Windows + E keys.
- Go to the folder where you stored the font files.
- Double-click on the font file.
- Click on the Install button.

After successfully installing the font, you can now access the font on your MS Word application along with other Office apps. Install each font individually to access additional styles of a font family.
Read more on Microsoft Word Read Aloud Stopped Working
2. Install Fonts Using Settings
You can also use the Settings of Windows to install a font. The process is almost similar for Windows 10, 7, & 8. Follow the following methods to install fonts using Settings.
Here are the methods to install fonts using Settings:
Following the above steps will install your fonts on your device, instantly available within any Office application, including MS Word.
You can also search for fonts in the Microsoft Store and install them directly on your computer from the Get more fonts in Microsoft Store option. 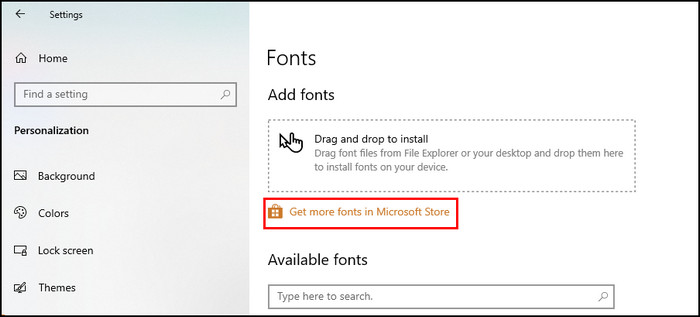
Also, check out our separate post on how to Unlock Selection in Word
If you have multiple users on your computer, you can install fonts using the context menu to limit the access to who can use the specific font. The instructions below show you how to install fonts using the context menu.
Here are the ways to install fonts using the context menu:
- Launch the File Explorer.
- Navigate to the font folder.
- Right-click on the font file.
- Select Install to install the font only for your account. You can also select the Install for all users option to install the font for all user’s accounts.

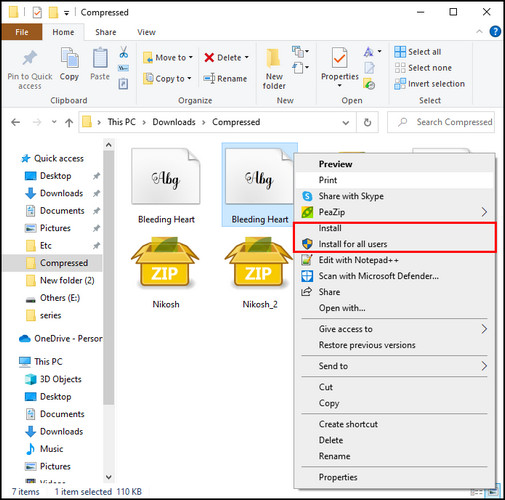
Installing the font with the context menu will immediately install your fonts on your computer. And the font can be used by every user if you choose the Install for all users option when installing the font.
After completing the installation, your font will be ready to use on MS Word and other Office applications. It is also possible to add fonts on your Mac devices. Keep reading the following to install fonts on your Mac successfully.
Check out our separate post on Fix Export to PDF Error in Word
How to Install Fonts to MS Word on Mac
Installing fonts to Mac is super simple; download your desired fonts from any trusted site and unzip the file. After unzipping, place the file in a folder and follow the instructions below to install fonts on your Mac.
Here are the steps to install fonts to MS Word on Mac:
- Navigate to the folder where you stored the font files.
- Open the file by double-clicking on it.
- Wait for the Font Preview window to appear.
- Click Install Font from the bottom-right corner.

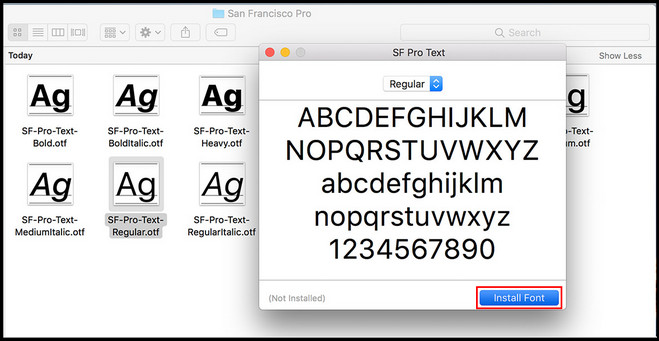
That will successfully install the font on your Mac device. It will be available on MS Word and other applications.
There are also some font manager applications for better managing your fonts on Mac. Font Book is one of them. In case you use Microsoft Word Online, you can easily add any fonts to MS Word. To learn more, keep reading.
Also, check out our separate post on how to Fix: Find and Replace Not Working On Microsoft Word
How to Add Fonts to Word Online
You can use your device fonts for the Word online version. To use any font in the Word web version, first install the font on your device by following the previous methods.
Quick Note: When installing a new font on your device, ensure the Word Online is closed. If you install the font while Word Online is running, you may not be able to see the font on the Word font list.
The instructions below will help you use any font for Word Online. Just type the font’s name in the font name box to use the desired font.
Here are the steps to add fonts to Word Online:
- Install the font on your device while Word Online is closed.
- Launch Microsoft Word Online on your web browser.
- Select the Font tab from the top toolbar.
- Type the font name in the display box.
- Press the Enter button to apply the font for your current document.

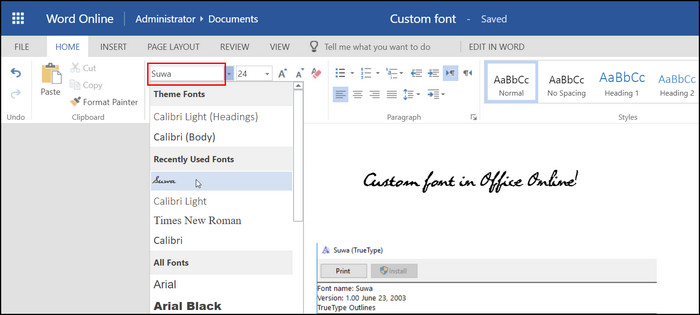
Following the above steps, you can quickly use any preferred font for your Word document or as a part of your Word file’s text.
You may also like to read How to Flip Quotation Marks in Word
How to Embed Fonts in a Microsoft Word Document
When you use a less popular font style for your word file and share it with someone, there is an excellent chance that they will not be able to see the font on their device if they don’t have the specific font installed.
To avoid this unwanted situation, you can embed the font with your word file, so the receiver can easily enjoy the doc with your favorite font. Follow the instructions below to embed a fond within the word file.
Here are the methods to embed a font within the Word file:
The above process will embed the essential font styles within the Word document, and anyone from any device can easily read the document with the embedded fonts.
Here’s a complete guide on how to Make a Resume in Word
Frequently Asked Questions
How do I import a font into Word?
You can import a font into Word by installing the font on your device. Right-click on the font file you want to import and click Install. After the installation, launch Word and search by the font name and select it to use for your document.
How do I remove fonts from Word?
In Windows, navigate to Control Panel > Fonts. Search for the font name, then choose the font you want to remove. Select the Delete button and click Yes to successfully remove the font.
Why does the font change in Word?
When you use a font installed on your device, and then you open the same document with another device that doesn’t have the same font installed. The MS Word will automatically change the font for the missing one.
A Final Thought
Though you will find a considerable pre-installed font collection in Microsoft Word or other programs, you can efficiently add various fonts to enhance the quality and looks of your documents.
While adding a new font to your Word document, remember that the document with not be able to show the fonts appropriately on other devices that don’t have the same font installed. In that case, embed your fonts with the document.
In this article, I have covered all the possible ways to download, install and use any fonts in your Word document. Do you have any additional queries? Mention them in the below comment section.