
So, you’ve named a range of cells, and … perhaps you forgot the location. You can find a named range by using the Go To feature—which navigates to any named range throughout the entire workbook.
-
You can find a named range by going to the Home tab, clicking Find & Select, and then Go To.
Or, press Ctrl+G on your keyboard.
-
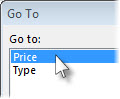
In the Go to box, double-click the named range you want to find.

Notes:
-
The Go to popup window shows named ranges on every worksheet in your workbook.
-
To go to a range of unnamed cells, press Ctrl+G, enter the range in the Reference box, and then press Enter (or click OK). The Go to box keeps track of ranges as you enter them, and you can return to any of them by double-clicking.
-
To go to a cell or range on another sheet, enter the following in the Reference box: the sheet name together with an exclamation point and absolute cell references. For example: sheet2!$D$12 to go to a cell, and sheet3!$C$12:$F$21 to go to range.
-
You can enter multiple named ranges or cell references in the Reference box. Separating each with a comma, like this: Price, Type, or B14:C22,F19:G30,H21:H29. When you press Enter or click OK, Excel will highlight all the ranges.
More about finding data in Excel
-
Find or replace text and numbers on a worksheet
-
Find merged cells
-
Remove or allow a circular reference
-
Find cells that contain formulas
-
Find cells that have conditional formats
-
Locate hidden cells on a worksheet
Need more help?
Want more options?
Explore subscription benefits, browse training courses, learn how to secure your device, and more.
Communities help you ask and answer questions, give feedback, and hear from experts with rich knowledge.
-
#2
Hi MikeyMay,
the following code copies to WORD single cell ranges as simple text, while copies as tables multiple cell ranges. It also restores bookmarks, so that next time they will be still available.
Code:
Dim StartRange As Long
For Each xlName In wb.Names
     If docWord.Bookmarks.Exists(xlName.Name) Then
        StartRange = docWord.Bookmarks(xlName.Name).Range.Start
        If docWord.Bookmarks(xlName.Name).Range.Tables.Count Then
            docWord.Bookmarks(xlName.Name).Range.Cells.Delete
        Else
            docWord.Bookmarks(xlName.Name).Range.Delete
        End If
        If Range(xlName.Name).Cells.Count = 1 Then
            docWord.Range(StartRange, StartRange).InsertAfter Range(xlName.Name).Value
            docWord.Bookmarks.Add xlName.Name, docWord.Range(StartRange, _
                StartRange + Len(Range(xlName.Name).Value))
        Else
            Range(xlName.Name).Copy
            Stop
            docWord.Range(StartRange, StartRange).Paste
            docWord.Bookmarks.Add xlName.Name, docWord.Range(StartRange, StartRange).Tables(1)
        End If
     End If
Next xlName
Post for feedback
Ciao
Andrea
-
#3
Thx for the code!
It seems to work apart from
Code:
docWord.Bookmarks.Add xlName.Name, docWord.Range(StartRange, StartRange).Tables(1)Falls down here with run-time error ‘The requested memeber of the collection does not exist’
Can’t quite figure out what this line is doing as the data has been pasted to the word document and don’t have any other tables.
Just 2 issues —
1 — When pasted into Word I would like it to just paste in as text rather than an ‘object’, ie without cells borders showing (can it be pasted with ‘Paste Special’, ‘Unformatted Text’?)
2 — If the number of transactions goes beyond 1 page can I set up headers, ie Invoice Date, Invoice Number and Invoice Amount?
Other than that, a great bit of code
Many thanks
-
#4
Try this code:
Code:
Dim StartRange As Long, EndRange As Long


For Each xlName In wb.Names
     If docWord.Bookmarks.Exists(xlName.Name) Then
        StartRange = docWord.Bookmarks(xlName.Name).Range.Start
        EndRange = docWord.Bookmarks(xlName.Name).Range.End + 1
        docWord.Bookmarks(xlName.Name).Range.Delete
        Range(xlName.Name).Copy
        docWord.Range(StartRange, StartRange).PasteSpecial Link:=False, _
            DataType:=wdPasteText, Placement:=wdInLine, DisplayAsIcon:=False
        docWord.Bookmarks.Add xlName.Name, docWord.Range(StartRange, EndRange - 1)
     End If
Next xlName
2 — If the number of transactions goes beyond 1 page can I set up headers, ie Invoice Date, Invoice Number and Invoice Amount?
Sorry but I’m afraid I do not understand. Please, try to explain further.
Ciao
Andrea
-
#5
A word document will be, for example, 60 lines long per page. The template document I am using will have headers — Date, Invoice Number, amount, etc on page 1. If the number of cells being copied from Excel is 60+ how do I tell word to add the headers to page 2 of the document?
Thanks
-
#6
Also tried the code above and the problem I now have is when the Excel range is copied to the bookmark in Word it is not copying in table form, ie columnar. If the bookmark is starts 40 space to the right of the document the first cell copied drops in at the bookmark but the remainder drop in to the far left of the documnet as if the carraige return has been hit and is no longer in columnar form.
Could this code be used to enter the copied ranges into a table?
-
#7
A word document will be, for example, 60 lines long per page. The template document I am using will have headers — Date, Invoice Number, amount, etc on page 1. If the number of cells being copied from Excel is 60+ how do I tell word to add the headers to page 2 of the document?
Also tried the code above and the problem I now have is when the Excel range is copied to the bookmark in Word it is not copying in table form, ie columnar. If the bookmark is starts 40 space to the right of the document the first cell copied drops in at the bookmark but the remainder drop in to the far left of the documnet as if the carraige return has been hit and is no longer in columnar form.
Range consisting of more than 1 cell
I think the best solution is using table bookmarks (insert table, fill first row with headers, and leave at least an other row for data. Then select the table and add the bookmark).
Remember to set the option «Repeat first row as header»
Furthermore, remove spaces and increase left indent, so the table will be placed toward the right side of the page
1 cell range
Use simple bookmark (the ones you have already)
Use the code below:
Code:
Dim StartRange As Long, iROW As Long
Dim xlsNr As Single, docNr As Single, docNc As Single
Dim iTABLE As Word.Table

For Each xlName In wb.Names
     If docWord.Bookmarks.Exists(xlName.Name) Then
        If Range(xlName.Name).Cells.Count = 1 Then
            StartRange = docWord.Bookmarks(xlName.Name).Range.Start
            docWord.Bookmarks(xlName.Name).Range.Text = Range(xlName.Name).Value
            docWord.Bookmarks.Add xlName.Name, docWord.Range(StartRange, _
                StartRange + Len(Range(xlName.Name).Value))
        Else
            With Range(xlName.Name)
                .Copy
                xlsNr = .Rows.Count
            End With
            Set iTABLE = docWord.Bookmarks(xlName.Name).Range.Tables(1)
            docNr = iTABLE.Rows.Count
            docNc = iTABLE.Columns.Count
            If docNr > xlsNr + 1 Then
                For iROW = 1 To docNr - xlsNr - 1
                    iTABLE.Rows(2).Delete
                Next iROW
            ElseIf docNr < xlsNr Then
                For iROW = 1 To xlsNr - docNr + 1
                    iTABLE.Rows.Add BeforeRow:=iTABLE.Rows(2)
                Next iROW
            End If
            docNr = iTABLE.Rows.Count
            docWord.Range(iTABLE.Cell(2, 1).Range.Start, _
                iTABLE.Cell(docNr, docNc).Range.End).PasteSpecial _
                Link:=False, DataType:=wdPasteText, Placement:=wdInLine, _
                DisplayAsIcon:=False
            Application.CutCopyMode = False
        End If
     End If
Next xlName
Ciao
Andrea
It may be better to «roll your own merge», but you can try this, and adapt it if you succeed.
This assumes that
a. you want to present a read-only copy of each staff member’s data, e.g. as a picture.
b. you only need it to work in Word 2007 or later Windows Word versions
c. your Excel data source looks like this:
— sheet1 contains a list of your staff members. You have a column in the sheet called «sheet» (without the quotes, and use «sheet» not «Sheet» or adapt the code to use the exact name of the column. This contains the name of the sheet containing
their data (e.g. «abc», «def»)
— each member’s data occupies the same area in the sheet (e.g. R1C1:R8C5)
— the workbook name is c:xlstaffdata.xlsx
d. a couple of other things that should be apparent from the code
The approach:
1. Open your workbook in Excel and make any changes needed
2. Open your Mail Merge Main Document
3. Attach Sheet1 of the Workbook as the data source for your mailmerge
4. Save your Mail Merge Main Document as a .docm
5. Where you want the Excel sheet, create a rich text content control. Edit its properties so that it is not deletable. Type a space in the control.
6. Create a Class Module and name it «ApplicationEvents». Copy the following code in there and amend as needed.
‘ Put the full name of your workbook here
Const WorkBookFullName As String = «c:\xl\multiws.xlsx»
‘ Put the exact name of the column containing the sheet names here
Const SheetNameColumnName As String = «sheet»
‘ Put the range you want to insert here
Const DataRange As String = «R1C1:R8C5»
Public WithEvents app As Word.Application
Private Sub app_MailMergeAfterRecordMerge(ByVal Doc As Document)
Doc.ContentControls(1).Range.Text = » «
End Sub
Private Sub app_MailMergeBeforeRecordMerge(ByVal Doc As Document, Cancel As Boolean)
Dim r As Word.Range
Set r = Doc.ContentControls(1).Range
With r.Fields.Add(r, _
WdFieldType.wdFieldLink, _
«Excel.Sheet.12 » & WorkBookFullName & » «»» & _
CStr(Doc.MailMerge.DataSource.DataFields(SheetNameColumnName).Value) & _
«!» & DataRange & «»»», _
False)
.Update
.Unlink
End With
Set r = Nothing
End Sub
7. Put the following code under «ThisDocument»:
Sub xautoopen()
Dim ae As ApplicationEvents
Set ae = New ApplicationEvents
Set ae.app = Application
With Me.MailMerge
.Destination = wdSendToNewDocument
.Execute
End With
Set ae.app = Nothing
Set ae = Nothing
End Sub
8. Save and Close your Mail Merge Main Document
9. Each time you want to test or perform your merge,
A. ensure your WorkBook is open and that you have saved any changes
B. Open your .docm, enable macros if necessary, and run xautoopen.
Notes:
point 9 A is important because otherwise you may run into various locking problems.
The problem with trying to insert an updateable sheet in Word is that you need to insert it as an embedded object, but if you try to embed a sheet from the file, the embedded object actually allows access to the entire workbook, i.e. each member would be
able to access the other members’ data. There may be a workaround for that, but if it’s not necessary let’s not go there. You can link, but that would create other problems.
If you need to insert different ranges for each user, you may be able to construct anew column that uses Excel formulas to find the boundaries of the non-blank cells on each sheet. I’ve never found an entirely reliable way of doing that, but I suspect a
good enough method exists for this purpose. Otherwise you would either have to specify the sheet and range for each user, or name all the ranges and change the code slightly (all of which are high maintenance options IMO), or it would be necessary to use the
Excel object model to get the correct range for each sheet during the merge. Unfortunately, { LINK } fields won’t work that out for you AFAIK.
This entire thing could be done without any macro code, using a DATABASE field, except for the fact that it is quite difficult to fix the numeric and date formatting problems in that case (i.e. the problems that you can typically fix in MERGEFIELD fields
by not mixing date types in Excel columns and using formatting switches).
Peter Jamieson
Здравствуйте дорогие читатели блога scriptcoding.ru. Сегодня мы рассмотрим работу с классом Range, который относится к объектном модели Word. Данный класс отвечает за работу с текстом в ворде, а точнее, за его выбор.
В отличии от Selection, Range позволяет не выделить, а выбрать заданный диапазон текста в ворде. Использовать Range более выгодно, чем Selection, так как получить выбор можно только программно, это работает нам на руку, так как пользователь не сможет повлиять на работу макроса или программного кода. Поясню: допустим, мы хотим обработать текст в ворде с помощью объекта Selection, выделив нужный диапазон. Если пользователь во время обработки щелкнет мышью и снимет выделение, то наш макрос потерпит поражение. В случае с Range такой неприятности не произойдет, поэтому и рекомендуется использовать вместо Selection.
Получить доступ к объекту можно несколькими способами:
Одноименный метод объекта Document – данный метод принимает два необязательных параметра, которые задают начальное и конечное значение выбора при работе с текстом в Word. Если вызвать метод без параметров, то будет выбрано содержимое всего документа, например:
' Выбираем весь текст
set oRange = oDoc(1).Range()
'Делаем шрифт жирным
oRange.Bold = true
Или такой вариант:
'Выбираем первые 10 символов
set oRange = oDoc(1).Range(0,10)
Одноименное свойство – данное свойство предусмотрено для большинства классов Word (Bookmark, Selection, Table, Row, Cell, Paragraph и так далее). В данном случае мы получаем Range для заданного класса, автоматически произойдет выбор содержимого данного класса (абзац, выделение, закладка и так далее).
Метод SetRange() – Данный метод предоставляет сам объект Range, и он позволяет переопределить выбор текста в ворде, например:
set oRange1 = oDoc(1).Range()
oRange1.SetRange 1,10
oRange1.Bold = true
Содержание
- Класс Range – выбираем текст в ворде
- Свойства – работа с текстом в ворде
- Методы – работа с текстом в Word
Класс Range – выбираем текст в ворде
Свойства – работа с текстом в ворде

Свойства, которые позволяет задать или получить значение константы:
Case– Регистр текста в ворд, константа WdCharacterCase:
- wdNextCase — -1 – Как в предложении
- wdLowerCase — 0 — Нижний регистр
- wdUpperCase — 1 — Верхний регистр
- wdTitleWord — 2 – Начало слова с заглавной буквы
- wdTitleSentence — 4 — в режиме ввода предложения
- wdToggleCase — 5 – Инвертировать регистр
CharacterWidth — Ширина символов, константа WdCharacterWidth:
- wdWidthFullWidth — 7 – Полная ширина.
- wdWidthHalfWidth — 6 – Половина ширины (нормальный режим).
HorizontalInVertical– Расположение текста в ворде, константа WdHorizontalInVerticalType:
- wdHorizontalInVerticalNone — 0 – Форматирование отсутствует
- wdHorizontalInVerticalFitInLine — 1 – Горизонтальное направление
- wdHorizontalInVerticalResizeLine — 2 – Вертикальное направление
Orientation— Направление ворд текста, константа WdTextOrientation:
- wdTextOrientationHorizontal — 0 – Горизонтально, по умолчанию.
- wdTextOrientationVerticalFarEast — 1 – Вертикально вниз от верхней части, справа налево.
- wdTextOrientationUpward — 2 — Вверх под углом.
- wdTextOrientationDownward — 3 – Вниз под углом.
- wdTextOrientationHorizontalRotatedFarEast — 4 — Горизонтально, но справа налево (только для языков с данным типом письма).
- wdTextOrientationVertical — 5 — Вертикально вниз от верхней части, слева направо.
HighlightColorIndex– Цвет выделения текста в ворде, константа WdColorIndex.
LanguageIDOther– Язык текста в ворд, константа, WdLanguageID.
Style– Стиль, константа WdBuiltinStyle.
Underline– Тип подчеркивания, константа WdUnderline.

Свойства, которые позволяют задать или получить логическое значение:
Bold– Делает шрифт жирным (true).
Italic— Делает шрифт курсивом (true).
GrammarChecked– Проверка грамматики.
LanguageDetected– Определение языка.

Прочие свойства (чтение и запись), только последнее доступно только для чтения.
Startи End– Начальная и конечная позиция для выбора.
FitTextWidth— Ширина текста в текущих единицах измерения.
ID— Имя идентификатора (строковое значение) для указанного диапазона.
Text– Позволяет вставить (в место, где находится курсор), заменить (выбранную область), или получить текст в ворде для заданного диапазона.
Information(type) — Информация об указанном диапазоне (параметр type содержит значение константы WdInformation. Только чтение.
Методы – работа с текстом в Word

CheckGrammar() — Начинает проверку орфографии и грамматики для указанного диапазона.
Set Range2 = Documents("MyDocument.doc").Sections(2).Range
Range2.CheckGrammar
CheckSynonyms() — Отображает диалоговое окно «Тезаурус«.
Collapse(Direction) — Убирает выделение.
Direction – Дополнительный параметр, который задает направление от позиции курсора. Может быть одним из следующих значений константы WdCollapseDirection: wdCollapseEnd — 0 или wdCollapseStart — 1. Значение по умолчанию wdCollapseStart.
ComputeStatistics(Statistic) – Позволяет получить статистику для заданного выбора. Параметр Statistic содержит значения константы WdStatistic.
Copy(), Delete(), Cut() – Копирование, удаление и вырезание выбранного диапазона.
Paste() – Вставка содержимого буфера обмена.
CopyAsPicture() – Копирование текста в ворде как изображения.
Select() – Выделение текущего выбора.
SetRange(Start, End) – Позволяет задать начальную и конечную позицию для выбора, вернет новый объект Range.
Relocate(Direction) — Переставляет местами абзацы в выбранном диапазоне.
Direction – Обязательный параметр, который задает направление, содержит значение константы WdRelocate:
- wdRelocateDown — 1 — Ниже следующего видимого абзаца.
- wdRelocateUp — 0 — Выше предыдущего видимого абзаца.
Методы с префиксом Insert…и Move… и метод ConvertToTable() используются также классом Selection, поэтому я не стал их описывать, просто ознакомьтесь со статьей «Объект Word Selection — выделение фрагмента текста в ворде, методы #1»
Ниже я привел два примера программного кода на языке VBScript и JScript, в них я просто выбираю каждый символ в тексте и задаю для него цвет выделения. Работа с текстами в Word. Причем так, что бы цвета периодически менялись.
Программный код на языке VBSCRIPT:
' ----------------------------------------------------------------------------
' Работа с текстом в ворде
' Выделение разными цветами
' Range1.vbs
' ----------------------------------------------------------------------------
Option Explicit

dim oWord, oDoc, oSel, i, oPars, MyText, oRange, j

Set oWord = CreateObject("Word.Application")
Set oDoc = oWord.Documents
oDoc.Add()
Set oSel = oWord.Selection
Set oPars = oSel.Paragraphs
oWord.Visible = True

MyText = "Работа с текстом в Word "

' Вставляем текст
For i=0 to 4
   oSel.TypeText MyText & MyText & MyText & MyText & MyText & MyText & MyText
   oSel.TypeParagraph
Next

' Создаем ссылку
' Заодно выбираем весь текст в ворде
set oRange = oDoc(1).Range()
i = 1:j = 0

' Обрабатываем каждый символ
Do While i <= oRange.End
   With oRange
      ' выбираем один символ
      .SetRange i, i+1
      ' если выбран последний цвет
      if j = 17 then
         j = 0
         ' Меняем цвет выделения
         .HighlightColorIndex = j
         j = j + 1
      else
         .HighlightColorIndex = j
         j = j + 1
      end if
      i = i + 1
   End With
Loop
Программный код на языке JSCRIPT:
// ----------------------------------------------------------------------------
// Работа с текстом в ворде
// Выделение разными цветами
// Range1.js
// ----------------------------------------------------------------------------

var oWord1, oDoc1, oSel1, oPars1, MyText1 = "Работа с текстом в Word. ", oRange1;

oWord1 = WScript.CreateObject("Word.Application");
oDoc1 = oWord1.Documents;
oDoc1.Add();
oSel1 = oWord1.Selection;
oPars1 = oSel1.Paragraphs;
oWord1.Visible = true;

// Вставляем текст
for (i=0; i<=4; i++){
    oSel1.TypeText(MyText1 + MyText1 + MyText1 + MyText1 + MyText1 + MyText1 + MyText1);
    oSel1.TypeParagraph();
}

// Создаем ссылку
// Заодно выбираем весь текст в ворде
oRange1 = oDoc1(1).Range();

var i = 1, j = 0;
// Обрабатываем каждый символ
while (i <= oRange1.End){
    with(oRange1){
        // выбираем один символ
        SetRange(i, i+1);
        // если выбран последний цвет
        if (j == 17){
            j = 0;
            // Меняем цвет выделения
            HighlightColorIndex = j;
            j++;
        }else{
            HighlightColorIndex = j;
            j ++;
        }
        i++
    }
}
Хорошо, с программированием закончили, теперь можно дать некоторые пояснения. И так, оба примера работают с текстом в Word одинаково. Имена переменных практически идентичны, только для JSCRIPT я к имени переменных добавил 1. В самом начале происходит подключение основных классов для доступа к приложению Microsoft Word, создание нового документа — «Коллекция Documents«, делаем документ видимым. Далее в цикле FOR — «Урок 9 по JScript — оператор цикла for» и «Урок 6 по VBScript: Циклы for…next и for each…next» происходит работа с текстом в ворд, а именно – добавление несколько раз содержимого переменной MyText.

Переменная oRange будет содержать ссылку н6а класс, используя цикл WHILE — «Урок 7 по VBScript: Циклы do…loop и while…wend» и «Урок 10 по JScript: Цикл while и do…while«, мы начинаем обрабатывать каждый символ и менять его цвет, естественно, что количество возможных цветов ограничено. Поэтому нам приходится дополнительно добавить переменные i и j. Ну и все, результат работы можно увидеть на рисунке выше.
November 15, 2015/
Chris Newman

What Is A Named Range?
Creating a named range allows you to refer to a cell or group of cells with a custom name instead of the usual column/row reference. The HUGE benefit to using Named Ranges is it adds the ability to describe the data inside your cells. Let’s look at a quick example:
Can you tell if shipping costs are charged with the product price?
-
= (B7 + B5 * C4) * (1 + A3)
-
=(ShippingCharge + ProductPrice * Quantity) * (1 + TaxRate)
Hopefully, you can clearly see option number TWO gives you immediate insight to whether the cost of the products includes shipping costs. This allows the user to easily understand how the formula is calculating without having to waste time searching through cells to figure out what is what.
How Do I Use Named Ranges?
As a financial analyst, I play around with a bunch of rates. Examples could be anything from a tax rate to an estimated inflation rate. I use named ranges to organize my variables that either are changed infrequently (ie Month or Year) or something that will be static for a good amount of time (ie inflation rate). Here are a list of common names I use on a regular basis:
-
ReportDate
-
Year
-
Month
-
FcstID
-
TaxRate
-
RawData
Creating Unique Names On The Fly
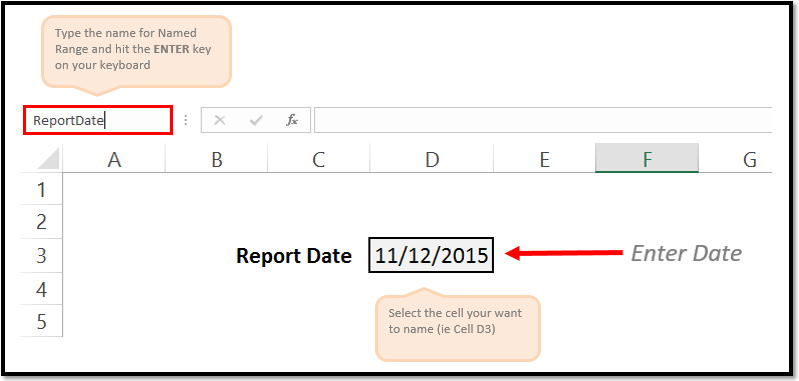
It is super easy to create a Named Range. All you have to do is highlight the cell(s) you want to reference and give it a name in the Name Box. You name cannot have any spaces in it, so if you need to separate words you can either capitalize the beginning of each new word or use an underscore (_). Make sure you hit the ENTER key after you have finished typing the name to confirm the creation of the Named Range.
As a side note, any Named Range created with the Name Box has a Workbook scope. This means the named range can be accessed by any worksheet in your Excel file.
Creating Names With The «Name Manager»
If you want to customize your named ranges even more, you can open up the Name Manager (Formulas tab > Defined Names group > Name Manager button) to edit and create new named ranges.
I won’t go into great detail in this article, but know that with the Name Manager you can
-
Change the name of an existing Named Range
-
Change the reference formula
-
Specify the scope (what worksheets the name can be accessed from)

On To The VBA
Now that you have had a brief overview on Named Ranges, lets dig into some VBA macros you can use to help automate the use of Named Ranges.
Add A Named Range
The below VBA code shows ways you can create various types of named ranges.
Sub NameRange_Add()
‘PURPOSE: Various ways to create a Named Range
‘SOURCE: www.TheSpreadsheetGuru.com
Dim cell As Range
Dim rng As Range
Dim RangeName As String
Dim CellName As String
‘Single Cell Reference (Workbook Scope)
RangeName = «Price»
CellName = «D7»
Set cell = Worksheets(«Sheet1»).Range(CellName)
ThisWorkbook.Names.Add Name:=RangeName, RefersTo:=cell
‘Single Cell Reference (Worksheet Scope)
RangeName = «Year»
CellName = «A2»
Set cell = Worksheets(«Sheet1»).Range(CellName)
Worksheets(«Sheet1»).Names.Add Name:=RangeName, RefersTo:=cell
‘Range of Cells Reference (Workbook Scope)
RangeName = «myData»
CellName = «F9:J18»
Set cell = Worksheets(«Sheet1»).Range(CellName)
ThisWorkbook.Names.Add Name:=RangeName, RefersTo:=cell
‘Secret Named Range (doesn’t show up in Name Manager)
RangeName = «Username»
CellName = «L45»
Set cell = Worksheets(«Sheet1»).Range(CellName)
ThisWorkbook.Names.Add Name:=RangeName, RefersTo:=cell, Visible:=False
End Sub
Loop Through Named Ranges
This VBA macro code shows how you can cycle through the named ranges within your spreadsheet.
Sub NamedRange_Loop()
‘PURPOSE: Delete all Named Ranges in the Active Workbook
‘SOURCE: www.TheSpreadsheetGuru.com
Dim nm As Name
‘Loop through each named range in workbook
For Each nm In ActiveWorkbook.Names
Debug.Print nm.Name, nm.RefersTo
Next nm
‘Loop through each named range scoped to a specific worksheet
For Each nm In Worksheets(«Sheet1»).Names
Debug.Print nm.Name, nm.RefersTo
Next nm
End Sub
Delete All Named Ranges
If you need to clean up a bunch of junk named ranges, this VBA code will let you do it.
Sub NamedRange_DeleteAll()
‘PURPOSE: Delete all Named Ranges in the ActiveWorkbook (Print Areas optional)
‘SOURCE: www.TheSpreadsheetGuru.com
Dim nm As Name
Dim DeleteCount As Long
‘Delete PrintAreas as well?
UserAnswer = MsgBox(«Do you want to skip over Print Areas?», vbYesNoCancel)
If UserAnswer = vbYes Then SkipPrintAreas = True
If UserAnswer = vbCancel Then Exit Sub
‘Error Handler in case Delete Function Errors out
On Error GoTo Skip
‘Loop through each name and delete
For Each nm In ActiveWorkbook.Names
If SkipPrintAreas = True And Right(nm.Name, 10) = «Print_Area» Then GoTo Skip
‘Error Handler in case Delete Function Errors out
On Error GoTo Skip
‘Delete Named Range
nm.Delete
DeleteCount = DeleteCount + 1
Skip:
‘Reset Error Handler
On Error GoTo 0
Next
‘Report Result
If DeleteCount = 1 Then
MsgBox «[1] name was removed from this workbook.»
Else
MsgBox «[» & DeleteCount & «] names were removed from this workbook.»
End If
End Sub
Delete Named Ranges with Error References
This VBA code will delete only Named Ranges with errors in them. These errors can be caused by worksheets being deleted or rows/columns being deleted.
Sub NamedRange_DeleteErrors()
‘PURPOSE: Delete all Named Ranges with #REF error in the ActiveWorkbook
‘SOURCE: www.TheSpreadsheetGuru.com
Dim nm As Name
Dim DeleteCount As Long
‘Loop through each name and delete
For Each nm In ActiveWorkbook.Names
If InStr(1, nm.RefersTo, «#REF!») > 0 Then
‘Error Handler in case Delete Function Errors out
On Error GoTo Skip
‘Delete Named Range
nm.Delete
DeleteCount = DeleteCount + 1
End If
Skip:
‘Reset Error Handler
On Error GoTo 0
Next
‘Report Result
If DeleteCount = 1 Then
MsgBox «[1] errorant name was removed from this workbook.»
Else
MsgBox «[» & DeleteCount & «] errorant names were removed from this workbook.»
End If
End Sub
Anything Missing From This Guide?
Let me know if you have any ideas for other useful VBA macros concerning Named Ranges. Or better yet, share with me your own macros and I can add them to the article for everyone else to see! I look forward to reading your comments below.
About The Author
Hey there! I’m Chris and I run TheSpreadsheetGuru website in my spare time. By day, I’m actually a finance professional who relies on Microsoft Excel quite heavily in the corporate world. I love taking the things I learn in the “real world” and sharing them with everyone here on this site so that you too can become a spreadsheet guru at your company.
Through my years in the corporate world, I’ve been able to pick up on opportunities to make working with Excel better and have built a variety of Excel add-ins, from inserting tickmark symbols to automating copy/pasting from Excel to PowerPoint. If you’d like to keep up to date with the latest Excel news and directly get emailed the most meaningful Excel tips I’ve learned over the years, you can sign up for my free newsletters. I hope I was able to provide you with some value today and I hope to see you back here soon!
— Chris
Founder, TheSpreadsheetGuru.com