
Arranging a meeting is usually a flurry of arranging, reservations, products collating and obtaining the term out in regards to the party, however you really don’t wish to possess a mass stampede of attendees upon arrival. Take full advantage of your Microsoft Word computer software to permit assembly guests know particularly wherever to select table name playing cards. Also referred to as seating playing cards or desk tents, desk name playing cards operate which has a standard measurement site of paper and offer you a quick and customizable method to present attendees to their tables.
Samples of Name Tent :

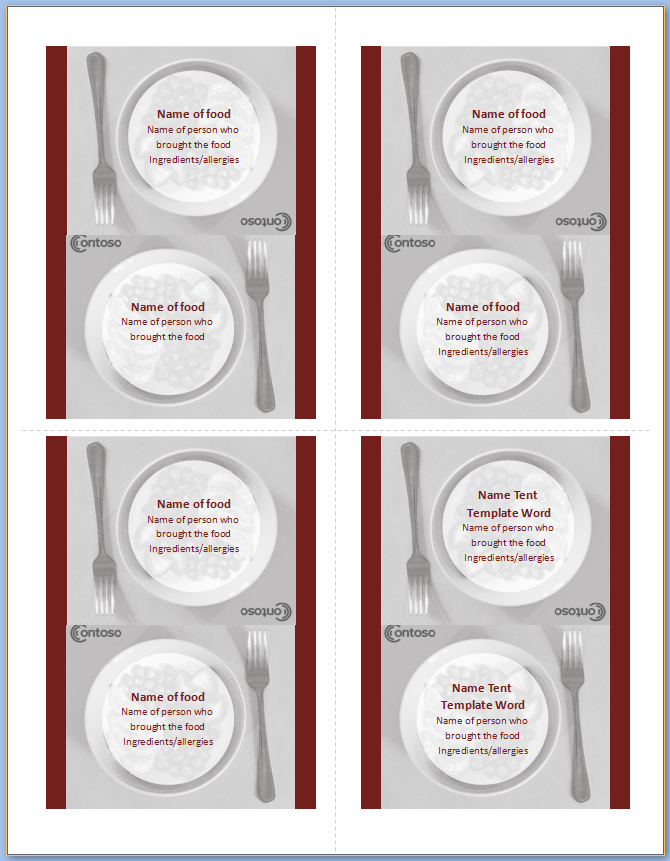
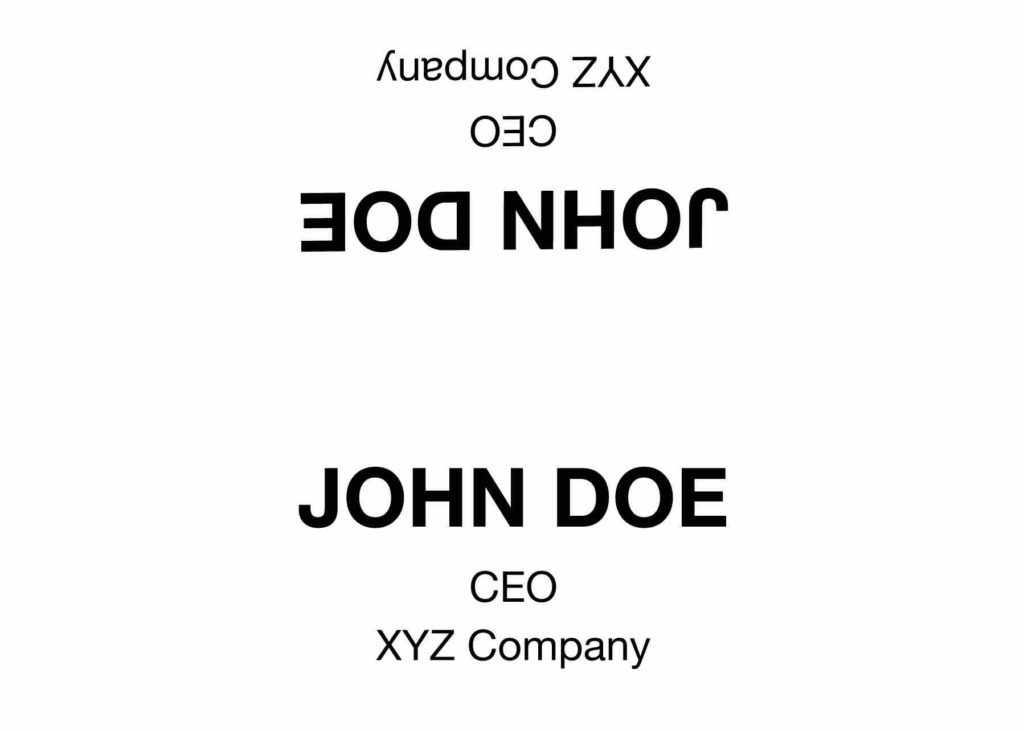
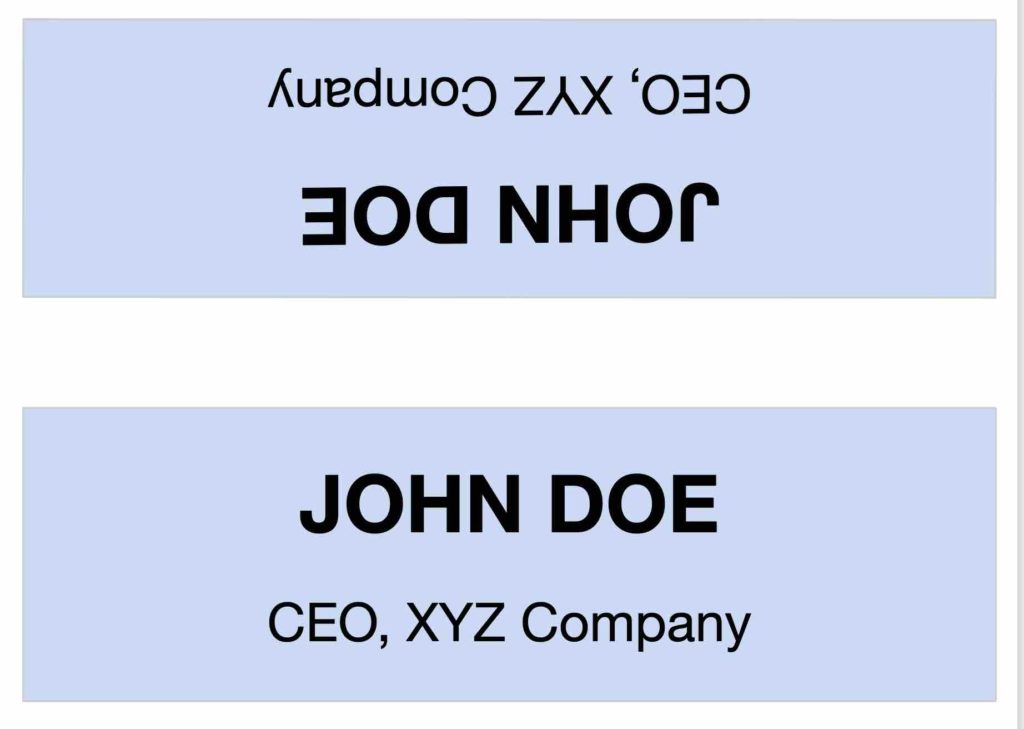
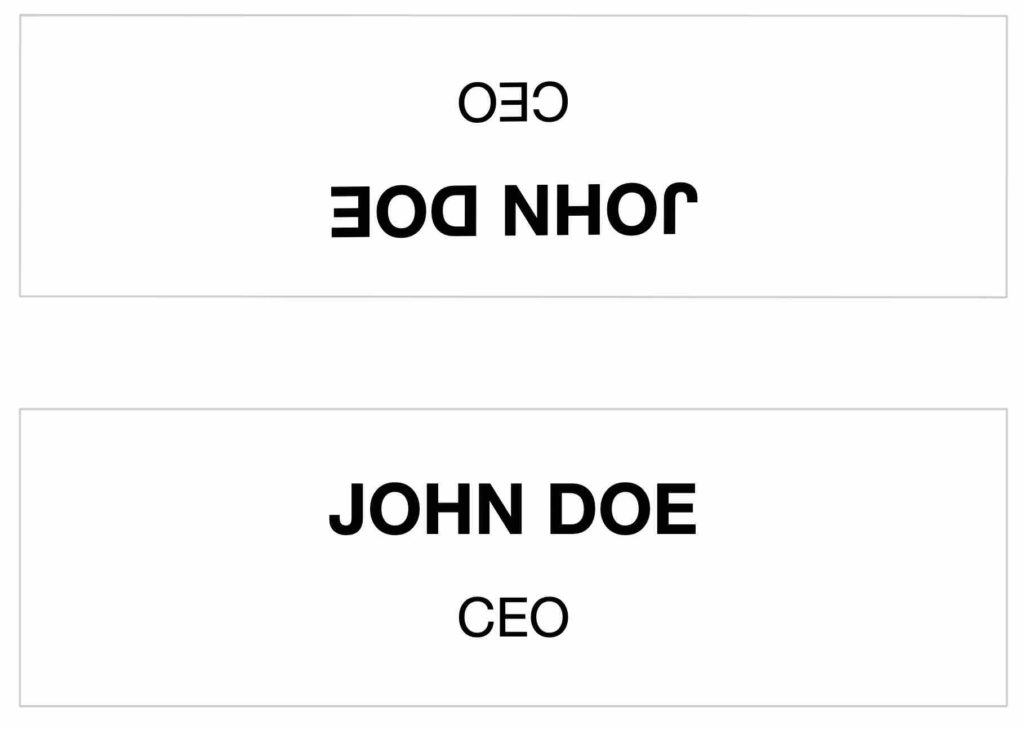
Sample of Name Tent Template Word

Example of Name Tent Template Word

Name Tent Template Word Example
Name Tent Template Word Sample
Using name tents in marketing and advertising can be a successful technique to invite additional customers or advertise products and solutions and providers for establishments this sort of as motels, places to eat or perhaps bars. When you thoroughly system and make desk tent templates in Word or almost every other software program in the pc, they can appreciably increase your return on investment decision.
Providing you consider the next critical procedures, you’d have the ability to successfully use these advertising and marketing instruments:
Do exploration to know the disposition of your respective viewers
Existing a terrific present along with a connect with to motion
Be as artistic as you can be
Name Tent Template Word – download
How To Print Place Cards
- Step 1 – Download Free Microsoft Word Place Card Print Template. …
- Step 2 – Open the Template File in Microsoft Word. …
- Step 3 – Enter your Guests Names and Table Numbers. …
- Step 4 – Time To Print! …
- Step 5 – Fold and Finish. …
- 4 Comments.
Likewise How do I make a table tent in Word?
How do you make table place cards on Cricut?
Also How do you make a food tent card?
How do you write on a place card on Cricut?
What is Digital name tent? The purpose of these tents is to allow students to see each other’s names and reference them when speaking.
What should I put on a name tent? Quick and Easy DIY Name Tent
- fold copy paper into three equal parts.
- write name boldly on the middle section.
- fold into a 3-d triangle.
- place in front of desk with name facing out.
How do you print names on both sides of a tent card? How to Print a Tent Card Both Sides at a Time
- Open the word processor application on your computer. …
- Select the text tool, which typically looks like a button with a letter “T,” in the drawing toolbar. …
- Type the name that will appear on the tent card. …
- Click on the edge of the text box to select the entire box.
How do I print name cards on Cricut?
How do you make a name card on Cricut joy?
Can the Cricut do calligraphy?
When you use your Cricut Calligraphy pen, you must put the tip in at a 45-degree angle to your machine so you get the pretty thick and thin lines associated with calligraphy. For the best results, angle your pen’s tip so it’s going off at an angle to the lower left corner of your machine.
How do you make tent labels?
How do you make a folding table card?
What size is a food tent card?
Big Tent Card Folded: 7.5 x 3.1 x 8.7 Inches; Small Tent Cards: Folded size: 4 x 2 inches; Picks: 7.25 inches Product names are trademark of listed manufacturer or other owners, and are not trademarks of eForCity Corp.
How do I make labels with my Cricut?
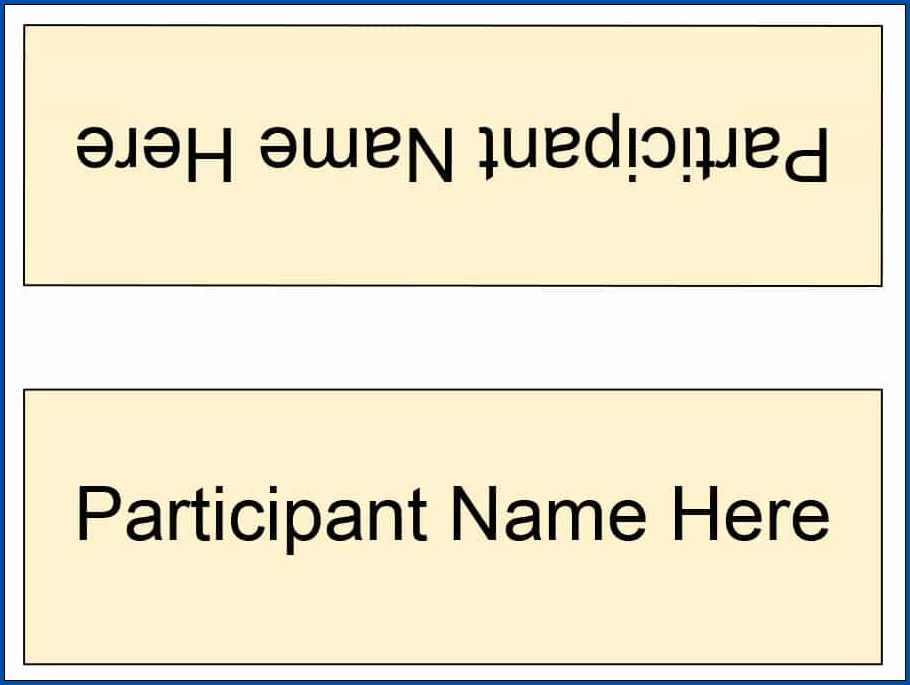
How do you make a table tent in Google Docs? Tutorial for creating and editing name tent online
- Click on File and on Make a Copy to make the template editable and save in desired Google Drive location.
- tap on the text and you can add any text, change font size, font format, text-color, background color and do more fomattings.
How do I print name tents in Word?
How To Print Your Own Tent Cards in Microsoft Word
- Step 1: Download the Tent Card Template. Download the Microsoft Word template for blank note cards.
- Step 2: Open the Template in Microsoft Word. …
- Step 3: Design Your Tent Cards. …
- Step 4: Print Your Tent Cards.
How do you flip text in a tent card in Word? In the Edit WordArt Text dialog box, select the font and font size that you want, type the text that you want in the Text box, and then click OK. On the Drawing toolbar, click Draw, point to Rotate or Flip, and then click Rotate Left twice.
How do you print on both sides of Avery 5305 Tent?
Place the Avery 5305 sheet in the printer face down, then print. Next, switch the 1st & 2nd person’s names, still using the 2nd & 4th boxes. Place the Avery 5305 sheet in the printer again face down, but this time, feeding it in the opposite direction. Click print.
What cardstock do you use for Cricut? I usually use 80#, which is what Cricut cardstock is. I find 65# to be a little too thin for my projects, but it can be great for layering. “Heavyweight” cardstock (100# or more) is almost like posterboard, and that’s the setting I usually use to cut it.
Can you make stickers with Cricut?
Both the Cricut Explore Air 2 and the Cricut Maker are great for making stickers. Both work with the Print Then Cut feature. … All that said, if you want to make stickers without a Cricut, you can cut out your printed designs with scissors or an X-Acto knife.
How do you write a thank you card on Cricut? Open up a new project in Cricut Design Space. Select the Images icon from the left pane and type “Thank You” into the search box that appears in the upper right of the screen. Scroll through to select a design you like. You can also create your own design using the Text feature.
Don’t forget to share this post ✨
Were you looking for an easy and reliable way to make and print name tents with Google Docs?
Or maybe you wanted to make name tags in a quick and easy way without having to use resource-heavy applications like Adobe Suite or want some alternative to MS Office.
Whatever may be the reason, this how-to blog post will be your ultimate friend in helping you to finish creating the name tents you want to make in a very efficient and easy manner.
I have listed six different name tag templates which can be folded in two here in this blog post, which you can use for free! And you won’t believe that all these templates are fully customizable.
You can modify the template to suit your requirement. You can change the font, font size, text colour, background colour, add images and more.
If you couldn’t find the relevant template, leave it in the comment section below what type of template you are looking for and I will try to customize one for you.
And as always, if you liked this blog post and think this was helpful you can buy me a coffee as well. 😉
Before we dive into the main topic,
let me share with you my story of why I ended up using Google Docs for the need of my name tag creation.
My story
I used to work in an event management company in Nepal before, and we used to have several large events with a number of speakers happening.
Our graphic designer used to use Adobe InDesign to make the name tent for the events. There was a template design and anyone could format and print the desired template.
But once, we had to make immediate changes to one of the speakers’ names during the event and we didn’t have to bring the design computer to the event venue, as we used to prepare prints and documents in advance and ship them to the venue.
I was given the task to make changes to the name tent printed, but since I don’t use Adobe Suit, I had to find some alternatives. A few minutes of Google Search ended up using Google Docs for fulfilling my name tent need.
What is Google Docs?
Google Docs, is an online cloud-based word processing application developed by Google.
It is available for free to use and can be accessed from any device with an internet connection and web browser. It is one of the strong competitors of Microsoft Word.
What are the advantages of using Google Docs to create a name tent?
- Since Google Docs is internet-based, you can access your file from anywhere anytime
- You don’t need any special application; just your web browser and internet connection is more than enough
- free to use, save files to cloud and reuse
- Collaboration, autosave, revision history and everything you would need
- easy options to export and print with different file formats like pdf, docx, svg, png etc.
Your Gift of $200 Cloud Hosting Credit is Here. Claim Now!
There can be several ways to do a certain task. Likewise, there are different methods of making a name tent in Google Docs.
The hard way or the easy way!
This post is about doing it the easy way!
Yes the easy way, because we want to save our time and why to reinvent the wheels when someone else has already done it!
Get Your name tent template in Google Docs
So to make a name tent we will be using a free to use and fully modifiable Google Docs template. This is actually a Google Drawing template that I found through Google Search.
I have modified the main template to different designs. You can select the design you like.
Remember, all designs can be fully modified.
2rows, transparent bg
2rows coloured bg

1row, transparent bg
3row, transparent bg
2row, coloured box
2row, bordered box
YouTube Video Tutorial on making a name tent
If you enjoy watching videos more than reading a blog, or if you face any problems you can refer to this 2m video that I have made on YouTube.
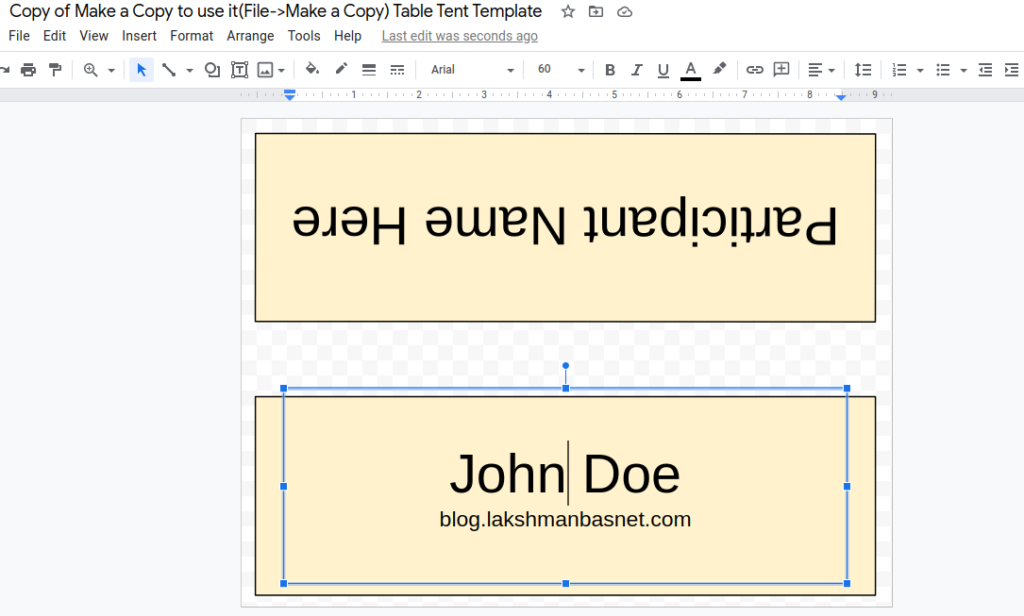
Tutorial for creating and editing name tent online
- the template looks like this
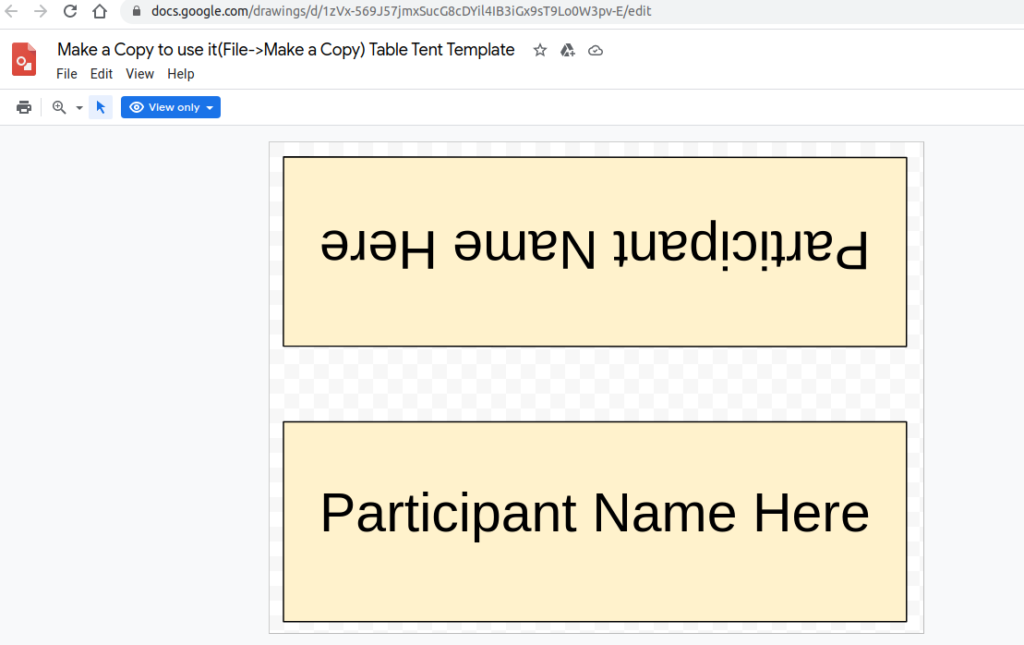
- Click on Use Template to make the template editable and save in desired Google Drive location
- tap on the text and you can add any text, change font size, font format, text-color, background color and do more fomattings
Button
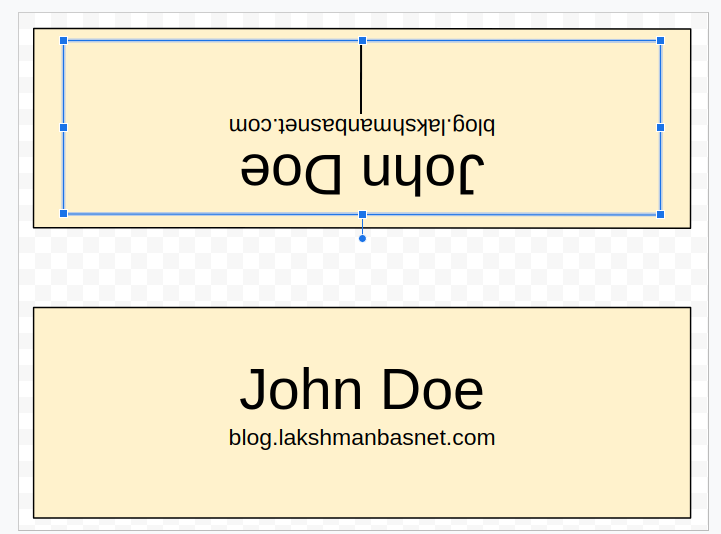
- To insert text in the top box (or one in inverted text), you can copy paste from the normal text box or just type in there
- better might be to copy paste from the normal text box as it would retain formatting
- don’t forget to delete the texts you don’t need like the links and buy me a coffee link
Exporting
- Don’t worry about saving as it will be auto saved
- once finished you can print directly from the print option or download the file to your computer in different file formats like pdf, svg, jpg, png, svg and odp
Table Name Tents are one of my favorite DM tools, right up there with Initiative Tents. (See Table Tents for PCs and Tracking Initiative.) Here’s why you want them and how to create them really quickly.

Table Name Tents Improve Your Game
Recall: Every game should use table name tents. They provide a quick reminder to the game master and players about the characters everyone is playing. It’s really hard to remember six character names, even after a few sessions! It’s also hard to remember their species/race, or what they should be known for.
Better Roleplaying: It’s easier to speak in character when you can see everyone’s character name. The additional information on the card also helps everyone remember the most important aspects that should be used in roleplaying. When we can see that Paige is an elven bard, and she used to be a pirate, we can more easily ask her what she thinks about the ship we are about to board, or ask her what she knows about this port town we just entered.
Tactics and Speed: When combined with initiative tents, we know when the rogue will be going in combat, so we can set them up for an easy sneak attack. Some DMs like to place AC or passive skills on the tent, so they can simply state what a character sees or whether an attack hits without asking for that information.
Campaign Specifics: If the campaign uses factions, houses, or similar systems, a small badge or image can let everyone see to which group each PC belongs.
One-Shots: Conventions especially benefit from name tents. If you run at conventions and use pregens, make a set of name tents so players can immediately jump into character and know who is playing which role.
Playing NPCs: It’s super-cool to jazz up a campaign by having the players play an NPC. Maybe it’s just a name tent for a single NPC a player will run in addition to their character. Or, maybe you shake up an existing game and have every player run an NPC for a session. It’s a really cool twist to a campaign.
Creating Table Name Tents
Here is how to create tents super easily using any word processing program.
Note: I’m using Microsoft Word in these examples and I’m assuming basic knowledge of the tool. The steps below all use basic functionality, so sometimes I won’t go into every basic step (such as how to add bullets or change your page layout to landscape). Such information can be found in the Help menu or through an internet search.
Start up your favorite word processing program and set the page layout to Landscape. Now insert a table. I go for a 3×2 format, though you can do larger or smaller tents as well by having more or fewer columns.

It looks terrible now, but we can now add information in the bottom row. Add the character name and some facts you want. In this example, I’m using the Dwarven Wedding Party NPCs found in the Acquisitions Incorporated adventure, Orrery of the Wanderer. In the adventure, the players momentarily play these NPCs. Table Name Tents help everyone remember their new roles and what they should know about each other. (There are secrets about each PC, and I give those out to each player as a handout since the other players don’t know these secrets.)

You can use cool fonts and start spacing things out so it looks the way you want it to look. This bottom row will be one side of the tent (the tent is folded, like a sandwich board or upside-down “V”), so we are just getting that side right.
In this example, I’m creating three name tents at a time. I’ll then copy this to a second page to do another three.

Once you like the bottom row, you can optionally set the height of the first row (or all rows, same thing) to be the same as the height of the bottom row. In Word, you can highlight a row and right-click, choose Table Properties, and then see the row height. Choose “previous row” to then go to the first row and set it to the same height.

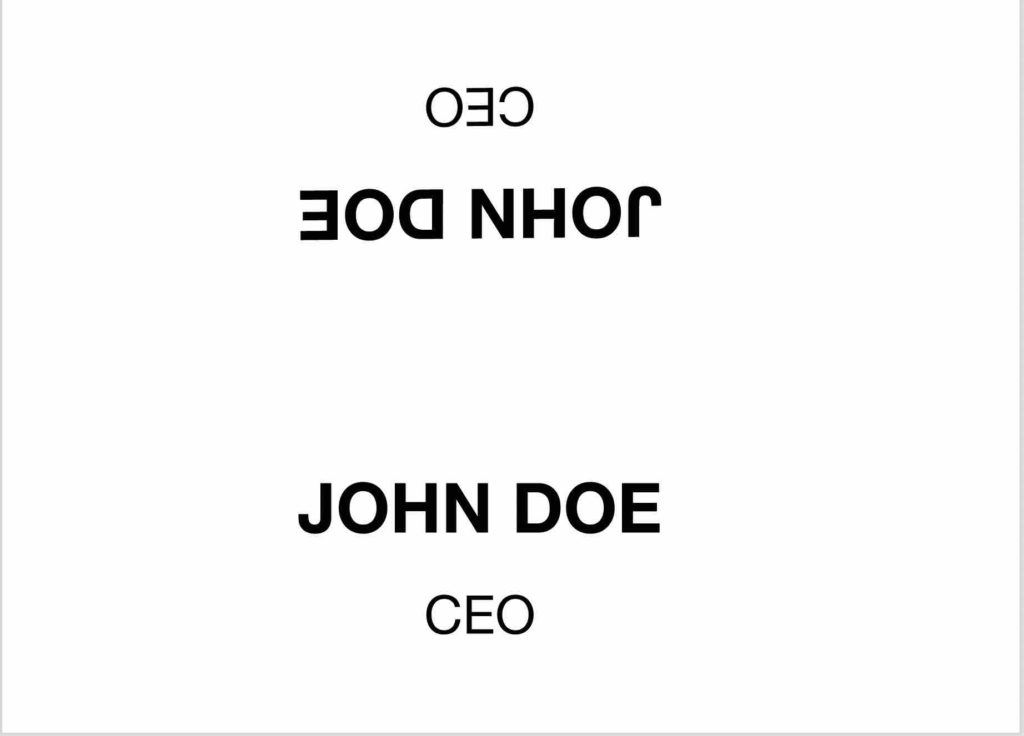
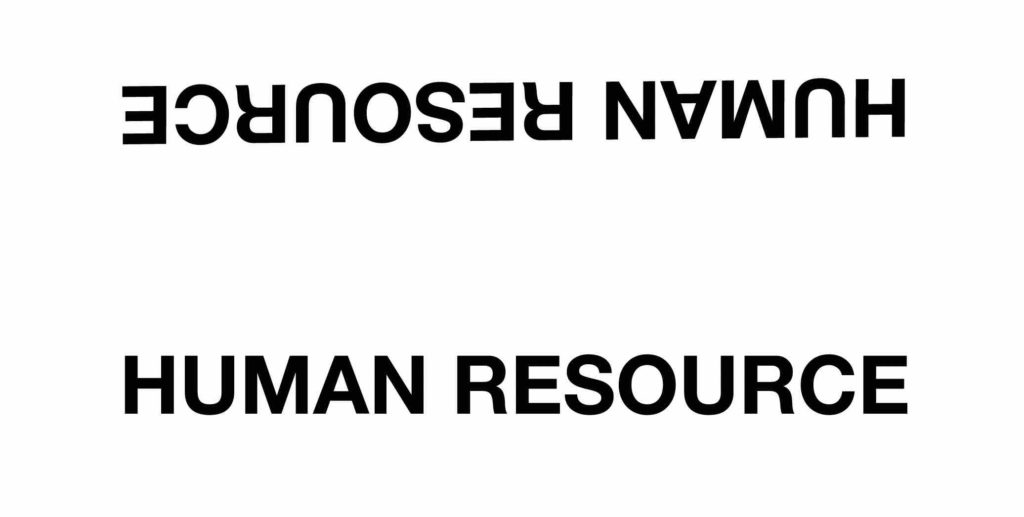
Now for the fun trick. See, the back of the tent should not be blank for two reasons. First, the player can benefit from seeing their own information. Second, when seated at a table players can’t always see the front of each tent. Sometimes they only see the back of the tent of a player sitting next to them. This lets everyone see the tent regardless of where they are sitting.
Some word processing programs let you flip text, so you could copy the text, paste it in the first row, and flip it. However, this can mess with the formatting and can be especially tricky with images and text. So, here’s the trick.
if you are using the Windows operating system, call up your Snipping Tool, or the Snip & Sketch tool (if you prefer that one). You can search in your operating system search toolbar if you don’t have the app showing, but every recent version of Windows has it.
If you aren’t in Windows, you can do a screen capture and use an editing program.
Okay, so get the Snipping Tool and capture the inside of just one cell.

The nice thing about the Snipping Tool is it captures the image and it’s also in your clipboard. Now, click on the empty cell above that table cell in Word, and paste. (You could optionally save the image and then insert it.)

Word makes the next step easy. See that round image at the top of the pasted object? If we click that and move our mouse, we can rotate the image.

Rotate it until it is upside down.

Repeat the process until the top row is done.
If you need more characters, you can copy and paste that table into a new page and repeat the whole process.
You can now print your tents, ideally on card stock so they don’t sag. Cut your tents, making sure to cut along the columns and not the row.

Now we just fold and we are done!

You can easily add images to jazz up your tents. Simply add the image in the first row, and include that in what you copy and paste. A quick image search will usually turn up great options.
Here is an example of tents I used for a Star Wars game using the Esper Genesis rules:

You can go full color, use cool fonts, and so on. Or you can just keep it simple. Either way, an easy but very powerful tool for your games!
How do I print name tent cards in Word?
How To Print Your Own Tent Cards in Microsoft Word Step 1: Download the Tent Card Template. Download the Microsoft Word template for blank note cards. Step 2: Open the Template in Microsoft Word. Step 3: Design Your Tent Cards. Step 4: Print Your Tent Cards.
How do you Create a name in Word?
Right-click the text on which you want to base a new style. In the mini toolbar that appears, click Styles, and then click Create a Style. In the Create New Style from Formatting dialog box, give your style a name and click OK. Your new style will now appear in the Styles gallery.
How do you print on both sides of a name tent?
How to Print a Tent Card Both Sides at a Time Open the word processor application on your computer. Select the text tool, which typically looks like a button with a letter “T,” in the drawing toolbar. Type the name that will appear on the tent card. Click on the edge of the text box to select the entire box.
What are name tents?
A name tent is a paper folded in half. On the front side, the kids write their names in the middle, and on each corner, they write something about themselves.
How do I print name plates in Word?
Create and print a page of different labels Go to Mailings > Labels. Select Options. Select the type of printer you’re using. Select your label brand in Label products. Select the label type in Product number. Select OK. Select OK in the Labels dialog box. Type the information you want in each label.
How do I create Avery 5309 Tent in Word?
Select “Mailings” tab in Ribbon, then click on “Labels” in “Create” group. Choose “Options” in the “Envelopes and Label” dialog box. Choose “Avery US Letter” from “Label vendors” in the “Label Options” dialog box. Select “5309” from “Product number” and click “OK.”.
How do you flip text in a tent card in Word?
In the Edit WordArt Text dialog box, select the font and font size that you want, type the text that you want in the Text box, and then click OK. On the Drawing toolbar, click Draw, point to Rotate or Flip, and then click Rotate Left twice.
How do you do a mail merge tent in Word?
Mail Merge/Tent Cards On the Mailings tab of the ribbon, expand the Start Mail Merge item and select Labels. In the Label Options dialog, select Avery US Letter from the Label vendors drop down and then select 5302 Small Tent Cards from the Product number list and then click on the OK button.
Can you make a logo on Microsoft Word?
Step 1: Open the new blank Word document. Go to Insert tab on the Ribbon and click on the Shapes option in the Illustrations group. A Recently Used Shapes dialog box will appear on the screen. Select the image that you want in your logo and drag it into your current document.
How do I insert watermark in Word?
On the Design tab, select Watermark. In the Insert Watermark dialog, select Text and either type your own watermark text or select one, like DRAFT, from the list. Then, customize the watermark by setting the font, layout, size, colors, and orientation. Select OK.
How do you make a table tent in Google Docs?
Tutorial for creating and editing name tent online Click on File and on Make a Copy to make the template editable and save in desired Google Drive location. tap on the text and you can add any text, change font size, font format, text-color, background color and do more fomattings.
What is tent card?
A tent card is a convenient, self-standing promotional unit created from printed and folded cardstock. Tent cards have widespread use in restaurants, bars, and hotels, where they are used to display new items or services, special offers, upcoming events, and similar promotional messages.
How do you make a name tag for pictures?
How to Create Photo Name Badges in Word Launch your Microsoft Word application and create a new document. Activate the name badge labels in Word. Add your digital photos to the name badges. Type in the name on the badge by applying a text box. Format the text on the photo-name badge. Name and save your photo badges.
How do you put a name tag on a border in Word?
How to Make a Border for Name Tags in Word Open Word. Select “Mailings,” then click “Create” and “Labels” to open the Label options dialog box. Select a product number that corresponds with your name tag sheets. Click “OK” to close the dialog. Select “Print” to open the Print dialog box.
Where can I get a nametag?
Name tags can be caught from fishing as part of the treasure category with a 1⁄6 chance after the 5% chance of being a treasure catch. The chance of catching treasure increases with the Luck of the Sea enchantment.
How rare are name tags Minecraft?
There’s a five percent chance of catching treasure, and only a 0.8 percent chance of getting a Name Tag.
What are name plates made of?
Office nameplates generally are made out of plastic, wood, metals (stainless steel, brass, aluminium, zinc, copper) and usually contain one or two lines of text. The standard format for an office nameplate is to display a person’s name on the first line and a person’s job title on the second line.
How do you put your name on a name plate on a house?
Always have a name plate on the main door or the adjoining wall, if the space permits, as it is believed to attract prosperity, opportunities and well-being. Ensure that the name plate is large enough to write one’s name or surname and the house number and is legible from at least a foot or two away.
Can you make place cards on Google Docs?
Click Insert, then click Text box in the drop-down menu. Click and drag from the top-right corner to close to the middle of the slide, then drag down to the bottom of the card. Enter your text and images if necessary.
Is there a business card template in Google Docs?
Since Google Docs doesn’t come with business card templates, you can use the numerous templates available for Microsoft Word. Just search for design template you like, download or save it and then upload it to Google drive. From there, you can click and open it with Google docs to start editing.
How do I print upside down in Word?
How to Print Upside Down or Rotating Text in MS Word Within Word, type and format your text as you want it. Select the text you want to be upside down. Press CTRL+C to copy the text to the Clipboard. Switch to Paint Shop Pro and press CTRL+V. Click on OK. Press CTRL+R to display the Rotate dialog box.
How do you make a tent out of a desk?
Individual Desk Tents Purchase $1 table cloths from the dollar store. Tape a 3-ring binder (rings up) to the desk top. Drape the table cloth over the binder and desk. Students sit under their desks while in their “tents”. (This will be a HUGE hit!).
How do I make Avery 5309 Tent in Word?
Select “Mailings” tab in Ribbon, then click on “Labels” in “Create” group. Choose “Options” in the “Envelopes and Label” dialog box. Choose “Avery US Letter” from “Label vendors” in the “Label Options” dialog box. Select “5309” from “Product number” and click “OK.”.
What is a table tent?
A Table Tent is a convenient, self-standing promotional unit created from printed and folded cardstock. As the name implies, table tents are designed to be placed on tables…as well as counters, desks, or any other horizontal surface. Sometimes referred to as tent cards, table tents act as miniature billboards.