
This content has been archived, and is no longer maintained by Indiana University. Information here may no longer be accurate, and links may no longer be available or reliable.
Following are instructions for downloading, installing, and configuring MySQL for Excel version 1.3.6.
On this page:
- Overview
- Download and install the MySQL for Excel
- Connect to your MySQL database
- Get help
Overview
Oracle’s MySQL for Excel is an add-in for Windows-based Excel. It provides a wizard-like interface for browsing MySQL schemas, tables, views, and procedures, and performing data operations against them in Excel. It also lets you import MySQL data into Excel, create new MySQL tables from selected Excel data, append Excel data to existing MySQL tables, and edit MySQL table data directly from Excel.
Note:
- MySQL for Excel can return all rows, or a specified range of rows, from a single table only. It cannot import data stored in two different tables, perform table joins, or filter data. Consequently, for example, you can use MySQL for Excel to import rows 1 through 5 in a single table, but you cannot use it to import only those rows that meet certain criteria, such as rows in an employee table with an «employee status» of
inactive. If you need to run MySQL queries that involve data filtering or retrieving data from more than one table, see Use MS Query to connect to your MySQL database on the RDC at IU. - Currently, MySQL for Excel is not available for Excel for Mac.
Download and install MySQL for Excel
To install the MySQL for Excel add-in, you must be logged into your workstation as an administrator.
The MySQL for Excel installer will check your system to make sure it meets the following requirements; the installer will notify you if further action is needed before starting with the installation:
- .NET Framework 4.0 (client or full profile)
- Excel 2007 or later
- Visual Studio 2010 Tools for Office Runtime (This is required to run Office-based tools built with Visual Studio; the MySQL for Excel installer may install this for you. Office Developer Tools for Visual Studio is not a substitute for this requirement.)
- An available MySQL Server connection.
To get the installer, download the standalone MSI file.
To run the installer:
- On your workstation, open the folder containing the installer file (
mysql-for-excel-1.3.6.msi), and then right-click the file and select . - If you see a security warning asking whether you want to run this file, click .
- When the
MySQL for Excel 1.3.6 Setupwizard launches, click . - To accept the default destination folder, click . Alternatively, to select a custom location, click , browse to the desired folder (or create a new one), click the desired folder, click , and then click .
- When prompted, click to begin the installation.
- If you see a security warning asking whether you want the program to install the software on your computer, click .
- If your system prompts you to log in as an administrator, enter the username and password for a local administrator account to proceed.
- When the installation is complete, click to exit the setup wizard.
To access the MySQL for Excel add-in, launch Microsoft Excel, and then, on the tab (to the right), click .
Connect to your MySQL database
Note:
- Before users (including the root user) can connect to your MySQL server instance from Excel, you must add logins for them (with the appropriate access privileges) in your database. For instructions, see Create user accounts for your MySQL database on the RDC at IU.
- If you don’t know your username or password, email the RDC Administration team for help.
To configure MySQL for Excel to connect to your MySQL database on the RDC:
- In Excel, on the tab, click to launch the add-in.
- In the «MySQL for Excel» panel (near the bottom), click .
- In the «MySQL Instance Connection» screen:
- For «Connection Name», enter a name for the connection (for example,
RDC-MySQL). - For «Connection Method», make sure that is selected.
- For «Hostname», enter the hostname of the RDC server:
sasrdsmp01.uits.iu.edu - For «Port», enter the TCP/IP port number:
3006 - For «Username» and «Password», enter the credentials for a MySQL account that has permissions to access your database.
- Optionally, for «Default Schema», enter a schema name.
- To confirm the connection, click . If the connection is valid, click .
- For «Connection Name», enter a name for the connection (for example,
- The newly created connection should appear in the «MySQL for Excel» panel; double-click its name to open a connection to your database.
Once your connection is configured in the MySQL for Excel add-in, you can return to it later; just open Excel, go to the tab, click , and then, double-click the name of your connection.
Get help
For help using MySQL for Excel, see the MySQL for Excel Guide.
If you need help connecting to your MySQL database on the RDC, email the RDC Administration team.
For information about RDC database accounts, see the Databases section of About the Research Database Complex (RDC) at Indiana University.
Note:
UITS does not support MySQL for Excel beyond providing installation instructions and helping you connect to your database.
This is document amse in the Knowledge Base.
Last modified on 2021-05-05 17:14:42.
MySQL for Excel 1.3
MySQL for Excel is an Excel Add-In that is installed and accessed from within the MS Excel’s Data tab offering a wizard-like interface arranged in an elegant yet simple way to help users browse MySQL Schemas, Tables, Views and Procedures and perform data operations against them using MS Excel as the vehicle to drive the data in and out MySQL Databases.
Copyright (c) 2012, 2019, Oracle and/or its affiliates. All rights reserved.
License information can be found in the Installer/LICENSE file.
Installation
- Prerequisites:
- Visual Studio 2015 or greater.
- .NET Framework 4.5.2 (Client or Full Profile).
- Microsoft Office Excel 2007 or greater, for Microsoft Windows.
- Visual Studio 2010 Tools for Office SDK (later called Office Developer Tools).
- WiX Toolset, for building the installer MSI.
- MSBuild Community Tasks, for building the installer MSI.
- Open MySQLForExcel.sln or Package.sln in Visual Studio.
Features
MySQL for Excel has been designed to be a simple and friendly tool for data analysts who want to harness the power of MS Excel to play with MySQL data without worrying about the technical details involved to reach the data they want, boosting productivity so they can focus on the data analysis and manipulation.
- Import Data
- MySQL for Excel makes the task of getting MySQL data into Excel a very easy one; there are no intermediate CSV files required, only a couple of clicks and data will be imported to Excel. MySQL for Excel supports importing data from tables, views and stored procedures.
- Export Data
- MySQL for Excel allows users to create a new MySQL table from selected Excel data; data types are automatically recognized and defaulted for the new table and column names can be created from the first row of data, speeding up the process and making it simple for non-technical users.
- Append Data
- MySQL for Excel lets users save selected Excel data in existing tables; it will automatically attempt to map the columns of the selection with the ones in the MySQL table by column name or by data type, users can then review the mapping, manually change it and store it for later use. Like the Export Data feature, appending data into an existing table is very easy.
- Edit Data
- MySQL for Excel now provides a way to edit a MySQL table’s data directly within Excel using a new worksheet as a canvas to update existing data, insert new rows and delete existing ones in a very friendly and intuitive way. Changes are pushed back to the MySQL Server as a transaction batch with the click of a button, or can be pushed as soon as they are done with no further clicks if users prefer it. This is a powerful feature since Excel is a natural user interface to operate with data, and these changes can be reflected in the database immediately.
Documentation
For further information about MySQL or additional documentation, see:
- http://www.mysql.com
- http://dev.mysql.com/doc/mysql-for-excel/en/
Содержание
- Подключение MySQL в Excel
- Установка драйвера
- Создание источника данных
- Подключение к источнику из Excel
- Ошибка совпадения архитектур
- Соединение Excel с MySQL
- Соединение Excel с MySQL
- MySQL database
- Summary
- Prerequisites
- Capabilities Supported
- Connect to MySQL database from Power Query Desktop
- Connect to MySQL database from Power Query Online
- Connect using advanced options
- How to export/import MySQL data to Excel
- Export/Import MySQL data to Excel using the SELECT INTO … OUTFILE statement
- Export/Import MySQL data to Excel using the From Database feature
- Use MySQL for Excel add-in
- Installation
- Connect to MySQL database
- Export to Excel using a third-party software
Подключение MySQL в Excel
Приложение Excel позволяет создавать подключение к внешним источникам, в том числе базам данных. Но при необходимости подключиться к базе данных под управлением СУБД MySQL, возникает проблема. Программа просто «не умеет» этого делать, но «научить» ее легко.
Установка драйвера
Прежде необходимо установить драйвер Connector/ODBC от Oracle Corporation, скачать который можно по адресу http://dev.mysql.com/downloads/connector/odbc/ (при выборе драйвера под определенную ОС есть важный нюанс, который будет описан ниже).
Создание источника данных
Далее необходимо создать источник данных ODBC. Для этого заходим в «Панель управления», выбираем пункт «Администрирование», в нем пункт «Источники данных (ODBC)». Откроется следующее окно:
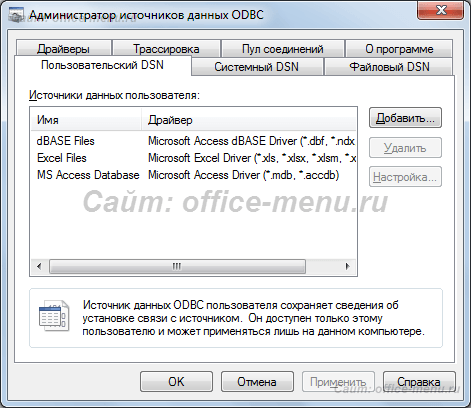
Выбираем «Добавить» и попадаем в меню выбора драйвера:
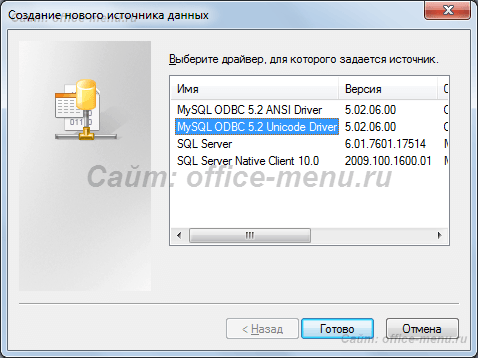
В списке имеется два возможных драйвера для MySQL различных кодировок: Unicode и ANSI. Выбирайте необходимую Вам. Если не знаете, какая Вам нужна, или это не имеет значения, то лучше устанавливать Unicode.
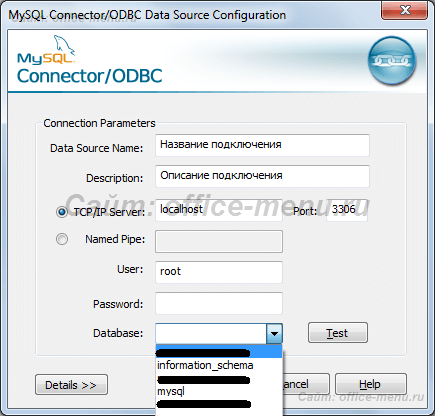
В параметрах подключения указываете:
- Произвольное название источника;
- Описание источника;
- Сервер и порт. Порт оставляйте по умолчанию, если того не требуют настройки сервера;
- Пользователь и пароль, как при подключении в phpMyAdmin.
Протестируйте подключение к источнику, нажав кнопку «Test». Если подключение прошло успешно, то в списке баз данных «Database» должен появиться список доступных баз. Выдираем необходимую и жмем «OK». Источник создан.
Подключение к источнику из Excel
Проходим в книге Excel на вкладку «Данные» -> раздел «Подключения» -> «Из других источников» -> «Из мастера подключения данных».
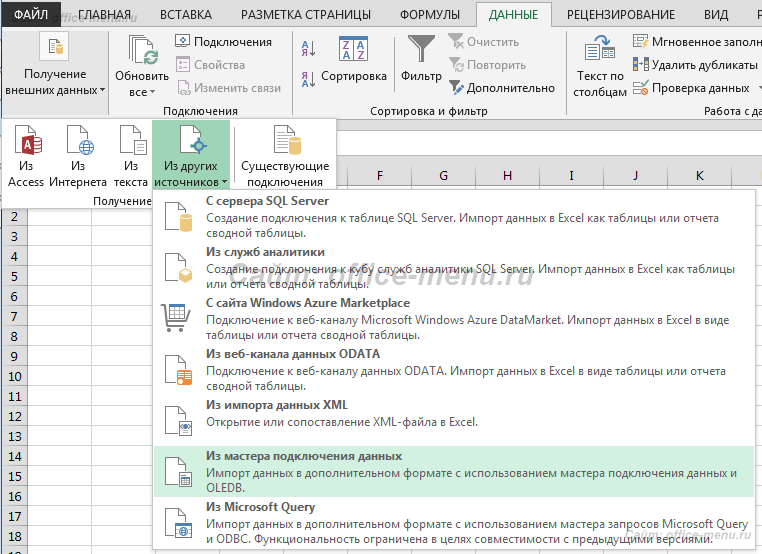
Выбираем «ODBC DSN» -> созданное ранее подключение.
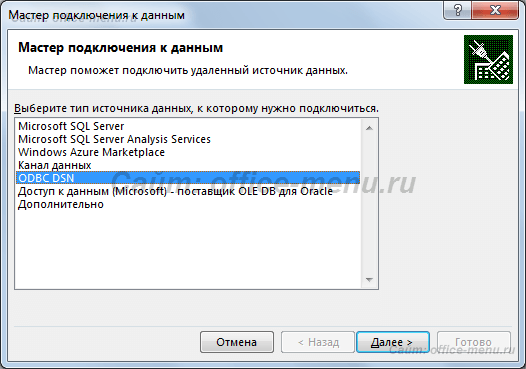

Дальнейшая работа аналогична стандартному подключению к SQL Server.
Ошибка совпадения архитектур
После установки соответствующего драйвера на 64-разрядную ОС, создании источника и подключения к нему, даже если все сделано правильно, может быть выдана ошибка «dns архитектура драйвера и архитектура приложения не соответствуют друг другу».
Проблема заключается в следующем. Вероятно, что во время инсталляции пакета программ Microsoft Office были выбраны параметры по умолчанию, при которых устанавливается 32-рязрядная версия. Таким образом, происходит несовпадение разрядностей драйвера и приложения.
Решение – скачать и установить дополнительно драйвер для Windows 32-bit.
Если установить только 32-битный драйвер, то подключение будет возможно, но создать источник через панель управления не получиться.
Источник
Соединение Excel с MySQL
На работе встретился с такой задачей «Надо сделать отчет, который брал бы данные из MySQL и закидывал его в таблицу Excel».
Ну вот я сейчас и опишу процесс конекта.
Есть:
1. Сервер MySQL
2. База данных на MySQL
3. Microsoft Excel 2010
Начнем:
1. Самое первое что нужно сделать, это установить MySQL Connector, актуальную версию можно скачать здесь
2. Нужно создать источник данных, идем вот сюда Панель управления — Администрирование — Источники данных (ODBC)
2.1. Вкладка Пользовательский DSN — Добавить — MySQL ODBC 5.1 Driver (должен появиться после манипуляций с п.1)
2.2. Откроется окно настройки источника, там в поле Data Source Name нужно написать имя сервера MySQL, порт оставляем стандартным (если вы при установке сервера не указали иной), User — имя пользователя, скорее всего root, Password — пароль, Database — тут можно указать базу, к которой подключаться, если все правильно на начальных этапах, то в выпадающем списке уже появятся существующие БД на сервере.
2.3. Ок. Источник данных создан.
3. Теперь необходимо создать строку подключения.
3.1. В любом месте компьютера создайте текстовый файл и переименуйте его в тип файла .udl
3.2. В открывшемся окне Использовать источник данных — выбрать ранее созданный источник данных (п. 2), ввести Пользователь и Пароль, жмем Ок.
3.3. Теперь созданный файл надо открыть с помощью Блокнот’а и там будет что-то подобное:
[oledb]
; Everything after this line is an OLE DB initstring
Provider=MSDASQL.1;Persist Security Info=False;User Source=MySQL
то, что начинается с Provider и до MySQL и есть строка подключения, т.е. Provider=MSDASQL.1;Persist Security Info=False;User Source=MySQL она нам понадобиться при настройке Excel.
4. Теперь скачиваем специально подготовленный мной документ Excel
5. Открываем, возможно будет ругаться из-за того, что у вас сервер отличный от моего.
6. Идем на вкладку Данные — Параметры — Источник данных — Свойства подключения — Вкладка Определения.
6.1. Вводим Строка подключения, которая у нас появилась ранее (п. 3.3.), вводим текст SQL команды и жмем Ок.
Все, если все правильно было сделано, то в правой части должны появиться поля, которые вы хотели выбрать. Советую на сервере протестировать синтаксис и правильность своего SQL запроса, чтобы не появлялись дополнительные вопросы. Лично я работаю с MySQL через HeidiSQL, там сделал запрос, а потом просто скопировал его в Excel.
Источник
MySQL database
Summary
| Item | Description |
|---|---|
| Release State | General Availability |
| Products | Power BI (Datasets) Power BI (Dataflows) Power Apps (Dataflows) Excel Dynamics 365 Customer Insights Analysis Services |
| Authentication Types Supported | Windows (Power BI Desktop, Excel, online service with gateway) Database (Power BI Desktop, Excel) Basic (online service with gateway) |
| Function Reference Documentation | MySQL.Database |
Some capabilities may be present in one product but not others due to deployment schedules and host-specific capabilities.
Prerequisites
Users need to install the Oracle MySQL Connector/NET package prior to using this connector in Power BI Desktop. This component must also be installed on the machine running the on-premises data gateway in order to use this connector in Power Query Online (dataflows) or Power BI Service.
Capabilities Supported
- Import
- Advanced options
- Command timeout in minutes
- Native SQL statement
- Relationship columns
- Navigate using full hierarchy
Connect to MySQL database from Power Query Desktop
To make the connection, take the following steps:
Select the MySQL database option in the connector selection.
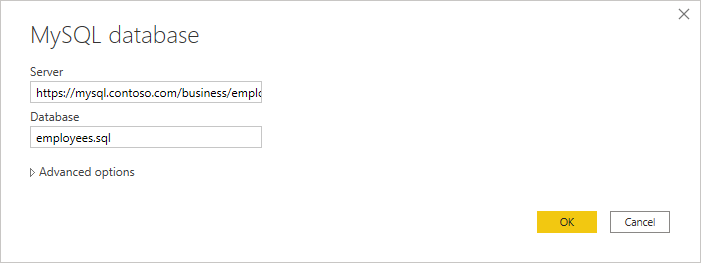
In the MySQL database dialog, provide the name of the server and database.
Select the Database authentication type and input your MySQL credentials in the User name and Password boxes.

Select the level to apply your credentials to.
Once you’re done, select OK.
If the connection is not encrypted, you’ll be prompted with the following dialog.
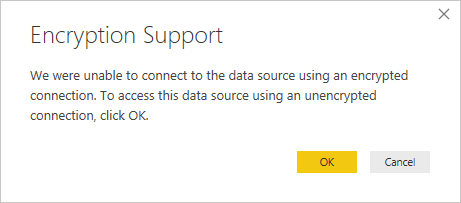
Select OK to connect to the database by using an unencrypted connection, or follow the instructions to set up encrypted connections to SQL Server.
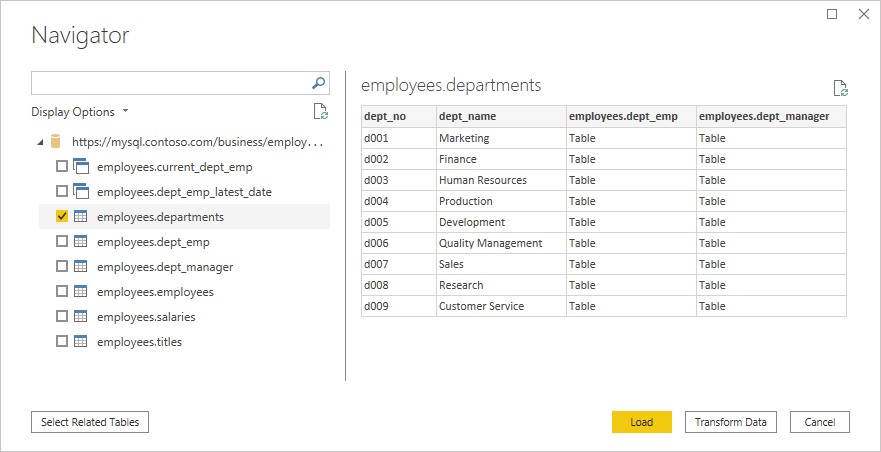
In Navigator, select the data you require, then either load or transform the data.
Connect to MySQL database from Power Query Online
To make the connection, take the following steps:
Select the MySQL database option in the connector selection.
In the MySQL database dialog, provide the name of the server and database.
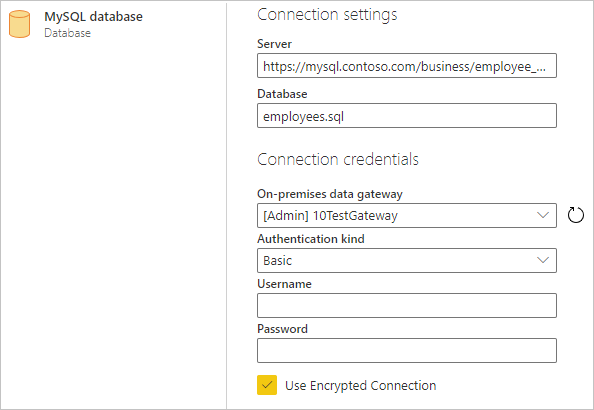
If necessary, include the name of your on-premises data gateway.
Select the Basic authentication kind and input your MySQL credentials in the Username and Password boxes.
If your connection isn’t encrypted, clear Use Encrypted Connection.
Select Next to connect to the database.
In Navigator, select the data you require, then select Transform data to transform the data in Power Query Editor.
Connect using advanced options
Power Query Desktop provides a set of advanced options that you can add to your query if needed.
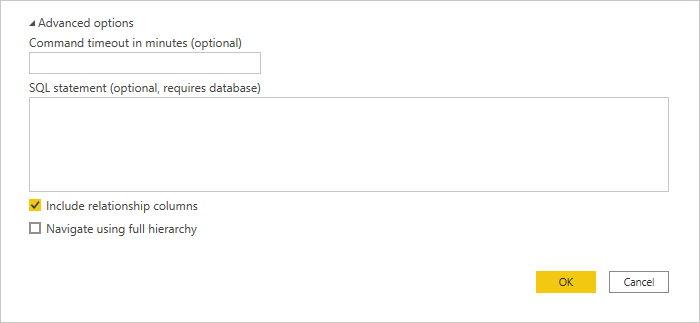
The following table lists all of the advanced options you can set in Power Query Desktop.
| Advanced option | Description |
|---|---|
| Command timeout in minutes | If your connection lasts longer than 10 minutes (the default timeout), you can enter another value in minutes to keep the connection open longer. This option is only available in Power Query Desktop. |
| SQL statement | For information, go to Import data from a database using native database query. |
| Include relationship columns | If checked, includes columns that might have relationships to other tables. If this box is cleared, you won’t see those columns. |
| Navigate using full hierarchy | If checked, the navigator displays the complete hierarchy of tables in the database you’re connecting to. If cleared, the navigator displays only the tables whose columns and rows contain data. |
Once you’ve selected the advanced options you require, select OK in Power Query Desktop to connect to your MySQL database.
Источник
How to export/import MySQL data to Excel
One of the main aspects of modern business is gathering and sharing information with others.
In this article, several ways to export/import MySQL data to an Excel file will be explained. The first method will show the exporting process when the SELECT INTO … OUTFILE statement is used. After that, the Excel features for export/import MySQL data, as well as MySQL add-in for Excel, will be explained, and in the end, the Export to Excel option from the ApexSQL Database Power Tools for VS Code extension will be shown.
The following methods will be used:
- The SELECT INTO … OUTFILE statement
- The From Database feature in Excel
- The MySQL for Excel add-in
- Export to Excel using a third-party software
Export/Import MySQL data to Excel using the SELECT INTO … OUTFILE statement
One of the commonly used MySQL statement which can be included in the SELECT statements for exporting data to specific (e.g., .txt, .CSV) file format is SELECT INTO … OUTFILE statement. This statement writes a selected row to a file. Columns and line terminators can be specified to produce a specific output format.
In a query editor, execute a SELECT statement which results want to be exported, add the location where data should be exported, and specify the file format. In the example below, the .txt file format is used:
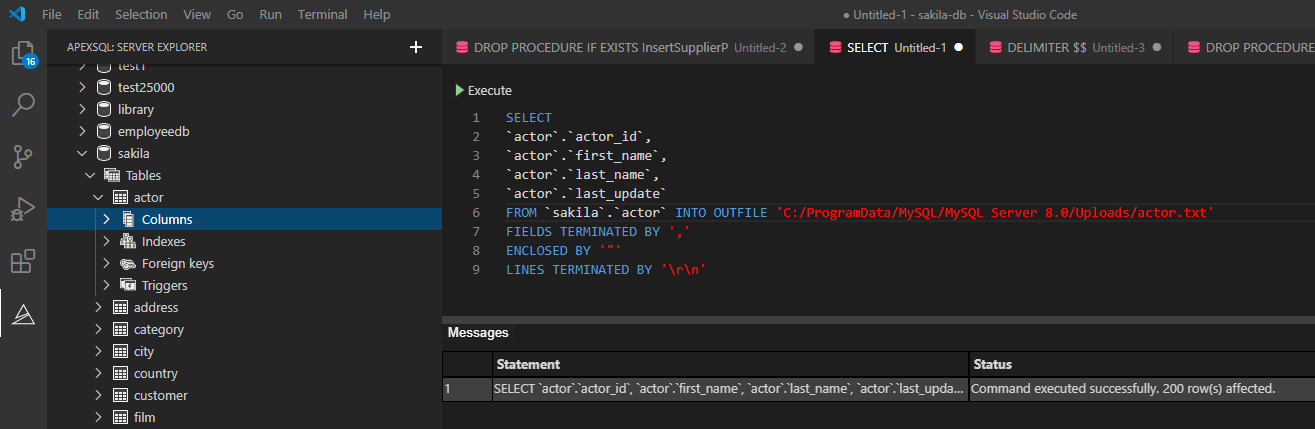
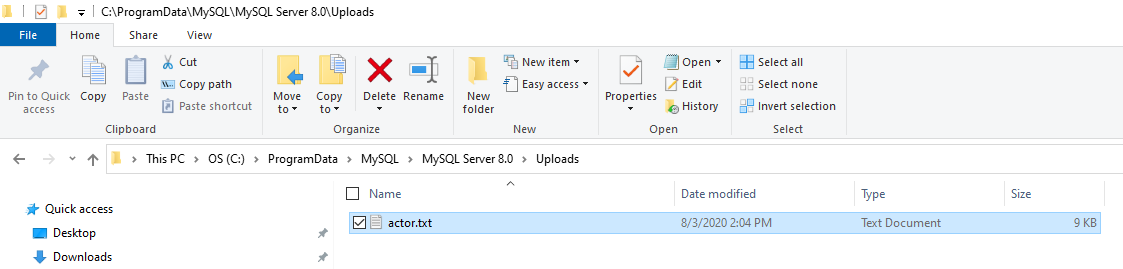
When the above statement is executed, all exported data will be in the actor.txt file:
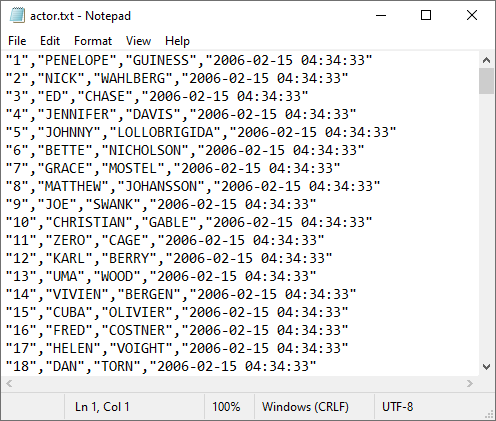
Under the specified location:
For more details about SELECT INTO … OUTFILE statement, see How to export MySQL data to CSV article.
When the data is exported, let’s open it in Excel and save it in .xlsx file format.
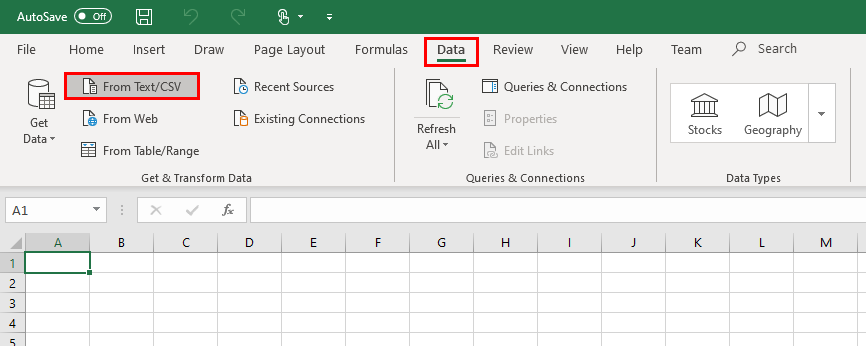
Open Excel and under the Data tab, click the From Text/CSV button:
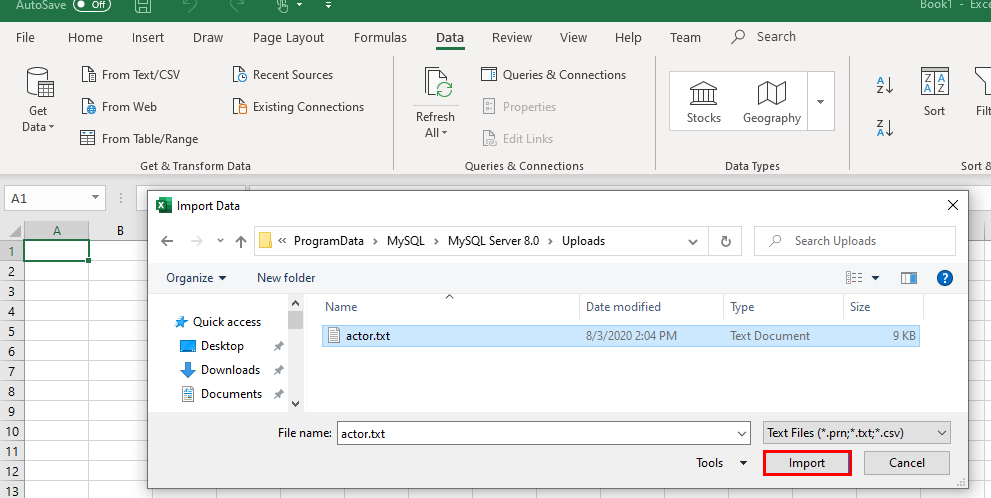
Navigate to the location of the exported .txt file and click Import:
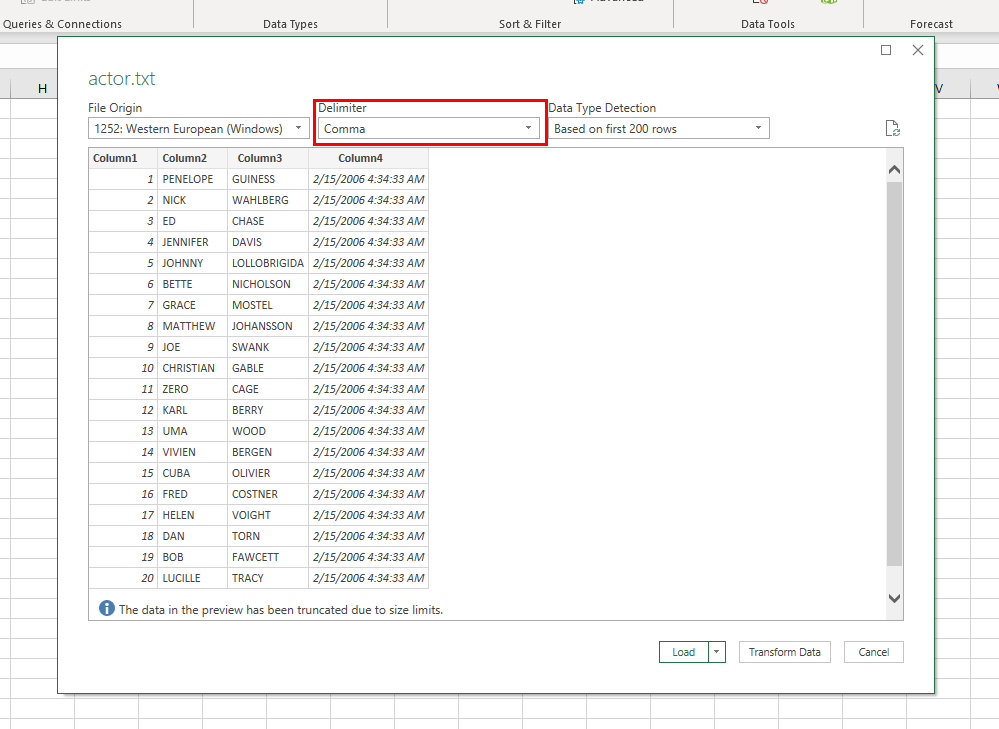
In the newly opened dialog, choose appropriate delimiter and click Transform Data:
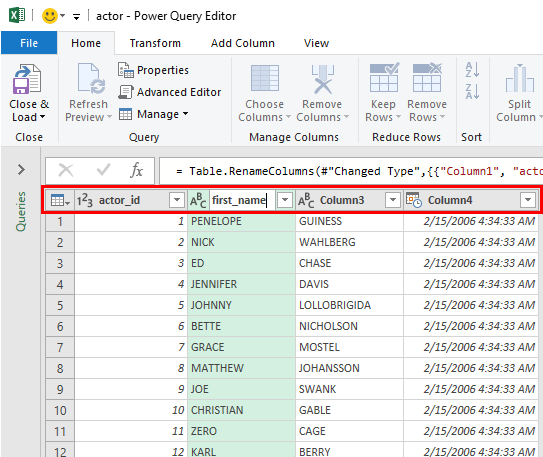
In the Power Query Editor window, it is necessary to set some additional settings (e.g., add the name of the columns):
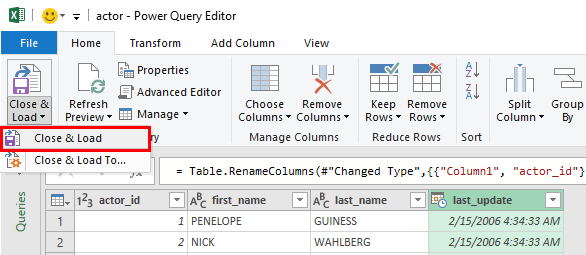
When all is set, click the Close & Load command:
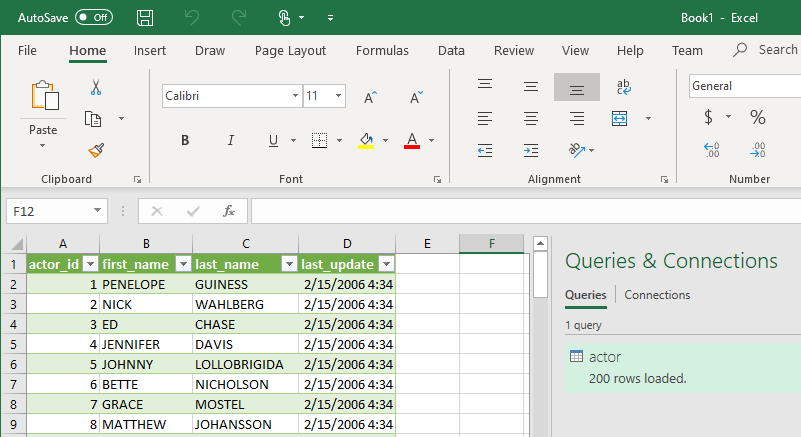
The data will be loaded in a separate sheet:
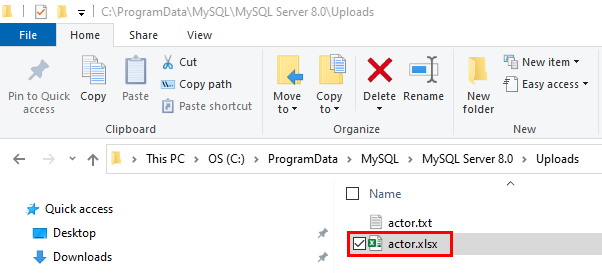
Save newly imported data in .xlsx file format:
Export/Import MySQL data to Excel using the From Database feature
Similar to the method in the section above, Excel provides one more option to load data from the MySQL database to Excel.
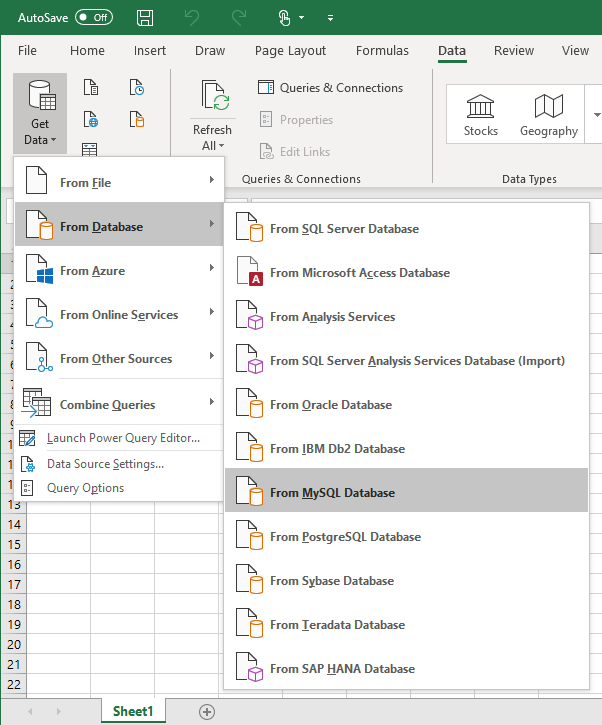
In the Data tab, under the Get Data list, choose the From MySQL Database command:
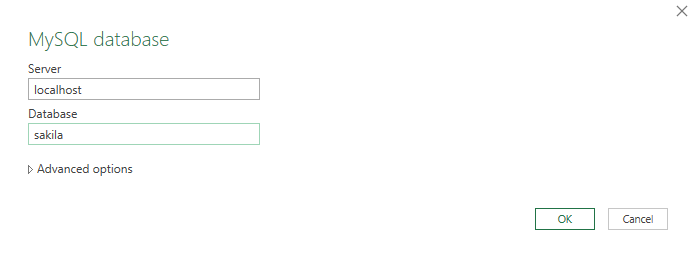
In the MySQL database dialog, enter server and database name from which you want to load data and click the OK button:
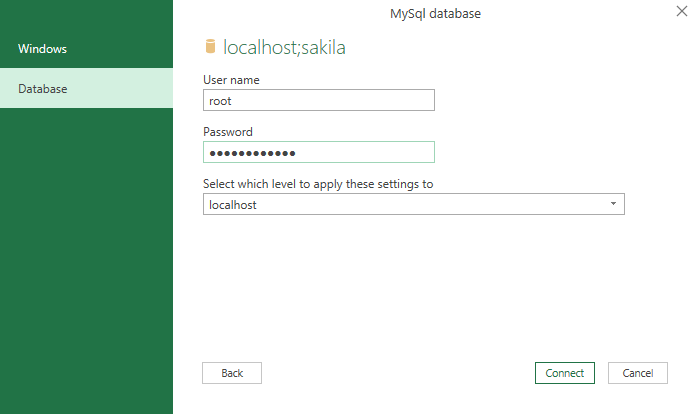
On the next window, under the Database tab, enter credentials for the user that have permission to access the targeted database and click the Connect button:
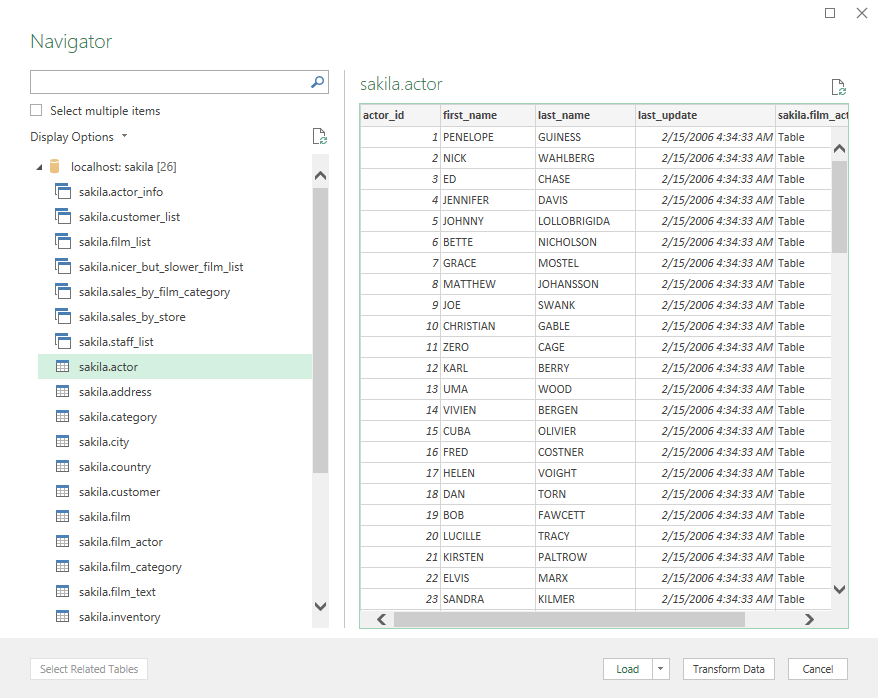
From the Navigator window, choose the tables, views, etc. from which to load data:
Click the Transform Data button. The Power Query Editor window will appear with desired data in it. Now, the steps for loading data are the same as we explained in the previous section:
Use MySQL for Excel add-in
MySQL for Excel is the Windows-based add-in that integrates into Excel under the Data tab that provides export/import MySQL data capabilities.
To install MySQL for Excel add-in first download the MySQL for Excel MSI file. Before starting with installation, please check that the following requirements are fulfilled:
- .NET Framework 4.5.2 (Client or Full Profile)
- Microsoft Office Excel 2007 or later (for Microsoft Windows)
- Visual Studio 2010 Tools for Office Runtime. MySQL Installer may install this for you. This requirement is different than Office Developer Tools for Visual Studio, which is not a substitute
- An available MySQL server connection
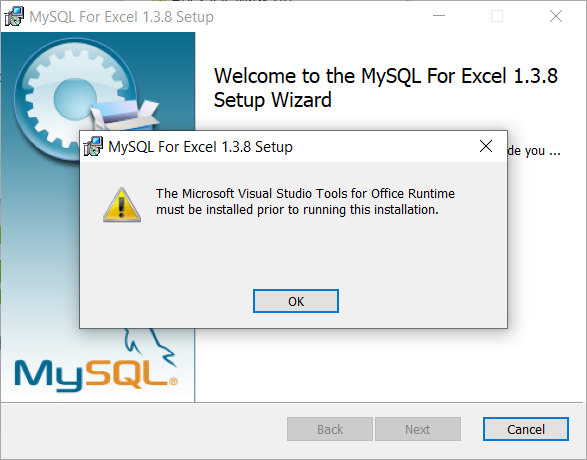
Otherwise, some errors may occur during the installation process, like that one from the image below, when the Visual Studio 2010 Tools for Office Runtime is not installed:
Note: The Microsoft Visual Studio Tools for Office Runtime must be installed prior to running this installation.
Installation
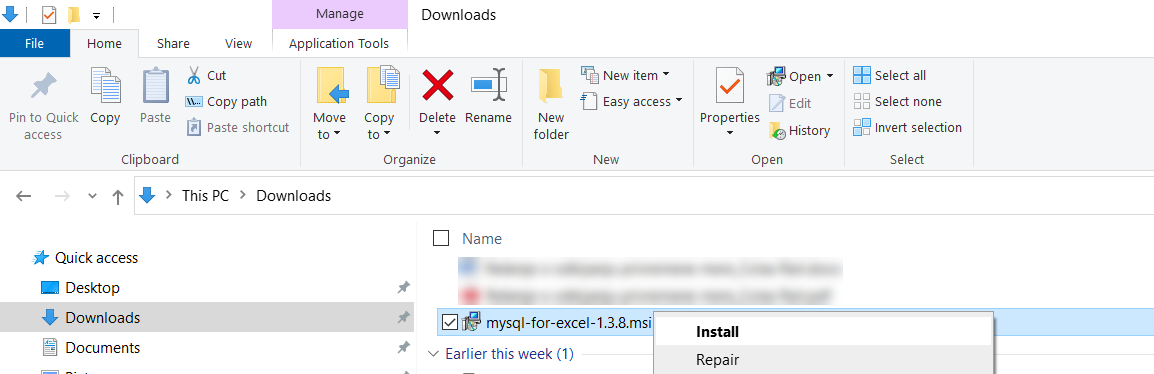
The installation process is straightforward. Go to the location where the installer (mysql-for-excel-1.3.8.msi) is downloaded, right-click on it, and from the context menu, choose the Install command:
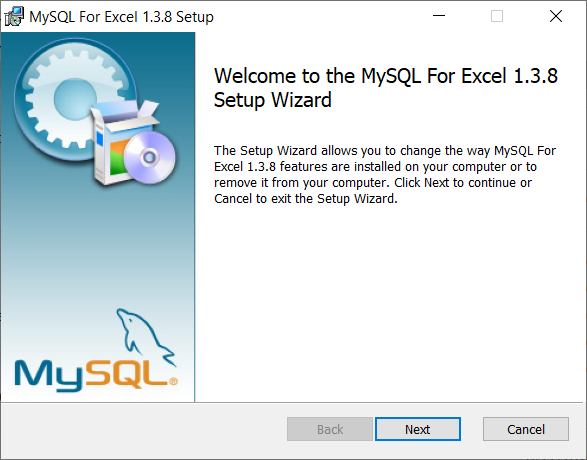
When the installation wizard is launched, click Next:
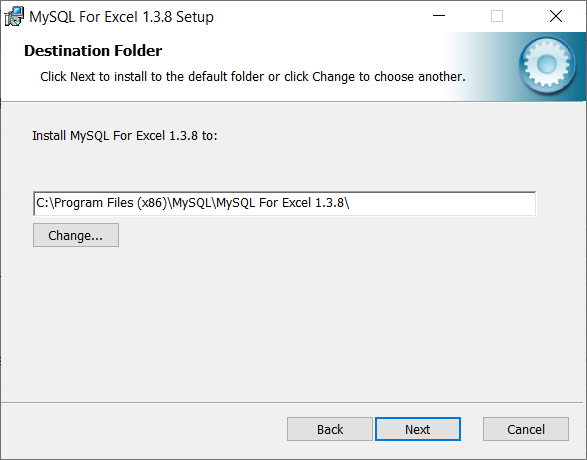
On the Destination Folder step, choose a location where the MySQL For Excel 1.3.8 will be installed and click Next:
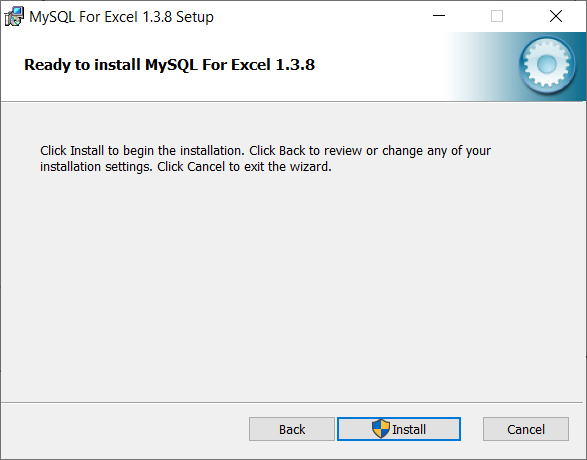
On the next step, click the Install button to start the installation of MySQL For Excel 1.3.8:
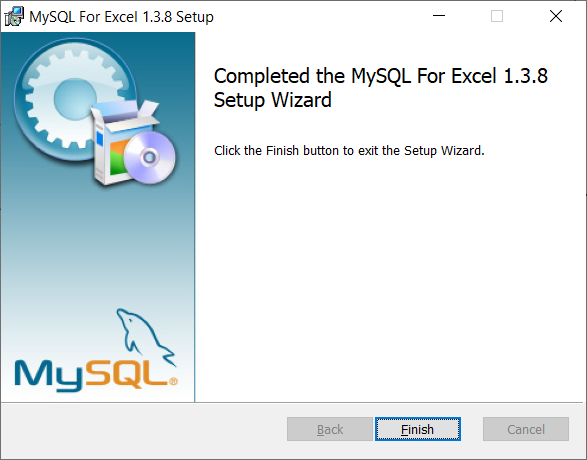
On the last step, click the Finish button to close the setup wizard:
Now when Excel is launched, the MySQL for Excel add-in will appear in the top-right corner of the Data tab:

Connect to MySQL database
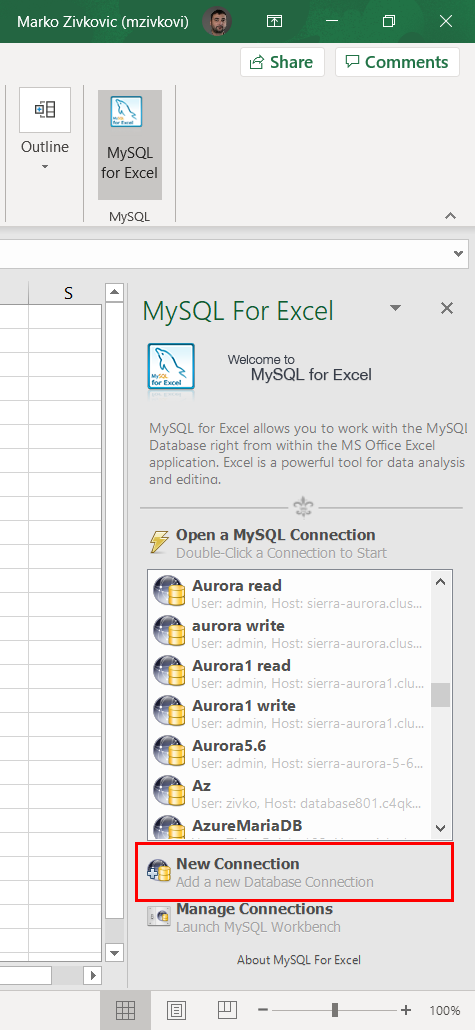
To start MySQL for Excel, click on the MySQL for Excel icon under the Data tab. In the panel that shows find and click the New Connection button:
In the MySQL Server Connection window, enter the name for the connection in the Connection Name box (e.g., Sakila_database).
From the Connection Method drop-down list, chose the method to connect to RDBMS (e.g., Standard (TCP/IP)).
In the Hostname box, enter a name or IP address of the server host (e.g., localhost). Under the Port box, enter the TCP/IP port number (e.g., 3306). For the Username and Password fields, enter the credentials for the user that have access to the specified server in the Hostname field:

Optional, from the Default Schema drop-down list, the default schema can be selected.
To confirm that connection to the MySQL Server works properly, click the Test Connection button:
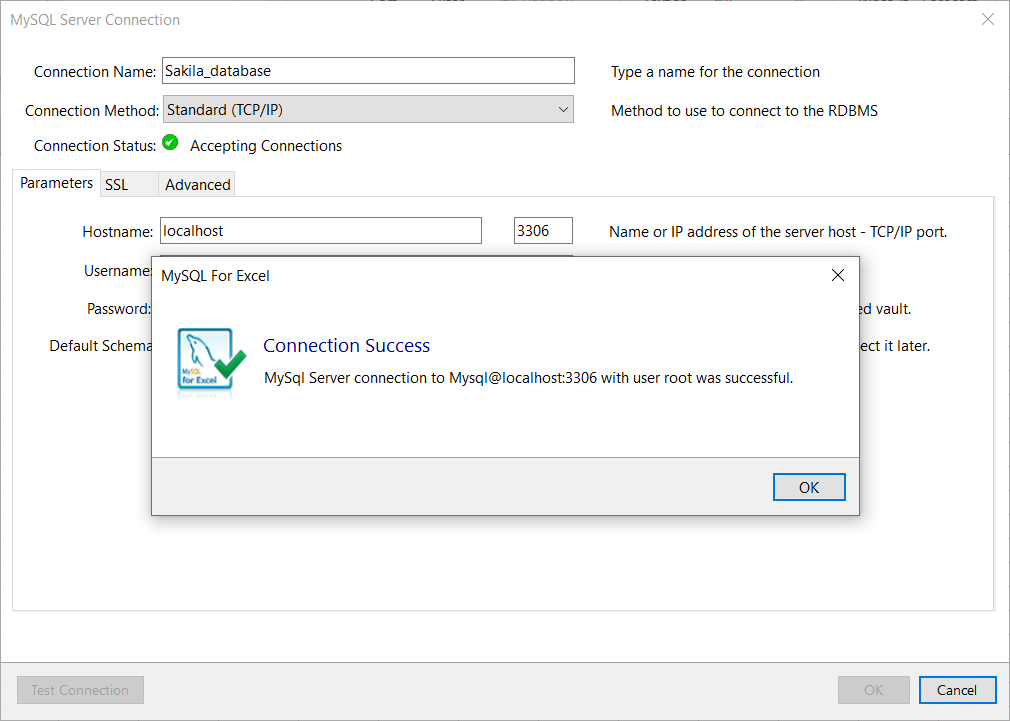
Click the OK button on the MySQL Server Connection window for MySQL for Excel to create a connection in MySQL for Excel panel:
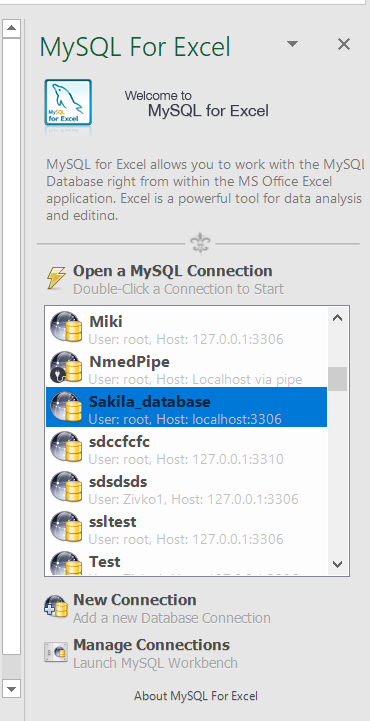
Double-click on the newly created connection will list all available databases from that MySQL server:
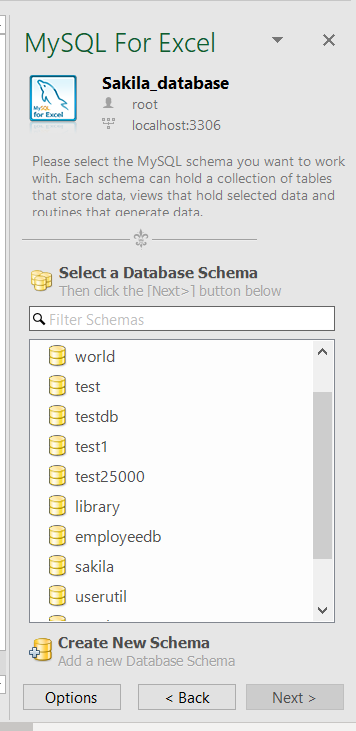
Double-click on a database, in the MySQL for Excel panel, will list all tables, views, and procedures from that database:
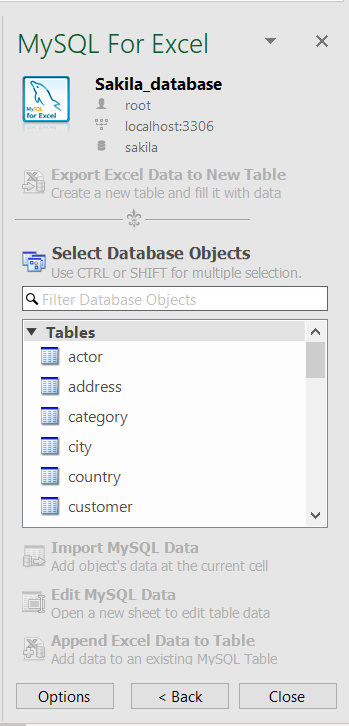
To import data, on the MySQL for Excel panel, select the desired table, and click the Import MySQL Data button. The Import Data window will appear:
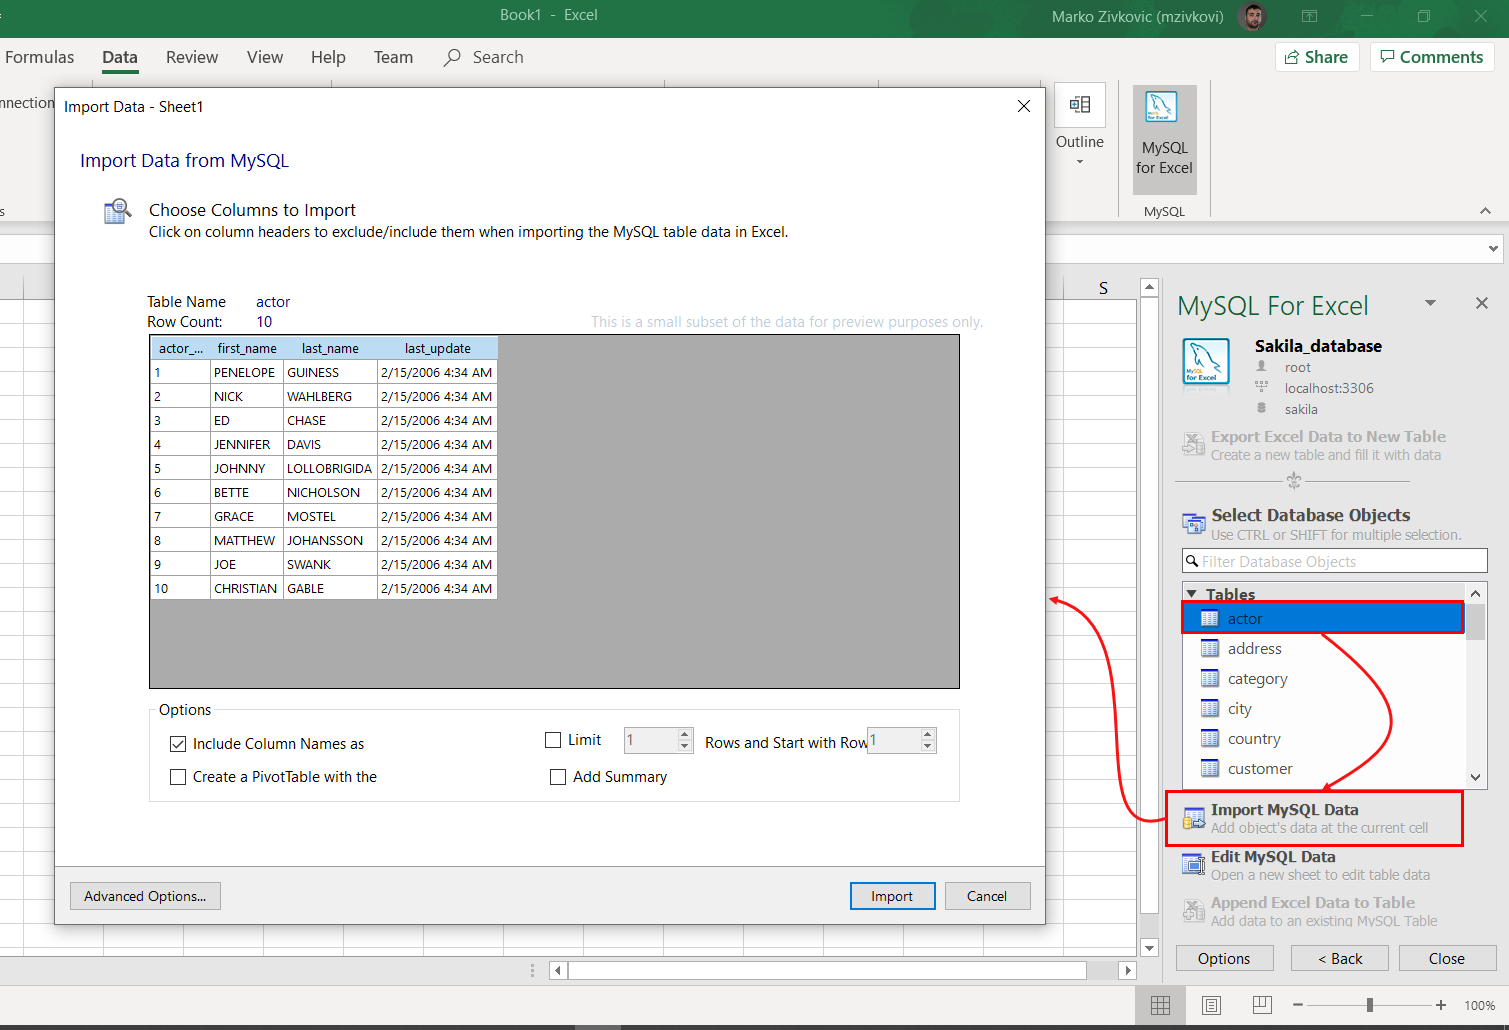
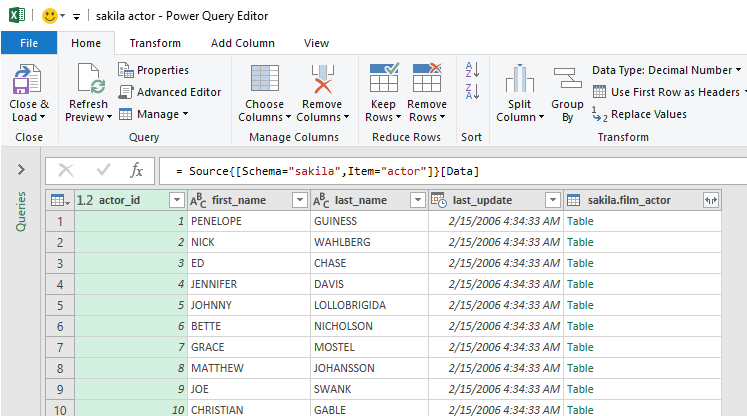
When all settings are set, click the Import button. The imported data will look something like this:
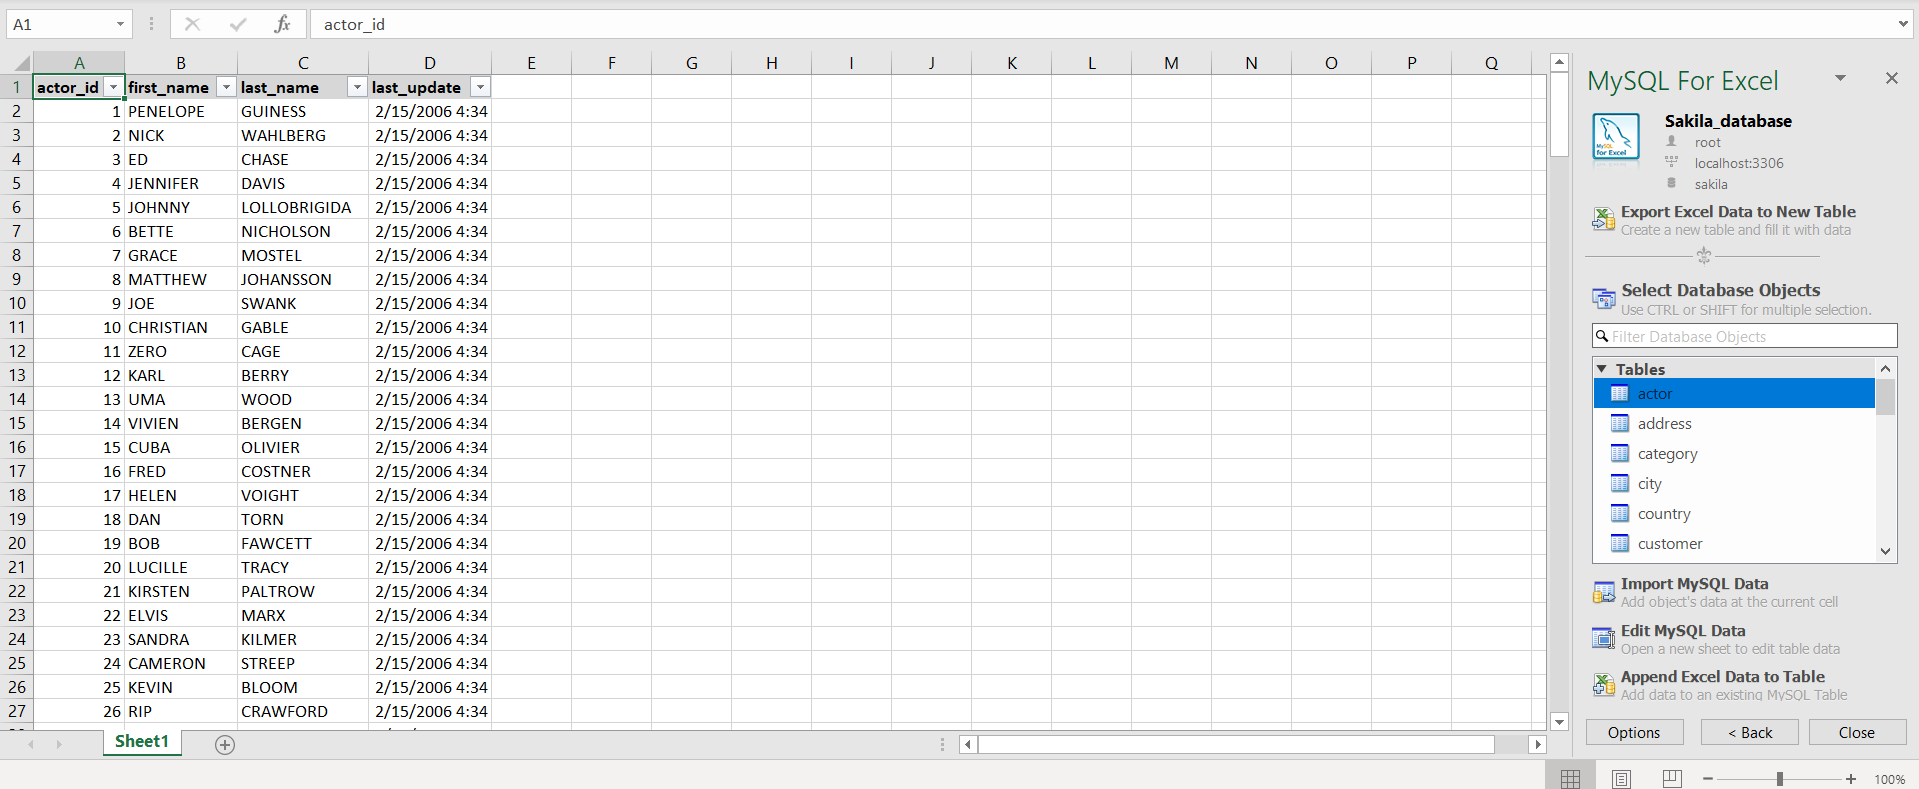
This add-in can return all rows, or a specified range of rows, from a specified table. It cannot import data stored in two different tables, perform table joins, or filter data.
More details about MySQL for Excel tool can be found on the MySQL for Excel page.
Export to Excel using a third-party software
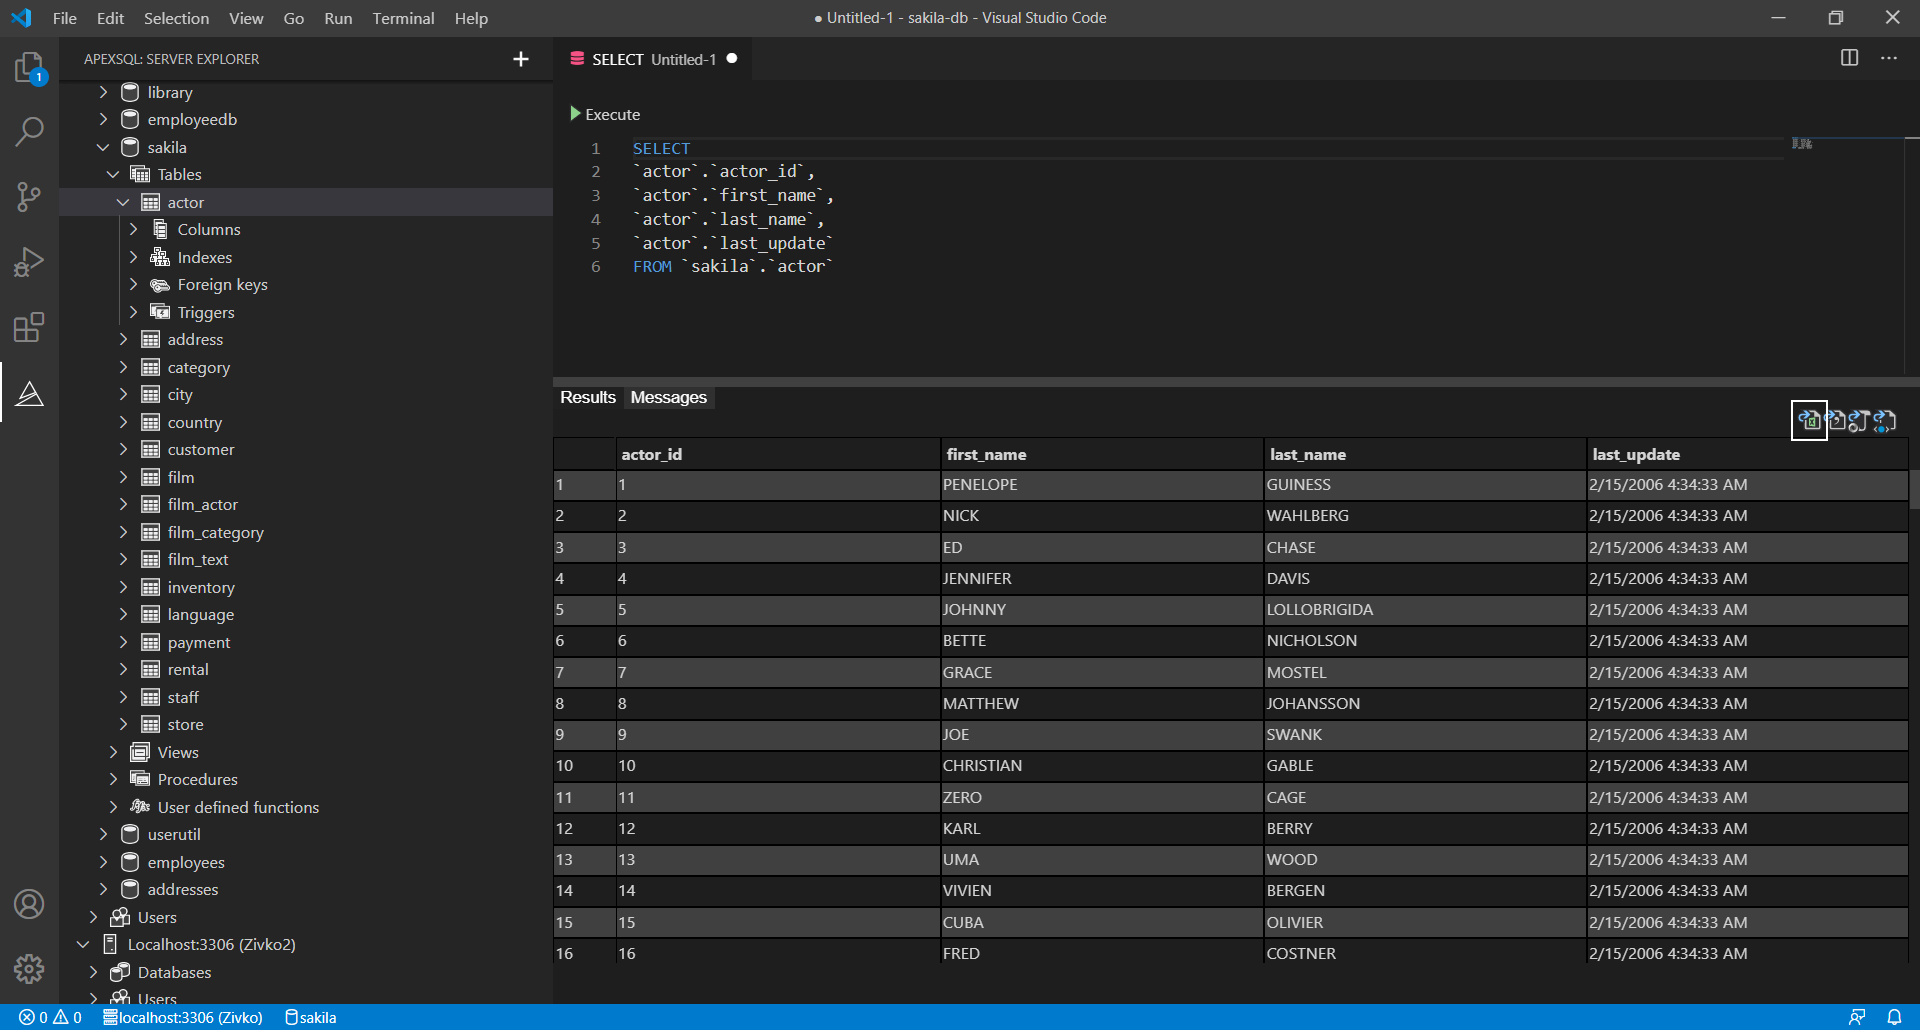
Using the Export to Excel feature from ApexSQL Database Power Tools for VS Code, query results can be exported to MySQL data from the results grid in just a few steps. Besides exporting data to Excel, this VS Code extension provides a couple of more exporting options, such as export data to JSON, CSV, and HTML file format.
In a query editor of the VS Code extension, execute a query from which you want to be data exported. In the top right corner of the Results grid, click the Export to Excel button:
In the Save as window, enter a name and location for a new Excel file and click the Save button:
Источник