
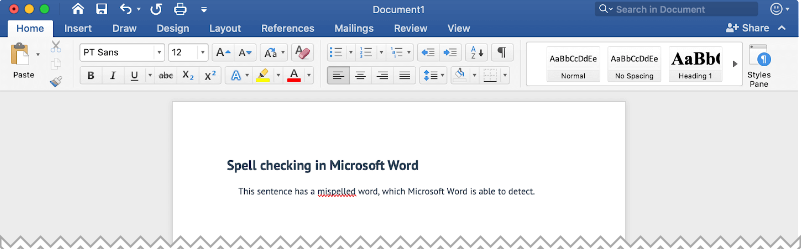
Have you ever had one of those days where you’re finishing an important document, but the spell check in Microsoft Word isn’t working correctly? Sometimes you can’t check one document, and other times you can’t spell-check any document. And sometimes, it’s several words. In this troubleshooting tutorial, I’ll show several fixes.
I’ve encountered this annoyance many times. Usually, I can solve the issue with the steps below unless it’s a protected Microsoft Word document. However, one reason you want to correct this issue is that it may interfere with calculating your Word readability statistics.
Spell Check Not Working – (1 Document)
Sometimes Word’s spell check will only work for one document. However, you can open other Microsoft Word documents, and spell check works. The problem is probably with the preferred languages or formatting settings.
Verify Your Language & Check Spelling Options
- Open the problem document.
- Press the Ctrl + A keys to select the entire text.
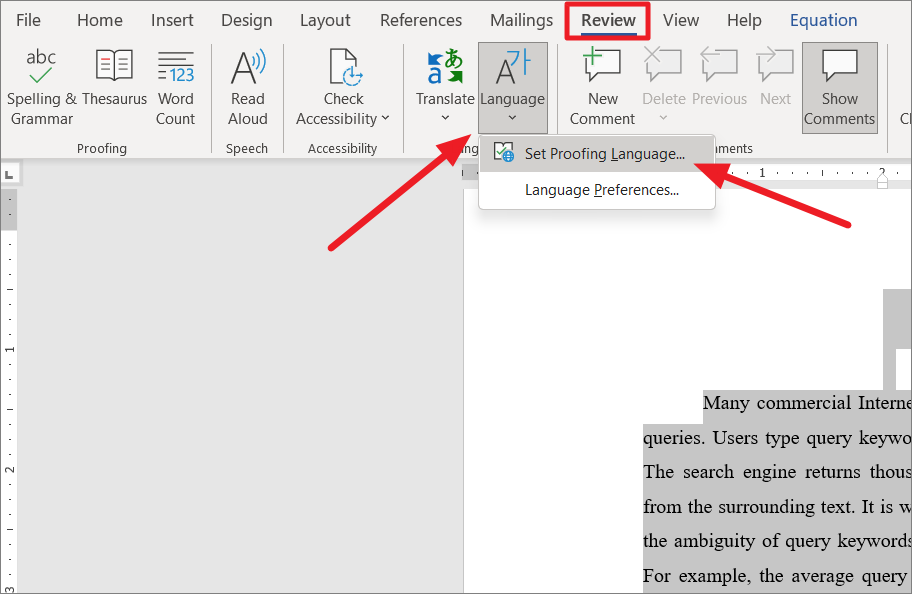
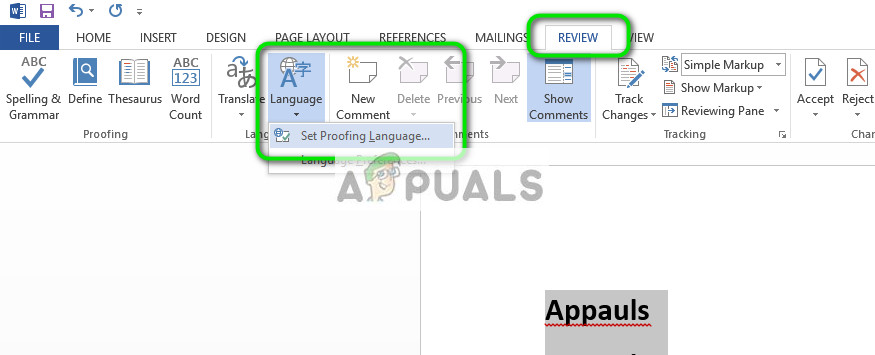
- From the Review tab, select Language then Set Proofing Language…
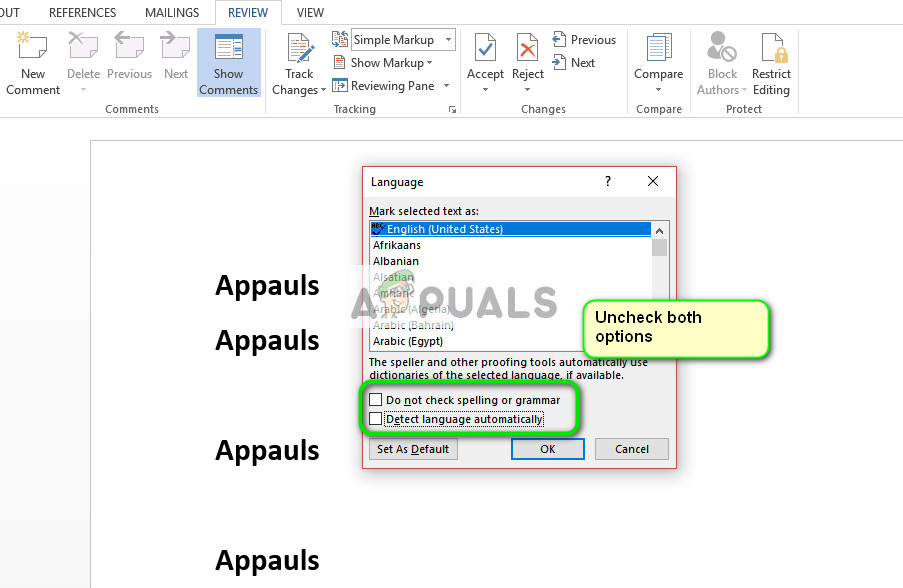
- In the Language dialog box make sure the correct default language is selected.
- Verify the checkbox Do not check spelling or grammar is unchecked.
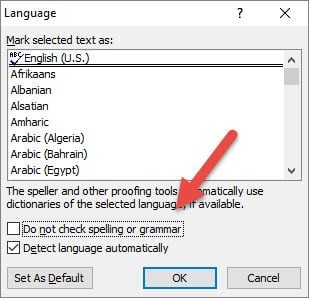
- Click OK.
- Recheck your document
I wish the above method were foolproof. Highlighting the entire document would overwrite all paragraph settings throughout. On older versions of Microsoft Word, I would get the following message as shown below. However, in Microsoft 365, I no longer get this alert even if I have spelling errors.
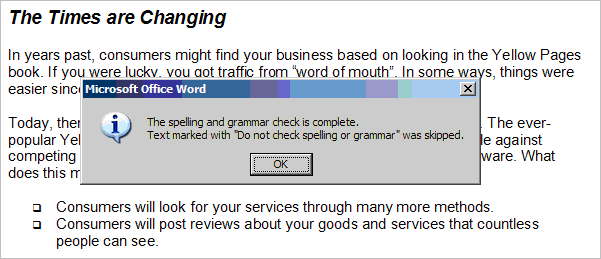
This alert message suggests that your document has a section marked “Do not check spelling or grammar.” Unfortunately, I don’t know any easy way to find these marks. So instead, I find a paragraph with a spelling mistake, highlight it, and press Shift + F1.
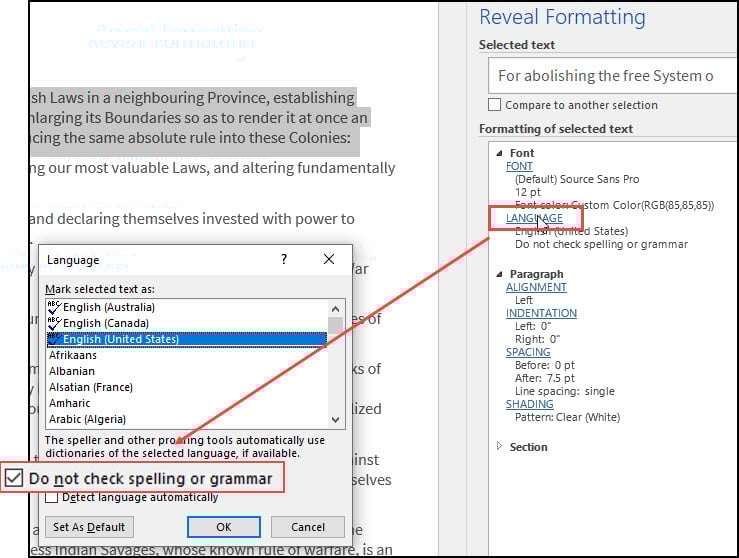
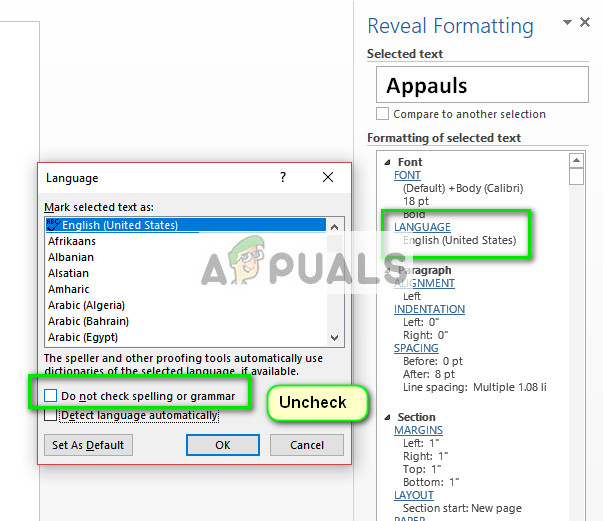
This opens the Reveal Formatting pane, where you can verify that your correct language is what you expect and if the paragraph has spell check turned off. In the example below, the highlighted paragraph is coded not to check for spelling.
Tip: If you don’t see the pane, you may have some sort of Function lock on your keyboard. Generally, these keyboards have an F Lock key on the top row because there are other functions mapped. Other keyboards may use an Fn key.

In the above example, I misspelled the word “government”. Word did not flag this instance because the paragraph was marked not to do spelling or grammar checks.
To fix the issue, highlight your paragraph and click the Language link in the Reveal Formatting dialog. This will open the Language dialog box, and you can deselect the check spelling or grammar option checkbox.
Are Multiple Proofing Languages Set
Looking at the screen print above, you’ll notice that I have three proofing languages above the double line. They are variations of English for Australia, Canada, United States. Word can get confused if you don’t enable “Detect language automatically“.
According to this support page, Microsoft noted several suggestions:
- Automatic language detection requires that a sentence of text be written in that language. Depending on the length of your sentences, you might need to type several sentences before Word has enough contextual information to automatically detect the language and apply the correct dictionary.
- Words that are spelled the same way in several languages, such as “centre” in English (United Kingdom) and French (France) might cause the Detect language automatically check box to incorrectly identify the language of text. To solve this problem, type more words in the language you want, or clear the Detect language automatically check box.
Review Your Proofing Exception Options
You should check another setting, as there is a Word option where you can elect to hide spelling errors. You can set this option on an individual file.
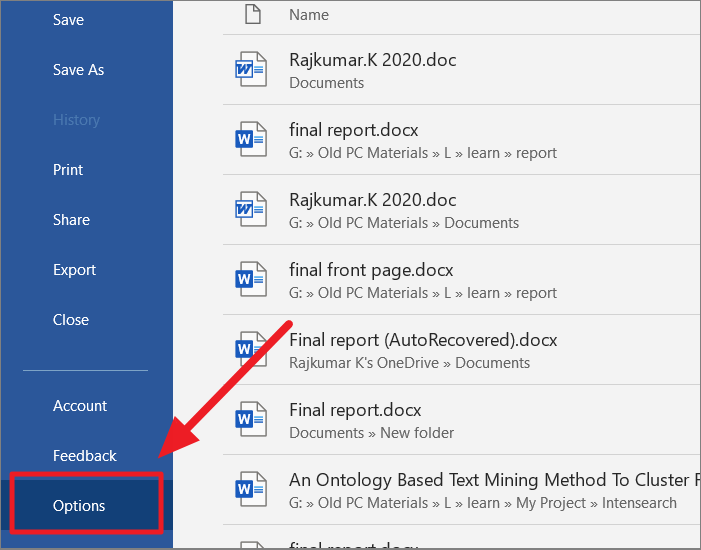
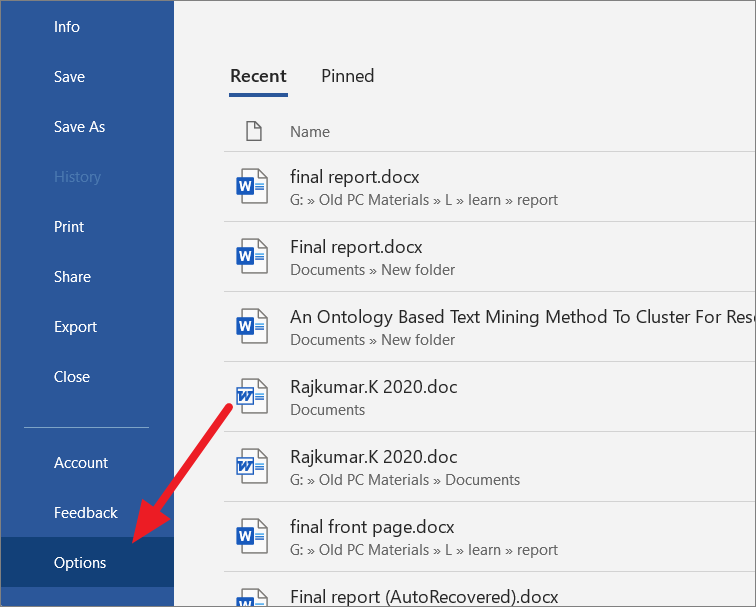
- Click the File tab.
- From the left panel, select Options.
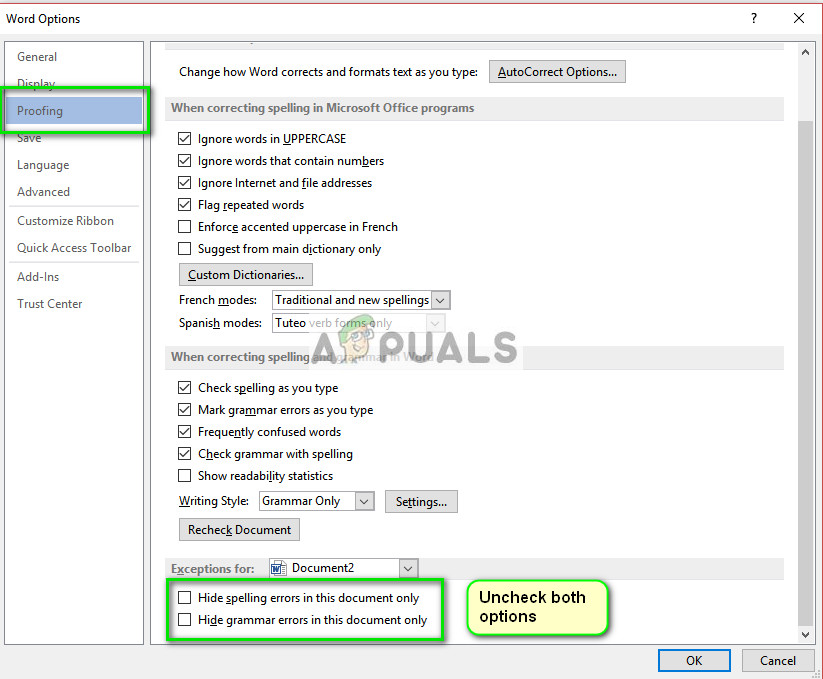
- In the Word Options dialog, click Proofing.
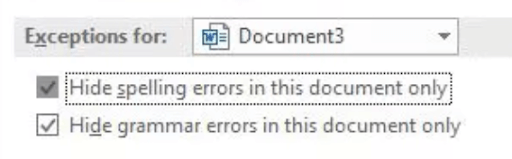
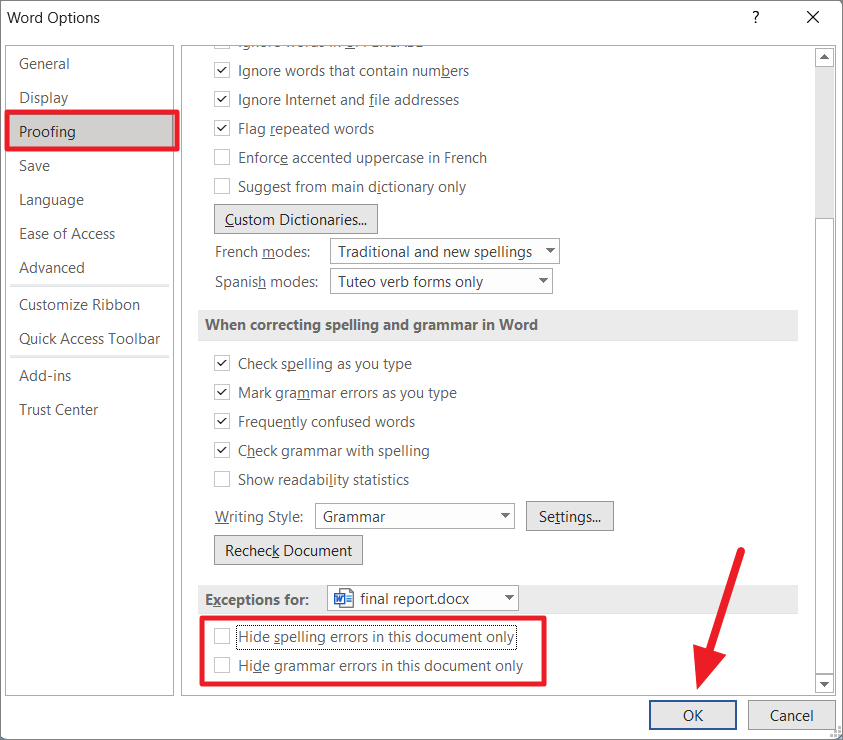
- Scroll to the bottom area called Exceptions for:
- Check to see if the Hide spelling errors in this document only check box is enabled.

Spell Check Not Working – (All Documents)
This second problem can be a real annoyance with many variations. The suggestions range from easy to a Microsoft Windows registry change.
Option 1: Verify the “check spelling as you type” Feature
This feature is an option to see your mistakes as they happen. In some cases, I’ve seen toggling this check box “on” and “off” fix the problem. Additionally, those red squiggly underlines might be from the Word Exclusion Dictionary.
To verify Spelling and Grammar Checkers are on,
- Click the File tab.
- From the left menu, select Options at the bottom.
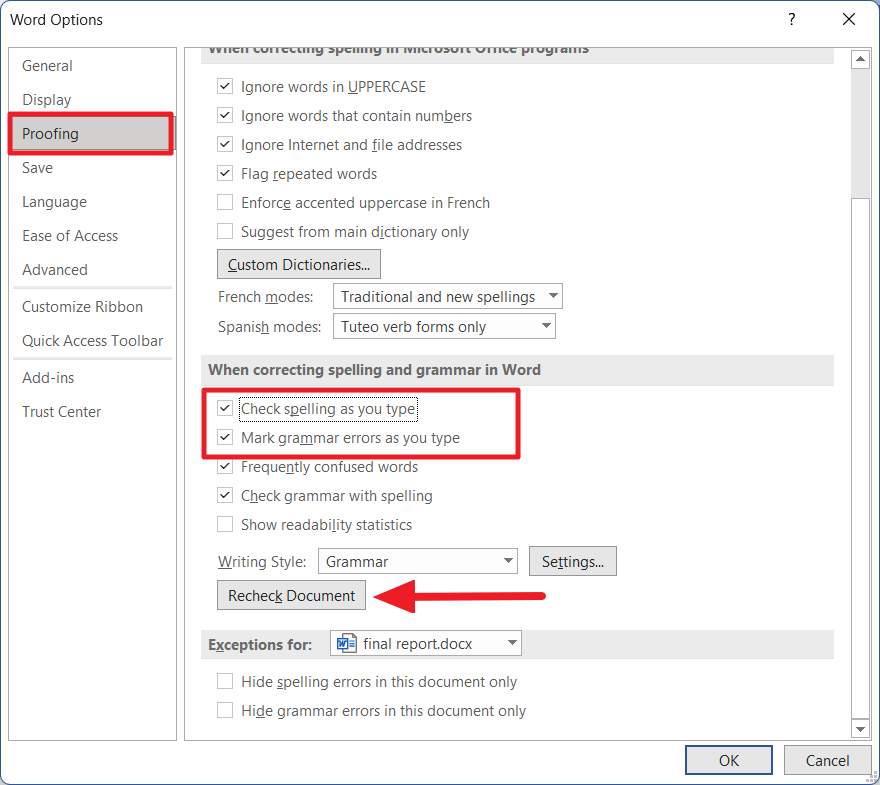
- In the Word Options dialog, click Proofing.
- Check the boxes for Check spelling as you type and Mark grammar errors as you type. (See picture above.)
- Click OK.
![]() Note: For older versions of Word, use the Check Document feature on your Review tab.
Note: For older versions of Word, use the Check Document feature on your Review tab.
Option 2: Check for Conflicting Word Add-in
Still, your problem may be caused by a combination of factors such as another Word add-in. The way to verify this is to see if the spellchecker works in “safe mode”. Safe Mode is a reduced functionality state where Microsoft Word loads without add-ins.
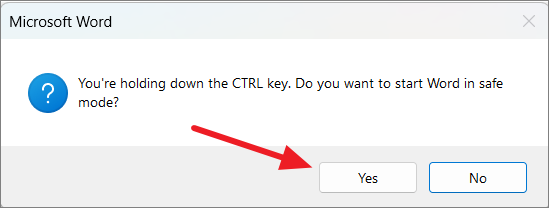
- Hold down your Ctrl key and then press the icon or menu option for Microsoft Word.
- Click Yes when the Safe Mode dialog appears.

- Open up your document.
- Press F7 to run spell-check.
If the spellchecker works, you need to figure out which add-in is causing the problem. There are two areas where you may see these.
The first is from the Insert tab.

If you click My Add-ins, you will see your installed items. If you hover over an item, a 3-dot menu will appear where you can remove the item.

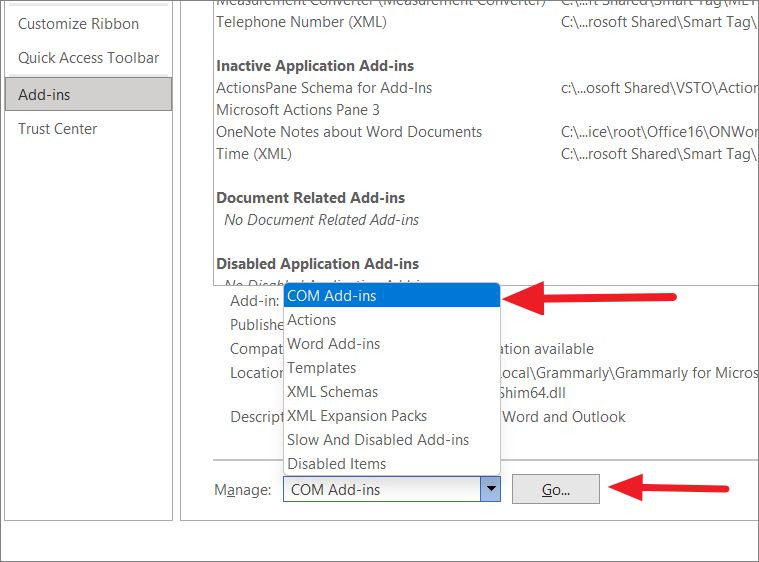
Additionally, you can access this area from the Word Options dialog box under Add-ins. Hopefully, you recognize an add-in name such as Grammarly. Then you can press the Go button.
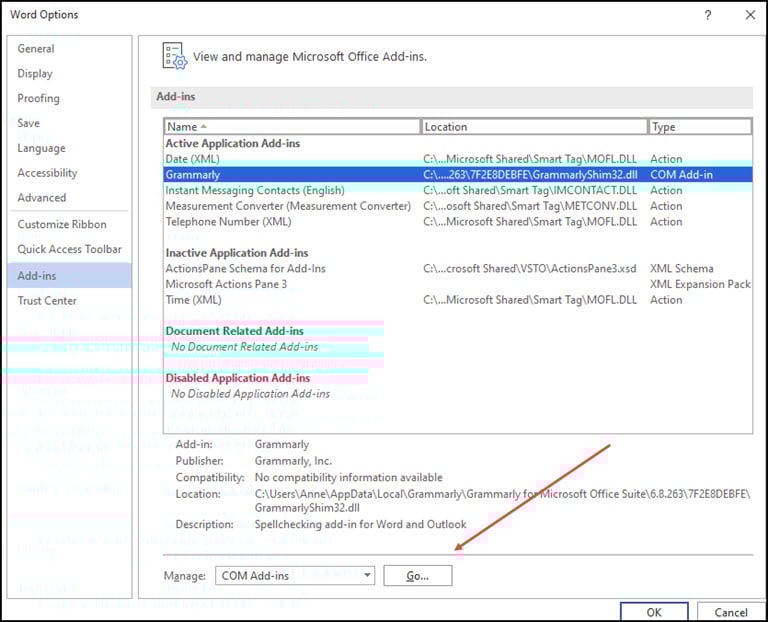
You’ll then get a COM Add-ins dialog where you can uncheck the box so it won’t load or remove it.

I’d suggest closing Word and reopening your document before checking again.
Option 3: Rename Your Word Template
Your Microsoft Word document template, which is either normal.dot or normal.dotm, might also be causing an issue. You can find these files in your Microsoft Templates folder. When you rename the template, Word will reset to the default settings.
Because your global template file has your settings, I would recommend renaming the file to something like normalPRV.dot or normalPRV.dotm so you can change the name if this suggestion doesn’t work.
Tip: If you need to confirm the location of your template you can press your Windows key ![]() + r. This will open the Run dialog, where you can copy and paste the command below.
+ r. This will open the Run dialog, where you can copy and paste the command below.
%appdata%MicrosoftTemplates

Option 4: Try Detect and Repair
Now and then, I have the spell-check feature go wonky after some other software update or hardware change. For example, a registry entry has become corrupted. In these rare cases, you may have to repair your installation.
Option 5: Rename a Windows Registry Folder
I don’t like giving instructions on using the Windows registry. But sometimes, this online repair works. If you’re unfamiliar with this area, I strongly recommend reading Microsoft’s https://docs.microsoft.com/en-US/troubleshoot/windows-server/performance/windows-registry-advanced-users.
As with an earlier suggestion, I rename the folder rather than deleting it. Some people rely on third-party dictionaries that may use some of these entries. If you find after renaming the folder, your 3rd party dictionary doesn’t work; you can revert the changes.
To rename the Proofing Tools folder,
- Close Word.
- Press the Windows key + R.
- In the Run dialog box type regedit.
- Click the OK button.
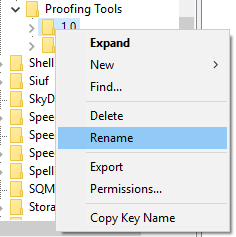
- Expand the left pane to HKEY_CURRENT_USER | Software | Microsoft | Shared Tools| Proofing Tools
- Right-click the folder named 1.0
- Select Rename from the menu.

- Rename folder to 1PRV.0
- Close regedit.
- Restart Microsoft Word.
Specific Word Isn’t Flagged as Misspelled
Sometimes, you’ve run through the steps above and Word still doesn’t flag an item that is misspelled. This can be frustrating, but sometimes the problem is us. Yes, I have misspelled words when adding them to Word’s custom spell check dictionary. That’s why I also created an exclude dictionary for Word.
Check Your Custom Dictionary
- Click the File tab.
- From the left menu, select Options at the bottom.
- In the Word Options dialog, click Proofing.
- Scroll down to When correcting spelling in Microsoft Office program section.
- Click the Custom Dictionaries… button.
- Click the Edit Word List… button.

- Find your misspelled word and delete it.
- Add correct variation if needed.
- Click OK.
Try Another Online Option & Then Fix
This isn’t a fix for the problem, but it buys you time if you’ve got a deliverable. In the interim, you can save your document and try to open or copy it to another online word processor such as Google Docs or Microsoft Word Online. You will need to have an online account. Once you’ve imported your document, use that system’s spell-checker.
Hopefully, these solutions helped you isolate why spell-check wasn’t working. Now, you can continue to write your great novel, business proposal, letter, or tutorial.
- How to Make Symbols with a Keyboard
- How to Make a Letterhead Template with Word
- How to Add Watermark in Word
- How to Compress a Word Document
- Video: How to Make a Letterhead in Word
Get your automatic editor back in action
Updated on April 20, 2022
While Word’s spell check works well most of the time, sometimes it can appear to stop operating. Some simple troubleshooting steps will quickly get Word’s spelling and grammar-checking tool back up and running. These solutions apply to Word for Microsoft 365, Word 2019, Word 2016, Word 2013, Word 2010, and Word for Mac.
Causes of Word’s Spell Check Not Working
There are several reasons Word’s spelling and grammar-checking tool might not be working. You might have changed a simple setting, or the language settings may be off. Exceptions may have been placed on the document or the spell-check tool, or the Word template may have an issue.
Whatever the reason, some easy fixes are likely to have Word back to pointing out mistakes in your documents soon.
The spelling and grammar checker may return an error message about the default language or say «Spelling and grammar check is complete» without flagging any errors. You may not receive any message but may notice the tool isn’t functioning.
Add Grammarly to Word: Learn How Now
How to Fix Word’s Spell Checker Not Working
Follow these troubleshooting steps in the order we present, from the simplest solution to the most complex.
-
Make sure Word spell check is turned on, the most likely culprit and most straightforward solution. If you haven’t enabled automatic spell-checking, the tool won’t function as you expect. Also, select the Mark grammar errors as you type and Check grammar with spelling check boxes.
On a Mac, select Word > Preferences > Spelling & Grammar, and select the Check spelling as you type and Check grammar as you type check boxes.
-
Check Word’s proofing language. Word may be set to the wrong proofing language, causing it to miss errors. Make sure Word is proofing in the correct language, and see if this solves the problem.
-
Check for proofing exceptions. A setting for Hide proofing errors, or other exceptions, may have been enabled in the document. The spell-check tool might not work as expected if a user has made exceptions for checking the spelling or grammar.
-
Open Word in Safe Mode. A Word add-in can interfere with the spelling and grammar-checking tool, causing it to work sporadically or not at all. If you start Word in Safe Mode, add-ins aren’t enabled. See if the spelling and grammar-checking tool works. If it does, move on to step 5.
-
Disable add-ins one at a time. An add-in might be the problem if the spelling and grammar-checking tool worked in Safe Mode. Disable add-ins one at a time to isolate the one causing the issue. When you find the culprit, permanently disable it.
-
Rename the default template. If the issue still isn’t resolved, there could be something wrong with Word’s global template, which is called normal.dotm. Renaming the template could fix the problem. Word will generate a new default document without any customizations.
When you rename the normal.dotm template, you lose the default settings you established, including styles, toolbars, AutoText entries, and macros.
-
Repair Word. If all your efforts haven’t resolved the spell-check problem, use the built-in Office Repair utility to fix Word. This tool repairs the entire Office suite even if there’s only one application you want to fix.
This tool is only available for Windows versions of Office.
-
Contact Microsoft Word. If you still can’t fix the problem with Word’s spelling and grammar-checking tool not working, visit the Microsoft Word help page. With a searchable knowledge base, community forums, and contact information, you’ll find additional help.
FAQ
-
Why is Grammarly not working in Word?
If Grammarly in Word isn’t working, you may be working in a password-protected document, you may have opened the document in Protected View, or the document is stored on a network. To solve the problem, save your document to a local drive and open it from there.
-
How do I turn off spell check in Word?
To turn off spell check in Word on a PC, go to File > Options > Proofing. Uncheck the box next to Check spelling as you type. On a Mac, go to Tools > Spelling & Grammar and select Hide Spelling Errors.
-
How do I reset spell check in Word?
To reset Word’s spell check on a PC, go to the Tools menu and select Spelling & Grammar > Options. In the Proofing Tools section, select Recheck Document. On a Mac, go to Tools > Spelling & Grammar and select Reset Ignored Words and Grammar.
Thanks for letting us know!
Get the Latest Tech News Delivered Every Day
Subscribe
How to Fix the Spell Check Not Working in Word
Spell check in Word is one of the features in Microsoft Word that make typing up documents an easy task. You can breeze through projects much more efficiently without worrying about your spelling and grammatical errors. This is why it’s a serious issue when the spell check feature in Word isn’t working.
We’re here to help you restore the spelling and grammatical check no matter what caused it to stop working in the first place. While the cause of the error can be different for everyone, it’s usually related to misconfigured settings or issues in Word itself.
Jump To Solution:
- How to manually check spelling and grammar in Word
- How to use the Spell Check in Word and Check Grammar in Office
- Show errors automatically while you work
- Why is Spell Check Not Working in Word?
- Problem a: How to Fix Spell check Not Working for a Specific Document
- Solution 1. Check your Language settings
- Solution 2. Check the Proofing Exception options
- Problem b: How to fix spell check not working in any Word document
- Solution 1. Verify the “Check spelling as you type” feature is on
- Solution 2. Repair Microsoft Word with the Office repair tool
- Solution 3. Rename a Windows Registry folder
- Solution 4. Verify that a Word add-in isn’t interfering with the spell checker
- Solution 5: Rename Your Word Template
Note: Please note that the methods below apply to Word 2019, Word 2016, Word 2013, Word 2010, and Word for Office 365.
How to manually check spelling and grammar in Word
- Click the «Review» tab in the ribbon at the top of the screen.
- In the ribbon, click «Spelling & Grammar.»
- If there are any spelling or grammar issues, the Spelling and Grammar dialog box will appear. You’ll see a list of suggestions for each potential error.
How to use the Spell Check in Word and Check Grammar in Office
Here are some tricks and tips to use spell check in Microsoft Word:
- Run the spelling and grammar checker. To start a check of the spelling and grammar in your document, just press F7.
Show errors automatically while you work
Most Office programs, including MS Word, automatically check for potential spelling and grammatical errors as you type, so you don’t need to do anything to show errors while you work.
Notes:
- Automatic spelling and grammar checking is unavailable in Access, Excel, or Project. You can manually start a spell check by pressing F7.
- Automatic grammar checking is available only in Outlook, Word, and PowerPoint 2013 (or newer).
The spell check in MS Office marks potential spelling errors with a red squiggly line and potential grammatical errors with a blue squiggly line.
If spelling or grammatical errors aren’t marked, automatic checking might be turned off. You may need to turn it on.
When you see a spelling or grammatical error you want assistance fixing, right-click on the underlined word or phrase and choose one of the options to fix the error.
If Office is flagging words as misspelled, but you have it spelled the way you want it, select Add to Dictionary to teach Office not to flag that word as misspelled in the future.
Spell check might not work in Word for several reasons, here’re the most common causes.
- The different language is set as default.
- The speller add-in is disabled.
- Proofing tools aren’t installed.
- HKEY_CURRENT_USERSoftwareMicrosoftShared ToolsProofingTools1.0Overrideen-US causing the error.
If you’ve noticed that spell check only seems to stop working in one specific document, you can use one of the methods below to fix this. The problem is usually related to language or formatting settings in cases like this.
Problem a: How to Fix Spell check Not Working for a Specific Document
If the spell check is not working for a specific document, the problem could be with formatting or language settings. Follow the solutions below to solve this problem for a specific document.
Solution 1. Check your Language settings
- Open the Word document you’ve been having spell-checking issues with.
- Press the Ctrl + A keys on your keyboard (Command + A on a Mac) to select the entire document.
- Switch to the Review tab in your Ribbon, then select the Language button and choose Set Proofing Language… from the drop-down menu.

- The Language window will open up. Here, make sure that the «Do not check spelling or grammar» box is unchecked.
- Click the OK button.
- Check if your spell checker works after applying this fix.

Solution 2. Check the Proofing Exception options
- Open the Word document you’ve been having spell-checking issues with.
- Click on File from the Ribbon, then select Options. The Word Options window should open up.
- Go to the Proofing tab in the left-side panel.
- Look for the Exceptions for: (Document name) section in the right-side panel.
- Make sure that the Hide spelling errors in this document only and Hide grammar errors in this document only boxes are both unchecked.

- Click the OK button to save your changes.
- Check if the spell checker works.
Problem b: How to fix spell check not working in any Word document
If neither of the methods above seemed to fix your issue, you might have errors with Word. In the next section, we’ll discuss further solutions to fix the spell checker not working at all in various versions of Word.
Solution 1. Verify the “Check spelling as you type” feature is on
- From the menu click File tab > Options. This will open up the Word Options in a new window.
- Next, select Proofing.
- Make sure to select both the Check spelling as you type and the Mark grammar errors as you type options under the When correcting spelling and grammar in Word section.

- Click on the Recheck Document button to test if Word’s spell check works after turning these features on.
- Click the OK button to save your changes.

Solution 2. Repair Microsoft Word with the Office repair tool
These instructions apply only to Windows 10 operating systems. If you need instructions for other versions of Windows, please navigate to the Repair an Office application page on Microsoft’s website and select your operating system.
- Open the Settings window by using the Windows + S keyboard shortcut.
- Click on the Apps and Features button.
- Scroll down and select the version of Microsoft Word you want to repair.
- Click on the Modify button.
- Depending on your installation, follow the steps below:
- MSI-based: In the Change your installation section, select Repair then click Continue.
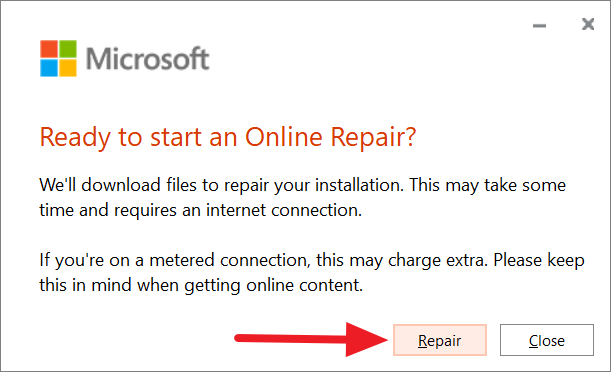
- Click-to-Run: In the How would you like to repair your Office Programs window, select Online Repair. Next, choose Repair.
- Follow any on-screen instructions to repair Word, then check if the spell checker works.
Solution 3. Rename a Windows Registry folder
- Completely exit out of Word.
- Press the Windows + R keys on your keyboard to open the Run utility.
- Type in “regedit” without the quotation marks and click the OK button. This will launch up the Registry Editor.
- Navigate to the following key using the panel on the left-hand side: HKEY_CURRENT_USERSoftwareMicrosoftShared ToolsProofing Tools
- Select the folder named 1.0 then right-click on it and choose Rename.

- Rename the folder to 1PRV.0 and click the OK button.
- Close the Registry Editor and re-launch Microsoft Word to check if your spell check works.
Solution 4. Verify that a Word add-in isn’t interfering with the spell checker
- Completely exit out of Word.
- Hold down the Ctrl key and double-click on the icon you use to launch Word. This will attempt starting Word in Safe mode.
- When prompted, click Yes to allow Word to run in Safe mode.
- Open up any document you’ve been having problems with and press the F7 key to perform a spell check.
- If the spell check works, you most likely have an add-in that interferes with the default spell checker in Word. Make sure to find and disable this add-in to be able to use the spell checker without having to launch in Safe mode.
Solution 5: Rename Your Word Template
If all the above solutions don’t work for you, then we recommend renaming your word template «normal.dotm.» Follow the procedure below.
- Press Windows key + R. This will open the Run utility dialog box
- Copy and Paste this text «%appdata%MicrosoftTemplates» on the dialog box without the quotes.
- Click Ok
Proceed and rename the normal.dotm to something like Fixednormal.dotm.
You May Also Like
> How to Check Your Spelling and Grammar in Word
> MS Word Features: 20 Secret Functions Revealed!
> How to Print Black and White on Word (With Images)
> How to Edit Your Word Documents Faster
Word’s Spell check is a built-in feature that can help you detect spelling mistakes and grammatical errors while you’re typing. If the tool finds any mistakes or errors in your document, it will underline the errors with different colors, like red for spelling errors, green for grammar errors, and blue for contextual spelling errors.
However, sometimes, the Spell Check feature doesn’t work as expected in Word. Many users have complained that the tool is not flagging misspelled and missing words correctly or the program stopped working entirely.
If you are facing any issue with Word’s spelling and grammar-checking tool, there are several ways to fix it and we will go through each of them in this post.
Check the Language and Spell Check Options
If the Spell Check and auto-correct are not working for a specific document, the issue could be caused by language settings. So keep a check on the language settings options. When you type in a document, Microsoft Word auto-detects the language you are using and tries to auto-correct it. This feature may be useful in many cases, however, sometimes it may be the cause of why Spell Check is not working properly. Here’s how you can resolve this:
First, open the Word document where spell check is not working. Then, press Ctrl+A to select all the text in the document.

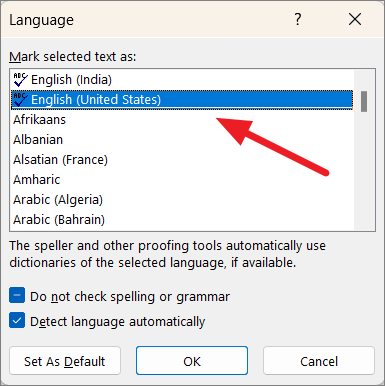
Next, go to the ‘Review’ tab, click the ‘Language’ button in the ribbon and select the ‘Set Proofing Language’ option.
Here, first, make sure the correct language is selected for the text. For example, if the language is set as ‘Spanish’ but the document is in ‘English’, Word will highlight every English word as misspelled words. Also, if your language is set as English (United States) and you’re using British English (for example, if you use the word flavour instead of flavor), it will highlight it as an error.
So, choose the correct language under the ‘Mark selected text as:’ section.
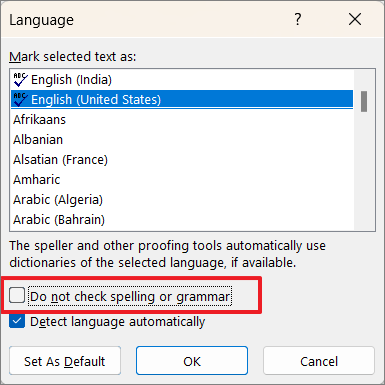
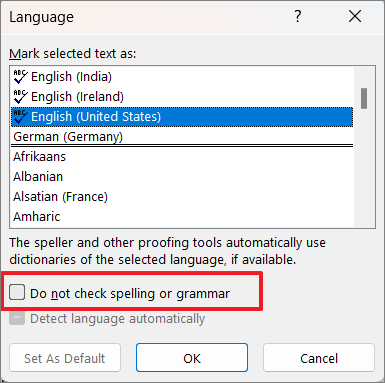
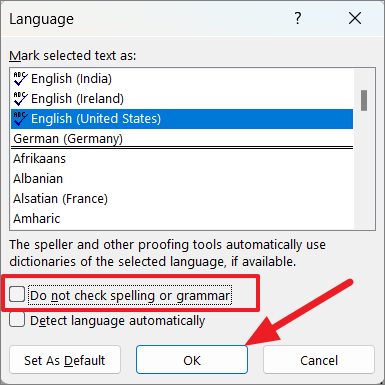
Then, verify that the ‘Do not check spelling or grammar’ option is unchecked. If not uncheck that checkbox.
You can also uncheck the ‘Detect language automatically’ option because the auto-language recognition can sometimes throw errors if you occasionally use some other language words (other than the set language).
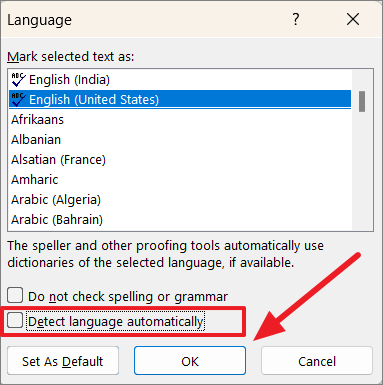
When you are done, click ‘OK’.
After doing the above steps, press the F7 key to run the spelling and grammar tool, and see if the problem is fixed. If not, try the next method.
Check for Proofing Exceptions
There’s another setting in Word that may prevent the spell checker from running properly. The proofing exception is a setting that can exempt certain documents from all proofing and spelling checks. Make sure this option is disabled for the proper functioning of the spell checker. To do this, follow these steps:
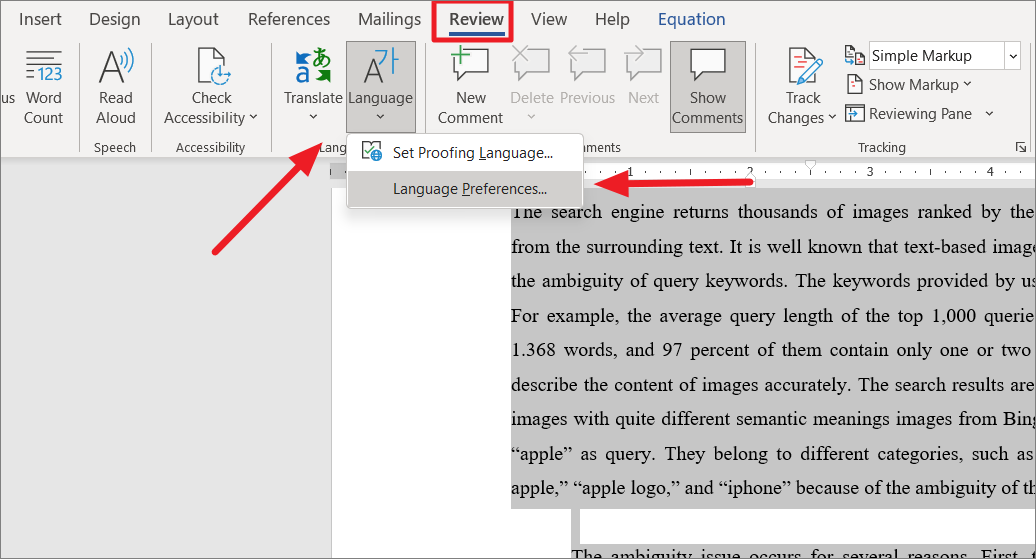
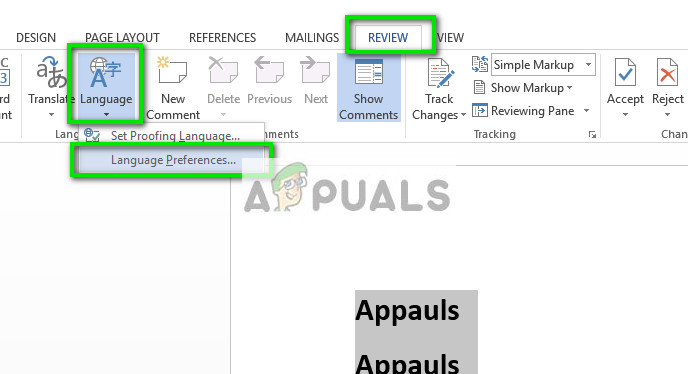
First, open Microsoft Word, or you can open any Word documents on the computer. After that, select all the content by pressing Ctrl+A, then go to the ‘Review’ tab and then click the ‘Language’ button. Then, click the ‘Language Preferences…’ option.
Alternatively, you can go to the ‘File’ tab from the Ribbon, then select ‘Options’ to open Word Options.
In the Word Options window, go to the ‘Proofing’ tab on the left panel. On the right-side panel, scroll down to the ‘Exceptions for’ section at the bottom. Then, make sure both ‘Hide spelling errors in this document only’ and ‘Hide grammar errors in this document only’ checkboxes are unchecked. Then, click ‘OK’ to save the settings.
Enable Check Spelling As You Type option
If the Spell Checking is not working in any document, then it might be due to the ‘Check spelling as you type’ setting (which checks the document in real-time for errors) is not turned on. Here is how you can turn it on:
Click the ‘File’ tab, select ‘Options’ in the right sidebar at the bottom of the menu.
When the Word Options dialog opens up, click the ‘Proofing’ section. On the right-side panel, navigate to the ‘When correcting spelling and grammar in Word’ section. Then, make sure to select both ‘Check spelling as you type’ and the ‘Mark grammar errors as you type’ options under that section.
Then, click on the ‘Recheck Document’ button to recheck the document
Click ‘Yes’ to the confirmation box.

After that, click ‘OK’ to save the settings and check your document.
Start Microsoft Word in Safe Mode
If some add-in or other program interfering with Spell Checker functionality and causes it to malfunction, you can start Microsoft Word in safe mode (loads without any add-ins) and find out what is causing the issue. Here’s how you can do this:
Press and hold the Ctrl key and then double-click on any Word document on your computer to open it.
In the elevated window, click ‘Yes’.
Alternatively, you can launch the Word program in safe mode using the Run command.
To do this first, open the Run command box with Ctrl+R shortcut keys. Then, type winword /safe in the Run command and press Enter or click ‘OK’.
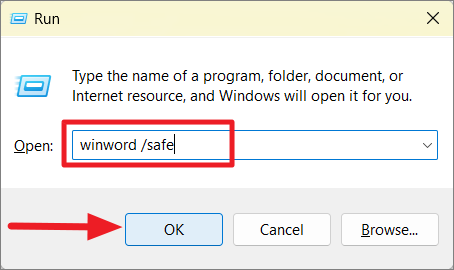
This will open Word in the safe mode.
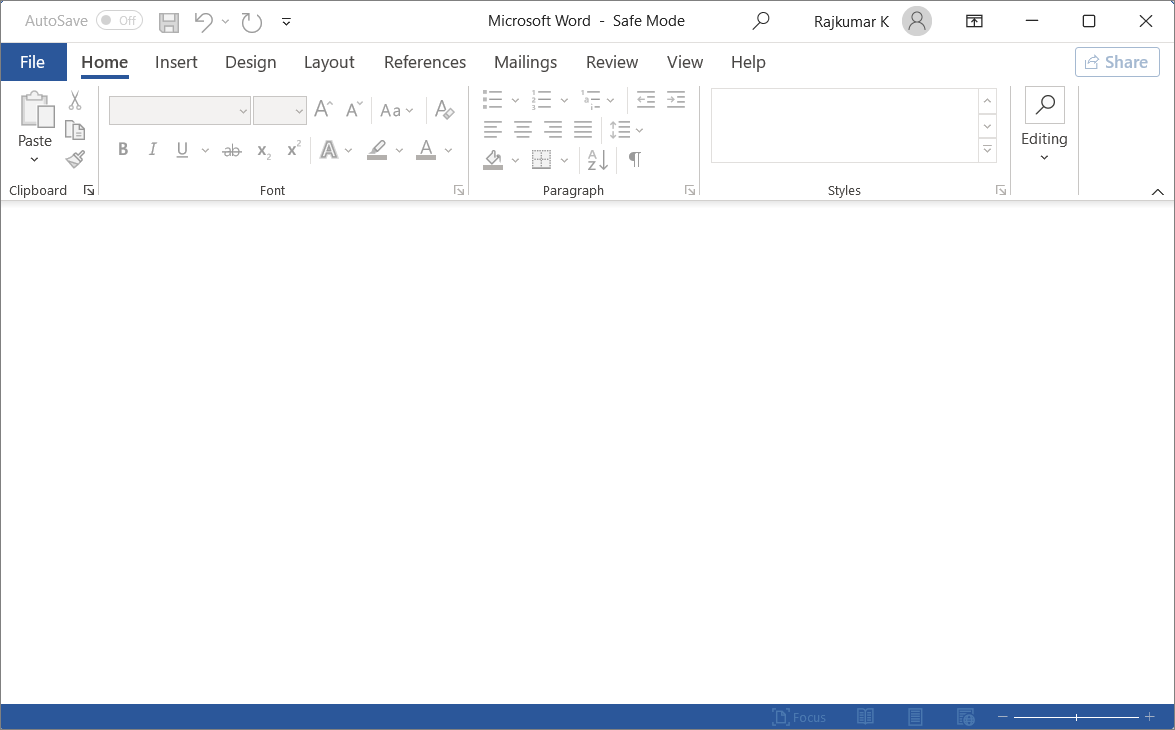
Now, click ‘File’ and select ‘New’ or press Ctrl+N to open a new black document. Then type some text and check if the spell check is working or not.
If the spell check is working on the safe mode, then the problem must be with one of the add-ins. Then, disable the unnecessary add-in that causes the problem.
Disable the Conflicting Add-ins in Word
In some cases, a third-party add-in could be malfunctioning or causing conflict with the spelling and grammar-checking tool. If the spell checker worked properly in safe mode with minimal functionality, then the problem might be with any of the installed add-ins. So you need to disable the third-party add-ins one by one to find which one is causing the conflict. Or you could disable them all and re-install them one by one to find the conflicting add-in. To disable add-ins, follow these instructions:
Open the ‘File’ tab and select ‘Options’ from the left-side panel.
In Word Options, select ‘Add-ins’ on the left-hand pane.

Next, at the bottom of the screen, select the ‘COM Add-ins’ option from the ‘Manage’ drop-down menu and click the ‘Go’ button.
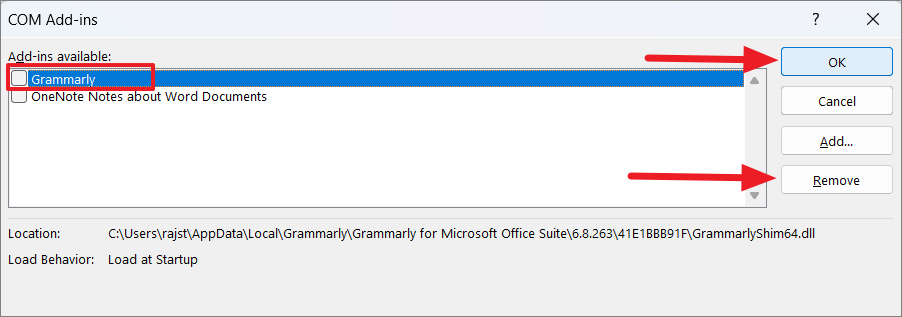
In the COM Add-ins pop-up, simply uncheck the add-in that you think is causing the problem to disable it. If you want to uninstall the add-in, select the add-in and click ‘Remove’. Then, click ‘OK’ to close the dialog.
Sometimes all the add-ins will not appear in the COM Add-ins dialog box. If the installed add-in is not available in the COM Add-ins box, do this instead:
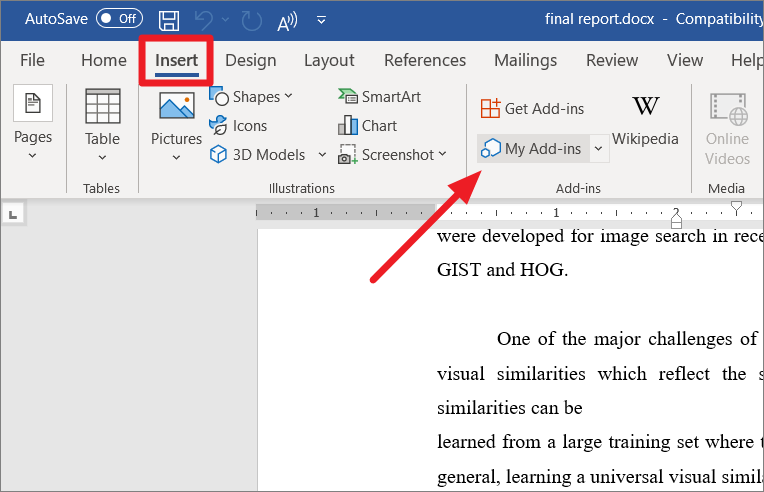
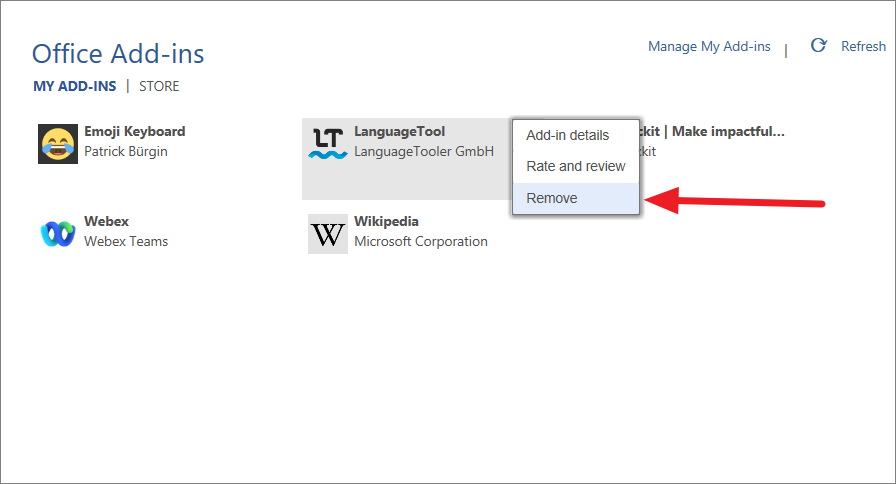
Go to the ‘Insert’ tab and click the ‘My Add-ins’ button in the Add-ins group.
Under Office Add-ins, click the three-dots button (Options) next to the add-in you want to remove.
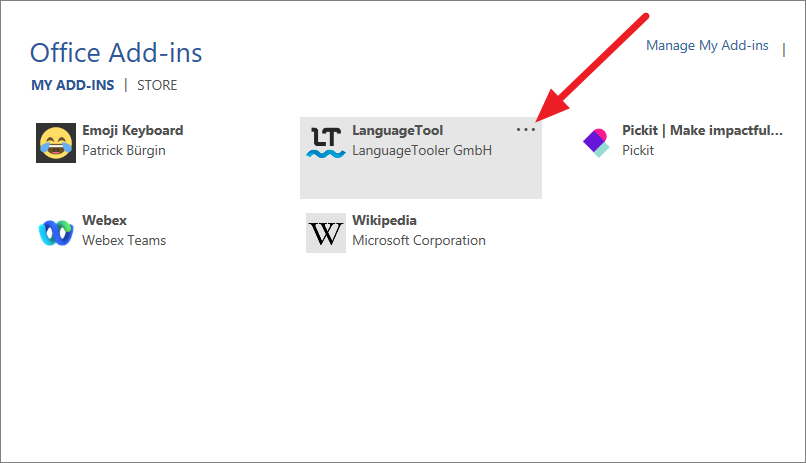
Then, click ‘Remove’ from the menu.
Now, check if the spell checker works or not.
Rename a Windows Registry Folder
Some users claim that renaming the Proofing tools folder in the Registry Editor to resolve the issue. Follow these instructions to rename the proofing folder:
First, completely close the Word program, then launch the Run command box by pressing Win+R. Type regedit to open Registry editor. And, if you see the User Account Control dialog box, click ‘Yes’.
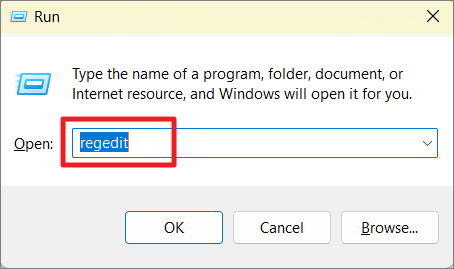
In the Windows Registry windows, navigate to the following path using the left pane or copy-paste the below path in the address bar:
HKEY_CURRENT_USERSoftwareMicrosoftShared ToolsProofing Tools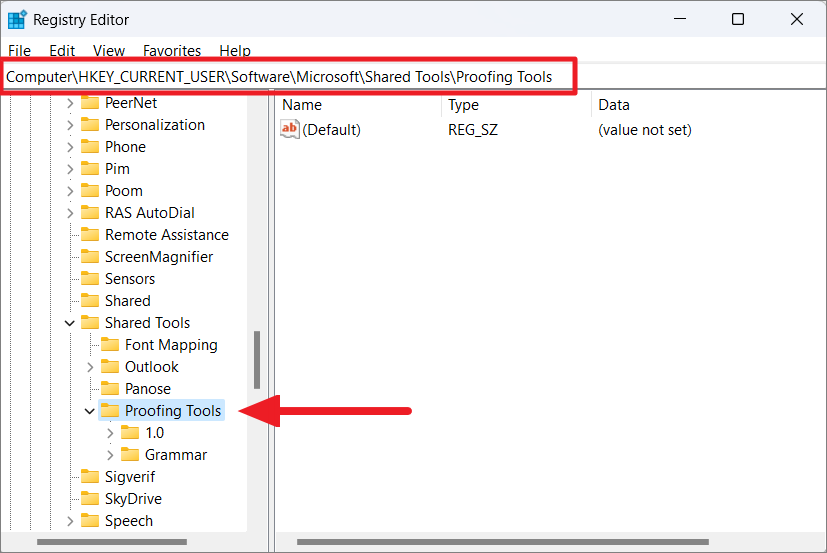
Under Proofing Tools, right-click on the ‘1.0’ folder and select the ‘Rename’ option from the context menu.
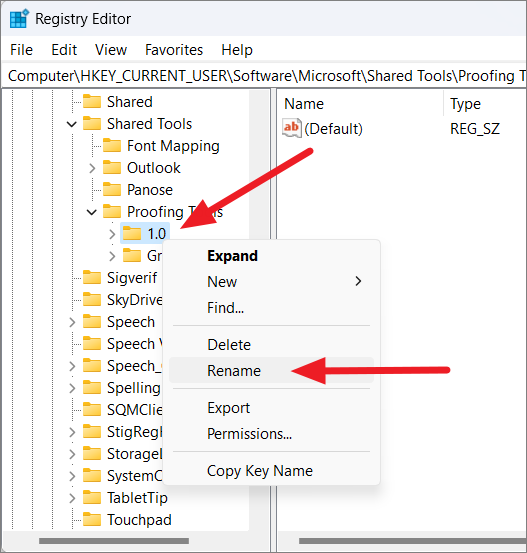
Rename the folder from ‘1.0’ to ‘1PRV.0’.

After that, close the Registry Editor and restart your PC to apply the changes. Now, relaunch Microsoft Word and recheck if the spell checker is working or not.
Rename Your Word Template
It is also possible that the spell checker is not working due to the corrupted global template. The Global Template is either the ‘normal.dot’ or ‘normal.dotm’ for Word 2007 and newer series respectively, which is usually located in the Microsoft Template folder. To resolve this issue, you need to rename the Global template file that will reset MS Word to the default settings. To do this, follow the below steps:
Open the Run command (Win+R), type the following, and press Enter:
%appdata%MicrosoftTemplatesThis will open the Microsoft Word Templates folder where you can find the ‘normal.dot’ or ‘normal.dotm’ file depending on the Word version.
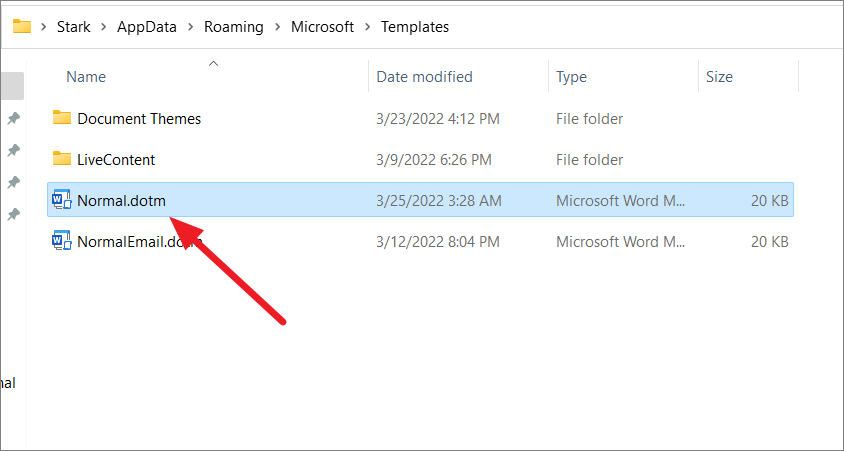
Now, right-click the file and select the ‘Rename’ icon or press F2.
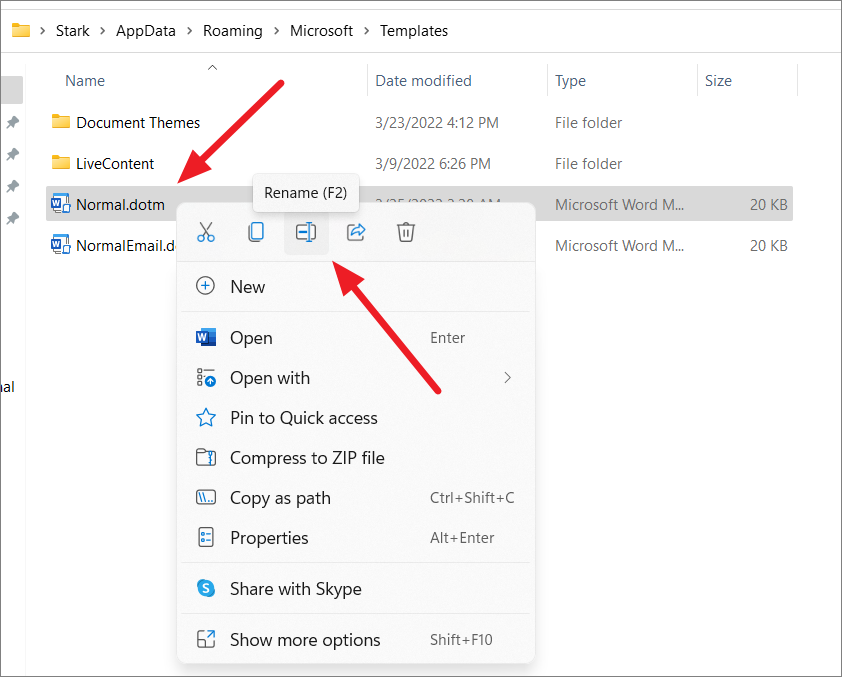
Then, rename the file from Normal.dotm to ‘Normal_old.dotm’.
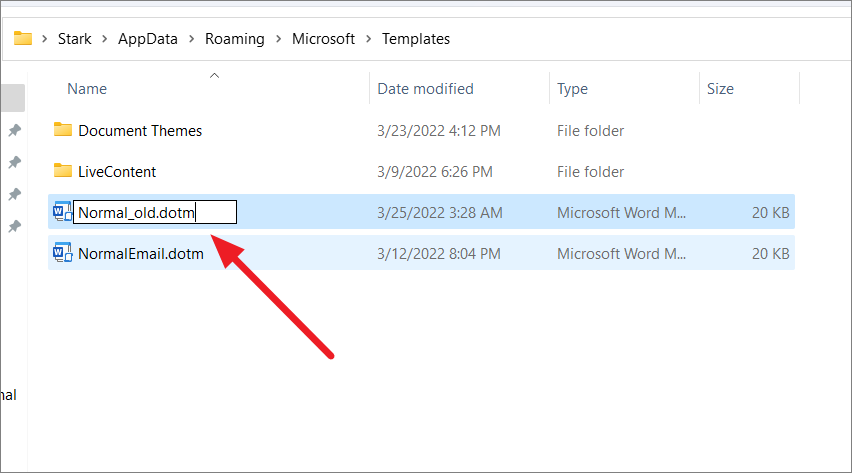
This will reset the Word settings to default and hopefully fix your problem.
Add Proofing Language
While you might be writing or editing a document in English, your preferred authoring and proofing language might be set to a foreign language (e.g German). If you accidentally set a different proofing language or uninstalled English from the list, then spell check might not work.
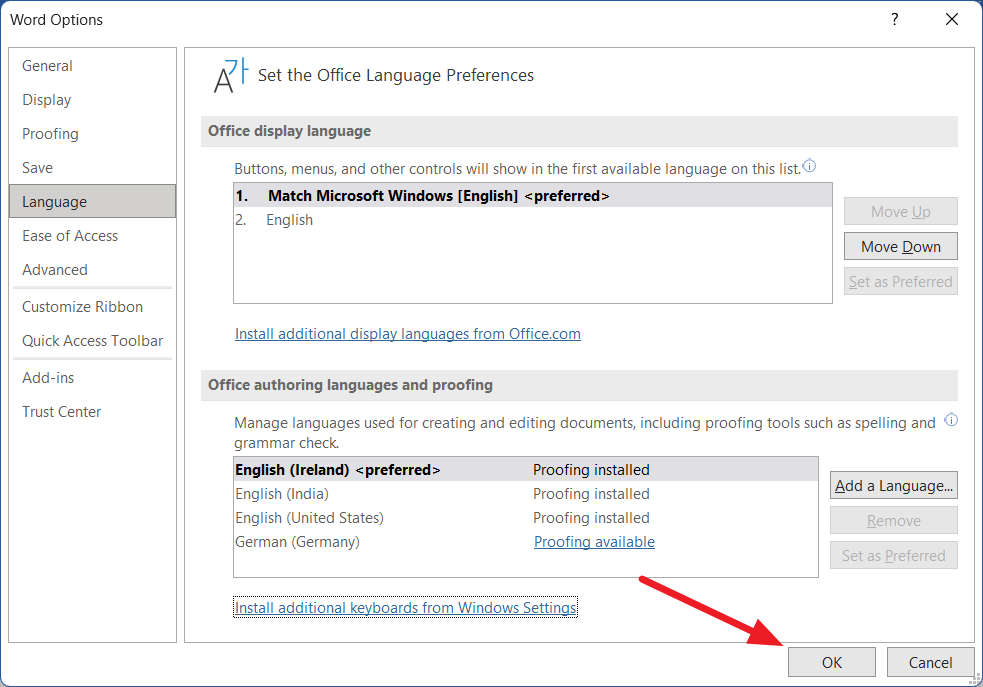
To fix this, open the ‘File’ menu and go to ‘Options’ in the backstage view. Next, go to the ‘Language’ section on the left and make sure that the correct language is installed and set as preferred under the ‘Office authoring languages and proofing’ section.
To set proofing language, select the language and click the ‘Set as Preferred’ button. In the below example, German is set as the preferred language.

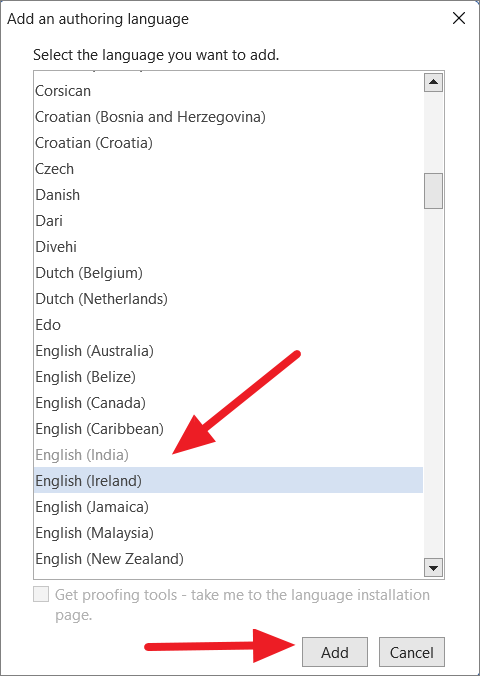
If your language is not available under the ‘Office authoring languages and proofing’ section, click the ‘Add a Language’ button to add a proofing language.
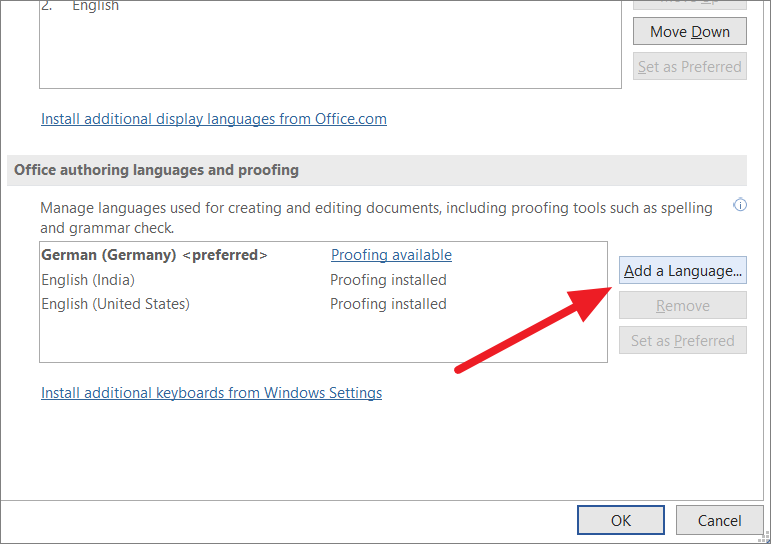
From the pop-up window, choose the language you want to add from the list and click the ‘Add’ button
After that, select the language from the list and click ‘Set as preferred’.

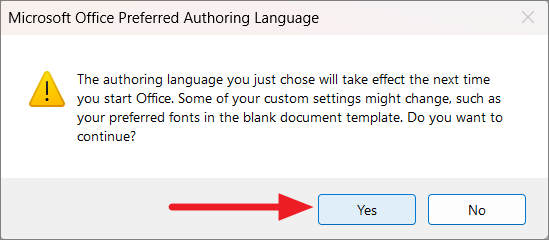
Then, click ‘Yes’ in the Microsoft Office Preferred Authoring Language pop-up box.
After selecting the preferred language, click ‘OK’ to close Word Options.
Now, check if the spelling and grammar tool is working or not.
Add to Custom Dictionary
There are times when Word couldn’t recognize certain words such as slags, names, etc. And the program will struggle to detect spelling and grammar mistakes. In such cases, you can add your words to Word’s built-in dictionary and it will not show them as errors in this document and in all future documents.
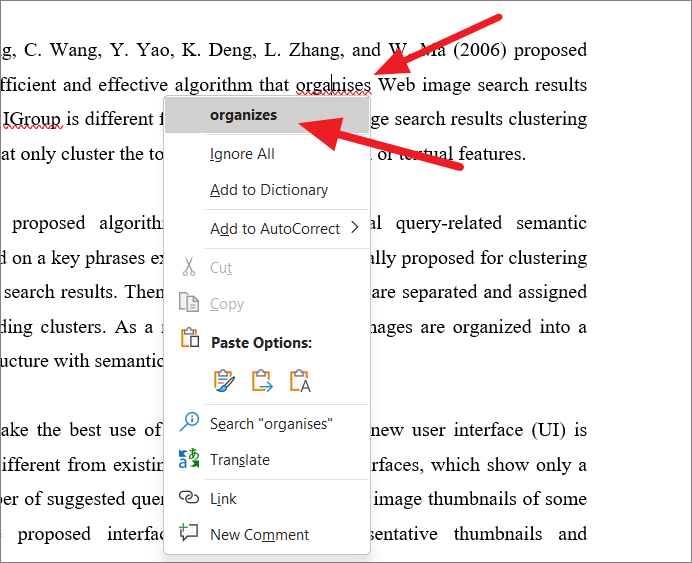
To add a word to the dictionary, right-click on the word you want to add and select the ‘Add to Dictionary’ option in the context menu.
Check Document Style Settings
Word uses different language settings for each paragraph in your document. If you use a style that is formatted the wrong way, then each new paragraph will be formatted in a different language even if you set the entire document language to English. Consequently, Word may highlight the words in the new paragraph as spelling mistakes. To fix this, you must set the correct language in the Style.
On the ‘Home’ tab, head to the Styles section and then right-click on the chosen style and select ‘Modify’ from the context menu.
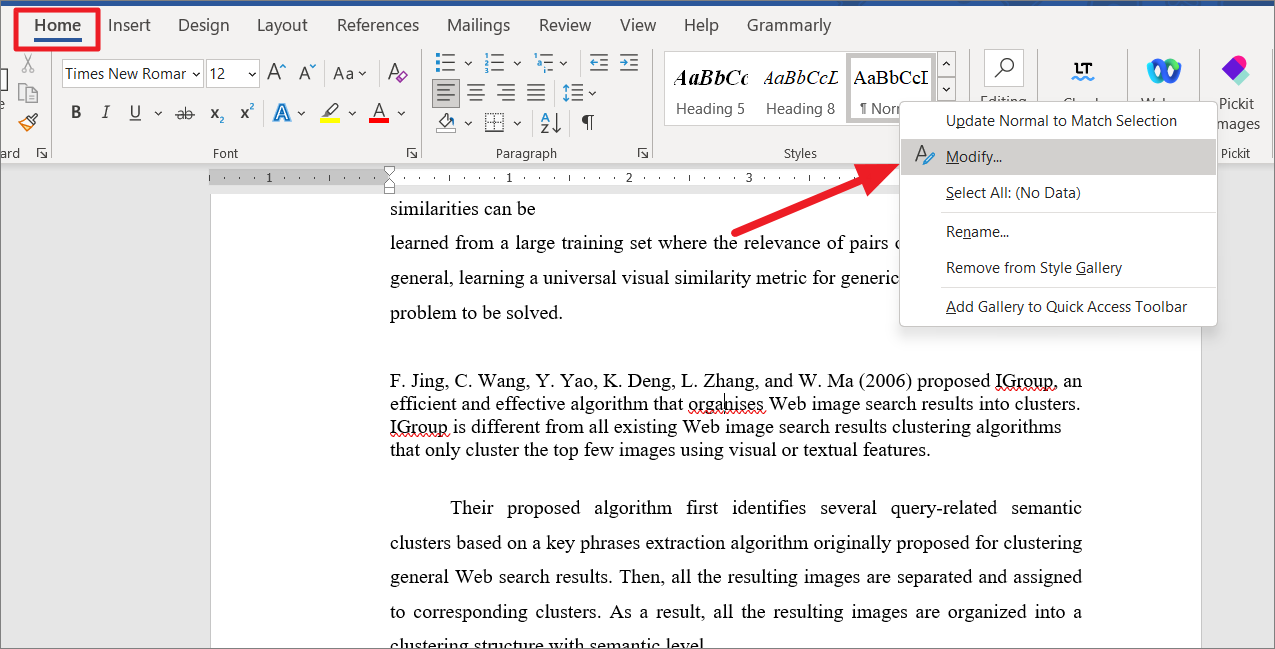
In the Modify Style dialog box, click the ‘Format’ button at the lower-left corner, and select ‘Language’ from the menu.
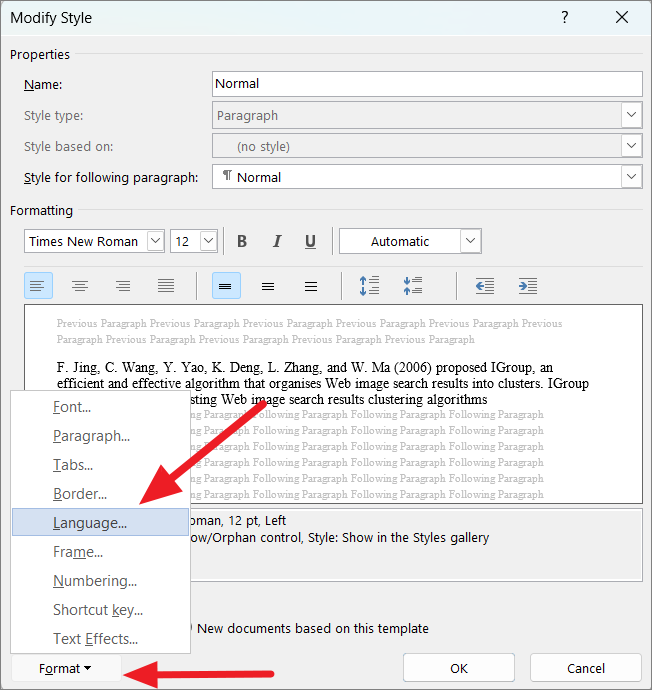
Then, select the correct language for the selected style and make sure the ‘Do not check spelling or grammar’ option is unchecked. Then, click ‘OK’.
Repair MS Office Application
The MS Word app could be corrupted or maybe a recent update damaged your software’s installation. Either way, damaged or corrupted MS Word application could also be another cause for spelling and grammar checking tool not working. So repairing the MS Office application on your computer might resolve your issue.
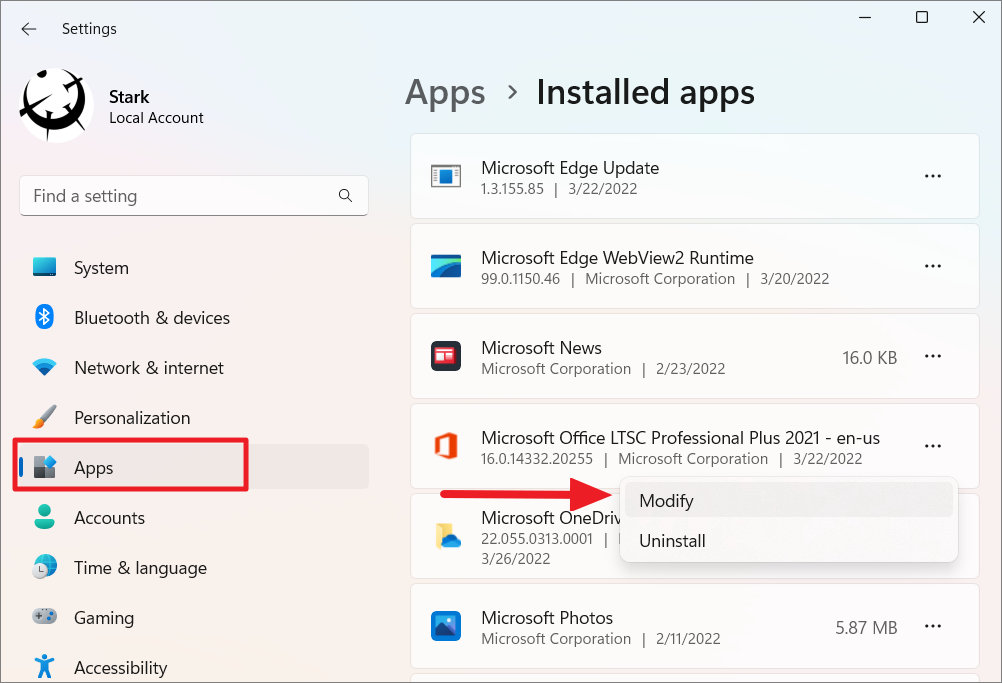
First, right-click on the Windows Start menu and select the ‘Installed apps’ option from the menu. or Go to Windows Settings (Win+I) and head to ‘Apps’ and then ‘Apps and features’.
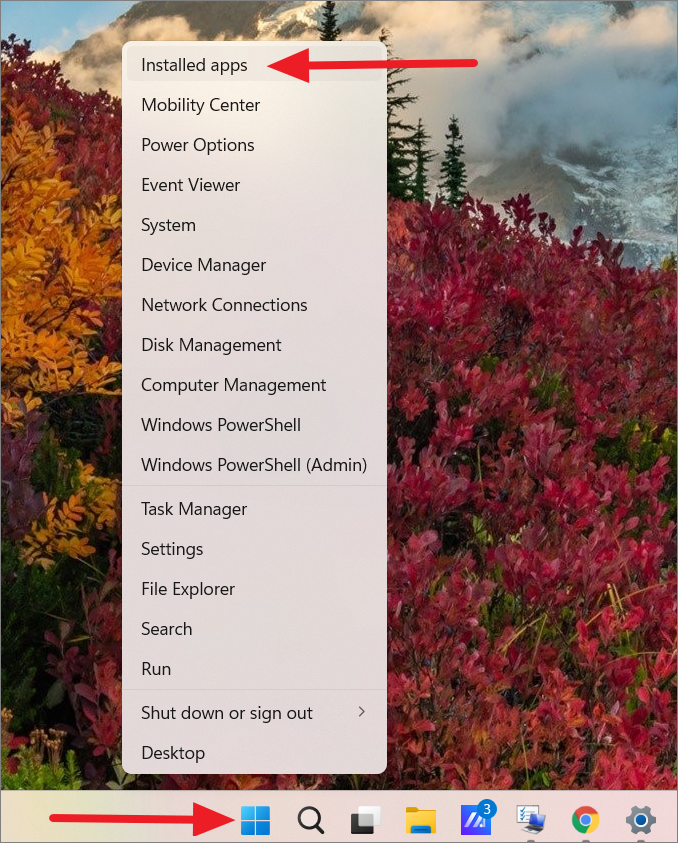
Under the list of installed apps, locate the Microsoft Office version you have installed. Then, click the three-dots button and select ‘Modify’.
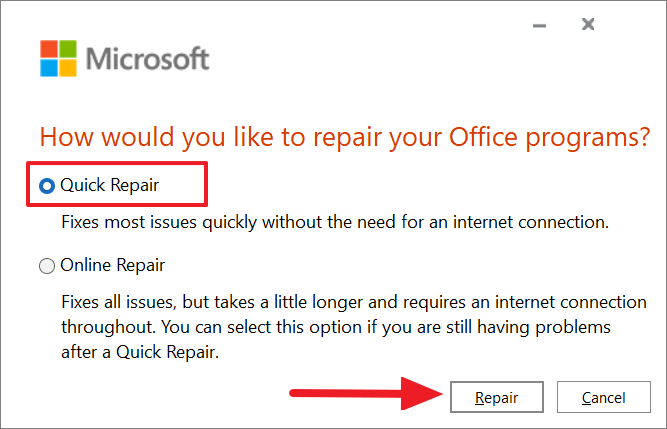
And, click ‘Yes’ to the User Account Control if prompted. In the Microsoft repair window, you will have two options. First, select the ‘Quick Repair’ option and click the ‘Repair’ button.
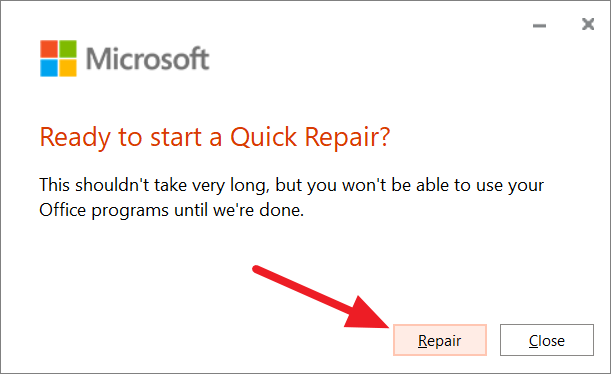
In the next dialog box, click the ‘Repair’ button again.
If the above option doesn’t fix the problem, select ‘Online Repair’ option and click the ‘Repair’ button.
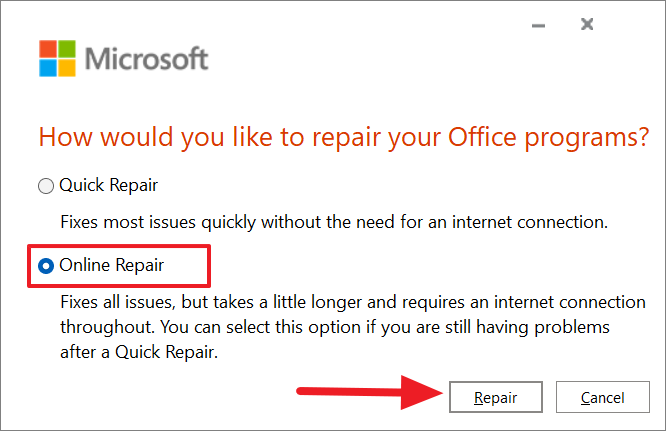
Then, click ‘Repair’ again.
After the repair is finished, restart your device, and see if the issue is fixed or not.
Disable the Do Not Check Spelling Or Grammar option
Sometimes when you try to check the spelling, it will show you the “Text marked with ‘Do not check spelling or grammar’ was skipped” error message. Word usually shows this message when you use the ‘Do Not Check Spelling’ option in the language settings to ignore certain words from the spell checker. However, if this option is not configured right, Word will skip spell-checking for all the words in the document. Here’s how you can disable this option:
Open the Word document and highlight the paragraph or the specific word which is not being shown in the spell checker. Next, press the Shift+F1 shortcut keys.
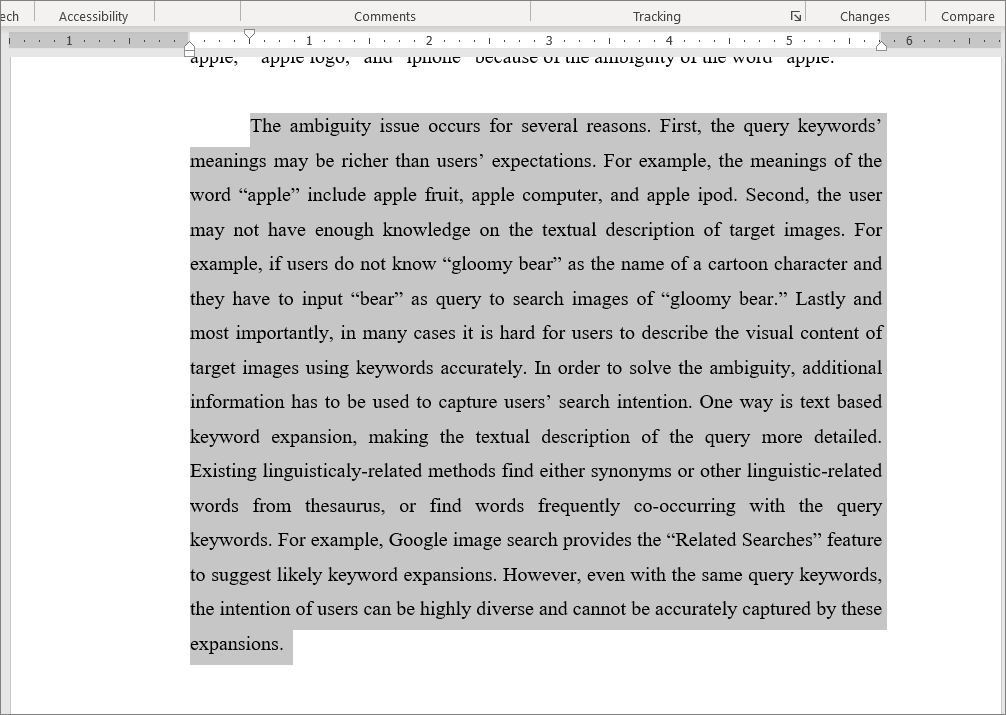
This will show you the Reveal Formatting pane on the right side of the Word window.
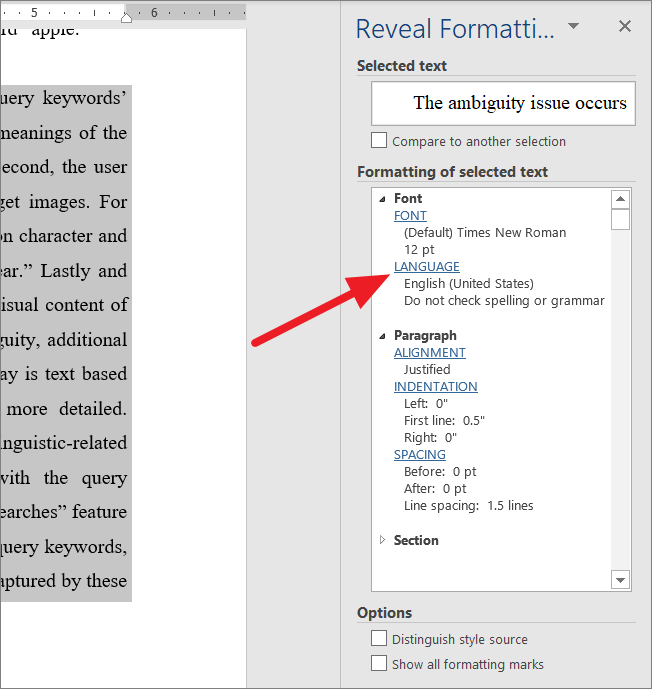
In the Reveal Formatting pane, click on the ‘Language’ option under the Formatting of the selected text box.
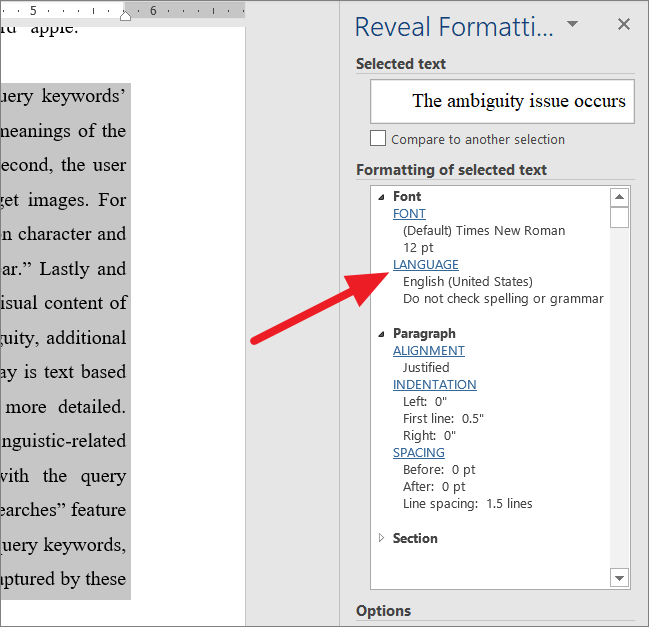
When the Language dialog box appears, make sure to uncheck the ‘Do not check spelling or grammar’ option. After that, click ‘OK’ and restart the Word program.
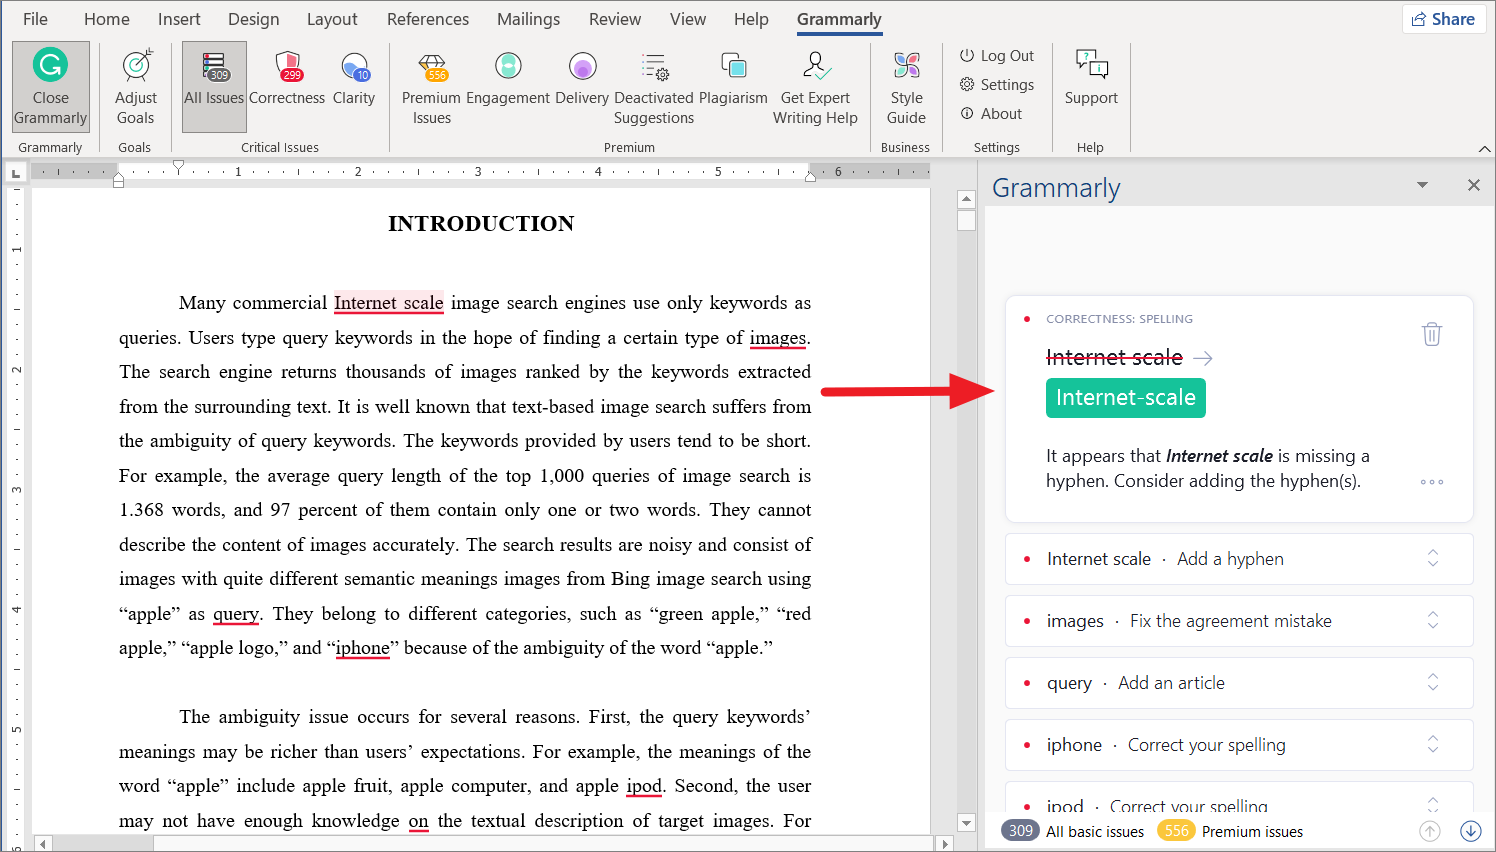
Use Grammarly Plug-in
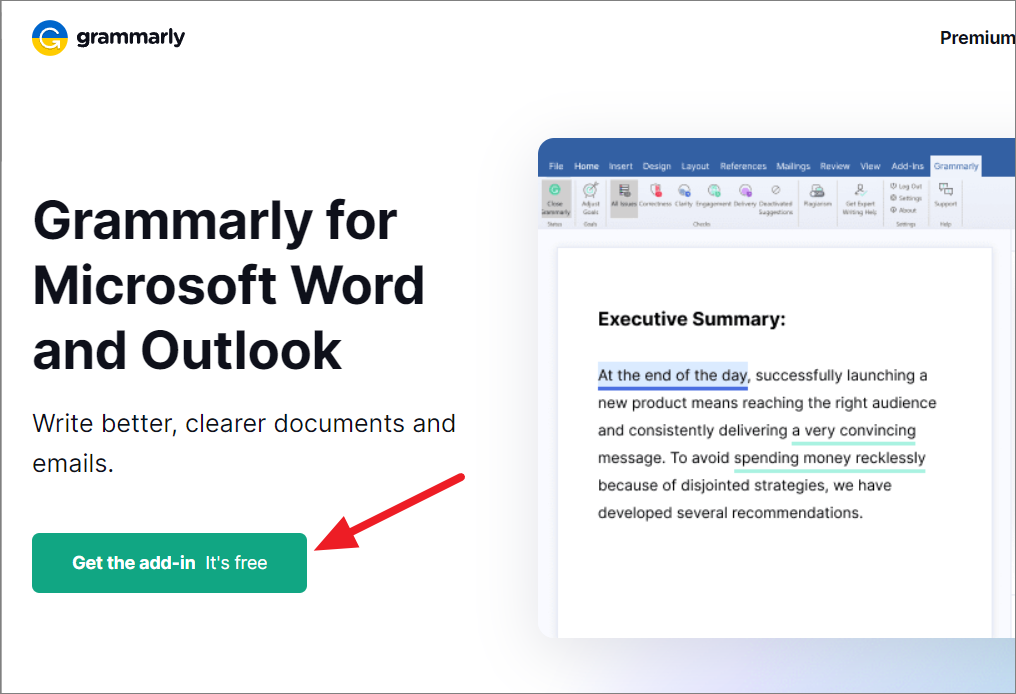
If Word’s Spelling and Grammer tool is not working for you, you can use Grammarly plug-in as an alternative. Grammarly is a cloud-based typing assistant that helps you detect and fix spelling mistakes, imperfect grammar, and punctuation mistakes. Also, Grammarly integrates seamlessly with Microsoft Word and Outlook.
To download Grammarly for Word and Outlook, go to this website and click the ‘Get the add-in It’s free’ button. After downloading the add-in, install it.
Then, restart the Word app and you will see a new tab called ‘Grammarly’ in the ribbon.
Now, you can open any document and go to the ‘Grammarly’ tab and click the ‘Open Grammarly’.
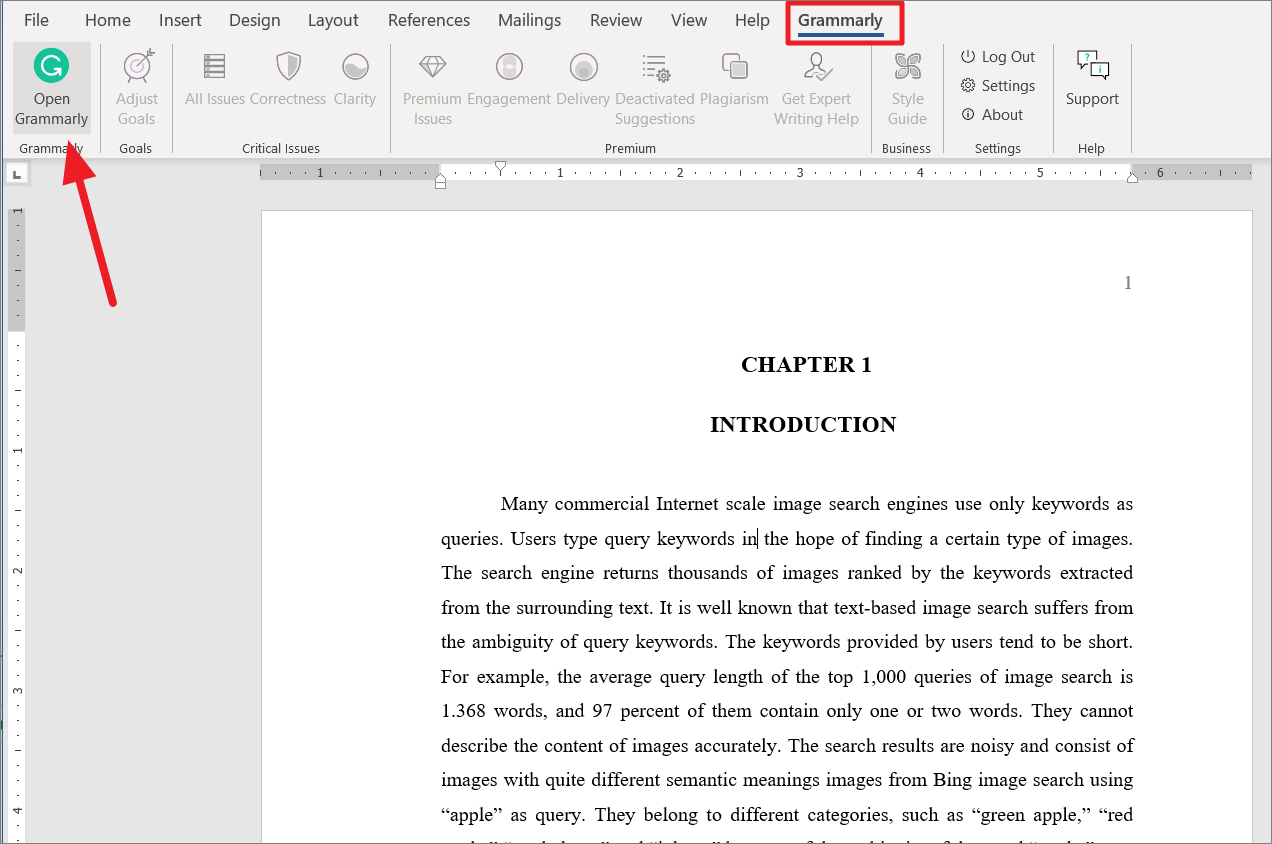
This will open the Grammarly pane on the right, where it will scan the document and show you suggestions to fix your spelling and grammar mistakes.
You can also use the Microsoft Word web app to quickly check the spelling of the document. If you have Microsoft 365 subscription, you can open the same document in the web app and quickly check for spelling and grammar mistakes online.
That’s it.
Microsoft Word is a word processor developed by Microsoft. It has been around for decades and is the most used office application around the globe. It receives periodic updates from Microsoft itself targeting various issues and improving various features.
Users using Microsoft Word might come across an issue where their words are not being monitored by the editor. This issue is not usually a big one and can be easily fixed by changing some of the settings. We will go through various settings for you to check. Start with the first one and work your way down.
Solution 1: Unchecking ‘Detecting language automatically’
Microsoft Word has a function where it automatically detects the language your inputting and it tries to correct it accordingly. This may be a good feature for many writers but this has proven to be inconsistent in numerous cases. We can try unchecking this setting after select all the text and see if this does the trick. If you are using a normal language such as English, it is most likely that you won’t even need this feature to be active.
- Open the word file. Press Ctrl + A to select all the text and click on the Review tab present at the top of the screen.
- Now select Language and select “Set Proofing Language”.
- Now uncheck the options “Do not check spelling or grammar” and “Detect language automatically”. Press OK to save changes.

- Now check if you can successfully use the utility spell check. If you can’t restart Word and try again.
Tip: You can also use the Default button when the list of options come up.
Solution 2: Changing Exceptions
There is also a feature in this word editor to include exceptions from all proofing and spelling checks. This is very useful for writers who don’t want their work to be checked as they want to use ‘custom’ language in their work. You should if your document is listed as an exception. If it is, simply removing it will solve the problem.
- After selecting all the text, click on the Review tab at the top of the screen. Now select Language and click “Language Preferences”.
- Now click on “Proofing” and navigate to the end of the options. Now uncheck both the checks i.e. “Hide spelling errors in this document only” and “Hide grammar errors in this document only”.
- Press OK to save changes and exit. You might be prompted to restart the application for the changes to take place. After restarting, check if the problem at hand got solved.
Solution 3: Disabling “Do not check spelling or grammar”
Another functionality present in Microsoft Word is to stop checking the spelling or grammar for several words. Through this, you can ensure that a specific miss-spelling is not detected by the word editor. This is useful for numerous users as there is always such a word they choose to ignore. However, if configured incorrectly, this means that word ignores all the spell checks. We can try reverting this options and see if this does the trick.
- Open the document. Now select the specific word which is not being shown in the spell check and press Shift + F1.
- Now click on Language. A dialog similar in Solution 1 will come up. Make sure that the option “Do not check spelling or grammar” is unchecked.
- Press OK to save changes and exit. Now check if the problem got solved. If it didn’t, consider restarting the application and check again.
Tips:
- Copy the entire text, open a new word file and paste it there. Now save the word file with a different and open it again to check the functionality.
- Make sure that the word is not in the custom dictionary. The words in the custom dictionary are automatically excluded from being checked (File > Options > Proofing > Custom Dictionaries).
- Also, make sure that the word is not saved in a foreign language dictionary which is automatically applied to all or some part of the text (Review tab > Language > Language Preferences).

Kevin Arrows
Kevin Arrows is a highly experienced and knowledgeable technology specialist with over a decade of industry experience. He holds a Microsoft Certified Technology Specialist (MCTS) certification and has a deep passion for staying up-to-date on the latest tech developments. Kevin has written extensively on a wide range of tech-related topics, showcasing his expertise and knowledge in areas such as software development, cybersecurity, and cloud computing. His contributions to the tech field have been widely recognized and respected by his peers, and he is highly regarded for his ability to explain complex technical concepts in a clear and concise manner.
Back to top button