
Использование функции MsgBox в VBA Excel, ее синтаксис и параметры. Значения, возвращаемые функцией MsgBox. Примеры использования.
Функция MsgBox предназначена в VBA Excel для вывода сообщения в диалоговом окне, ожидания нажатия кнопки и возврата значения типа Integer, указывающего на то, какая кнопка была нажата. Для упрощения восприятия информации, в этой статье не рассматриваются параметры, связанные с контекстной справкой и модальностью диалогового окна MsgBox.
Синтаксис функции
MsgBox ( Prompt [, Buttons ] [, Title ])
Обязательным параметром функции MsgBox является Prompt, если Buttons и Title явно не указаны, используются их значения по умолчанию. Кроме того, если необязательные параметры не указаны и возвращаемое значение не присваивается переменной, сообщение не заключается в скобки:
Пример 1
|
Sub Test1() MsgBox «Очень важное сообщение!» End Sub |
Параметры функции
| Параметр | Описание | Значение по умолчанию |
|---|---|---|
| Prompt* | Обязательный параметр. Выражение типа String, отображаемое в диалоговом окне в виде сообщения. Разделить на строки можно с помощью константы vbNewLine. | Нет |
| Buttons | Необязательный параметр. Числовое выражение, которое представляет собой сумму значений, задающих номер и тип отображаемых кнопок, стиль используемого значка, тип кнопки по умолчанию. | 0 |
| Title | Необязательный параметр. Выражение типа String, отображаемое в заголовке диалогового окна. | Имя приложения** |
*Максимальная длина параметра Prompt составляет примерно 1024 знака и зависит от их ширины.
**В Excel по умолчанию в заголовке MsgBox выводится надпись «Microsoft Excel».
Константы параметра «Buttons»
Тип и количество кнопок
| Константа | Описание | Значение |
|---|---|---|
| vbOKOnly | Отображается только кнопка OK. | 0 |
| vbOKCancel | Отображаются кнопки OK и Cancel (Отмена). | 1 |
| vbAbortRetryIgnore | Отображаются кнопки Abort (Прервать), Retry (Повторить) и Ignore (Пропустить). | 2 |
| vbYesNoCancel | Отображаются кнопки Yes (Да), No (Нет) и Cancel (Отмена). | 3 |
| vbYesNo | Отображаются кнопки Yes (Да) и No (Нет). | 4 |
| vbRetryCancel | Отображаются кнопки Retry (Повторить) и Cancel (Отмена). | 5 |
Стиль значка
| Константа | Описание | Значение |
|---|---|---|
| vbCritical | Отображается значок Critical — Критичное сообщение, сообщение об ошибке. | 16 |
| vbQuestion | Отображается значок Question — Сообщение с вопросом. | 32 |
| vbExclamation | Отображается значок Exclamation — Предупреждающее сообщение. | 48 |
| vbInformation | Отображается значок Information — Информационное сообщение. | 64 |
Для просмотра отображаемых значков, скопируйте код в свой модуль и запустите на выполнение:
Пример 2
|
Sub Test2() Dim a As Integer a = MsgBox(«Критичное сообщение, сообщение об ошибке», 16) a = MsgBox(«Сообщение с вопросом», 32) a = MsgBox(«Предупреждающее сообщение», 48) a = MsgBox(«Информационное сообщение», 64) End Sub |
Кнопка по умолчанию
| Константа | Описание | Значение |
|---|---|---|
| vbDefaultButton1 | По умолчанию активна первая кнопка. | 0 |
| vbDefaultButton2 | По умолчанию активна вторая кнопка. | 256 |
| vbDefaultButton3 | По умолчанию активна третья кнопка. | 512 |
Возвращаемые значения
| Константа | Кнопка | Значение |
|---|---|---|
| vbOK | OK | 1 |
| vbCancel | Отмена | 2 |
| vbAbort | Прервать | 3 |
| vbRetry | Повторить | 4 |
| vbIgnore | Пропустить | 5 |
| vbYes | Да | 6 |
| vbNo | Нет | 7 |
Значение, возвращаемое функцией MsgBox, используется для выбора дальнейших действий исполняемой программы в зависимости от нажатой кнопки.
Для третьего примера зададим следующие параметры первой функции MsgBox:
- Prompt = «Выберите кнопку!»
- Buttons = 323 (3 (vbYesNoCancel) + 64 (vbInformation) + 256 (vbDefaultButton2))
- Title = «Выбор кнопки»
Вторая функция MsgBox используется как простое информационное сообщение с параметрами по умолчанию.
Пример 3
|
Sub Test3() Dim a As Integer a = MsgBox(«Выберите кнопку!», 323, «Выбор кнопки») If a = 6 Then MsgBox «Вы нажали кнопку: Да» ElseIf a = 7 Then MsgBox «Вы нажали кнопку: Нет» Else MsgBox «Вы нажали кнопку: Отмена» End If End Sub |
В этом примере, в зависимости от нажатой кнопки в первом диалоговом окне, во втором сообщении выводится название нажатой кнопки. Обратите внимание, что вторая кнопка в открывшемся первом окне MsgBox выделена по умолчанию и срабатывает при нажатии клавиши «Enter».
А что будет, если первое диалоговое окно из третьего примера закрыть крестиком? Проверьте сами.
На чтение 10 мин. Просмотров 38.4k.
В Excel VBA вы можете использовать функцию MsgBox для отображения окна сообщения (как показано ниже):

MsgBox — это не что иное, как диалоговое окно, которое вы можете использовать для информирования своих пользователей, показывая пользовательское сообщение или получая некоторые основные входные данные (такие как Да / Нет или OK / Отмена).
Пока отображается диалоговое окно MsgBox, ваш код VBA останавливается. Вам нужно нажать любую из кнопок в MsgBox, чтобы запустить оставшийся код VBA.
Примечание: в этом уроке я буду использовать слова «окно сообщения» и MsgBox взаимозаменяемо. При работе с Excel VBA вам всегда нужно использовать MsgBox.
Содержание
- Анатомия VBA MsgBox в Excel
- Синтаксис функции VBA MsgBox
- Константы кнопки Excel VBA MsgBox (примеры)
- Константы значков Excel VBA MsgBox (примеры)
- Настройка заголовка и приглашения в MsgBox
- Присвоение значения MsgBox переменной
Анатомия VBA MsgBox в Excel
Окно сообщения состоит из следующих частей:

- Title — заголовок: обычно используется для отображения содержания окна сообщения. Если вы ничего не указали, отображается имя приложения, в данном случае Microsoft Excel.
- Prompt — подсказка: это сообщение, которое вы хотите отобразить. Вы можете использовать это пространство, чтобы написать пару строк или даже отобразить таблицы / данные здесь.
- Button(s) — кнопка(-и): хотя кнопка «ОК» является кнопкой по умолчанию, ее можно настроить таким образом, чтобы отображать такие кнопки, как «Да / Нет»; «Да / Нет / Отмена», «Повторить» / «Пропустить» и т.д.
- Close Icon — значок закрытия: Вы можете закрыть окно сообщения, нажав на значок закрытия.
Синтаксис функции VBA MsgBox
Как я уже упоминал, MsgBox является функцией и имеет синтаксис, аналогичный другим функциям VBA.
MsgBox( prompt [, buttons ] [, title ] [, helpfile, context ] )
- prompt — это обязательный аргумент. Он отображает сообщение, которое вы видите в MsgBox. В нашем примере текст «Это образец MsgBox» — это «подсказка». В приглашении можно использовать до 1024 символов, а также использовать его для отображения значений переменных. Если вы хотите показать подсказку, состоящую из нескольких строк, вы можете сделать это также (подробнее об этом позже в этом руководстве).
- [buttons ] — определяет, какие кнопки и значки отображаются в MsgBox. Например, если я использую vbOkOnly, на нем будет отображаться только кнопка OK, а если я использую vbOKCancel, на нем будут отображаться кнопки OK и Отмена. Я расскажу о различных видах кнопок позже в этом уроке.
- [title] — здесь вы можете указать заголовок в диалоговом окне сообщения. Отображается в строке заголовка MsgBox. Если вы ничего не укажете, будет показано название приложения.
- [helpfile] — вы можете указать файл справки, к которому можно получить доступ, когда пользователь нажимает кнопку «Справка». Кнопка справки появится только тогда, когда вы используете для нее код кнопки. Если вы используете файл справки, вам также необходимо указать аргумент context.
- [context] — это числовое выражение, которое является номером контекста справки, назначенным соответствующему разделу справки.
Если вы новичок в концепции Msgbox, не стесняйтесь игнорировать аргументы [helpfile] и [context]. Они редко используются.
Примечание. Все аргументы в квадратных скобках являются необязательными. Только аргумент «подсказка» является обязательным.
Константы кнопки Excel VBA MsgBox (примеры)
В этом разделе я расскажу о различных типах кнопок, которые вы можете использовать с VBA MsgBox.
Прежде чем я покажу вам код VBA для него и то, как выглядит MsgBox, вот таблица, в которой перечислены все различные константы кнопок, которые вы можете использовать.
| Константа кнопки | Описание |
| vbOKOnly | Показывает только кнопку ОК |
| vbOKCancel | Показывает кнопки ОК и Отмена |
| vbAbortRetryIgnore | Показывает кнопки «Прервать», «Повторить» и «Игнорировать» |
| vbYesNo | Показывает кнопки Да и Нет |
| vbYesNoCancel | Показывает кнопки Да, Нет и Отмена |
| vbRetryCancel | Показывает кнопки «Повторить» и «Отменить» |
| vbMsgBoxHelpButton | Показывает кнопку справки. Чтобы это работало, вам нужно использовать аргументы справки и контекста в функции MsgBox |
| vbDefaultButton1 | Делает первую кнопку по умолчанию. Вы можете изменить номер, чтобы изменить кнопку по умолчанию. Например, vbDefaultButton2 делает вторую кнопку по умолчанию |
Примечание. Просматривая примеры создания различных кнопок, вы можете задаться вопросом, какой смысл использовать эти кнопки, если они не влияют на код.
Влияют! В зависимости от выбора вы можете кодировать то, что вы хотите, чтобы код делал. Например, если вы выберете «ОК», код должен продолжиться, а если вы нажмете «Отмена», код должен прекратиться. Это можно сделать с помощью переменных и присвоения значения окна сообщения переменной. Мы рассмотрим это в последующих разделах этого урока.
Теперь давайте рассмотрим несколько примеров того, как различные кнопки могут отображаться в MsgBox и как они выглядят.
Кнопки MsgBox — vbOKOnly (по умолчанию)
Если вы используете только приглашение и не указываете ни один из аргументов, вы получите окно сообщения по умолчанию, как показано ниже:

Ниже приведен код, который выдаст это окно сообщения:
Sub DefaultMsgBox()
MsgBox "This is a sample box"
End Sub
Обратите внимание, что текстовая строка должна быть в двойных кавычках.
Вы также можете использовать постоянную кнопку vbOKOnly, но даже если вы ничего не указали, она используется по умолчанию.
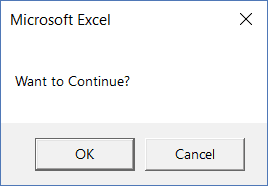
Кнопки MsgBox — ОК и Отмена
Если вы хотите показать только ОК и кнопку Отмена, вам нужно использовать константу vbOKCancel
Sub MsgBoxOKCancel()
MsgBox "Want to Continue?", vbOKCancel
End Sub

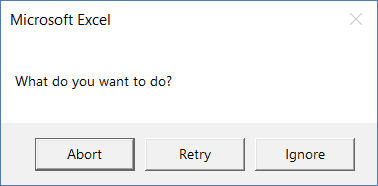
Кнопки MsgBox — Отмена, Повтор и Игнорирование
Вы можете использовать константу vbAbortRetryIgnore для отображения кнопок «Отмена», «Повторить» и «Игнорировать».
Sub MsgBoxAbortRetryIgnore()
MsgBox "What do you want to do?", vbAbortRetryIgnore
End Sub

Кнопки MsgBox — Да и Нет
Вы можете использовать константу vbYesNo для отображения кнопок Да и Нет.
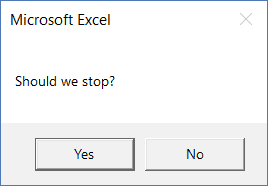
Sub MsgBoxYesNo()
MsgBox "Should we stop?", vbYesNo
End Sub

Кнопки MsgBox — Да, Нет и Отмена
Вы можете использовать константу vbYesNoCancel для отображения кнопок «Да», «Нет» и «Отмена».
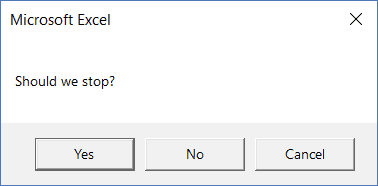
Sub MsgBoxYesNoCancel()
MsgBox "Should we stop?", vbYesNoCancel
End Sub

Кнопки MsgBox — повторить попытку и отменить
Вы можете использовать константу vbRetryCancel для отображения кнопок «Повторить» и «Отмена».
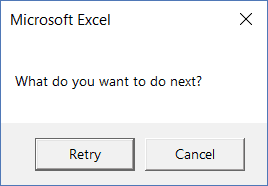
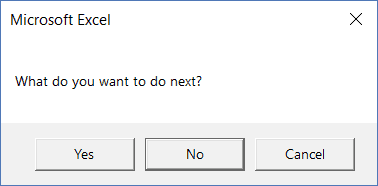
Sub MsgBoxRetryCancel()
MsgBox "What do you want to do next?", vbRetryCancel
End Sub

Кнопки MsgBox — Кнопка справки
Вы можете использовать константу vbMsgBoxHelpButton для отображения кнопки справки. Вы можете использовать его с другими константами кнопок.
Sub MsgBoxRetryHelp()
MsgBox "What do you want to do next?", vbRetryCancel + vbMsgBoxHelpButton
End Sub

Обратите внимание, что в этом коде мы объединили две разные константы кнопки (vbRetryCancel + vbMsgBoxHelpButton). Первая часть показывает кнопки «Повторить» и «Отмена», а вторая часть показывает кнопку «Справка».
MsgBox Buttons — Настройка кнопки по умолчанию
Вы можете использовать константу vbDefaultButton1 для установки первой кнопки по умолчанию. Это означает, что кнопка уже выбрана, и если вы нажмете Enter, она выполнит эту кнопку.
Ниже приведен код, который установит в качестве кнопки по умолчанию вторую кнопку (кнопка «Нет»).
Sub MsgBoxOKCancel()
MsgBox "What do you want to do next?", vbYesNoCancel + vbDefaultButton2
End Sub

В большинстве случаев крайняя левая кнопка является кнопкой по умолчанию. Вы можете выбрать другие кнопки, используя vbDefaultButton2, vbDefaultButton3 и vbDefaultButton4.
Константы значков Excel VBA MsgBox (примеры)
Помимо кнопок, вы также можете настроить значки, отображаемые в диалоговом окне MsgBox. Например, у вас может быть красный критический значок или синий информационный значок.
Ниже приведена таблица со списком кода, который будет отображать соответствующий значок.
| Константа значка | Описание |
| vbCritical | Показывает значок критического сообщения |
| vbQuestion | Показывает значок вопроса |
| vbExclamation | Показывает значок предупреждения |
| vbInformation | Показывает значок информации |
Иконки MsgBox — Критические
Если вы хотите показать критический значок в своем MsgBox, используйте константу vbCritical. Вы можете использовать ее вместе с другими константами кнопки (поставив знак + между кодами).
Например, ниже приведен код, который будет показывать кнопку ОК по умолчанию с критическим значком.
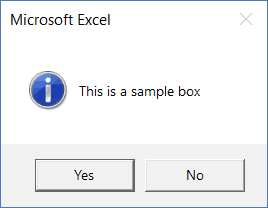
Sub MsgBoxCriticalIcon()
MsgBox "This is a sample box", vbCritical
End Sub

Если вы хотите показать критический значок с кнопками Да и Нет, используйте следующий код:
Sub MsgBoxCriticalIcon()
MsgBox "This is a sample box", vbYesNo + vbCritical
End Sub

Иконки MsgBox — Вопрос
Если вы хотите показать иконку вопроса в своем MsgBox, используйте константу vbQuestion.
Sub MsgBoxQuestionIcon()
MsgBox "This is a sample box", vbYesNo + vbQuestion
End Sub

Иконки MsgBox — Восклицательный знак
Если вы хотите показать восклицательный значок в вашем MsgBox, используйте константу vbExclamation.
Sub MsgBoxExclamationIcon()
MsgBox "This is a sample box", vbYesNo + vbExclamation
End Sub

Иконки MsgBox — Информация
Если вы хотите отобразить информационный значок в вашем MsgBox, используйте константу vbInformation.
Sub MsgBoxInformationIcon()
MsgBox "This is a sample box", vbYesNo + vbInformation
End Sub

Настройка заголовка и приглашения в MsgBox
При использовании MsgBox вы можете настроить заголовок и сообщения подсказок.
До сих пор в примерах, которые мы видели, использовался Microsoft Excel в качестве заголовка. Если вы не указали аргумент title, MsgBox автоматически использует заголовок приложения (в данном случае это был Microsoft Excel).
Вы можете настроить заголовок, указав его в коде, как показано ниже:
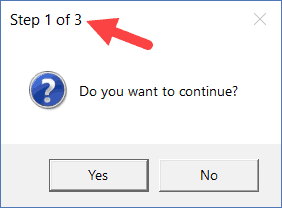
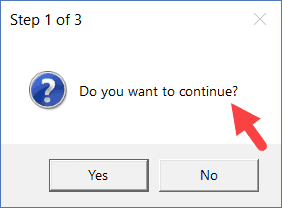
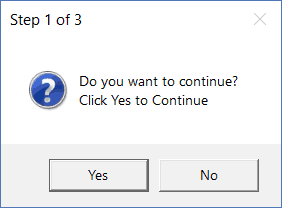
Sub MsgBoxInformationIcon()
MsgBox "Do you want to continue?", vbYesNo + vbQuestion, "Step 1 of 3"
End Sub

Точно так же вы также можете настроить сообщение подсказки.

Вы также можете добавить разрывы строк в сообщении подсказки.
В приведенном ниже коде я добавил разрыв строки, используя «vbNewLine».
Sub MsgBoxInformationIcon()
MsgBox "Do you want to continue?" & vbNewLine & "Click Yes to Continue", vbYesNo + vbQuestion, "Step 1 of 3"
End Sub

Вы также можете использовать символ возврата каретки — Chr (13) или перевод строки — Chr (10), чтобы вставить новую строку в сообщение с подсказкой.
Обратите внимание, что вы можете добавить новую строку только к сообщению, а не к заголовку.
Присвоение значения MsgBox переменной
До сих пор мы видели примеры, где мы создавали окна сообщений и настраивали кнопки, значки, заголовок и приглашение.
Однако нажатие кнопки ничего не сделало.
С помощью функции MsgBox в Excel вы можете решить, что вы хотите делать, когда пользователь нажимает определенную кнопку. И это возможно, поскольку каждая кнопка имеет значение, связанное с ней.
Поэтому, если я нажимаю кнопку «Да», функция MsgBox возвращает значение (6 или константа vbYes), которое я могу использовать в своем коде. Аналогично, если пользователь выбирает кнопку «Нет», он возвращает другое значение ((7 или константа vbNo)), которое я могу использовать в коде.
Ниже приведена таблица, которая показывает точные значения и константу, возвращаемую функцией MsgBox. Вам не нужно запоминать их, просто помните об этом, и вы можете использовать константы, которые проще в использовании.
| При нажатии кнопки | Константа | Значение |
| Ok | vbOk | 1 |
| Cancel | vbCancel | 2 |
| Abort | vbAbort | 3 |
| Retry | vbRetry | 4 |
| Ignore | vbIgnore | 5 |
| Yes | vbYes | 6 |
| No | vbNo | 7 |
Теперь давайте посмотрим, как мы можем контролировать макрос-код VBA в зависимости от того, на какую кнопку нажимает пользователь.
В приведенном ниже коде, если пользователь нажимает кнопку «Да», отображается сообщение «Вы нажали кнопку «Да», а если пользователь нажимает кнопку «Нет», отображается сообщение «Вы нажали кнопку «Нет»».
Sub MsgBoxInformationIcon()
Result = MsgBox("Do you want to continue?", vbYesNo + vbQuestion)
If Result = vbYes Then
MsgBox "You clicked Yes"
Else: MsgBox "You clicked No"
End If
End Sub

В приведенном выше коде я присвоил значение функции MsgBox переменной Result. Когда вы нажимаете кнопку «Да», переменная Result получает константу vbYes (или число 6), а когда вы нажимаете «Нет», переменная Result получает константу vbNo (или число 7).
Затем я использовал конструкцию If Then Else, чтобы проверить, содержит ли переменная Result значение vbYes. Если это так, отображается запрос «Вы нажали Да», в противном случае — «Вы нажали Нет».
Вы можете использовать ту же концепцию для запуска кода, если пользователь нажимает Да, и выход из подпрограммы, когда он нажимает Нет.
Примечание. Когда вы присваиваете выход MsgBox переменной, вы должны поместить аргументы функции MsgBox в круглые скобки. Например, в строке Result = MsgBox («Хотите продолжить?», VbYesNo + vbQuestion) вы можете видеть, что аргументы находятся в скобках.
Если вы хотите в дальнейшем углубиться в функцию Message Box, вот официальный документ по ней.
In Excel VBA, you can use the MsgBox function to display a message box (as shown below):
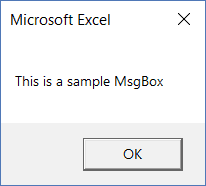
A MsgBox is nothing but a dialog box that you can use to inform your users by showing a custom message or get some basic inputs (such as Yes/No or OK/Cancel).
While the MsgBox dialog box is displayed, your VBA code is halted. You need to click any of the buttons in the MsgBox to run the remaining VBA code.
Note: In this tutorial, I will be using the words message box and MsgBox interchangeably. When working with Excel VBA, you always need to use MsgBox.
Anatomy of a VBA MsgBox in Excel
A message box has the following parts:
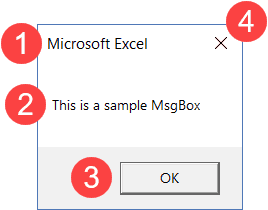
- Title: This is typically used to display what the message box is about. If you don’t specify anything, it displays the application name – which is Microsoft Excel in this case.
- Prompt: This is the message that you want to display. You can use this space to write a couple of lines or even display tables/data here.
- Button(s): While OK is the default button, you can customize it to show buttons such as Yes/No, Yes/No/Cancel, Retry/Ignore, etc.
- Close Icon: You can close the message box by clicking on the close icon.
Syntax of the VBA MsgBox Function
As I mentioned, MsgBox is a function and has a syntax similar to other VBA functions.
MsgBox( prompt [, buttons ] [, title ] [, helpfile, context ] )
- prompt – This is a required argument. It displays the message that you see in the MsgBox. In our example, the text “This is a sample MsgBox” is the ‘prompt’. You can use up to 1024 characters in the prompt, and can also use it to display the values of variables. In case you want to show a prompt that has multiple lines, you can do that as well (more on this later in this tutorial).
- [buttons] – It determines what buttons and icons are displayed in the MsgBox. For example, if I use vbOkOnly, it will show only the OK button, and if I use vbOKCancel, it will show both the OK and Cancel buttons. I will cover different kinds of buttons later in this tutorial.
- [title] – Here you can specify what caption you want in the message dialog box. This is displayed in the title bar of the MsgBox. If you don’t specify anything, it will show the name of the application.
- [helpfile] – You can specify a help file that can be accessed when a user clicks on the Help button. The help button would appear only when you use the button code for it. If you’re using a help file, you also need to also specify the context argument.
- [context] – It is a numeric expression that is the Help context number assigned to the appropriate Help topic.
If you’re new to the concept of Msgbox, feel free to ignore the [helpfile] and [context] arguments. I have rarely seen these being used.
Note: All the arguments in square brackets are optional. Only the ‘prompt’ argument is mandatory.
Excel VBA MsgBox Button Constants (Examples)
In this section, I will cover the different types of buttons that you can use with a VBA MsgBox.
Before I show you the VBA code for it and how the MsgBox looks, here is a table that lists all the different button constants you can use.
| Button Constant | Description |
| vbOKOnly | Shows only the OK button |
| vbOKCancel | Shows the OK and Cancel buttons |
| vbAbortRetryIgnore | Shows the Abort, Retry, and Ignore buttons |
| vbYesNo | Shows the Yes and No buttons |
| vbYesNoCancel | Shows the Yes, No, and Cancel buttons |
| vbRetryCancel | Shows the Retry and Cancel buttons |
| vbMsgBoxHelpButton | Shows the Help button. For this to work, you need to use the help and context arguments in the MsgBox function |
| vbDefaultButton1 | Makes the first button default. You can change the number to change the default button. For example, vbDefaultButton2 makes the second button as the default |
Note: While going through the examples of creating different buttons, you may wonder what’s the point of having these buttons if it doesn’t have any impact on the code.
It does! Based on the selection, you can code what you want the code to do. For example, if you select OK, the code should continue, and if you click Cancel, the code should stop. This can be done by using variables and assigning the value of the Message Box to a variable. We will cover this in the later sections of this tutorial.
Now let’s have a look at some examples of how the different buttons can be displayed in a MsgBox and how it looks.
MsgBox Buttons – vbOKOnly (Default)
If you only use the prompt and don’t specify any of the arguments, you will get the default message box as shown below:
Below is the code that will give this message box:
Sub DefaultMsgBox()
MsgBox "This is a sample box"
End Sub
Note that the text string needs to be in double quotes.
You can also use the button constant vbOKOnly, but even if you don’t specify anything, it’s taken as default.
MsgBox Buttons – OK & Cancel
If you only want to show the OK and the Cancel button, you need to use the vbOKCancel constant.
Sub MsgBoxOKCancel()
MsgBox "Want to Continue?", vbOKCancel
End Sub
MsgBox Buttons – Abort, Retry, and Ignore
You can use the ‘vbAbortRetryIgnore’ constant to show the Abort, Retry, and the Ignore buttons.
Sub MsgBoxAbortRetryIgnore()
MsgBox "What do you want to do?", vbAbortRetryIgnore
End Sub
MsgBox Buttons – Yes and No
You can use the ‘vbYesNo’ constant to show the Yes and No buttons.
Sub MsgBoxYesNo()
MsgBox "Should we stop?", vbYesNo
End Sub
MsgBox Buttons – Yes, No and Cancel
You can use the ‘vbYesNoCancel’ constant to show the Yes, No, and Cancel buttons.
Sub MsgBoxYesNoCancel()
MsgBox "Should we stop?", vbYesNoCancel
End Sub
MsgBox Buttons – Retry and Cancel
You can use the ‘vbRetryCancel’ constant to show the Retry and Cancel buttons.
Sub MsgBoxRetryCancel()
MsgBox "What do you want to do next?", vbRetryCancel
End Sub
MsgBox Buttons – Help Button
You can use the ‘vbMsgBoxHelpButton’ constant to show the help button. You can use it with other button constants.
Sub MsgBoxRetryHelp()
MsgBox "What do you want to do next?", vbRetryCancel + vbMsgBoxHelpButton
End Sub
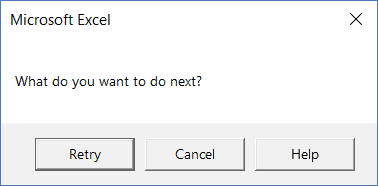
Note that in this code, we have combined two different button constants (vbRetryCancel + vbMsgBoxHelpButton). The first part shows the Retry and Cancel buttons and the second part shows the Help button.
MsgBox Buttons – Setting a Default Button
You can use the ‘vbDefaultButton1’ constant to set the first button as default. This means that the button is already selected and if you press enter, it executes that button.
Below is the code that will set the second button (the ‘No’ button) as the default.
Sub MsgBoxOKCancel()
MsgBox "What do you want to do next?", vbYesNoCancel + vbDefaultButton2
End Sub
In most cases, the left-most button is the default button. You can choose other buttons using vbDefaultButton2, vbDefaultButton3, and vbDefaultButton4.
Excel VBA MsgBox Icon Constants (Examples)
Apart from the buttons, you can also customize the icons that are displayed in the MsgBox dialog box. For example, you can have a red critical icon or a blue information icon.
Below is a table that lists the code that will show the corresponding icon.
| Icon Constant | Description |
| vbCritical | Shows the critical message icon |
| vbQuestion | Shows the question icon |
| vbExclamation | Shows the warning message icon |
| vbInformation | Shows the information icon |
MsgBox Icons – Critical
If you want to show a critical icon in your MsgBox, use the vbCritical constant. You can use this along with other button constants (by putting a + sign in between the codes).
For example, below is a code that will show the default OK button with a critical icon.
Sub MsgBoxCriticalIcon()
MsgBox "This is a sample box", vbCritical
End Sub
![]()
If you want to show the critical icon with Yes and No buttons, use the following code:
Sub MsgBoxCriticalIcon()
MsgBox "This is a sample box", vbYesNo + vbCritical
End Sub
![]()
MsgBox Icons – Question
If you want to show a critical icon in your MsgBox, use the vbQuestion constant.
Sub MsgBoxQuestionIcon()
MsgBox "This is a sample box", vbYesNo + vbQuestion
End Sub
![]()
MsgBox Icons – Exclamation
If you want to show an exclamation icon in your MsgBox, use the vbExclamation constant.
Sub MsgBoxExclamationIcon()
MsgBox "This is a sample box", vbYesNo + vbExclamation
End Sub
![]()
MsgBox Icons – Information
If you want to show an information icon in your MsgBox, use the vbInformation constant.
Sub MsgBoxInformationIcon()
MsgBox "This is a sample box", vbYesNo + vbInformation
End Sub
Customizing Title and Prompt in the MsgBox
When using MsgBox, you can customize the title and the prompt messages.
So far, the example we have seen have used Microsoft Excel as the title. In case you don’t specify the title argument, MsgBox automatically uses the title of the application (which has been Microsoft Excel in this case).
You can customize the title by specifying it in the code as shown below:
Sub MsgBoxInformationIcon()
MsgBox "Do you want to continue?", vbYesNo + vbQuestion, "Step 1 of 3"
End Sub
Similarly, you can also customize the prompt message.
You can also add line breaks in the prompt message.
In the below code, I have added a line break using ‘vbNewLine’.
Sub MsgBoxInformationIcon()
MsgBox "Do you want to continue?" & vbNewLine & "Click Yes to Continue", vbYesNo + vbQuestion, "Step 1 of 3"
End Sub
You can also use the carriage return character – Chr(13) – or line feed – Chr(10) to insert a new line in the prompt message.
Note that you can add a new line to the prompt message only and not the title.
Assigning MsgBox Value to a Variable
So far, we have seen the examples where we have created message boxes and customized the buttons, icons, title, and prompt.
However, clicking a button has done nothing.
With MsgBox function in Excel, you can decide what you want to do when a user clicks a specific button. And this is possible as every button has a value associated to it.
So if I click on the Yes button, the MsgBox function returns a value (6 or the constant vbYes) which I can use in my code. Similarly, is the user selects the No button, it returns a different value ((7 or the constant vbNo)) that I can use in the code.
Below is a table that shows the exact values and the constant returned by the MsgBox function. You don’t need to memorize these, just be aware of it and you can use the constants which are easier to use.
| Button Clicked | Constant | Value |
| Ok | vbOk | 1 |
| Cancel | vbCancel | 2 |
| Abort | vbAbort | 3 |
| Retry | vbRetry | 4 |
| Ignore | vbIgnore | 5 |
| Yes | vbYes | 6 |
| No | vbNo | 7 |
Now let’s see how we can control the VBA macro code based on what button a user clicks.
In the below code, if the user clicks Yes, it displays the message “You Clicked Yes”, and if the user clicks No, it displays, “You clicked No”.
Sub MsgBoxInformationIcon()
Result = MsgBox("Do you want to continue?", vbYesNo + vbQuestion)
If Result = vbYes Then
MsgBox "You clicked Yes"
Else: MsgBox "You clicked No"
End If
End Sub
In the above code, I have assigned the value of the MsgBox function to the Result variable. When you click Yes button, the Result variable gets the vbYes constant (or the number 6) and when you click No, the Result variable gets the vbNo constant (or the number 7).
Then I used an If Then Else construct to check if the Result variable holds the value vbYes. If it does, it shows the prompt “You Clicked Yes”, else it shows “You clicked No”.
You can use the same concept to run a code if a user clicks Yes and exit the sub when he/she clicks No.
Note: When you assign the MsgBox output to a variable, you need to put the arguments of MsgBox function in parenthesis. For example, in the line Result = MsgBox(“Do you want to continue?”, vbYesNo + vbQuestion), you can see that the arguments are within parenthesis.
If you want to further dig into the Message Box function, here is the official document on it.
You May Also Like the Following Excel VBA Tutorials:
- Excel VBA Split Function.
- Excel VBA InStr Function.
- Working with Cells and Ranges in Excel VBA.
- Working with Worksheets in VBA.
- Working with Workbooks in VBA.
- Using Loops in Excel VBA.
- Understanding Excel VBA Data Types (Variables and Constants)
- How to Create and Use Personal Macro Workbook in Excel.
- Useful Excel Macro Code Examples.
- Using For Next Loop in Excel VBA.
- Excel VBA Events – An Easy (and Complete) Guide.
- How to Run a Macro in Excel – A Complete Step-by-Step Guide.
- How to Create and Use an Excel Add-in.
- Using Active Cell in VBA in Excel (Examples)
The VBA MsgBox function is used to display messages to the user in the form of a message box.

We can configure the message box to provide the user with a number of different buttons such as Yes, No, Ok, Retry, Abort, Ignore and Cancel. The MsgBox function will then return the button that was clicked.
Related Links
VBA Userforms
Basic VBA MsgBox Examples
In most cases, you will use MsgBox to simply display a message or to ask the user to click Yes/No or Ok/Cancel. The following code shows how to display a simple message box:
' https://excelmacromastery.com/
Sub BasicMessageBox()

    ' Basic message
    MsgBox "There is no data on this worksheet "

    ' Basic message with "Error" as the title
    MsgBox "There is no data on this worksheet ", , "Error"

End Sub

VBA MsgBox Parameters
The parameters of the message box are as follows:
MsgBox prompt, [ buttons, ] [ title, ] [ helpfile, context ]
prompt – This is the message text that will be displayed.
buttons[optional] – This parameter does many things including setting the buttons, icons, select button, modal type etc. If this parameter is not used a message box with the Ok button and no icon is displayed. See the next section for more about this parameter.
title[optional] – this is the title that will appear at the top of the message box. The default is “Microsoft Excel”.
helpfile, context[optional] – These parameters are used to reference a help file and location of specific help text. It is very unlikely you use this unless you are creating an application for a third party and help files are a requirement.
VBA MsgBox Return Values
The following are all the return values for the MsgBox function:
vbOk
vbCancel
vbAbort
vbRetry
vbIgnore
vbYes
vbNo
Each of these values represents a button that was clicked.
VBA MsgBox Yes No
We can use the message box to get a simple response from the user. For example, we can ask the user a question and they can respond by clicking on the Yes or No button. The return value from the MsgBox function tells us which button was clicked.

If we want to get a Yes/No response from the user we can do it with the following code:
' https://excelmacromastery.com/
Sub MessagesYesNoWithResponse()

    ' Display a messagebox based on the response
    If MsgBox("Do you wish to continue? ", vbYesNo) = vbYes Then
        MsgBox "The user clicked Yes"
    Else
        MsgBox "The user clicked No"
    End If

End Sub
Note: When we return a value from the message box we must use parenthesis around the parameters or we will get the “Expected end of statement” error.
We can also use a variable to store the response from the MsgBox. We would normally do this if we want to use the response more than once. For example, if there were three buttons:
' https://excelmacromastery.com/
Sub Msgbox_AbortRetryIgnore()

    Dim resp As VbMsgBoxResult
    ' Store MsgBox response in a variable
    resp = MsgBox("Do you wish to continue? ", vbAbortRetryIgnore)

    ' Display Ok/Cancel buttons and get response
    If resp = vbAbort Then
        MsgBox "The user clicked Abort"
    ElseIf resp = vbRetry Then
        MsgBox "The user clicked Retry"
    ElseIf resp = vbIgnore Then
        MsgBox "The user clicked Ignore"
    End If

End Sub
VBA MsgBox Button Constants
The button parameter of MsgBox allows us to configure the message box in many ways. The table below shows the different options:
| Constant | Group | Type | Description |
|---|---|---|---|
| vbOKOnly | 1 | Buttons | Ok button. |
| vbOKCancel | 1 | Buttons | Ok and cancel buttons. |
| vbAbortRetryIgnore | 1 | Buttons | Abort, Retry and Ignore buttons. |
| vbYesNoCancel | 1 | Buttons | Yes, No and Cancel buttons. |
| vbYesNo | 1 | Buttons | Yes and No buttons. |
| vbRetryCancel | 1 | Buttons | Retry and Cancel buttons. |
| vbCritical | 2 | Icon | Critical Message icon. |
| vbQuestion | 2 | Icon | Question mark icon. |
| vbExclamation | 2 | Icon | Warning Message icon. |
| vbInformation | 2 | Icon | Information Message icon. |
| vbDefaultButton1 | 3 | Default button | Set button 1 to be selected. |
| vbDefaultButton2 | 3 | Default button | Set button 2 to be selected. |
| vbDefaultButton3 | 3 | Default button | Set button 3 to be selected. |
| vbDefaultButton4 | 3 | Default button | Set button 4 to be selected. Note that there will only be four buttons if the help button is included with vbAbortRetryIgnore or vbYesNoCancel. |
| vbApplicationModal | 4 | Modal | Cannot access Excel while the button is displayed. Msgbox is only displayed when Excel is the active application. |
| vbSystemModal | 4 | Modal | Same as vbApplicationModal but the message box is displayed in front of all applications. |
| vbMsgBoxHelpButton | 5 | Other | Adds a help button |
| vbMsgBoxSetForeground | 5 | Other | Sets the message box windows to be the foreground window |
| vbMsgBoxRight | 5 | Other | Right aligns the text. |
| vbMsgBoxRtlReading | 5 | Other | Specifies text should appear as right-to-left reading on Hebrew and Arabic systems. |
These constants work as follows:
- The constants in group 1 are used to select the buttons.
- The constants in group 2 are used to select icons.
- The constants in group 3 are used to select which button is highlighted when the message box appears.
- The constants in group 4 are used to set the modal type of the message box.
- The constants in group 5 are used for various settings.
When we use MsgBox, we can combine items from each group by using the plus sign. For example:
MsgBox "Example 1" ,vbOkCancel + vbCritical + vbDefaultButton1 + vbApplicationModal
This displays the message box with the Ok and Cancel button, the critical message icon, with the Ok button highlighted and the message box will display only when Excel is the active application.
MsgBox "Example 2", vbYesNo + vbQuestion + vbDefaultButton2 + vbSystemModal
This displays the message box with the Yes and No button, the warning query icon, with the No button highlighted and the message box will display in front of all applications.
Important: Each time we use the MsgBox function we can only select one of each:
- button type
- icon type
- default button
- modal type
In other words, we can only select one item from each of the first 4 groups.
The next section shows some more examples of using the message box.
VBA MsgBox Examples
The following examples show to display the various icons with the Yes and No buttons:
  ' Yes/No buttons with Critical icon and No button selected
 resp = MsgBox("Do you wish to continue", vbYesNo + vbCritical)

 ' Yes/No buttons with Warning Query icon and Yes button selected
 resp = MsgBox("Do you wish to continue", vbYesNo + vbQuestion)

 ' Yes/No buttons with Warning Message icon and Yes button selected
 resp = MsgBox("Do you wish to continue", vbYesNo + vbExclamation)

 ' Yes/No button with Information Message icon and Cancel button selected
 resp = MsgBox("Do you wish to continue", vbYesNo + vbInformation)
The following examples show the Abort/Retry/Ignore button plus the help button with different buttons selected:
' Abort/Retry/Ignore button with the Help button displayed and Abort selected
resp = MsgBox("Error", vbAbortRetryIgnore + vbDefaultButton1 + vbMsgBoxHelpButton)

' Abort/Retry/Ignore button with the help button displayed and Retry selected
resp = MsgBox("Error", vbAbortRetryIgnore + vbDefaultButton2 + vbMsgBoxHelpButton)

' Abort/Retry/Ignore button with the Help button displayed and Ignore selected
resp = MsgBox("Error", vbAbortRetryIgnore + vbDefaultButton3 + vbMsgBoxHelpButton)

' Abort/Retry/Ignore button with the Help button displayed and Help selected
resp = MsgBox("Error", vbAbortRetryIgnore + vbDefaultButton4 + vbMsgBoxHelpButton)
The following examples show some button selections and the title parameter being set:
' Retry/Cancel button with query warning as the icon and "Error" as the title
resp = MsgBox("An error occurred. Try again?", vbRetryCancel + vbQuestion, "Error")

' Ok button with critical icon and "System error" as the title
MsgBox "An error occurred", vbCritical, "System Error"
What’s Next?
Free VBA Tutorial If you are new to VBA or you want to sharpen your existing VBA skills then why not try out the The Ultimate VBA Tutorial.
Related Training: Get full access to the Excel VBA training webinars and all the tutorials.
(NOTE: Planning to build or manage a VBA Application? Learn how to build 10 Excel VBA applications from scratch.)
Message Box is one of the most frequently used functions in VBA Macro. The message box is a dialogue box that appears on the screen as an extra window. The dialogue box that appeared asks input from the user and returns a constant/code/number accordingly or it can use to display messages. In this article, we will learn how to create different types of message boxes in VBA Macro.
Message Box
A message box is a dialogue box that displays information that can be text, date, number, etc. like as shown in the below image. In Excel, we can easily create a message box using VBA.

Parts of a message box:
1. Title: The title of a message box specifies what properties or functions will this dialogue box performs. While writing a message box in VBA macro it is not mandatory to write a title. A title does not have multiple lines. If a title is not mentioned then by default the title becomes Microsoft Excel.

2. Prompt: The prompt is the heart of the message box. It specifies the work to be done or the information provided in a detailed manner. While writing a message box function it is mandatory to write a prompt statement. You can also display tables, dates, and numbers in the prompt. You can also add multiple lines in the prompt area.

3. Buttons: While working with basic Excel, you might have configured the different buttons that appear in a dialogue box. For example, Yes/No, Retry, Help, Abort/Retry/Ignore, etc. You can create and use any of the buttons, according to your requirement. While writing a message box function it is not mandatory to specify the buttons. By default, Ok appears.

Creating a Basic Message Box in VBA
In Excel, we can easily create a message box with the help of the MsgBox function.
Syntax:
Msgbox “prompt(mandatory)”, buttons(temporary), “title(temporary)”, “helpfile(temporary)”, “context(temporary)”
Here,
- Prompt: Prompt is the detailed information of the MsgBox. It is mandatory to add a prompt while writing the MsgBox function. You can also add multiple lines to the prompt.
- Buttons: It is the temporary argument that you wish to add. By default, it shows only the Ok button. To add custom buttons, you have the code for each button. For example, vbRetryCancel, vbOkOnly.
- Title: It is the temporary argument of the MsgBox function. You cannot add multiple titles to a message box.
- HelpFile: This is a very rare argument that is passed on while creating a MsgBox. This argument is only provided when you are using a help button. When you are passing the help file, you have to use context arguments also.
- Context: It is only used with the help file and help button. You need to have a numeric help context number to the appropriate help topic.
Follow the below steps:
Step 1: The MsgBox keyword is used to create a message box is MsgBox. So write MsgBox. Start with a double quote and write the prompt you want to display. Press Enter.

Step 2: Click on the Run button.

Step 3: The Message Box appears. Here, the VBA code has stopped running and will not get executed until we select any of the buttons in the message box. Click Ok.

Step 4: The VBA code resumes.

Buttons in MessageBox
When you have typed a prompt in the MsgBox function. The next argument is separated with a comma(,). Now, the VBA editor gives us a list of buttons that can be added to the MsgBox function. You can select and add the button according to your requirements.

The types of buttons in the MsgBox.
1. vbOkOnly(Default): This is the default button that appears. To create this button follow the following steps:
Step 1: Write the code. vbOkOnly is the code that helps create only the Ok button.

Step 2: The MsgBox contains only the Ok button.

2. vbOkCancel: vbOkCancel code tells the VBA compiler to show Ok and cancel buttons while displaying the MsgBox. To create this button follow the following steps:
Step 1: Write the code. vbOkCancel is the code that helps create the Ok and Cancel buttons.

Step 2: The MsgBox contains both Ok and Cancel.

3. vbAbortRetryIgnore: This code displays Abort, Retry and Ignore buttons in the message box. To create this button follow the following steps:
Step 1: Write the code. vbAbortRetryIgnore is the code that helps create the Abort, Retry, and Ignore buttons.

Step 2: The MsgBox contains all three Abort, Retry and Ignore.

4. vbYesNoCancel: vbYesNoCancel code displays Yes, No, and Cancel buttons in the message box. To create this button follow the following steps:
Step 1: Write the code. vbYesNoCancel is the code that helps create the Yes, No, and Cancel.

Step 2: The MsgBox contains all three Yes, No, and Cancel.

5. vbYesNo: vbYesNo code displays Yes and No buttons in the message box. To create this button follow the following steps:
Step 1: Write the code. vbYesNo is the code that helps create the Yes and No.

Step 2: The MsgBox contains both Yes and No.

6. vbRetryCancel: vbRetryCancel code displays Retry and Cancel buttons in the message box. To create this button follow the following steps:
Step 1: Write the code. vbRetryCancel is the code that helps create the Retry and Cancel.

Step 2: The MsgBox contains both Retry and Cancel.

7. vbDefaultButton2: You can use any of the default buttons. There are four types of default buttons. vbDefaultButton1, vbDefaultButton2, vbDefaultButton3, vbDefaultButton4. Here, vbDefaultButton2 is the button that is selected by default when a Msgbox appears. If you press Enter, then it automatically gets selected. To create this button follow the following steps:
Step 1: Write the code. Using vbAbortRetryIgnore creates three-button Abort, Retry and Ignore. vbDefaultButton2 is the code that helps us select the second default button i.e. Retry.

Step 2: The MsgBox appears and the default is Retry.

Different Icons in Excel VBA
While working with basic excel. You have come across different warnings and information. These all are represented with symbols. For example, a yellow exclamation for warning, a blue color question marks for information, etc. Here, we have discussed some of the icons that can appear in a message box.
1. vbCritical: This icon is a red cross. This red cross is used to display a critical message. To create this icon follow the following steps:
Step 1: Write the code. vbCritical creates a red cross.

Step 2: The message box with a critical icon appears.

2. vbQuestion: This icon is a blue question mark. This blue question mark is used to display when you forgot something to choose in a procedure. To create this icon follow the following steps:
Step 1: Write the code. vbQuestion creates a blue Question Mark.

Step 2: The message box with a Question icon appears.

3. vbExclamation: This icon is a yellow exclamation mark. It is used to represent an error when the entered data doesn’t match with the already present data. To create this icon follow the following steps:
Step 1: Write the code. vbExclamation creates a yellow exclamation mark.

Step 2: The message box with a ! (exclamation) icon appears.

4. vbInformation: This icon is a blue I mark that represents information. To create this icon follow the following steps:
Step 1: Write the code. vbInformation creates a blue I information mark.

Step 2: The message box with an i(information) icon appears.

Values returned by Buttons
Till now, you have studied how to create a message box and the different buttons associated with it. Now, we will learn how you can create nested message boxes and also with some conditions that are more practical in the real designing of a dialogue box. A message box returns a code or a constant according to the buttons applied. Some of the most commonly used constants and their return value are given in the table below.
| Constant | Value |
|---|---|
| vbOKOnly | 0 |
| vbOKCancel | 1 |
| vbAbortRetryIgnore | 2 |
| vbYesNoCancel | 3 |
| vbYesNo | 4 |
| vbRetryCancel | 5 |
Note: You can use values as well as constant interchangeably while comparing the boolean expressions.
For example, given Yes, No, and Cancel buttons. Display a message box accordingly. So to do this task follow the following steps:
Step 1: Write the code. The initial MsgBox will return a value and it will get stored in a variable name ans. If you click yes, then it will go inside the if condition else it will output the other one. Click on the Run button.

Step 2: A dialogue box appears. Click on Yes.

Step 3: A dialogue box appears. Click Ok.

Editing Title in a Msg Box
You can edit the title in a message box. By default, it shows Microsoft Excel as the title. In the MsgBox, function the third argument is for writing your custom title. It is a temporary argument. Follow are the following steps:
Step 1: Write the code. The third argument is your custom title.

Step 2: A dialogue box with the title “Be a geek” appears.
