
Excel for Microsoft 365 Outlook for Microsoft 365 PowerPoint for Microsoft 365 Excel 2021 Outlook 2021 PowerPoint 2021 Excel 2019 Outlook 2019 PowerPoint 2019 Excel 2016 Outlook 2016 PowerPoint 2016 Excel 2013 Outlook 2013 PowerPoint 2013 Project Professional 2013 Project Standard 2013 Excel 2010 Outlook 2010 PowerPoint 2010 More…Less
When you add pictures, shapes, or other objects to your Office documents, they automatically stack in individual layers as you add them. You can move individual shapes or other objects or groups of objects in a stack. For example, you can move objects up or down within a stack one layer at a time, or you can move them to the top or bottom of a stack in one move. You can overlap objects when you draw to create different effects.

Notes:
-
For information on aligning objects, see Align or arrange a picture, shape, text box, or WordArt.
-
For information about grouping objects, see Group or ungroup shapes, pictures, or other objects.
Move a picture, shape, text box, or WordArt
-
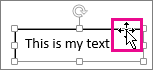
Click the border of the WordArt, text box, or shape that you want to move.
To move multiple text boxes or shapes, press and hold Ctrl while you click the borders.
-
When the cursor changes to the four headed arrow, drag it to the new location.

To move in small increments, press and hold Ctrl while pressing an arrow key. And to move the object horizontally or vertically only, press and hold Shift while you drag it.
Note: The incremental, or nudge, distance is a 1 pixel increment. What 1 screen pixel represents relative to the document area depends on the zoom percentage. When your document is zoomed in to 400%, 1 screen pixel is a relatively small nudge distance on the document. When your document is zoomed out to 25%, 1 screen pixel is a relatively large nudge distance on the document.
Depending on how far you’re moving the WordArt, shape, or text box, it might be easier to cut and paste it. Right-click the object, and then click Cut (or, press Ctrl+X). Press Ctrl+V to paste it. You can also cut and paste it into a different document, or between programs, such as from a PowerPoint slide to an Excel worksheet.
Move a text box, WordArt, or shape forward or backward in a stack
-
Click the WordArt, shape, or text box that you want to move up or down in the stack.
-
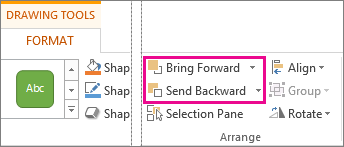
On the Drawing Tools Format tab, click either Bring Forward or Send Backward.
You’ll have the choice of moving the object up one layer (Bring Forward) or to the top of the stack (Bring to Front). Send Backward has similar options: down one layer (Send Backward) or to the bottom of the pile (Send to Back).
Tips:
-
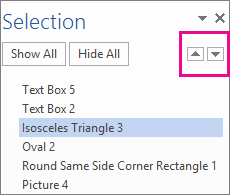
In Office 2016 and Office 2013, if you have a lot of WordArt, shapes, text boxes, or other objects, it may be easier to use up and down arrows in the Selection Pane to move objects. The Selection Pane is not available in Project or in Office 2010.
-
-

See also
-
Align or arrange a picture, shape, text box, or WordArt
-
Group or ungroup shapes, pictures, or other objects
Need more help?
Move a picture, shape, text box, or WordArt
- Click the border of the WordArt, text box, or shape that you want to move. To move multiple text boxes or shapes, press and hold Ctrl while you click the borders.
- When the cursor changes to the four headed arrow, drag it to the new location.
Contents
- 1 How do I move a text box in Word using the keyboard?
- 2 How do you adjust text boxes in Word?
- 3 Why can’t I move textbox in Word?
- 4 How do you move objects freely in Word?
- 5 How do I resize a text box?
- 6 How do I stretch a text box in Word?
- 7 How do I fix the size of a text box in Word?
- 8 How do I move a text box anywhere in Word?
- 9 How do I move a text box outside the margin?
- 10 How do I move a text box horizontally in Word?
- 11 Why can’t I move images in Word?
- 12 How do I move objects in small increments in Word for Mac?
- 13 How do I remove a text box but keep the text in Word?
- 14 Can I stretch text in Word?
- 15 How do I fit text to page width in Word?
- 16 How do I make my font taller?
How do I move a text box in Word using the keyboard?
To move in small increments, press and hold Ctrl while pressing an arrow key. And to move the object horizontally or vertically only, press and hold Shift while you drag it. Depending on how far you’re moving the WordArt, shape, or text box, it might be easier to cut and paste it.
How do you adjust text boxes in Word?
Adjust the text box margins
- Click the outer edge of the text box to select it.
- On the Shape Format tab, click Format Pane.
- Click the Shape Options tab if it isn’t already selected.
- Click the text box icon. , and then click Text Box.
- You can adjust the left, right, top, and bottom margins.
Why can’t I move textbox in Word?
If the text box is In Line With Text, it’s constrained by the margins. With any other text wrapping, you should be able to drag it anywhere. But it may be that all you need to do is change the internal margin of the text box: Right-click on the edge of the text box and choose Format Shape…
How do you move objects freely in Word?
First, confirm that the object is not set to In Line with Text: With the object selected click the Arrange button on the Shape Format contextual tab. From the Wrap Text choices select the method you prefer. You then should be able to freely drag the object to any location.
How do I resize a text box?
To change the size of an existing text box, follow these steps:
- Click once on the information within the text box.
- Use the mouse to point to one of the handles.
- Drag the handle to resize the text box.
- Release the mouse button when the text box is the size you want.
How do I stretch a text box in Word?
Stretch Text Horizontally
- Highlight the text you want to stretch.
- Select the “Home” tab, then click the small arrow in the Font section to open the Font dialog box.
- Select the “Advanced” tab.
- Increase the percentage value in the “Scale” field.
- Highlight the text you want to stretch.
How do I fix the size of a text box in Word?
Follow these general steps.
- Place the text box in your document.
- Adjust the width of your text box to reflect what you need.
- Right-click the text box and choose Format Text Box from the resulting Context menu.
- Make sure the Text Box tab is displayed.
- Make sure the Resize AutoShape to Fit Text check box is selected.
How do I move a text box anywhere in Word?
To move a text box:
- Click the text box you want to move.
- Hover the mouse over one of the edges of the text box. The mouse will change into a cross with arrows.
- Click and drag the text box to the desired location.
How do I move a text box outside the margin?
RECOMMENDED FOR YOU
- Click the Insert menu and Click Text Box in the Text group.
- Use the mouse to drag and drop a text box of the approximate size in the margin.
- Enter the text “Use Quick Styles.”
- On the Contextual Format ribbon, choose Middle from the Align Text dropdown in the Text group.
How do I move a text box horizontally in Word?
Enter the text in the shape or text box or table cell, and then select the text. Ctrl+Click the selected text, and then select Format Shape. On the Text Box tab in the dialog box, choose a direction from the Text Direction box.
Why can’t I move images in Word?
You must set the layout to something other than ‘in-line‘ before you can drag it around. You can only move them around if their layout property is set to something other than in-line, otherwise you can cut and paste to a new position, just like a font character.
How do I move objects in small increments in Word for Mac?
To move an object up, down, or sideways in small increments, click the object, hold down OPTION, and then press an arrow key.
How do I remove a text box but keep the text in Word?
Follow these steps:
- In your document, press Ctrl+A.
- Press Ctrl+C.
- Open a new, blank document.
- Make sure the Home tab of the ribbon is displayed.
- Click the down-arrow under the Paste tool (at the left side of the ribbon) and choose Paste Special.
- In the list of formats, choose Unformatted Text.
- Click on OK.
Can I stretch text in Word?
Stretch or scale the text horizontally
On the Home tab, click the Font Dialog Box Launcher, and then click the Advanced tab. Note: If you’re using Word 2007 the tab is called Character Spacing. In the Scale box, enter the percentage that you want. Percentages above 100 percent stretch the text.
How do I fit text to page width in Word?
To fit the columns to the text (or page margins if cells are empty), click [AutoFit] > select “AutoFit Contents.” To fit the table to the text, click [AutoFit] > select “AutoFit Window.” To keep Word from automatically adjusting your column size, click [AutoFit] > select “Fixed Column Width.”
How do I make my font taller?
Changing the Height of a Font
- Select the text you want to affect.
- Enlarge the font size to 15 points. (12 times 1.25 is 15.)
- Display the Advanced tab of the Font dialog box.
- Using the Scale control, specify a scaling of 80%.
Lesson 21: Text Boxes
/en/word2016/shapes/content/
Introduction
Text boxes can be useful for drawing attention to specific text. They can also be helpful when you need to move text around in your document. Word allows you to format text boxes and the text within them with a variety of styles and effects.
Optional: Download our practice document.
Watch the video below to learn more about text boxes in Word.
To insert a text box:
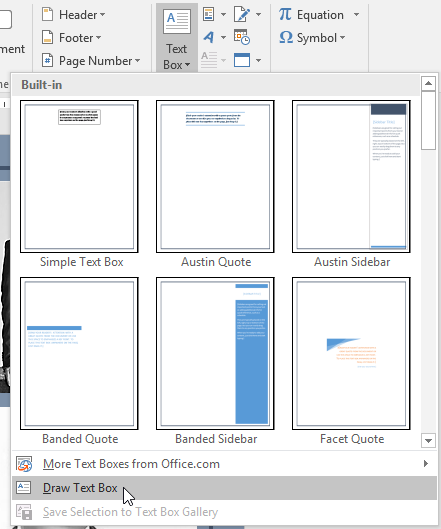
- Select the Insert tab, then click the Text Box command in the Text group.

- A drop-down menu will appear. Select Draw Text Box.
- Click and drag anywhere on the document to create the text box.
- The insertion point will appear inside the text box. You can now type to create text inside the text box.
- If you want, you can select the text and then change the font, color, and size by using the commands on the Format and Home tabs. To learn more about using these formatting commands, see our Formatting Text lesson.
- Click anywhere outside the text box to return to your document.


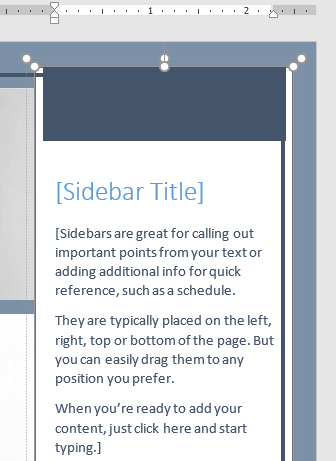
You can also select one of the built-in text boxes that have predefined colors, fonts, positions, and sizes. If you choose this option, the text box will appear automatically, so you will not need to draw it.
To move a text box:
- Click the text box you want to move.
- Hover the mouse over one of the edges of the text box. The mouse will change into a cross with arrows.
- Click and drag the text box to the desired location.

To resize a text box:
- Click the text box you want to resize.
- Click and drag any of the sizing handles on the corners or sides of the text box until it is the desired size.

Modifying text boxes
Word offers several options for changing the way text boxes appear in your document. You can change the shape, style, and color of text boxes or add various effects.
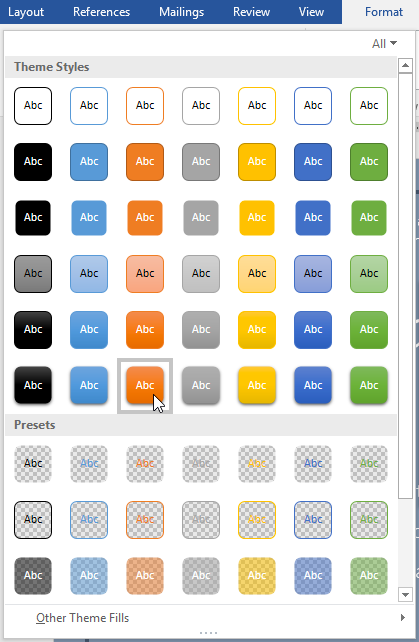
To change the shape style:
Choosing a shape style allows you to apply preset colors and effects to quickly change the appearance of your text box.
- Select the text box you want to change.
- On the Format tab, click the More drop-down arrow in the Shape Styles group.
- A drop-down menu of styles will appear. Select the style you want to use.
- The text box will appear in the selected style.


If you want to have more control over text box formatting, you can use any of the shape formatting options such as Shape Fill and Shape Outline. To learn more, see our Shapes lesson.
To change the text box shape:
Changing the shape of a text box can be a useful option for creating an interesting look in your document.
- Select the text box you want to change. The Format tab will appear.
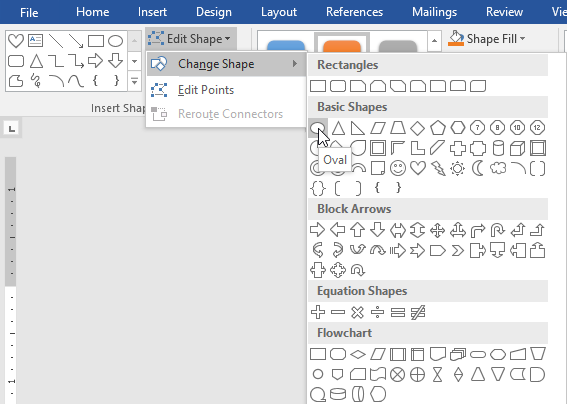
- From the Format tab, click the Edit Shape command.
- Hover the mouse over Change Shape, then select the desired shape from the menu that appears.
- The text box will appear formatted as the shape.


Challenge!
- Open our practice document.
- Insert a Simple Text Box.
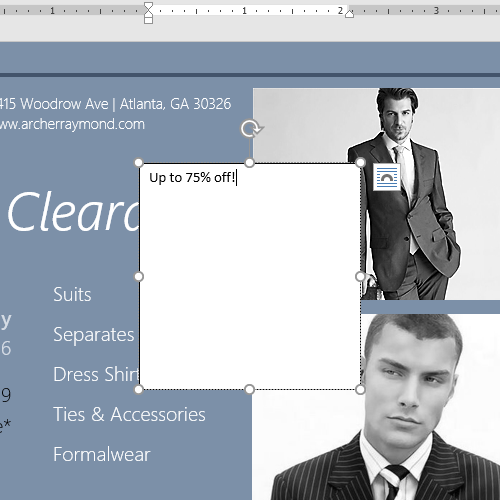
- In the text box, type Get an additional 25% off when you mention this ad!
- Change the font to Gadugi, 20 pt, Center Align.
- Change the shape of the text box to Double Wave from the Stars and Banners group.
- Change the text box style by selecting any style in the Intense Effect row.
- Drag the text box to the space below Buy 1, Get 1 Free* and Formalwear.
- When you’re finished, your document should look something like this:


/en/word2016/aligning-ordering-and-grouping-objects/content/
Even though Microsoft Word gives you plenty of ways to format, align, and manipulate text, there may be a time when it’s not enough. By using text boxes in Word, you have the flexibility to place text where you want, put it inside a shape, or customize it to make it pop.
Content
- How to Insert a Text Box in Word
- How to Resize, Rotate, or Move a Text Box
- How to Customize the Text Box Appearance
- How to Connect Text Boxes in Word
- Frequently Asked Questions
You can insert a premade text box that includes formatting and a style or start from scratch by drawing your own.
Insert a Built-In Text Box
Using a premade text box, you can get a jump start on the formatting or apply a bit of flare without any extra work. Currently, this feature is only available in Word on Windows, not Mac.
- Head to the “Insert” tab and open the “Text Box” drop-down box. You’ll see options below “Built-in” at the top. If you hover your cursor over one, you can see a brief description.

- Choose the premade text box you want to use, and you’ll see it pop onto the page.

- Click inside the box, which selects the sample text, then type your own.

You can customize the built-in text box, just like one you draw yourself, which is described below.
Draw a Text Box
If you want a complete blank canvas for your text box, you can draw one the size you need and insert your text. Additionally, this is the only option for inserting a text box in Word on Mac at this time.
- Go to the “Insert” tab and open the “Text Box” drop-down box. On Windows, select “Draw Text Box.”

- On Mac, select either “Draw Text Box” or “Draw Vertical Text Box.” The latter places the text sideways in the box as shown below.

- When your cursor changes to a crosshair symbol, drag to draw the text box the size you want. You can still resize the text box later if needed.

- Once you have your box, just type your text inside of it.

Note: you can also add text boxes in Google Docs.
How to Resize, Rotate, or Move a Text Box
You aren’t stuck with the size, angle, or location of your new text box. You can easily resize, rotate, or move a text box in Word a few different ways.
Resize a Text Box
- To quickly resize a text box, drag a corner or edge.

- You can also go to the “Shape Format” tab to change the size. Use the Size section of the ribbon to enter the dimensions in the “Height” and “Width” boxes.

- If you want to size your box according to the text within it, right-click the text box and pick “Format Shape.” When the sidebar opens, go to the “Layout & Properties” tab and check the box for “Resize shape to fit text.”

Rotate a Text Box
- To freely rotate the box, drag the circular arrow at the top to the right or left.

- To rotate it right or left 90 degrees, go to the “Shape Format” tab. Pick an option from the “Rotate” drop-down menu in the “Arrange” section of the ribbon.

- For an exact angle, right-click and choose “More Layout Options.” Open the Size tab, enter the angle in the “Rotation” box, and click “OK.”

Move a Text Box
To move a text box, drag it to your desired location.
Because a text box works like an object, any other text in your document won’t move out of the way for a text box. However, you can use the Wrap Text and Position features to adjust this if needed.

- Go to the “Shape Format” tab, then use the “Wrap Text” drop-down box in the “Arrange” section of the ribbon to choose a wrapping option. For instance, you can place the box in line with the text.

- You can also use the “Position” drop-down box to the left of “Wrap Text” to place the box in a specific spot within the text. For example, you can place it on the top left with text wrapping around it.

Tip: learn how you can create and customize tables in Word.
How to Customize the Text Box Appearance
Along with resizing, rotating, or moving a text box, you may want to change its appearance. You can customize the shape of the text box, apply a background color, or give it a border.
- Select the text box and head to the “Shape Format” tab, then use the following sections of the ribbon to customize the box and text:
- Insert Shapes: open the “Edit Shape” drop-down menu, move to “Change Shape,” and select a new shape in the pop-out menu.

- Shape Styles: pick a preformatted design in the Shapes Styles box or choose a fill, apply a border, or add a shadow.

- WordArt Styles and Text: use these two sections to adjust the appearance of the text. Apply a design, fill, outline, or effect. You can also change the direction or align the text. For the font style and size, use the options in the “Font” section of the “Home” tab.

- For additional options, right-click the text box and select “Format Shape,” then you can adjust both the box and text settings in the sidebar. Some options match those in the ribbon while others are different. For instance, you can adjust the transparency of the box or text.

Try this: create an organized document with a table of contents and add page numbers in Word.
How to Connect Text Boxes in Word
One super-handy feature of text boxes in Word is that you can link them together. This allows you to start typing in one box and have the text carry over to the next box. It’s ideal for a list of tips, brief instructions, or short stories you want to include with your content.
To link text boxes, the box you want to connect to the previous one must be empty. If you already have your boxes filled with text, you can either remove the text from the subsequent boxes or add new boxes and remove the existing ones.
- Insert a text box as described earlier, then add a second text box, but be sure to leave it empty.

- Select the first text box, go to the “Shape Format” tab, and pick “Create Link” in the Text section of the ribbon.

- When your cursor changes to a paint can icon, click inside the second text box. This creates a link between the two. If you want a third or fourth text box linked, follow the same process by linking the second box to the third, third to the fourth, and so on.
- As you add text to the first box, the text that won’t fit then fills the second text box. If you have more text boxes, they will continue to fall into them.

- If you resize the text boxes, the amount of text in each one adjusts to accommodate it. When you resize one text box, you’ll see the linked box automatically resize as well.

- Should you decide later you don’t want the boxes linked, you can break the link. Select the first text box, go to the “Shape Format” tab, and click “Break Link.” Follow the same process to remove any additional text box connections.

Frequently Asked Questions
Can I add a hyperlink to a text box in Word?
You can add a link to a text box or specific text within it, just like any other object or text in a Word document.
To link the box, select it. To link specific text within the box, select it instead. Right-click, pick “Link” or “Hyperlink,” then choose an existing file or web page, place in the document, new document, or email address. On the right, select the item or add the URL and click “OK.”
How do I stop text from wrapping inside of a text box?
By default, the text inside of a text box wraps to the next line when it reaches the edge of the shape. But you can change this if you would like.
Right-click the text box and pick “Format Shape.” When the sidebar opens, select the “Layout & Properties” tab and uncheck the box for “Wrap text in shape.”
Can I temporarily hide text boxes in Word?
As you work on the other content in your document, you may want to hide a text box or two to focus on other things.
Select a text box, go to the “Shape Format” tab, and click “Selection Pane” in the “Arrange” section. When the sidebar opens, click the eye icon to the right of a text box to hide it. For all text boxes, click “Hide All” at the top. To unhide the text boxes, select the eye with a line through it to the right or pick “Show All” at the top.
Image credit: Pixabay. All screenshots by Sandy Writtenhouse.

Sandy Writtenhouse
With her BS in Information Technology, Sandy worked for many years in the IT industry as a Project Manager, Department Manager, and PMO Lead. She wanted to help others learn how technology can enrich business and personal lives and has shared her suggestions and how-tos across thousands of articles.
Subscribe to our newsletter!
Our latest tutorials delivered straight to your inbox
Achieve more control and flexibility with your documents
Updated on September 11, 2022
What to Know
- Select Insert > Text Box > choose a text box template. Select and drag box to the position you want.
- To resize text, select and drag circles around the edge. To rotate text, select and drag the circular arrow.
- Place the cursor inside the text box and type the information you want to appear.
This article explains how to use text boxes in Microsoft Word. Instructions apply to Word for Microsoft 365, Word 2019, Word 2016, and Word 2013.
How to Insert a Text Box in Word
Start by opening the document you want to add a text box to. Then follow the steps below.
-
On the ribbon, select Insert.
-
In the Text group, select Text Box, then choose a text box template.
-
The new text box appears in the middle of the text, and the Shape Format tab is automatically selected.
-
Select and drag the box to the position you want. To resize the text box, select and drag the circles around the edge. To rotate the text box, select and drag the circular arrow at the top of the box.
-
Place the cursor inside the text box and type the information you want to appear there.
Why Use Text Boxes?
When you type text in Microsoft Word, you have options for making it look a particular way on the page (such as changing the page margins), but those options are limited. Text boxes expand your formatting repertoire by offering additional control and flexibility for how your text appears. You can place a text box anywhere within a document and format it with different colors and fonts. This feature is especially helpful for creating a blockquote or a sidebar.
Customize a Text Box
After you create a text box, you can customize it in a number of ways.
-
To bring up options, place the cursor inside the text box and right-click. Choose an option and follow the screen prompts to add a border, change the style, or adjust the way the text box interacts with the other text on the page.
Alternatively, use the controls on the Shape Format tab.
-
To go directly to the Layout Options menu, select the text box, then select the Layout Options icon (it looks like a horseshoe and is located to the right of the text box).
-
Change the text, make more adjustments, or move the box to another location at any time. To delete a text box, select its border, then press Delete on the keyboard.
Thanks for letting us know!
Get the Latest Tech News Delivered Every Day
Subscribe

Text Box (Text Box) is used quite a lot in office computing practice exercises. In addition, it is also one of many useful features that are being used more widely by people in their Word documents and documents.
In today’s post, I will guide you about How to use Text Box in Word detailed and easy to understand. If you’re interested, keep an eye on it…
#first. Insert Text Box into Word
To insert a Text Box, do the following:
+ Step 1: Select Tab Inserthover over the group Text => select tool Text Box. Here are available Text Box templates for us to choose from, if you want to design your own, choose Draw Text Box
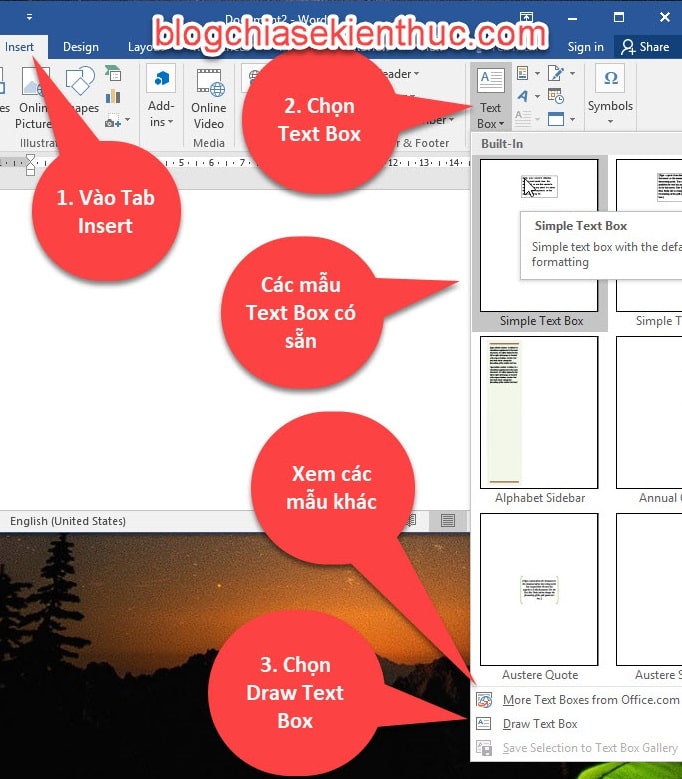
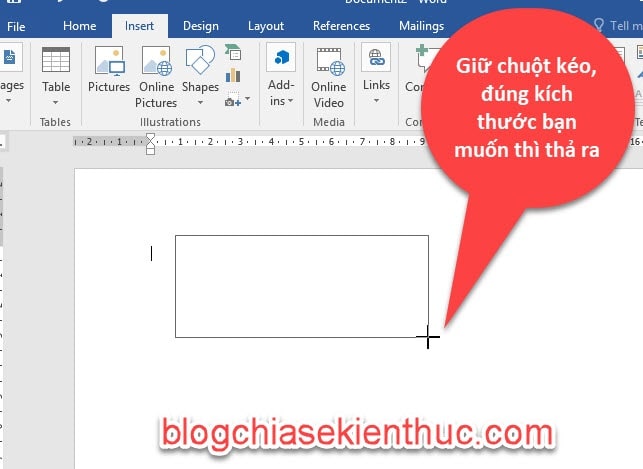
+ Step 2: Appear dấu cộng màu đenhold the mouse and drag to the size you want, then release the mouse.
+ Step 3: After the insertion is complete, the mouse pointer will be displayed inside Text Boxyou can now type content into this text box.
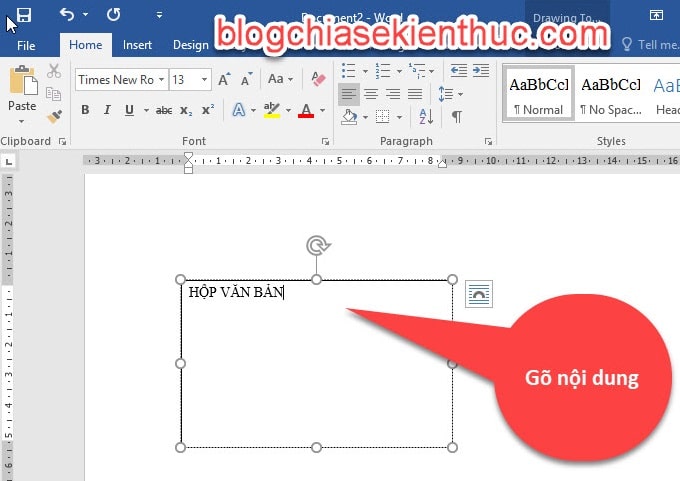
Note: You can highlight the text and then change the font, color and size using the commands above Tab Format and Home Please.
+ Step 5: Click anywhere outside Text Box to exit the text input box.
#2. Resize Text Box in Word
Perform:
+ Step 1: Select Text Box => now you will see small round boxes on the border of Text Box.
+ Step 2: Hover your mouse over the circle in any corner of the box Text Boxwhen two arrows appear in opposite directions, drag the Text Box to the size you want => then release the mouse.
#3. Move the Text Box in Word
To move the box Text Box You do the following:
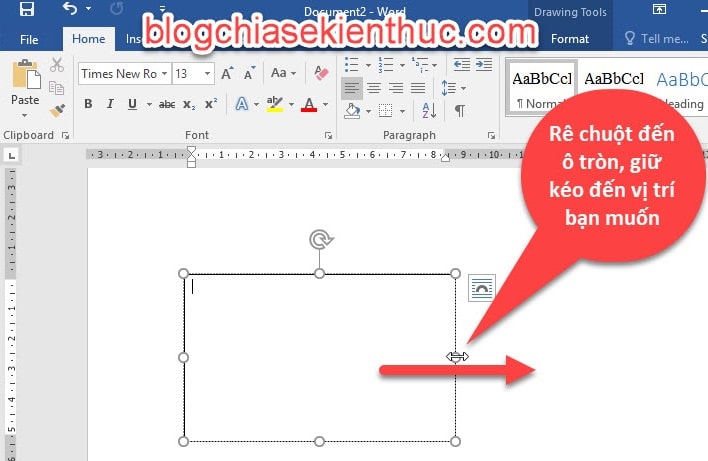
+ Step 1: Click on the Text Box that you want to move => then drag the mouse pointer to any edge and you will see a 4-way arrow as shown below.

+ Step 2: Now hold the mouse => and drag to the position you want, then release the mouse.
#4. Change Text Box color in Word
You can change the color of the Text Box to make it more beautiful and eye-catching.
Perform:
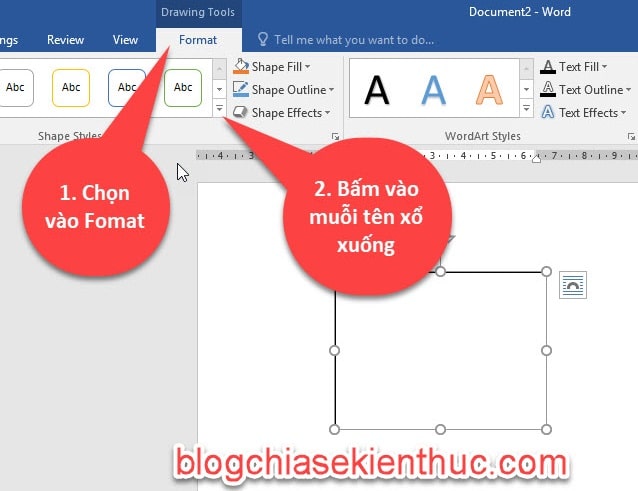
+ Step 1: Check box Text Box that you want to change.
+ Step 2: Select Tab Fomat (or in Step 1 you double click on the Text Box) => Click the drop-down arrow.
+ Step 3: Select Style whichever you want.
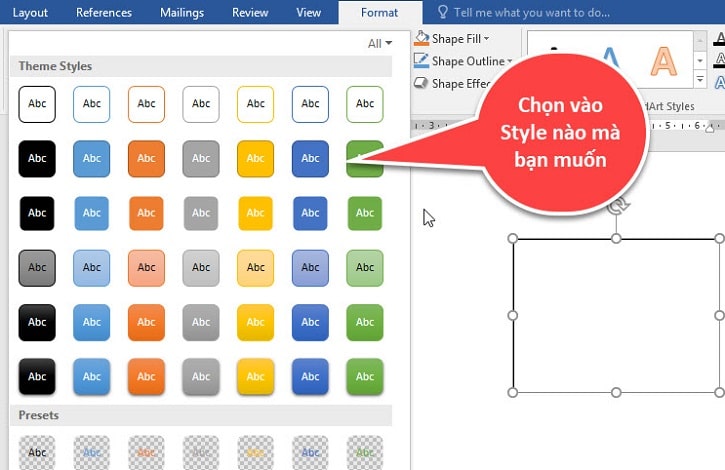
+ Step 4: Box Text Box will appear with Style selected.
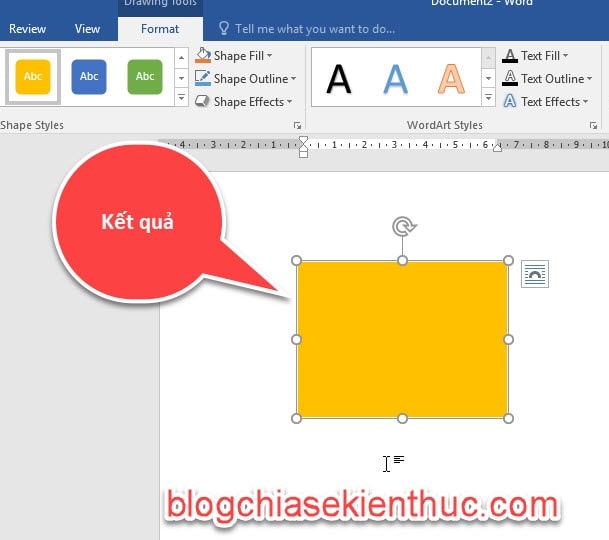
If you want to format the Text Box more, you can use formatting options like Shape Fill or Shape Outline.

#5. Change the shape of the Text Box in Word
Change the shape of the Text Box to make your text more beautiful, customize the shape to suit your purposes.
Perform:
+ Step 1: Double click on the border Text Box you want to change, now Tab Format will appear. Click command Edit Shape => Select Change Shape.
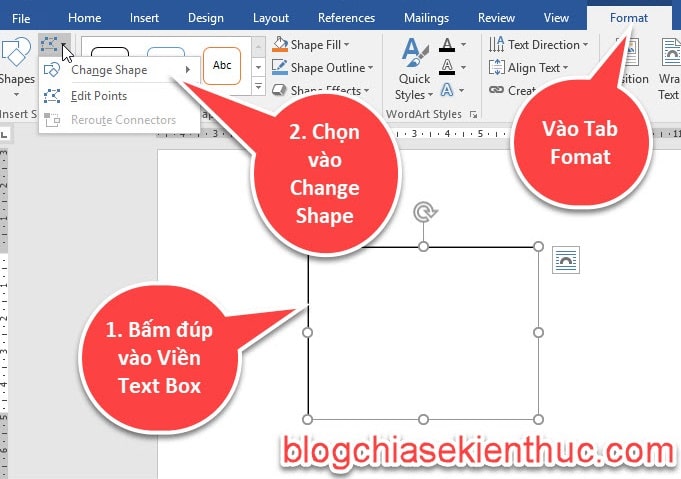
+ Step 2: Now a lot of pictures appear, you can choose the one you want to change.

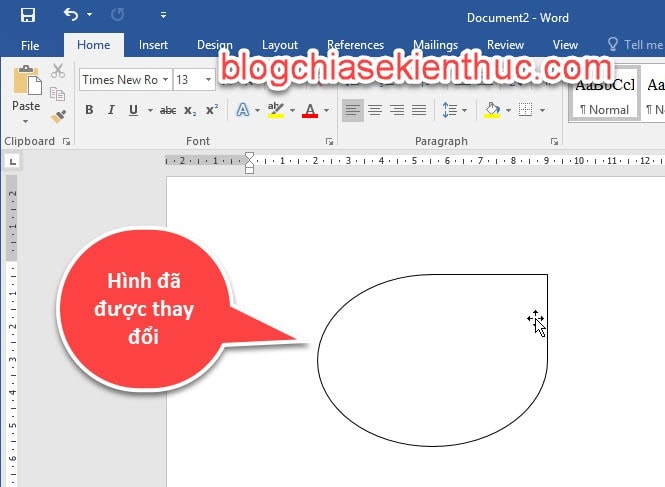
Result : As you can see, the image has been changed.
#6. Add effects to the Text Box
We can also add effects like: Shadow, 3D, Bevel… to the box Text Box look better….
Perform:
+ Step 1: Double click on the border of the Text Box => it will move quickly to Tab Fomat.
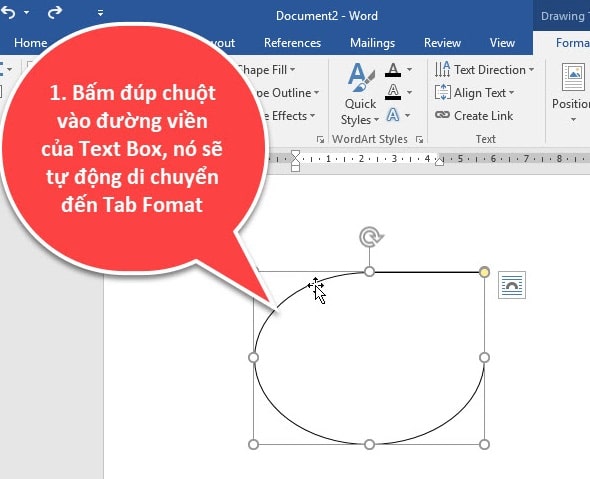
+ Step 2: Click the drop-down arrow in the section Shape Effects, Here are items like: Shadown, Glow, Bevel…
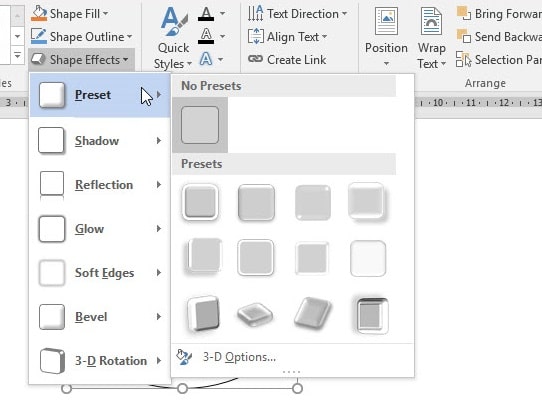
+ Step 3: Select an effect that you want to add the effect to => and as a result, the Text Box has the effect.
#7. Epilogue
Okay! So in this article, I have detailed instructions for you How to insert Text Box into Wordas well as the operations for the Text Box then ha.
Hope this knowledge will help you in your work. Wish you all success and don’t forget to continue to follow techtipsnreview for more interesting knowledge 😀
CTV: Ngoc Cuong – techtipsnreview
The article achieved: 2.8/5 stars – (There are 18 reviews)
Note: Was this article helpful to you? Don’t forget to rate the article, like and share it with your friends and family!
Source: Instructions for using Text Box in Word from A to Z
– TechtipsnReview
Sometimes you may want to fine tune object placement in Word. This article will talk about how to move objects with greater precision.
When you move a text box or a picture in Word, they seem to be snapping to the nearest intersection of lines in the grid. But sometimes, we want to precisely control the placement of these objects. In this article will mainly look at 3 ways to move the object to exactly the location where you want.
Method 1: Hold Down “Alt” Key to Move the Object Precisely
For example, we want to move the text box below to exactly where we want. Follow these two steps:
- First, left click at the text box, and then hold down the“Alt”key on your keyboard.
- Then use our mouse to drag the text box to the new position you want.


Because we have been hold the “Alt” key, the grid will not have effect on the movement of objects. But note that this method will only turn off “snap to grid” temporarily.
Method 2: Reduce the Horizontal & Vertical Spacing of the Grids
Since there is an invisible grid in our Word, one simple way is to minimize the horizontal and verticals spacing of the grid. To do it, you can refer to this section.
- Place your cursor on the text box, and then left click at it.
- Switch to “Format” tab, and then click on “Align” drop down arrow, in the “Arrange” group.
- Select “Grid Settings” in the drop down list.

- In the subsequent “Drawing Grid” dialog box, enter a small value in the “Horizontal spacing” and “Vertical spacing” boxes. For example, here we enter “0.01”.
- Finally, click “OK” to save it. And this will apply to all your documents.


Method 3: Disable the Snap-to-grid Option Permanently
Another way is to disable “Snap to” option so that objects won’t snap to grid. And you can also turn off this option permanently. Follow this section to learn how.
- Head to the “Drawing Grid” dialog box again, by following the steps specified in last section.
- Click the tick in the “Snap objects to grid when the gridlines are not displayed” to deselect it. And then click “OK”.

Word is Susceptible to Corruptions
To sum up, we can precisely control the placement of text boxes or pictures in our Word. Though Word offers a host of useful options for common users, it cannot avoid file corruptions.
Therefore, it mandates the need of a specialized tool to repair word. With its advanced technology, it guarantees to recover your Word with an outstanding recovery rate.
Author Introduction
Kelly Zhao is a data recovery expert in DataNumen, Inc., which is the world leader in data recovery technologies, including excel recovery and pdf repair software products. For more information visit www.datanumen.com
Adding text boxes can make your document stand out.
- Using the pre-defined text box in MS Word
- Using the Draw Text Box tool in MS Word

Method 1: Using The Pre-defined Text Box In Ms Word
Step 1. Open up your MS Word document.

Step 2. Go to the Insert tab on the ribbon.
On the ribbon, click the Insert tab found next to the Home tab at the upper-left corner of your window. Then, move to the left side of the ribbon and select Text Box.
A drop-down menu will appear displaying several built-in text boxes that come in pre-defined formats.

If that isn’t enough for you, there’s also the option of clicking More Text Boxes from Office.com for more styles.

Start selecting a style that suits the theme of your document. The formatted text box will then appear at the right side of your file.

Once you’ve clicked on a text box style, a text box with a default message should appear.
Simply double-click or select the text box to edit the text, and input your own text into the box.

Method 2: Using the Draw Text Box tool in MS Word
This method allows you to create a text box from scratch and, later on, modify it to fit your own creative design.
Step 1. Open up your MS Word document.

Step 2. Go to the Insert tab on the ribbon.
On the ribbon, click on the Insert tab. You’ll find this next to the Home tab at the upper-left corner of your window. Then, move to the left side of the ribbon and select Text Box.
This will open a drop-down menu on the right side of your screen.
Now, select the Draw Text Box tool found at the bottom of the menu.

Once selected, you will notice that your mouse cursor will change into a black crosshair. This signals us that we are ready to create a text box.

The yellow circle beside the crosshair was purposefully added to help you spot the mouse.
Step 3. Draw your text box.
Once that’s done, we can now draw the text box by left-clicking and holding down the mouse while dragging your cursor to a particular direction.

You can now place your desired text in the box. Furthermore, you can resize the text box by clicking and dragging the circles around the box.

Notice that we have stretched the text box a bit to make sure the sentences inside have ample space to move around.
There you have it! You just created a simple text box from scratch.
Resizing, Moving, and Deleting a Text Box in MS Word
In this section, we will walk you through the steps of resizing, moving, and deleting your text box in MS Word.
Here’s how you can do that.
Resizing a text box in MS Word
You can easily resize your MS Word text boxes by simply dragging any of the four corners of your text box.
Make sure that your cursor changes into a crosshair before dragging. Otherwise, you will be moving your box instead of resizing it.

You should be able to drag your text box horizontally and vertically at the same time.
Another way is to drag the midpoints of each side if you want to resize one side at a time. Drag the top or bottom midpoints to resize vertically and left or right midpoints to resize horizontally.


For a more accurate sizing, MS Word has a Drawing tool where you can specify the height and width of your text box in exact units.
After selecting a text box, go to the Format tab on the ribbon. Note that this will only be visible when you have selected at least one text box.

On the right-most part of the ribbon, you will see the height and width field under the Size group. You can then enter your exact measurements in the given fields.

Tip: Double-clicking any side of your text box, automatically activates the Format tab.
Moving a text box in MS Word
Moving a text box in MS Word can easily be done by selecting the text box then dragging it by any of the sides. Make sure you avoid selecting the circles as these will resize your text box instead of moving it

Make sure to NOT hover your mouse inside the box, as this will only let you edit the text.
As another option, you can use your keyboard’s arrow keys to move your text box.
This method enables you to move your text box gradually by millimeters. This way, you can easily align them with other elements in your document.
If you’re looking for a more accurate way to position your text box, you can use MS Word’s Layout options found in the Format tab. We used the Top and Bottom text wrapping for this example. Go ahead and choose one that suits your layout.

Tip: Click on the More Layout Options for a finer way to position your text box.

Deleting a text box in MS Word
After selecting a text box, you should be able to delete it by pressing the Delete or Backspace keys on your keyboard.
Customizing a Text Box in MS Word
Microsoft Word offers several ways to customize text boxes with colors, shapes, styles, and a number of other effects. Even built-in text boxes can be modified to your preference. All these options are found in the Format tab on the ribbon. Remember that the Format tab can only be activated once a text box is selected.

Tip: Double-clicking any side of your text box automatically activates the Format tab.
Here’s a quick rundown of some of the groups under the Format tab.
Shape Styles Group
The options in this group can be used to customize the shape, background color, border outline, and shape effects of your text box. Of course, Microsoft Word has a number of pre-defined themes readily available for use.
WordArt Styles Group
As for any Word document, you can change your text as WordArt. If you’re not familiar with WordArt, don’t worry we’ve got you covered.
WordArt is simply how Microsoft Word refers to style options that make your text come alive with special effects. Basically, they’re pre-decorated text that’s ready for use. You can simply choose a style to see how it works.

These options are also accessible when you right-click on any side of your text box. You should see the three formatting tools: Style, Fill, and Outline.

As you may have noticed, there’re more than a dozen customization tweaks that we can do to make our text boxes stand out. Try out a few more and tell us down in the comments which styles you liked best!
Conclusion
We hope you found this article helpful!
When you add pictures, shapes, or other objects to your Word documents, they automatically stack in individual layers as you add them. You can move individual shapes or other objects or groups of objects in a stack.
Move a picture, shape, text box, or WordArt
-
Select the border of the WordArt, text box, or shape to move.
To move multiple text boxes or shapes, press and hold Ctrl while you select the borders.
-
When the cursor changes to the four headed arrow, do one or more of the following:
-
Drag it to the new location.
-
Press and hold Ctrl while pressing an arrow key to move in small increments.
-
Press and hold Shift while you drag it to move the object horizontally or vertically only.
-
-
Alternatively, you can cut and paste your WordArt, shape, or text box. Right-click the object and press Ctrl+X. Press Ctrl+V to paste it.
Move a text box, WordArt, or shape forward or backward in a stack
-
Select the WordArt, shape, or text box to move up or down in the stack.
-
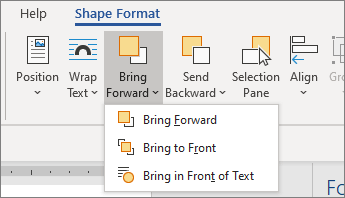
Go to Shape Format or Drawing Tools Format and select one of the following:
-
Bring Forward to move the object up one layer.
-
Bring to Front to move the object to top of the stack.
-
Send Backward to move the object down one layer.
-
Send to Back to move the object to the bottom of the stack.
-
See also
-
Align pictures, shapes, text boxes, or WordArt in Word
-
Group or ungroup shapes, pictures, or other objects
In some document layouts (e.g., magazines), you may need to run a series of text boxes that contain a
sequence of text. Word lets you flow text from one text box to another: When the first text box is full,
Word automatically moves to the next text box and fills it. If you add or delete text in a text box, Word
adjusts the text in the subsequent text boxes accordingly.

To make the text flow, you create a link between the text boxes. Follow these steps:
1. Insert the text boxes that you will link and position
them where you want them. Place all the content in the first text box. Most likely, only the first part
of it will appear in the text box.
2. Under Drawing Tools, on the Format tab, in
the Text group, click the Create Link button:

Word changes the mouse pointer to a pouring jug:
— In the first text box: ![]()
— In other text box displays a prompt telling you to move text here:

3. Click the next text box. Word creates the link and flows
the text from the first text box.
4. Choose the second text box, and then repeat the linking
process as needed.

To break a link, select a linked text box, and then under Drawing Tools, on the Format
tab, in the Text group, click the Break Link button:

See also this tip in French:
Flux de texte d’une zone de texte à une autre.