
Many documents have more than one index. You may want to create an index of subjects and an index of names, or an index of legal cases or titles of works. You can use the indexing features in Microsoft Word to embed tags in the document, so that as the text moves, the page numbers will still be correct. To create more than one index in Microsoft Word, you’ll need to use flags that give a name to each index and use the name of the index in each tag.
Create Tags for Multiple Indexes in Microsoft Word
Open the Microsoft Word document you want to index.
Go to the Tools menu and choose Options. Click the View tab, and in the Formatting marks section, click All. This will let you see the index tags.
Click where you would like to insert an index tag. You might want to insert the tag close to term you’re indexing, or you might want to put all the tags at the start or end of the paragraph so they don’t accidentally get deleted.
Go to the Insert menu and choose Field. In the Categories column on the left, choose Indexes and Tables. In the Field names column on the right, choose XE.
In the white box that starts with XE, type the index term you want in quotes, then a backslash and a lowercase f, then the name for the index in quotes. Use a colon to separate entries and subentries. Then click OK. For example, to create a name index, your entry might look like {XE “Dick” f “names”} For a subject index, your entry might look like {XE “children:boys” f “subjects”}
Repeat steps 2 through 5 for each index entry.
Generate Multiple Indexes in Microsoft Word
Click where you would like to insert the index. If you want to put the indexes in a separate document, see the section below.
Go to the Insert menu and choose Field. In the Categories column on the left, choose Indexes and Tables. In the Field names column on the right, choose Index.
In the white box that starts with INDEX, type a backslash and a lowercase f, then the name for the index in quotes. Then click OK. For example {INDEX f “names”} The entries for that index will appear, sorted in alphabetical order and with page numbers.
Repeat steps 2 and 3 for the other index(es).
Type a title above each generated index, such as “Name Index” and “Subject Index.”
Create Separate Index Documents
Create a new document and save it in the same folder as the other document file(s).
Go to the Insert menu and choose Field. In the Categories column on the left, choose Indexes and Tables. In the Field names column on the right, choose RD.
In the white box that starts with RD, type the name of the document that has the index entries in quotes.
If the entries are in more than one document, repeat steps 2 and 3 for each document.
Follow the directions above to insert the indexes.
Tips
- Since the process of inserting tags can be time consuming, you may want to copy and paste a previous tag for the new entries. Be careful not to delete any quote marks or field codes.
- Turn off the Formatting marks before generating the indexes so that the page numbers will be correct.
- Make sure to use the same name for each index consistently. For example “name” and “names” should make two different indexes. However, you may need to give each index a name that starts with a different letter, as Microsoft Word may sometimes have difficulty separating index flags that start with the same letter.
Warnings
- Even if you do everything correctly, you may still have trouble generating the indexes, as these features are not very robustly supported. Try the website below for troubleshooting tips.

The February 2015 article How to add an index to a Word document using index tags shows how to add an index to a Word document. Now I’d like to show you how to add to individual indices using special switches. You can bookmark sections and index the bookmarked section. Or, you can identify specific terms. In both cases, you selectively index the document to create multiple indices.
I’ll be working in Word 2013 on Windows 7; I’ll supply instructions for earlier versions as necessary. For your convenience, you can download the example .docx or .doc file, or use an existing document of your own. If you don’t know how to generate an index, I recommend that you work through the first article before trying to tackle this more advanced topic. This article assumes you know how to mark terms and generate an ordinary index.
Use the bookmark switch
Generating more than one index based on different sections of the document is the easiest way to add more than one index to the same document. Initially, the process is the same as generating a single index. You begin by marking each term you want included in the index. Then, before you generate the index, you bookmark the different sections. When generating each index, you indicate the bookmarked area you want indexed.
Before you can bookmark anything, you must determine the sections you want indexed. The example document shown in Figure A has two obvious sections: Galleries and Using Galleries. (The text is repeated to keep things simple.)
Figure A

Use Show/Hide to display indexed terms.
The example document already contains marked terms. If you’re working with your own document, mark a few terms in two different sections or paragraphs. If you don’t see the index fields, click Show/Hide in the Paragraph group on the Home tab. This is a toggling option, so a click is all that’s required to display or hide formatting symbols. It’s on the Standard toolbar in 2003.
With the first step already completed for us, let’s move on to the second step — bookmarking the sections Galleries and Using Galleries. To bookmark the Galleries section, do the following:
- Select the three short paragraphs in the Galleries section (you don’t have to select the section title, but you can).
- Click the Insert tab, and then click Bookmark in the Links group. In 2003, choose Bookmark from the Insert menu.
- In the resulting dialog, give the bookmark a meaningful but short name. In this case, name the bookmark Galleries (Figure B) and click Add.
Figure B

Name the bookmark Galleries.
Repeat this process to create a bookmark named UGalleries after selecting the Using Galleries section. Word displays brackets around bookmarked areas, as shown in Figure C.
Figure C

Look for the brackets after adding a bookmark.
Now you’re ready to generate an index, but you won’t do so using the Insert Index on the References tab. You must insert the index field manually so you can add the bookmark switch as follows:
- Click where you want to position the index.
- Click the Insert tab.
- In the Text group, click the Quick Parts drop-down and choose Field (Figure D). In 2003, choose Field from the Insert menu.
Figure D
- In the Field Names list, select Index.
- Below the Field Names list, click Field Codes and Word will display the Field Codes control. (The Field Codes button will then display Hide Codes.)
- In the Field Codes control, add b Galleries c 2 (Figure E).
Figure E - Click OK and Word will index only the previously indexed terms in the Galleries bookmark section.


If you’re comfortable using the keyboard, you can bypass the seven steps above and enter the index field as follows:
- Press [Ctrl]+[F9] to generate a blank field.
- Enter the appropriate field text: index b Galleries c.
- Press [F9] to generate the index.
Using either process, generate the index for the Using Galleries section, but in step 6, add b UGalleries c 3. Figure F shows the results of both indices.
Figure F

Add two indexes to the same document using the bookmark switch, b.
The b switch tells Word to restrict the index to marked terms in the bookmarked sections. The c switch formats the index in columns. In a working document you’d probably want the indexes to be consistently formatted, but I wanted you to see the flexibility that comes with using these switches by generating both a two- and a three-column index. There aren’t enough index terms to force a third column of text, but you can see that there’s room for it.
I promised you two methods, so next I’ll show you how to add specific terms to an index.
Use the entry type switch
You might want to separate terms in the same sections of the document into one or more indexes. In this case, bookmarks won’t help. Instead, use the f entry type switch. In this example, we’ll use f “abc” and f “xyz”. Notice that we’re not referring to a bookmark this time; the strings are arbitrary, but you must match the references, respectively, when you generate each index later. You’ll want to use meaningful references and avoid including the term index in the reference. With a bit of testing, I found references that include index to be unreliable.
Don’t try to add the switch when marking the term using the Mark Index Entry dialog (Mark Index option). Word can’t transfer the switch correctly. Instead, manually add the switch and its argument to an indexed term. To demonstrate, we’ll modify only two terms (to keep things simple).
To mark the first term, do the following:
- Click inside the right end of the first indexed string, Insert tab, in the first line of the first paragraph following the Galleries heading.
- Type f “abc”, as shown in Figure G.
Figure G

Alter the existing index field by adding the bookmark switch and its argument.
Next, add the switch f “xyz” to the Quick Styles field in the Formatting Text subsection in the Using Galleries section.
To generate the abc index, use the keyboard as I showed you earlier or use the interface as follows:
- Click where you want to insert the index (I added a header so you can visually distinguish between the two).
- Click the Insert tab and choose Field from the Quick Parts drop-down in the Text group.
- Choose Index in the Field Names list.
- Click Field Codes.
- In the control, add the following string, f abc (Figure H). (Notice that I did not include the double quotation marks this time.)
Figure H - Click OK to generate the abc index.

Generate the xyz index, shown in Figure I, using the switch f xyz (no quotation marks).
Figure I

Generate entry type indexes.
Worth noting
We used multiple indexing as an excuse to explore two different ways to add index terms to an index that isn’t document-inclusive. In neither case must you generate more than one index. You can use the bookmark method to generate a unique index when you don’t want to index the entire document. In addition, the f switch references can occur in the same section and even the same paragraph. If the resulting index doesn’t produce the results you expect, check your arguments for typos and missing quotation marks.
Multiple indexing isn’t something most ordinary users will need, but it’s a fun exercise. Learning what Word is capable of, even when you don’t think you’ll utilize the feature, is a great way to expand your Word expertise.
Send me your question about Office
I answer readers’ questions when I can, but there’s no guarantee. When contacting me, be as specific as possible. For example, “Please troubleshoot my workbook and fix what’s wrong” probably won’t get a response, but “Can you tell me why this formula isn’t returning the expected results?” might. Please mention the app and version that you’re using. I’m not reimbursed by TechRepublic for my time or expertise, nor do I ask for a fee from readers. You can contact me at susansalesharkins@gmail.com.
Indexes can be useful additions to non-fiction books to help readers locate terms or subjects. For some books, it is beneficial to have more than one index. As an example, my current book project on Genesis 1 (co-authored with theologian Ken Turner) will have three: Subject, Author, and Scripture indexes. MicroSoft makes it relatively easy to create a single index in Word, but if wishing to make multiple indexes, the developers seem to have gone out of their way to make it as non-intuitive as possible. When searching the web for solutions, I found lots of teasers, but very few “solutions” that were actually helpful. I didn’t find any that were sufficient to answer all my questions. In the end, I was successful only with insights from my computer scientist wife. To avoid forgetting all those non-intuitive steps for some future project, I wrote up step by step instructions – mostly for myself, but posting it in case it turns out to be useful for anyone else.
Steps for generating multiple indexes (including Scripture references)
All based on MS Office 2019
1) Create a concordance file: A concordance is a two-column table with all variations of words to search in the first column (including variable capitalization, singular and plural, abbreviations, etc.) and index categories as they will appear in the index in the right column. Follow the main entry with a colon and the subcategory term. For scripture references, insert a backslash () before the colon to avoid it being read as a sub-category.
For multiple indexes, create a concordance for each index and add dummy characters to the end of each index category in the right column. Note that for a scripture index, if you wish books to be listed in biblical order (rather than alphabetical) leading numbers must be added before each book category to order correctly. To get chapter and verses to order correctly, leading zeros need to be added to avoid a reference such as 10:9 from being listed before 1:10 (so write as 01:10). The dummy text and leading zeros are removed in the final product.
concordance 1 (Author)
| Turner | Turner, Kenneth J.-aaa |
| Davidson | Davidson, Gregg-aaa |
concordance 2 (Subject)
| simile | literary device: simile-bbb |
| metaphor | literary device: metaphor-bbb |
concordance 3 (Scripture)
| Ps. 34:1–3 | 19-Psalms:034:01–3-ccc |
| Psalm 34:1–3 | 19-Psalms:034:01–3-ccc |
2) In the document to be indexed, go to References / Insert Index / AutoMark. Select the first concordance file and Open.
Index field codes will appear as, e.g. {XE “Turner, Kenneth J.-aaa”}
(The curly brackets cannot be searched or replaced, but text inside can be.)
3) Do a global search and replace to exchange the dummy characters with the index number identifier.
First turn on Show Marks (the paragraph icon under the Home tab).
Open Replace.
Find –> enter the dummy characters (e.g. -aaa)
Replace –> _^92f_^34^49^34 (use space key where underscore is shown)
– these are Ascii codes that will become f “1”
^92 =
^34 = ” (straight double quote, not curly version)
^49 = 1, ^50 = 2, ^51 = 3
Check the box for use wildcards
Click Replace All
Alternative: To append text or commands to the end of index field codes:
Find –> XE “*”
Check box for use wildcards
Replace –> ^&_^92f_^34^49^34 (again, underscore is actually a space)
4) Repeat steps 2 and 3 for each new index.
5) Select an arbitrary word in the document and mark for a temporary index (References / Mark Entry / Mark).
6) Add page breaks for each index. On each page, insert a dummy index. References / Insert Index, pick formatting, number of columns, etc. and click OK.
When it asks if you want to replace existing index, click No.
7) Right click on each index and select edit field, then click on Field Codes at bottom left. A window will open with format coding. At the end of the string add: _f_”1″ (underscore is a space, make sure double quotes are straight, not fancy). Click OK. All the index 1 entries should appear.
 Repeat step 7 for each index.
9) Delete the index field code for the random word selected to initiate the indexes. e.g. {XE “whatever”}
10) For repeated trials, all index field codes can be deleted using the find and replace function, entering ^d XE to Find and leaving Replace as blank (view codes has to be turned on).
11) To add a “see X” item in an index, select the first occurrence of the word and highlight it. Go to References / Mark Entry, click on cross-reference, add the term for X, and click OK. Add the f “1” (or other index number) at the end.
The cross-reference mark is only done on one word, but all subsequent occurrences will need the index field-code tag associated with word X.
12) For the Scripture index, the leading numbers in front of the books of the Bible and leading zeros in front of chapters or verses will need to be manually deleted.
Note: In principle, it should be possible to take a duplicated document with a unique set of index field codes (for a second index) and use the Review / Combine function to merge the second file with the original. This does NOT work. Field codes get mysteriously dropped and fragments of text get duplicated.
I hope this helps someone out there!
 Please Note:
This article is written for users of the following Microsoft Word versions: 2007, 2010, 2013, and 2016. If you are using an earlier version (Word 2003 or earlier), this tip may not work for you. For a version of this tip written specifically for earlier versions of Word, click here: Multiple Indexes in a Document.
![]()
Written by Allen Wyatt (last updated November 29, 2022)
This tip applies to Word 2007, 2010, 2013, and 2016
Marc has a multi-sectioned document. He wants to create an index on one section and a second index for the entire document. Marc wonders if there is a way to have two indexes in a document where one of them covers only a single section.
The short answer is yes, there is a way. When you insert an index into a document, what you are actually doing is inserting the INDEX field. With no switches used in the field, Word creates an index based on the entire document. To create an index based on only a portion of the document (such as on a single section), follow these general steps:
- Select the document section that you want to have indexed in its own special index.
- Create a bookmark that applies to the selected text. (Click the Bookmark tool on the Insert tab of the ribbon.) Remember the name you used for the bookmark.
- Create the basic INDEX field. (Press Ctrl+F9 to insert field braces and type the word INDEX.)
- After the word INDEX, type a space, b (to indicate that this index will apply to only a bookmarked area of the text), another space, and the name of the bookmark you created in step 2. Your entire field should look something like this:
- Press F9 to collapse the field and create your index.
{ INDEX b MySection }
There is another way to approach the problem, as well: You could add a switch to the XE field that is used to create an index entry. For instance, let’s say you are indexing the term «polar bear» for the index. Make sure you have a field near the term like this one:
{ XE "polar bear" f "a" }
The f switch should appear only for index entries in the section that you want to have its own index. Later, when you insert the INDEX field to create the index for that section, you should make sure it looks like this:
{ INDEX f "a" }
The index created by this field will only included those index entries that use the f switch followed by the letter «a».
Adding the switch to the XE fields is handy, but suppose that you’ve already created your index entries without using the f switch. If you want to later add the f switch to the XE fields in the section, you can do it by following these steps:
- Type f «a» (note the space in there) in a blank spot of your document and then cut it to the Clipboard.
- Make sure that field codes are displayed in your document. (Press Alt+F9 to either show or hide the field codes.)
- Select all the text in the section that will have its own index.
- Press Ctrl+H to display the Replace tab of the Find and Replace dialog box.
- In the Find box, type XE «*»
- In the Replace box, type ^&, a space, and then ^c. The ^& will replace what is found with itself, then there’s a space, and the ^c adds what is on the Clipboard (from Step 1).
- Click More and make sure the Use Wildcards checkbox is selected.
- Click Replace All. When you’re asked if you want to search the rest of the document, answer negatively. (You don’t want to search the entire document; you only want to affect the portion you selected in step 3.)
You can find additional information about these steps in the Microsoft Knowledge Base:
http://support.microsoft.com/?kbid=154025
Even though the Knowledge Base article is for much older versions of Word, it will still work with your version because the behavior of the index-related fields it uses has not changed since the earliest versions of Word.
WordTips is your source for cost-effective Microsoft Word training.
(Microsoft Word is the most popular word processing software in the world.)
This tip (12137) applies to Microsoft Word 2007, 2010, 2013, and 2016. You can find a version of this tip for the older menu interface of Word here: Multiple Indexes in a Document.
Author Bio
With more than 50 non-fiction books and numerous magazine articles to his credit, Allen Wyatt is an internationally recognized author. He is president of Sharon Parq Associates, a computer and publishing services company. Learn more about Allen…
MORE FROM ALLEN
Stopping Text from Jumping Around
Do you struggle with getting your graphics and surrounding text to appear just the way you want it? Here are some …
Discover More
Ignoring Words Containing Numbers
If your writing often contains words that include numbers, you’ll want to make sure you set up the spelling checker to …
Discover More
Replacing an X with a Check Mark
In order to provide a finishing touch to your document, you may want to replace mundane X marks with fancier check marks. …
Discover More

Or, Inserting Multiple Indexes in Word
As an editor and information architect, I find the topic of creating indexes somewhat interesting, although like many things that are theoretically interesting the actual application of it is sure tedium. As a result I’ve been putting off indexing Fly Fishing in the Russian Far East because I knew it was going to be a long and tedious process. However, the book really needed one and we needed to get it done. (Does anybody have a copy of the first Joy of Homebrewing, before it was indexed? Great book, nearly useless.)
At any rate, a beautiful book needs a beautiful index. I finally set down to do it and realized I’d had a stroke of good luck, as the author had thought about this a little bit and sent me an Excel file with a list of categories and all of the words in each category. I realized that what I had here was a concordance file. Now strictly speaking a concordance is a list of words in a book. For instance, all of the times “Jesus” is listed in the Bible, while an index is a list of ideas (I got that on the internet while doing research on this). In other words, sometimes we’ll go to an index looking for a certain word, but often we are looking for an answer to a question. “What flies should I use for grayling?” As a result there are a fascinating number of classifications and taxonomies used and each book will pretty much require a unique solution. In our case, Mikhail had divided it up into Geographic Regions, Species, Flies, and General. This is pretty much exactly how I would use the index to answer questions about the book. Once again, when I went off research just how to do this, I couldn’t find the info, so once I I figured it out I thought I would share.
Tip: As an aside, if you ever get stuck on any taxonomy problem, it always helps to start your organization by the old who, what, where, why, when, and how. Here we have the Where, What, and How covered. The General category then picks up all of the subheads such as “Fishing Techniques for Stargazers” which were too granular to keep in the TOC. I think you can effectively answer any question about finding information in this book with this scheme.
In general there are two ways to index a book in Word. You can go through the entire book manually and mark up each word, term, or section you think you want to index, then you go to References | Insert Index and it will generate a very nice alphabetic index, complete with subentries and cross references. The other way is to generate a concordance file and have Word go through and find all of the words in the file.
I’m not going to be one of those bloggers who reposts a help file or somebody else’s tutorial and calls it content. There is a lot of information out there on how to build Word indexes. However to get what we wanted, an alphabetico-classed index for the semantically inclined, Word doesn’t get you there unless you want to manually edit the file, so this will tell you how to do it automatically using Word.
There are some caveats here and I’m still in proof-of-concept so I’ll call them out, but I hope you find this helpful.
Caveat 1: Word is a word processing platform, not a publishing platform. It’s not really made for books, so we have to bend it up a little bit.
What I realized was Mikhail had given me a concordance file. Now Word really isn’t a publishing platform, and so it doesn’t get everything right, but in this case they did a smart thing. A concordance file is, as I said a list of words in a document (book) that you want to find. But what Word has done that makes it brilliant is they use a two-column table for their concordance file. The first column is the list of words you are looking for, the second column is the idea you want to link to that word.

Concordance file
This makes it much more useable than a strict concordance file. For instance in the left column you can see the actual text from the book, including things like the scientific name. Odds are pretty good that while the scientific name for round whitefish is of passing interest to me, unless I’m a professional ichthyologist (which I almost did become at one point) I won’t be using that term to look them up in the index. So in the right column are the terms that you will see in the index to find the text in the left column. Therefore, the text “Round Whitefish (Prosopium cylindraceum)” will be in the index as its full text name “Round Whitefish (Prosopium cylindraceum)”: its common name, “Round Whitefish;” and its Latin name “Prosopium cylindraceum.” You have to make lots of choices like this and I’m still editing the concordance file to optimize it.
Tip: Using a concordance file lets you iterate through your index design much easier than manually marking up text.
Caveat 2: Word doesn’t always behave as advertised.
Notice in a couple of places I’ve appended the term “Latin:” to the terms in the right column? Well that’s because in theory that should give me a heading with subheadings in the index file, like so:
Latin names:
Coregonus ussuriensis 99
Coregonus subautumnalis, 234
So far, I have not gotten this to work. Big sad face because that would be pretty sweet. And while we are at it, I had taken the 20 or so separate chapters and put them into a Master Document, the way you are supposed to build long documents in Word, but I could not get the collapsed chapters to expand ever again and therefore could not index them. I tried this in both Word 2007 and 2010. Master Documents have long been known to be poorly implemented, in fact in my VBA days I wrote my own implementation so we could use that functionality at Microsoft, but after fighting with it for a couple of hours and rebuilding multiple versions, I just gave up and made one long document. Your results may vary and if you can get Master Documents to work, this indexing technique should still theoretically work.
Okay, so I took the all-up concordance file and made an Index. To do this you will first have to make your own concordance file, which is just a two-column table (this is no small feat on its own by the way, but still a time saver, to ease it I suggest collecting terms as you write and edit) and save it as a document. Go to References | Index and click Insert Index (in 2010, for 2007, well you’ll figure it out):

Word Index Menu
Then,

Word Index screen
Click AutoMark… and navigate to and choose your index file. Word then passes through the document and puts a field code around every instance of every word in the left column.

Word field codes
This is exactly what it would look like if you inserted this manually. You can click on and edit these if you need to add sub entries, etc. So for instance, I could go back through and add my “Latin names:” bit here to make that work. These will expand your document and change pagination. You can turn them off by either ALT+F9 (I think) or hitting the little paragraph marker thingy on the tool bar (the Show/Hide control).
Caveat 3: Concordance files do not automatically give you all of the subentries and see alsos you would get from manual tagging. But that’s okay.
Because while I called this Creating Categorized Indexes in Word (and it is Indexes and not Indices, btw), what we are really going to do is Insert Multiple Indexes in Word. So you can mix and match techniques to suit your fancy.
Okay, so the first time you hit References | Index and click Insert Index, it places the index in the book. Now go to the end of the book, place your cursor there and do it again. This places the actual index in the book. If you just run an all up concordance file you get a very nice, not very useful (for this book) alphabetized index. I inserted the “Index” heading here, but Word formats the rest in several canned styles, which you can edit manually if you want:

Word sample index
Well that’s not so useful is it? I’m going to have to scan the whole index just to find one fly, not to mention all of the flies I might like to take on my trip.
Caveat 4: Manually editing Word References (TOC, indexes, etc.) is a bear. But it doesn’t matter.
Because if you are doing this for publication you are probably going to import this into Indesign or other actual publishing program and do all of your styling there. But I would like to point out that the two column layout will fit nicely on the grid we designed last time. If you need to repaginate, etc you can right-click on the index and choose to either update pages or update the whole file. You might want to do this, for instance, after you hide the field codes.
Aside: Before I mentioned that Word is for documents, by which I mean electronic documents, and not for published books. As such, the index is actually linked to the pages and you can CTRL+SHIFT a topic to go to it in the document. Okay, well I never put an index in something I wasn’t printing and don’t find this so valuable. So, if you are absolutely positively done, and want to format the index for printing, then it’s much easier to right-click the index to highlight it and hit CTRL+SHIFT+F9 to break all of the links. That is not an easy hot key sequence to find so you might want to file it away.
So, that was to show how to use a concordance file. To break the index up into categories. Is just a few more simple steps. So first, break your concordance file into multiple files: Concordance_fish, Concordance_geo, etc. (I recommend using the Split Table feature, if you don’t know about it.) But also keep an all-up version. Again, you pretty much want to do this once your all up version is completely edited so I would do my trial runs there and then edit the separate docs, you’ll see why in a bit.
Then, if you have already indexed the book remove all of the existing field codes by going to Replace | Special | Field to get ^d for the search term and leave Replace with: blank:

Word Find and Replace field codes
Sorry, don’t have SnagIt on this computer so can’t get the Special menu, but you’ll figure it out. Also a handy S&R to remember, btw. Oh, and delete the index if you have one. Okay, now you have a document with no field markers and no index. Go to your concordance files and pick the one that represents the category you want first. Use that file to index it, Insert the index. Remove all of the field codes in the document, index with the next file, and so on. Each time it is smart enough to ask you if you want to replace the existing index, say no. If you don’t remove the field codes between passes, then on each pass you will get the full index from all of the files. Now if you really, really need the field codes to be hyperlinked to the index, I think you can run the all up file one last time at the end, it will certainly add the codes to the text, whether you can link them back to the indexes in the back I haven’t fully tested yet.

Multiple Word indexes n document
Remember I was saying that this allows you to iterate through you design? Well there is a great example in this shot. In the text in the chapters for each fish species there is a subheading called “Fishing Techniques.” Well here you can see that by using that term in the concordance file it picked them all up, and there are a lot of them because Mikhail has really studied them and this is one of the strengths of the book. But this pile of page numbers would be pretty frustrating if I just want to go Asp fishing for the afternoon. So, I think I’ll actually go through the text and add the fish name to each of these subheadings and then add all of those entries separately into the concordance file. That way I’ll get Steelhead Fishing Techniques, Taimen Fishing Techniques, etc. They will also be put under the correct category (General). Likewise with “Habitat and Biology.” Information design is iterative. This is a very powerful tool.
Caveat 5: You absolutely want to do this the very last thing.
I’ll be honest , we are just now importing this into Indesign, and while I take it Indesign will move over the Word entries, once we add images and stuff over there, the page numbers will all have to be manually adjusted at the end of the process, but I take it that happens anyway. I did however create a categorized (alphabetico-classed, if you will) index file that at least gives me the relative placement of the terms. And despite fighting with Master Document for over two hours and doing a fair bit of editing on the concordance file, I generated a 1,795-entry index in under 4 hours. Again, I think the blog took longer than the actual work. I’m sure if you put this in your bag of tricks that you will be able to expand on the technique and refine it’s application. If so, please give me a shout! Damn, I just broke 2000 words on this “short” post.
Summary
- Write a book
- Write a concordance file (do it as you write or edit the book)
- Break it into categories
- Insert an index based on the first category
- Remove index fields
- Insert second index
- Do not replace existing
- Repeat until done
P.S. Who Are You and Where are You From?
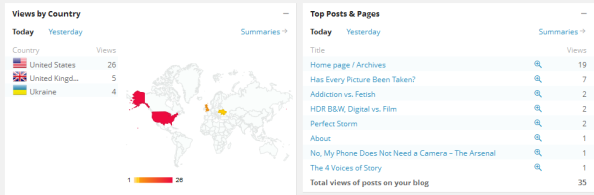
WordPress gives me these awesome reports and I can see how people find me, where they live, how they found the blog, what pages they visited. I see people from Europe, Asia, South America, and I always wonder who they are. I would love to get comments from you!