
Excel for Microsoft 365 Word for Microsoft 365 Outlook for Microsoft 365 PowerPoint for Microsoft 365 Project Online Desktop Client Excel for Microsoft 365 for Mac Word for Microsoft 365 for Mac PowerPoint for Microsoft 365 for Mac Excel for the web PowerPoint for the web Excel 2021 Word 2021 Outlook 2021 PowerPoint 2021 Project Professional 2021 Excel 2021 for Mac Word 2021 for Mac PowerPoint 2021 for Mac Excel 2019 Word 2019 Outlook 2019 PowerPoint 2019 Project Professional 2019 Excel 2019 for Mac Word 2019 for Mac PowerPoint 2019 for Mac Excel 2016 Word 2016 Outlook 2016 PowerPoint 2016 Project Professional 2016 Excel 2016 for Mac Word 2016 for Mac PowerPoint 2016 for Mac Excel 2013 Word 2013 Outlook 2013 PowerPoint 2013 Project Professional 2013 Project Standard 2013 Excel 2010 Word 2010 Outlook 2010 PowerPoint 2010 More…Less
You can add shapes, such as boxes, circles, and arrows, to your documents, email messages, slide shows, and spreadsheets. To add a shape, click Insert, click Shapes, select a shape, and then click and drag to draw the shape.
After you add one or more shapes, you can add text, bullets, and numbering to them, and you can change their fill, outline, and other effects on the Format tab.
Tip: You can add individual shapes to a chart, or add shapes on top of a SmartArt graphic to customize the chart or the graphic.
Add a shape in Excel, Outlook, Word, or PowerPoint
-
On the Insert tab, click Shapes.

-
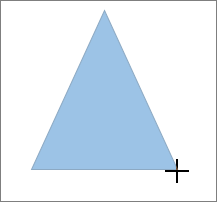
Click the shape you want, click anywhere in the workspace, and then drag to place the shape.
To create a perfect square or circle (or constrain the dimensions of other shapes), press and hold Shift while you drag.


To follow these steps, you need to open or create a report. To do that, on the Report tab, click Recent to open an existing report, or click More Reports to select a report from the list in the Reports dialog box or create a new report.
-
In the open report, on the Design tab, click Shapes.
-
Click the shape you want, click anywhere in the workspace, and then drag to place the shape.
To create a perfect square or circle (or constrain the dimensions of other shapes), press and hold Shift while you drag.
Insert a shape, or click an existing shape, and then enter text.
-
Right-click the shape and click Add Text or Edit Text, or just start typing.
Note: The text that you add becomes part of the shape — if you rotate or flip the shape, the text rotates or flips also.
-
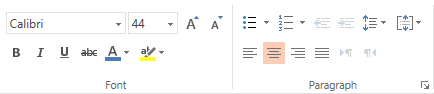
To format and align your text, click the Home tab, and then choose options from the Font, Paragraph, or Alignment groups, depending on the program you’re using and what kind of formatting you want to apply. (Text formatting options are limited in Project.)
Note: These commands aren’t available in Project.
-
Click the shape you want to change.
To change multiple shapes, press Ctrl while you click the shapes that you want to change.
-
On the Format tab, in the Insert Shapes group, click Edit Shape
, point to Change Shape, and then click the new shape that you want.
 , point to Change Shape, and then click the new shape that you want.
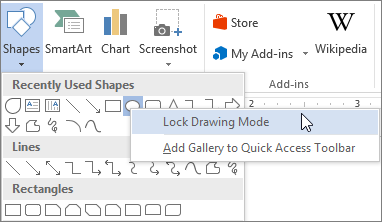
If you need to add the same shape repeatedly, you can do so quickly by using Lock Drawing Mode.
Note: Instead of adding individual shapes to create a drawing, you might want to Choose a SmartArt graphic. In a SmartArt graphic, the arrangement of the shapes and the font size in those shapes is updated automatically as you add or remove shapes and edit your text.
-
On the Insert tab, click Shapes.
-
Right-click the shape you want to add, and then click Lock Drawing Mode.
-
Click anywhere in the workspace, and then drag to place the shape.
-
Repeat step 3 to add the shape as many times as you like.
Tip: To create a perfect square or circle (or constrain the dimensions of other shapes), press and hold Shift while you drag.
-
After you add all the shapes you want, press Esc to turn off Lock Drawing Mode.
Note: This feature isn’t available in Project.
-
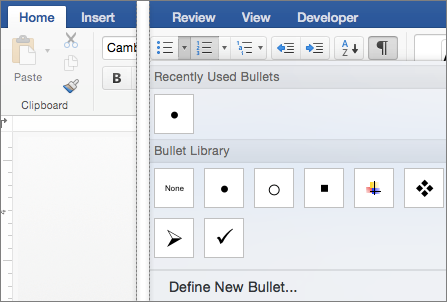
Select the text in the shape that you want to add bullets or numbering to.
-
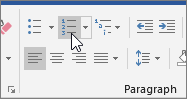
Select the Home tab on the ribbon, and in the Paragraph group, select Bullets or Numbering.
You can find different bullet styles and numbering formats by clicking the down arrow next to Bullets or Numbering.
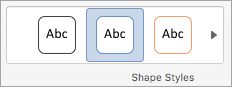
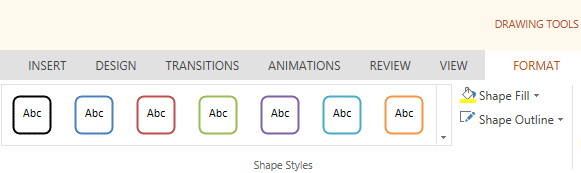
Quick Styles let you apply a style to your shape with one click. You’ll find the styles in the Quick Style gallery. When you rest your pointer over a Quick Style thumbnail, you can see how the style affects your shape.
-
Click the shape you want to change.
-
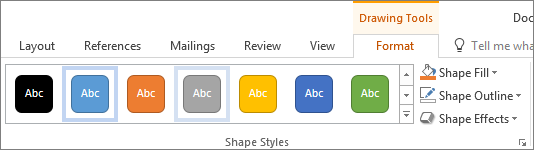
Select the Format tab, and in the Shape Styles group, select the Quick Style you want to use.
To see more Quick Styles, click the More button
.
 .
.Click the shape that you want to delete, and then press Delete. To delete multiple shapes, press Ctrl while you click the shapes that you want to delete, and then press Delete.
See Also
Draw or delete a line, connector, or freeform shape
Rotate a text box, shape, WordArt, or picture
Change the colors in a text box or shape
Draw a decorative line in Word or Outlook
Choose a SmartArt graphic
Create a chart from start to finish
Add clip art to a file
Draw and sketch notes on a page
After adding a shape to a document, you can modify it by adding connector lines, changing the style, adding a mirror image, changing the color, and applying a variety of other effects, such as shadows, glow, and 3-D.
Add a shape
-
On the Insert tab, click Shapes.
-
Click the shape you want, click anywhere in the workspace, and then drag to place the shape.

-
Right-click the shape and click Add Text or Edit Text, or just click inside the shape and start typing .
Note: The text that you add becomes part of the shape — if you rotate or flip the shape, the text rotates or flips also.
-
To format and align your text, click the Home tab, and then choose the available formatting options. For example, you can change font color, styles, sizes, change alignment or indentation, change the text orientation, to name a few.
-
Click the shape you want to change.
To change multiple shapes, press
while you click the shapes you want to change. -
On the Shape Format tab, click
, point to Change Shape, and click the new that you want.
 while you click the shapes you want to change.
 , point to Change Shape, and click the new that you want.
-
Select the shape you want to copy.
-
Press the option key and drag the shape anywhere you want. Release the mouse, and a copy of the shape is created. You can drag and release the shape as many times as necessary.
Note: Adding lists is not available in Excel 2016 for Mac.
-
Select the text in the shape that you want to add bullets or numbering to.
-
On the Home tab, click the arrow next to Bullets or Numbering.
-
Press Enter every time you want a new bullet or number, or press Enter twice to end the list.
-
Click the shape you want to change.
-
Click the Shape Format tab, and in the style gallery, click the style you want.
To see more styles, click
below the style gallery.
 below the style gallery.
-
Click the shape you want to change.
-
Click the Shape Format tab, and click
(Shape Fill icon). -
Do one of the following:
-
To use a different fill color, under Theme Colors or Standard Colors, click the color that you want to use.
-
To remove the color from the selected chart element, click No Fill.
-
To use a fill color that is not available under Theme Colors or Standard Colors, click More Fill Colors. In the Colors dialog box, use the available options to pick a color, and then click OK.
-
To fill the shape with a picture, click Picture. In the Insert Picture dialog box, click the picture that you want to use, and then click Insert.
-
To use a gradient effect for the selected fill color, click Gradient, and then click the gradient style that you want to use.
For additional gradient styles, click More Gradients, and then in the Format Chart Area pane, under Fill, click the gradient options that you want to use.
-
To use a texture fill, click Texture, and then click the texture that you want to use.
-
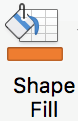 (Shape Fill icon).
-
Click your shape, and then click the Shape Format tab.
-
In the Shape Styles group, click Shape Effects, point to an effect category, and then click the effect that you want.
-
On the Shape Format tab, click Format Pane.
-
In the Format Shape pane, click the Fill & Line tab, and then click either Fill or Line.
-
Drag the Transparency slider to achieve the effect you want.


Click the shape that you want to delete, and then press Delete. To delete multiple shapes, press Command while you click the shapes that you want to delete, and then press Delete.
See also
Change the size of an object
Crop a picture
Move, rotate, or group a picture, text box, or other object
Align objects in Word for Mac
Group or ungroup objects
You can add shapes, such as boxes, circles, and arrows, to your workbooks and presentations. (Word for the web doesn’t support shapes.) To add a shape, select Insert on the ribbon, select Shapes, and then choose a shape.
After you add a shape, you can move it and resize it; add text, bullets, or numbering; and you can change the fill color or outline.
-
On the Insert tab, select Shapes.
-
Select the shape you want from the drop-down gallery.
A default-sized shape is immediately inserted in the middle of the visible page.
-
Select a sizing handle on the perimeter of the shape and drag inward or outward to change the size of the shape.
To create a perfect square or circle (or constrain the dimensions of other shapes), press and hold Shift while you drag.
-
To move the shape, point the mouse at it until the pointer turns into a four-headed arrow. Then click and drag to move the shape where you want it.
When a shape is selected in your document, a Shape tab appears on the toolbar ribbon. It has buttons for things you can do with the shape such as adding a fill color or outline, or choosing a predefined shape style.
Note: If you have the Simplified Ribbon turned off, the tab name in step #4 is Format. For more information on the Simplified Ribbon see The new look of Microsoft 365.

Insert a shape, or click an existing shape, and then enter text, as follows:
-
Right-click the shape and select Edit Text.
A blinking cursor appears in the center of the shape.
-
Type the text you want to add to the shape.
-
To format and align your text, select the Home tab, and then choose options from the Font, Paragraph, or Alignment groups.
Quick Styles let you apply a style to your shape with one click. You’ll find the styles in the Shape gallery.
-
Select the shape you want to change.
-
On the Shape tab (or the Format tab if you have the Simplified Ribbon turned off), open the Shape Style gallery and select the Quick Style you want to use.
Select the down arrow on the end of the gallery to open it and see the complete list of options:
You can pause the mouse pointer over an option in the gallery to see a short description of it.

-
Select the shape you want to change.
-
On the Shape tab (or the Format tab if you have the Simplified Ribbon turned off), select the down arrow next to Fill to open the gallery of fill colors.
-
Select a color.
-
To make the shape transparent, select No Fill at the bottom of the color gallery.
-
Select the shape you want to change.
-
On the Shape tab, (or the Format if you’re still using the classic ribbon) select the down arrow next to Outline to open the gallery of outline colors.
-
Select a color.
-
At the bottom of the gallery there are also options for the thickness (Weight) of the outline, and whether the outline is solid, dotted, or a dashed line. Point at Weight or Dashes to see a pop-out list of options.
Click the shape that you want to delete, and then press the Delete key. To delete multiple shapes, press Ctrl while you select the shapes that you want to delete, and then press Delete.
Need more help?
Want more options?
Explore subscription benefits, browse training courses, learn how to secure your device, and more.
Communities help you ask and answer questions, give feedback, and hear from experts with rich knowledge.
Доброго времени суток всем читателям и подписчикам блога scriptcoding.ru. В этой статье мы рассмотрим работу с коллекцией Shapes, которая позволяет добавлять различные графические объекты в Word документ.
По сути, используя методы данной коллекции, мы можем делать вставку таких графических объектов в Word как авто-фигуры, выноски, рисунки, диаграммы, полотна и многое другое. Также стоит уточнить, что по ходу статьи, под словом «фигура» будут подразумеваться все графические Word объекты (полотно, WordArt, SmartArtи так далее). Я не привожу примеров программного кода, самим программированием мы займемся, когда будет изучать по отдельности работу с каждым графическим объектом Word, которые создаются с помощью коллекции Shapes.
Содержание
- Коллекция Shapes – графические объекты в Word
- Shapes – свойства, работа с графическими объектами Word
- Shapes — методы, создание графических объектов в Word
Коллекция Shapes – графические объекты в Word
Shapes – свойства, работа с графическими объектами Word
Count— Возвращает количество фигур в коллекции.
Shapes — методы, создание графических объектов в Word

Основной функционал коллекции заключается в ее методах, большинство из которых будут возвращать класс Shape, а тот в свою очередь, будет предоставлять нужные свойства для конкретной фигуры. Например, мы добавили новое полотно в документ, для обработки данного полотна используется свойство CanvasItems, которое хранит ссылку на CanvasShapes. При добавлении новой линии в документ, нам нужно обратиться к свойству Line, которое хранит ссылку на класс LineFormat, который отвечает за обработку линий. И так далее, это логично, так как у каждого графического объекта в Word, например, выноски и WordArt есть различные возможности.
AddCanvas(Left, Top, Width, Height, Anchor) — Добавляет новое полотно в документ.
Anchor – Содержит ссылку на класс Range, который представляет текст, к которому нужно привязать полотно.
AddSmartArt(Layout, Left, Top, Width, Height, Anchor) – Вставка таких графических объектов Word в активный документ, как рисунок SmartArt. Начиная с версии Word 2010.
Layout – Ссылка на класс SmartArtLayout.
AddCallout(Type, Left, Top, Width, Height) – Добавляет текстовую выноску с линиями.
Type – Данный параметр определяет тип линии. Значения константы MsoCalloutType:
- msoCalloutOne — 1 – Горизонтальная линия слева.
- msoCalloutTwo — 2 – Горизонтальна линия с наклоном лева.
- msoCalloutThree — 3 – Линия состоит из двух отрезков слева (один отрезок с наклоном, а другой горизонтальный).
- msoCalloutFour — 4 — Линия состоит из трех отрезков справа (один отрезок с наклоном, другой горизонтальный и третий вертикальный).
AddLine(BeginX, BeginY, EndX, EndY) – Рисует линию с указанными начальными и конечными координатами.
AddConnector(Type, Left, Top, Width, Height) – Рисует соединительную линию.
Type – Тип линии, значение константы MsoConnectorType:
- msoConnectorStraight — 1 — Прямая линия.
- msoConnectorElbow — 2 – Прямое колено.
- msoConnectorCurve — 3 – Изогнутое колено.
- msoConnectorTypeMixed — -2 – Смешанные значения.
AddShape(Type, Left, Top, Width, Height) – Вставка графических объектов в Word, которые представляют указанную автофигуру.
Type – Определяет тип фигуры, значение константы MsoAutoShapeType.
AddPicture(FileName, LinkToFile, SaveWithDocument, Left, Top, Width, Height) — Добавляет изображения. Возвращает класс Shape, представляющий картинку и добавляет ее в коллекцию CanvasShapes. Обязательный только первый параметр.
FileName – Путь к файлу и его имя.
LinkToFile – True – привязать изображение к файлу, из которого он был создан. False – сделать изображение независимым от файла, по умолчанию.
SaveWithDocument – True — сохранить связанный рисунок с документом. Значение по умолчанию False. Если использовать значение False, то может возникнуть ошибка. Работа с графическими Word объектами.

AddLabel(Orientation, Left, Top, Width, Height) — Добавляет текстовую область.
Orientation – Задает ориентацию текста. Значение константы MsoTextOrientation:
- msoTextOrientationHorizontal — 1 — Горизонтальная.
- msoTextOrientationUpward — 2 – Направление вверх.
- msoTextOrientationDownward — 3 – Направление вниз.
- msoTextOrientationVerticalFarEast — 4 – Вертикальное направление для азиатских языков.
- msoTextOrientationVertical — 5 – Направление вниз.
- msoTextOrientationHorizontalRotatedFarEast — 6 — Горизонтальное направление для азиатских языков.
AddTextbox(Orientation, Left, Top, Width, Height) — Добавляет текстовое поле.
AddTextEffect(PresetTextEffect, Text, FontName, FontSize, FontBold, FontItalic, Left, Top) – Создание графического объекта WordArt в Word.
PresetTextEffect – Определяет эффект текста WordArt. Значение константы MsoPresetTextEffect.
Text — Текст в WordArt.
FontName — Название шрифта, используемого в WordArt.
FontSize — Размер шрифта в пунктах.
FontBold – Содержит логическое значение, определяющее, нужно ли сделать шрифт жирным (true) или нет (false).
FontItalic — Содержит логическое значение, определяющее, сделать шрифт курсивом (true) или нет (false).
Item(index) — Возвращает отдельный класс Shape в коллекции Shapes по его индексу.
Range(index) — Возвращает ShapeRange, представляющий графические объекты в Word внутри заданного диапазона. Данный метод позволяет выбрать несколько графических Word объектов для будущей их группировки или обработки.
Index — Указывает, какие графические объекты Word должны быть включены в указанный диапазон. Может быть целое число, указывающее порядковый номер фигуры в коллекции Shapes, строка, которая определяет имя фигуры, или массив, содержащий целые числа или строки. Например:
ActiveDocument.Shapes.Range(Array("Oval 5", "Rectangle 4")).Select
SelectAll() — Выбирает все графические объекты в Word в коллекции Shapes. Этот метод не выбирает классы InlineShape. Вы не можете использовать этот метод, чтобы выбрать более одного полотна.
AddPolyline(SafeArrayOfPoints) — Добавляет открытый или закрытый полигон. Возвращает Shape, который представляет многоугольник и добавляет его в коллекцию CanvasShapes.
SafeArrayOfPoints — Массив с парами координат, которые определяют вершины и контрольные точки кривой.
AddCurve(SafeArrayOfPoints) — Возвращает Shape, который представляет кривую Безье.
BuildFreeform(EditingType, X1, Y1) – Создание свободного графического объекта в Word, вернет класс FreeformBuilder. По сути, данный метод позволяет добавить только первый узел будущей фигуры, а уже далее нужно использовать функционал класса FreeformBuilder.
EditingType – Свойства узла. Значение константы MsoEditingType:
- msoEditingAuto — 0 – Подключение узла.
- msoEditingCorner — 1 — Угловой узел.
- msoEditingSmooth — 2 — Гладкий узел.
- msoEditingSymmetric — 3 — Симметричный узел.
X1 и Y1— Определяют положение узла в пунктах.
AddChart(Style, Type, Left, Top, Width, Height, Anchor, NewLayout) — Добавляет диаграмму в документе.
Style — Стиль диаграммы, целое значение
Type — Тип диаграммы, значение константы XlChartType.
Left – Положение диаграммы в пунктах от левого края.
Top — Положение диаграммы в пунктах от верхнего края.
Width и Height — Ширина и высота в пунктах.
Anchor – Диапазон, который будет связан с графическим объектом в Word.
NewLayout — Если значение true, то график будут вставлен с помощью новых динамические правил форматирования.
AddOLEControl(ClassType, Range) – Добавляет в документ элемент управления ActiveX (ранее известный как элемент управления OLE). Возвращает InlineShape, представляющий новый элемент управления ActiveX. Чтобы изменить свойства элемента управления ActiveX, можно использовать свойство Objectкласса OLEFormat для заданной фигуры.
ClassType — Данный параметр принимает строковое значение, которое содержит имя элемента управления ActiveX. Например:
- CheckBox — «Forms.CheckBox.1».
- ComboBox — «Forms.ComboBox.1».
- CommandButton — «Forms.CommandButton.1».
- Frame — «Forms.Frame.1».
- Image — «Forms.Image.1».
- Label — «Forms.Label.1».
- ListBox — «Forms.ListBox.1».
- MultiPage — «Forms.MultiPage.1».
- OptionButton — «Forms.OptionButton.1».
- ScrollBar — «Forms.ScrollBar.1».
- SpinButton — «Forms.SpinButton.1».
- TabStrip — «Forms.TabStrip.1».
- TextBox — «Forms.TextBox.1».
- ToggleButton — «Forms.ToggleButton.1».
Range — Диапазон, в котором нужно разместить элемент управления ActiveX. Если этот аргумент опущен, то ActiveX размещается автоматически.
Hey Insiders!
My name is Jessica and I am a Program Manager on the Office Graphics team.
When I’m working in Office, sometimes it’s hard to express work-in-progress diagrams and models without throwing up a big watermark that says “DRAFT” on your content.
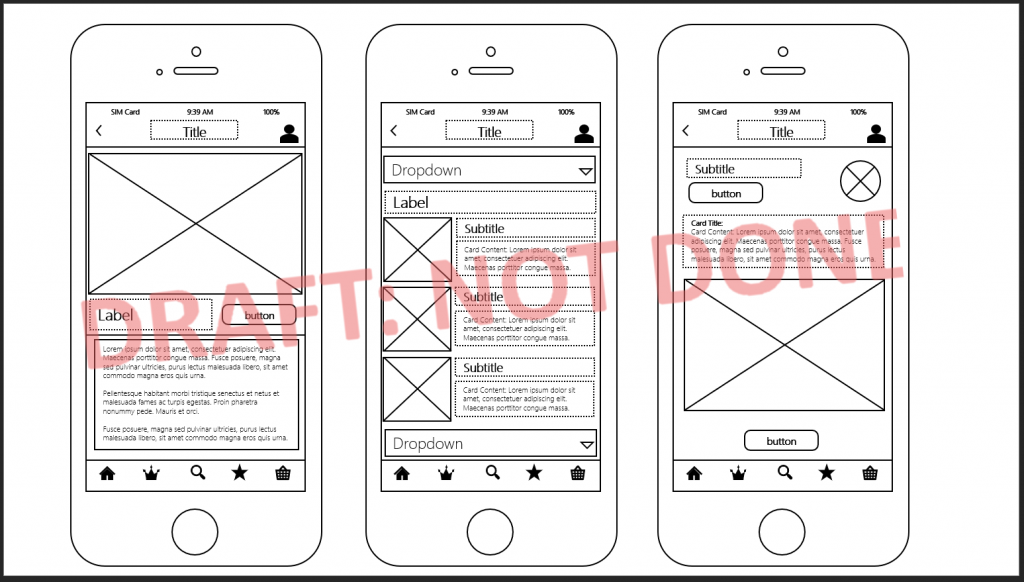
So we built in a new style that helps convey that sense of in-progress work that should be taken as a sketch of what you’re proposing.
And because it’s an Office style on top of Office shapes, it’s easy to quickly go from a draft to professional look in seconds! You can iterate with a colleague and make changes back and forth while with a sketched style. And when you’re done, you can just remove that sketched style and show it as a final design, ready to be shared.
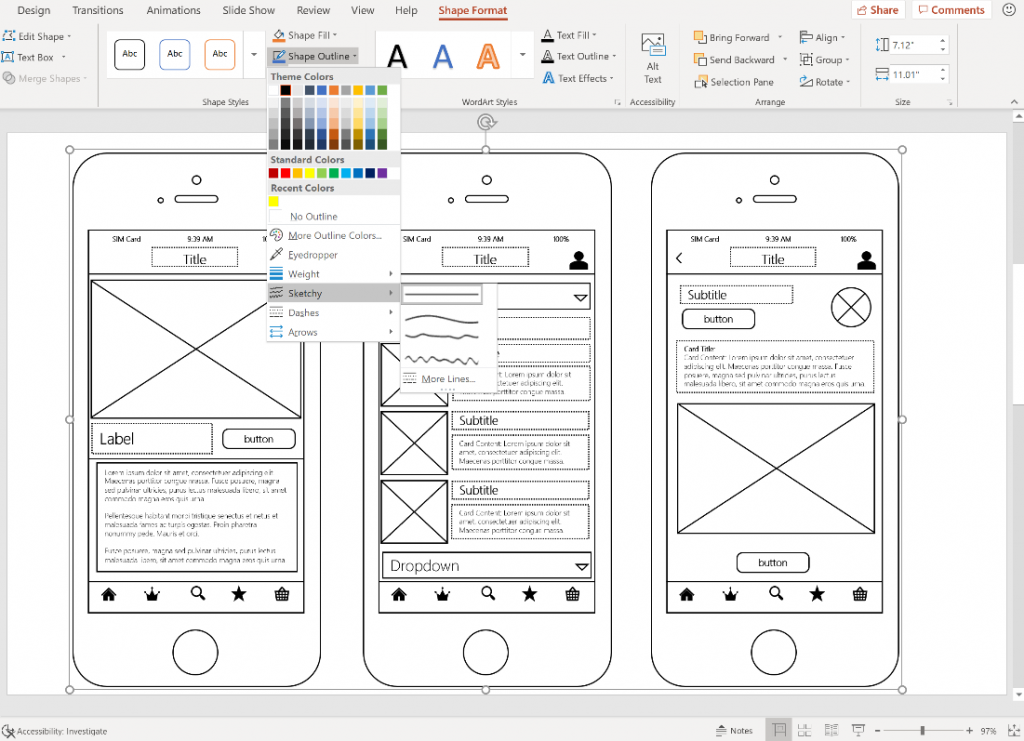
Introducing: Sketched Shapes! It’s an outline style that lets you play around with your shapes to give them a bit more personality.
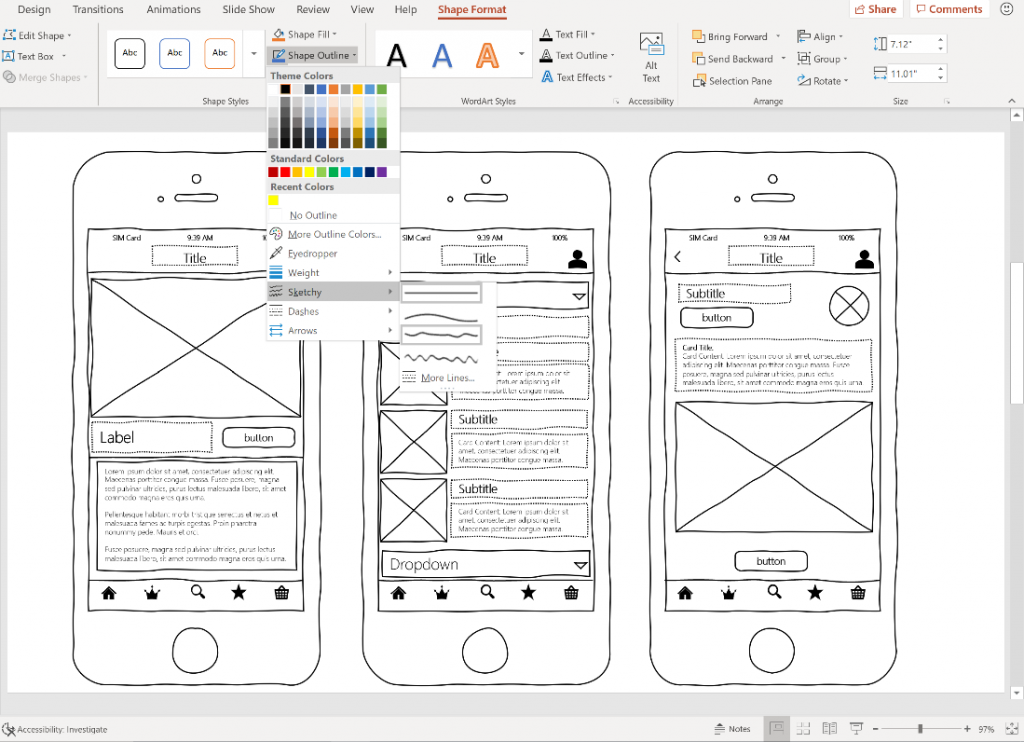
Creating a Draft: Apply a Sketched Outline
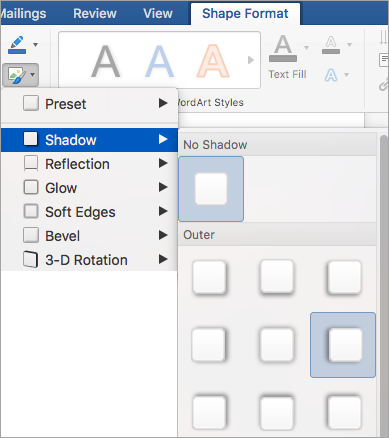
Build your slide and select the shapes you want to apply a sketched style to. Go to the Shape Format tab and then the Shape Outline dropdown. Hover over the Sketched options and select one of the sketched line styles.
Going Back to Professional: Remove the Sketched Outline
Select the shapes you want. Go to the Shape Format tab and then the Shape Outline dropdown. Hover over the Sketched options and select None.
Now you have your clean looking professional version, ready to go.
Tips and Tricks
Set a Sketched default
If you’re working on a bunch of sketches, rather than applying a sketched style to each shape as you go, you can set the sketched shape styles as your default shape.
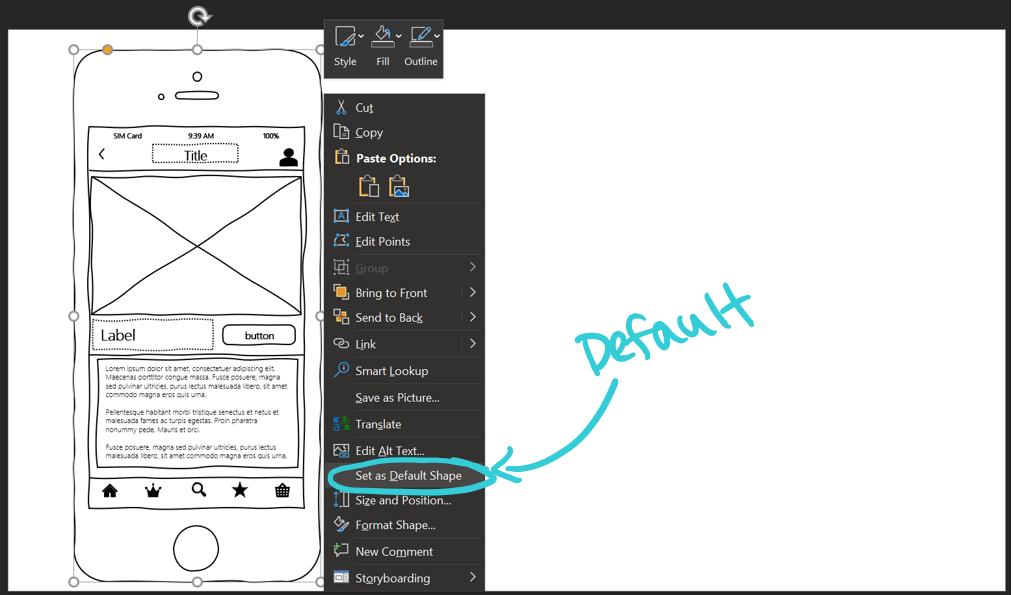
This will make it so that every new shape you create has the same sketched style applied.
Sketched Icons
Want some sketched out icons?
![]()
Insert an icon, select it, then use Office’s Convert to Shape feature to turn your icons into Office shapes. Then you can apply any sketched style you want.

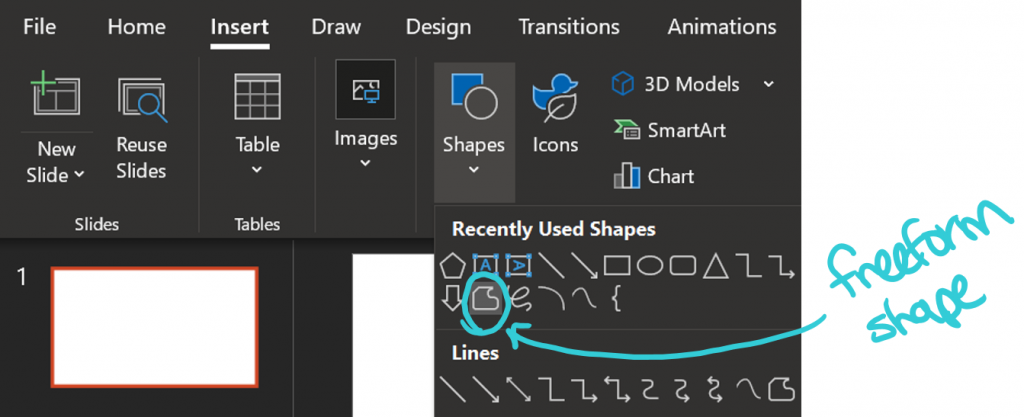
Sketched Lines
Want some scribbles?
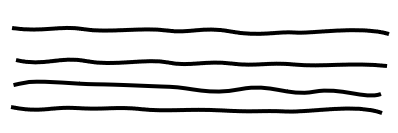
Use a free form shape to draw a line, then apply a sketched style to it.
How to Get It
Sketched shapes is available in Insiders on Windows Desktop starting with 1907 (Build 11901.20018) and on Mac Insider Fast starting with 16.28 (19070300). Sketched Shapes is available in Word, Excel, and PowerPoint, and requires an Office 365 subscription. UPDATE! Sketched Shapes is now also available to Windows running Monthly Channel (Targeted) build 1907 (11901.20080) and later!
Feedback
We are actively working on this feature in Office, and your feedback is key to guiding improvements. Let us know what you think and submit your feedback using the Send-a-Smile (🙂) and Send-a-Frown (🙁) buttons (in the top right)!
Learn what other information you should include in your feedback to ensure it’s actionable and reaches the right people. We’re excited to hear from you!
Sign up for the Office Insider newsletter and get the latest information about Insider features in your inbox once a month!
Everyday in business or in another field there are lots of information or documentation files that are required to store for future use. For anyone, it is very difficult to store that information for a long time. Earlier letters, office files, documents, projects, and information are stored in a form of a registrar, file, or by paperwork but finding it may be difficult for us. It takes a lot of time. To resolve this issue Microsoft brings software called MS Word.
Microsoft Word is a software tool that allows users to create documents like articles, letters, projects files very easily. It has various features like editing and formatting, graphics, designs, fonts styles, printing documents, etc.

Features of MS Word
- Various Page Designs, page numbers, border
- Tables
- 3D models, charts, and icons
- WordArt
- Page Layout formats
- Inserting Online pictures and video
- Text color and many more.
- Date and Time
- Page Designs
- Different text fonts
What are Shapes in MS Word?
Microsoft Word has a special feature called shapes in which users can insert many different types of shapes in the document. A shape highlights the important item of the document. It attracts the attention of the readers for a better understanding of the content of the document.
MS Word contains many different types of shapes such as boxes, rectangles, callouts, circles, arrows, lines, triangles, curves, equations shapes, and many more. Once the shape is added, you can modify it by changing features like color, style format, size, outline, etc.
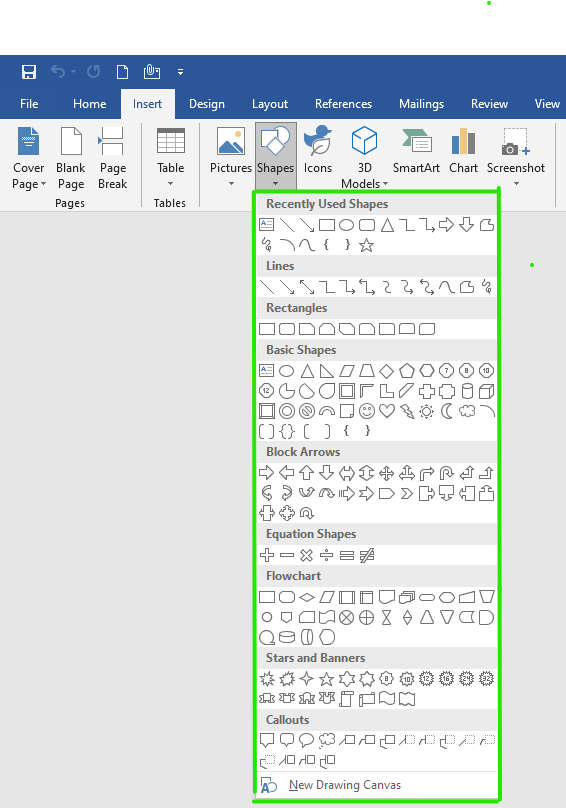
So you should use different types of shapes in your document. The figure below shows the different types of shapes that are available in MS Word.
Some examples of shapes are:


Steps to Add Shapes in MS Word
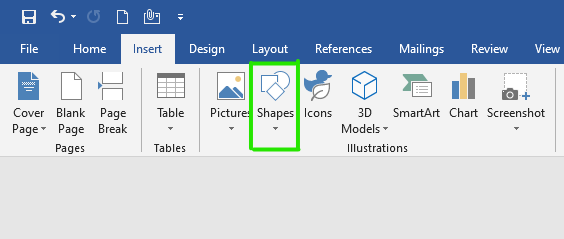
Step 1: On the navigation menu click on the insert option.

Step 2: In the illustration section select the shapes option as shown in the figure:
Step 3: A list of shapes will pop up on the screen where you can select different types of shapes.
There are total of 8 sections in shapes:
- Lines
- Rectangles
- Basic Shapes
- Block Arrows
- Equation Shapes
- Flowcharts
- Stars and Banners
- Callouts
Step 4: Now select a shape as per your need.

Step 5: Next drag the cursor on your current page to draw the shape.
Step 6: Finally shape is added on the current page of the document as shown in the figure:

Step 7: Now click on the drag button to set the size of the shape as shown in the figure:

Step 8: On the navigation menu click on the format option to give color, layout, style to the shape.

Step 9: Under the shape style section click on the drop-down arrow to open the style panel.

Step 10: A theme style color panel will open where you can select different types of color styles for the shape as shown in the figure:
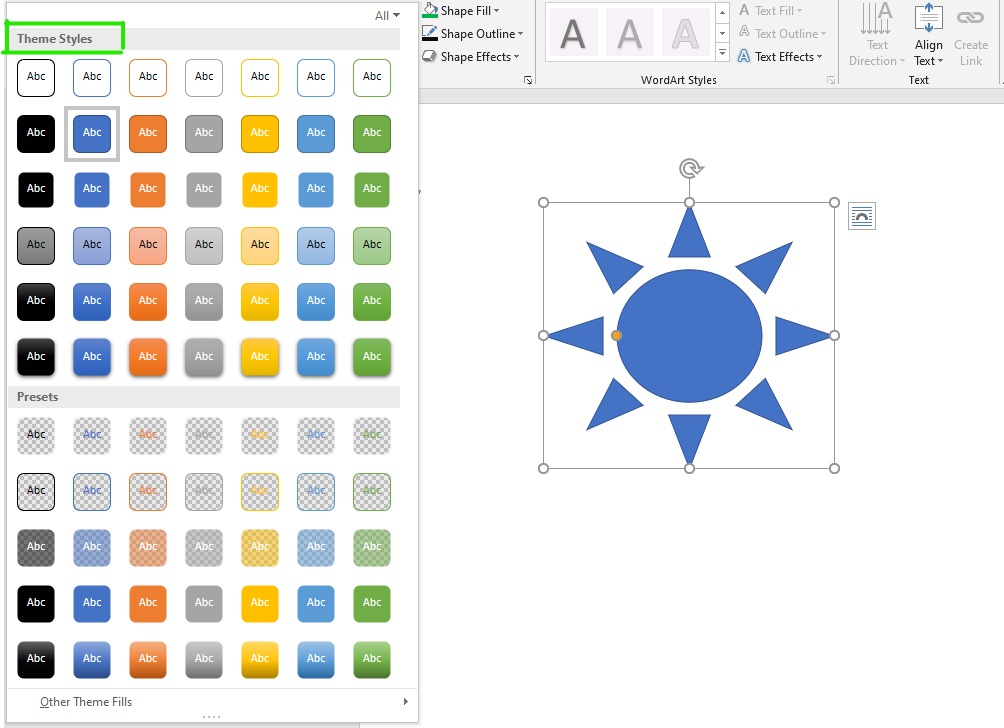
Step 11: Select the color of your choice.

Step 12: You can also choose a different color pattern from other theme fills options as shown in the figure:

Step 13: You can also select a different color from the shape fill option.

Step 14: Next click on the shape outline option to give an outline to the shape.

Step 15: Select the color from the theme colors panel as shown in the figure:

Step 16: Next click on the shape effects option.

Step 17: Now select the option from the menu as per your requirement.

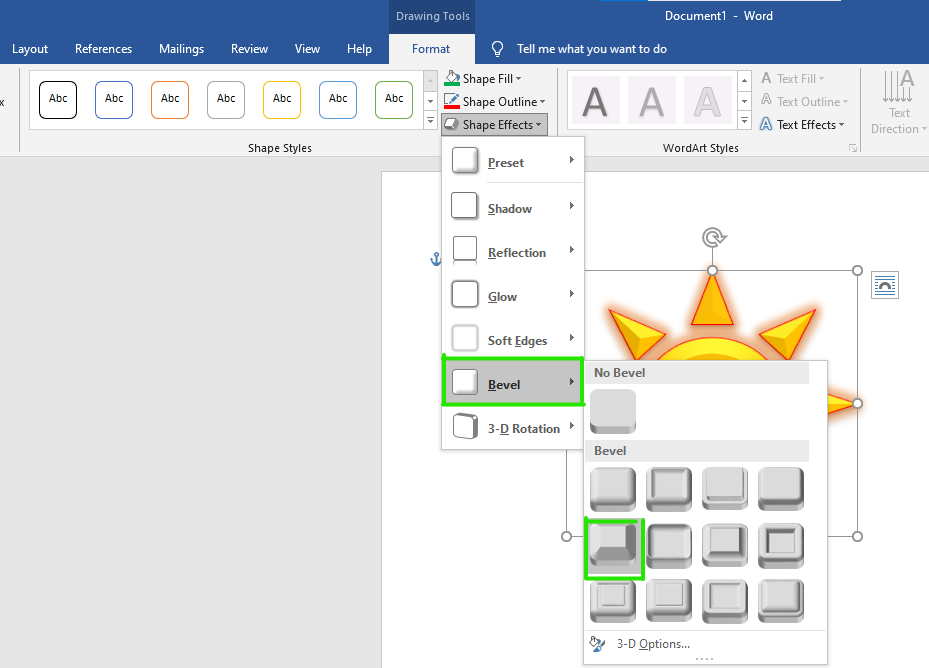
Finally, the shape is inserted in your document.
These are some of the steps to insert a shape in an MS Word document.