

Try it!
Change margins in your document to change the layout and make sure everything fits.
Apply a predefined margin setting
-
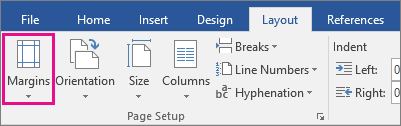
Select Layout > Margins.

-
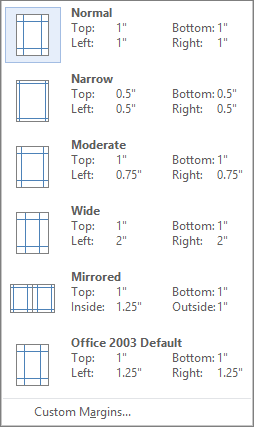
Select the margin measurements you want.
Note: If your document contains multiple sections, the new margins apply only to the selected sections.
Create a custom margin
-
Select Layout > Margins.
-
Select Custom Margins.
-
In Margins, use the Up and Down arrows to enter the values you want.
-
Select OK when done.
Change default margins
-
Select Layout > Margins > Custom Margins.
-
Set your margins.
-
Select Set As Default.
-
Confirm your selection.
Want more?
Set page margins in Word
Discover more Word training at LinkedIn Learning
Need more help?
Want more options?
Explore subscription benefits, browse training courses, learn how to secure your device, and more.
Communities help you ask and answer questions, give feedback, and hear from experts with rich knowledge.
Change margins
In Word, each page automatically has a one-inch margin. You can customize or choose predefined margin settings, set margins for facing pages, allow extra margin space to allow for document binding, and change how margins are measured.
-
Select Layout > Margins.
-
Select the margin configuration you want, or select Custom Margins to define your own margins.
Important:
Office 2010 is no longer supported. Upgrade to Microsoft 365 to work anywhere from any device and continue to receive support.
Upgrade now
What would you like to do?
-
On the Page Layout tab, in the Page Setup group, choose Margins and the Margins gallery appears.
-
Choose the margin type that you want to apply.
Note: If your document contains multiple sections, the new margin type will only be applied to the current section. To apply the new margin type to multiple sections, be sure to select each one.
3. Make your new margin settings the default for your template. Each new document based on that template will automatically use the new margin settings.
-
Choose Margins after you select a new margin, and then choose Custom Margins.
-
In the Page Setup dialog box, choose Set As Default.
-
On the Page Layout tab, in the Page Setup group, choose Margins and the Margins gallery appears.
-
At the bottom of the Margins gallery, choose Custom Margins.
-
In the Page Setup dialog box, enter new values for the margins.
More tips about margins
-
Change the margins for only a section of a document by selecting the text and entering the new margins in the Page Setup dialog box. In the Apply to box, click Selected text. Microsoft Word automatically inserts section breaks before and after the text with new margin settings.
-
Most printers require a minimum width for margin settings. If your settings are too narrow, Microsoft Word displays the message One or more margins are set outside the printable area of the page. Click Fix to automatically increase the margin width. If you ignore the message, Word will display another message asking whether you want to continue.
-
Minimum margin settings for printing depend on your printer, printer driver, and paper size. To learn about your minimum settings, check your printer manual.
Use mirror margins to set up facing pages for double-sided documents, such as books or magazines. When you choose mirror margins, the margins of the left page are a mirror image of those on the right page. The inside margins are the same width, and the outside margins are the same width.
-
On the Page Layout tab, in the Page Setup group, click Margins >Mirrored.
Note: To change margin widths, click Custom Margins at the bottom of the Margins gallery. Enter new values in the Inside and Outside boxes.
A gutter margin adds extra space to the side margin, top margin, or inside margins of a document that you plan to bind to help ensure that text isn’t obscured by binding.
1. Gutter margins for binding
2. Mirror margins for facing pages
To set the gutter margin
-
On the Page Layout tab, in the Page Setup group, click Margins.
-
Click Custom Margins.
-
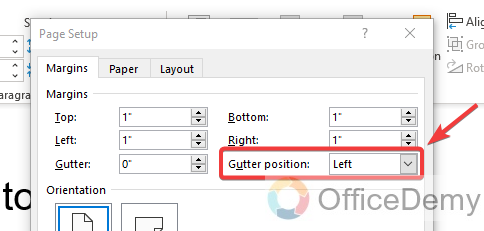
In the Gutter box, enter a width for the gutter margin.
-
In the Gutter position box, click Left or Top.
Note: The Gutter position box is not available when you use the Mirror margins, 2 pages per sheet, or Book fold option. For those options, the gutter position is determined automatically.
Word can display lines in your document to represent text boundaries.
-
On the File tab, click Options.
-
Click Advanced, and then select the Show text boundaries check box under Show document content.
The page margins appear in your document as dotted lines.
Note: You can view page margins in either Print Layout view or Web Layout view, and the text boundaries don’t appear on the printed page.
Important:
Office 2007 is no longer supported. Upgrade to Microsoft 365 to work anywhere from any device and continue to receive support.
Upgrade now
What would you like to do?
Microsoft Word offers several page margin options. You can use the default page margins or specify your own.
-
Add margins for binding
A gutter margin adds extra space to the side margin, top margin, or inside margins of a document that you plan to bind to help ensure that text isn’t obscured by binding.
1. Gutter margins for binding
2. Mirror margins for facing pages
-
Set margins for facing pages
Use mirror margins to set up facing pages for double-sided documents, such as books or magazines. In this case, the margins of the left page are a mirror image of those of the right page. The inside margins are the same width, and the outside margins are the same width. -
Note: You can set gutter margins for a document that has mirror margins if the document needs extra space for binding.
-
Add a book fold
Using the Book fold option in the Page Setup dialog box, you can create a booklet. Use the same option to create a menu, invitation, event program, or any other type of document with a single center fold.

1. Word inserts a single, center book fold
After you set up a document as a booklet, work with it just as you would any document to insert text, graphics, and other visual elements.
-
Most printers require a minimum width for margin settings. If you try to set margins that are too narrow, Microsoft Word displays the message One or more margins are set outside the printable area of the page. Click Fix to automatically increase the margin width. If you ignore the message, Word will display another message asking whether you want to continue.
-
Minimum margin settings depend on your printer, printer driver, and paper size. To learn about your minimum margin settings, check the printer manual.
-
On the Page Layout tab, in the Page Setup group, click Margins.
-
Click the margin type that you want. For the most common margin width, click Normal.
Note: When you click the margin type that you want, your entire document automatically changes to the margin type that you have selected.
-
You can specify your own custom margin settings. Click Margins, click Custom Margins, and then in the Top, Bottom, Left, and Right boxes, enter new values for the margins.

-
To change the default margins, click Margins after you select a new margin, and then click Custom Margins. In the Page Setup dialog box, click the Default button, and then click Yes. The new default settings are saved in the template on which the document is based. Each new document based on that template automatically uses the new margin settings.
-
To restore the original margin settings, click Margins and then click Custom Margins. Change the margins for Top, Bottom, Left, and Right to 1″. Then click the Default button and click Yes.
-
To change the margins for part of a document, select the text, and then set the margins that you want by entering the new margins in the Page Setup dialog box. In the Apply to box, click Selected text. Microsoft Word automatically inserts section breaks before and after the text that has the new margin settings. If your document is already divided into sections, you can click in a section or select multiple sections and then change the margins.
-
Click the Microsoft Office Button
, and then click Word Options. -
Click Advanced, and then click the Show text boundaries check box under Show document content.
The page margins appear in your document as dotted lines.
 , and then click Word Options.
Note: You can view page margins in either Print Layout view or Web Layout view, and the text boundaries do not appear on the printed page.
When you choose mirror margins, the margins of the left page are a mirror image of those on the right page. The inside margins are the same width, and the outside margins are the same width.
-
On the Page Layout tab, in the Page Setup group, click Margins >Mirrored.
-
Click Margins > Custom Margins, and in the Inside and Outside boxes, enter the widths that you want.
A gutter margin setting adds extra space to the side margin or top margin of a document that you plan to bind. A gutter margin helps ensure that text isn’t obscured by the binding.
-
On the Page Layout tab, in the Page Setup group, click Margins >Custom Margins.
-
In the Multiple pages list, click Normal.
-
In the Gutter box, enter a width for the gutter margin.
-
In the Gutter position box, click Left or Top.
Note: The Gutter position box is not available when you use the Mirror margins, 2 pages per sheet, or Book fold option. For those options, the gutter position is determined automatically.
-
Click on the text box you created to highlight it.
-
Click on the Format tab in the ribbon.
-
Click the small button in the lower left of the Size group.
-
In the Format Text Box window, click the Text Box tab.
-
In the Internal margin section, you can customize the margins to your desired size.
-
Click OK.
If this article did not answer your question, you can chat with a Microsoft virtual agent or a person at any time.
Need more help?
Want more options?
Explore subscription benefits, browse training courses, learn how to secure your device, and more.
Communities help you ask and answer questions, give feedback, and hear from experts with rich knowledge.
Find solutions to common problems or get help from a support agent.
![]()
Download Article
A user-friendly guide to changing a Word document’s margins to wide, narrow, and more
![]()
Download Article
- Applying Preset Margins (Desktop)
- Creating Custom Margins (Desktop)
- Using the Mobile App
- Q&A
- Warnings
|
|
|
|
Are you trying to adjust your margins in Microsoft Word? The margins are the empty space between the edge of the page and the contents of the document. Depending on your needs, you can change the margins to become wider, narrower, or a mix of both. You’ll be able to select from a few preset options or customize your own. This wikiHow will show you how to fix and change the default 1-inch margins in Microsoft Word using your iPhone, Android, or Windows or Mac computer.
Things You Should Know
- On desktop, click «Layout» → «Margins» → select a margin preset.
- For custom margins, click «Custom Margins…» and enter the values for Top, Left, Bottom, and Right.
- On mobile, tap «•••» → «Home» → «Layout» → «Margins» → select a preset or «Custom Margins». Enter a new value and tap «Done».
-
1
-
2
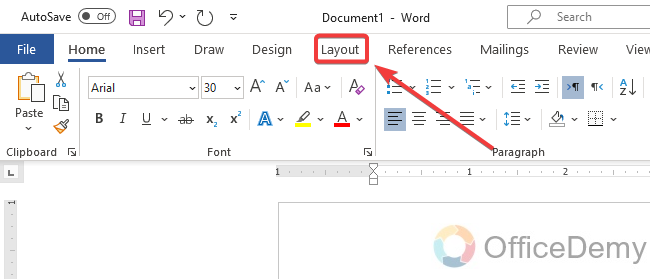
Click Layout. This will be in the top toolbar, between Design and References.
Advertisement
-
3
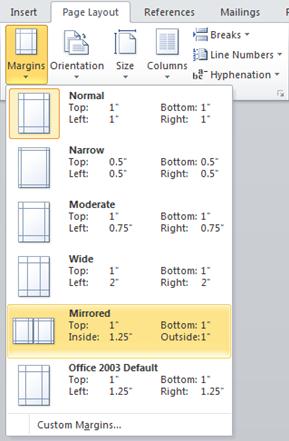
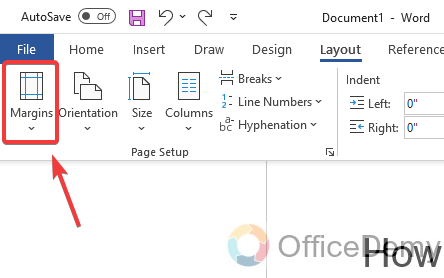
Click Margins. You can find this in the upper-left corner of the Layout tab. This looks like a rectangle with blue lining the margins.
- A pop-up menu will open.
-
4
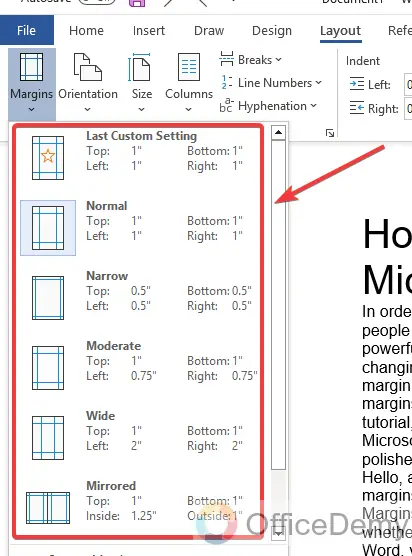
Select a margin type. You’ll see a list of preset margins: Normal, Narrow, Moderate, Wide, Mirrored, and Office 2003 Default. Click a preset margin to apply it to your document. It should be applied immediately.
- If you don’t like how it looks, you can select Normal again, or press CTRL + Z (Windows) or CMD + Z (Mac) to undo the change.
Advertisement
-
1
Click Layout. This will be in the top toolbar, between Design and References.
-
2
Click Margins. You can find this in the upper-left corner of the Layout tab. This looks like a rectangle with blue lining the margins.
- A menu will open.
-
3
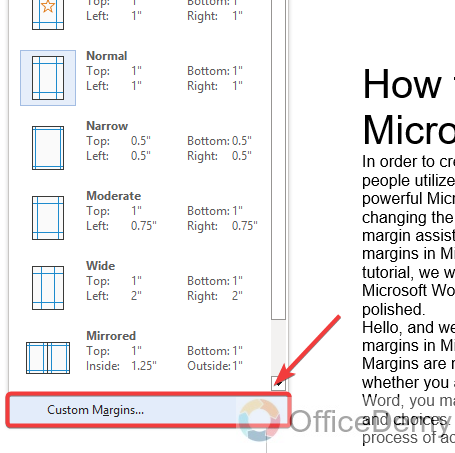
Click Custom Margins…. This will be at the bottom of the drop-down menu.
- A new window will open.
-
4
Set your new margins. On the desktop application, you’ll be able to edit the margin sizes for: Top, Left, Bottom, Right, Gutter, and Gutter Positions. On the web version, you’ll only be able to edit the margin sizes for: Top, Left, Bottom, and Right. You’ll see a preview of the document layout at the bottom of the window.
- Click the field and enter your new margin size, or use the up/down arrow to adjust the current margins.
- For Gutter Positions, select Left or Top.
- Only adjust the Gutter margin if you intend to use the document in a bound format, like a book or report, and you need space for the binding. In this case, type a number in Gutter that will allow enough room for the binding and use the drop-down to indicate whether the binding will be on the top or on the left.
- Make sure Apply to is set to Whole document, unless you only want to change the margins from This point forward.
-
5
Set new default margins (optional). If you want to use this margin for all new documents in Microsoft Word, click Set as default in the bottom-left corner. Click Yes to confirm.
- When you create a new document, the margins will reflect the change.
-
6
Click OK when finished. The changes will be applied immediately.
Advertisement
-
1
Open the Microsoft Word app. Microsoft Word is available for iOS in the App Store and for Android in the Google Play Store.
- If you aren’t already logged in to your Microsoft account, enter your email address and password to do so now.
-
2
Open a new or existing project. Tap a recent project on your homepage, or tap the + tab to create a new one.
-
3
Tap ••• . This is the «•••» located at the top of your on-screen keyboard. If you don’t see your keyboard, tap the document to open it.
- A new menu will open at the bottom.
-
4
Tap Home. This is located at the top of the new menu.
- A pop-up menu will open.
-
5
Tap Layout. You can find this between Draw and Review.
-
6
Tap Margins. This is the first listing in the Layout tab.
-
7
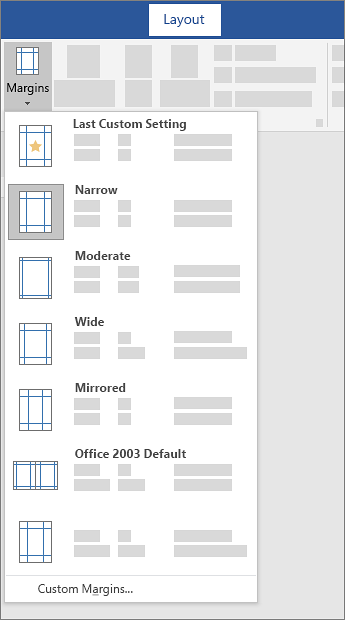
Select a margin type. You’ll see a list of preset margins: Normal, Narrow, Moderate, Wide, and Mirrored. Tap a preset margin to apply it to your document. It should be applied immediately.
- If you don’t like how it looks, you can select Normal again, or pick a new preset.
- Be sure to save your document when you’re finished.
-
8
Create a custom margin (optional). Tap Custom Margins at the bottom of the Margins menu. You’ll be able to edit the margin sizes for: Top, Left, Bottom, and Right.
- Tap a margin to edit it.
- Tap the backspace button to erase the existing margin.
- Enter a new margin value.
- Tap Done in the top-right corner.
- Tap Margins → Custom Margins to edit another margin.
- The changes will be applied immediately.
Advertisement
Add New Question
-
Question
I want the page ruler. What can I do?

To get the ruler, go into the View tab (Word 2010 and newer) and select the Ruler checkbox.
-
Question
Can I ever allow one more letter on a line to finish a long word rather than wrap to the next line?
No. The only thing you could possibly do would be to make all the margins wider. Making only one word go to the next line is impossible unless you do the same for all words.
Ask a Question
200 characters left
Include your email address to get a message when this question is answered.
Submit
Advertisement
Thanks for submitting a tip for review!
-
Leaving the margin under .25″ may lead to text being cut off when printed.
Advertisement
About This Article
Article SummaryX
1. Open a Microsoft Word document.
2. Click the Layout tab.
3. Click Margins.
4. Click Custom Margins….
5. Set the margins.
6. Click the Apply to drop-down.
7. Select how to apply the margins.
8. Click OK.
Did this summary help you?
Thanks to all authors for creating a page that has been read 493,209 times.
Is this article up to date?
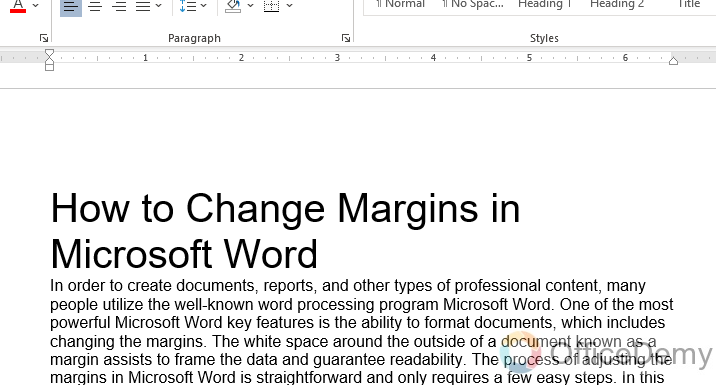
To create documents, reports, and other types of professional content, many people utilize the well-known word-processing program Microsoft Word. One of the most powerful Microsoft Word key features is the ability to format documents, which includes changing the margins. The white space around the outside of a document known as a margin assists to frame the data and guarantee readability. The process of adjusting the margins in Microsoft Word is straightforward and only requires a few easy steps. In this tutorial, we will show you how to adjust the margins in
Microsoft Word so you can easily format your documents and generate text that looks polished.
Hello, and welcome back to the ongoing tutorial series of Microsoft word. how to change margins in Microsoft word will be covered in today’s lesson.
Margins are necessary to keep your information well-organized and simple to read, whether you are writing an academic paper or a professional report. With Microsoft Word, you may easily adjust the document’s boundaries to suit your requirements and choices. To help you format your documents like a pro, we will walk you through the process of adjusting margins in Microsoft Word in this tutorial.
Importance of changing Margins in Microsoft Word
Anyone who wants to create documents with a professional appearance must learn how to adjust the margins in Microsoft Word. Margins are essential to document formatting because they frame your information and make it simple to read. You may make your document look better by adding additional white space around your content by altering the margins.
You might need to understand how to change the margins in Microsoft Word for several reasons. For instance, you might be required to draught a report or other professional document that needs to adhere to a set of margin requirements. Alternatively, you may have to reduce the amount of white space in your document or maximize margins to fit more text into the same page.
Also, saving time and effort while designing your papers is possible if you have a firm grasp of how to modify margins in Microsoft Word. With just a few clicks, you can easily apply your preferred settings to all future documents rather than manually altering margins for each one. In conclusion, knowing how to adjust margins in Microsoft Word is a valuable ability that may assist you in producing polished, expert-looking papers that are simple to read and aesthetically pleasing.
How to Change Margins in Microsoft Word
Below given easy steps will make it simple for you to change your document margins to suit your unique or different requirements and preferences, whether you need to do it for a study purpose, a business report, or any other type of document. Using the Page Layout tab in Microsoft Word is the simplest and most direct approach to changing margins. You have the choice of creating custom margins or choosing from a list of standard margins. Here are the easy steps
Step 1
The first step is to open your new MS word document or open an existing MS word document you want to change the margins for
Step 2
Once it is open, Click on the Layout tab in the mid of the MS word main menu
Step 3
Click on the margins button in the page setup group, under the layout tab
Step 4
From the drop-down option, select one of the preset margin sizes
Step 5
You can also select Custom Margins if you have different requirements in the last of the margins drop-down options
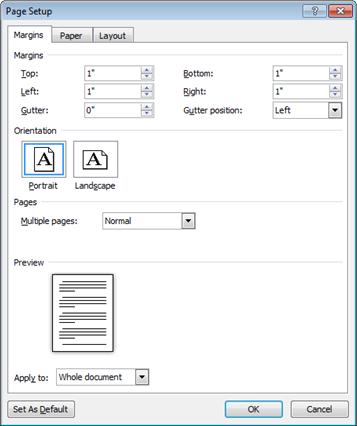
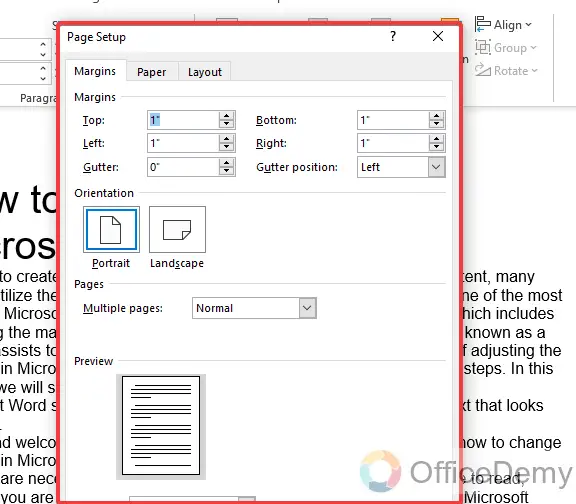
Step 6
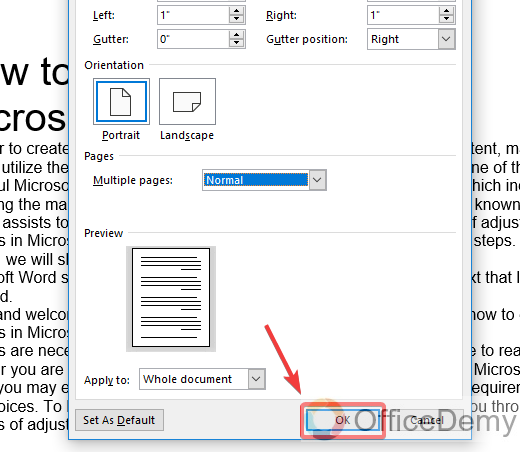
The Page Setting dialogue box will show up if you select Custom Margins. You can enter precise measurements here.
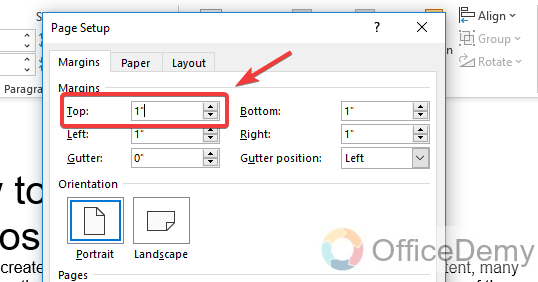
Step 7
To adjust page top margins, enter the number in the Top field (your entered number will be counted in inches)
Step 8
To adjust page left margins, enter the number in the Left field (your entered number will be counted in inches)

Step 9
Set the gutter, which is the area between a document’s main text and binding, from the Gutter field (your entered number will be counted in inches)

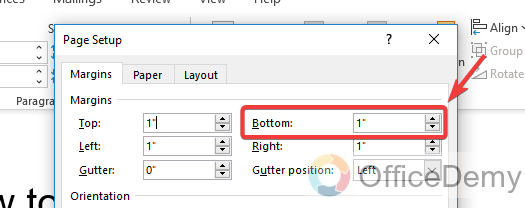
Step 10
To adjust the page’s bottom margins, enter the number in the Bottom field (your entered number will be counted in inches)
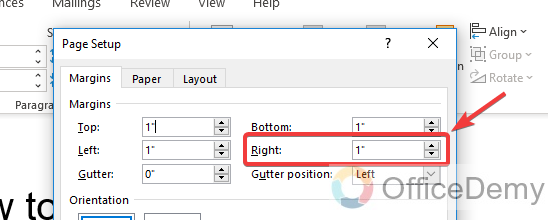
Step 11
To adjust page right margins, enter the number in the Right field (your entered number will be counted in inches)
Step 12
Set the gutter position, from the Gutter position field which can be ‘left’, ‘top’, or ‘right’
Step 13
You can also change the page orientation from the Orientation section under the page setup dialogue box

Step 14
After choosing your desired margins, click OK to save your document’s changes
Tip
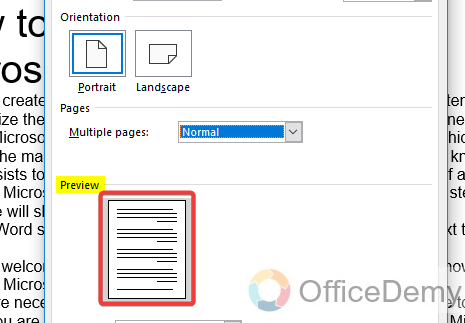
Here is one good thing in the MS word page setup dialogue box you can see your margin changes or page modifications in live preview which can minimize your efforts.
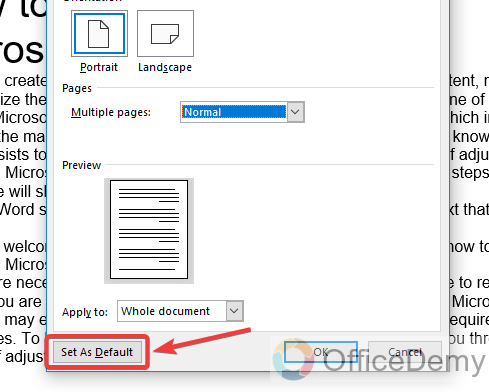
Here is one more effort-reducing thing is, if you choose the wrong margins accidentally or by mistake you can immediately set your margins to default by clicking on the Set As Default button.
A4 Paper Page Margins in Word
Below is a size chart for A4 page margins which is widely used it will going to very useful for you.
| A4 Paper Page Margins | ||
| Paper size | (8.27×11.69) in | (21×29.7) cm |
| Top margin (1st page) | 1.0in | 2.54cm |
| Top margin (rest) | 0.75in | 1.9cm |
| Left margin | 0.75in | 1.9cm |
| Right margin | 0.52in | 1.32cm |
| Bottom margin | 1.44in | 3.67cm |
| Text width | 7.0in | 17.78cm |
| Text height | 9.5in | 24.13cm |
| Column width | 3.4in | 8.63cm |
| Column separation | 0.2in | 0.5cm |
Frequently Asked Questions
What margin width does one inch mean?
This indicates that there is a one-inch gap between the text and the paper’s edge. As most computers are set to 1.25″ or 1.50″ as the default, you should probably set one-inch margins as your computer’s default.
What is a default margin size?
The top, bottom, and both sides of the page all have 1-inch margins, according to the MLA and APA style manuals. Most of the time, Microsoft Word’s margins are automatically set to 1 inch when you launch it.
In Microsoft Word, can I adjust the margins for only one page?
Yes, you can use section breaks in Microsoft Word to adjust the margins for only one page. First, add a section break at the top of the page for which you wish to change the margins. Then, pick the desired margin size as we learned in the above guide.
Why do I need to change the margins in Microsoft Word?
Changing margins can be beneficial in several different situations, such as when users will need to fit more information around on a page or if you want to change a document’s structure to give it an additional polished and professional appearance.
Conclusion
The information in the above guide is meant to be beneficial to you. As a result, we learned today how simple it is to change margins in Microsoft Word. Anyone who wants to create documents with a professional appearance must learn how to change margins in Microsoft Word. This straightforward, clear, and practical guideline has shown you how to change margins in Microsoft Word. I sincerely hope you enjoyed reading this guide and withdrew some useful information. Keep learning with Office Demy. Thank you.
Trying to create an attractive and engaging document in Microsoft Word? Need to arrange content so that it fits perfectly on a page? You should be thinking of how to change the margins in Word.


By making this quick change, you can transform the appearance of any Word project. It only takes a few clicks. In this tutorial, we’ll teach you how to change margins in Word so that you’ve got complete control over your document.
Why Adjust Margins in Word?
Margins in Word are a powerful way to control the layout of your document. In essence, they control how far text and numbers sit from the edge of each page.
Microsoft Word margins default to one inch on all four sides of a page. This means that characters start (and end) one inch from the side of each page. In many instances, this is the perfect measurement. After all, it’s the one you’ll most commonly see on documents of all types.


It’s amazingly easy to learn how to change the margins in Word. And there are great reasons to do exactly that! Changing margins gives you precise control over the layout of each page in your document. Depending on the nature of your project, you may want to change margins in Word to alter how content fits onto a page.
Think with the end in mind as you set your margins in Word. Imagine, for example, that you’re designing an event poster. The goal here is to share as much as possible on a single sheet. Narrow margins are a perfect choice here. This way, you can pack more material onto your poster.


Or consider a scenario like this one:
You’re designing a certificate that you plan to print out and frame. The frame will cover the edges of the printed page. Choose narrow margins, and chances are, you’ll cover up some of your text! In this case, wide margins are your friend. They move characters toward the center of a page, leaving ample open space around the borders.
Microsoft Word margins are easy to adjust, and they’re a design tool that you should never forget. Often, it’s useful to try out different settings before completing your document. In just a few clicks, you can change up the look and feel of any page. Margins are the perfect way to creatively control the readability of your projects.
How to Use Margin Settings in Microsoft Word
Margins are a measurement setting that you can easily adjust. In Word, you’ve got many ways to adjust your page margins. The first step is to think back to our examples above. Here are some questions to consider:
- What type of document are you creating?
- What margin settings will look and work best for you?
- What paper will this document eventually print on?
From here, you’ll need to decide how much control you need. And you can decide what settings fit the circumstance. Microsoft Word offers several preset margin settings that you can apply instantly. These work in many instances, and save you the work of adjusting margins manually.
Microsoft Word documents are best created using premium templates. When you browse the vast Envato Elements library, you’ll find thousands to choose from. With the powerful Elements unlimited-download offer, you can use as many as you want! Each one can then be transformed by changing the margins in Word.


Let’s learn how to change margins in Microsoft Word. To follow along, download the beautiful Letterhead Word Template from Envato Elements. It’s a great template that illustrates the power of margin management. We’ll use it in the tutorial below.
The tips in this tutorial were written using macOS and Office 365. If you’ve got a different operating system or a different version of Microsoft Word, your steps may be slightly different.
Review Your Word Margin Settings
To explore how to change margins in Microsoft Word, let’s first consider these margin options. Remember, margins in Word default to one inch under default app settings. You’ll see this referred to as the Normal setting. When you build a new Word document, this is the setting that you see.


To change the margins in Word, start by going to the Layout tab. You’ll find this on the ribbon, the series of menu tabs across the top of the screen (beginning with Home and Insert). With Layout selected, you’ll see several drop-down menus. The one you need is on the far left side, and it’s labeled Margins.
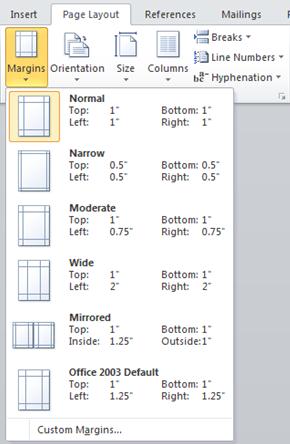
Click the Margins dropdown arrow, and you’ll see the preset margin size options displayed. As mentioned, Normal is the default selection. Below, you can choose from others, like Narrow, Moderate, and Wide. With each, the precise measurements are listed, along with a preview image.


Click on any setting to apply it. As you do, Word automatically adjusts any content that you’ve added to the page. Test it out to spark your thinking about how margins in Word work. You might have an idea about how to fit a document that didn’t fit in the past.
How to Apply Custom Margins
In many cases, preset Microsoft Word margins give you the control you need over your page layout. But there may be times where you need more detailed control. In those cases, Microsoft Word has you covered.
This is where Custom Margins come into play. This is a robust feature in Word that lets you adjust margins to an exact measurement that you specify. No margin is out of reach, and that helps you address totally custom documents.
To customize margins, return to the Margins drop-down on the Layout tab. Below the list of pre-built options is the Custom Margins button. Click on this, and Word launches a menu called Document.
The Document menu is the control center for page layouts in Microsoft Word. Always remember it as you think of how to change the margins in Word. With it open, you’ll see that you can adjust each of the four margins to an exact measurement.


In the screenshot above, you’ve got two options. You can type in custom values into the white boxes (in inches). Or you can adjust up and down in 0.1-inch increments by clicking on the arrows. Sometimes, it pays to experiment with these settings with those pre-built options.
By doing so, you can customize margins to be any size that you want. This lets you craft a unique and dynamic document with the content placed exactly where you need it.
By the way, you’ll notice a setting here as well called Gutter. This applies to documents that are going to be bound, like a book or magazine for example. Add a gutter setting for extra spacing between pages on the inside or top side of the document.
When you’re finished, click OK at the bottom of the Document window. Your margins in Word are applied, and you can resume editing and customizing each page.
More Ways to Edit Margins in Word
You’ve seen how to change margins in Microsoft Word. With custom or default settings, you can control how text fits onto a page. But with Word margin settings, you’ve got more options available to you. To explore them, return to the Margins > Custom Margins button to launch the Document menu.
Below the four margin control boxes, you’ll see some extra options. The first of these is Gutter. Gutter is a specialty control useful if you plan to print and bind your Word document. It helps ensure that text won’t be obscured on the edge of your pages during the binding process.
Changing the Gutter setting works like adjusting any other margin setting. Simply type in a custom value in the box or arrow up and down to choose a measurement using the buttons on the right.


Next up, you can control multi-page margin options, in the Pages section. Launch the Multiple Pages dropdown menu by clicking on it.
Inside, there are three selections: Mirror Margins, 2 Pages Per Sheet, and Book Fold. Choose among them to do the following:
- Mirror Margins. This is common in two-sided printing, and controls how facing pages appear to each other.
- 2 Pages Per Sheet. This cuts a sheet in half horizontally and fits two pages of content onto the original single sheet.
- Book Fold. This cuts a sheet in half vertically and fits text into a column-style layout.
Finally, in the Apply To section, you can control where your settings appear. By default, changing margins alters the Whole Document. Or you can choose This Point Forward to keep settings you’ve already applied to previous pages.
Again, when you’re finished, press OK. Your Word margin settings are applied. Make sure that your content appears as you expect, and it now fits on your page. Sometimes, changing the margin moves content in an unexpected way, so quality control is essential.
You’ve learned how to change margins in Microsoft Word using a variety of settings and options. As you can see, it’s amazingly easy! This is a quick way to customize the look and feel of any document in 2022.
The Best Source for Top Margin Microsoft Word Templates (In 2022)
Premium templates are the best way to build stunning documents in Microsoft Word. And the best source for them is Envato Elements. As a subscriber, you’ve got access to thousands of stunning MS Word templates available now.


The Elements offer is unbeatable: unlimited downloads. For a flat monthly rate, you get access to as many premium Word templates as you want.
Use these templates as you change margins in Word. With Elements, you’ll enjoy expertly-crafted layouts that you won’t find anywhere else. Yet, you keep full creative control. You can change the margins of any template to perfectly fit your needs.
Explore Word Templates


This is only one of the benefits of Elements. You’ll also have access to:
- Stock photos
- Beautiful custom fonts
- Graphics and themed templates
All of these digital assets fit well on your Word documents to create memorable projects in a flash. As you can see, Envato Elements is the best value for creatives in 2022. Explore the vast library and join Envato Elements today.
Now You Know How to Change the Margins in Word
Learning how to change margins in Microsoft Word gives you complete control. That means that your documents appear exactly as expected. Whether in print or as a digital document, setting the margins helps you create a great finished product.
Start putting what you learned into practice today. Now that you know how to change the margins in Word, think about that document that didn’t fit on the page when you tried to print it. Practice how to change margins in Microsoft Word with the tips you just saw.
Did you find this post useful?

I believe that life is too short to do just one thing. In college, I studied Accounting and Finance but continue to scratch my creative itch with my work for Envato Tuts+ and other clients. By day, I enjoy my career in corporate finance, using data and analysis to make decisions.
I cover a variety of topics for Tuts+, including photo editing software like Adobe Lightroom, PowerPoint, Keynote, and more. What I enjoy most is teaching people to use software to solve everyday problems, excel in their career, and complete work efficiently. Feel free to reach out to me on my website.