
Document themes make it easy to coordinate colors, fonts, and graphic formatting effects across your Word, Excel, and PowerPoint documents and update them quickly. This video show you how-to change the entire theme, read below to just customize theme fonts, colors, or effects.

I want to
-
Choose a standard color theme
-
Create my own color theme
-
Change theme fonts
-
Change theme effects
-
Switch or remove a theme
-
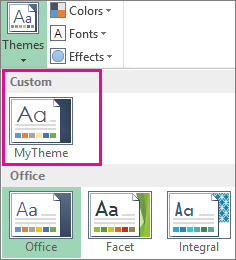
Save a custom theme for reuse
-
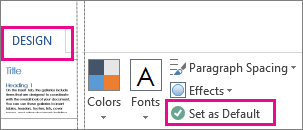
Make my changes the new default theme
-
Learn more about themes
Choose a standard color theme
-
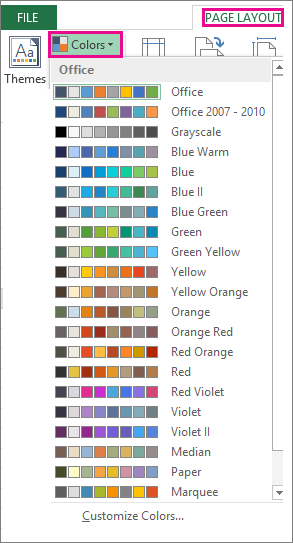
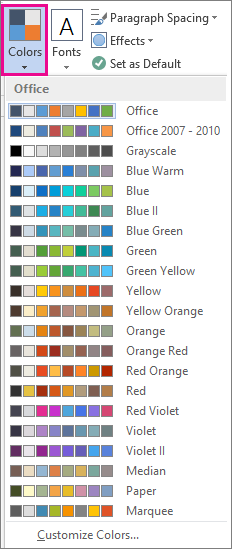
On the Page Layout tab in Excel or the Design tab in Word, click Colors, and pick the color set you want.
Excel

Word
Tip: The first group of colors are the colors in the current theme.
Create my own color theme
-
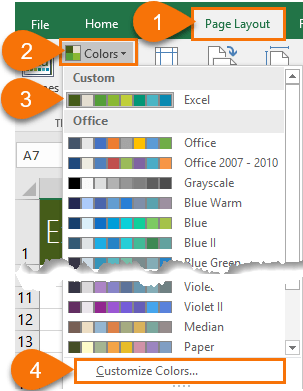
On the Page Layout tab in Excel or the Design tab in Word, click Colors, and then click Customize Colors.
-
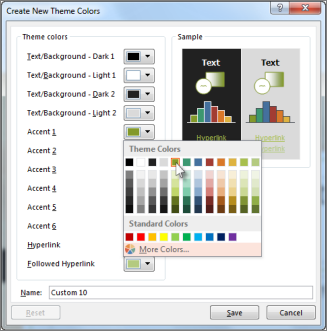
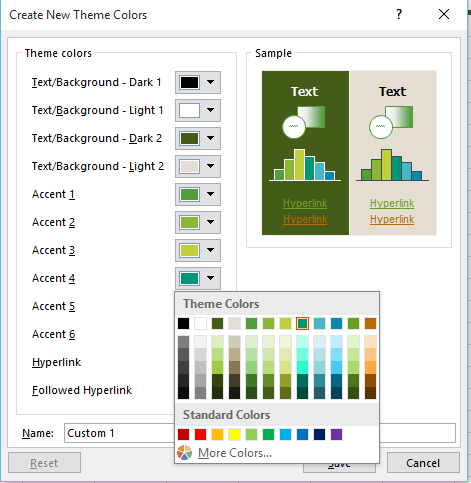
Click the button next to the theme color you want to change (for example, Accent 1 or Hyperlink), and then pick a color under Theme Colors.
To create your own color, click More Colors, and then pick a color on the Standard tab, or enter numbers or select a color on the Custom tab.
-
In the Sample pane, preview the changes that you made.
-
Repeat this for all the colors you want to change.
-
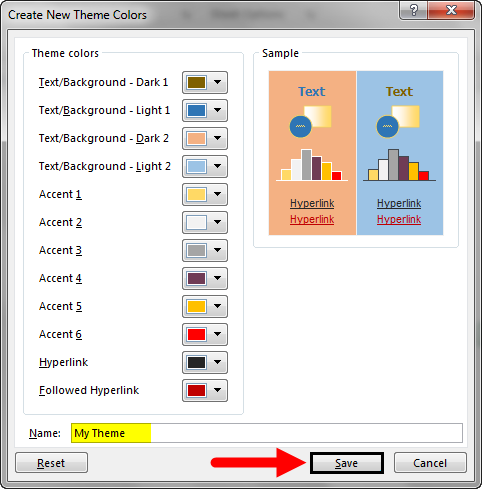
In the Name box, type a name for the new theme colors, and click Save.
Tip: To return to the original theme colors, click Reset before you click Save.
Change theme fonts
-
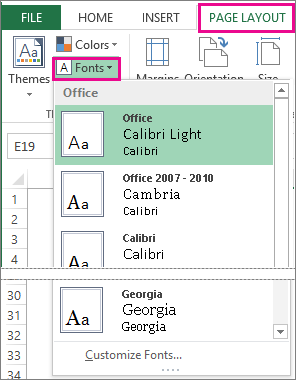
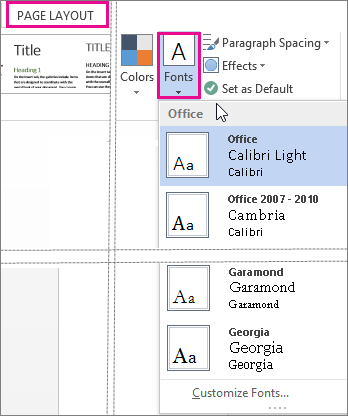
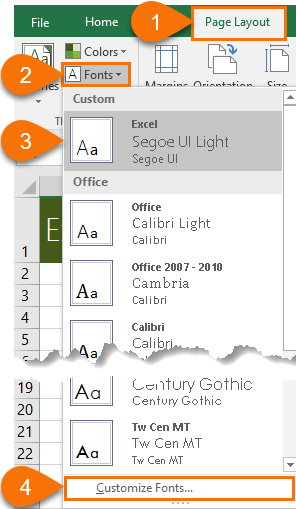
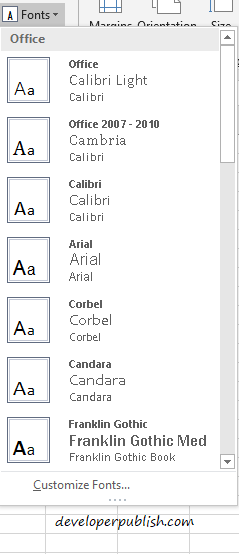
On the Page Layout tab in Excel or the Design tab in Word, click Fonts, and pick the font set you want.
Excel
Word
Tip: The top fonts are the fonts in the current theme.
-
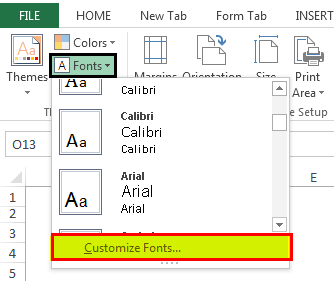
To create your own set of fonts, click Customize Fonts.
-
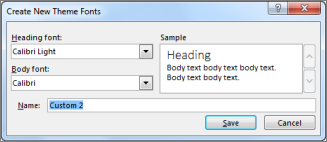
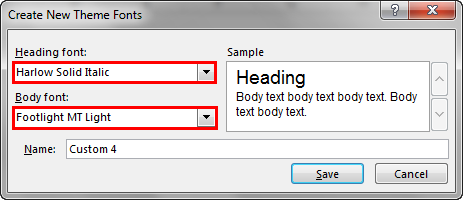
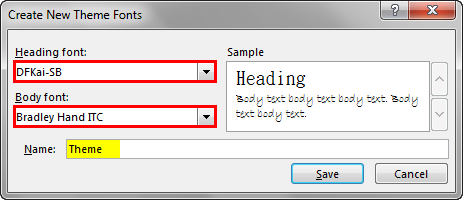
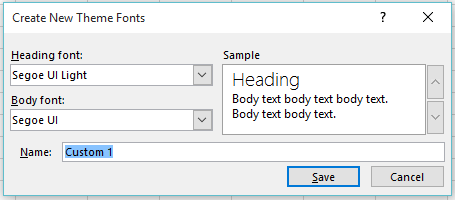
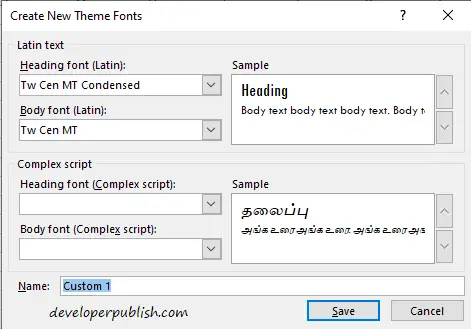
In the Create New Theme Fonts box, under the Heading font and Body font boxes, pick the fonts you want.
-
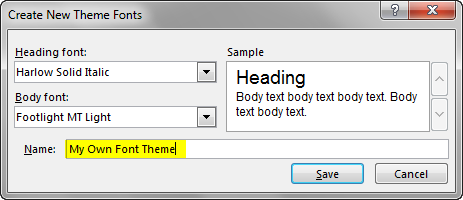
In the Name box, enter a name, and click Save.
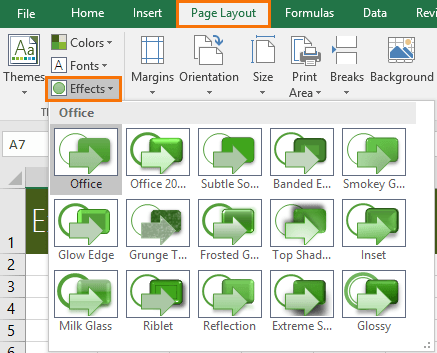
Change theme effects
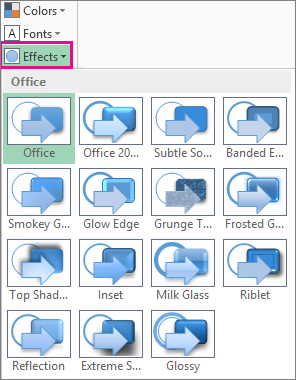
Theme effects include shadows, reflections, lines, fills, and more. While you cannot create your own set of theme effects, you can choose a set of effects that work for your document.
-
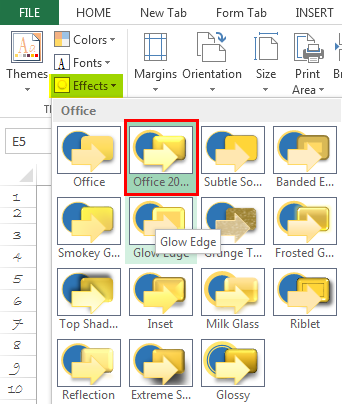
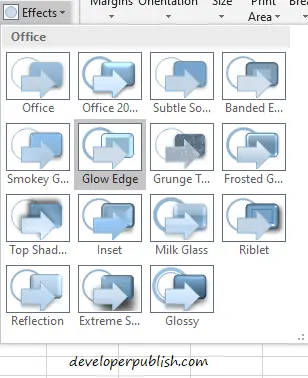
On the Page Layout tab in Excel or the Design tab in Word, click Effects.
. -
Select the set of effects that you want to use.
 .
.
Switch or remove a theme
-
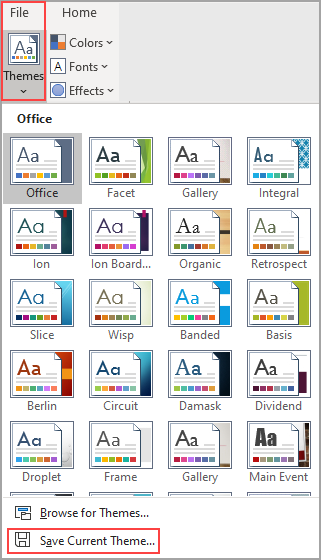
To change themes, simply pick a different theme from the Themes menu. To return to the default theme, choose the Office theme.
-
To remove theme formatting from just a portion of your document, select the portion you want to change and change any formatting you like, such as font style, font size, color, etc.
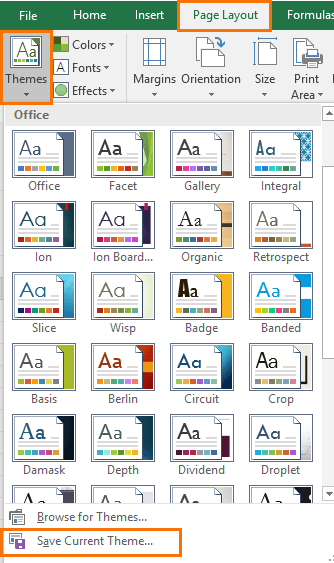
Save a custom theme for reuse
Once you’ve made changes to your theme, you can save it to use again. Or you can make it the default for new documents.
-
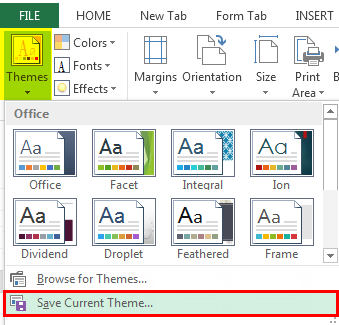
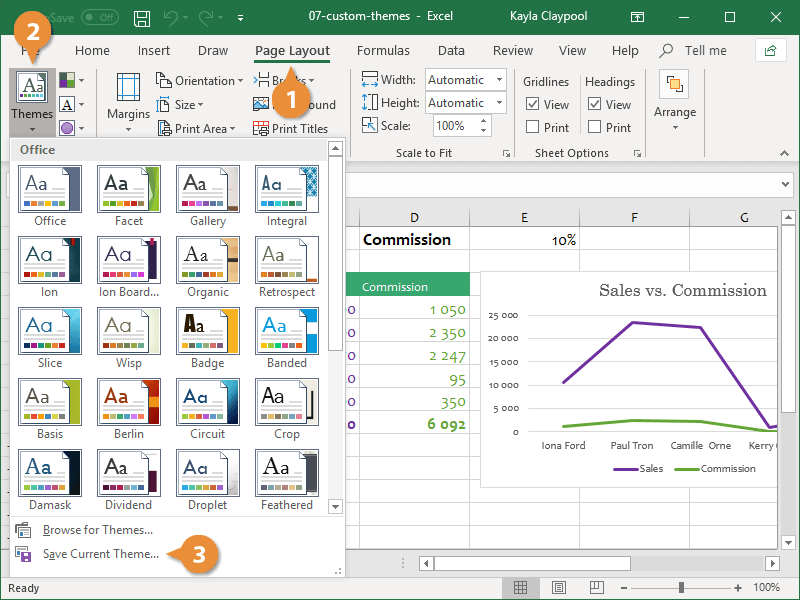
On the Page Layout tab in Excel or the Design tab in Word, click Themes > Save Current Theme.
-
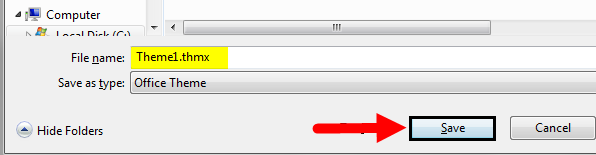
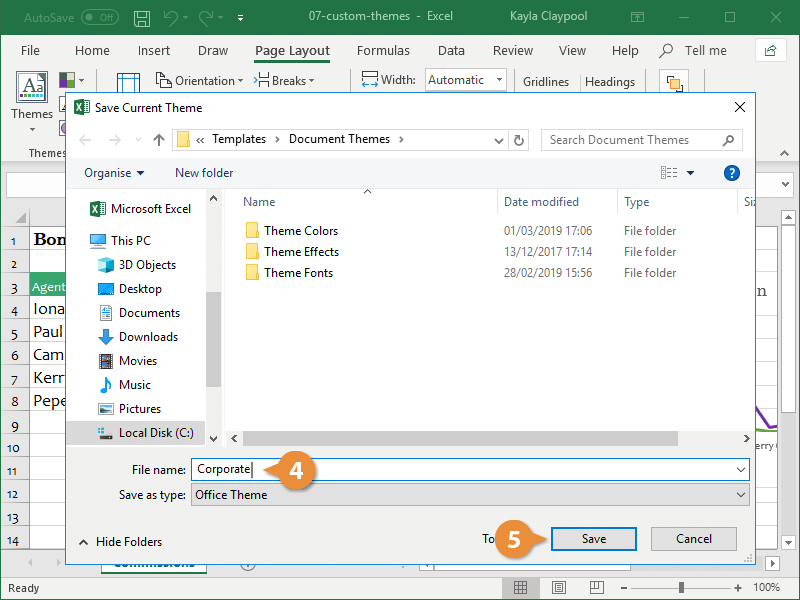
In the File name box, enter a name for the theme, and click Save.
Note: The theme is saved as a .thmx file in the Document Themes folder on your local drive and is automatically added to the list of custom themes that appear when you click Themes.
Make my changes the new default theme
After saving your theme, you can set it so it’s used for all new documents.
Excel
Apply your custom theme to a blank workbook and then save it as a template named Book.xltx.
Word
-
On the Design tab, click Set as Default.
More about themes
A document theme is a unique set of colors, fonts, and effects. Themes are shared across Office programs so that all your Office documents can have the same, uniform look.
You can also change the Office theme. The Office theme is the color scheme for your entire Office program, while document themes are more specific (they show up in individual Word documents or Excel spreadsheets).

In addition, you can add a pattern to your Office program, by changing the Office Background.
See Also
-
Change the font size in Word, Excel or PowerPoint
-
Change the line spacing in Word
-
Insert subscript or superscript text in Word
-
Add or remove a sheet background in Excel
-
Create your own theme in PowerPoint
-
Customize and save a theme in Word 2016 for Mac
To change the background color and design of all your Microsoft 365 programs, go to File > Options > General > Office Theme:
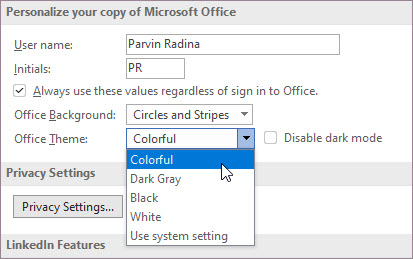
Colorful theme
The colorful theme aligns with the visuals of our modern Microsoft 365 apps by bringing their primary accent color to the ribbon.
The colorful theme in Excel:
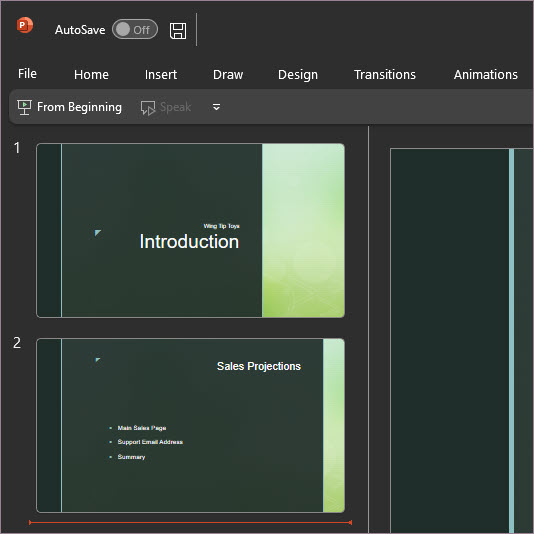
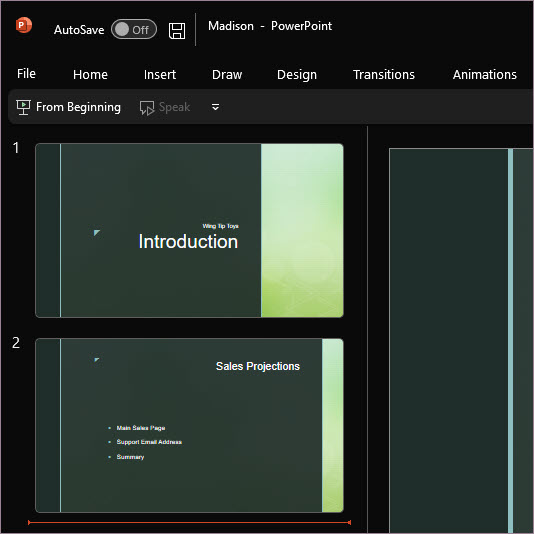
The colorful theme in PowerPoint:

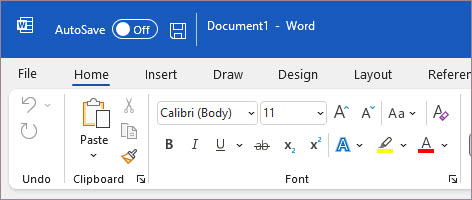
The colorful theme in Word:
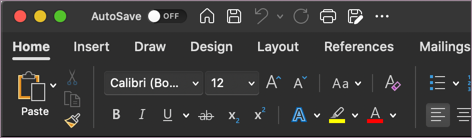
Dark gray theme
The dark gray theme is perfect for those who prefer a softer take on high-contrast visuals. Here’s an example of the dark gray theme applied to PowerPoint:
Black theme
This feature is only available if you have a Microsoft 365 subscription. If you are a Microsoft 365 subscriber, make sure you have the latest version of Office.
The Black theme provides the highest-contrast visual for your Microsoft 365 apps. Here’s an example of the black theme applied to PowerPoint:
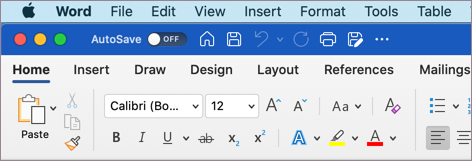
White theme
The white theme displays the classic look of Microsoft 365. Here’s an example of the white theme in PowerPoint:

See Also
Dark mode in Outlook for Microsoft 365
On the Mac, if you’re a Microsoft 365 subscriber or have Office 2021 or 2019, you can set macOS to Dark Mode.
Turn on Dark Mode on macOS
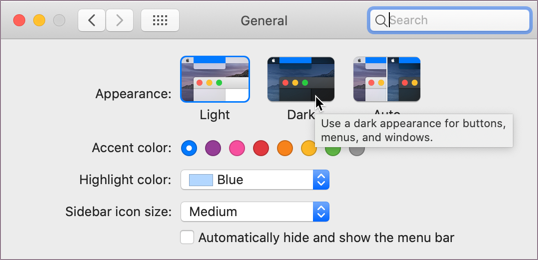
For Dark Mode (AKA «Night mode»), you need to change the setting in the macOS system preferences:
-
Click the Apple menu at the top left.
-
Select System Preferences > General.
-
At the top of the dialog box you can switch the appearance of the operating system from Light to Dark:
Here’s an example of Word in Dark Mode.
Turn off Dark Mode for a Microsoft app
If you’d like to have Dark Mode turned on for your operating system but want to turn it off for individual Microsoft 365 apps, follow these steps:
-
Go to the app preferences (For example, in Word, select Word > Preferences).
-
Select the General tab.
-
Under Personalize, select Turn off Dark Mode.
Note that this setting only affects the current app, so if you want it turned off in WordandExcel, for example, you’ll need to repeat these steps in each of those apps.
Dark Mode in Outlook
To set Dark Mode in Outlook, first set it for macOS, as described above. Then do the following:
-
In Outlook, select Outlook > Preferences.
-
Select the General tab.
-
Choose the Appearance option you want:
-
Light Sets Outlook to light mode, regardless of what macOS is set to.
-
Dark Sets Outlook to dark mode, regardless of what macOS is set to.
-
System Matches your macOS mode setting, either light or dark.
-
Themes in Office 2016
If you’re still using Office 2016 you can choose between two themes: Colorful or Classic.
To change the theme, click on the menu for your Microsoft 365 application (Word, Excel, etc.) and select Preferences > General. Under the Personalize section you can configure your theme.
Colorful theme
The colorful theme aligns with the visuals of our modern apps by bringing their primary accent color to the ribbon. Here’s an example of the colorful theme in Word.
Classic theme
The classic theme is available for Office 2016 customers. Here’s an example of the classic theme in Word.

The appearance of any Microsoft document, such as an Excel workbook, is determined by a Theme (also known as document Theme) — a combination of colors, fonts, and effects. Themes help to create creative and professional-looking documents without a professional designer.
All Microsoft 365 applications share a common set of Themes and Theme elements. Shared styling makes it easy to create coordinated printed and presentation materials. You can also mix and match theme elements, create your custom themes or theme elements for more convenient work, save, share, or use them on any other device.
A Theme in Excel is a set of predefined formatting options that includes theme Colors, Fonts, and Effects.
For example:
- Spreadsheet elements using the default Office theme:

- The same spreadsheet elements using the Facet theme:


Apply a Theme
To apply the predefined Themes, do the following:
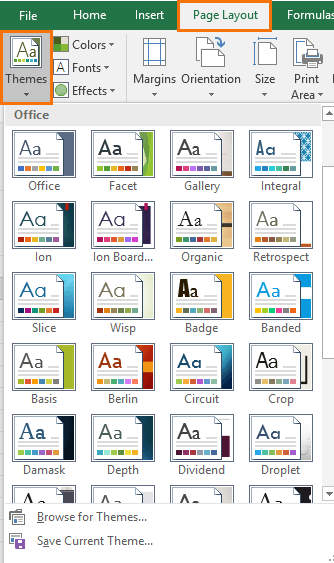
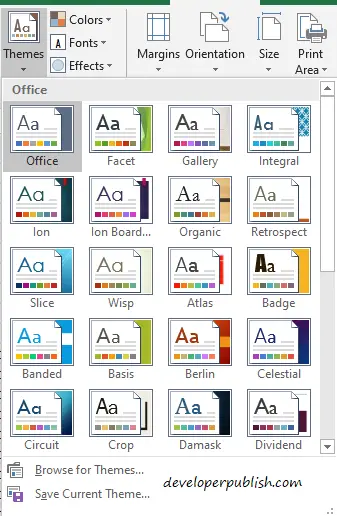
1. On the Page Layout tab, in the Themes group, click the Themes button:

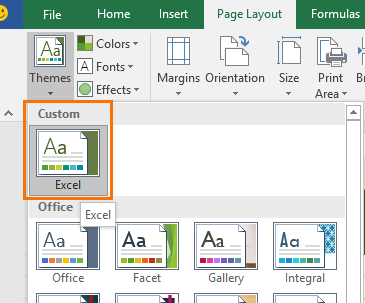
The Themes list displays all predefined themes in the Office section and the custom themes in the Custom section (if available, i.e., if there are custom *.thmx files in the Document Theme folder — see how to create a custom Theme for more details).
2. Point to a Theme and observe the preview on the spreadsheet.
3. Click the chosen Theme to apply it.
Notes:
- Applying a Theme changes the overall design of an entire Excel workbook. You can’t specify different themes for different spreadsheets within a workbook.
- To apply a Theme from a nonstandard location (not from the Document Themes folder), in the Themes list, click Browse for Themes…
In the Choose Theme or Themed Document dialog box, browse the theme you want to apply, then click the Open button.
- Themes use different fonts, the size of which may vary. Thus, changing the theme can affect the layout of the spreadsheets.
Some themes can change the page borders if applied and the appearance of charts and tables. Therefore, we strongly recommend checking your documents after applying a new theme.
Create a custom Theme
Along with using a predefined Theme, Excel allows customizing separately three theme elements: Colors, Fonts, and Effects. If you made some changes in any of the theme elements and want to save the customized Theme, do the following:
1. On the Page Layout tab, in the Themes group, click the Themes button, then click Save Current Theme…

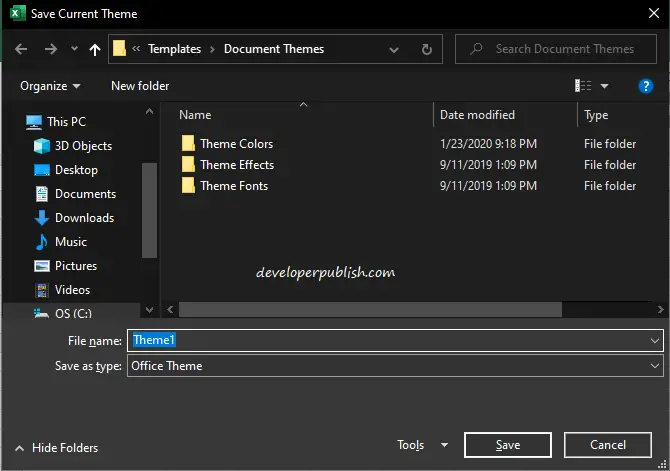
2. In the Save Current Theme dialog box:
- In the File Name field, type a name for the new custom theme:

- Click the Save button.

Notes:
- Office Theme (*.thmx) file format allows saving only theme settings (fonts, colors, and effects) without content.
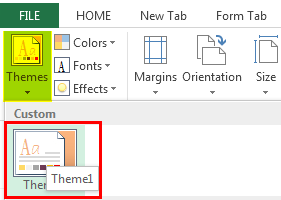
- A custom document Theme is saved in the Document Themes folder and is automatically added to the Custom section of the Themes list.
The location of the Document Themes folder may vary, but it is usually located here:
C:Users<user_name>AppDataRoamingMicrosoftTemplatesDocument Themes, where <user_name> is your Windows login name.
- Other Microsoft Office applications, such as Word and PowerPoint, also can use these theme files.
Modify a custom Theme
You cannot edit a custom Theme. You can simply modify any Theme elements (it doesn’t matter, custom or predefined) and save changes as a new custom Theme by overwriting the existing theme file.
Share a custom Theme
A custom Theme is only available to the current Windows user logged in and only in that location. To share it with other users or locations, do the following:
1. Ensure that the customization is saved – you can see the *.thmx file with the custom name you defined for the custom Theme in the Document Themes folder (see where you can find the Document Themes folder).
2. Copy this *.thmx file to another location you need or send it as an email attachment.
Note:
- If you want to see the custom Theme in the Themes list, copy a *.thmx file to the correspondent Document Themes folder in the new location.
- If you don’t want to see this custom Theme in the Themes list, you can copy a *.thmx file to any location except the Document Themes folder (you will need to use the Browse for Themes… option to apply this custom Theme).
Delete a custom Theme
To delete a custom Theme, do one of the following:
- In the Windows Explorer, open the Document Themes folder (see where you can find the Document Themes folder), then delete the *.thmx file with the name you have defined for the custom Theme.
- In the Themes list, right-click the custom Theme, then choose Delete… in the popup menu:


Note: If you don’t want to delete a custom Theme but don’t want to see it in the Themes list, move the *.thmx file to any folder outside the Document Themes folder (you will need to use the Browse for Themes… option to apply it later).
Themes available in Excel are used in formatting the entire document or workbook. We can use the themes provided by Excel or customize them according to our choice. Themes are available in Excel in the “Page Layout” tab with the name of the “Themes” option. In addition, there are different options for colors and effects fonts.
Table of contents
- Themes For Excel
- Where are the Themes Stored in Excel?
- Examples
- Example #1 – Change Default Theme
- Example #2 – Change the Row Header & Column Header View
- Example #3 – Create Your Own Theme Under Custom Theme
- Things to Remember
- Recommended Articles
Where are the Themes Stored in Excel?
The first question is, where are these themes hidden in Excel? The truth is that it is not hidden in Excel. Rather, it is visible just before us, but we have not recognized it for long.
Themes are available under “Page Layout” in Excel. So, for example, under “Themes,” we have themes, colors, fonts, and effects.
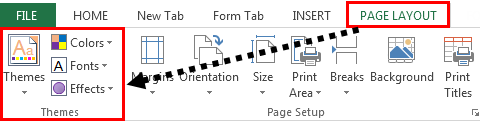
Excel 2013 has as many as 31 built-in themes, 23 colors, and 15 different built-in effects.
Examples
Example #1 – Change Default Theme
Now, we will see the practical example of themes.
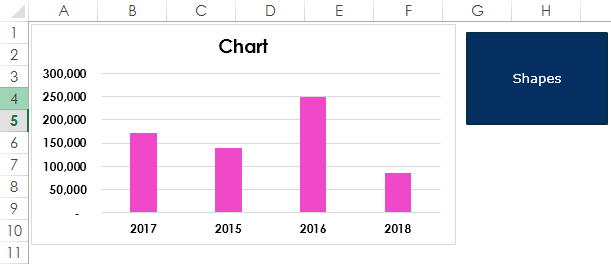
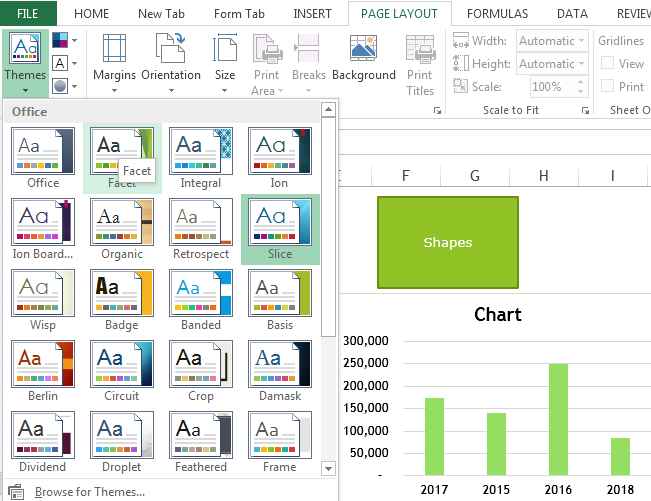
- But, first, we have created a basic default chart of sales for many years and one of the shapes.

- These are the themes of the default theme of the office. To change the theme of these two: charts and shapes, go to “Page Layout.” The above available themes will preview the result before clicking on it.

- In the above image, we selected the theme type “Facet.” Like this, we can choose any of the above themes, look at the preview, and finalize the theme.


Example #2 – Change the Row Header & Column Header View
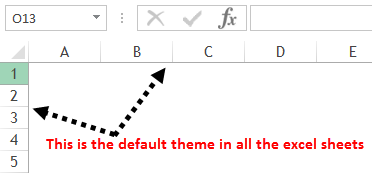
You must be familiar with the default row headerExcel Row Header is the grey column on the left side of column 1 in the worksheet that contains the numbers (1, 2, 3, etc.). To hide or reveal row and column headers, press ALT + W + V + H.read more and column header, which Microsoft gives, like the one below.
Step 1: Go to “Page Layout” and select “Fonts.”.
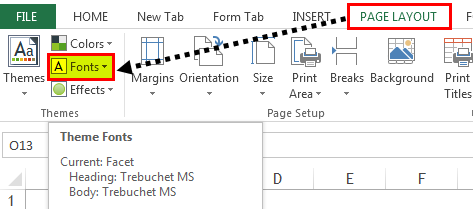
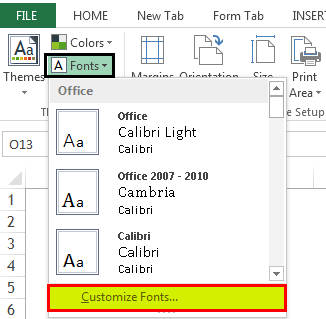
Step 2: Click on the dropdown and select “Customize Fonts.”
Step 3: Now, you will see below the new dialog box.

Step 4: Change the “Heading font” to “Harlow Solid Italic and the “Body font” to “Footlight MT Light.” Now, on the right-hand side, you can see the preview.
Step 5: You can name this font theme.
Now, look how row and column headers fonts have changed.

It is slightly different from the default theme.
Example #3 – Create Your Own Theme Under Custom Theme
If you are not satisfied with the available wide variety of themes from Microsoft, you can create your theme and apply it to make a difference.
Usually, the theme is the makeup of three elements: colors, fonts, and effects. To design your theme, follow the below steps.
Step 1: Go to “Page Layout” and select “Colors.”

Step 2: Click on the colors drop-down list in excelA drop-down list in excel is a pre-defined list of inputs that allows users to select an option.read more and select “Customize Colors.”

Step 3: Apply the colors below (you can give your colors), name your theme, and click on “Save.”
Step 4: Now, click on “Fonts” and select “Customize Fonts.”
Step 5: Select the fonts as per your wish.
Note: We cannot change the font size. It will be, by default, 11 sizes.
Step 6: Click on “Effects” and select any one of the existing effects. We cannot customize this. We have chosen one of the current effects.
Now, we have created all theme options.
Step 7: Click on the “Theme” dropdown and select “Save Current Theme.”
Step 8: Now, we will see a different save window. Please give them a name and select the “Save type” as “.thmx.“
Now, we have created our theme. When the Excel workbook opens, we can see this theme under Page Layout > Theme > Custom.
Things to Remember
- It will not be available if we share the file with a custom theme with the colleague theme. But theme color and font styles will be applicable.
- The theme applies to Excel charts, tables, shapes, slicers, and pivot tablesA Pivot Table is an Excel tool that allows you to extract data in a preferred format (dashboard/reports) from large data sets contained within a worksheet. It can summarize, sort, group, and reorganize data, as well as execute other complex calculations on it.read more.
- We must use very light colors in the custom themes.
Recommended Articles
This article is a guide to Themes in Excel. Here, we discuss applying different themes in Excel with examples and downloadable Excel templates. You may learn more about Excel from the following articles: –
- Excel Chart Animation
- Excel Marimekko Chart (Mekko)
- Organization Chart in Excel
- Flow Chart in Excel
- Percentage Change Formula in Excel
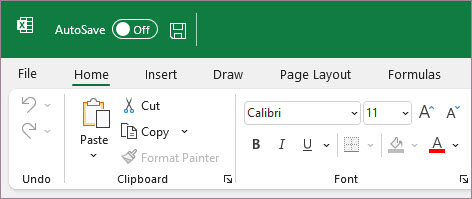
Excel Themes are a bundle of default colors, font styles and Shape effects. There are lots of built in Excel Themes available from the Page Layout menu:
Hovering over a theme will give you a preview of the effect on your workbook.
You’ll notice that different fonts will have an impact on your workbook layout.
Custom Excel Themes
When you create reports and dashboards you can give them a professional finish by using your company branding, including colours and font styles.
One way we can automate this is to customize our default workbook to always use your company font and colors, but you may not want every workbook to use these special fonts and colors.
This is when a custom Excel Theme is useful, because with one click we can transform any file to adopt our corporate branding.
Themes consist of colors, fonts and Shape effects and we can access them via the Page Layout tab:
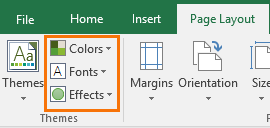
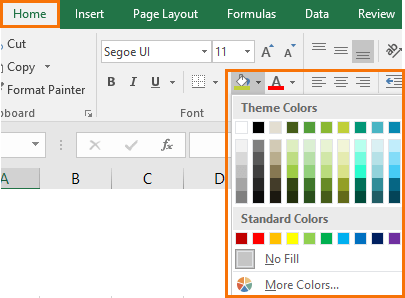
Color Themes
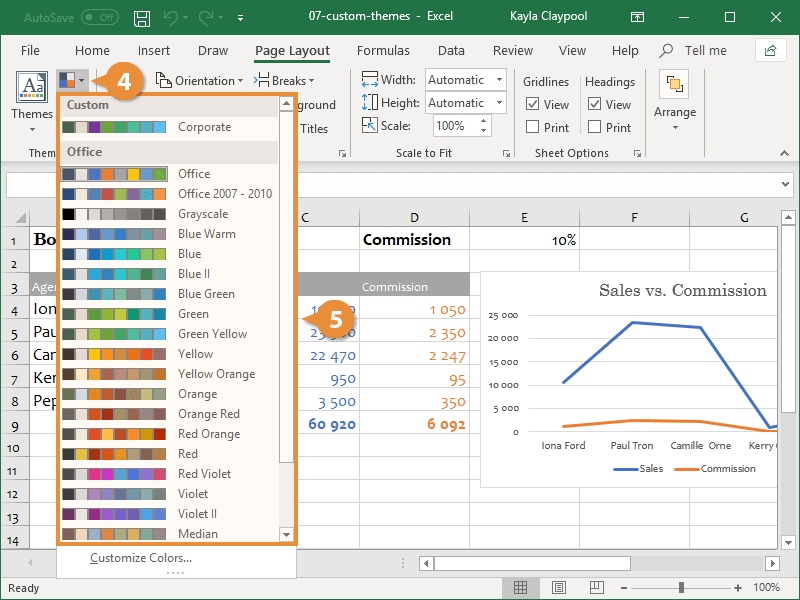
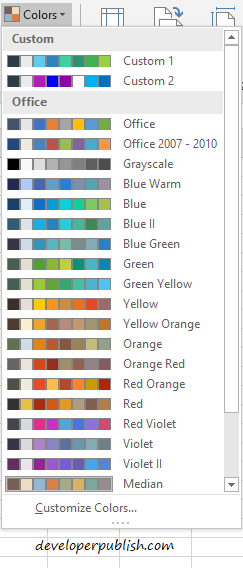
In the image below you can see that clicking on Colors (2) reveals a list of the default color styles for the workbook under the Office group and you can choose from one of these.
You’ll also see any custom color themes at the top (3), I have one called ‘Excel’. And at the bottom of the list you can choose ‘Customize Colors’ (4) to create your own:
Clicking on Customize Colors brings up a dialog box where you can set your theme colors from the drop down lists and give it a name:
Font Themes
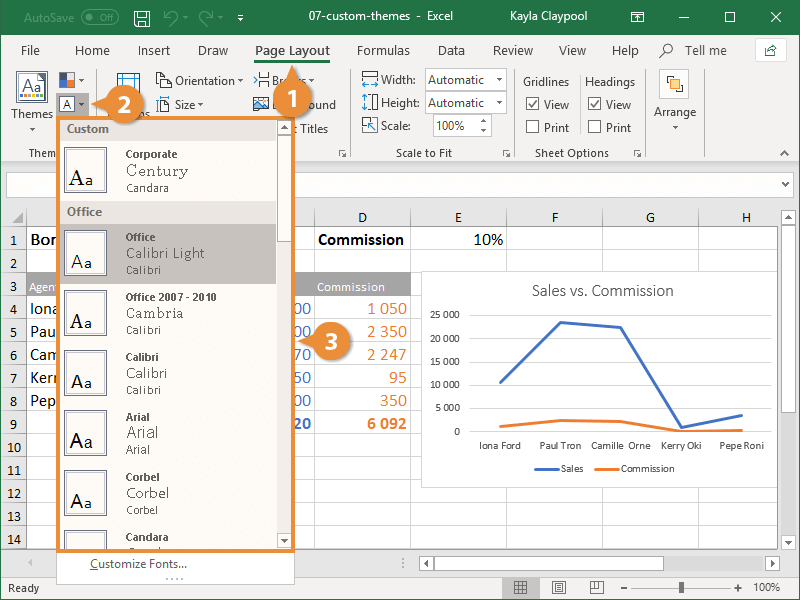
Similarly, we can set a custom Font theme (see image below) from the Page Layout menu (1) > Fonts (2).
At the top of the list I have a custom theme called ‘Excel’ (3), or I can choose from the default Office themes, or I can create my own custom font theme (4).
Clicking on Customize Fonts (4) opens the dialog box (see image below) where you can specify a font style for your workbook headings and body font. Don’t forget to give your font theme a name.
Note: you can’t set the font size. It will simply default to 11pt.
Effects Themes
Effects Themes include reflections, shadows, lines, fills and other effects you can apply to Shapes. You can’t customize an Effects Theme, but you can choose from one of the pre-set themes available via the Page Layout tab > Effects:
Custom Theme
Once you’ve setup your colors and fonts, and selected your effect theme you can bundle them together in a Theme for the workbook by clicking on Themes > Save Current Theme…:
This opens the Save dialog box and all you need to do is give the theme file a name. Excel will save it in your templates folder for Excel as a .thmx file:

Each time you open Excel you will have access to this theme and can apply it to your workbook by selecting the theme via the Page Layout > Themes menu:
With one click all of the colors, fonts and effects will be changed to reflect your chosen theme. This can save hours of fiddly formatting time and frustration.
Theme Portability
If you send an Excel file that contains a custom theme to a colleague, the theme itself will not be available under the Page Layout > Themes menu for them in their version of Excel, but the file will retain all the theme colors and fonts (assuming they have the fonts installed on their PC):
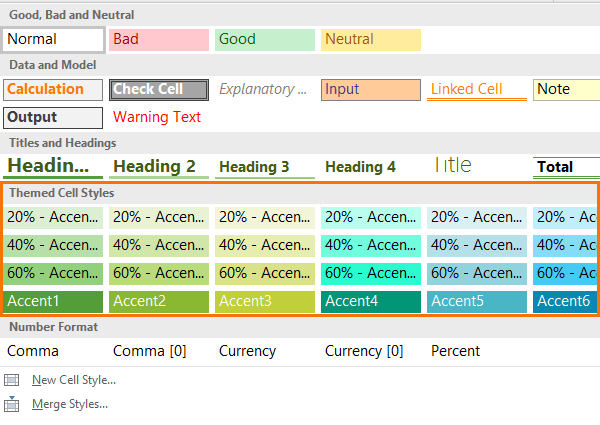
And the Styles menu will also retain them in the ‘Themed Cell Styles’ menu:
Caution: Styles can breed like mice when copied from workbook to workbook and can quickly multiply to plague levels. Click here for the Excel Styles tutorial where I include some VBA code to easily exterminate them.
You can save any combination of theme colors, theme fonts, and theme effects as a new document theme.
Apply Theme Elements
Before saving the custom theme, you’ll have to apply the desired theme colors, theme fonts, and theme effects to the current workbook.
- Click the Page Layout tab.
- Click the Fonts button.
- Select a font theme.

- Click the Colors button.
Once again, you can choose a built-in color scheme or a custom scheme.
- Select a color palette.
In the menu, select from the built-in font sets or a custom one you’ve created.
Create a Custom Theme
- Click the Page Layout tab.
- Click Themes.
- Click Save Current Theme.
- Enter a name for your theme.
- Click Save.
The new theme is now available in the Custom section of the Themes menu. Custom themes you’ve saved will be available for use in all your Office applications. You can even share the theme file with others, so they can also use your new theme.
To remove a custom theme or theme element, right-click the theme in the menu and select Delete. Finally, click Yes to confirm the deletion.

FREE Quick Reference
Click to Download
Free to distribute with our compliments; we hope you will consider our paid training.
In this article, you’ll learn about Themes in Microsoft Excel and how to use them. This article will cover topics such as how to apply custom themes and options such as fonts, colors, and effects.
What is Theme in Excel?
The theme is a feature provided by Excel which lets you customize the color theme of the worksheet, font styles, color and effects, and graphic formatting of the entire worksheet.
How to use Themes in Excel?
Change the Standard Color Theme in Excel
To change the standard color theme in Microsoft Excel, follow the below steps.
- Go to the Page Layout menu.

- Choose the Colors option under the Theme group.
- Select any one of the themes that appear in the drop-down list.
- In case if you wanted to create your theme. Choose the Customize Colors option that you’ll find at the end of the list.
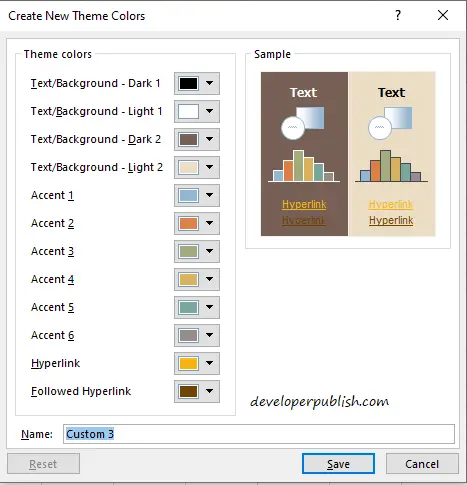
- Create New Theme Colors dialog box opens up, here you can select different colors and create a theme of your wish. Finally, Name the theme by entering a name in the Name box and click on Save to create your theme. You can find your theme at the top of the theme list.
Change the Font Theme in Excel
To change the font theme in Microsoft Excel, follow the below steps.
- Go to the Page Layout Menu. Select the Fonts option under the Theme group.
- You can select any one of the themes from the drop-down list.
- If you want to create a set of a theme on your own then click on Customize Fonts option at the bottom of the list.
- Create New Theme Fonts dialog box opens, where you can create your theme. Name it and then save it.
Change Theme Effects in Microsoft Excel
To change the theme effects in Excel, follow the below steps.
- Go to the Page Layout menu and select the Effects option under the group.
- Select the effect of the options that are displayed.
Remove or Change Theme in Excel
To remove a theme or change a theme in Excel, follow the below steps.
- To change a theme just go to the respective theme options and simply choose another theme.
- To remove a theme and go back to the default theme. Go to the respective theme option and select the default theme i.e Office theme.
Save Custom Theme in Excel
To save a custom theme, follow the below steps.
- Go to the Page Layout menu and select the Theme option.
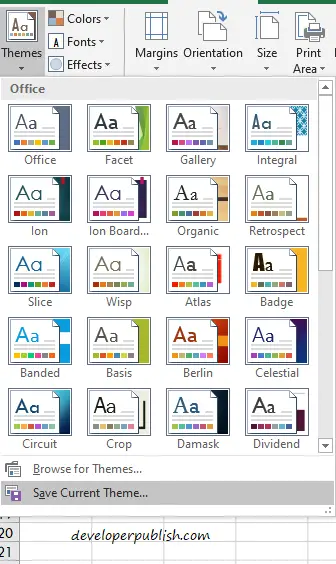
- Select the Save Current Theme option and then name the theme and save it.
So, we are at the end of the article. By now , you would’ve got to know how to apply themes, create your theme, remove themes or change themes, and save a custom theme.