
Время на прочтение
7 мин
Количество просмотров 312K
Приветствую всех.
В этом посте я расскажу, что такое VBA и как с ним работать в Microsoft Excel 2007/2010 (для более старых версий изменяется лишь интерфейс — код, скорее всего, будет таким же) для автоматизации различной рутины.

VBA (Visual Basic for Applications) — это упрощенная версия Visual Basic, встроенная в множество продуктов линейки Microsoft Office. Она позволяет писать программы прямо в файле конкретного документа. Вам не требуется устанавливать различные IDE — всё, включая отладчик, уже есть в Excel.
Еще при помощи Visual Studio Tools for Office можно писать макросы на C# и также встраивать их. Спасибо, FireStorm.
Сразу скажу — писать на других языках (C++/Delphi/PHP) также возможно, но требуется научится читать, изменять и писать файлы офиса — встраивать в документы не получится. А интерфейсы Microsoft работают через COM. Чтобы вы поняли весь ужас, вот Hello World с использованием COM.
Поэтому, увы, будем учить Visual Basic.
Чуть-чуть подготовки и постановка задачи
Итак, поехали. Открываем Excel.
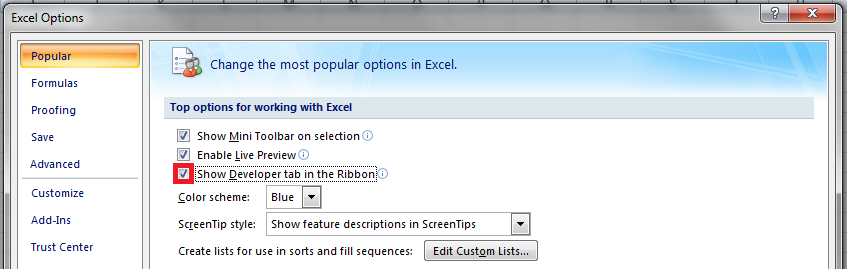
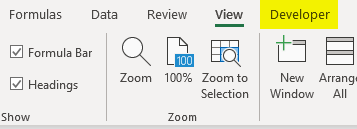
Для начала давайте добавим в Ribbon панель «Разработчик». В ней находятся кнопки, текстовые поля и пр. элементы для конструирования форм.

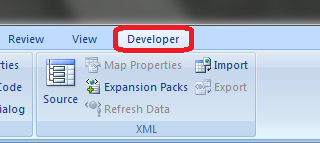
Появилась вкладка.
Теперь давайте подумаем, на каком примере мы будем изучать VBA. Недавно мне потребовалось красиво оформить прайс-лист, выглядевший, как таблица. Идём в гугл, набираем «прайс-лист» и качаем любой, который оформлен примерно так (не сочтите за рекламу, пожалуйста):

То есть требуется, чтобы было как минимум две группы, по которым можно объединить товары (в нашем случае это будут Тип и Производитель — в таком порядке). Для того, чтобы предложенный мною алгоритм работал корректно, отсортируйте товары так, чтобы товары из одной группы стояли подряд (сначала по Типу, потом по Производителю).
Результат, которого хотим добиться, выглядит примерно так:

Разумеется, если смотреть прайс только на компьютере, то можно добавить фильтры и будет гораздо удобнее искать нужный товар. Однако мы хотим научится кодить и задача вполне подходящая, не так ли?
Кодим
Для начала требуется создать кнопку, при нажатии на которую будет вызываться наша програма. Кнопки находятся в панели «Разработчик» и появляются по кнопке «Вставить». Вам нужен компонент формы «Кнопка». Нажали, поставили на любое место в листе. Далее, если не появилось окно назначения макроса, надо нажать правой кнопкой и выбрать пункт «Назначить макрос». Назовём его FormatPrice. Важно, чтобы перед именем макроса ничего не было — иначе он создастся в отдельном модуле, а не в пространстве имен книги. В этому случае вам будет недоступно быстрое обращение к выделенному листу. Нажимаем кнопку «Новый».


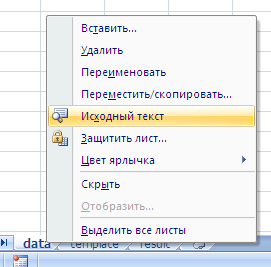
И вот мы в среде разработки VB. Также её можно вызвать из контекстного меню командой «Исходный текст»/«View code».

Перед вами окно с заглушкой процедуры. Можете его развернуть. Код должен выглядеть примерно так:
Sub FormatPrice()End Sub
Напишем Hello World:
Sub FormatPrice()

    MsgBox "Hello World!"

End Sub
И запустим либо щелкнув по кнопке (предварительно сняв с неё выделение), либо клавишей F5 прямо из редактора.
Тут, пожалуй, следует отвлечься на небольшой ликбез по поводу синтаксиса VB. Кто его знает — может смело пропустить этот раздел до конца. Основное отличие Visual Basic от Pascal/C/Java в том, что команды разделяются не ;, а переносом строки или двоеточием (:), если очень хочется написать несколько команд в одну строку. Чтобы понять основные правила синтаксиса, приведу абстрактный код.
Примеры синтаксиса
' Процедура. Ничего не возвращает

' Перегрузка в VBA отсутствует

Sub foo(a As String, b As String)

    ' Exit Sub ' Это значит "выйти из процедуры"

    MsgBox a + ";" + b

End Sub' Функция. Вовращает Integer

Function LengthSqr(x As Integer, y As Integer) As Integer

    ' Exit Function

    LengthSqr = x * x + y * y

End FunctionSub FormatPrice()

    Dim s1 As String, s2 As String

    s1 = "str1"

    s2 = "str2"

    If s1 <> s2 Then

        foo "123", "456" ' Скобки при вызове процедур запрещены

    End IfDim res As sTRING ' Регистр в VB не важен. Впрочем, редактор Вас поправит

    Dim i As Integer

    ' Цикл всегда состоит из нескольких строк

    For i = 1 To 10

        res = res + CStr(i) ' Конвертация чего угодно в String

        If i = 5 Then Exit For

    Next iDim x As Double

    x = Val("1.234") ' Парсинг чисел

    x = x + 10

    MsgBox xOn Error Resume Next ' Обработка ошибок - игнорировать все ошибки

    x = 5 / 0

    MsgBox xOn Error GoTo Err ' При ошибке перейти к метке Err

    x = 5 / 0

    MsgBox "OK!"

    GoTo ne
Err:
MsgBox
"Err!"
ne:
On Error GoTo 0 ' Отключаем обработку ошибок
' Циклы бывает, какие захотите
Do While True
Exit DoLoop 'While True
Do 'Until False
Exit Do
Loop Until False
' А вот при вызове функций, от которых хотим получить значение, скобки нужны.
' Val также умеет возвращать Integer
Select Case LengthSqr(Len("abc"), Val("4"))
Case 24
MsgBox "0"
Case 25
MsgBox "1"
Case 26
MsgBox "2"
End Select' Двухмерный массив.
' Можно также менять размеры командой ReDim (Preserve) - см. google
Dim arr(1 to 10, 5 to 6) As Integer
arr(1, 6) = 8Dim coll As New Collection
Dim coll2 As Collection
coll.Add "item", "key"
Set coll2 = coll ' Все присваивания объектов должны производится командой Set
MsgBox coll2("key")
Set coll2 = New Collection
MsgBox coll2.Count
End Sub
Грабли-1. При копировании кода из IDE (в английском Excel) есь текст конвертируется в 1252 Latin-1. Поэтому, если хотите сохранить русские комментарии — надо сохранить крокозябры как Latin-1, а потом открыть в 1251.
Грабли-2. Т.к. VB позволяет использовать необъявленные переменные, я всегда в начале кода (перед всеми процедурами) ставлю строчку Option Explicit. Эта директива запрещает интерпретатору заводить переменные самостоятельно.
Грабли-3. Глобальные переменные можно объявлять только до первой функции/процедуры. Локальные — в любом месте процедуры/функции.
Еще немного дополнительных функций, которые могут пригодится: InPos, Mid, Trim, LBound, UBound. Также ответы на все вопросы по поводу работы функций/их параметров можно получить в MSDN.
Надеюсь, что этого Вам хватит, чтобы не пугаться кода и самостоятельно написать какое-нибудь домашнее задание по информатике. По ходу поста я буду ненавязчиво знакомить Вас с новыми конструкциями.
Кодим много и под Excel
В этой части мы уже начнём кодить нечто, что умеет работать с нашими листами в Excel. Для начала создадим отдельный лист с именем result (лист с данными назовём data). Теперь, наверное, нужно этот лист очистить от того, что на нём есть. Также мы «выделим» лист с данными, чтобы каждый раз не писать длинное обращение к массиву с листами.
Sub FormatPrice()

    Sheets("result").Cells.Clear

    Sheets("data").Activate

End Sub
Работа с диапазонами ячеек
Вся работа в Excel VBA производится с диапазонами ячеек. Они создаются функцией Range и возвращают объект типа Range. У него есть всё необходимое для работы с данными и/или оформлением. Кстати сказать, свойство Cells листа — это тоже Range.
Примеры работы с Range
Sheets("result").Activate

Dim r As Range

Set r = Range("A1")

r.Value = "123"

Set r = Range("A3,A5")

r.Font.Color = vbRed

r.Value = "456"

Set r = Range("A6:A7")

r.Value = "=A1+A3"
Теперь давайте поймем алгоритм работы нашего кода. Итак, у каждой строчки листа data, начиная со второй, есть некоторые данные, которые нас не интересуют (ID, название и цена) и есть две вложенные группы, к которым она принадлежит (тип и производитель). Более того, эти строки отсортированы. Пока мы забудем про пропуски перед началом новой группы — так будет проще. Я предлагаю такой алгоритм:
- Считали группы из очередной строки.
- Пробегаемся по всем группам в порядке приоритета (вначале более крупные)
- Если текущая группа не совпадает, вызываем процедуру AddGroup(i, name), где i — номер группы (от номера текущей до максимума), name — её имя. Несколько вызовов необходимы, чтобы создать не только наш заголовок, но и всё более мелкие.
- После отрисовки всех необходимых заголовков делаем еще одну строку и заполняем её данными.
Для упрощения работы рекомендую определить следующие функции-сокращения:
Function GetCol(Col As Integer) As String

    GetCol = Chr(Asc("A") + Col)

End FunctionFunction GetCellS(Sheet As String, Col As Integer, Row As Integer) As Range

    Set GetCellS = Sheets(Sheet).Range(GetCol(Col) + CStr(Row))

End FunctionFunction GetCell(Col As Integer, Row As Integer) As Range

    Set GetCell = Range(GetCol(Col) + CStr(Row))

End Function
Далее определим глобальную переменную «текущая строчка»: Dim CurRow As Integer. В начале процедуры её следует сделать равной единице. Еще нам потребуется переменная-«текущая строка в data», массив с именами групп текущей предыдущей строк. Потом можно написать цикл «пока первая ячейка в строке непуста».
Глобальные переменные
Option Explicit ' про эту строчку я уже рассказывал

Dim CurRow As Integer

Const GroupsCount As Integer = 2

Const DataCount As Integer = 3
FormatPrice
Sub FormatPrice()

    Dim I As Integer ' строка в data

    CurRow = 1

    Dim Groups(1 To GroupsCount) As String

    Dim PrGroups(1 To GroupsCount) As String
Sheets(
"data").Activate
I = 2
Do While True
If GetCell(0, I).Value = "" Then Exit Do
' ...
I = I + 1
Loop
End Sub
Теперь надо заполнить массив Groups:
На месте многоточия
Dim I2 As Integer

For I2 = 1 To GroupsCount

    Groups(I2) = GetCell(I2, I)

Next I2

' ...

For I2 = 1 To GroupsCount ' VB не умеет копировать массивы

    PrGroups(I2) = Groups(I2)

Next I2

I =  I + 1
И создать заголовки:
На месте многоточия в предыдущем куске
For I2 = 1 To GroupsCount

    If Groups(I2) <> PrGroups(I2) Then

        Dim I3 As Integer

        For I3 = I2 To GroupsCount

            AddHeader I3, Groups(I3)

        Next I3

        Exit For

    End If

Next I2
Не забудем про процедуру AddHeader:
Перед FormatPrice
Sub AddHeader(Ty As Integer, Name As String)

    GetCellS("result", 1, CurRow).Value = Name

    CurRow = CurRow + 1

End Sub
Теперь надо перенести всякую информацию в result
For I2 = 0 To DataCount - 1

    GetCellS("result", I2, CurRow).Value = GetCell(I2, I)

Next I2
Подогнать столбцы по ширине и выбрать лист result для показа результата
После цикла в конце FormatPrice
Sheets("Result").Activate

Columns.AutoFit
Всё. Можно любоваться первой версией.

Некрасиво, но похоже. Давайте разбираться с форматированием. Сначала изменим процедуру AddHeader:
Sub AddHeader(Ty As Integer, Name As String)

    Sheets("result").Range("A" + CStr(CurRow) + ":C" + CStr(CurRow)).Merge

    ' Чтобы не заводить переменную и не писать каждый раз длинный вызов

    ' можно воспользоваться блоком With

    With GetCellS("result", 0, CurRow)

        .Value = Name

        .Font.Italic = True

        .Font.Name = "Cambria"

        Select Case Ty

        Case 1 ' Тип

            .Font.Bold = True

            .Font.Size = 16

        Case 2 ' Производитель

            .Font.Size = 12

        End Select

        .HorizontalAlignment = xlCenter

    End With

    CurRow = CurRow + 1

End Sub
Уже лучше:

Осталось только сделать границы. Тут уже нам требуется работать со всеми объединёнными ячейками, иначе бордюр будет только у одной:

Поэтому чуть-чуть меняем код с добавлением стиля границ:
Sub AddHeader(Ty As Integer, Name As String)

    With Sheets("result").Range("A" + CStr(CurRow) + ":C" + CStr(CurRow))

        .Merge

        .Value = Name

        .Font.Italic = True

        .Font.Name = "Cambria"

        .HorizontalAlignment = xlCenterSelect Case Ty

        Case 1 ' Тип

            .Font.Bold = True

            .Font.Size = 16

            .Borders(xlTop).Weight = xlThick

        Case 2 ' Производитель

            .Font.Size = 12

            .Borders(xlTop).Weight = xlMedium

        End Select

        .Borders(xlBottom).Weight = xlMedium ' По убыванию: xlThick, xlMedium, xlThin, xlHairline

    End With

    CurRow = CurRow + 1

End Sub

Осталось лишь добится пропусков перед началом новой группы. Это легко:
В начале FormatPrice
Dim I As Integer ' строка в  data

CurRow = 0 ' чтобы не было пропуска в самом начале

Dim Groups(1 To GroupsCount) As String
В цикле расстановки заголовков
If Groups(I2) <> PrGroups(I2) Then

    CurRow = CurRow + 1

    Dim I3 As Integer

В точности то, что и хотели.
Надеюсь, что эта статья помогла вам немного освоится с программированием для Excel на VBA. Домашнее задание — добавить заголовки «ID, Название, Цена» в результат. Подсказка: CurRow = 0 CurRow = 1.
Файл можно скачать тут (min.us) или тут (Dropbox). Не забудьте разрешить исполнение макросов. Если кто-нибудь подскажет человеческих файлохостинг, залью туда.
Спасибо за внимание.
Буду рад конструктивной критике в комментариях.
UPD: Перезалил пример на Dropbox и min.us.
UPD2: На самом деле, при вызове процедуры с одним параметром скобки можно поставить. Либо использовать конструкцию Call Foo(«bar», 1, 2, 3) — тут скобки нужны постоянно.
Excel Programming (Table of Contents)
- Introduction to Programming in Excel
- How to Program in Excel?
Introduction to Programming in Excel
Have you ever been tired of doing a task in Excel which you feel can be automated and save your time? Most of the time, you must have encountered such tasks. However, in order to automate any task, you first need to have programming skills for that particular language. In Excel, you can do programming with the help of Visual Basic for Application (VBA) which is Excel’s own programming language that can help you to automate the tasks. In this article, we will see how we can do programming in Excel VBA. VBA can be used to write a program that can automate the task for you. The piece of lines we write under VBA is called Macro, which is written in such a way that they instruct the Excel system about what to be done.
How to Program in Excel?
Let’s understand how to Program in excel with few illustrations.
Enabling Developer Tab
The first thing that comes is enabling the developer tab that helps you to record and store a macro (VBA Code). Let us see how we can get that enabled.
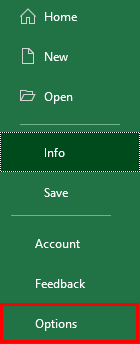
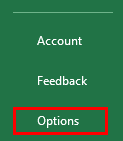
- Navigate to the File menu in your excel file and click on it.
- Within the File menu, click on Options, and it will load a new window with all excel options available.
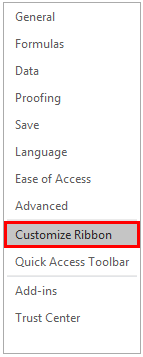
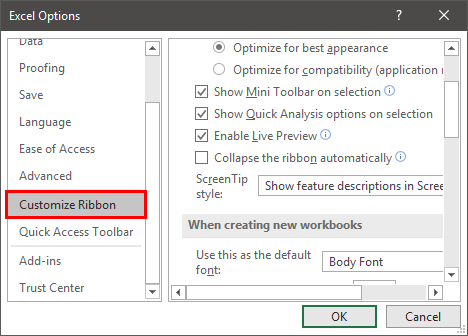
- In the new window that popped up named Excel Options, click on the Customize Ribbon tab. You can see all the customization options you can use for Excel Ribbon, which appears at the top of your Excel file.
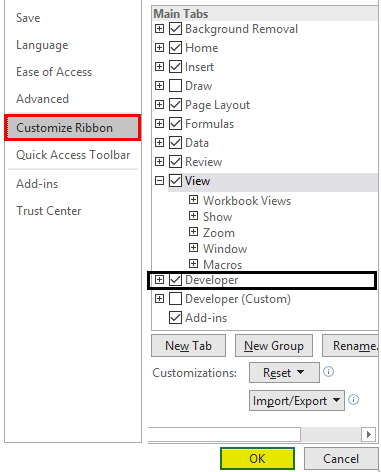
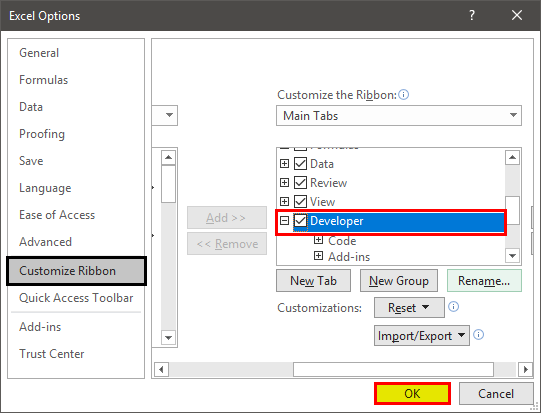
- Enable Developer option under Main Tabs dropdown within Customize the Ribbon: section. You can check (tick-mark) the Developer tab to enable it. Click the OK button placed at the bottom right of the Excel Options tab, and that’s it.
- You have successfully enabled the Developer option within your excel. If you check the Excel Ribbon in your file now, you’ll be able to see a new tab added there with the name Developer on it.
This is the first step you need to follow before you start writing macros in Excel. Because the Developer tab is needed to record and run the macro, this option tab is not by default enabled, which is why we tried enabling it here first.
Recording a Macro
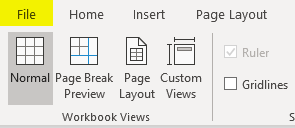
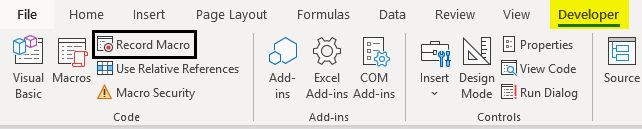
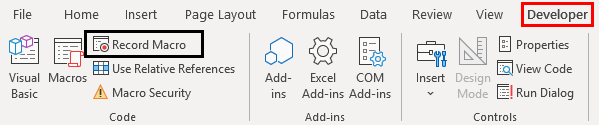
- Open the Excel file. Navigate towards the Developer tab you just enabled and then click on the Record Macro button, categorized and can be seen under the Code section.
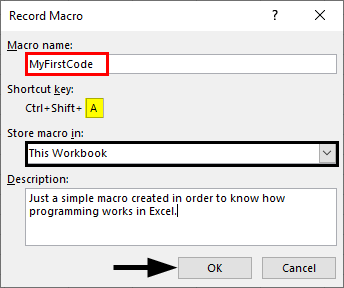
- As soon as you click on the Record Macro button, you’ll see a window popping up; in that window, you must have to assign a name to the macro; you can also assign a shortcut key for this macro to run. Can you add the description, if any, for this macro you are creating? Once you are done with all this, you can click on the OK button placed at the right bottom of the window. See the screenshot below for your reference.
As soon as you click OK, the system starts recording the macro and all the tasks you perform will be recorded and converted to Excel Program in the backend.
- Try typing the sentence “This is my first VBA code, and I am very happy!” in cell A1 within the Excel sheet and press Enter key. These steps will be recorded in the backend of the macro.

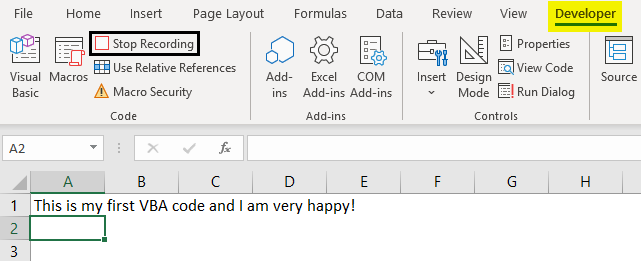
- Under the Code section, you might have observed that the Record Macro button has changed to Stop Recording. This is like Play and Stop. Record Macro Works as Play button and Stop Recording work as Stop button. Click on the Stop Recording button to stop the recording.
The magic behind all this is, Excel has recorded my steps here and converted those into pieces of code so that this task can be automated. It means, every single step, selecting cell A1, inputting the text as “This is my first VBA code, and I am happy!”, clicking Enter to go to the next cell. All these steps are converted into a VBA code. Let’s check the code now.
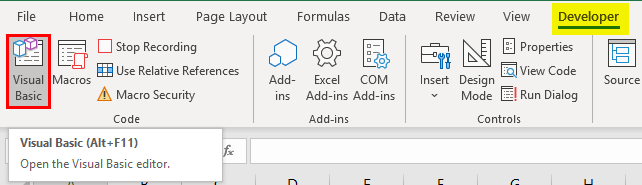
- In order to go to Visual Basic Editor, you can click on the Visual Basic option under the Code category in the Developer tab, or you can use Alt + F11 as a shortcut for the same.
- Navigate towards the Modules section under VBAProject and click on the plus button under it to see the list of active modules in VBA.
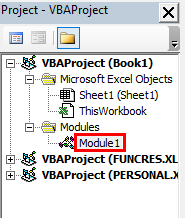
- Inside the Modules folder, you can see Module1 as soon as you click on the plus sign. You can double click on Module1; it is where your code for the task we performed in previous steps (Step 3 and 4) are recorded. Save this code, and you can run it every time to get the same output. See the screenshot below:
Conclusion
- We can record a macro in Excel to automate day to day small tasks, which are simpler for the system to manipulate programmatically.
- The cool thing about it is you don’t need to dig your head deep for the logic behind each step you perform. Excel VBA does it for you.
- For some complex tasks, such as the one which involves looping and conditional statements, you need to write code manually under VBA.
Things to Remember About Programming in Excel
- The Developers tab is not by default enabled and visible to you in Excel Ribbon. You need to enable it through Excel Options.
- Recording a macro works on simple tasks that are repeating, and you need those to be automated. However, for complex tasks which involve looping or Conditional Inputs and Outputs are still need to be coded manually under VBA.
- You need to save the file as an Excel-Macro Enable file format in order to be able to read and run the code again on your excel.
Recommended Articles
This is a guide to Programming in Excel. Here we discuss how to Program in Excel along with practical examples and a downloadable excel template. You can also go through our other suggested articles –
- Ribbon in Excel
- TRIM Formula in Excel
- Project Management Template in Excel
- COUNTIFS in Excel
Содержание
- Начало программирования настроек на уровне документа для Excel
- Общие сведения о том, как работают настройки на уровне документа для Excel
- Создание проектов на уровне документа для Excel
- Программирование книг Excel с помощью ведущих элементов и элементов управления ведущего приложения
- Настройка пользовательского интерфейса Excel
- Использование привязки данных
- Дальнейшие действия
- Программирование с использованием API C в Excel
- Программные интерфейсы Excel
- Причины для использования C API
- Написание высокопроизводительных определяемых пользователем функций для работы с листами
- Доступ к многопоточным серверам с помощью функций XLL
- Настройка пользовательского интерфейса Excel
- Создание приложений, доступных в Интернете
- Управление Excel из внешних приложений
- Асинхронный вызов Excel
- Интерфейс C API и его связь с XLM
- Programming with the C API in Excel
- Excel Programming Interfaces
- When to Use the C API
- Writing High-Performance User-Defined Worksheet Functions
- Accessing Multithreaded Servers by Using XLL Worksheet Functions
- Customizing the Excel User Interface
- Creating Applications that Can Be Accessed on the Internet
- Controlling Excel from External Applications
- Asynchronous Calling of Excel
- C API and Its Relation to XLM
Начало программирования настроек на уровне документа для Excel
Применимо к: Visual Studio Visual Studio для Mac Visual Studio Code
Если вы только начинаете создавать настройки на уровне документа для Microsoft Office Excel с помощью Visual Studio, ознакомьтесь с тем, что нужно знать.
Применимо к: Сведения в этом разделе относятся к проектам уровня документа для Excel. Дополнительные сведения см. в разделе «Функции», доступные в приложениях Office и типах проектов.
Общие сведения о том, как работают настройки на уровне документа для Excel
Настройка на уровне документа для Excel основана на одной книге. Чтобы приступить к настройке, пользователь открывает книгу или создает книгу из шаблона Excel. События в книге, например ввод текста в ячейках или нажатие кнопок и элементов меню, могут вызывать методы обработки событий в сборке. При закрытии книги функции, предоставляемые настройкой, больше не доступны в Excel только в документе, содержавшемся в них.
Создание проектов на уровне документа для Excel
Чтобы создать настройку на уровне документа для Excel, используйте шаблон книги Excel или шаблона Excel в диалоговом окне «Новый проект «. Эти шаблоны включают в себя необходимые ссылки на сборки и файлы проекта.
Дополнительные сведения о создании проекта на уровне документа для Excel см. в статье «Практическое руководство. Создание проектов Office в Visual Studio». Дополнительные сведения о шаблонах проектов см. в обзоре шаблонов проектов Office.
Программирование книг Excel с помощью ведущих элементов и элементов управления ведущего приложения
Элементы узла и элементы управления ведущего приложения — это классы, предоставляющие модель программирования для настроек на уровне документа, созданных с помощью Visual Studio.
Элементы узла предоставляют точку входа для кода, и они также могут выступать в качестве контейнеров для элементов управления узла и элементов управления Windows Forms. В проектах уровня документа для Excel эти хост-элементы представлены классами , Sheet1 Sheet2 и Sheet3 классами ThisWorkbook .
Элементы управления ведущего приложения основаны на собственных объектах Excel, таких как объекты списка и диапазоны. Элементы управления ведущего приложения предоставляют аналогичные функциональные возможности для собственных объектов Excel, но также имеют новые события, поддержку конструктора и возможность привязки данных. Они отображаются как объекты первого класса в коде проекта и в IntelliSense, что упрощает ссылки на определенные объекты непосредственно в коде без необходимости перемещаться по объектной модели Excel.
Дополнительные сведения см. в следующих разделах:
Настройка пользовательского интерфейса Excel
Большинство решений Microsoft Office изменяют пользовательский интерфейс приложения Office, чтобы пользователи пользовались возможностями взаимодействия с решением. Существует множество способов изменения пользовательского интерфейса Excel с помощью настройки на уровне документа. Например, можно добавить элементы управления на ленту или отобразить панель действий. Дополнительные сведения см. в статье о настройке пользовательского интерфейса Office.
Вы также можете открыть книгу, связанную с проектом, непосредственно в Visual Studio. Когда книга открыта в Visual Studio, ее можно изменить с помощью пользовательского интерфейса Excel. Вы также можете использовать книгу в качестве области конструктора, которая позволяет перетаскивать элементы управления на листы. Дополнительные сведения см. в проектах Office в среде Visual Studio.
Использование привязки данных
Элементы управления ведущего приложения также находятся в списке элементов управления, которые можно перетащить из окна источников данных . Добавление элементов управления узла таким образом автоматически привязывает их к источнику данных, настроенному с помощью окна. Без написания кода можно отображать данные из баз данных, веб-служб и бизнес-объектов. Дополнительные сведения см. в статье «Привязка данных к элементам управления в решениях Office».
Дальнейшие действия
Чтобы узнать, как создать настройку на уровне документа для Excel, см. пошаговое руководство. Создание первой настройки уровня документа для Excel. В этом пошаговом руководстве представлены средства разработки Office в Visual Studio и модель программирования для настроек на уровне документа Excel.
Список разделов, в которые рассматриваются некоторые распространенные задачи в проектах Excel, см. в статье «Общие задачи» в программировании Office.
Источник
Программирование с использованием API C в Excel
Относится к: Excel 2013 | Office 2013 | Visual Studio
Программные интерфейсы Excel
Причины для использования C API
Версия C API, представленная в Excel 2007, относится, в основном, к высокопроизводительным расчетам, а не пользовательскому интерфейсу.
Написание высокопроизводительных определяемых пользователем функций для работы с листами
API C Excel идеально подходит для создания высокопроизводительных функций листа путем создания надстроек XLL. API C предоставляет наиболее прямой доступ к данным листа. XLL предоставляют Excel прямой доступ к ресурсам DLL. Производительность БИБЛИОТЕК XLL в Excel 2013 еще больше повышается за счет добавления новых типов данных и, что самое главное, поддержки запуска определяемых пользователем функций на кластеризованных серверах.
Доступ к многопоточным серверам с помощью функций XLL
������������� �������� (MTR), ������� ����������� � Excel 2007, ��������� ��������� ���������������� ������� ����� XLL. �� ����� ������������ ��� ������� � ������������� ��������. � ��������� �������� ����� �������� �����������, ��� ��� ����� ����������� ��������� ����������� ������������������. Для пользователей Excel, которым иногда требуется доступ к мощным вычислительным ресурсам, сочетание библиотеки XLL, использующей MTR, и мощного сервера обеспечивает высокую производительность решения.
Настройка пользовательского интерфейса Excel
Создание приложений, доступных в Интернете
������ Excel � Microsoft Office 2007 � ��� ������ ������ �������������� ������������� ������� � ������ � �������� Excel � ������� ����������� ������� ��������. Вместе с языками разработки и ресурсами .NET Framework эти технологии очень важны в случае развертывания Excel для пользователей в будущем.
Управление Excel из внешних приложений
Асинхронный вызов Excel
Excel позволяет XLLs вызывать API C только в том случае, если Excel передал управление XLL. Функция листа, вызываемая Excel, может вызывать обратно в Excel с помощью API C. Команда XLL, вызываемая Excel, может вызывать API C. Функции и команды DLL и XLL, вызываемые VBA при вызове самой VBA Excel, могут вызывать API C. Например, нельзя задать обратный вызов Windows в XLL и вызвать api C из него, а api C нельзя вызвать из фонового потока, созданного XLL. Асинхронный вызов Excel с помощью COM из БИБЛИОТЕКи DLL или XLL не рекомендуется.
� ��������� ������ ��������� ����� ����������� ������� ������� ��� �������� ��������� ������, ������� ���������� Excel ��� ���������� ���������� � ���������. ��� ����� ������� � ������� ����������, ������� ��������������� � Excel � ������� ������ COM. � ������� �� ���������� C API, � ������� �������� ������ ����� ������������, ������ ���� ���������� Excel ���� �������� ����������, ������ COM �� ��� ����������. Приложения COM могут вызывать методы Excel всякий раз, когда Excel находится в состоянии готовности, несмотря на то, что эти вызовы могут игнорироваться, если отображаются диалоговые окна, открываются меню или выполняется макрос.
Интерфейс C API и его связь с XLM
функции, предоставляющие сведения о рабочей области, такие как GET.CELL и GET.WORKBOOK;
эквивалентные командам функции, позволяющие автоматизировать обычные пользовательские операции, такие как DEFINE.NAME и PASTE;
функции, связанные с надстройками, такие как REGISTER;
эквивалентное командам перехватывание событий (например, с помощью ON.ENRTY и ON.TIME);
операции макросов, связанные с функциями, такие как ARGUMENT и VOLATILE;
операции управления потоком выполнения, такие как GOTO и RETURN.
Windows Vista и Windows 7 не поддерживают HLP-файлы напрямую, но вы можете скачать программу справки Windows (WinHlp32.exe) для Windows Vista или программу справки Windows (WinHlp32.exe) для Windows 7 от корпорации Майкрософт, позволяющие открыть эти файлы.
���������� DLL �������� ����������� ���� ������� � ������ ���������� C API, ��������� ������� ��������� ������ Excel4, Excel4v, Excel12 � Excel12v (��������� ��� ���� ������������ � Excel 2007). ������������� ���������, ��������������� ������ ������� � �������, ���������� � ����� ��������� � ���������� ��� ���� �� ���������� �������� ��������� ������. ��������, ������� GET.CELL ������������ xlfGetCell, REGISTER � xlfRegister, � DEFINE.NAME � xlcDefineName.
Дополнительные сведения см. в статье Новые возможности API C для Excel.
Источник
Programming with the C API in Excel
Applies to: Excel 2013 | Office 2013 | Visual Studio
You can use the Microsoft Excel 2013 XLL Software Development Kit and the C API to create high-performance worksheet functions for Excel 2013. The upgrades to the Excel 2013 C API reflect ongoing support for users for whom the performance of third-party or in-house functionality is critical.
Excel Programming Interfaces
Excel provides several options for developing applications that interface with it. The Excel programming interfaces were added to earlier versions in the following order:
XLM macro language: The first user-accessible language for the extension of Excel and the basis of the C API. Although still supported in Excel 2010, XLM has long been superseded by Visual Basic for Applications (VBA).
C API and XLLs: DLLs that are integrated with Excel. These DLLs provide the most direct and fastest interface for the addition of high-performance worksheet functions, although at the cost of some complexity compared with later technologies.
VBA: Visual Basic code objects that are associated with Excel workbook objects. VBA allows event trapping, customization, and the addition of user-defined functions and commands. VBA is the most commonly used and most easily available of the extensibility options.
COM: The interoperability standard for Windows-based applications, through which Excel exposes its events and objects. VBA uses COM to interact with Excel. Excel exports COM type libraries that can help you create C++ COM code resources and applications that can control Excel externally.
The Microsoft .NET Framework: The multi-language managed code environment designed for rapid application development for distributed environments. The primary programming language for code that is based on the .NET Framework is C#, although many languages can be compiled to the Microsoft intermediate language (MSIL). Excel 2013 can access code resources contained within .NET Framework assemblies.
When to Use the C API
The primary reason for writing XLLs and using the C API is to create high-performance worksheet functions. Although XLL functions are frequently referred to as user-defined functions, the investment in time to obtain the understanding and skills that are required to write XLLs make this a technology impractical for most users. Nevertheless, the applications of high-performance functions—and, in Excel 2013, the ability to write multithreaded interfaces to powerful server resources—make this a very important part of Excel extensibility.
The revision of the C API that was introduced in Excel 2007 is mainly concerned with the aspects relating to high-performance calculations, rather than features such as the user interface.
Writing High-Performance User-Defined Worksheet Functions
The Excel C API is the ideal choice when you want to create high-performance worksheet functions by creating XLL add-ins. The C API provides you with the most direct access to worksheet data. XLLs provide Excel with the most direct access to the DLL resources. The performance of XLLs is further enhanced in Excel 2013 by the addition of new data types and, most importantly, support for running user-defined functions on clustered servers.
Working with XLLs comes at a cost: The C API has none of the higher-level rapid development features of VBA, COM, or the .NET Framework. Memory management is low level and, therefore, puts greater responsibility on the developer. Many Excel features that are exposed via COM, making them available through VBA and the .NET Framework, are not exposed to the C API.
Accessing Multithreaded Servers by Using XLL Worksheet Functions
Multithreaded recalculation (MTR), which was introduced in Excel 2007, enables you to create thread-safe XLL worksheet functions. You can use these functions to access multithreaded servers. Later sections describe more fully how this can dramatically increase the performance observed by the user. For Excel users who sometimes need access to a lot of processing power, the combination of an XLL that uses MTR and a powerful calculation server provides the highest-performance solution.
Customizing the Excel User Interface
For many versions of Excel, the C API has not been the best choice for customizing the user interface. VBA has superior access to Excel objects and events. The user interface introduced in Excel 2007 is significantly different from earlier versions both in appearance and underlying technology. You can best customize this interface by using managed code resources.
Creating Applications that Can Be Accessed on the Internet
Excel Services, introduced with the 2007 Microsoft Office system, provides the best way to give users access to workbooks and Excel functionality by using standard Web browser tools. Together with .NET Framework development languages and resources, these technologies represent an important part of Excel deployment to users in the future.
Controlling Excel from External Applications
Excel exposes its objects, methods, and events through the COM interface. You can, therefore, use COM to create stand-alone applications that can start and control an Excel session or control an existing Excel session. You can access the COM-exposed Excel interface within several development languages, including C++ and VBA. C# and the .NET Framework similarly provide an interface to Excel that enables remote access to and control of Excel.
Asynchronous Calling of Excel
Excel allows XLLs to call the C API only when Excel has passed control to the XLL. A worksheet function that is called by Excel can call back into Excel by using the C API. An XLL command that is called by Excel can call the C API. DLL and XLL functions and commands that are called by VBA when VBA has itself been called by Excel can call the C API. You cannot, for example, set a timed Windows callback into your XLL and call the C API from it, and you cannot call the C API from a background thread created by your XLL. Calling Excel asynchronously by using COM from a DLL or XLL is not recommended.
This is very limiting because there may be applications in which you want Excel to react to an event asynchronously. For example, you might want Excel to retrieve a piece of data on the Internet and recalculate whenever that data changes. Or you might want a background thread to perform a calculation and have Excel recalculate when it is finished.
You can do this by having Excel actively poll for changes, but this is inefficient and limiting because it involves Excel frequently interrupting its regular activity. You can set up repeated timed command using the C API or VBA, although this is not an ideal solution.
Ideally you would want a more efficient external process to check for the change in data, and for that external process to trigger Excel to retrieve the update and perform a recalculation. You can do this by using an application that interfaces to Excel by using COM. COM is not restricted in the same manner as the C API to making calls only when Excel has explicitly passed it control. COM applications can invoke Excel methods whenever Excel is in a ready state, although these method calls might be ignored if dialog boxes are being displayed, menus are pulled down, or when a macro is executing.
C API and Its Relation to XLM
The Excel macro (XLM) language was the first user-accessible programming environment provided in Excel. It enabled users to create custom commands and functions on special macro sheets that look like ordinary worksheets. XLM macro sheets are still supported in Excel 2013. You can use all the usual worksheet functions like SUM and LOG on a macro sheet, in addition to the following items that cannot be entered on a worksheet:
Workspace information functions such as GET.CELL and GET.WORKBOOK.
Command-equivalent functions that enable automation of ordinary user operations such as DEFINE.NAME and PASTE.
Functions that relate to add-ins such as REGISTER.
Command-equivalent event traps such as ON.ENRTY and ON.TIME.
Macro function-specific operations such as ARGUMENT and VOLATILE.
Flow-control operations such as GOTO and RETURN.
A limited version of the C API existed in Excel version 3. However, in Excel version 4, the XLM language was mapped to the C API. Since then, DLLs have been able to call all worksheet functions, macro sheet information functions, and commands, and to set event traps. DLLs cannot call XLM flow control functions from within the C API. These macro-sheet functions and commands are documented in the Help file XLMacr8.hlp (formerly named Macrofun.hlp). To obtain this help file, go to the Microsoft Download Center and search for «XLMacr8.hlp».
Windows Vista and Windows 7 do not directly support .hlp files, but you can download the Windows Help program (WinHlp32.exe) for Windows Vista or the Windows Help program (WinHlp32.exe) for Windows 7 from Microsoft that enables them to be opened.
DLLs call C API equivalents of these functions and commands by using the callback functions Excel4, Excel4v, Excel12, and Excel12v (the last two were introduced in Excel 2007). Enumerated constants that correspond to each function and command are defined in a header file and passed as one of the arguments to these callbacks. For example, GET.CELL is represented by xlfGetCell, REGISTER by xlfRegister, and DEFINE.NAME by xlcDefineName.
In addition to providing the worksheet functions and macro-sheet functions and commands, the C API provides function and command enumerations that can be called only by using these callbacks from within a DLL. For example, xlGetName enables the DLL to find out its own the full path and file name, which is required when you register functions and commands with Excel.
Since the introduction of Visual Basic for Applications (VBA) sheets in Excel version 5, and the Visual Basic Editor (VBE) in version 8 (Excel 97), the easiest way for users to customize Excel is to use VBA instead of XLM. Consequently, much of the new functionality introduced in later versions of Excel is available through VBA, but not through XLM or the C API. For example, several commands, event traps, and enhanced dialog box capabilities are available through VBA, but not through XLM or the C API.
Источник
What is Programming in Excel?
Programming refers to writing a set of instructions that tell Excel to perform one or more tasks. These instructions are written in the Visual Basic for Applications (VBA) as this is the language understandable to Excel. To write an instruction, one can either write a code in VBA or record a macro in Excel. A macro is recorded to automate repetitive tasks. When a macro is recorded, VBA generates a code in the background.
For example, to submit an Excel report, a table needs to undergo the same set of tasks each time. These tasks include applying a pre-defined border, color, alignment, and font. To program in Excel, a macro can be recorded for performing all these tasks.
The purpose of programming in Excel is to save the user from performing the same tasks again and again. Moreover, it helps accomplish multiple tasks at a great speed that would have taken a lot of time, had they been performed manually.
Table of contents
- What is Programming in Excel?
- Stages of Programming in Excel VBA
- Stage 1–Enable the Developer Tab in Excel
- Stage 2–Record a Macro in Excel
- Stage 3–View and Examine the VBA Code Generated by the Recorded Macro
- Stage 4–Test the VBA Code of the Recorded Macro
- Stage 5–Save the Recorded Macro (or the VBA Code)
- Frequently Asked Questions
- Recommended Articles
- Stages of Programming in Excel VBA
Stages of Programming in Excel VBA
Programming in Excel VBA is carried out in the following stages:
- Enable the Developer tab in Excel
- Record a macro in Excel
- View and examine the VBA code generated by the recorded macro
- Test the VBA code of the recorded macro
- Save the recorded macro (or the VBA code)
Further in this article, every stage of programming ine xcel has been discussed one by one. The steps to be performed in each stage are also listed.
Stage 1–Enable the Developer Tab in Excel
Let us understand how to enable the Developer tabEnabling the developer tab in excel can help the user perform various functions for VBA, Macros and Add-ins like importing and exporting XML, designing forms, etc. This tab is disabled by default on excel; thus, the user needs to enable it first from the options menu.read more in Excel. This tab is enabled to record a macro and access VBA. When the Developer tab is enabled, it appears on the Excel ribbonRibbons in Excel 2016 are designed to help you easily locate the command you want to use. Ribbons are organized into logical groups called Tabs, each of which has its own set of functions.read more. However, by default, Excel does not display the Developer tab.
Note: To know an alternate method to record a macro and access VBA, refer to the “alternative to step 1” in stages 2 and 3.
The steps to enable the Developer tab in Excel are listed as follows:
Step 1: Go to the File tab displayed on the Excel ribbon.
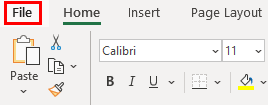
Step 2: Select “options” shown in the following image.
Step 3: The “Excel options” window opens, as shown in the following image. Select “customize ribbon” displayed on the left side of this window.
Step 4: Under “choose commands from” (on the left side of the window), ensure that “popular commands” is selected. Under “customize the ribbon” (on the right side of the window), choose “main tabs” from the drop-down list.
Next, select the checkbox of “developer” and click “Ok.” This checkbox is shown in the following image.
Step 5: The Developer tab appears on the Excel ribbon, as shown in the following image.

Stage 2–Record a Macro in Excel
Let us learn how to record a macroRecording macros is a method whereby excel stores the tasks performed by the user. Every time a macro is run, these exact actions are performed automatically. Macros are created in either the View tab (under the “macros” drop-down) or the Developer tab of Excel.
read more in Excel. When a macro is recorded, all tasks performed by the user (within the workbook) are stored in the Macro Recorder until the “stop recording” option is clicked. Apart from Microsoft Excel, a macro can be recorded for all Office applications that support VBA.
The steps to record a macro in Excel are listed as follows:
Step 1: From the Developer tab, click “record macro” from the “code” group.
Alternative to step 1: One can also click “record macro” from the “macros” group of the View tab of Excel.
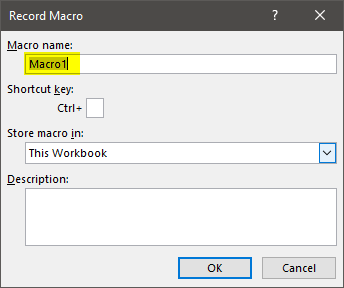
Step 2: The “record macro” window opens, as shown in the following image. In this window, one can name the macro before recording it. The default macro name given by Excel is “macro1.”
The rules governing a macro name are stated as follows:
- It should not contain any space ( ), period (.) or exclamation point (!).
- It cannot contain any special characters (like $, @, ^, #, *, &) except the underscore (_).
- It should not begin with a numerical value. Rather, it must start with a letter.
- It cannot exceed 255 characters in length.
Note: It is recommended to use short and meaningful names for macros. Further, one must assign a unique name to each macro. In VBA, two macros within the same code module cannot have the same names.
Step 3: In the “macro name” box, we have entered the name “recording_macro.”
Notice that an underscore has been used as a separator between the two strings (recording and macro) of the name. No spaces, periods or special characters have been used in this name.
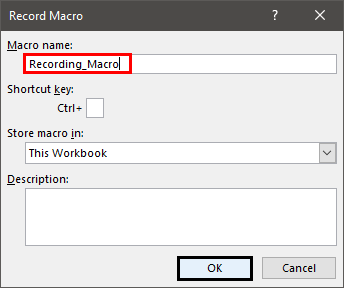
Step 4: Click “Ok” to start recording the macro. Once “Ok” is clicked in the preceding window, the “record macro” button (in the Developer tab or the View tab) changes to the “stop recording” button.
Next, carry out the tasks to be recorded in the macro “recording_macro.”
Note: Since the Macro Recorder records every action performed by the user, ensure that the actions are executed in the right sequence. If the recorded sequence is correct, Excel will perform the tasks efficiently each time the macro is run.
However, if a sequencing error occurs, one must either re-record the actions or edit the VBA codeVBA code refers to a set of instructions written by the user in the Visual Basic Applications programming language on a Visual Basic Editor (VBE) to perform a specific task.read more manually. If one is recording the macro for the first time, it is recommended to keep a copy of the workbook to prevent any undesired changes to the stored data.
In the following steps (step 4a to step 4c), the tasks to be recorded have been performed.
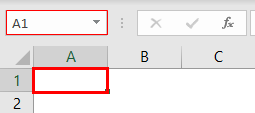
Step 4a: Select cell A1 of the worksheet. This is the first task that is recorded. The selection is shown in the following image.
Step 4b: Type “welcome to VBA” in cell A1. This is the second task that is recorded. Exclude the beginning and ending double quotation marks while typing.
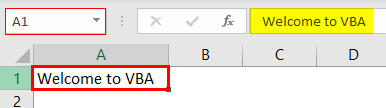
Step 4c: Press the “Enter” key. As a result, the selection shifts from cell A1 to cell A2. This becomes the third task that is recorded.
The selection is shown in the following image.
Step 5: Click “stop recording” in the “code” group of the Developer tab. By clicking this option, Excel is told to refrain from recording any further tasks.
The “stop recording” option is shown in the following image.

Stage 3–View and Examine the VBA Code Generated by the Recorded Macro
Let us observe and study the VBA code generated by the macro recorded in stage 2. Remember that one can either directly write a code in the Visual Basic Editor (VBE or VB Editor) or let a macro do the same.
The VBE is a tool or program where VBA codes are written, edited, and maintained. When a macro is recorded, a code is automatically written in a new module of VBE. Note that VBA is the programming language of Excel.
The steps to view and study the code generated by the recorded macro are listed as follows:
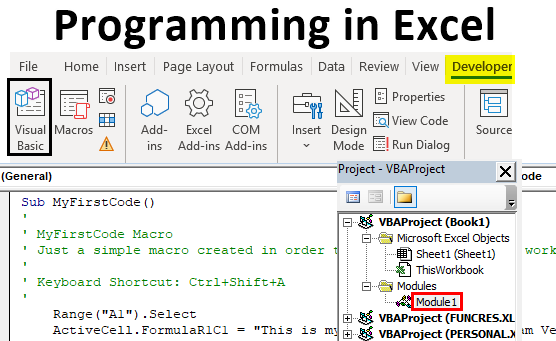
Step 1: Click “visual basic” from the “code” group of the Developer tab. This option is shown in the following image.
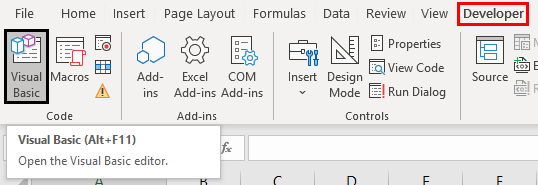
Alternative to step 1: As a substitute for the preceding step, press the keys “Alt+F11” together. This is the shortcutAn Excel shortcut is a technique of performing a manual task in a quicker way.read more to open the VBE window.
Note: “Alt+F11” is a toggle key which when pressed repeatedly, helps to switch between VBE and Excel.
![]()
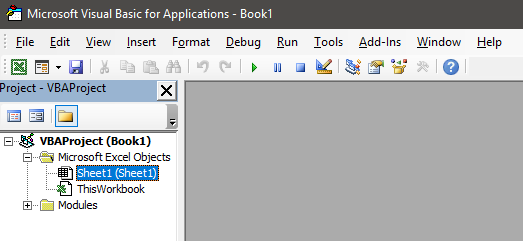
Step 2: The Visual Basic Editor window opens, as shown in the following image.
To the left of the VBE window, the worksheet, workbook, and module are shown. This window on the left (named “Project-VBAProject”) is also known as the Project window or the Project Explorer of VBE.
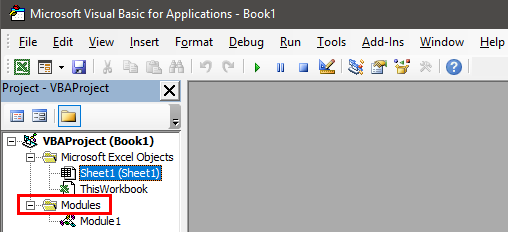
Step 3: Double-click “modules” shown in the following image.
Note: “Modules” are folders shown in the Project window after recording a macro. They are not shown prior to recording a macro. “Modules” are also shown when a module is inserted manually from the Insert tab of the VBE.
Step 4: Double-click “module1” under modules. A code appears on the right side of the VBE window. This window on the right [named “Book1-Module1 (Code)”] is known as the module code window.
The code is displayed in the following image.
Note: The code generated by recording a macro can be checked in the “modules” folder (in the module code window). In a module code window, one can also write a code manually or copy-paste it from another source.

In the following steps (step 4a to step 4d), the code generated by the recorded macro has been studied.
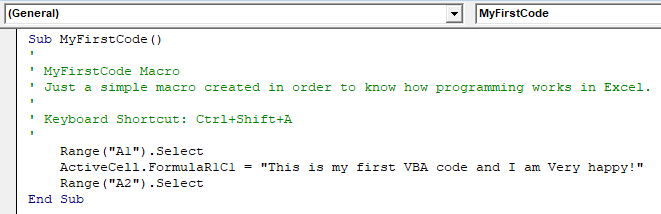
Step 4a: The first word of the code is “Sub.” “Sub” stands for subroutine or procedure. At the start of the code, the word “Sub,” the macro name (recording_macro), and a pair of empty parentheses are displayed. This is followed by the statements to be executed by the code. These statements are:
ActiveCell.FormulaR1C1 = “Welcome to VBA”
Range (“A2”). Select
The code ends with “End Sub.”
The start or head [Sub Recording_Macro ()] and the end or tail [End Sub] of the code are shown in the following image.
Note 1: The words “macro” and “code” are often used interchangeably by several Excel users. However, some users also distinguish between these two words.
A VBA code is a command created either by writing a code directly in VBE or by recording a macro in Excel. In contrast, a macro consists of instructions that automate tasks in Excel. According to one’s choice, one can decide whether or not to differentiate between the two words.
Note 2: The “Sub” can be preceded by the words “Private,” “Public,” “Friend,” or “Static.” All these words set the scope of the subroutine. The default subroutine used in VBA is “Public Sub.” So, when “Sub” is written in a code, it implies “Public Sub.”
A “Public Sub” can be initiated by subroutines of different modules. However, a “Private Sub” cannot be initiated by subroutines of other modules.

Step 4b: The first activity we performed (in step 4a of stage 2) was to select cell A1. Accordingly, the following statement of the code tells Excel that the active cell is R1C1.
ActiveCell.FormulaR1C1
When a macro is recorded, VBA uses the R1C1 style for referring to cells. In this style, the letter R is followed by the row number and the letter C is followed by the column number. So, cell R1C1 implies that the row number is 1 and the column number is also 1. In other words, cell R1C1 is the same as cell A1 of Excel.
Step 4c: The second activity we performed (in step 4b of stage 2) was to type “welcome to VBA” in cell A1. So, the following statement of the code tells Excel that the value in cell R1C1 is “welcome to VBA.”
ActiveCell.FormulaR1C1 = “Welcome to VBA”
Step 4d: The third activity we performed (in step 4c of stage 2) was to press the “Enter” key. By pressing this key, the selection had shifted from cell A1 to cell A2. Therefore, the following statement tells Excel to select cell A2.
Range (“A2”). Select
This is the way VBA generates a code for all the activities performed under stage 2 of programming in Excel. Examining the code line-by-line makes it easier to interpret it.
Stage 4–Test the VBA Code of the Recorded Macro
Let us test the code when it is run multiple times. Note that a macro (or code) can be run as many times as one wants. Each time it runs, it performs the recorded tasks in Excel.
The steps to test the code that we examined in stage 3 are listed as follows:
Step 1: Delete the string “welcome to VBA” from cell A1 of Excel. Let A1 remain as a blank, selected cell. The following image shows the empty cell A1.
Note: To go back from VBE to Excel, press the toggle key “Alt+F11.”
Step 2: Go to VBE again by pressing the key “Alt+F11.” Click anywhere within the code. Next, click the “Run Sub/UserForm (F5)” button. This button is shown within a blue box in the following image.
Note: Alternatively, one can press the key F5 to run the VBA code.

Step 3: The output is shown in the following image. The preceding code enters the string “welcome to VBA” in cell A1. Thereafter, the selection shifts to cell A2. The string “welcome to VBA” has been entered in cell A1 because this cell was selected (in step 1) before running the code.
Each time the code is run, the currently selected cell (or the active cell) is filled with the string “welcome to VBA.” Then, the selection shifts to cell A2. So, if cell M10 is the active cell, running the code fills this cell with the stated string and selects cell A2 at the end.
However, had cell A2 been selected, running the code would have filled this cell with the string “welcome to VBA.” Moreover, in the end, cell A2 would have remained the selected cell.

Stage 5–Save the Recorded Macro (or the VBA Code)
Let us learn how to save a workbook containing a recorded macro. If a macro is saved, its VBA code is also saved.
The steps to save a workbook containing a macro (or a VBA code) are listed as follows:
- Click “save as” from the File tab of Excel. The “save as” dialog box opens, as shown in the following image.
- Assign a name to the Excel workbook in the “file name” box. We have entered the name “macro class.”
- Save the workbook with the “.xlsm” extension. So, in the “save as type” box, choose “Excel macro-enabled workbook.”
- Click “save” to save the workbook.
A workbook containing a macro should always be saved with the “.xlsm” extension. This extension ensures that the macro is saved and can be reused the next time the workbook is opened.
Note 1: The “save as” command is used when a workbook is saved for the first time. It is also used when a new copy of the workbook is to be created and, at the same time, the original copy is to be retained as well.
Note 2: If the workbook containing a macro is saved as a regular workbook (with the “.xlsx” extension), the macro will not be saved. Further, one may lose the code of the recorded macro.

Frequently Asked Questions
1. What is programming and how is it carried out in Excel?
Programming refers to instructing Excel to perform one or more tasks. To instruct Excel, either a code can be written in the Visual Basic for Applications (VBA) or a macro can be recorded in Excel. Each time a macro is recorded, a code is generated by VBA in the background.
The steps to carry out programming in Excel are listed as follows:
a. Enable the Developer tab in Excel.
b. Record a macro in Excel. For recording, perform each activity in the sequence in which it should be recorded.
c. Save the code generated by the recorded macro and run it whenever required.
One can also carry out programming by writing a code manually and then saving and running it.
Note: To learn the details of programming in Excel, refer to the description of the different stages given in this article.
2. How to write a code for programming in Excel?
For programming in Excel, a code is written in Visual Basic Editor (VBE), which is a tool of VBA. The steps to write a code in VBE are listed as follows:
a. Open a blank Excel workbook.
b. Press the keys “Alt+F11” to open VBE.
c. Select any worksheet from “Microsoft Excel Objects” listed in the “Project-VBA Project window.”
d. Click the Insert tab and choose “module.” A folder named “modules” and an object named “module1” are created in the “Project-VBA Project window.” At the same time, a window opens on the right, which is titled “Book1-Module1 (Code).”
e. Enter the code in the “Book1-Module1 (Code)” window that has opened in the preceding step.
f. Click anywhere within the code once it has been written entirely.
g. Run the code by pressing F5 or clicking the “Run Sub/UserForm (F5)” button.
If the code has been entered correctly in step “e,” Excel will perform the tasks it has been instructed to. However, if there is an error in the code, an error message will appear.
Note: For saving a code, refer to stage 5 of programming in Excel given in this article.
3. How to learn programming in Excel?
To learn programming, one can learn how to record a macro in Excel. It is easier to learn macro recording than to create a code manually in VBE. Moreover, macro recording can be done even if one does not know VBA coding.
However, each time a macro is recorded, examine the generated code carefully. As one becomes proficient in macro recording, the codes too will become understandable. In this way, learning programming in Excel will no longer be a complicated task.
Recommended Articles
This has been a guide to Programming in Excel. Here we discuss how to record VBA macros along with practical examples and downloadable Excel templates. You can learn more from the following articles–
- Create Button Macro in ExcelA Macro is nothing but a line of code to instruct the excel to do a specific task. Once the code is assigned to a button control through VBE you can execute the same task any time in the workbook. By just clicking on the button we can execute hundreds of line, it also automates the complicated Report.read more
- What is VBA Macros?
- Excel MacroA macro in excel is a series of instructions in the form of code that helps automate manual tasks, thereby saving time. Excel executes those instructions in a step-by-step manner on the given data. For example, it can be used to automate repetitive tasks such as summation, cell formatting, information copying, etc. thereby rapidly replacing repetitious operations with a few clicks.
read more - Code in Excel VBAVBA code refers to a set of instructions written by the user in the Visual Basic Applications programming language on a Visual Basic Editor (VBE) to perform a specific task.read more
Перейти к содержанию
На чтение 2 мин Опубликовано 11.05.2020
Данный учебник является введением в язык программирования Excel VBA (Visual Basic for Applications). Изучив VBA, Вы сможете создавать макросы и выполнять в Excel практически любые задачи. Вы очень скоро поймёте, что макросы могут сэкономить уйму времени благодаря автоматизации повторяющихся задач и обеспечить гибкое взаимодействие с другими пользователями.
Этот учебник не является исчерпывающим руководством по языку программирования Excel VBA. Его цель – помочь начинающему специалисту освоить написание макросов в Excel при помощи кода VBA. Для желающих изучить этот язык программирования более глубоко существуют отличные книги по Excel VBA. Далее приведено содержание самоучителя по Excel Visual Basic. Для начинающих программистов настоятельно рекомендуется начать с первого раздела учебника и изучать их по порядку. Те, кто имеет опыт в программировании на VBA, могут сразу же перейти к интересующим темам.
- Часть 1: Оформление кода
- Часть 2: Типы данных, переменные и константы
- Часть 3: Массивы
- Часть 4: Процедуры Function и Sub
- Часть 5: Условные операторы
- Часть 6: Циклы
- Часть 7: Операторы и встроенные функции
- Часть 8: Объектная модель Excel
- Часть 9: События в Excel
- Часть 10: Ошибки VBA
- Примеры по VBA
Более подробное описание по Excel VBA можно найти на сайте Microsoft Office.
Оцените качество статьи. Нам важно ваше мнение: