
I get a «stopped working» error when I start Office applications on my PC
Excel for Microsoft 365 Word for Microsoft 365 Outlook for Microsoft 365 PowerPoint for Microsoft 365 Publisher for Microsoft 365 Visio Plan 2 Excel 2021 Word 2021 Outlook 2021 PowerPoint 2021 Publisher 2021 Visio Professional 2021 Visio Standard 2021 Excel 2019 Word 2019 Outlook 2019 PowerPoint 2019 Publisher 2019 Visio Professional 2019 Visio Standard 2019 Excel 2016 Word 2016 Outlook 2016 PowerPoint 2016 Publisher 2016 Visio Professional 2016 Visio Standard 2016 Excel 2013 Word 2013 Outlook 2013 PowerPoint 2013 Publisher 2013 Visio Professional 2013 Visio 2013 Office.com More…Less
You might get this error when you start the Office 2021, Office 2019, Office 2016, or Office 2013 versions of Excel, Word, Outlook, PowerPoint, Publisher, or Visio on your PC:
Microsoft Excel has stopped working.
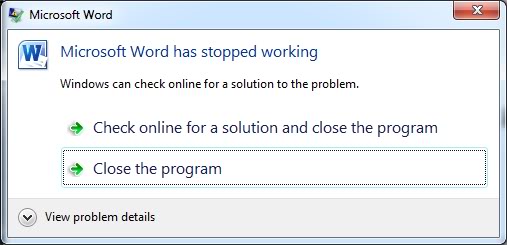
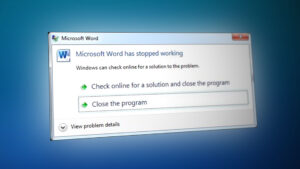
Microsoft Word has stopped working.
Microsoft Outlook has stopped working.
Microsoft PowerPoint has stopped working.
Microsoft Visio has stopped working.
Microsoft Publisher has stopped working.
Before you try any of the resolutions in this article, it’s important to make sure that Office is fully up-to-date. If you still get «stopped working» errors after installing Office updates, choose Most Office apps or Outlook and follow the troubleshooting options in the order they are presented.
Try these solutions in the order listed below.
Instructions on this tab apply to Excel, Word, PowerPoint, Publisher, and Visio. Click the header for more instructions.
-
Open any Office app, such as Word, and create a new document.
-
Go to File > Account (or Office Account if you opened Outlook).
-
Under Product Information, choose Update Options > Update Now.
Note: You may need to click Enable Updates first if you don’t see the Update Now option right away.
-
Close the You’re up to date! window after Office is done checking for and installing updates.
Certain add-ins may cause compatibility issues that cause a «stopped working» error with Office apps. A quick way to find out is by starting the Office app in Safe Mode. To do this, follow these steps:
-
Click the Search icon and type «run», then click the Run app that appears in the search results.
-
In Windows 10, Windows 8.1, and Window 8, right-click the Start button
 (lower-left corner), and choose Run.
 -
In Windows 7, click Start > Run.
-
-
Type one of these commands:
Note: If you get a «can’t find» error after typing the command, check if you included a space between the app name and /safe.
-
Type excel /safe and press Enter to start Excel.
-
Type winword /safe and press Enter to start Word.
-
Type powerpnt /safe and press Enter to start PowerPoint.
-
Type mspub /safe and press Enter to start Publisher.
-
Type visio /safe and press Enter to start Visio.
-
 (lower-left corner), and choose Run.
To ensure the Office app is in Safe Mode, check the title bar. You should see something like: Microsoft Excel (Safe Mode).
If the Office app doesn’t start in Safe Mode, the problem isn’t with add-ins. Try repairing Office or uninstalling and reinstalling it instead. If that still doesn’t work, you should have the latest device drivers installed on your PC.
If the Office app starts in Safe Mode, disable the application add-ins and COM add-ins one at a time:
-
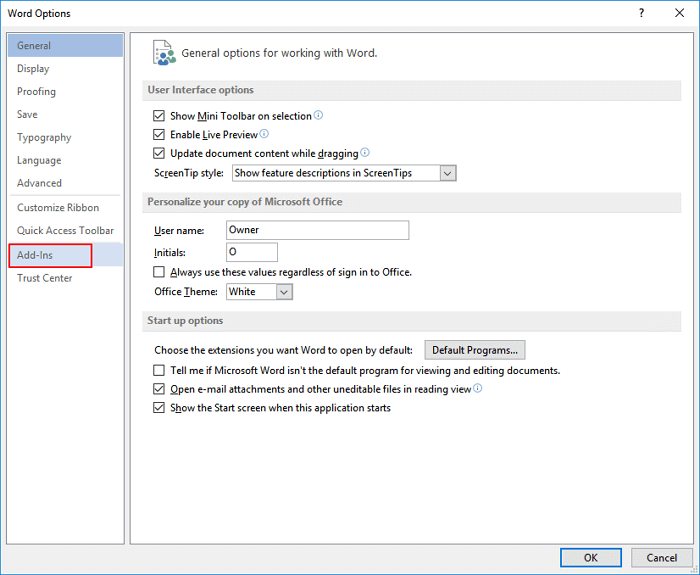
With the Office app still in Safe Mode, click File > Options > Add-Ins.
-
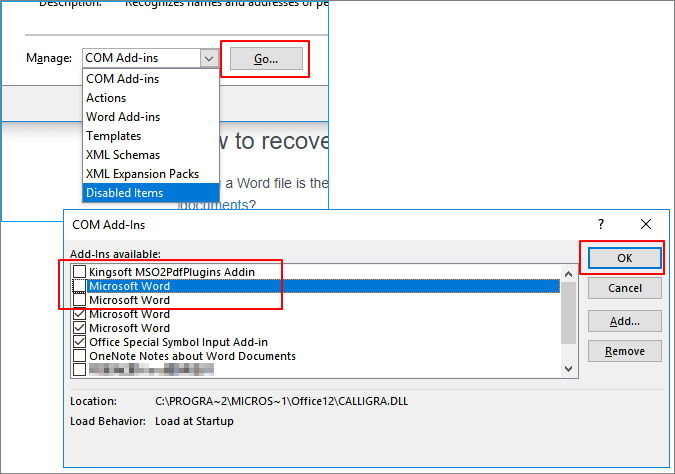
Check the Manage list for Add-ins options, such as Word Add-ins or Excel Add-ins, and then click Go. If you can’t find an Add-ins option specific to the Office app in the Manage list, choose COM Add-ins instead.
-
Uncheck one of the add-ins in the list and click OK.
Note: Some older add-ins are known to cause problems. Uncheck these add-ins first if they are in your list: Abbyy FineReader, PowerWord and Dragon Naturally Speaking.
-
Restart the application (not in Safe Mode this time).
If the Office app starts, there’s a problem with the add-in you unchecked. We recommend you visit the company website for the add-in to check for an updated version you can install. If there isn’t a newer version or if you don’t need to use the add-in you can leave it unchecked or remove it from your PC.
If the Office app doesn’t start, repeat the steps to uncheck the other add-ins one by one. If there was another Add-ins option in the Manage list, such as COM Add-ins, repeat this process for those add-ins as well. If all add-ins are unchecked and you still can’t open your Office application, the problem isn’t related to add-ins. Try some of the other troubleshooting options provided in this article.
Older versions of these add-ins are known to cause problems with Office 2016 or Office 2013 applications:
-
ABBYY FineReader
-
Dragon Naturally Speaking
If this didn’t resolve your issue, click the next header, below.
This step is useful if one of the Office app is damaged or corrupted. Try a quick repair first, and if that doesn’t work, try the online repair. For more information, see Repair an Office application.
If this didn’t resolve your issue, click the next header, below.
Older Windows device drivers may be incompatible with your Office application. You should run a Windows or Microsoft update on your PC to ensure you have the latest drivers. To do this, follow these steps:
For Windows 11:
-
Select the Start
button. -
Type «settings» in the Search box.
-
Select Windows Update.
-
Select Check for updates.
-
If updates are available, select Install.
For Windows 10:
-
Select the Start
button. -
Select Settings > Update & security > Windows Update.
-
Select Check online for updates from Microsoft Update.
-
If updates are available they should automatically be installed on your PC.
For Windows 8.1 and Windows 8:
-
On the Start screen, click Settings on the Charms Bar.
-
Click Change PC Settings.
-
In the PC Settings app, click Windows Update.
-
Click Check for updates now.
For Windows 7:
-
Click Start.
-
Type Windows Update in the Search programs and files box.
-
In the search results, click Check for updates.
-
If updates are available, click Install.
If the problem continues to occur after updating Windows, you should check to make sure that these specific drivers are up-to-date: video card, printer, mouse, and keyboard. Drivers for these devices can usually be downloaded and installed directly from the manufacturer’s website.
Also, if you have a laptop, you should check the manufacturer’s website for any updated files related to the laptop. For example, there’s a known issue with an older DisplayLink User Mode Driver that certain laptops use. To update the DisplayLink driver you need to go to the manufacturer’s site.
-
Select the button below to download and install the Office uninstall support tool.
Download
-
Follow the steps below to download the uninstall support tool according to your browser.
Tip: The tool may take a few minutes to download and install. After completing the installation, the Uninstall Office products window will open.
Edge or Chrome
-
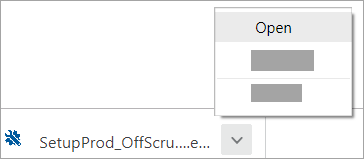
In the lower-lower left corner right-click SetupProd_OffScrub.exe > Open.
Edge (older) or Internet Explorer
-
At the bottom of the browser window, select Run to launch the SetupProd_OffScrub.exe.
Firefox
-
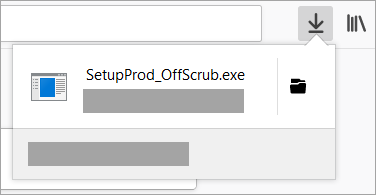
In the pop-up window, select Save Fileand then from the upper-right browser window, select the downloads arrow > SetupProd_OffScrub.exe.
-
-
Select the version you want to uninstall, and then select Next.
-
Follow through the remaining screens and when prompted, restart your computer.
After you restart your computer, the uninstall tool automatically re-opens to complete the final step of the uninstall process. Follow the remaining prompts.
-
Select the steps for the version of Office you want to install or reinstall. Close the uninstall tool.
Microsoft 365 | Office 2021 | Office 2019 | Office 2016 | Office 2013 | Office 2010 | Office 2007

If this didn’t resolve your issue, click the next header, below.
Instructions on this tab apply to Outlook.
Problems with the existing Outlook profile could cause this error to appear when try starting Outlook. A quick fix is to create a new profile to replace the existing one and to re-add your email accounts to the new profile. To do this, follow the information in this article: Create an Outlook profile.
If this didn’t resolve your issue, click the next header, below.
This step is useful if one of the Outlook files is damaged or corrupted. Try a quick repair first, and if that doesn’t work, try the online repair. For more information, see Repair an Office application.
If this didn’t resolve your issue, click the next header, below.
-
Select the button below to download and install the Office uninstall support tool.
Download
-
Follow the steps below to download the uninstall support tool according to your browser.
Tip: The tool may take a few minutes to download and install. After completing the installation, the Uninstall Office products window will open.
Edge or Chrome
-
In the lower-lower left corner right-click SetupProd_OffScrub.exe > Open.
Edge (older) or Internet Explorer
-
At the bottom of the browser window, select Run to launch the SetupProd_OffScrub.exe.
Firefox
-
In the pop-up window, select Save Fileand then from the upper-right browser window, select the downloads arrow > SetupProd_OffScrub.exe.
-
-
Select the version you want to uninstall, and then select Next.
-
Follow through the remaining screens and when prompted, restart your computer.
After you restart your computer, the uninstall tool automatically re-opens to complete the final step of the uninstall process. Follow the remaining prompts.
-
Select the steps for the version of Office you want to install or reinstall. Close the uninstall tool.
Microsoft 365 | Office 2021 | Office 2019 | Office 2016 | Office 2013 | Office 2010 | Office 2007
If this didn’t resolve your issue, click the next header, below.
Older Windows device drivers may be incompatible with Outlook. You should run a Windows or Microsoft update on your PC to ensure you have the latest drivers. To do this, follow these steps:
For Windows 10:
-
Select the Start
button. -
Select Settings > Update & security > Windows Update.
-
Select Check online for updates from Microsoft Update.
-
If updates are available they should automatically be installed on your PC.
For Windows 8.1 and Windows 8:
-
On the Start screen, click Settings on the Charms Bar.
-
Click Change PC Settings.
-
In the PC Settings app, click Windows Update.
-
Click Check for updates now.
For Windows 7:
-
Click Start.
-
Type Windows Update in the Search programs and files box.
-
In the search results, click Check for updates.
-
If updates are available, click Install.
If the problem continues to occur after updating Windows, you should check to make sure that these specific drivers are up-to-date: video card, printer, mouse, and keyboard. Drivers for these devices can usually be downloaded and installed directly from the manufacturer’s website.
Also, if you have a laptop, you should check the manufacturer’s website for any updated files related to the laptop. For example, there’s a known issue with an older DisplayLink User Mode Driver that certain laptops use. To update the DisplayLink driver you need to go to the manufacturer’s site.
You may also want to see Outlook not responding, stuck at «Processing,» stopped working, freezes, or hangs.
We’re listening!
We last reviewed this topic on November 3rd, 2021 based on your comments. If you found this article helpful, and especially if you didn’t, please use the feedback controls below to let us know how we can make it better.
Need more help?
Want more options?
Explore subscription benefits, browse training courses, learn how to secure your device, and more.
Communities help you ask and answer questions, give feedback, and hear from experts with rich knowledge.
Find solutions to common problems or get help from a support agent.
Одно из самых популярных приложений Office — Microsoft Word. У этого текстового редактора миллионы пользователей, но и проблемы присутствуют. Пользователи сообщили, что программа перестала работать и выдает сообщение об ошибке. Ошибка предотвращает запуск Word, что мешает редактированию и созданию новых документов. Это становится серьезной проблемой, если вам захотелось заняться вашей школьной или рабочей программой. В статье мы описали способы исправления этой неполадки.

Ремонт офиса
Восстановите установку Office. Это относительно простой процесс, выполняйте следующие шаги:
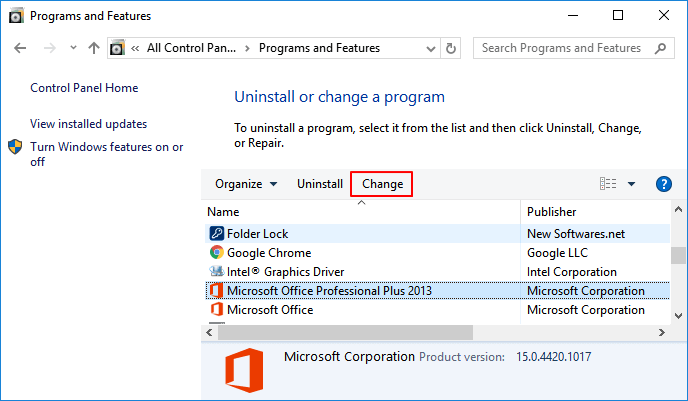
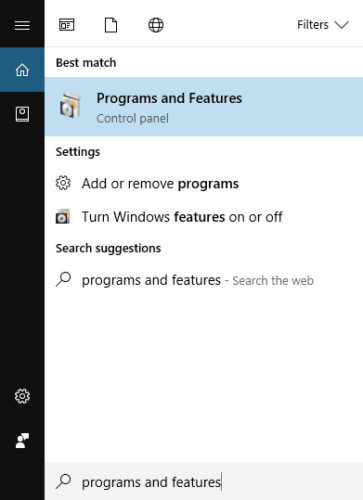
- Щелкните Win Key + S и введите “программы и функции”.
- Когда откроется окно, найдите Офис в списке.
- В верхнем меню тапните «Изменить».

- Выберите вариант «Ремонт» и нажмите «Продолжить». Имейте в виду, что более новые версии Office могут иметь дополнительные параметры онлайн-ремонта или быстрого восстановления.

- Следуйте инструкциям.
- Это решение работает для всех версий программы.
Отключите надстройки
Чтобы повысить функциональность и добавить новые функции, Ворд и многие другие инструменты Офиса поддерживают надстройки.
- Щелкните Win + R, чтобы открыть диалоговое окно «Выполнить».
Введите “winword.exe /” a и нажмите «Ввод» или нажмите «ОК». В дополнение используйте команду “winword / safe” для запуска Word в безопасном режиме.
- Откройте «Параметры Word».
- Откройте вкладку надстроек, а затем отключите все.
Пользователи сообщили, что ABBYY FineReader 9.0 Sprint — распространенная причина ошибок в Ворд 2016. Если она установлена у вас, то обязательно отключите ее.
Компания Microsoft сообщила, что надстройки PowerWord и Dragon Naturally Speaking от KingSoft имеют проблемы с Office 2013 и 2016. Если вы используете какую-либо из них, мы рекомендуем отключить их.
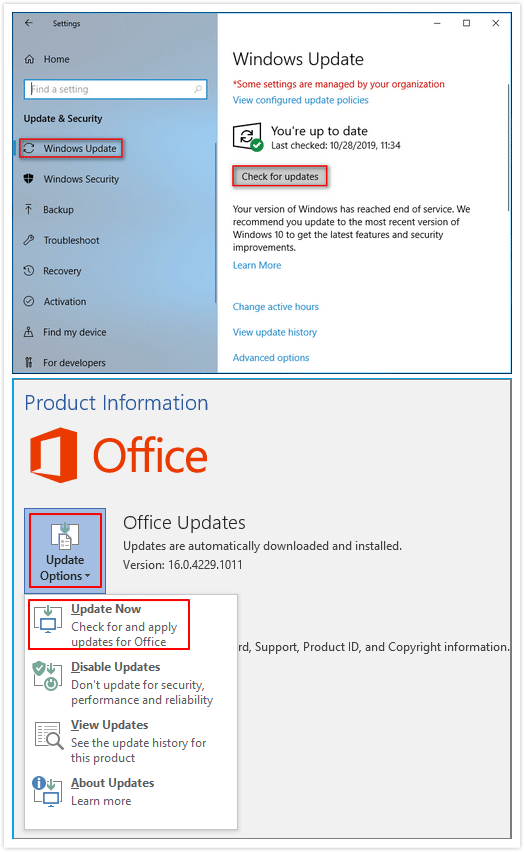
Установите последние обновления
Устаревшие версии имеют проблемы с несовместимостью, поэтому рекомендуется их обновлять.
- Откройте любое приложение Офиса и нажмите «Файл» в левом верхнем углу.
- Перейдите в раздел «Аккаунт»> «Информация о продукте»> «Параметры».
- В разделе «Информация о продукте» выберите «Параметры обновления».
- Выберите вариант «Включить обновления». Если этот параметр недоступен, то автоматические установки включены.
- Выберите «Параметры обновления» еще раз и в меню выберите «Обновить сейчас». Подождите, пока Office загрузит и установит обновления.
Измените реестр
В вашем реестре есть ключ Ворд — вам придется удалить его.
Внимание! Изменение реестра потенциально опасно, поэтому создайте резервные копии.
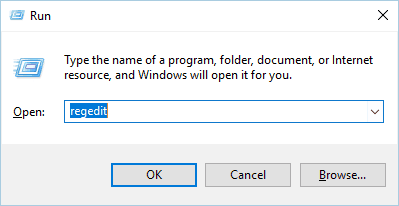
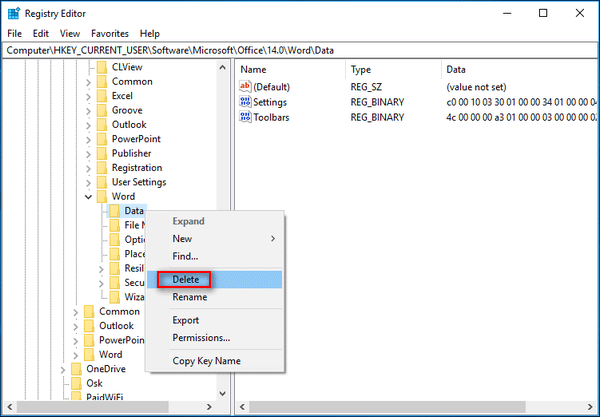
- Щелкните Win+ R и напечатайте “regedit”.

- Нажмите «Ввод» перейдите в “HKEY_CURRENT_USERSoftwareMicrosoftOffice15.0Word” .
- Найдите подраздел данных.
- Удалите его.
- Закройте редактор реестра и попробуйте снова запустить программу.
Ворд автоматически воссоздает удаленный ключ, и проблема должна быть решена.
Удаление старого драйвера
Пользователи сообщают, что придется установить последний драйвер принтера. Посетите веб-сайт производителя вашего принтера, выберите модель и загрузите последнюю версию драйвера.
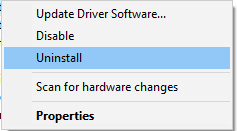
Для удаления текущего драйвера:
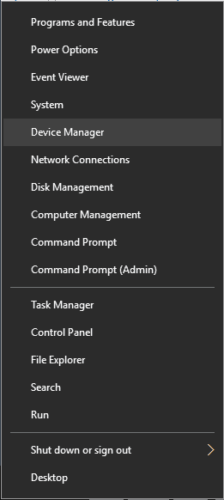
- Нажмите Winkey + X.
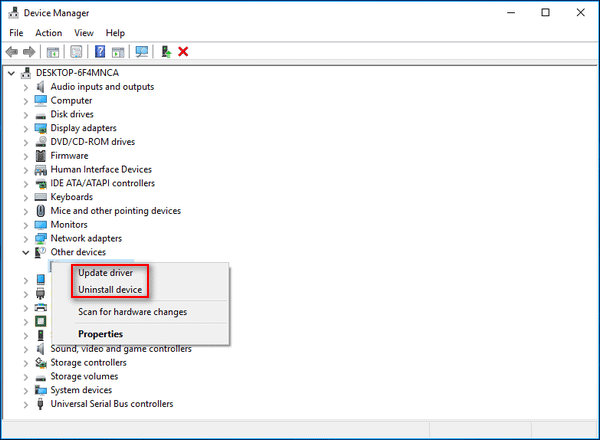
- Далее «Диспетчер устройств».

- Найдите принтер в диспетчере и удалите его.

Перезагрузите компьютер и проверьте, не устранена ли проблема.
Отключите недавно установленные программы
Сторонние приложения могут конфликтовать с работой Ворд. Вам придется удалить все недавно установленное программное обеспечение и добавленное оборудование.
Fix Microsoft Word has Stopped Working: Microsoft Office is one of the most important software packages that we all install on our system. It comes with a package of software such as Microsoft Word, Excel, PowerPoint etc. MS word which is used in creating doc files is one of the software that we use to write and store our text files. There are several other things that we do with this software. However, it happens that suddenly Microsoft word stops working sometimes. Also read 27 Best Alternatives to Microsoft Word here.

Did you ever face this problem with your MS word? While opening your MS word, it will crash and shows you error message “Microsoft Word has Stopped Working – A problem caused the program to stop working correctly. Windows will close the program and notify you if a solution is available”. Isn’t annoying? Yes, it is. However, it also gives you some options to find out solutions online but ultimately you end up crashing your software which is not opening. Let us help you out by giving a set of methods that you can choose depending on your situation.
Table of Contents
1
Method 1 – Start with Repair option for Office 2013/2016/2010/2007
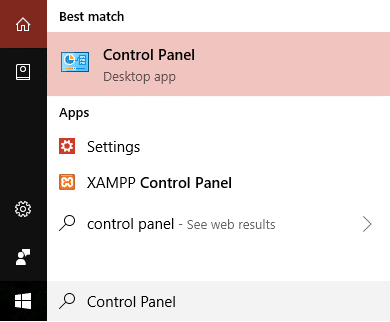
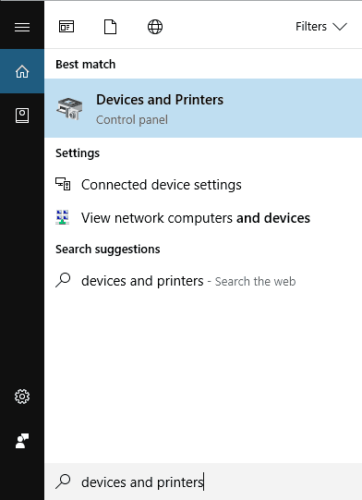
Step 1 – To start with the repair option, you need to navigate to “Control Panel“. Just type “Control Panel” in the Windows search bar and open control panel.
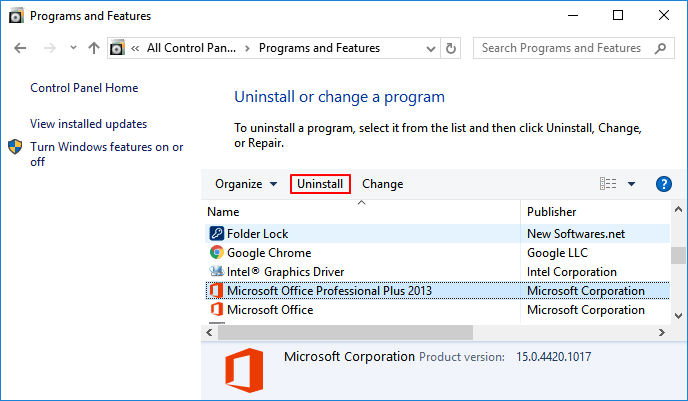
Step 2 – Now click on the Programs and Features > Microsoft Office and click on the “Change” option.

Step 3 – You will get a pop-up window on your screen asking you to repair or uninstall the program. Here you need to click on the Repair option.

Once you will start the repair option, it will take a while the program will restart. Hopefully, you will able to Fix Microsoft Word has Stopped Working issue but if the problem still persists, you can go ahead for other troubleshooting methods.
Method 2 – Disable all Plug-ins of MS Word
You might have never noticed that there are some external plugins that installed automatically and can cause a problem for the MS Word to start properly. In that case, if you start your MS word in Safe Mode, it will not load any Add-ins and can start working properly.
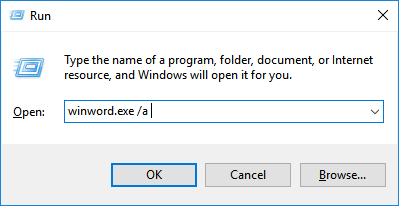
Step 1 – Press Windows Key + R then type winword.exe /a and hit Enter open MS Word without any plugins.

Step 2 – Click on File > Options.

Step 3 – In the pop up you will see Add-ins option in the left sidebar, click on it

Step 4 – Disable all the plug-ins or the ones that you think would be causing trouble for the program and restart your MS Word.

For Active Add-ins, click on the Go button then uncheck the trouble-making add-in and click OK.

Once finished, reboot your PC to save changes and see if you’re able to Fix Microsoft Word has Stopped Working issue.
Also Read: How to Fix We’re Sorry But Word Has Run into an Error in Windows 10
Method 3 – Install Latest Files and Updates
Sometimes it is all about keeping your windows and programs updated with the latest files. It could be possible that your program needs updated files and patches to run smoothly. You can check the latest updates on Windows Update setting under the control panel and install if there are any important updates pending. Moreover, you can browse to the Microsoft office download center for downloading the latest service packs.

Method 4 – Delete Word Data Registry Key
If the above-mentioned methods are not helping you to solve your problem, here is another way to Fix Microsoft Word has Stopped Working issue. Whenever you open MS word, it stores a key in the registry file. If you delete that key, Word rebuilds itself next time when you start this pragma.
Depending on your MS word version, you can choose one of the below mentioned key registry option:
Word 2002: HKEY_CURRENT_USERSoftwareMicrosoft Office10.0WordData
Word 2003: HKEY_CURRENT_USERSoftwareMicrosoft Office11.0WordData
Word 2007: HKEY_CURRENT_USERSoftwareMicrosoft Office12.0WordData
Word 2010: HKEY_CURRENT_USERSoftwareMicrosoftOffice14.0WordData
Word 2013: HKEY_CURRENT_USERSoftwareMicrosoftOffice15.0Word
Word 2016: HKEY_CURRENT_USERSoftwareMicrosoftOffice16.0Word

Step 1 – You just need to open registry editor on your system.
Step 2 – If you are using Windows 10, press Windows Key + R then type regedit and hit Enter to open Registry Editor.

However, you need to be very cautious while making any changes in the registry key section. Therefore, you need to follow the exact methods mentioned here and do not try to tap anywhere else.
Step 3 – Once the registry editor is open, navigate to the above-mentioned sections depending on your word version.
Step 4 – Right-click on the Data or Word registry key and choose the “Delete” option. That’s it.

Step 5 – Restart your program, hopefully, it will start properly.
Method 5 – Remove recently installed software
Did you recently install any new software on your system (printer, scanner, webcam, etc)? You might be thinking that how installing new software which is unrelated to MS word cause this problem. Annoyingly, it happens sometimes that newly installed software can interfere with the working of previously installed software. You can check this method. Uninstall, the software and check whether the problem is solved or not.
Method 6 – Uninstall and Reinstall the MS Office
If nothing has worked yet, you can uninstall MS Office completely and Install it again. Maybe this method can help you to get the problem solved.

Recommended:
- How to Fix IP Address Conflict
- Change from Public to Private Network in Windows 10
- Want to Edit the Hosts File in Windows 10? Here is how to do it!
- Delete Gmail Account Permanently (With Pictures)
Hopefully, one of the above-mentioned methods will surely help you to Fix Microsoft Word has Stopped Working Issue and you again start working on your Microsoft Word. If you still have any questions regarding this article then feel free to ask them in the comment’s section.
These suggestions apply to Microsoft Word for Office 365, Word 2019, Word 2016, Word 2010, Word 2007, and Word for Mac.
There are eight methods in total for Microsoft Office Word has stopped working and Word file recovery and repair. These approaches can also be applied to fix similar issues on other Office apps, such as Excel, PowerPoint, etc.
| Workable Solutions | Step-by-step Troubleshooting |
|---|---|
| Fix 1. Repair Corrupted Word | A corrupted file may make the Word stop working. Fix the corrupted Word documents with file repair tool…Full steps |
| Fix 2. Disable Add-ins in Safe Mode | Certain add-ins may cause compatibility issues that cause a «Word stopped working» error with Office apps…Full steps |
| Fix 3. Repair Office 2016 | If Word is damaged or corrupted. Try a quick repair first, and if that doesn’t work, try the online repair…Full steps |
| Fix 4. Install Latest Update | Download and install the latest updates for your version of Office and Windows to fix Word not working …Full steps |
| Fix 5. Insert Word into Another File | Microsoft Word has stopped working error can occur while opening your previously saved documents…Full steps |
| More practical solutions | Update old printer drivers; remove or delete word registry keys; uninstall and reinstall MS office…Full steps |
Issue: Microsoft Word Has Stopped Working 2016/2013/2010/2007
With the increasing fame of Microsoft Office, its applications like Word have gained worldwide users’ favor. However, the more users there are, the more problems there are. «Microsoft Office Word has stopped working» is one of the top concerned questions for many Word users.
Usually, when Microsoft word stopped working error shows up, you have two available options to undertake: check online for a solution or close the program. When you choose to close the application, you may run into the problem that Microsoft word not opening.
If you are also facing Microsoft word not working issue in Microsoft Office Word 2016, 2013, 2010, or 2007, read on and check the provided solutions below. Depending on your situation, the solution may be different. We hope one will work for you.
9 Fixes for Microsoft Word Has Stopped Working Error in Windows 10/8/7
Once Microsoft Word stopped working, wait for the program to process firstly and try your best to save the editing document. If you’ve waited for a very long period with no progress, click «Close the program» on the pop-up window in Word and follow the methods to fix the issue effectively.
Fix 1. Repair Corrupted Word Documents with a File Repair Tool
You may encounter Microsoft Word stopped working issue when opening and viewing a corrupted Word document. Try to fix the damaged Word document with a robust file repair tool — EaseUS Data Recovery Wizard. This file repair software enables you to repair corrupted Word, Excel, and PPT from Microsoft Office 2019, 2016, 2013, 2010, & previous versions.
EaseUS file repair software fixes unreadable content in Word and restores them to the original form. It also can fix damaged, corrupted, or inaccessible PDF files, and recovers all objects.
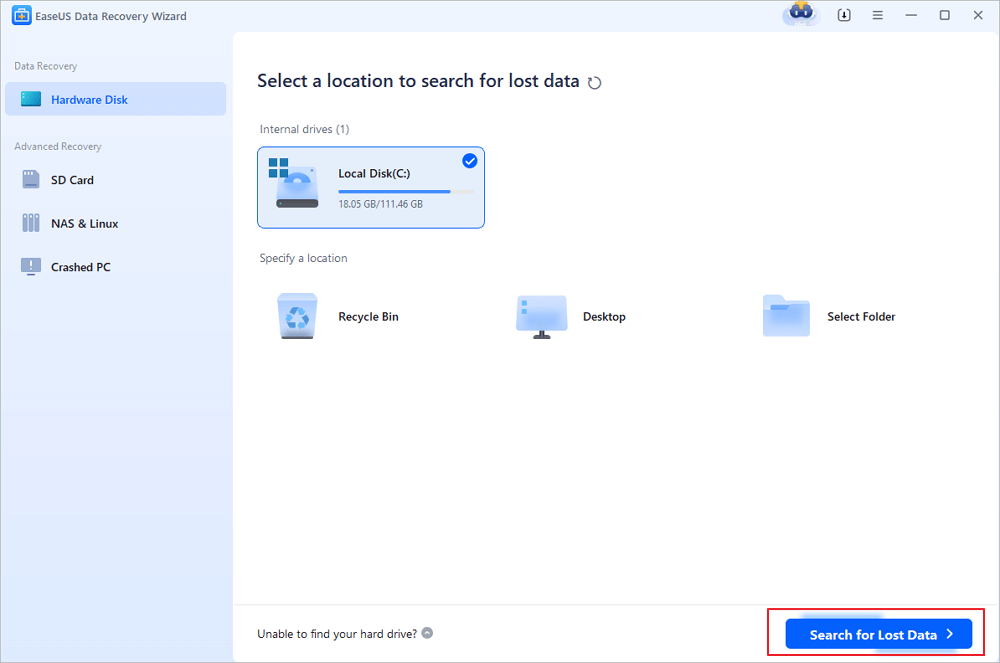
Step 1. Launch EaseUS Data Recovery Wizard, and then scan disk with corrupted documents. This software enables you to fix damaged Word, Excel, PPT, and PDF files in same steps.
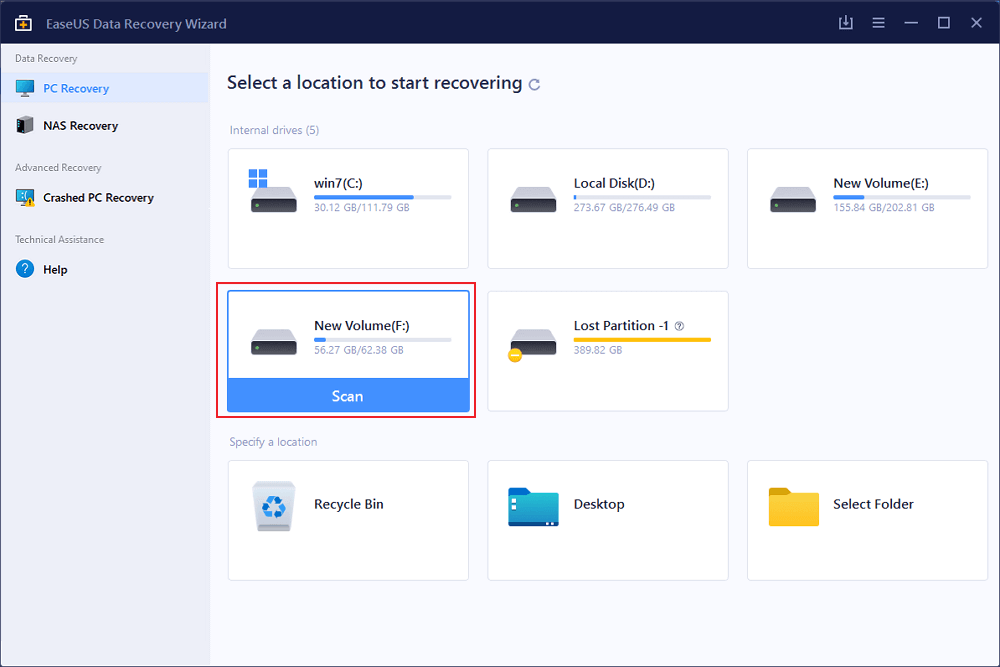
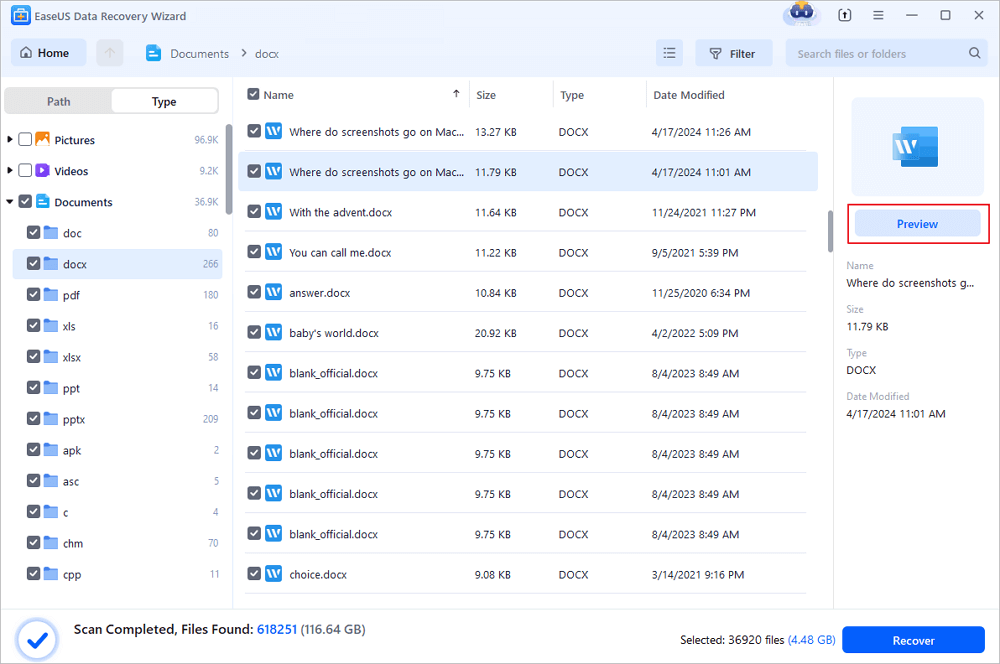
Step 2. EaseUS data recovery and repair tool will scan for all lost and corrupted files. You can find the target files by file type or type the file name in the search box.
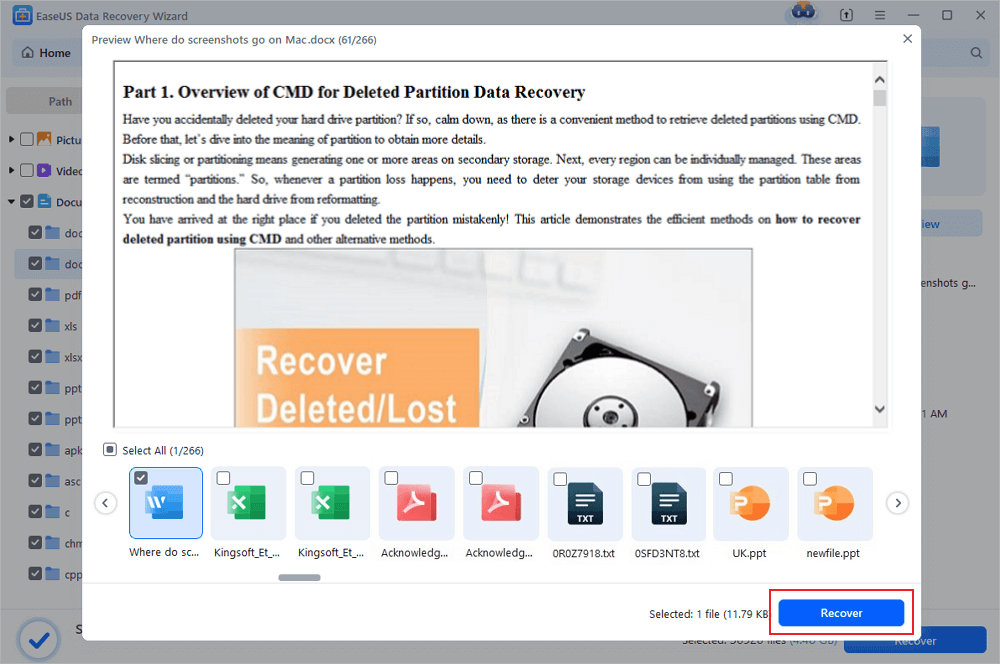
Step 3. EaseUS Data Recovery Wizard can repair your damaged documents automatically. After file preview, you can click «Recover» to save the repaired Word, Excel, and PDF document files to a safe location.
Fix 2. Disable Add-ins in Safe Mode
Some incompatible add-ins may cause Word to stop working error with Office apps. A quick way to find out is by starting the Office app in Safe Mode and disabling the add-ins.
Step 1. Press Windows + R keys and type: winword.exe /a and hit Enter to open MS Word in Safe Mode without plugins. Or you can also use winword /safe to start Word in Safe Mode. If Office Word cannot be launched in Safe Mode, the problem is not with add-ins. Try repairing Office or uninstalling and reinstalling it instead.
Step 2. If Word starts in Safe Mode, fix the problem by disabling the application add-ins and COM add-ins. Click «File» > «Options» > «Add-Ins».
Step 3. Click «Manage» at the bottom and select COM Add-ins, click «Go» to uncheck the problematic ones and click «OK» to confirm. Some out-dated add-ins are more likely to cause problems. Uncheck these add-ins first if they are in your list: Abbyy FineReader, PowerWord, and Dragon Naturally Speaking.
After this, restart Word to check if the issue has been resolved.
Fix 3. Repair Office 2016/2013/2010/2007
According to some experienced users, when Microsoft Office contains errors, it would prevent users from opening a Word or edit any files. Then, you will get the Microsoft word has stopped working or Microsoft word not opening error.
The application would directly shut down no matter you want to create a new document or continue editing a file. The direct solution towards this issue is to repair Office installation with the below steps:
Step 1. In Windows 10, 8, or 7, open Control Panel, click «Programs and Features» and click on «Microsoft Office».
Step 2. Locate and select your Microsoft Office, and click «Change» in the top menu.
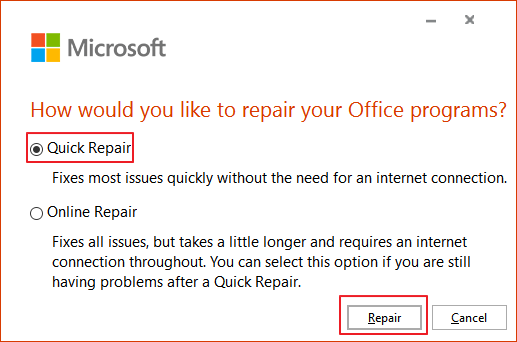
Step 3. On the window, click «Repair» and then «Continue».
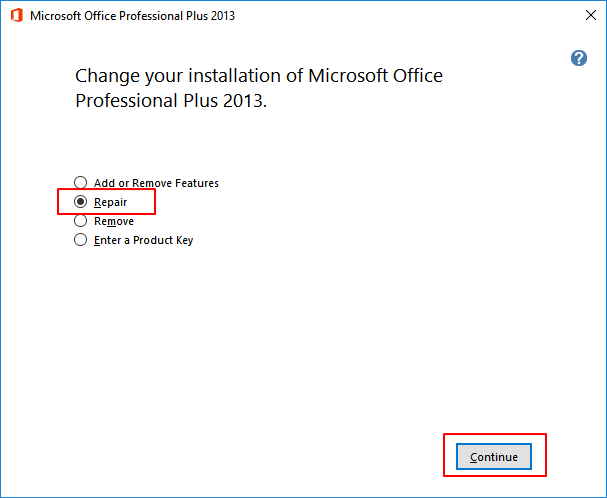
For Newer versions of Microsoft Office users, you can choose «Online Repair» or «Quick Repair» and click «Repair».
Step 4. Let the repair finish and restart your computer.
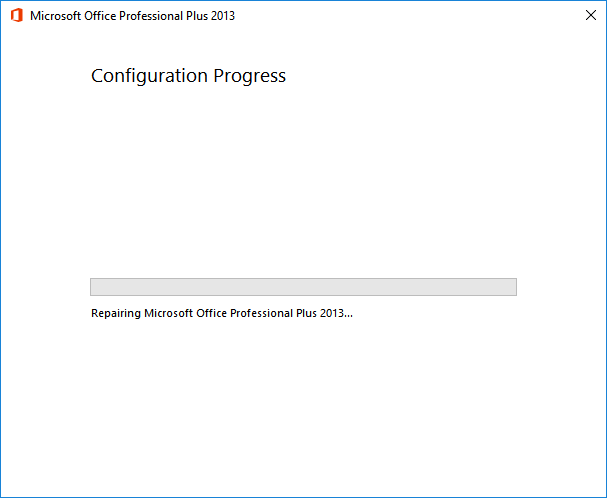
When the repair process finishes, open your Word application to check if the error appears again.
Fix 4. Install Latest Windows Update or Office Update
When your Office version or Windows system is out of date, Microsoft Office Word may stop working and even crashes. Here are the steps to install the latest updates of Windows or Microsoft Office:
1. Install Latest Windows Update
Step 1. Press Windows + I to open Windows Settings.
Step 2. Click «Update & Security» and select «Check for updates» under Windows Update.
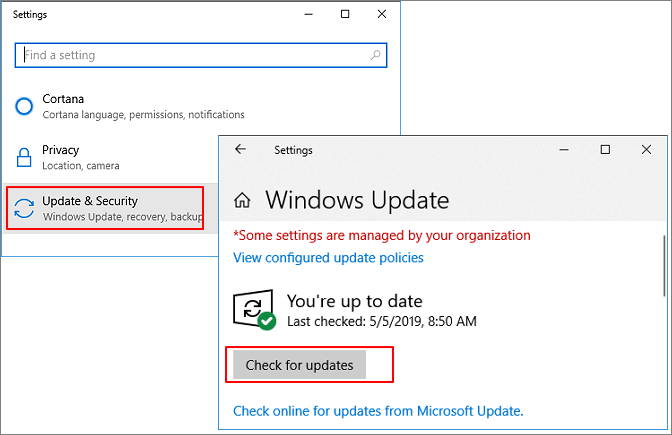
Step 3. If a new Windows update window pops up, click «Install Now» and follow the instructions to install the available update.
2. Install Microsoft Office Update
For Office 2013 and newer versions:
Step 1. Open an Office application — Excel or Word, click «File».
Step 2. Click «Account» > «Product Information» > «Update Options» .
Step 3. Click «Enable Update» and then select «Update Now».
Note: If the Enable Update button is not available, it means that the automatic update feature is enabled.

For Office 2010 or older versions:
Step 1. Open an Office application — Excel or Word, click «File» > «Help».
Step 2. Click the «Check for Updates» or «Install Updates» option.
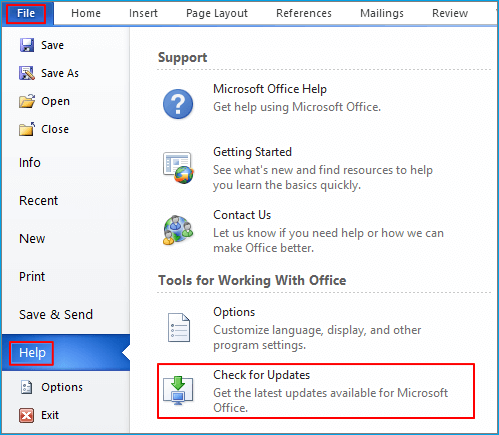
Follow the instructions to finish the process. After this, you can re-open a Word document or create a new Word file again.
Fix 5. Insert Word Document into Another File
Microsoft Word has stopped working error can sometimes occur while trying to open your previously saved documents. In this case, you can try inserting your document into another file to fix the issue. Do it by following these steps:
Step 1. Run Microsoft Office Word, and create a blank new file.
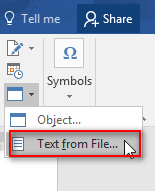
Step 2. Click «Insert» from the top ribbon menu, click «Text».
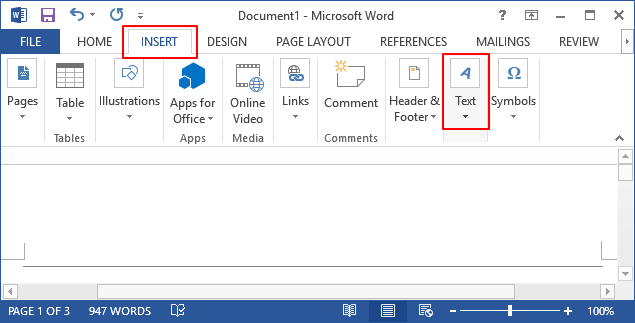
Step 3. Click «Object» and select » Text from File».
Step 4. Select the target Word document which is unopenable or not working, and click «Insert».

Step 5. Check the document content and save it as a new file on your PC.
Fix 6. Remove or Update Old Printer Drivers
Your printer drivers can interfere with Office and cause Microsoft Word has stopped working error to arise. So, sometimes you can fix this problem simply by removing or updating the default printer. To do that, follow these steps:
Step 1. Open Device Manager, and locate your printer.
Step 2. Right-click on your printer drivers and select «Uninstall» or «Update drivers».
Step 3. Uninstall or update the old printer drivers.
- For uninstalling the driver: click «OK» and restart the PC.
- For updating the driver: click «Search automatically for updated driver software» and follow the instruction to finish the process, and restart the PC. Or, you can download a relative driver from your printer website and install it on your PC.
Fix 7. Remove or Delete Word Registry Keys
Some users have reported that Microsoft Word has stopped working error can appear due to problems with your registry. There is a key in the registry that stores frequently used options in Word. If you delete the key, Word rebuilds it the next time you start Word by using the default settings, thus fixing the problem.
- Tip
- Deleting the registry can be potentially dangerous, so we highly recommend you create a backup in case anything goes wrong.
Step 1. Bring up Registry Editor by typing regedit in the search bar and hit Enter.
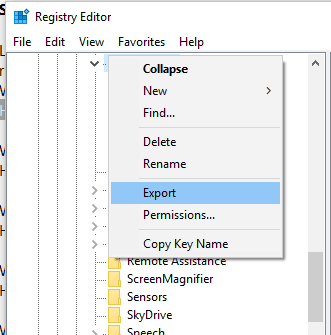
Step 2. Click «Yes» to open Registry and follow the path to locate the Word options key: HKEY_CURRENT_USERSoftwareMicrosoftOffice16.0WordOptions.
Step 3. Locate and right-click the key, and select «Export».
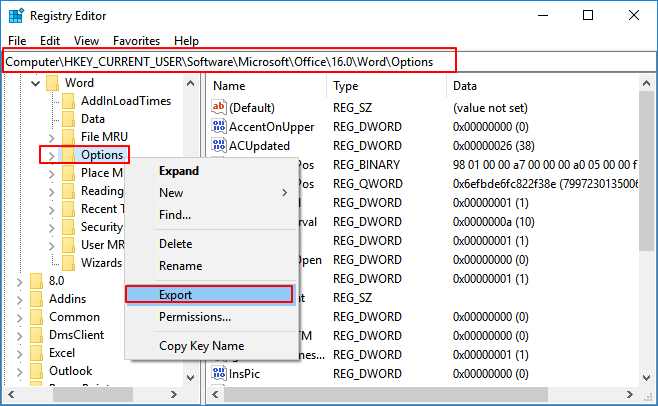
Step 4. Save the Options key as «Wddata.reg» and save it on your Desktop.
Step 5. Go back to Registry Editor and locate the Options key, and delete it from the menu.
Step 6. Exit Registry Editor.
After this, restart your Word and check if the problem is resolved. If the problem still exists, run the Wddata.reg on your Desktop to restore the deleted key.
Fix 8. Replace the Normal.dot Global Template File
Microsoft Word stores formatting and macros in a global template file. When the global template file is corrupted, you’ll get the Microsoft word stopped working error message. To resolve the problem, you need to rename the Normal.dot file.
Note: Modifying the global template file will lose some customization features, such as styles, macros, etc. To keep previous settings, you can copy the customization from one global template to another by using the Organizer. Do the following to replace Normal.dot file.
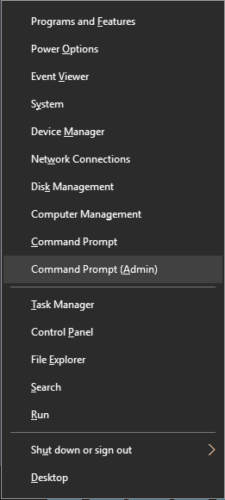
Step 1. Press Windows + X and select «Command Prompt (Admin)». Sign in if the program requires administrator permission.
Step 2. Enter the command below and hit Enter:
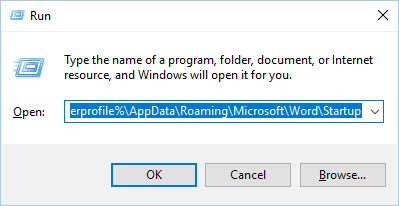
ren %userprofile%AppDataRoamingMicrosoftTemplatesOldNormal.dotm Normal.dotm
Step 3. Wait for the command to finish and exit Command Prompt.
After this, restart your Word application to check if you can use it to edit documents or create new files again.
Fix 9. Uninstall and Reinstall MS Office
Note: This fix may cause your activation key invalid after the reinstallation of MS Office. Make sure that your activation key can be used twice before taking the below steps.
Step 1. Keep your MS Office activation key and save it to another secure device.
Step 2. Open Control Panel, click «Program and Features», then locate and select Microsoft Office.
Step 3. Click «Uninstall» in the top menu.
Step 4. Re-install Microsoft Office on your PC and activate it with your serial key.
If your old key fails to activate the newly installed MS Office, please contact the Microsoft support team for help: https://support.microsoft.com/contactus.
More Guides: How to Recover Lost or Unsaved Word Documents
Another big issue that concerns users the most is the lost or unsaved Word file when Word stopped working. If you’re editing a Word document when it happens, you’re likely to lose documents that haven’t been saved. In this section, you can learn how to recover unsaved Word documents with useful tips. What’s more, a renowned file recovery tool is introduced to help you repair and recover lost Word documents in the simplest way.
How to Restore Unsaved Word Documents
If you lost unsaved Word documents due to Word crash, Word not responding, Word stopped working, Word keeps freezing, or other Word problems, there are three ways for you to recover unsaved Word documents in Windows 10. Link to the page to see details.
- Fix 1. Recover from Temporary Files
- Fix 2. Recover from AutoRecover
- Fix 3. Use Document Recovery
For a Mac user, check this link to see how to recover unsaved Word document on Mac.
How to Restore Deleted Word Document with File Recovery Software
If the Word has stopped working error lead to file corruption or if you have deleted some crucial Word documents and need to get them back, EaseUS Data Recovery Wizard is a great choice. This software will not only help you recover lost files but also help you repair damaged documents during the recovery process.
EaseUS data recovery software features:
- Recover lost or deleted Word, Excel, PPT, and PDF documents
- Repair corrupted files after the data recovery, such as repair corrupted Excel, Word, PPT, and PDF
- Support data recovery for sudden deletion, formatting, hard drive corruption, virus attack, system crash under different situations
- Recover Word document on HDD, SSD, USB flash drive, pen drive, SD card, external hard drive, etc.
Download EaseUS file recovery tool to recover lost or corrupted Word documents on HDD, USB flash drive, external hard drive, and more in only 3 simple steps.
Step 1. Choose the Word file location
Choose the drive or a specific folder and click the «Scan» button.
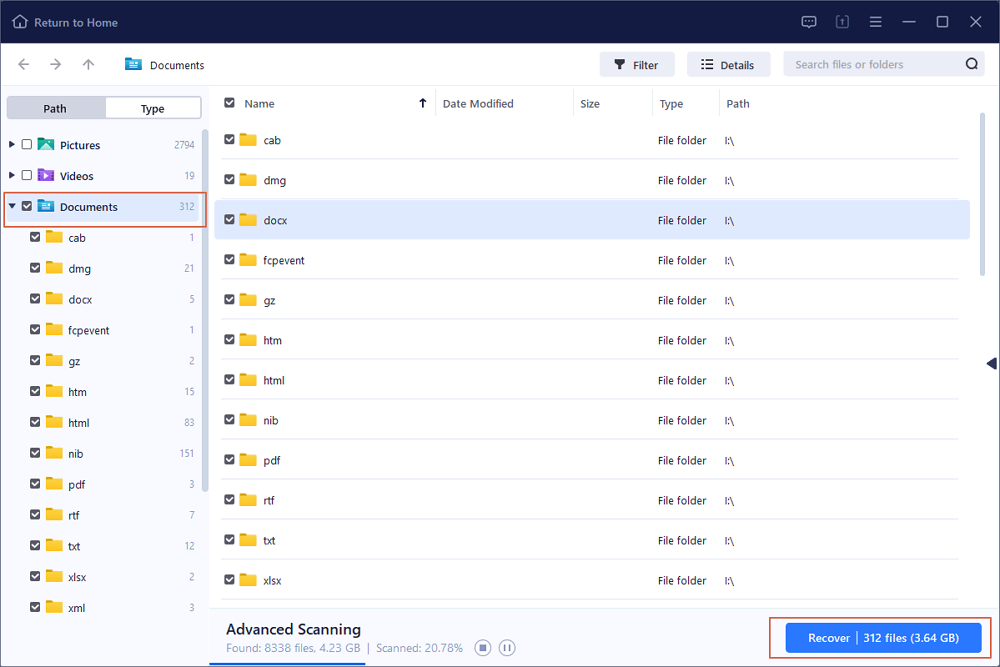
Step 2. Locate your Word files
The software will start immediately scanning all lost data on the selected drive. After the scan, click the «Documents» option in the left panel. Choose «Word» from the category bar. Then, click «Preview».
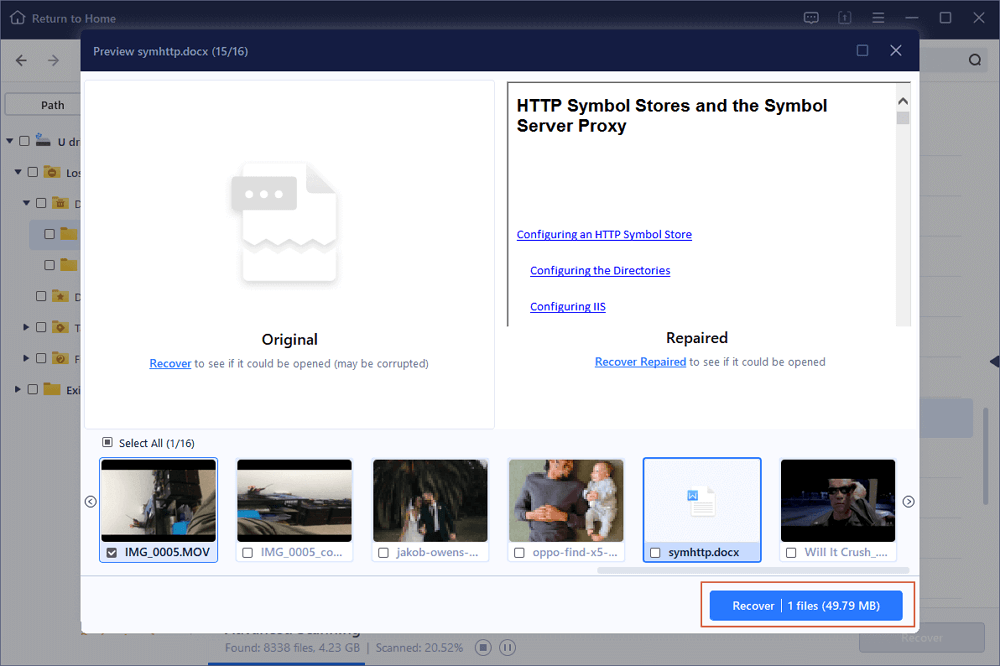
Step 3. Recover Word files
After previewing the lost Word files, select the desired Word files and click «Recover». Then, select a folder to store the Word files.
Causes of Microsoft Word Has Stopped Working Error
Except for finding the right solutions to solve the Microsoft office has stopped working error on Windows PC, it’s highly necessary to know the reasons that cause your Word malfunction. Here are the main reasons:
- Office edition isn’t compatible with the current OS on your PC.
- Word is out of date.
- The device driver is out of date.
- Word Add-in issue.
- Word file issue.
Useful Tips to Back Up and Protect Word File
If you are looking for a reliable method to fix the «Word has stopped working» error, the solutions included in the above two parts are capable to help you out.
If you prefer a more comprehensive plan to protect your precious Word documents, stay here. Two reliable Word backup tips are available here for you to try:
1. Enable Auto-Save Feature in Word
Applies to: Back up and save editing Word document.
Step 1. Open MS Word application and create a new file, click «File» > «Option».
Step 2. Click «Save» and check the below two boxes:
- «Save AutoRecover information every * munites» (set a time for autosave — every 2 or 5 minutes will be good)
- «Keep the last autosaved version if I close without saving»
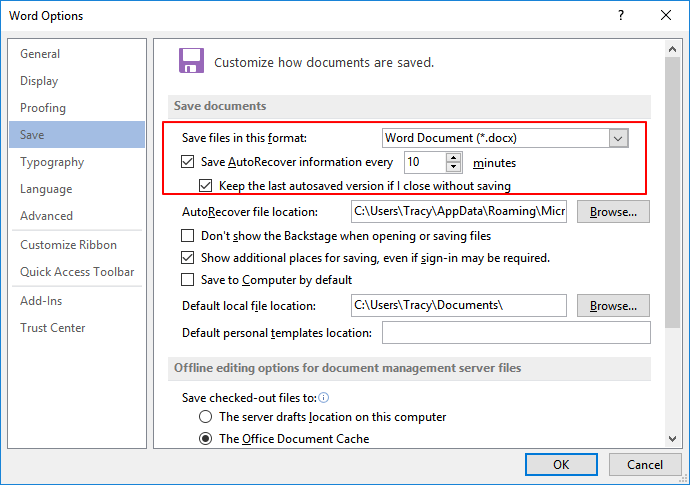
Step 3. Click «OK» to confirm.
2. Back Up Saved Word File with File Backup Software
Applies to: Back up saved Word file on your local drive.
Reliable file backup software like EaseUS Todo Backup can help you effectively back up important files including Word, Excel, PowerPoint, etc. on a local drive with ease.
The backup will be a lifesaver to immediately bring your hard word back once you lose it due to unknown reasons.
Download and follow the below 3 steps to safely back up your Word file with ease:
Step 1. For the first time you use EaseUS Todo Backup to back up files, click Create backup on the home screen and then mouse click the big question mark to select backup contents.

Step 2. Since you’re going to back up files and folders on your computer, go on with the «File» backup mode, where you can select pictures, videos, documents and all other types of files to back up.

Step 3. Follow the paths to locate the files, folders or directories you want to back up, select them all and click «OK«.

Step 4. Now you need to select a backup location to save and retain the backup.

Step 5. EaseUS Todo Backup allows users to save the backup files to every device that is handy for you, like a local hard drive, external USB drive, SD card, network drive, or a NAS drive, plus a cloud drive of the EaseUS brand. We personally recommend users to choose the cloud drive prior to a physical drive to save important backups due to the greater accessibility, flexibility and safety.

To be able to access to EaseUS cloud, all you need is an email registration and login.

Step 6. If you’re interested in an automatic and intelligent backup schedule for the next file backup task, go on with the «Options» setting. There you can encrypt a confidential file backup, compress the backup image size, or customize a backup scheme to tell the software in what time to start the next backup.
Customize an advanced and automatic backup task here:

Step 7. Click «Backup Now» to start the file backup process. Your completed backup files are visible on the left area in a card style.

Here are a few questions related to Microsoft Word has stopped working. If you also have any of these problems, you can find the methods here.
1. How do I fix Microsoft Word has stopped working?
When MS word has stopped working, you can fix it by repairing Office installation.
Step 1. Open Control Panel, click “Programs and Features» and click on «Microsoft Office».
Step 2. Locate and select your Microsoft Office, and click «Change» in the top menu.
Step 3. On the window, click «Repair» and then «Continue». For Newer versions of Microsoft Office users, you can choose «Online Repair» or «Quick Repair» and click «Repair».
Step 4. Let the repair finish and restart your computer.
2. Why is my Microsoft Word not opening?
When there are a few corrupted documents, or you have an issue with a Word or 3rd party add-on, your Word maybe not opening.
3. How do you restart Microsoft Word?
Step 1. Go to the Tools Menu, then Customize, then click options.
Step 2. Choose the option for the Reset menu and toolbar usage data. This will put your toolbars back to the original settings. If you would like to reset your settings further, move on to the steps below.
4. Why has my office 365 stopped working?
When Microsoft Office 365, 2016 or 2013 stops working or not opening on your PC, you can also use the Office repair feature to get the problem fixed in Windows 10/8/7: right-click on Office 365, Office 2016 or Office 2013 > Select Change; click Online Repair > click on Repair button.
5. How do I fix Outlook that has stopped working?
When you happen to encounter Outlook 2016 Not Responding in Windows 10, you can try to fix it by using Outlook recovery software; start Outlook in Safe Mode; install Outlook updates; repair Office program, or repair Outlook data files.
by Milan Stanojevic
Milan has been enthusiastic about technology ever since his childhood days, and this led him to take interest in all PC-related technologies. He’s a PC enthusiast and he… read more
Updated on January 14, 2022
- Every once in a while you might get a Microsoft Word stops working error on Windows 10.
- We’ve compiled a list of solutions, depending on the Word version, so check them out below.
- Whatever software error you get, we’ve got it covered! See the Troubleshooting page.
- Our Microsoft Guides will come in handy whenever you want to get the best of your Office tools.

Probably one of the most popular Office applications is Microsoft Word. The text editor has millions of users, despite the fact that the application also has a few issues.
A common, and at the same time very vague error message, is, for instance, Microsoft Word has stopped working.
Today we’re going to focus on it and show you how to fix this problem on Windows 10.
What can I do if Word stops working on Windows 10?
How do I fix Microsoft Word (Office suite)?
1. Repair the Office installation
- Press Windows Key + S and enter programs and features. Select Programs and Features from the list of results.

- Locate your Office installation on the list and select it.
- In the top menu click the Change button.

- Select the Repair option and click Continue. Bear in mind that newer versions of Office might have Online Repair or Quick Repair options instead.
- Follow the instructions to repair your Office installation.

This solution should work for all versions of Office. After repairing your Office installation, check if the error appears again.
2. Install the latest updates
Outdated versions of Word and Office might have a few bugs or incompatibility issues, so it’s recommended that you always update them.
To download Office updates, do the following:
- Open any Office application and click File in the top left corner.
- Navigate to Account / Product Information / Update Options.
- Select Update Options.
- Choose to Enable Updates option. If this option isn’t available, it means that automatic updates are enabled.
- Select Update Options again and choose Update Now from the menu. Wait for Office to download and install the necessary updates.
If you have Office 2010 or older, you can check for updates by following these steps:
- Start any Office application.
- Go to File / Help.
- Select Check for Updates or Install Updates option.
Windows 10 performs updates automatically, but you can also check manually for updates. To do that, follow these steps:
- Press Windows Key + I to open the Settings app.
- Go to the Update & security section.
- Go to the Windows Update tab and click Check for updates.
Update drivers
After updating the apps, make sure to also check your drivers. Windows usually update drivers in the background or with certain updates, however, glitches are possible.
So we recommend updating the drivers using reliable third-party tools to automatically install the newest one.
Downloading and installing drivers manually is a process that carries the risk of getting the wrong driver installed, which may lead to serious malfunctions of your system.
That being said, if you are not sure what kind of software to choose for driver administration, discover here the best driver update software on Windows 10.
3. Reinstall Office completely
Reinstalling Office will get you a new, updated copy of the program, with no glitches, cache, or temporary files that might have affected the program’s functionality before.
To uninstall Office 2013, 2016, or Office 365 from your PC, you’ll need to download Microsoft’s Office removal tool. It will remove all files and registry entries associated with Office.
After downloading the tool, start it and follow the instructions on the screen to complete the uninstall. Now you just need to restart your PC and install the same version of Office.
If you have Microsoft Office 2010 or older, we recommend that you download the appropriate removal tool from Microsoft’s website.
More so, to efficiently uninstall Office apps from your computer, without letting file leftovers behind, it’s advised to use the best uninstaller software today.
4. Disable Add-ins
- Press Windows Key + R to open the Run dialog. Enter winword.exe /a and press Enter or click OK. (In addition to winword.exe /a command, you can also use winword /safe to start Word in Safe Mode).

- Microsoft Word should now start. Click on the Office button and select Word Options.
- Select the Add-Ins tab and then disable all add-ins.
- After doing that, try to start Word again and check if the problem is resolved.

In order to enhance their functionality, Word and many other Office tools support add-ins. These little applications allow you to expand the functionality of Word or any other Office tool with new features.
Unfortunately, not all add-ins are compatible with Windows 10 or with your version of Office and that can lead to the issue discussed here.
To find a problematic add-in you’ll need to repeat previous steps and enable add-ins one by one. Keep in mind that after enabling an add-in you have to restart Word again. Repeat this process until you find the add-in that is causing this problem.
It’s worth mentioning that some users reported that ABBYY FineReader 9.0 Sprint add-in was problematic for them on Word 2016.
However, it appears that updating ABBYY FineReader can resolve the issue for good.
Besides, Microsoft reported that KingSoft’s PowerWord and Dragon Naturally Speaking add-ins also have problems with Office 2013 and 2016. The Bluetooth add-in also caused some trouble.
In all instances, disabling the ad-ins restored access to Word.
5. Modify your registry
- Press Windows Key + R and enter regedit. Press Enter or click OK.
- Once Registry Editor opens, go to the following location (your key might be different depending on the version of Office that you have):
HKEY_CURRENT_USERSoftwareMicrosoftOffice15.0Word - Locate Data subkey. Right-click it and choose Delete from the menu.
- After deleting the key, close Registry Editor and try to start Word again.
Word will automatically recreate the deleted key, and the problem should be resolved. We have to mention that this solution should work with almost any version of Word, so be sure to try it out.
6. Remove the old printer driver
- Press Windows Key + X to open Win + X menu. Choose the Device Manager from the list.

- Locate your printer, right-click it, and choose Uninstall.

- Click OK to confirm that you want to remove the driver.
After deleting the driver, restart your PC and check if the issue is resolved. If removing the driver solves the problem, download and install the latest driver for your printer from the manufacturer’s website.
7. Remove any recently installed software
Third-party applications can interfere with Word and cause errors. To fix this problem, you’ll need to uninstall any recently installed software.
If you added any new hardware to your PC, such as a printer or scanner, you might want to try removing its driver and software and check if that solves the issue.
Or you might want to remove any tools that you installed in the past few weeks.
8. Insert your document into another file
- Open the File menu and then select New / Blank Document.
- Go to the Insert tab and click on Object in the Text group. Now select Text from File.
- Select the desired file and click Insert.
The Microsoft Word has stopped working error can sometimes appear while trying to open previously saved documents. If that’s the case, this step might help.
9. Delete the Word Options registry key
Some PC issues are hard to tackle, especially when it comes to corrupted repositories or missing Windows files. If you are having troubles fixing an error, your system may be partially broken.
We recommend installing Restoro, a tool that will scan your machine and identify what the fault is.
Click here to download and start repairing.
Keys in your registry can get corrupted, and if that happens, you’ll need to remove them manually. Removing keys from the registry can lead to instability issues, therefore we advise you to create a backup of your registry, just in case.
To delete this key from the registry, do the following:
- Open Registry Editor. (For detailed instructions on how to do that be sure to check the forth solution above.)
- In the left pane navigate to the following key (it might look different on your device, depending on the Office version):
HKEY_CURRENT_USERSoftwareMicrosoftOffice16.0WordOptions - Right-click the key and choose Export from the menu.

- Save the file as Wddata.reg and save it on your Desktop.
- Now go back to the Registry Editor, right-click the Options key, and choose Delete from the menu.
- Close Registry Editor.
After doing that, try to start Word again and check if the problem is resolved. If the problem still persists, run Wddata.reg on your Desktop to restore the deleted key.
10. Replace the Normal.dot global template file
- Make sure that all Office programs are closed.
- Press Windows Key + X and select Command Prompt (Admin).

- When Command Prompt starts, enter the command below and press Enter to run it:
ren %userprofile%AppDataRoamingMicrosoftTemplatesOldNormal.dotm Normal.dotm - Wait for the command to finish and then close Command Prompt.
- After that, try to start Word again.
Word stores formatting and macros in a global template file, and if your global template file is corrupted you’ll get this error message. So renaming the Normal.dot file should work.
Note that by altering this file you can lose your customization options such as styles, macros, etc. If you want to preserve those settings, we highly recommend that you copy the customization from one global template to another by using the Organizer.
11. Disable Startup folder add-ins
- Locate the Office installation directory on your PC. By default, it should be something like this (depending on your Office version):
C:Program FilesMicrosoft Officeoffice16 - Navigate to the Startup folder.
- A list of files should appear. Rename one file by adding .old at the end. Be sure to remember the original file name because you’ll need to revert the changes later.
- Try to start Word again. If the issue appears again, repeat Step 3. Rename a different file this time. After that, try to start Word again. Repeat this step until you rename all files in the Startup directory.
- If you manage to start Word after renaming one of the files, it means that the last renamed file was causing this error.
- Rename all files except the problematic one to their original names and check if Word still works. If so, you’ll need to update the problematic add-in or remove it.
If the problem still persists, you need to do the following:
- Press Windows Key + R and enter the following command and press Enter:
%userprofile%AppDataRoamingMicrosoftWordStartup. - After the folder opens, repeat steps 3-5 from above.
12. Delete COM add-ins registry keys
- Close all Office programs and start the Registry Editor.
- In the left pane navigate to this key:
HKEY_CURRENT_USERSoftwareMicrosoftOfficeWordAddins - Right-click on Addins and choose Export. Save the file to the desired location.
- Right-click Addins key again and choose Delete from the menu.
- In the left pane navigate to:
HKEY_LOCAL_MACHINESoftwareMicrosoftOfficeWordAddins - Export the key as we showed you in Step 3.
- Delete the Addins key.
- Close Registry Editor and start Word again.
If the problem is resolved, it means that COM add-ins are causing this issue. To fix the problem, you need to find and disable the problematic COM add-in. First, you need to restore the deleted keys by running the exported .reg files. After that, follow these steps:
- Click the File menu and choose Options.
- Click Add-Ins.
- In the Manage list click COM Add-Ins and then click on Go.
- If a certain add-in is listed in the COM Add-Ins dialog box, clear the checkbox next to its name. (If you have multiple COM Add-Ins available, repeat this step and disable a single add-in at a time in order to find the problematic one.)
- Click OK.
- Now select File / Exit.
- Start Word and check if the problem is resolved. If the issue still persists, repeat the steps until you find the problematic add-in. After finding it, disable it or try to download the latest version.
13. Change the default printer
- Press Windows Key + S and enter devices and printers. Select Devices and Printers from the list of results.

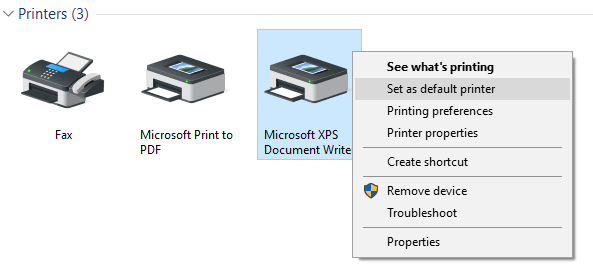
- In the next window, Go to the Printers section.
- Right-click Microsoft XPS Document Writer. Select Set as a default printer option.

- Close Devices and Printers window and try to start Word again.
If the error message doesn’t appear, it means that your printer was causing this problem.
To fix the problem, we advise that you update your printer drivers using DriverFix, as mentioned in the first solution, and check if that solves the issue.
14. Create a new Windows profile
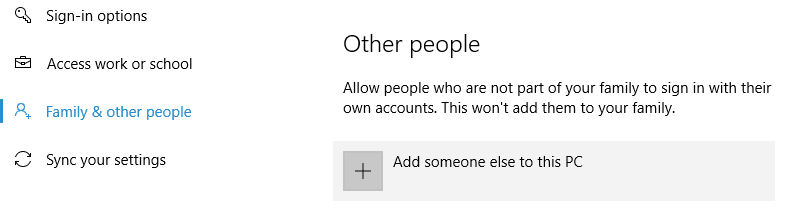
- Press Windows Key + I to open the Settings app.
- Go to Accounts > Family & other people.
- In the Other people section click the Add someone else to this PC button.

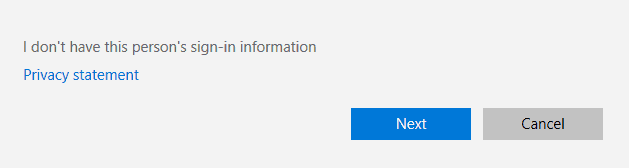
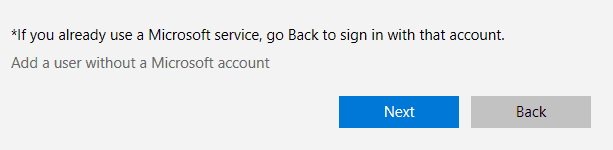
- Select I don’t have this person’s sign-in information.

- Now select Add a user without a Microsoft account.

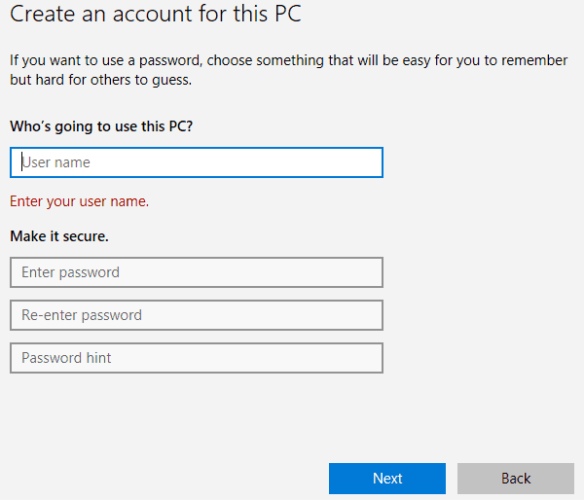
- Enter the username and password for the new user account and click on Next.

After making a new user account, switch to it and check if the problem is resolved.
If Word is working properly, you might have to continue using the new user account if you don’t manage to find another working solution.
How do I fix Microsoft Word 2013 issues?
1. Set Word to Power Saving mode
Users reported Word 2013 being set to High-Performance mode surely causes functionality issues.
So go to your switchable graphics control panel and set Word 2013 to work in Power Savings mode. After doing that, try to run Word and check if the problem is resolved.
2. Check your graphics card driver
This issue can sometimes appear due to problems with your graphics card driver. Users reported that they had problems with Nvidia drivers, and they fixed them by renaming the NVWGF2UM.DLL to NVWGF2UM.old.
Renaming the driver files isn’t the best solution, especially since it’s hard to find the problematic driver file.
So we advise you to update your graphics card driver and check if that solves the issue. If the problem still persists, you might want to remove your driver and use the default driver from Microsoft.
Solution 3 – Disable your dedicated graphics card
Many laptops and some desktop computers have both integrated and dedicated graphics cards. According to users, they experienced Microsoft Word has stopped working error because Word 2013 wasn’t compatible with their AMD graphics card.
To fix this problem, you need to temporarily disable the dedicated graphics card from the switchable graphics menu. After doing that, try to start Word 2013 and check if the problem is resolved. If the issue is fixed, you’ll need to download the latest drivers for your dedicated graphics card and check if that solves the problem.
4. Disable Hardware Acceleration
- Open any Office application.
- Select File / Options / Advanced.
- Locate the Hardware Acceleration option and disable it.
- After doing that, try to start Word 2013 again.
If you can’t open Word 2013 at all, you can disable hardware acceleration using Registry Editor. To do that, follow these steps:
- Open Registry Editor.
- In the left pane navigate to this key:
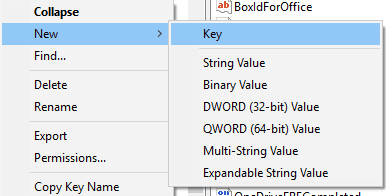
HKEY_CURRENT_USERSoftwareMicrosoftOffice15.0Common - Right-click the Common key and choose New > Key from the menu.

- Enter Graphics as the name of the new key.
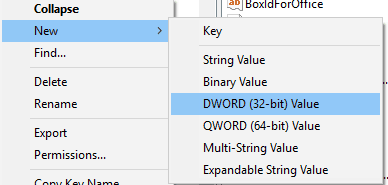
- Now right click Graphics key and select New / DWORD (32-bit) Value. Name the new value DisableHardwareAcceleration.

- Double click DisableHardwareAcceleration value and set its Value data to 1. Click OK to save changes.
- Close the Registry Editor and check if the problem is resolved.
We have to mention that modifying the registry comes with certain risks, so we strongly advise you to create a backup of your registry before making any changes.
Hardware acceleration can be useful to achieve maximum performance with certain apps, but it seems that with Word 2013, there’s an opposite effect.
5. Delete any add-in leftover files
Sometimes when you delete a certain add-in, its files might remain in the Office Startup folder.
Users reported that this is what happened with the Mendeley add-in after they removed it.
Keep in mind that almost any leftover file from add-ins can cause this problem to appear, so be sure to check the Office Startup folder.
We already explained how to enter the Office Startup folder in one of our previous solutions, so be sure to check that solution for detailed instructions.
How do I fix Microsoft Word 2010 issues?
Users reported issues with the Bluetooth add-in in Office 2013 and Office 2010. If you can’t disable the Bluetooth add-in, you might have to uninstall the Bluetooth driver or update it.
If you use Bluetooth frequently and you don’t want to uninstall the driver, you might be able to fix the problem by renaming two files.
On this note, users suggested renaming btmoffice.dll and btmofficea.dll. You can simply add .bak and the end of the file name to safely rename your files.
To find the files easier, use the search bar in File Explorer.
So these were our solutions to get Work running again. If you need to further investigate how to repair a Word document, we’ve got a dedicated article specifically on this topic.
If any of our recommendations worked for you, we’d like to hear that, so please use the comments sections below.
Still having issues? Fix them with this tool:
SPONSORED
If the advices above haven’t solved your issue, your PC may experience deeper Windows problems. We recommend downloading this PC Repair tool (rated Great on TrustPilot.com) to easily address them. After installation, simply click the Start Scan button and then press on Repair All.
![]()
Newsletter
Recently, I find more and more users are encountering the error — Microsoft Word has stopped working. In order to help them fix the issue and continue using Microsoft Word, I decided to write this post. What’s more, I’d like to show them the detailed steps to recover a Word document with the help of the AutoSave feature and MiniTool Software.
Oops, the System Says Microsoft Word Has Stopped Working
You’ll be happy to use the Microsoft Word program when everything works fine. However, the calm will be broken as soon as something went wrong and affect the using of Microsoft Word. Well, Microsoft Word has stopped working is a popular error that has bothered millions of Microsoft Office users.
Error Messages of Microsoft Word Not Working
When you’re trying to open a Microsoft Word document or when you’re in the middle of using it, you may see a prompt window with one of the following error messages:
- Microsoft Word has stopped working. A problem caused the program to stop working correctly. Windows will close the program and notify you if a solution is available.
- Microsoft Word has stopped working. There’s a problem caused the program stopped work properly. Windows will close the program, and notify you when there’s a solution available.
- Microsoft Word has stopped working. A problem caused the program to stop working correctly. Please close the program. (Close the program/Debug the program.)
- Microsoft Word has stopped working. Windows is checking for a solution to the problem…
- Microsoft Word has stopped working. Windows can try to recover your information. Close the program.
- Microsoft Word has stopped working. Windows can try to recover your information and restart the program. Restart the program.
- Microsoft (Office) Word has stopped working. Windows can check online for a solution to the problem (and try to recover your information). Check online for a solution and close the program/Close the program/Debug the program.
The Word document not opening/working error could occur when you’re using Word 2019, 2016, 2013, 2010, or 2007. Most people reported their Microsoft Word is not opening while they encounter the error message while there are still few people who said their Word is not responding when they’re working with it.
Microsoft Word Won’t Open On Windows & Mac: How To Fix It?

In the next part, I’ll show several useful solutions to help them fix the Microsoft Word stopped working issue.
How to fix There is not enough memory or disk space error in Word & Excel?
Microsoft Word Has Stopped Working Windows 10, How to Fix
#Fix 1: End Microsoft Word & Restart
It’s reasonable that the Microsoft Word stops working on your PC when there is a conflict or improper change. In this case, you should try to force quit the Microsoft Word and restart it.
- Open the Windows Task Manager by pressing Ctrl + Alt + Delete & selecting Task Manager.
- Make sure the Processes tab is checked.
- Find the Apps area and locate the Microsoft Word process.
- Right click on Microsoft Word to bring up its context menu.
- Choose End task from the menu and wait a second.
Tip: You can also expand the Microsoft Word to see all opening Word documents and then right click on the not working one to end.
FYI: If you lose the Word content you want, please click here to learn different ways to recover unsaved Word documents (including using AutoSave feature).

#Fix 2: Recover Lost/Deleted Word Document
Please don’t worry if you have lost the Word file with the important information you need. Let MiniTool Power Data Recovery help you recover Word files in only 5 simple steps.
Step 1: download and install MiniTool Power Data Recovery. Download the professional recovery software from a reliable link and double click on the setup program to install it on your PC.
Free Download
Step 2: launch the file recovery software for Windows 10. Make sure the This PC icon is selected in the left panel and the Logical Drives tab is selected in the right panel (you should shift to the Devices tab if the drive used to keep your Word files doesn’t exist now).

Step 3: you should select the drive that contains lost Word document to scan in the following ways.
- Navigate to the target drive from the partition list and click on the Scan button appeared on it.
- Locate the target drive and double click on it to start the scan directly.
Step 4: wait for the scan. It may last for a few minutes, several hours, or even longer based on the actual situation. Browse the found Word documents and check the ones you need.
The Filter, Find, and Preview feature will be able to help you find your needed files more easily, accelerating the process.

Step 5: click on the Save button located in the bottom right corner to bring up a directory selection window. Please choose another drive to store the recovered Word document for the sake of avoiding data overwriting and click on the OK button to confirm this operation.
Now, you just need to wait for the completion of the recovery. When you see a window popping ups in software and informing you that the selected files have been saved to the target place, you can go to take a look at the recovered documents.
- If you’re satisfied with the recovery, please close the software.
- If you still have other files to recover, please choose them from the recovery result in step 4 or do a scan on another drive again and repeat step 4 and step 5.
Click to Tweet
Tip: Please click here to know more about how to recover deleted/lost files on your PC. If you’d like to recover lost Word documents on Mac, you should use Stellar Data Recovery for Mac instead.
#Fix 3: Disable Problematic Word Add-ins
Many users would ask — why is my Microsoft Office not working. In fact, there are many reasons that can lead to Microsoft Office has stopped working. For instance, the corruption of add-ins is a popular cause of Microsoft Word not working. In that case, you should disable the add-in that went wrong.
- Press Start + R on the keyboard to open the Run dialog box.
- Type winword.exe /a into the textbox of Run window.
- Click on the OK button below to open Word without loading the add-ins.
- Click on the Yes button in the pop-up window which asks you whether you want to start Word in Safe Mode.
- Click on the File tab (in the upper left corner) in the opening Word.
- Select Options from the drop-down list.
- Now, Word Options window will show up; please select Add-ins from the left sidebar.
- Look through the Add-ins from the right pane and select the one that may cause your Word to crash.
- Select Word Add-ins from the list after clicking on the arrow button behind Manage.
- Click on the Go button at the bottom to manage the Add-in.
- Uncheck one or more Add-ins that you suspect should be responsible for Microsoft Office not working.
- Click on the OK button on your right.
- Close Word and restart it.

#Fix 4: Repair Office 2016/2013/2010/2007
The Microsoft Office itself has provided you with the feature to repair the program when any problems occur.
- Click on the Start button in the lower left corner, expand the Windows System folder, and choose Control Panel. (You can also open it through Windows search feature.)
- Choose Programs if you view by Category and click Programs and Features next. (You can click on the Programs and Features option directly if you view by Small/Large icons.)
- Browse the programs list and select Microsoft Office; then, click on the Change button. (You can also right click on Microsoft and choose Change from the context menu.)
- Choose Yes in the User Account Control window appears on your screen.
- Check Repair and click on the Continue button located at the bottom.
- Office will start repairing the programs and features for you automatically. Just wait for the process to complete; it may take a while.
- Restart your computer.
If you are using Office 2019/2016 or Office 365, you can also choose Online Repair (it will take a longer time than Quick Repair) to perform a complete repair.
#Fix 5: Check the Activation Status of Office
If your Microsoft Office Suite is not activated properly, you may also come across Microsoft Word stopped working issue. In that case, you need to re-activate it with a genuine serial key.
How to check the status in Office 2013 and newer versions:
- Open any of the Word documents on your PC.
- Click File from the menu bar and choose Account from the submenu.
- Look at the Product Information section in the right pane.
- Check the program’s activation status under it.
- If it says Product Activated, it means your Microsoft Office has been activated with a valid license; if not, please reactivate it properly.

How to check the status in Office 2010 and older versions:
- Open an Office file (Word, Excel, PowerPoint, etc.).
- Click File at the upper left and choose Help.
- Look for the Activate Product Key button in the right pane and click it.
- If you can’t see this button, it means your Microsoft Office has been activated successfully.
#Fix 6: Install the Latest Updates
Since the old Windows version or Office version will lead to Word stops working and crashes, you should check for the latest updates for both.
Step 1: check for the latest Windows update in Windows 10.
- Right click on the Start button in the lower left corner of the PC screen.
- Choose Settings from the context menu.
- Scroll to the bottom to select Update & Security.
- Windows Update will be selected in the left sidebar by default. Now, click on the Check for updates button in the right pane.
- Wait for the checking process and click on the Install Now button if any new update is found.
- Follow the on-screen instructions to complete the update process.
Step 2: check for the latest Microsoft Office update in Office 2013 and newer versions.
- Open a Word document (or Excel, PowerPoint).
- Find File from the menu bar and click on it.
- Select Account from the submenu and look for Product Information on the right side.
- Expand Update Options to choose Update Now.
- Wait for the checking process and follow the instructions to complete the update.
- The You’re up to date window will pop up to tell you that the update is finished.
Warning: You need to click the Enable Updates button first if you can’t find Update Now from the submenu of Update Options.
#Fix 7: Insert the Not Working Word Document into A New File
- Right click on the blank area on desktop (make sure the Microsoft Office is installed properly on your PC).
- Navigate to the New option in the context menu and choose Microsoft Word Document.
- Give it a name and double click on the new document to open it.
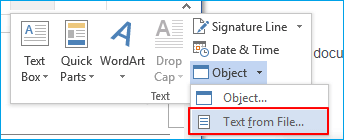
- Select Insert from the menu bar and find the Text section from the submenu.
- Click on the arrow next to Object to see the drop-down options. (If you can’t find Object, please click the arrow next to Text to expand it.)
- Choose Text from File and a dialog box will appear.
- Select the problematic document and click on the Insert button at the bottom.
- Check the information and click File in the menu bar.
- Choose Save As and give it a name.
- Click on the Save button to complete.
#Fix 8: Remove the Old Printer Driver
- Right click on the Start button in the lower left corner.
- Choose Device Manager from the Start menu.
- Go to find your printer and right click on it.
- Choose Uninstall device from the menu.
- Click OK and restart your computer.
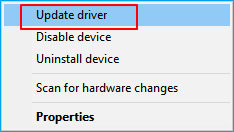
You can also update the old printer driver: repeat step 1 to step 3 -> choose Update driver -> select Search automatically for updated driver software -> follow updating instructions -> restart PC.
Besides, you can try to change the default printer to fix when Microsoft Word stopped working.
#Fix 9: Delete the Word Data Registry Key
- Type regedit into the search box and press Enter to open Registry Editor.
- Navigate to this path to locate Word options key if you’re using Word 2010: HKEY_CURRENT_USERSoftwareMicrosoftOffice14.0WordData.
- Right click on the Data subkey to choose Delete.
- Restart Microsoft Office Word.
Other Word options key paths:
- Word 2002: HKEY_CURRENT_USERSoftwareMicrosoft Office10.0WordData
- Word 2003: HKEY_CURRENT_USERSoftwareMicrosoft Office11.0WordData
- Word 2007: HKEY_CURRENT_USERSoftwareMicrosoft Office12.0WordData
- Word 2013: HKEY_CURRENT_USERSoftwareMicrosoftOffice15.0Word
- Word 2016: HKEY_CURRENT_USERSoftwareMicrosoftOffice16.0Word
#Fix 10: Replace the Normal.dot Global Template File
- Close all Office programs.
- Type cmd into the search box.
- Right click on Command Prompt to run it as administrator.
- Type ren %userprofile%AppDataRoamingMicrosoftTemplatesOldNormal.dotm Normal.dotm and hit Enter.
- Wait for the command to complete and close this tool.
- Restart Microsoft Word.

Click to see how Command Prompt can help you recover lost data.
Other methods you may try when finding Microsoft Word not working:
- Boot Windows into Safe Mode.
- Create a new Windows profile.
- Set Word to Power Saving mode.
- Remove recently installed software.
- Check the graphics card driver.
- Disable hardware acceleration.
- Uninstall the Microsoft Office completely and reinstall it.
Click to Tweet
Verdict
Most users said they have ever had the experience: 1. when they try to open a Word document, they failed; 2. when they are working on a Word document, it stops working suddenly. Both could lead to important data loss.
In view of this, I summarized the common error messages you may see when Microsoft Word has stopped working and provided over 10 useful ways to fix it. You should read them carefully if you’re one of the victims of Microsoft Word not opening/working issue.
With the increasing fame of Microsoft Office, its applications like MS Word, have gained worldwide users’ favor. However, the more users there are, the more problems there are. “Microsoft Office Word has stopped working” is one of the top concerned questions for many Word users. Usually, when a Microsoft word stopped working error shows up, you have two available options to undertake: check online for a solution or close the program. When you choose to close the application, you may run into another problem that Microsoft won’t open. When you choose to check a solution online, it will open a window with a bing search by default which also doesn’t help the situation itself. The error notification is as follows:
Except for finding the right solutions to solve the Microsoft office has stopped working error on Windows 10, it’s highly necessary to know the reasons that cause your Word malfunction to avoid problems like these to occur in the first place. The list of reasons is as follows:
- Compatibility: This problem is likely to occur if your MS Office version is not compatible with the current Operating System on your PC. The mismatch may occur from either of the concerned parties i.e. Operating System and Microsoft Word. Some people have connected it to the fact that certain applications are made for older versions of Windows, and aren’t fully compatible with newer releases.
- Outdated Software: Using an older version of Microsoft Word on an updated operating system will most likely cause this error. That’s because software updates address any new-found security issues, fix recently discovered bugs, and add support for drivers and new hardware.
- Device Driver Update: Device drivers are essential pieces of software that help different hardware components work smoothly with your computer. When these drivers are properly updated, your computer will run smoothly. However, when they have become outdated they can start causing problems like the one under consideration.
- Word Add-in Issue: To enhance their functionality, Word and many other Office tools support add-ins. These little applications allow you to expand the functionality of Word or any other Office tool with new features. Unfortunately, not all add-ins are compatible with Windows 10 or with your version of Office therefore, there is a high probability that add-ins may lead to the error under consideration.
- Corrupted Word File: A Word document may get corrupt for several reasons that will prevent you from opening it or may cause this error. This behavior may be related to damage to the document or to the template on which the document is based.
All the causes mentioned above are the result of thorough online research done by our technical researchers. Let us move forward now.
Pre-requisites:
Before jumping into the solutions, our advice is to go through these short but promising workarounds that helped many individuals online. In case these do not work for you, you can sort out your problem by following the solutions, provided right-after. Discussed workarounds are as follows:
- Update Microsoft Word/Office: The user should keep the software updated, so to update Microsoft word, open Microsoft Word and click File > Account > Product Information > Update Options and click Enable Update and then select Update Now.
- Check Corrupted File: Sometimes the word document file is corrupted which can not open in Microsoft Word and gets an error of Microsoft Word Stopped Working. The user can try to open another file in MS Word to check either it’s a software issue or the file is corrupted.
Solution 1: Disable Add-Ins in Safe Mode
Starting a Microsoft Word for Windows application in Word Safe Mode can allow you to safely use it when it has encountered certain problems. This is useful when you need to open a file that you can’t under normal mode because the application is crashing or if you need help in identifying an add-in or extension that may be causing a problem on startup. The first troubleshooting step is to see if Word works in Safe mode. If it works in Safe mode, a COM add-in may be causing problems (A COM add-in is a supplemental program that extends the capabilities of Microsoft Word by adding custom commands and specialized features).
- Close Microsoft Word by right-clicking the Microsoft Word icon in the taskbar and select the Close window. This will end all the background ongoing processes related to Microsoft Word.
- Press Windows + R keys on your keyboard to open the Run dialog box.
- Type winword /safe and press Enter or click OK. This will start Microsoft Word in Safe mode.
Note: If MS Word works fine in Safe mode, disable all COM Add-ins (while being in safe mode) and restart Word. Re-enable the add-ins one a time to identify the culprit. Follow the steps below to disable the add-ins.
Opening Microsoft Word in Safe Mode - Click File and then click Options. This will open a window that contains all options you can go through in MS Word.

Opening Microsoft Word Options - Click on Add-Ins from the options list, located on the left pane.

Opening Add-Ins Option - At the bottom, select COM Add-ins from the drop-down menu and click on Go. This will open a dialog box.

Managing COM Add-Ins - Uncheck all the add-ins and click OK to confirm. Some outdated add-ins are more likely to cause problems like the one under consideration.

Unchecking COM Add-Ins - Close the Dialog Box and MS Word. Now try running MS Word normally and see if it works.
- Repeat steps 1 – 3 to enable the add-ins, one at a time, and check which add-in is causing this error.
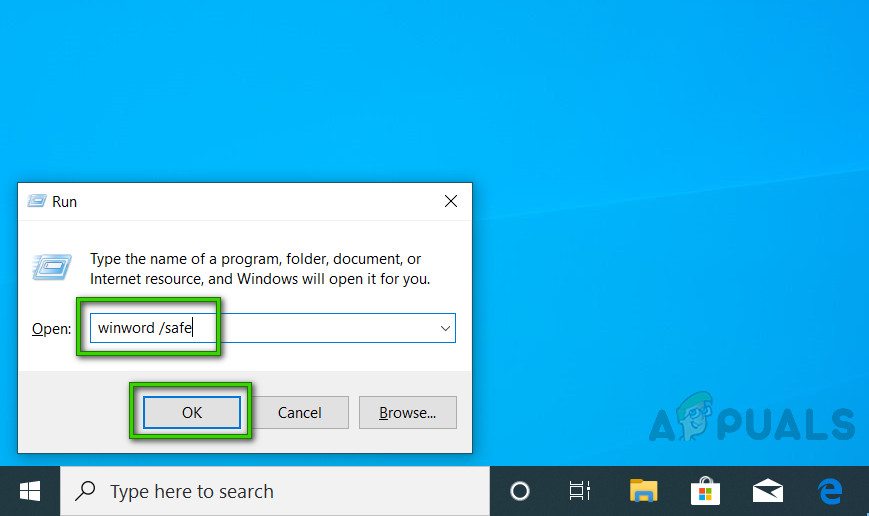
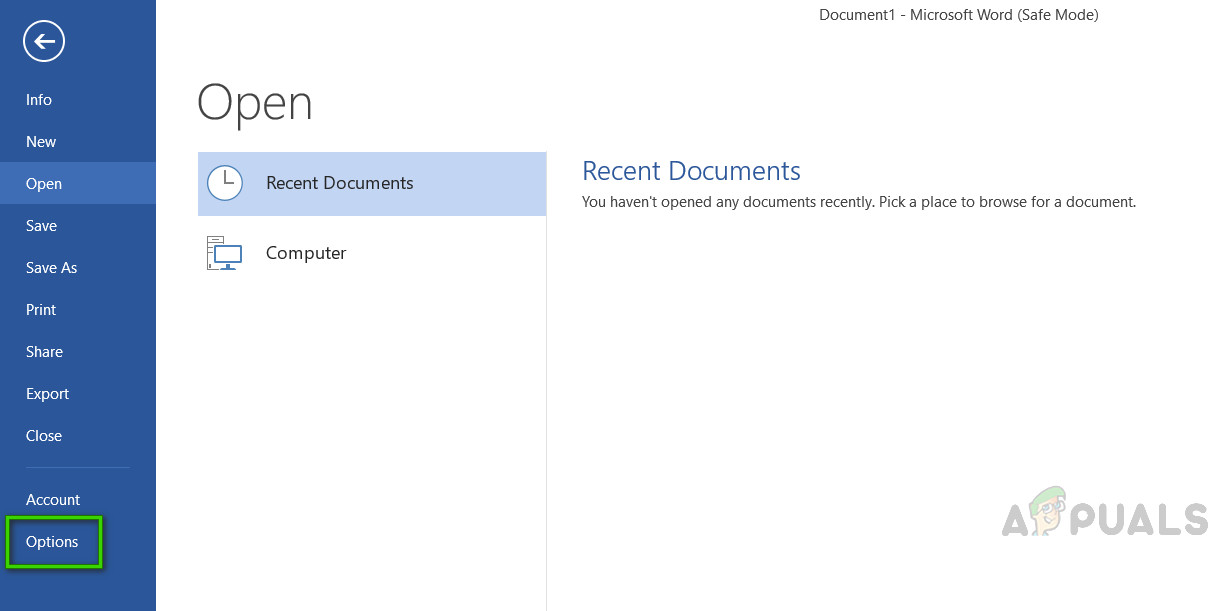

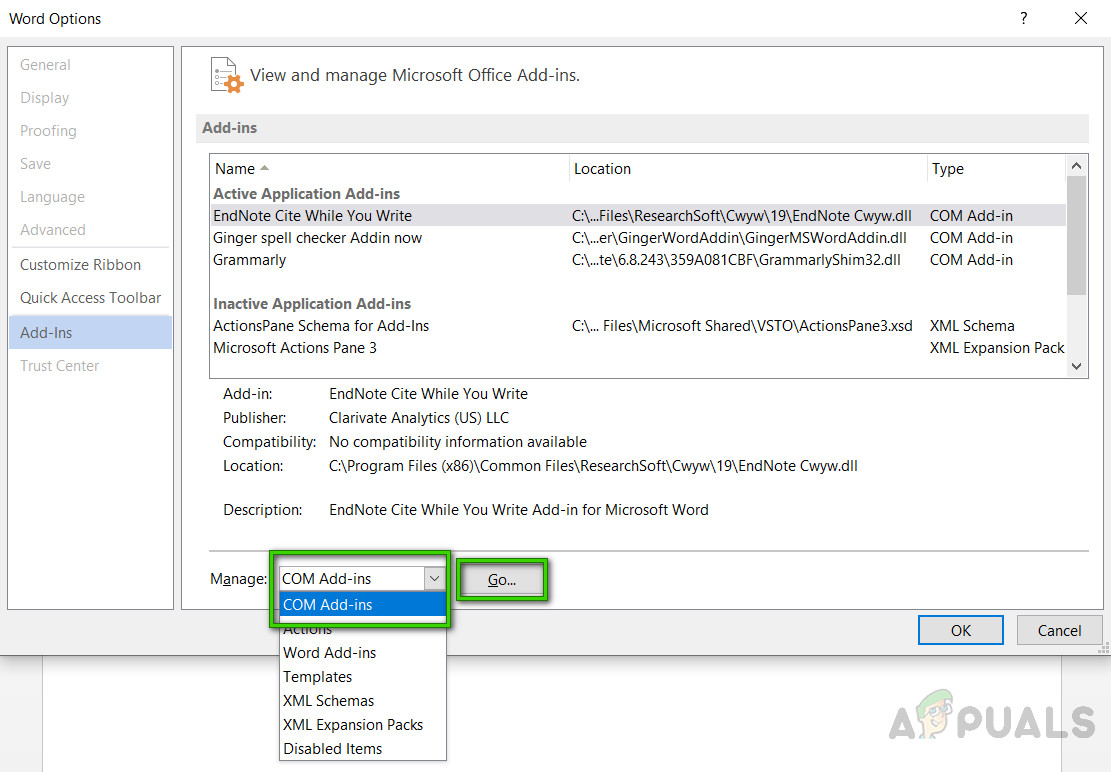
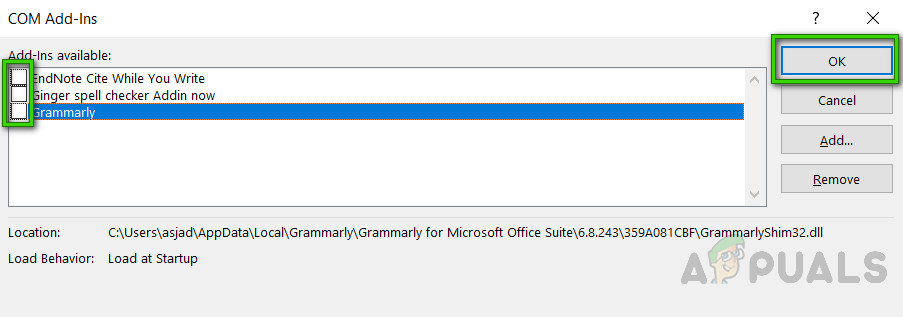
If the Office application doesn’t start on Step 7, check If there is another Add-ins option in the Manage list (just like COM Add-ins). In case there is, repeat this process for those add-ins as well.
We’ve received reports of crashes that occur when the Office Compatibility Pack Add-in is installed. This add-in allows people to use older versions of Office i.e. Office 2003, Office 2000, etc. so that they may open, edit, and save documents, workbooks, and presentations that were created in newer versions of Word, Excel, and PowerPoint. If you’re using Office 2010 or later, you can safely uninstall this add-in to get rid of the problem. To uninstall the add-in:
- Click Start, search Control Panel, and open it. This will open the Control Panel window that contains all the settings related to different Windows modules i.e. Networking, System and Hardware, etc.

Opening Control Panel - Under Programs, click Uninstall a Program. This will open a list of currently installed programs on your PC.

Clicking Uninstall a Program Window - In the list of currently installed programs, select Compatibility Pack for the Office System, right-click on it, and select Uninstall. If a dialog box appears, follow the on-screen instructions to remove the program completely from your PC.
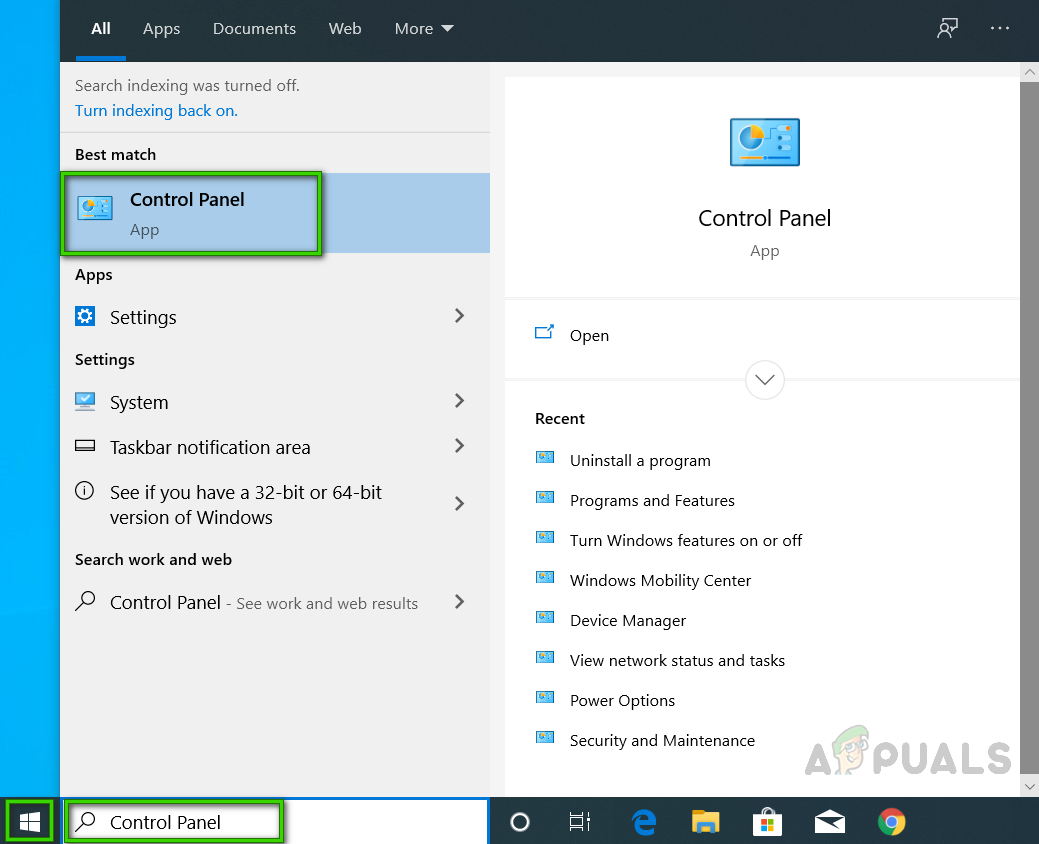
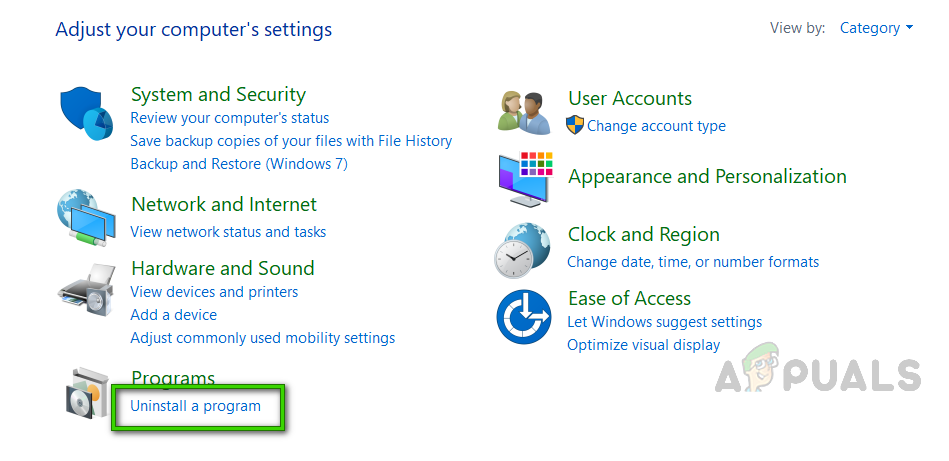
If you are still facing the problem then this error isn’t related to add-ins. Please move onto the next solution to get rid of this problem.
Solution 2: Repair Microsoft Word Installation
There is a high probability that you are facing this error because some system files for Microsoft Word may have gotten corrupted. Microsoft Office comes with a feature of Installation Repair that verifies the integrity of the current system files and fixes or repairs all the corrupted ones. This solution proved to be helpful for many users online. Please follow the steps given below:
- Click Start, search Control Panel, and open it. This will open the Control Panel window that contains all the settings related to different Windows modules i.e. Networking, System and Hardware, etc.
- Under Programs, click Uninstall a Program. This will open a list of currently installed programs on your PC.
- Locate Microsoft Word, right-click on it, and select Change. This will open a window that contains options i.e. Repair, Uninstall, etc. for Microsoft Word.
Note: Your office version will be written right next to Microsoft Word as shown in the picture below.
Opening Microsoft Word Repair Settings - From the multiple given options, select Repair and click Continue. This will start the repairing process. It may take time so wait until it gets finished.
Note: For newer versions of Microsoft Office i.e Microsoft Office 365, you can choose Quick Repair and click Repair after step 3. It is a good practice to use the Quick Repair option first as it will fix many things fairly and quickly.
Repairing Microsoft Word - If Quick Repair doesn’t help, use the Online Repair option. It will not delete your existing Office settings or your Outlook profile and data files. Your problem should be fixed now. In case it does not, move to the final solution.
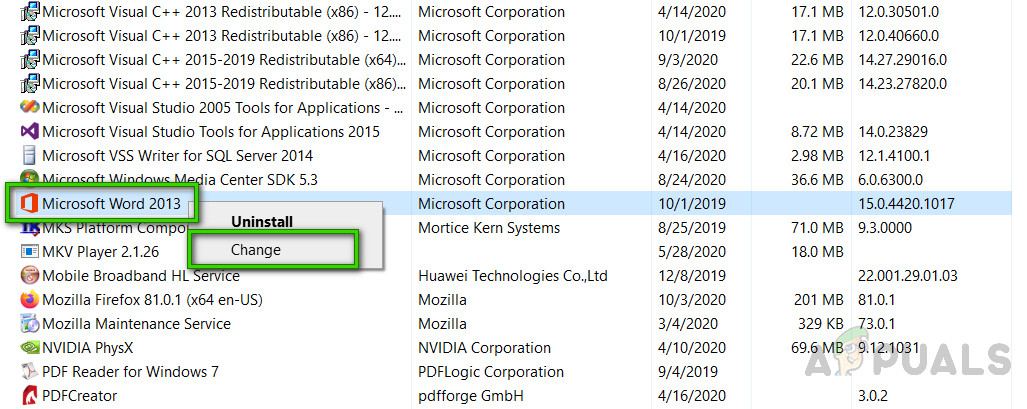
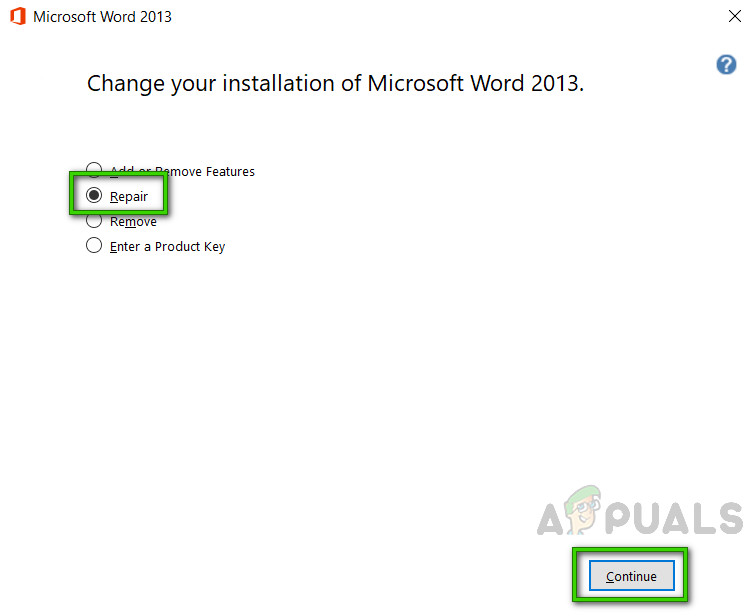
Solution 3: Clean Uninstall and Reinstall MS Word/Office
If the above solutions do not work for you then there is a strong possibility that some of the Microsoft Word system files are permanently corrupted and can not be fixed using the Repair utility. The easy fix would be to completely uninstall Microsoft Word and reinstall the latest fresh copy. This solution proved to be helpful for many users online. Follow the steps given below to do so:
- Click Start, search Control Panel, and open it. This will open the Control Panel window that contains all the settings related to different Windows modules i.e. Networking, System and Hardware, etc.
- Under Programs, click Uninstall a Program. This will open a list of currently installed programs on your PC.
- Select Microsoft Word/Office from the list of installed programs and click Uninstall. This will start the uninstall procedure. This procedure may take time so wait until it gets finished.

Uninstalling Microsoft Office/Word - Press Windows + R keys on your keyboard to open the Run dialog box.
- Type %appdata% and click OK. This will take you to a hidden folder named AppData where user data is stored for different applications installed on your PC.

Opening Windows AppData Folder - Open Microsoft folder, right-click on Word folder and select Delete. Furthermore, click Yes to confirm the deletion process.

Deleting MS Word App Data - Close all windows and again press Windows + R keys on your keyboard to open the Run dialog box.
- Type %Programdata% and click OK. This will take you to a hidden folder named ProgramData where program-related settings or data are stored.

Opening Windows ProgramData Folder - Repeat step 5. Now you have completely uninstalled Microsoft Word/Office from your PC.
- Install Microsoft Word/Office again from the downloaded setup. This should finally fix your problem.
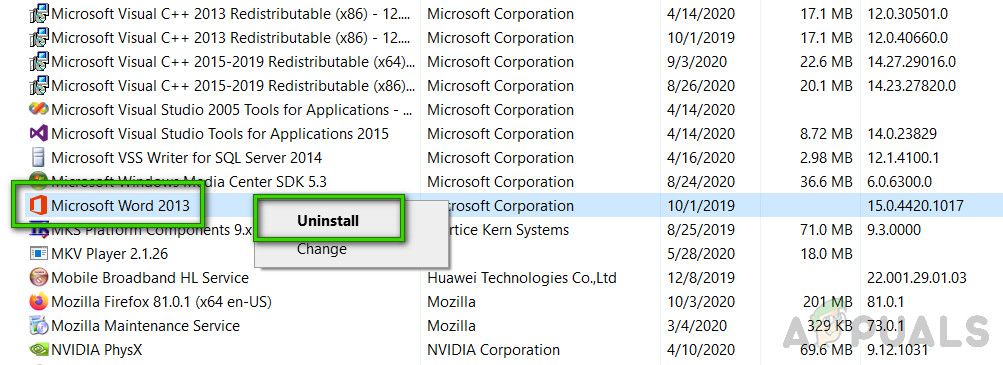
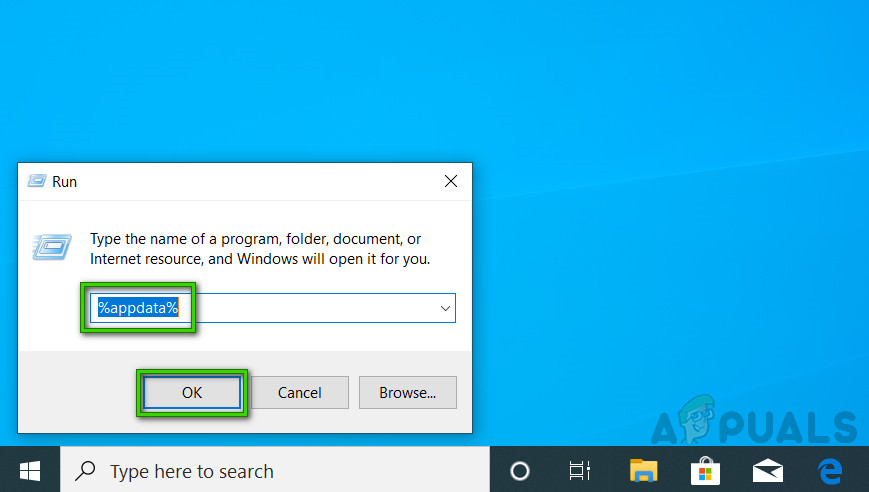
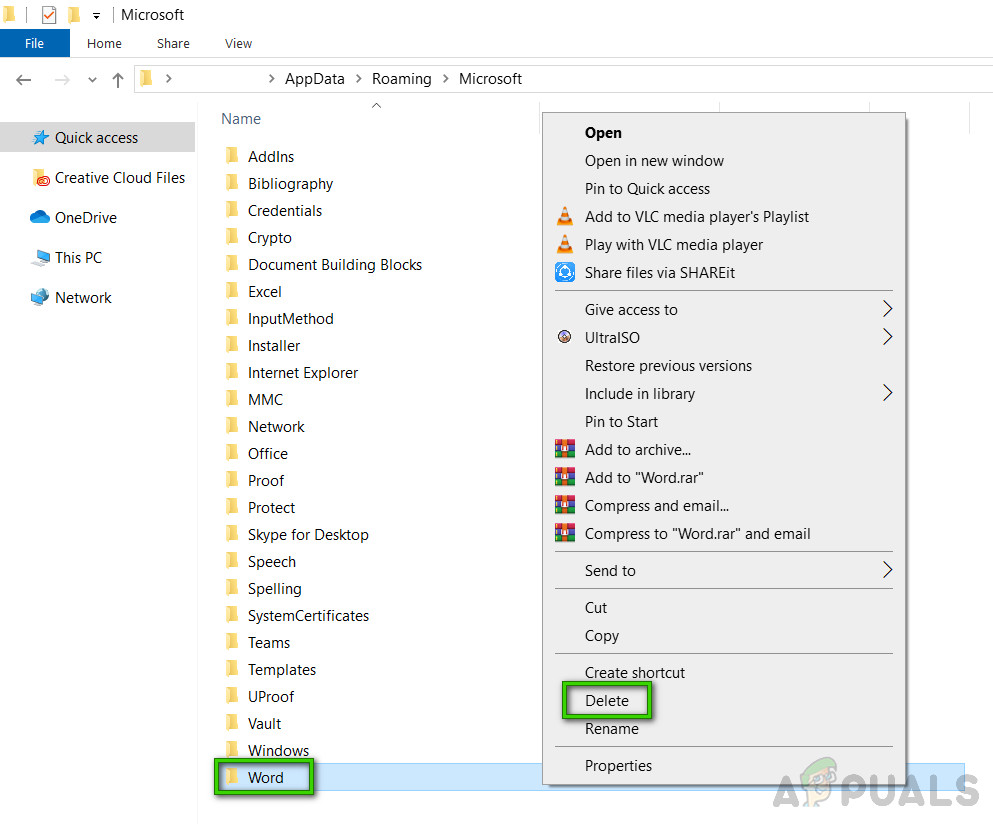
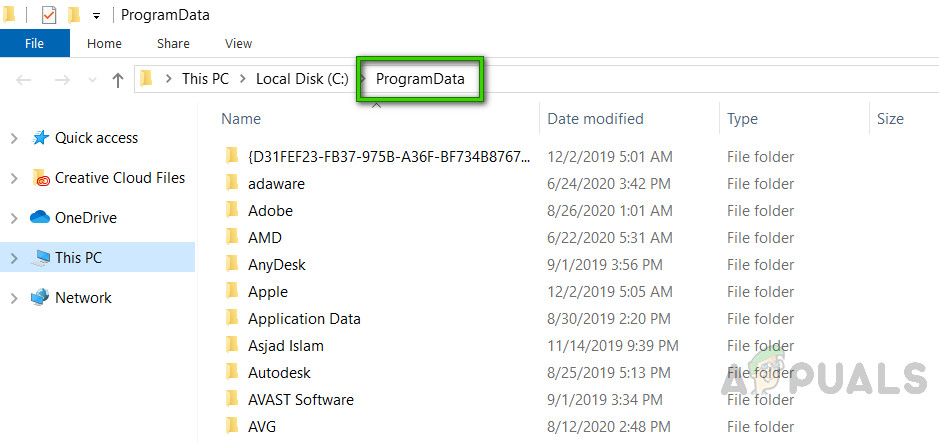

Kevin Arrows
Kevin Arrows is a highly experienced and knowledgeable technology specialist with over a decade of industry experience. He holds a Microsoft Certified Technology Specialist (MCTS) certification and has a deep passion for staying up-to-date on the latest tech developments. Kevin has written extensively on a wide range of tech-related topics, showcasing his expertise and knowledge in areas such as software development, cybersecurity, and cloud computing. His contributions to the tech field have been widely recognized and respected by his peers, and he is highly regarded for his ability to explain complex technical concepts in a clear and concise manner.
Вероятно, одним из самых популярных приложений Office является Microsoft Word. Этот текстовый редактор имеет миллионы пользователей, но у приложения также есть несколько проблем. Пользователи сообщили, что Microsoft Word перестало работать сообщение об ошибке, и сегодня мы собираемся показать вам, как исправить эту проблему в Windows 10.
Исправлено — «Microsoft Word перестал работать»
Решение 1 — Ремонт офисной установки
По словам пользователей, эта ошибка появляется всякий раз, когда они пытаются открыть Microsoft Word на своем ПК. Ошибка препятствует запуску Word, что делает невозможным редактирование или создание новых документов. Это может быть серьезной проблемой, если вам нужно, чтобы Microsoft Word работал над вашей школой или рабочим проектом. Хотя это большая проблема, вы должны быть в состоянии ее исправить, исправив установку Office.
Это относительно простой процесс, и вы можете выполнить его, выполнив следующие действия:
- Нажмите Windows Key + S и введите программы и функции. Выберите Программы и компоненты из списка результатов.
- Когда откроется окно « Программы и компоненты», найдите в списке установку Office и выберите ее.
- В верхнем меню нажмите кнопку « Изменить».
- Выберите опцию « Восстановить» и нажмите « Продолжить». Имейте в виду, что в более новых версиях Office вместо этого могут использоваться параметры онлайн-восстановления или быстрого восстановления.
- Следуйте инструкциям, чтобы восстановить установку Office.


Это решение должно работать для всех версий Office. После восстановления установки Office проверьте, не появляется ли ошибка снова.
Решение 2 — отключить надстройки
В целях повышения их функциональности Word и многие другие инструменты Office поддерживают надстройки. Эти небольшие приложения позволяют расширять функциональные возможности Word или любого другого инструмента Office с помощью новых функций.
- ЧИТАЙТЕ ТАКЖЕ: Как: Найти место автосохранения Word в Windows 10
К сожалению, не все надстройки совместимы с Windows 10 или с вашей версией Office. Если определенная надстройка не совместима с вашей версией Office, вы, скорее всего, получите сообщение Microsoft перестало работать. Чтобы решить эту проблему, вам нужно отключить проблемные надстройки, и вы можете сделать это, выполнив следующие действия:
- Нажмите клавишу Windows + R, чтобы открыть диалоговое окно « Выполнить ». Введите winword.exe / a и нажмите Enter или нажмите OK. В дополнение к команде winword.exe / a вы также можете использовать winword / safe для запуска Word в безопасном режиме.
- Слово должно начать. Нажмите кнопку « Офис» и выберите « Параметры Word».
- Выберите вкладку Надстройки, а затем отключите все надстройки.
- После этого попробуйте снова запустить Word и проверьте, решена ли проблема.

Следует отметить, что надстройки могут вызывать проблемы в любой версии Office. Поскольку эта проблема затрагивает практически все версии Office, мы настоятельно рекомендуем вам попробовать это решение. Чтобы найти проблемную надстройку, вам нужно повторить предыдущие шаги и включить надстройки одну за другой. Имейте в виду, что после включения надстройки вы должны перезапустить Word снова. Повторяйте этот процесс, пока не найдете надстройку, вызывающую эту проблему.
Пользователи сообщали, что надстройка ABBYY FineReader 9.0 Sprint является частой причиной этой ошибки в Word 2016. Если у вас установлена эта надстройка, обязательно отключите ее и проверьте, устраняет ли она проблему. Пользователи также сообщили, что доступно обновление для ABBYY FineReader, и после установки обновления проблема была решена полностью.
В дополнение к этой надстройке Microsoft сообщила, что надстройки KingSoft PowerWord и Dragon Naturally Speaking также имеют проблемы с Office 2013 и 2016. Если вы используете какие-либо из этих надстроек, мы рекомендуем отключить их или обновить до Последняя версия. Пользователи Word 2013 сообщали о проблемах с надстройкой Bluetooth, но после ее отключения проблема была полностью решена.
- ЧИТАЙТЕ ТАКЖЕ: Как восстановить документ Word
Решение 3 — Установите последние обновления
Иногда Microsoft Word перестает работать, может появиться ошибка, если ваша версия Office или Windows 10 не обновлена. Устаревшие версии могут иметь немного ошибок или проблем несовместимости, поэтому рекомендуется обновить их. Чтобы загрузить обновления Office, выполните следующие действия.
- Откройте любое приложение Office и нажмите « Файл» в верхнем левом углу.
- Перейдите к Учетной записи> Информация о продукте> Параметры обновления.
- В разделе « Информация о продукте » выберите « Обновить параметры».
- Выберите опцию « Включить обновления». Если этот параметр недоступен, это означает, что автоматические обновления включены.
- Выберите « Обновить параметры» еще раз и выберите « Обновить сейчас» из меню. Подождите, пока Office загрузит и установит необходимые обновления.
Если у вас Office 2010 или старше, вы можете проверить наличие обновлений, выполнив следующие действия:
- Запустите любое приложение Office.
- Перейдите в Файл> Справка.
- Выберите « Проверить наличие обновлений» или « Установить обновления».
Windows 10 выполняет обновления автоматически, но вы также можете проверить наличие обновлений вручную. Для этого выполните следующие действия:
- Нажмите клавишу Windows + I, чтобы открыть приложение «Настройки».
- Когда откроется приложение «Настройки», перейдите в раздел « Обновление и безопасность ».
- Перейдите на вкладку Windows Update и нажмите « Проверить наличие обновлений».
Обновлять драйверы автоматически (рекомендуется)
После проверки драйверов мы рекомендуем обновить их автоматически. Загрузка и установка драйверов вручную — это процесс, который несет в себе риск установки неправильного драйвера, что может привести к серьезным сбоям в работе вашей системы.
Более безопасный и простой способ обновления драйверов на компьютере с Windows — использование автоматического инструмента. Мы настоятельно рекомендуем инструмент обновления драйверов Tweakbit.
Вот как это работает:
-
- Загрузите и установите TweakBit Driver Updater
- После установки программа начнет сканирование вашего компьютера на наличие устаревших драйверов автоматически. Driver Updater проверит установленные вами версии драйверов по своей облачной базе данных последних версий и порекомендует правильные обновления. Все, что вам нужно сделать, это дождаться завершения сканирования.
- По завершении сканирования вы получите отчет обо всех проблемных драйверах, найденных на вашем ПК. Просмотрите список и посмотрите, хотите ли вы обновить каждый драйвер по отдельности или все сразу. Чтобы обновить один драйвер за раз, нажмите ссылку «Обновить драйвер» рядом с именем драйвера. Или просто нажмите кнопку «Обновить все» внизу, чтобы автоматически установить все рекомендуемые обновления.
Примечание. Некоторые драйверы необходимо устанавливать в несколько этапов, поэтому вам придется нажимать кнопку «Обновить» несколько раз, пока не будут установлены все его компоненты.

Отказ от ответственности: некоторые функции этого инструмента не являются бесплатными.
Если какие-либо обновления доступны, Windows 10 загрузит их и установит их. После обновления Windows 10 и вашей версии Office проверьте, решена ли проблема.
Решение 4 — Изменить ваш реестр
По словам пользователей, Microsoft Word перестал работать, ошибка может появиться из-за проблем с вашим реестром. В вашем реестре есть ключ Word, и, удалив его, вы заставите Word воссоздать его, тем самым решив проблему.
- Читайте также: последнее обновление Microsoft Office добавляет поддержку изображений SVG
Следует отметить, что изменение реестра может быть потенциально опасным, поэтому настоятельно рекомендуется создать резервную копию на случай, если что-то пойдет не так. Чтобы отредактировать реестр, сделайте следующее:
- Нажмите Windows Key + R и введите regedit. Нажмите Enter или нажмите ОК.
- После открытия редактора реестра перейдите к ключу HKEY_CURRENT_USERSoftwareMicrosoftOffice15.0Word на левой панели и разверните его. Помните, что ваш ключ может отличаться в зависимости от используемой версии Office.
- Найдите подраздел данных. Щелкните правой кнопкой мыши и выберите « Удалить» из меню.
- После удаления ключа закройте редактор реестра и попробуйте снова запустить Word.

Word автоматически воссоздает удаленный ключ, и проблема должна быть решена. Мы должны отметить, что это решение должно работать практически с любой версией Word, поэтому обязательно попробуйте его.
Решение 5 — Удалить старый драйвер принтера
Немногие пользователи сообщили, что эта проблема вызвана старым драйвером принтера. По их словам, для решения проблемы вам нужно установить последнюю версию драйвера принтера. Обновление драйверов принтера относительно просто, и вы можете сделать это, посетив веб-сайт производителя вашего принтера. Просто выберите модель вашего принтера и загрузите последнюю версию драйвера для него. После его установки проблема будет решена.
Некоторые пользователи рекомендуют удалить текущий драйвер принтера, чтобы Microsoft Word перестала работать из-за ошибки. Для этого выполните следующие действия:
- Нажмите Windows Key + X, чтобы открыть меню Win + X. Выберите диспетчер устройств из списка.
- Когда диспетчер устройств запустится, найдите принтер, щелкните его правой кнопкой мыши и выберите « Удалить».
- Нажмите OK, чтобы подтвердить, что вы хотите удалить драйвер.


После удаления драйвера перезагрузите компьютер и проверьте, устранена ли проблема. Если удаление драйвера решает проблему, загрузите и установите последнюю версию драйвера для вашего принтера.
- Читайте также: LibreOffice, чтобы получить новый дизайн панели инструментов, похожий на Microsoft Office Ribbon
Решение 6. Удалите все недавно установленные программы
Сторонние приложения могут мешать работе Word и вызывать прекращение работы Microsoft Word. Чтобы решить эту проблему, вам нужно удалить все недавно установленное программное обеспечение. Если вы добавили какое-либо новое оборудование на ваш компьютер, такое как принтер или сканер, вы можете попробовать удалить его драйвер и программное обеспечение и проверить, решает ли это проблему. Если нет, вы можете удалить все инструменты, которые вы установили за последние несколько недель.
Решение 7 — Переустановите Office полностью
Если Microsoft Word перестал работать, ошибка все еще сохраняется, вам, возможно, придется переустановить Office, чтобы исправить это. Чтобы удалить Office 2013, 2016 или Office 365 с вашего компьютера, вам необходимо загрузить этот инструмент. Это инструмент Microsoft для удаления Office, и он удалит все файлы и записи реестра, связанные с Office. После загрузки инструмента запустите его и следуйте инструкциям на экране для завершения удаления. Теперь вам просто нужно перезагрузить компьютер и установить ту же версию Office.
Если у вас Microsoft Office 2010 или более ранняя версия, мы рекомендуем вам загрузить соответствующий инструмент для удаления с веб-сайта Microsoft.
Решение 8. Вставьте документ в другой файл
Microsoft Word перестала работать Иногда ошибка может появиться при попытке открыть ранее сохраненные документы. Если это так, вы можете попробовать вставить свой документ в другой файл. Это относительно просто, и вы можете сделать это, выполнив следующие действия:
- Откройте меню « Файл» и выберите « Создать»> «Пустой документ».
- Перейдите на вкладку « Вставка » и нажмите « Объект» в группе « Текст ». Теперь выберите текст из файла.
- Выберите нужный файл и нажмите « Вставить».
Это простое решение, поэтому обязательно попробуйте его, если вы не можете открыть свои документы из-за ошибки Microsoft Word перестала работать.
- ЧИТАЙТЕ ТАКЖЕ: Microsoft изменила параметры проверки в Word 2016, и пользователи сошли с ума
Решение 9. Удалите раздел реестра Word Options.
Если Microsoft Word перестал работать, ошибка по-прежнему сохраняется, возможно, вам придется удалить один ключ из реестра. Ключи в реестре могут быть повреждены, и если это произойдет, вам придется удалить их вручную. Удаление ключей из реестра может привести к проблемам с нестабильностью, поэтому мы советуем вам на всякий случай создать резервную копию вашего реестра. Чтобы удалить этот ключ из реестра, выполните следующие действия:
- Откройте редактор реестра. Для получения подробных инструкций о том, как это сделать, обязательно проверьте Решение 4.
- Когда откроется редактор реестра, на левой панели перейдите к ключу HKEY_CURRENT_USERSoftwareMicrosoftOffice16.0WordOptions. Имейте в виду, что этот ключ может немного отличаться в зависимости от используемой версии Office.
- Щелкните правой кнопкой мыши и в меню выберите « Экспорт».
- Сохраните файл как Wddata.reg и сохраните его на рабочем столе.
- Теперь вернитесь в редактор реестра, щелкните правой кнопкой мыши ключ Options и выберите Delete из меню.
- Закройте редактор реестра.

После этого попробуйте снова запустить Word и проверьте, решена ли проблема. Если проблема не устранена, запустите Wddata.reg на рабочем столе, чтобы восстановить удаленный ключ.
Решение 10. Замените файл глобального шаблона Normal.dot.
Word хранит форматирование и макросы в глобальном файле шаблона, и если ваш глобальный файл шаблона поврежден, вы получите это сообщение об ошибке. Чтобы исправить Microsoft Word перестало работать сообщение об ошибке, вам необходимо переименовать файл Normal.dot. Мы должны предупредить вас, что, изменяя этот файл, вы можете потерять параметры настройки, такие как стили, макросы и т. Д. Если вы хотите сохранить эти параметры, настоятельно рекомендуем скопировать настройку из одного глобального шаблона в другой с помощью Организатора., Чтобы заменить файл Notmal.dot, вам необходимо сделать следующее:
- Убедитесь, что все программы Office закрыты.
- Нажмите Windows Key + X и выберите Командная строка (Администратор).
- Когда командная строка запускается, введите ren % userprofile% AppDataRoamingMicrosoftTemplatesOldNormal.dotm Normal.dotm и нажмите Enter, чтобы запустить его.
- Дождитесь окончания команды и закройте командную строку.
- После этого попробуйте снова запустить Word.

- Читайте также: Microsoft добавляет новые функции для инспектора документов в Excel, PowerPoint и Word
Решение 11. Отключите надстройки папки «Автозагрузка»
Еще один способ решить эту проблему — отключить надстройки для папки автозагрузки. Это относительно просто, и вы можете выполнить это, выполнив следующие действия.
- Найдите каталог установки Office на вашем компьютере. По умолчанию это должен быть C: Program FilesMicrosoft Officeoffice16. Имейте в виду, что точное местоположение может отличаться в зависимости от версии Office и Windows.
- Перейдите в папку « Автозагрузка ».
- Должен появиться список файлов. Переименуйте один файл, добавив.old в конце его имени. Обязательно запомните исходное имя файла, потому что вам нужно будет отменить изменения позже.
- Попробуйте запустить Word снова. Если проблема появляется снова, повторите Шаг 3. Не забудьте переименовать другой файл на этот раз. После этого попробуйте снова запустить Word. Повторяйте этот шаг, пока вы не переименуете все файлы в каталоге автозагрузки.
- Если вам удается запустить Word после переименования одного из файлов, это означает, что последний переименованный файл вызывал эту ошибку. Переименуйте все файлы, кроме проблемного, в их исходные имена и проверьте, работает ли Word. Если это так, вам нужно обновить проблемную надстройку или удалить ее.
Если проблема все еще сохраняется, вам необходимо сделать следующее:
- Нажмите клавишу Windows + R и введите % userprofile% AppDataRoamingMicrosoftWordStartup. Нажмите Enter или нажмите ОК.
- После открытия папки повторите шаги 3-5 сверху.

Решение 12. Удалите ключи реестра надстроек COM.
Если вы получаете сообщение об ошибке Microsoft Word перестало работать, вы можете временно отключить надстройки COM. Для этого вам нужно отредактировать реестр, выполнив следующие действия:
- Закройте все программы Office и запустите редактор реестра.
- В левой панели перейдите к ключу HKEY_CURRENT_USERSoftwareMicrosoftOfficeWordAddins.
- Щелкните правой кнопкой мыши надстройки и выберите « Экспорт». Сохраните файл в нужном месте.
- Снова щелкните правой кнопкой мыши ключ Addins и в меню выберите « Удалить».
- В левой панели перейдите к ключу HKEY_LOCAL_MACHINESoftwareMicrosoftOfficeWordAddins.
- Экспортируйте ключ, как мы показали на шаге 3.
- Удалить ключ Addins.
- Закройте редактор реестра и снова запустите Word.
- Читайте также: нет Microsoft Office? Скачать бесплатную Word Viewer для.Docx файлов
Если проблема решена, это означает, что надстройки COM вызывают эту проблему. Чтобы устранить проблему, вам нужно найти и отключить проблемную надстройку COM. Во-первых, вам нужно восстановить удаленные ключи, запустив экспортированные файлы.reg. После этого выполните следующие действия:
- Откройте меню « Файл» и выберите « Параметры».
- Нажмите Надстройки.
- В списке Управление выберите Надстройки COM, а затем нажмите Перейти.
- Если определенная надстройка указана в диалоговом окне Надстройки COM, снимите флажок рядом с ее именем. Если у вас есть несколько доступных надстроек COM, обязательно повторите этот шаг для всех доступных надстроек. Имейте в виду, что вам нужно отключить одну надстройку за раз, чтобы найти проблемную.
- Нажмите ОК.
- Теперь выберите « Файл»> «Выход».
- Запустите Word и проверьте, решена ли проблема. Если проблема не устранена, повторяйте шаги, пока не найдете проблемную надстройку. Найдя его, отключите его или попробуйте загрузить последнюю версию.
Решение 13 — Изменить принтер по умолчанию
Как мы уже упоминали, драйверы принтера могут мешать работе Office и приводить к тому, что Microsoft Word перестает работать, и появляется ошибка. Однако иногда вы можете решить эту проблему, просто изменив принтер по умолчанию. Для этого выполните следующие действия:
- Нажмите Windows Key + S и введите устройства и принтеры. Выберите « Устройства и принтеры» из списка результатов.
- Когда откроется окно « Устройства и принтеры», перейдите в раздел « Принтеры ».
- Щелкните правой кнопкой мыши Microsoft XPS Document Writer. Выберите « Установить как принтер по умолчанию».
- Закройте окно « Устройства и принтеры» и попробуйте снова запустить Word.


Если сообщение об ошибке не появляется, это означает, что ваш принтер был причиной этой проблемы. Чтобы устранить проблему, мы рекомендуем обновить драйверы принтера и проверить, решает ли это проблему.
- Читайте также: Как запустить Microsoft Office Picture Manager в Windows 10
Решение 14 — Создайте новый профиль Windows
Несколько пользователей сообщили, что им удалось решить эту проблему, создав новый профиль пользователя Windows 10. Это относительно просто, и вы можете сделать это, выполнив следующие действия:
- Нажмите клавишу Windows + I, чтобы открыть приложение «Настройки».
- Перейдите в раздел Аккаунты> Семья и другие люди.
- В разделе Другие люди нажмите кнопку Добавить кого-то еще на этот компьютер.
- Выберите У меня нет информации для входа этого человека.
- Теперь выберите Add suer без учетной записи Microsoft.
- Введите имя пользователя и пароль для новой учетной записи и нажмите « Далее».


После создания новой учетной записи пользователя переключитесь на нее и проверьте, решена ли проблема. Если Word работает правильно, вам, возможно, придется продолжить использовать новую учетную запись пользователя, если вам не удастся найти другое рабочее решение.
Исправлено — «Microsoft Word перестал работать» 2013
Решение 1. Установите Word в режим энергосбережения
Пользователи сообщили, что Microsoft Word перестал работать, ошибка возникает с пользователями, у которых есть переключаемые видеокарты. По их словам, Word 2013 был установлен в режим высокой производительности, и это стало причиной появления этой ошибки. Чтобы устранить проблему, перейдите на переключаемую графическую панель управления и настройте Word 2013 на работу в режиме энергосбережения. После этого попробуйте запустить Word и проверьте, решена ли проблема.
Решение 2. Проверьте драйвер видеокарты
Эта проблема может иногда возникать из-за проблем с драйвером вашей видеокарты. Пользователи сообщили, что у них были проблемы с драйверами Nvidia, и, по их словам, они исправили их, переименовав NVWGF2UM.DLL в NVWGF2UM.old. Переименование файлов драйвера — не лучшее решение, тем более что трудно найти проблемный файл драйвера. Чтобы решить эту проблему, мы рекомендуем вам обновить драйвер видеокарты и проверить, решает ли это проблему. Если проблема не устранена, вы можете удалить драйвер и использовать драйвер по умолчанию от Microsoft.
- Читайте также: пользователи Dropbox на iOS теперь могут создавать и редактировать файлы Microsoft Office с помощью приложения
Решение 3. Отключите выделенную видеокарту
Многие ноутбуки и некоторые настольные компьютеры имеют как встроенные, так и выделенные видеокарты. По словам пользователей, Microsoft Word перестала работать из-за ошибки, поскольку Word 2013 не был совместим с их видеокартой AMD.
Чтобы решить эту проблему, вам необходимо временно отключить выделенную графическую карту из переключаемого графического меню. После этого попробуйте запустить Word 2013 и проверить, устранена ли проблема. Если проблема устранена, вам необходимо загрузить последние версии драйверов для вашей выделенной видеокарты и проверить, решает ли это проблему.
Решение 4 — Отключить аппаратное ускорение
Многие приложения используют аппаратное ускорение для достижения максимальной производительности. Тем не менее, некоторые пользователи утверждают, что из-за этой функции Microsoft Word перестала работать ошибка в Word 2013. Чтобы устранить эту проблему, необходимо отключить функцию аппаратного ускорения. Вы можете сделать это, выполнив следующие действия:
- Откройте любое приложение Office.
- Выберите « Файл»> «Параметры»> «Дополнительно».
- Найдите параметр аппаратного ускорения и отключите его.
- После этого попробуйте снова запустить Word 2013.
Если вы вообще не можете открыть Word 2013, вы можете отключить аппаратное ускорение с помощью редактора реестра. Для этого выполните следующие действия:
- Откройте редактор реестра.
- В левой панели перейдите к HKEY_CURRENT_USERSoftwareMicrosoftOffice15.0Common key.
- Щелкните правой кнопкой мыши общий ключ и в меню выберите « Создать»> «Ключ».
- Введите Графика в качестве имени нового ключа.
- Теперь щелкните правой кнопкой мыши по графическому ключу и выберите New> DWORD (32-bit) Value. Назовите новое значение DisableHardwareAcceleration.
- Дважды щелкните значение DisableHardwareAcceleration и установите для его значения данных значение 1. Нажмите OK, чтобы сохранить изменения.
- Закройте редактор реестра и проверьте, решена ли проблема.
Мы должны отметить, что изменение реестра сопряжено с определенными рисками, поэтому мы настоятельно рекомендуем вам создать резервную копию реестра, прежде чем вносить какие-либо изменения.
- ЧИТАЙТЕ ТАКЖЕ: альтернатива Microsoft Office OpenOffice ожидает выключения
Решение 5. Удалите все оставшиеся надстройки
По словам пользователей, Microsoft Word перестал работать, ошибка может появиться из-за остатков файлов. Иногда при удалении определенной надстройки ее файлы могут оставаться в папке автозагрузки Office. Пользователи сообщали о проблемах с надстройкой Mendeley и оставшимися файлами. По их словам, один файл, связанный с этой надстройкой, остался в папке автозагрузки Office, и это привело к появлению ошибки. После нахождения и удаления файла проблема была полностью решена.
Имейте в виду, что почти любой оставшийся файл из надстроек может вызвать эту проблему, поэтому обязательно проверьте папку «Автозагрузка Office». Мы уже объясняли, как войти в папку «Автозагрузка Office» в одном из наших предыдущих решений, поэтому обязательно ознакомьтесь с этим решением для получения подробных инструкций.
Исправлено — «Microsoft Word перестал работать» 2010
Решение — удалите драйвер Bluetooth
Пользователи сообщали о проблемах с надстройкой Bluetooth в Office 2013 и Office 2010. Если у вас есть эта проблема в Office 2010, и вы не можете отключить надстройку Bluetooth, возможно, вам придется удалить драйвер Bluetooth или обновить его.
Если вы часто используете Bluetooth и не хотите удалять драйвер, вы можете решить проблему, переименовав два файла. По словам пользователей, они переименовали btmoffice.dll и btmofficea.dll, таким образом отключив надстройку Bluetooth. Что касается переименования, вы можете просто добавить.bak и конец имени файла, чтобы безопасно переименовать ваши файлы. Что касается этих файлов, вы сможете найти их в папке C: Program FilesMotorolaBluetooth. Имейте в виду, что расположение этих файлов может отличаться на вашем ПК, поэтому вам, возможно, придется искать эти файлы самостоятельно.
Microsoft Word — самый популярный текстовый редактор, но у него есть свои недостатки. Microsoft Word перестал работать, ошибка не позволит вам использовать Word, но мы надеемся, что вы решили проблему с помощью одного из наших решений.
ЧИТАЙТЕ ТАКЖЕ:
- 5 лучших альтернатив Microsoft Office для Windows 10
- Microsoft Office 365 для образования получает собственную дорожную карту
- Open 365 использует Microsoft Office 365 в качестве альтернативы с открытым исходным кодом
- Бесплатные приложения Microsoft Office Touch доступны для пользователей Windows 10
- Microsoft Office не открывается в Windows 8, 8.1

Открываете документ «Ворд», а в итоге получаете сообщение «Прекращена работа Word». Запускаете другой текстовый файл — то же самое. Почему программа не даёт прочитать документ? Что с ней случилось? Как исправить ошибку и продолжить работу в редакторе?
Первые действия: проверяем, есть ли обновления для «Ворда» и драйверов ПК
Что делаем в первую очередь: обновляем офис и драйверы, если те нуждаются в апдейте. Как проверить наличие апдейта для офиса 2010 и выше:
- Щёлкните по «Файл» вверху. Перейдите в раздел «Учётная запись».
- Кликните по плитке «Параметры обновления».
- Нажмите на первый пункт «Обновить».

Дайте команду обновить «Ворд»
- Если мастер установки обновлений сообщит, что всё в порядке, значит, программа не нуждается в апдейте.
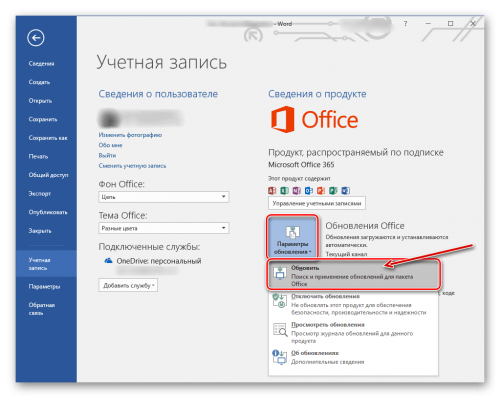
Сразу зайдите в «Диспетчер устройств», чтобы проверить работоспособность драйверов аппаратных частей ПК:
- Зажмите «Вин» и R на клавиатуре, напишите код devmgmt.msc и щёлкните по ОК.
- Откройте диспетчер. Здесь вам нужно просмотреть все вкладки в списке. Если на каком-то пункте стоит жёлтый значок с восклицательным знаком, знак вопроса, значит, с драйвером этого устройства что-то не в порядке. Вам нужно его попробовать обновить.
- Щёлкните правой клавишей мышки по проблемному пункту. Выберите «Обновить драйвер».

Запустите обновление проблемного драйвера
- Выберите автоматический поиск. Система попробует найти апдейт в сети. Если он будет, все файлы сами загрузятся и установятся.
- Если встроенный мастер обновлений не найдёт ничего, но значок есть, вам нужно обновить драйвер вручную. Для этого скачайте файл установки с официального сайта производителя ПК. Вам нужно найти свою точную модель ПК на сайте, зайти в раздел для ПО и драйверов, выбрать ОС, которая стоит у вас на ПК. Часто файлы для установки драйверов находятся в разделе «Поддержка» на сайте.

Выберите свою ОС в списке, чтобы скачать верный драйвер
- Отыщите в списке драйвер проблемного устройства и запустить загрузку.
- После этого запустите файл-инсталлятор и саму установку драйвера. После процедуры перезагрузите компьютер. Зайдите в диспетчер снова и посмотрите, не исчез ли значок. Если да, запустите «Ворд» и протестируйте его работу.
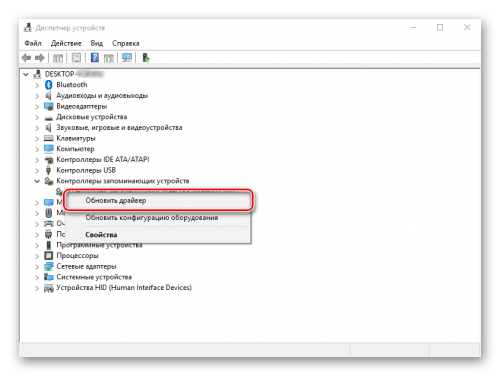
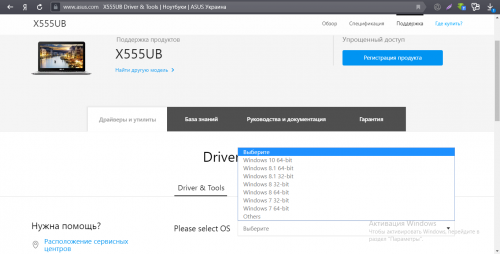
Запустите также апгрейд самой операционной системы в «Центре обновления Виндовс». Если у вас «десятка», сделайте следующее:
- Зажмите «Вин» и I. Выберите в окошке «Параметры» плитку для обновления.
- В первом же разделе запустите проверку наличия апдейта.

Нажмите на серую кнопку «Проверка обновлений»
- Подождите, пока она завершится. Если они есть, система тут же начнёт их скачивание и установку. Это может занять относительно много времени.
- После обновление при необходимости перезагрузите компьютер, чтобы все изменения вступили в силу.
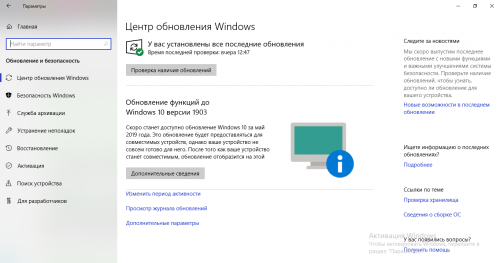
Как запустить автоматическое исправление неполадок
Попробуйте восстановить «Ворд» с помощью специальной утилиты от «Майкрософт»:
- Перейдите на сайт компании Microsoft, кликните по «Отключение надстроек с помощью средства простого исправления». Щёлкните по «Загрузить».

Нажмите на синюю кнопку «Загрузить»
- Запустите скачанный файл. Щёлкните по «Далее». В следующем окне тоже нажмите на «Далее».
Кликните по «Далее» справа внизу
- Подождите, пока утилита найдёт проблему и сразу исправит.

Подождите, пока программа решит проблемы, связанные с офисом
- В итоге появится отчёт. Если там будет стоять «Исправлено», запустите «Ворд» и проверьте, была ли исправлена ошибка.

Утилита покажет проблему и скажет, удалось ли её устранить

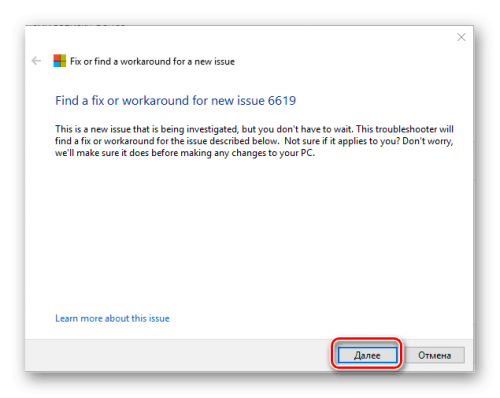
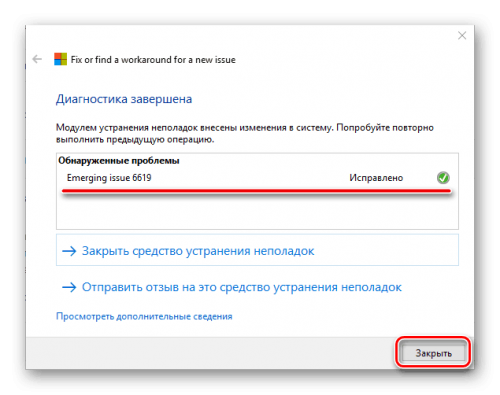
Отключаем вручную надстройки «Ворда»
Ошибка о прекращении работы может появляться из-за надстроек, установленных системой или вами в «Ворде». Чтобы проверить эту теорию, сделайте следующее:
- Запустите окошко «Выполнить» с помощью комбинации клавиш «Вин» и R. В поле вводим winword /safe и щёлкаем по ОК.
- «Ворд» запустится в безопасном режиме. Щёлкаем по меню «Файл» на верхней панели.

Нажмите на пункт «Файл» вверху слева
- В перечне слева находим пункт «Параметры».

Щёлкните по параметрам в списке
- Переходим в блок «Надстройки»
- В меню ниже «Управление» ставим значение «Настройки Ворд» и кликаем по «Перейти».

Перейдите к надстройкам «Ворда»
- В списке убираем отметку с одной из надстроек и кликаем по ОК.

Выделите пункт надстройки и щёлкните по ОК
- Закройте «Ворд» и откройте его в обычном режиме. Если проблема исчезла, значит, дело было в той выключенной надстройке. Тогда придётся оставить её деактивированной. Если не помогло, отключите так же по очереди все остальные надстройки в перечне.
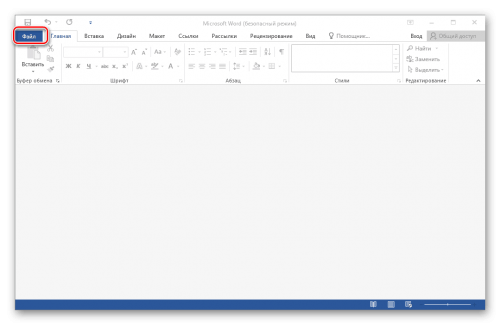
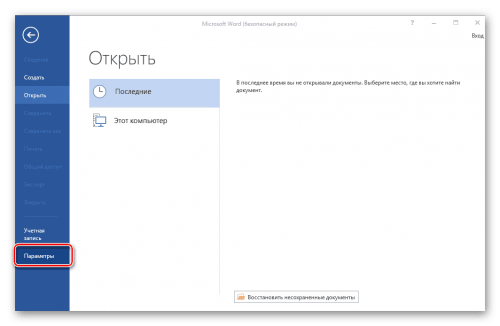
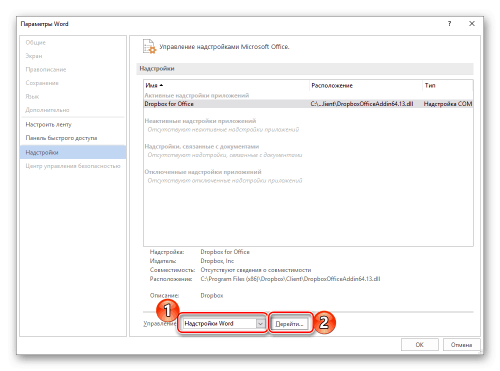

Обычно проблемы с работой «Ворда» вызывают такой надстройки, как Abbyy FineReader, PowerWord и Dragon Naturally Speaking.
Восстанавливаем офис
Если виноваты не надстройки, попробуйте восстановить работу «Ворда» с помощью встроенной в офис программы:
- Снова зажмите «Вин» и R. В окошке пишем код appwiz.cpl и жмём на ОК.
- Находим в списке в новом окне офис от «Майкрософт». Выделяем строчку и жмём на «Изменить».

Перейдите к изменению программы
- Выделяем второй пункт «Восстановить». Щёлкните по «Продолжить».

Укажите на восстановление и нажмите на «Продолжить»
- Подождите, пока завершится процесс.

Ждём, когда мастер восстановит офис целиком
- Откройте «Ворд» и проверьте его работоспособность.
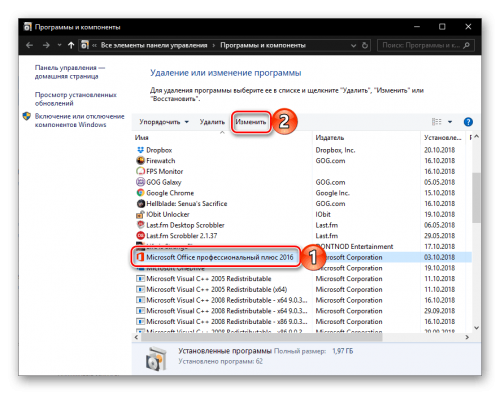
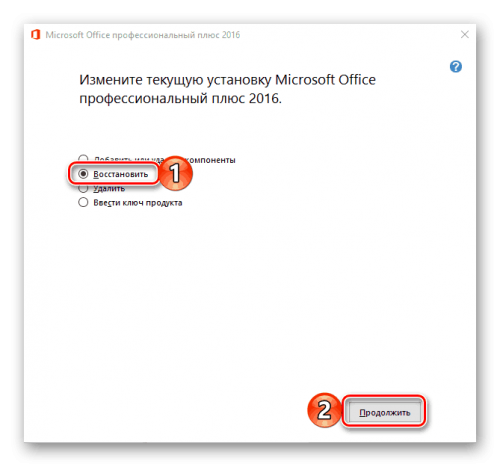
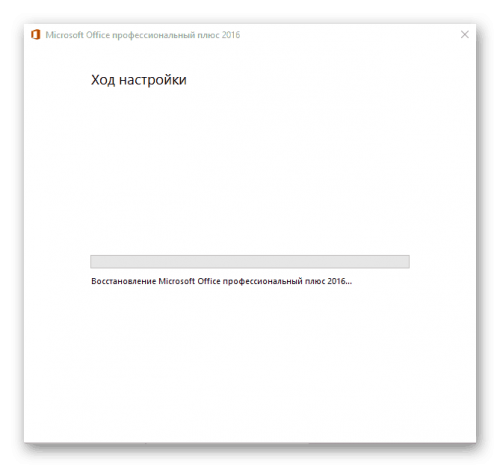
Переустановка офиса
Если восстановление с помощью встроенного мастера ничего не дало, нужно принять крайние меры — переустановить полностью офис. Сначала вам нужно полностью очистить систему от файлов офиса. Стандартная программа для удаления в «Виндовс» здесь не поможет. Нужно скачать специальную утилиту от «Майкрософт»:
- Перейдите опять же на сайт Microsoft. Прокрутите до второго варианта удаления и щёлкните по «Загрузить».

Нажмите на «Загрузить» в меню для полного удаления
- Откройте скачанный только что файл. Кликните по «Далее».

Запустите удаление всего офиса
- Подтвердите полную деинсталляцию, включая данные из реестра ПК и прочую остаточную информацию, которая обычно остаётся в памяти компьютера после стандартного удаления софта через окно «Программы и компоненты».
Согласитесь на удаление офиса
- Дождитесь, когда удаление завершится. Перезагрузите ПК.
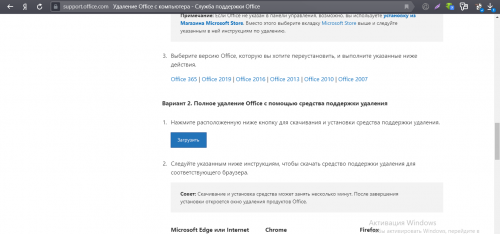
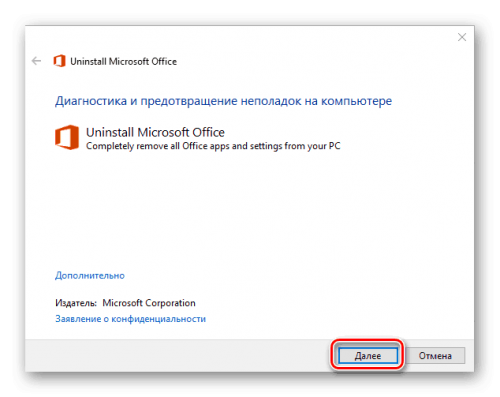

Теперь переходите к повторной установке офиса:
- Если вы ещё не связывали свою учётную запись «Майкрософт» с офисом с помощью ключа активации, войдите в свою «учётку» на официальном сайте компании. Если у вас ещё нет аккаунта, создайте его.

Войдите в аккаунт Microsoft
- Введите на этой же странице ключ продукта, который вы получили при покупке офиса.
- Щёлкните по «Установить офис». Подождите, пока закончится загрузка дистрибутива на ваш ПК.
- Откройте скачанный файл. Сразу начнётся инсталляция. Ждём, когда она завершится.

Ждём, когда установится офис на ПК
- Щёлкните по «Закрыть». На вашем «Рабочем столе» должны появиться программы, которые входят в офис. Откройте «Ворд» и протестируйте его работу.

Офис был успешно установлен на компьютер

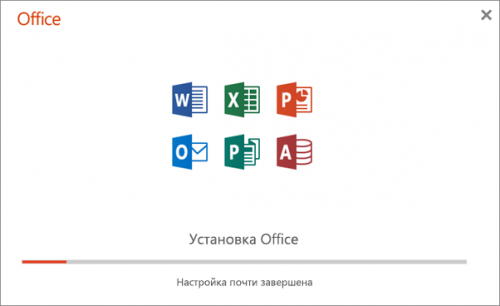
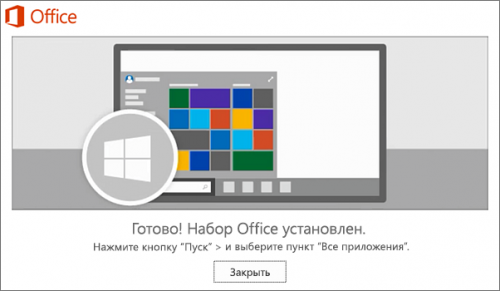
Сначала проверьте, есть ли обновления для офиса и драйверов устройств в диспетчере. После этого переходите к диагностике с помощью фирменной утилиты «Майкрософт». Если не помогло, отключайте надстройки редактора по очереди. В крайнем случае попробуйте восстановить пакет программ в офисе или вовсе его переустановить (полностью удалить с ПК и инсталлировать заново).
- Распечатать
Оцените статью:
- 5
- 4
- 3
- 2
- 1
(1 голос, среднее: 5 из 5)
Поделитесь с друзьями!