
Excel for Microsoft 365 Excel for Microsoft 365 for Mac Excel 2021 Excel 2021 for Mac Excel 2019 Excel 2019 for Mac Excel 2016 Excel 2016 for Mac Excel 2013 Excel 2010 Excel 2007 More…Less
Add-ins provide optional commands and features for Microsoft Excel. By default, add-ins are not immediately available in Excel, so you must first install and (in some cases) activate these add-ins so that you can use them.
Are you looking for information about Office Add-ins based on HTML, CSS, and JS? If you are, see Get an Office Add-in for Excel.
Some add-ins are built in to Excel, such as Solver and the Analysis ToolPak. Other add-ins are available from the Download Center and must first be downloaded and installed. Finally, there are add-ins that are created by third parties, such as a programmer in your organization or a software solution provider. These can be Component Object Model (COM) add-ins, Visual Basic for Applications (VBA) add-ins, and DLL add-ins. These add-ins must also be installed to use them.
Most add-ins can be categorized into three different types:
-
Excel add-ins These typically include Excel add-in (.xlam), Excel 97-2003 add-in (.xla), or DLL add-in (.xll) files or they are automation add-ins. Some Excel add-ins, such as Solver and the Analysis ToolPak, may be available after you install Excel or Microsoft Office. Typically, you only need to activate these add-ins to use them.
-
Downloadable add-ins Additional add-ins for Excel can be downloaded and installed from Downloads at Office.com.
-
Custom add-ins Developers and solution providers usually design custom Component Object Model (COM) add-ins, automation add-ins, VBA add-ins, and XLL add-ins. These must be installed for you to use them.
After you have installed or activated an add-in, the add-in and its commands may be available in one of the following locations:
-
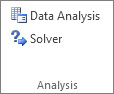
Data tab. After you install and activate the Analysis ToolPak and Solver add-ins, the Data Analysis and Solver commands are available in the Analysis group.

-
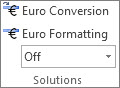
Formulas tab. After you install and activate the Euro Currency Tools, the Euro Conversion and Euro Formatting commands are displayed in the Solutions group.
-
Add-Ins tab. Other add-ins may be added to the Add-Ins tab. This tab is added to the ribbon when you install and activate the first add-in that is shown in the Add-Ins tab. If you don’t see the Add-Ins tab, you should exit and then restart Excel.
Other add-ins, such as the Get Started tab, are available in other places in Excel, such as a tab on the ribbon, or through macros or customized menus.
Important: If you are a software developer, you can use this procedure to install or remove an automation program before you design installation and removal programs for your add-in.
To activate an Excel add-in
-
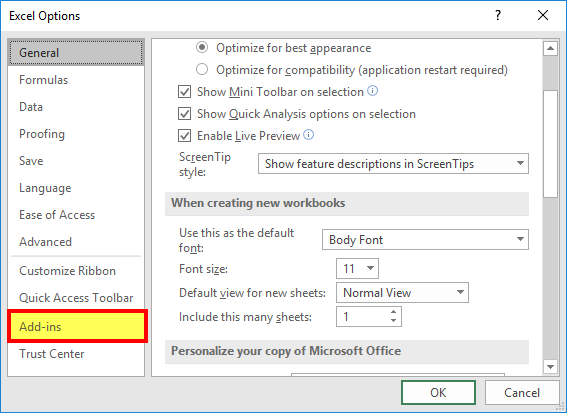
Click the File tab, click Options, and then click the Add-Ins category.
-
In the Manage box, click Excel Add-ins, and then click Go.
The Add-Ins dialog box appears.
-
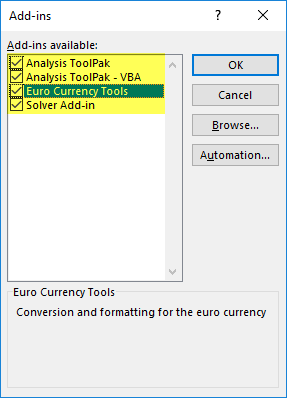
In the Add-Ins available box, select the check box next to the add-in that you want to activate, and then click OK.
If you cannot find the add-in that you want to activate in the Add-Ins available box, you may need to install it.
To install an Excel add-in
-
To install an add-in that is typically installed with Excel, such as Solver or the Analysis ToolPak, run the setup program for Excel or Microsoft Office and choose the Change option to install the add-in. After you restart Excel, the add-in should appear in the Add-Ins available box.
-
Some Excel add-ins are located on your computer and can be installed or activated by clicking Browse (in the Add-Ins dialog box) to locate the add-in, and then clicking OK.
-
Some Excel add-ins require running an installation package. You may need to download or copy the installation package to your computer (an installation package is typically a file with an .msi file name extension), and then run it.
-
Other add-ins that are not available on your computer can be downloaded and installed through a Web browser from Downloads or from other sites on the Internet or a server in your organization. Follow the setup instructions for the download as needed.
To inactivate an Excel add-in
-
Click the File tab, click Options, and then click the Add-Ins category.
-
In the Manage box, click Excel Add-ins, and then click Go.
-
In the Add-Ins available box, clear the check box next to the add-in that you want to inactivate, and then click OK.
In many cases, when you inactivate an add-in, it is removed from its group on the ribbon. In other cases, to remove the add-in from the ribbon, you may need to restart Excel.
Note Inactivating an add-in does not remove the add-in from your computer. To remove the add-in from your computer, you must uninstall it.
To remove an Excel add-in
Important: If you originally installed the Excel add-in from a network file server or from a shared folder, you might need to remove the add-in from that location. If you installed the Excel add-in from a CD and you mapped your CD drive to a new drive letter after installing the add-in, you need to reinstall the add-in from the CD. If you are running any Excel add-ins from the CD, you must uninstall the Excel add-ins, and then reinstall them from the CD.
-
Click the File tab, and then click Exit.
-
In Control Panel, click Programs and Features (Windows 7 and Windows Vista) or Add/Remove Programs (Windows XP).
-
Do one of the following:
-
If you installed Excel as part of Microsoft Office, click Microsoft Office in the list of installed programs, and then click the Change button.
-
If you installed Excel individually, click the name of your program in the list of installed programs, and then click the Change button.
-
If you installed the add-in from the Download Center, click the name of your program in the list of installed programs, and then click the Uninstall button.
-
-
Follow the instructions in the installation program.
Important: If you are a software developer, you can use this procedure to install or remove an automation program before you design installation and removal programs for your add-in. If you are not a developer, you should not need to use this procedure. Contact the system administrator who provided the add-in if you want installation and removal instructions.
Add a COM add-in
-
Click the File tab, click Options, and then click the Add-Ins category.
-
In the Manage box, click COM Add-ins, and then click Go.
The COM Add-Ins dialog box appears.
-
In the Add-Ins available box, select the check box next to the add-in that you want to install, and then click OK.
Tip If the add-in that you want to use is not listed in the Add-Ins available box, click Add, and then locate the add-in.
Remove a COM add-in
-
Click the File tab, click Options, and then click the Add-Ins category.
-
In the Manage box, click COM Add-ins, and then click Go.
The COM Add-Ins dialog box appears.
-
In the Add-Ins available box, clear the check box next to the add-in that you want to remove, and then click OK.
Note This removes the add-in from memory but keeps its name in the list of available add-ins. It does not delete the add-in from your computer.
-
To remove a COM add-in from the list of available add-ins and to delete the add-in from your computer, click its name in the Add-ins available box, and then click Remove.
Note: If you are a software developer, you can use this procedure to install or remove an automation program before you design installation and removal programs for your add-in. If you are not a developer, you should not need to use this procedure. Contact the system administrator who provided the add-in if you want installation and removal instructions.
-
Click the File tab, click Options, and then click the Add-Ins category.
-
In the Manage box, click Excel Add-ins, and then click Go.
The Add-Ins dialog box appears.
-
To install an automation add-in, in the Automation servers available box, click Automation, and then click the add-in that you want.
Tip If the add-in that you want isn’t in the list, click Browse, locate the add-in, and then click OK.
-
To remove an automation add-in, you must remove it from the registry. See your system administrator for details.
Some add-ins are built in to Excel, such as Solver and the Analysis ToolPak. Other add-ins are available from the Download Center and must first be downloaded and installed. Finally, there are add-ins that are created by third parties, such as a programmer in your organization or a software solution provider. These can be Component Object Model (COM) add-ins, Visual Basic for Applications (VBA) add-ins, and DLL add-ins. These add-ins must also be installed to use them.
Most add-ins can be categorized into three different types:
-
Excel add-ins These typically include Excel add-in (.xlam), Excel 97-2003 add-in (.xla), or DLL add-in (.xll) files or they are automation add-ins. Some Excel add-ins, such as Solver and the Analysis ToolPak, may be available after you install Excel or Microsoft Office. Typically, you only need to activate these add-ins to use them.
-
Downloadable add-ins Additional add-ins for Excel can be downloaded and installed from Downloads at Office.com.
-
Custom add-ins Developers and solution providers usually design custom Component Object Model (COM) add-ins, automation add-ins, VBA add-ins, and XLL add-ins. These must be installed for you to use them.
After you have installed or activated an add-in, the add-in and its commands may be available in one of the following locations:
-
Data tab. After you install and activate the Analysis ToolPak and Solver add-ins, the Data Analysis and Solver commands are available in the Data tab on the ribbon.
-
Home tab. Other add-ins may be added to the Home tab.
Other add-ins, such as the Get Started tab, are available in other places in Excel, such as a tab on the ribbon, or through macros or customized menus.
Important: If you are a software developer, you can use this procedure to install or remove an automation program before you design installation and removal programs for your add-in.
To activate a pre-installed Excel add-in
-
On the Tools menu, select Add-ins.
-
In the Add-Ins available box, select the check box for the Add-in you want to activate, and then click OK.
To install an Excel add-in
-
Some Excel add-ins are located on your computer and can be installed or activated by clicking Browse (in the Add-Ins dialog box above) to locate the add-in, and then clicking OK.
-
Some Excel add-ins require running an installation package. You may need to download or copy the installation package to your computer (an installation package is typically a file with an .msi file name extension), and then run it.
-
Other add-ins that are not available on your computer can be downloaded and installed through a Web browser from Downloads or from other sites on the Internet, a server in your organization, , or using the built-in Store option in Excel. Follow the setup instructions for the download as needed.
To install Add-ins from the Store
-
Click the Insert tab in the ribbon.
-
Click the Store button.
-
Use the Categories or Search field to find Add-ins.
-
Click Add to install the Add-in.
Note: Some Add-ins need to be purchased.
-
To remove an Excel add-in
-
Click the Insert tab, and then click My Add-ins.
-
In Office Add-ins, click the 3 dots menu next to the Add-in.
-
Click Remove.
-
Read the notice that appears regarding other devices and click Remove.
Need more help?
What are Add-ins in Excel?
An add-ins is an extension that adds more features and options to Microsoft Excel. Providing additional functions to the user increases the power of Excel. An add-in needs to be enabled for usage. Once enabled, it activates as Excel is started.
For example, Excel add-ins can perform tasks like creating, deleting, and updating the data of a workbook. Moreover, one can add buttons to the Excel ribbon and run custom functions with add-ins.
The Solver, Data Analysis (Analysis ToolPakExcel’s data analysis toolpak can be used by users to perform data analysis and other important calculations. It can be manually enabled from the addins section of the files tab by clicking on manage addins, and then checking analysis toolpak.read more), and Analysis ToolPak-VBA are some essential add-ins.
The purposes of activating add-ins are listed as follows: –
- To interact with the objects of Excel
- To avail an extended range of functions and buttons
- To facilitate the setting up of standard add-ins throughout an organization
- To serve the varied needs of a broad audience
In Excel, one can access several Add-ins from “Add-ins” under the “Options” button of the “File” tab. In addition, one can select from the drop-down “Manage” in the “Add-ins” window for more add-ins.
By default, it might hide some add-ins. One can view the unhidden add-ins in the “Data” tab on the Excel ribbonThe ribbon is an element of the UI (User Interface) which is seen as a strip that consists of buttons or tabs; it is available at the top of the excel sheet. This option was first introduced in the Microsoft Excel 2007.read more. For example, it is shown in the following image.

Table of contents
- What are Add-ins in Excel?
- How to Install Add-ins in Excel?
- Types of Add-ins in Excel
- The Data Analysis Add-in
- Create Custom Functions and Install as an Excel Add-in
- Example #1–Extract Comments from the Cells of Excel
- Example #2–Hide Worksheets in Excel
- Example #3–Unhide the Hidden Sheets of Excel
- The Cautions While Creating Add-ins
- Frequently Asked Questions
- Recommended Articles
How to Install Add-ins in Excel?
If Excel is not displaying the add-ins, they need to be installed. The steps to install Excel add-ins are listed as follows:
- First, click on the “File” tab located at the top left corner of Excel.

- Click “Options,” as shown in the following image.

- The “Excel Options” window opens. Select “Add-ins.”

- There is a box to the right of “Manage” at the bottom. Click the arrow to view the drop-down menu. Select “Excel add-ins” and click “Go.”

- The “Add-ins” dialog box appears. Select the required checkboxes and click “OK.” We have selected all four add-ins.

- The “Data Analysis” and “Solver” options appear under the “Data tab” of the Excel ribbon.


Types of Add-ins in Excel
The types of add-ins are listed as follows:
- Inbuilt add-ins: These are built into the system. One can unhide them by performing the steps listed under the preceding heading (how to install add-ins in Excel?).
- Downloadable add-ins: These can be downloaded from the Microsoft website (www.office.com).
- Custom add-ins: These are designed to support the basic functionality of Excel. They may be free or chargeable.
The Data Analysis Add-in
The “Data Analysis Tools” pack analyzes statistics, finance, and engineering data.

The various tools available under the “Data Analysis” add-in are shown in the following image.

Create Custom Functions and Install them as an Excel Add-in
Generally, an add-in is created with the help of VBA macrosVBA Macros are the lines of code that instruct the excel to do specific tasks, i.e., once the code is written in Visual Basic Editor (VBE), the user can quickly execute the same task at any time in the workbook. It thus eliminates the repetitive, monotonous tasks and automates the process.read more. Let us learn to create an add-in (in all Excel files) for a custom functionCustom Functions, also known as UDF (User Defined Functions) in Excel, are personalized functions that the users create through VBA programming code to fulfill their particular requirements. read more. For this, first, we make a custom function.
Let us consider some examples.
You can download this Excel Add-Ins Excel Template here – Excel Add-Ins Excel Template
We want to extract comments from specific cells of Excel. Then, create an add-in for the same.
The steps for creating an add-in and extracting comments from cells are listed as follows:
Step 1: Open a new workbook.
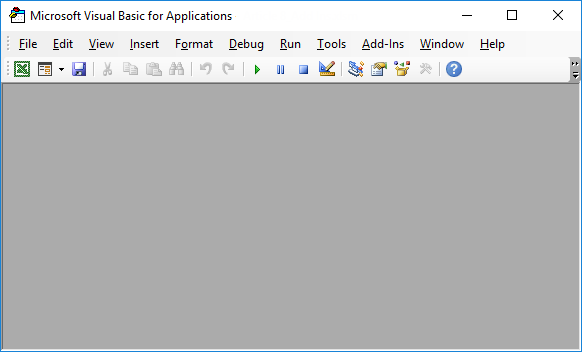
Step 2: Press the shortcutAn Excel shortcut is a technique of performing a manual task in a quicker way.read more “ALT+F11” to access the “Visual Basic Editor.” The following image shows the main screen of Microsoft Visual Basic for Applications.
Step 3: Click “Module” under the “Insert” tab, shown in the following image.

Step 4: Enter the following code in the “module” window.
Function TakeOutComment(CommentCell As Range) As String
TakeOutComment = CommentCell.Comment.Text
End Function

Step 5: Once the code is entered, save the file with the type “Excel add-in.”

Step 6: Open the file containing comments.
Step 7: Select ” Options ” in the “File” tab and select “Options.” Choose “Add-ins.” In the box to the right of “Manage,” select “Excel Add-ins.” Click “Go.”
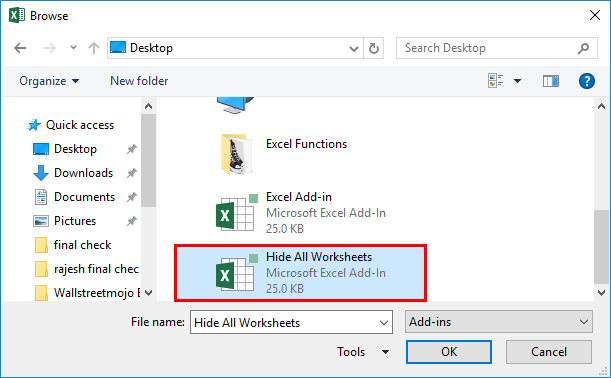
Click the “Browse” option in the “Add-ins” dialog box.

Step 8: Select the add-in file that had been saved. Click “Ok.”
We saved the file with the name “Excel Add-in.”

Step 9: The workbook’s name (Excel Add-in) that we had saved appears as an add-in, as shown in the following image.
This add-in can be applied as an Excel formula to extract comments.

Step 10: Go to the sheet containing comments. The names of three cities appear with comments, as shown in the following image.

Step 11: In cell B1, enter the symbol “equal to” followed by the function’s name. Type “TakeOutComment,” as shown in the following image.

Step 12: Select cell A1 as the reference. It extracts the comment from the mentioned cell.
Since there are no comments in cells A2 and A3, the formula returns “#VALUE!.”

Example #2–Hide Worksheets in Excel
We want to hide Excel worksheets except for the active sheet. Create an add-in and icon on the Excel toolbar for the same.
The steps to hide worksheets (except for the currently active sheet) and, after that, create an add-in and icon are listed as follows:
Step 1: Open a new workbook.
Step 2: In the “Visual Basic” window, insert a “Module” from the Insert tab. The same is shown in the following image.
Step 3: Copy and paste the following code into the module.
Sub Hide_All_Worksheets_()
Dim As Worksheet
For Each Ws In ActiveWorkbook.Worksheets
If Ws.Name <> ActiveSheet.Name Then
Ws.Visible = xlSheetVeryHidden
End If
Next Ws
End Sub

Step 4: Save this workbook with the type “Excel add-in.”
Step 5: Add this add-in to the new workbook. For this, click “Options” under the “File” tab. Select “Add-ins.” In the box to the right of “Manage,” select “Excel add-in” Click “Go.”
In the “Add-ins” window, choose “Browse.”

Step 6: Select the saved add-in file. Click “Ok.”
We have saved the file with the name “Hide All Worksheets.”
Step 7: The new add-in “Hide All Worksheets” appears in the “Add-ins” window.

Step 8: Right-click the Excel ribbon and select “Customize the Ribbon.”

Step 9: The “Excel Options” window appears. Click “Quick Access Toolbar.” Under the drop-down of “Choose commands from,” select “macrosA macro in excel is a series of instructions in the form of code that helps automate manual tasks, thereby saving time. Excel executes those instructions in a step-by-step manner on the given data. For example, it can be used to automate repetitive tasks such as summation, cell formatting, information copying, etc. thereby rapidly replacing repetitious operations with a few clicks.
read more.”
In the box following this drop-down, choose the name of the macro. Then, click “Add” followed by “OK.” The tasks of this step are shown with the help of black arrows in the following image.

Step 10: A small icon appears on the toolbar. Clicking this icon hides all worksheets except for the currently active sheet.

Example #3–Unhide the Hidden Sheets of Excel
If we want to unhide the sheetsThere are different methods to Unhide Sheets in Excel as per the need to unhide all, all except one, multiple, or a particular worksheet. You can use Right Click, Excel Shortcut Key, or write a VBA code in Excel. read more hidden in the preceding example (example #2). Create an add-in and toolbar icon for the same.
The steps to unhide the sheets and, after that, create an add-in and toolbar icon are listed as follows:
Step 1: Copy and paste the following code to the “Module” inserted in Microsoft Visual Basic for Applications.
Sub UnHide_All_HiddenSheets_()
Dim Ws As Worksheet
For Each Ws In ActiveWorkbook.Worksheets
Ws.Visible = xlSheetVisible
Next Ws
End Sub

Step 2: Save the file as “Excel add-in.” Add this add-in to the sheet.
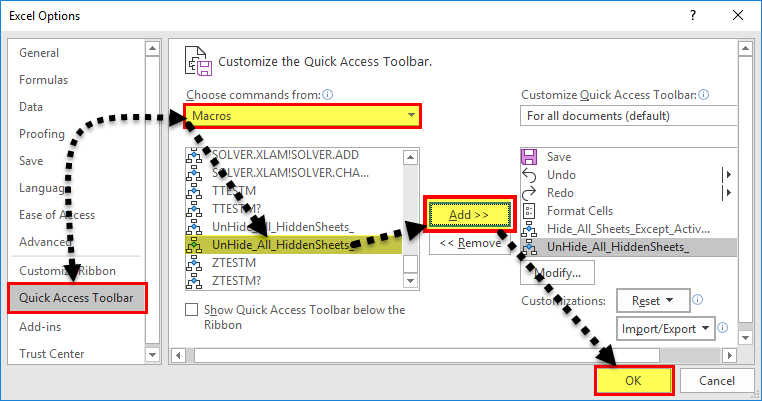
Right-click the Excel ribbon and choose the option “Customize the ribbon.” Then, in the “Quick Access Toolbar,” select “Macros” under the drop-down of “Choose commands from.”
Choose the macro’s name, click “Add” and “OK.” The tasks of this step are shown with the help of black arrows in the following image.
Step 3: Another icon appears on the toolbar. Clicking this icon unhides the hidden worksheets.

The Cautions While Creating Add-ins
The points to be observed while working with add-ins are listed as follows:
- First, remember to save the file in Excel’s “Add-in” extensionExcel extensions represent the file format. It helps the user to save different types of excel files in various formats. For instance, .xlsx is used for simple data, and XLSM is used to store the VBA code.read more of Excel.
- Be careful while selecting the add-ins to be inserted by browsing in the “Add-ins” window.
Note: It is possible to uninstall the unnecessary add-ins at any time.
Frequently Asked Questions
1. What is an add-in? where is it in Excel?
An add-in extends the functions of Excel. It provides more features to the user. It is also possible to create custom functions and insert them as an add-in in Excel.
An add-in can be created, used, and shared with an audience. One can find the add-ins in the “Add-ins” window of Excel.
The steps to access the add-ins in Excel are listed as follows:
a. Click “Options” in the “File” tab of Excel. Select “Add-ins.”
b. In the box to the right of “Manage,” select “Excel add-ins.” Click “Go.”
c. The “Add-ins” window opens. Click “Browse.”
d. Select the required add-in file and click “OK.”
Note: The add-ins already present in the system can be accessed by browsing. Select the corresponding checkbox in the “Add-ins” window and click “OK” to activate an add-in.
2. How to remove an Add-in from Excel?
For removing an add-in from the Excel ribbon, it needs to be inactivated. The steps to inactivate an add-in of Excel are listed as follows:
a. In the File tab, click “Options” and choose “Add-ins”.
b. From the drop-down menu of the “Manage” box, select “Excel add-ins.” Click “Go.”c.
c. In the “Add-ins” window, deselect the checkboxes of the add-ins to be inactivated. Click “OK.”
The deselected add-ins are inactivated. Sometimes, one may need to restart Excel after inactivation. It helps remove the add-in from the ribbon.
Note: Inactivation does not remove an add-in from the computer. For removing an inactivated add-in from the computer, it needs to be uninstalled.
3. How to add an Add-in to the Excel toolbar?
The steps to add an Add-in to the Excel toolbar are listed as follows:
a. In an Excel workbook, press “Alt+F11” to open the Visual Basic Editor. Enter the code by inserting a “module.”
b. Press “Alt+F11” to return to Excel. Save the file as “Excel add-in” (.xlam).
c. In File, select “Options” followed by “Add-ins.” Select “Excel add-ins” in the “Manage” box and click “Go.”
d. Browse this file in the “Add-ins” window. Select the required checkbox and click “OK.”
e. Right-click the ribbon and choose “Customize the Ribbon.” Click “Quick Access Toolbar.”
f. Select “Macros” from the drop-down of “Choose commands from.”
g. Choose the required macro, click “Add” and” OK.”
The icon appears on the toolbar. This icon works in all Excel workbooks as the add-in has been enabled.
Recommended Articles
This article is a step-by-step guide to creating, installing, and using add-ins in Excel. Here, we also discuss the types of Excel add-ins and create a custom function. Take a look at these useful functions of Excel: –
- What is the Quick Access Toolbar in Excel?
- “Save As” Shortcut in Excel
- Remove Duplicates in Excel
- How to Show Formula in Excel?
Даже если вы не умеете программировать, то существует множество мест (книги, сайты, форумы), где можно найти готовый код макросов на VBA для огромного количества типовых задач в Excel. По моему опыту, большинство пользователей рано или поздно собирают свою личную коллекцию макросов для автоматизации рутинных процессов, будь то перевод формул в значения, вывод суммы прописью или суммирования ячеек по цвету. И тут встает проблема — код макросов на Visual Basic нужно где-то хранить, чтобы потом использовать в работе.
Самый простой вариант — сохранять код макросов прямо в рабочем файле, зайдя в редактор Visual Basic с помощью сочетания клавиш Alt+F11 и добавив новый пустой модуль через меню Insert — Module:

При таком способе возникает, однако, несколько неудобств:
- Если рабочих файлов много, а макрос нужен везде, как например макрос преобразования формул в значения, то и копировать код придется в каждую книгу.
- Нужно не забыть сохранить файл в формате с поддержкой макросов (xlsm) или в формате двоичной книги (xlsb).
- При открытии такого файла защита от макросов будет каждый раз выдавать предупреждение, которое нужно подтвердить (ну, или отключить защиту полностью, что может быть не всегда желательно).
Более изящным решением будет создание своей собственной надстройки (Excel Add-in) — отдельного файла особого формата (xlam), содержащего все ваши «любимые» макросы. Плюсы такого подхода:
- Достаточно будет один раз подключить надстройку в Excel — и можно будет использовать её VBA процедуры и функции в любом файле на этом компьютере. Пересохранять ваши рабочие файлы в xlsm- и xlsb-форматы, таким образом, не потребуется, т.к. исходный код будет храниться не в них, а в файле надстройки.
- Защита от макросов вас тоже беспокоить уже не будет, т.к. надстройки по определению входят в доверенные источники.
- Можно сделать отдельную вкладку на ленте Excel с красивыми кнопками для запуска макросов надстройки.
- Надстройка — это отдельный файл. Его легко переносить с компьютера на компьютер, делиться им с коллегами или даже продавать

Давайте рассмотрим весь процесс создания своей собственной надстройки для Microsoft Excel по шагам.
Шаг 1. Создаем файл надстройки
Открываем Microsoft Excel с пустой книгой и сохраняем ее под любым подходящим именем (например MyExcelAddin) в формате надстройки с помощью команды Файл — Сохранить как или клавиши F12, указав тип файла Надстройка Excel (Excel Add-in):

Обратите внимание, что стандартно Excel хранит надстройки в папке C:UsersВаше_имяAppDataRoamingMicrosoftAddIns, но, в приниципе, можно указать любую другую удобную вам папку.
Шаг 2. Подключаем созданную надстройку
Теперь созданную нами на прошлом шаге надстройку MyExcelAddin надо подключить к Excel. Для этого идем в меню Файл — Параметры — Надстройки (File — Options — Add-Ins), жмем на кнопку Перейти (Go) в нижней части окна. В открывшемся окне жмем кнопку Обзор (Browse) и указываем положение нашего файла надстройки.
Если вы все сделали правильно, то наша MyExcelAddin должна появиться в списке доступных надстроек:

Шаг 3. Добавляем в надстройку макросы
Наша надстройка подключена к Excel и успешно работает, но в ней нет пока ни одного макроса. Давайте её наполним. Для этого нужно открыть редактор Visual Basic сочетанием клавиш Alt+F11 или кнопкой Visual Basic на вкладке Разработчик (Developer). Если вкладки Разработчик не видно, то её можно отобразить через Файл — Параметры — Настройка ленты (File — Options — Customize Ribbon).
В левом верхнем углу редактора должно быть окно Project (если его не видно, то включите его через меню View — Project Explorer):

В этом окне отображаются все открытые книги и запущенные надстройки Microsoft Excel, в том числе и наша VBAProject (MyExcelAddin.xlam) Выделите её мышью и добавьте в неё новый модуль через меню Insert — Module. В этом модуле мы и будем хранить VBA-код наших макросов надстройки.
Код можно либо набрать «с нуля» (если вы умеете программировать), либо скопировать откуда-нибудь уже готовый (что гораздо проще). Давайте, для пробы, введем в добавленный пустой модуль код простого, но полезного макроса:

После набора кода не забудьте нажать на кнопку сохранения (дискетку) в левом верхнем углу.
Наш макрос FormulasToValues, как легко сообразить, преобразует формулы в значения в выделенном предварительно диапазоне. Иногда такие макросы называют еще процедурами. Чтобы его запустить, нужно выделить ячейки с формулами и открыть специальное диалоговое окно Макросы с вкладки Разработчик (Developer — Macros) или сочетанием клавиш Alt+F8. Обычно в этом окне отображаются доступные макросы из всех открытых книг, но макросы надстроек здесь не видны. Несмотря на это, мы можем ввести имя нашей процедуры в поле Имя макроса (Macro name), а затем нажать кнопку Выполнить (Run) — и наш макрос заработает:
Здесь же можно назначить сочетание клавиш для быстрого запуска макроса — за это отвечает кнопка Параметры (Options) в предыдущем окне Макрос:

При назначении клавиш имейте ввиду, что здесь учитывается регистр и раскладка клавиатуры. Поэтому, если вы назначите сочетание, например, Ctrl+Й, то, по факту, вам придется в будущем следить за тем, чтобы у вас была включена именно русская раскладка и жать дополнительно Shift, чтобы получить заглавную букву.
Для удобства можно добавить и кнопку для нашего макроса на панель быстрого доступа в левом верхнем углу окна. Для этого выберите Файл — Параметры — Панель быстрого доступа (File — Options — Customize Quick Access Toolbar), а затем в выпадающем списке в верхней части окна опцию Макросы. После этого наш макрос FormulasToValues можно поместить на панель кнопкой Добавить (Add) и выбрать для него значок кнопкой Изменить (Edit):

Шаг 4. Добавляем в надстройку функции
Кроме макросов-процедур, существуют еще и макросы-функции или как их еще называют UDF (User Defined Function = пользовательская функция). Давайте создадим в нашей надстройке отдельный модуль (команда меню Insert — Module) и вставим туда код такой функции:

Несложно сообразить, что эта функция нужна для извлечения НДС из суммы включающей НДС. Не бином Ньютона, конечно, но нам для примера сгодится, чтобы показать основные принципы.
Заметьте, что синтаксис функции отличается от процедуры:
- используется конструкция Function …. End Function вместо Sub … End Sub
- после названия функции в скобках указываются её аргументы
- в теле функции производятся необходимые вычисления и затем результат присваивается переменной с названием функции
Также обратите внимание, что эту функцию не нужно, да и невозможно запустить как предыдущий макрос-процедуру через диалоговое окно Макросы и кнопку Выполнить. Такую макрофункцию нужно использовать как стандартную функцию листа (СУММ, ЕСЛИ, ВПР…), т.е. просто ввести в любую ячейку, указав в качестве аргумента значение суммы с НДС:

… или ввести через стандартное диалоговое окно вставки функции (кнопка fx в строке формул), выбрав категорию Определенные пользователем (User Defined):

Единственный неприятный момент здесь — это отсутствие привычного описания функции в нижней части окна. Чтобы его добавить придется проделать следующие действия:
- Откройте редактор Visual Basic сочетанием клавиш Alt+F11
- Выделите надстройку в панели Project и нажмите клавишу F2, чтобы открыть окно Object Browser
- Выберите в верхней части окна в выпадающем списке свой проект надстройки
- Щелкните по появившейся функции правой кнопкой мыши и выберите команду Properties.
- Введите описание функции в окно Description
- Сохраните файл надстройки и перезапустите Excel.

После перезапуска у функции должно отобразиться описание, которое мы ввели:

Шаг 5. Создаем вкладку надстройки в интерфейсе
Финальным, хоть и не обязательным, но приятным штрихом будет создание отдельной вкладки с кнопкой запуска нашего макроса, которая будет появляться в интерфейсе Excel после подключения нашей надстройки.
Информация об отображаемых вкладках по умолчанию содержится внутри книги и должна быть оформлена в виде специального XML-кода. Проще всего писать и редактировать такой код с помощью специальных программ — XML-редакторов. Одна из самых удобных (и бесплатных) — это программа Максима Новикова Ribbon XML Editor.
Алгоритм работы с ней следующий:
- Закройте все окна Excel, чтобы не было конфликта файлов, когда мы будем редактировать XML-код надстройки.
- Запустите программу Ribbon XML Editor и откройте в ней наш файл MyExcelAddin.xlam
- При помощи кнопки tabs в левом верхнем углу добавьте заготовку кода для новой вкладки:

- В пустые кавычки нужно вписать id нашей вкладки и группы (любые уникальные идентификаторы), а в label — названия нашей вкладки и группы кнопок на ней:

- При помощи кнопки button на панели слева добавляем заготовку кода для кнопки и дописываем к ней теги:

— label — это текст на кнопке
— imageMso — это условное название изображения на кнопке. Я использовал иконку с красной кнопкой, которая имеет название AnimationCustomAddExitDialog. Названия всех доступных кнопок (а их несколько сотен!) можно найти на большом количестве сайтов в интернете, если искать по ключевым словам «imageMso». Для начала можно сходить сюда.
— onAction — это имя процедуры обратного вызова — специального короткого макроса, который будет запускать наш основной макрос FormulasToValues. Назвать эту процедуру можно как угодно. Мы добавим её чуть позже. - Проверить правильность всего сделанного можно с помощью кнопки с зеленой галочкой сверху на панели инструментов. Там же рядом нажмите на кнопку с дискетой для сохранения всех изменений.
- Закрываем Ribbon XML Editor
- Открываем Excel, заходим в редактор Visual Basic и добавляем к нашему макросу процедуру обратного вызова KillFormulas, чтобы она запускала наш основной макрос замены формул на значения.

- Сохраняем внесенные изменения и, вернувшись в Excel проверяем результат:


Вот и всё — надстройка готова к использованию. Наполните её своими процедурами и функциями, добавьте красивые кнопки — и использовать макросы в работе станет намного проще.
Ссылки по теме
- Что такое макросы, как их использовать в работе, где взять код макросов на Visual Basic.
- Как сделать заставку при открытии книги в Excel
- Что такое Личная Книга Макросов и как её использовать
Установка надстроек в Excel 2003/2007/2010/2013/2016 процесс однотипный для всех версий, но имеет и некоторые различия. Условно можно разбить механизм установки надстроек в Excel на несколько шагов. Рассмотрим процедуру установки надстроек подробно для каждой из перечисленных версий Excel в отдельности. Для этого нам понадобится надстройка (чаще всего это файл с расширением .xla, но бывают и другие) и установленное приложение Excel со встроенным редактором Visual Basic.
Для тех кому лучше один раз увидеть — представлен видеоролик по установке и подключению![]()
Шаг 1. Сохраняем файл надстройки на компьютер и запоминаем место его хранения (расположения).
Шаг 2. Запускаем приложение Excel 2003 и выбираем меню «Сервис»/»Надстройки…»

После выбора пункта меню «Надстройки…» появляется список доступных надстроек, которые можно подключать и отключать установкой и снятием галочек перед названиями соответствующих надстроек.

Шаг 3. Для добавления (подключения) новой надстройки, нажимаем кнопку «Обзор». При нажатии на эту кнопку, появляется вот такое окно «Обзор»:

Excel отправляет нас искать надстройки в папку с названием Addins и это не с проста. Именно здесь и должны располагаться файлы надстроек для максимально быстрого доступа к ним как приложения, так и самого пользователя. Размещение надстроек в папке Addins ускорит загрузку приложения Excel и подключение к ней надстройки (надстроек) при последующих запусках. Остается переместить файл надстройки с того места, которое мы запомнили в Шаге 1, в эту папку (можно и прямо в это окно, чтобы не искать саму папку на жестком диске). Если по каким-то причинам Вы не смогли, либо не захотели размещать свои надстройки в папке Addins, то через окно «Обзор» просто добираетесь до того места, куда сохранили файл надстройки. Дважды кликнув по выбранному файлу, Вы добавите его в список доступных надстроек. Вот собственно и все, надстройка установлена.
В случае установки готовых надстроек (макросов) для Excel 2003, взятых с этого сайта, по окончании установки будет сформирована новая панель инструментов с кнопками, запускающими макросы.

Установка надстроек в Excel 2007
Устанавливать надстройки в Excel 2007 не сложнее, чем в Excel 2003. Рассмотри по шагам.
Шаг 1. Сохраняем файл надстройки на компьютер и запоминаем место его хранения (расположения).
Шаг 2. Запускаем приложение Excel 2007, нажимаем кнопку «Office» ![]() и выбираем «Параметры Excel» как показано на рисунке
и выбираем «Параметры Excel» как показано на рисунке

Шаг 3. В появившемся окне «Параметры Excel» в поле «Управление:» выбираем «Надстройки Excel» и жмем кнопку «Перейти…»

Шаг 4. В очередном окне с названием «Надстройки» появляется список доступных надстроек, которые можно подключать и отключать установкой и снятием галочек перед названиями соответствующих надстроек. Для добавления (подключения) новых надстроек, нажимаем кнопку «Обзор».

Появляется окно «Обзор», которое отправляет нас искать надстройки в папку с названием Addins и это не случайно.
 Именно в этом месте и должны располагаться файлы надстроек для максимально быстрого доступа к ним как приложения, так и самих пользователей. Размещение надстроек в папке Addins ускоряет загрузку приложения Excel и подключение к нему надстройки (надстроек) при последующих запусках. Перемещаем (добавляем) в это окно (в эту папку) файл, который присутствовал в Шаге 1. Если по каким-то причинам Вы не смогли, либо не захотели расположить свои надстройки в папке Addins, то через окно «Обзор» просто добираетесь до того места, где был изначально сохранен файл надстройки. Дважды кликаете по выбранному файлу и надстройка добавляется в список доступных надстроек. Все, надстройка установлена. Обращаю Ваше внимание на то, что если после установки файл надстройки будет перемещен в другое место жесткого диска, либо название папки, в которой он находится будет изменено, то весь процесс установки придется повторить заново.
Если Вы устанавливали готовые надстройки для Excel 2007, взятые с этого сайта, то после окончания процесса установки на ленте будет сформирована новая вкладка «Надстройки». При этом в настраиваемой панели инструментов будут отображены кнопки, запускающие макросы.

Установка надстройки в Excel 2010
Стоит заметить, что в Excel 2010 редактор Visual Basic устанавливается как отдельный компонент пакета с наименованием «Общие средства Office» и называется «Visual Basic для приложений». Узнать установлен ли у Вас редактор Visual Basic — очень просто. Нужно его запустить! О том как это сделать, можно прочитать отдельно. Если редактор Visual Basic не запустился — доустанавливаем его. Итак, переходим непосредственно к установке надстроек в Эксель!
Установить надстройку в Excel 2010 можно аналогично тому как это делается в Excel 2007.
Шаг 1. Сохраняем файл надстройки на компьютер и запоминаем место его хранения (расположения).
Шаг 2. Запускаем приложение Excel 2010, выбираем вкладку «Файл», а затем «Параметры Excel» как показано на рисунке

Шаг 3. В появившемся окне «Параметры Excel» в поле «Управление:» выбираем «Надстройки Excel» и жмем кнопку «Перейти…»

Шаг 4. В очередном окне с названием «Надстройки» появляется список доступных надстроек, которые можно подключать и отключать установкой и снятием галочек перед названиями соответствующих надстроек. Для добавления (подключения) новых надстроек, нажимаем кнопку «Обзор».

Появляется окно «Обзор», которое отправляет нас искать надстройки в папку с названием Addins и это имеет свой смысл.
 Именно в этом месте и должны располагаться файлы надстроек для максимально быстрого доступа к ним как приложения, так и самих пользователей. Размещение надстроек в папке Addins ускоряет загрузку приложения Excel и подключение к нему надстройки (надстроек) при последующих запусках. Перемещаем (добавляем) в это окно (в эту папку) файл, который присутствовал в Шаге 1. Если по каким-то причинам Вы не смогли, либо не захотели расположить свои надстройки в папке Addins, то через окно «Обзор» просто добираетесь до того места, где был изначально сохранен файл надстройки. Дважды кликаете по выбранному файлу и надстройка добавляется в список доступных надстроек. Все, надстройка установлена. Обращаю Ваше внимание на то, что если после установки файл надстройки будет перемещен в другое место жесткого диска, либо название папки, в которой он находится будет изменено, то весь процесс установки придется повторить заново.
Если Вы устанавливали готовые надстройки для Excel 2010, взятые с этого сайта, то после окончания процесса установки на ленте будет сформирована новая вкладка «Надстройки». При этом в настраиваемой панели инструментов будут отображены кнопки, запускающие макросы.

Начиная с Excel 2010 появилась возможность установки надстроек на вкладке «Разработчик».
Установка надстройки в Excel 2013
Надстройки в Excel 2013 устанавливаются через Файл/Параметры/Надстройки после чего нажимается кнопка «Перейти» и в менеджере надстроек подключаются необходимые надстройки. Окно менеджера надстроек можно вызывать кнопкой, расположенной на вкладке «Разработчик».
Быстрая установка надстроек через вкладку «Разработчик»
Начиная с Excel 2010 на вкладку «Разработчик» добавлена новая группа кнопок «Надстройки». По умолчанию эта вкладка на ленте Excel отсутствует, для её отображения необходимо зайти в меню Файл/Параметры/Настройка ленты и в правой части диалогового окна установить флажок перед полем «Разработчик». После этого на ленте приложения появляется одноименная вкладка с группой кнопок «Надстройки». При помощи одной из них вызывается менеджер надстроек, в котором можно произвести выбор файла устанавливаемой надстройки.

При помощи кнопки, расположенной рядом, можно управлять COM-надстройками.
Установка, подключение и отключение надстроек в Excel 2016 и выше
Как и в более ранних версиях окно менеджера надстроек вызывается одним из двух способов, либо через меню Файл/Параметры/Надстройки/Перейти, либо через вкладку «Разработчик», которую предварительно необходимо отобразить на ленте.
Другие материалы по теме:
What Are Add-ins?
Add-ins for Excel are similar to the apps you can download and purchase for your smartphone. They are mini software applications that you install into Excel in order to provide integration, shortcuts, and tasks that are not available within the standalone Excel application. Add-ins are created mainly by third-party businesses or self-motivated users (like myself) to fill a void that seems to be missing within Excel’s vast array of capabilities. Creating an add-in not only takes coding prowess in languages like VBA and XML, but it also requires an eye for a smooth intuitive user-interface to make the program «feel» like it is a natural part of Excel. If you can find add-ins that possess both of these characteristics, you can do absolute magic within Microsoft Excel.
Where Do I Find Add-ins?
The main purpose of this directory is to provide a one-stop list of high-quality and practical add-ins that you can use to increase your productivity and capabilities while using Microsoft Excel. Since there are so many Excel developers out there, it can be somewhat hard to find Excel add-ins, let alone decipher the good ones from the bad ones.
This list is in no way a reflection of «my favorites» or a «guaranteed hit», as I have not used every single one of the add-ins within this list. This is simply a starting place to help get you in the right direction without having to scour all over the internet for days to determine your options.
I do encourage you to leave reviews within the Comments Section at the bottom of this page describing add-ins you have had good/bad experiences with. Please feel free to recommend add-ins that may have been left off this list that you think people should know about. Enjoy!
Overview
Here is a listing of all the add-ins that are detailed in this article:
-
AbleBits Utility Pack
-
ASAP Utilities
-
AutoChart (Automate bulk chart creation)
-
CF Shapes (Shape object conditional formatting)
-
Chart-Me
-
Custom UI Editor (Ribbon XML Code Editor)
-
E2P (Excel To PowerPoint copy/paste automation)
-
myBrand (Custom Color Branding Tool)
-
My First Add-in (Build Your Own Ribbon Add-in)
-
Password Recovery (Remove VBA Project Passwords)
-
Peltier Tech Chart Utility
-
PivotPal (Extra Pivot Table Functionalities)
-
Ribbon Commander
-
Tickmark (Spreadsheet auditing & Tick icons)
-
Unviewable Plus (VBA Project Protection)
-
Waterfall Chart Add-in
-
XL Styles Tool (File Clean up utility)
-
XL Tools
-
X-Y Chart Labeler
These kinds of add-ins just flat out do a bunch of things. They contain general purpose functionalities that can be used in pretty much any spreadsheet you are working with. With these kinds of add-ins I usually find myself only using a few of the functionalities on a regular basis, but they sure do help make life easier! Below are some of the more popular Excel add-ins that will provide you with a whole ribbon tab worth of extra functionalities.
ASAP Utilities
Claimed to be «The most popular add-in for Excel users.» ASAP Utilities is a powerful Excel add-in that fills the gaps in Excel with over 300 features. You can learn more about this Excel add-in by visiting the ASAP Utilities Page.
Trial Available? Yes
Original Release Date: 1999
Developer: Bastien Mensink
AbleBits Utility Pack
A suite of Excel add-ins that can perform various tasks. Examples include
-
Merging Excel Workbooks
-
Removing Duplicates
-
Combine Duplicate Rows
-
Remove Spaces, Change Cases
-
Sum or Count Cells by Color
You can learn more about this Excel add-in by visiting the AbleBits Sales Page.
Trial Available? Yes
Developer: Add-in Express Ltd
Ribbon Commander
Ribbon Commander takes a new spin on Excel Add-in functionality. It acts as its own framework that allows the Excel Ribbon to be completely dynamic, which allows developers to create add-ins that were once thought to be impossible. Ribbon Commander comes with a bunch of individual add-ins that can be downloaded for free within its Add-in Manager. You can learn more about this Excel add-in by visiting the Ribbon Commander Sales Page.
Trial Available? Yes
Developer: Ilyda Ltd
The Ribbon Commander Add-in Manager where you have access to a bunch of useful add-ins with the click of a mouse
XL Tools Add-in
A suite of various Excel productivity tools. Examples Include Pop-up Calendars, Version Control, Data Cleaning, Combine Cell Data, and many more. You can learn more about this Excel add-in by visiting the XL Tools Sales Page.
Trial Available? Yes
Developer: WavePoint Co
Productivity forms of Excel Add-ins do a specific task to help speed up what you are working or provide an easier solution than what is the norm within the Excel application. Here are some great solutions that will speed up specific tasks that might currently put a strain on your work day.
PivotPal Add-in
Supercharge your pivot tables with the PivotPal add-in. This Excel add-in provides tons of great Pivot Table-related features that will make it easier and faster to modify your pivots. You can learn more about this Excel add-in by visiting the PivotPal Sales Page.
Trial Available? No
Developer: Excel Campus
E2P Add-in
This Excel add-in allows you to automate the painful task of copying & pasting your charts and tables from Excel into PowerPoint. You can learn more about this Excel add-in by visiting the E2P Sales Page.
Trial Available? Yes
Original Release Date: 2015
Developer: TheSpreadsheetGuru
Password Recovery Add-in
The Password Recovery Add-in allows you to remove passwords from VBA projects and Excel Worksheets that you have lost the passwords to. The Add-in is packaged with a Microsoft Word and Microsoft PowerPoint version as well. You can learn more about this Excel add-in by visiting the Password Recovery Sales Page.
Trial Available? No
Developer: TheSpreadsheetGuru & Spreadsheet1
Peltier Tech Chart Utility 3.0 Add-in
This add-in is probably the most popular in its category. The variety of extra chart types available with this add-in is truly phenomenal. You can create Box Plots, Histograms, Paretos, and many more with a few click within the add-in. If you love using these advanced charting forms but hate the hassle of setting them up, the Peltier Tech Chart Utility add-in is definitely for you! You can learn more about this Excel add-in by visiting the Peltier Tech Chart Utility Sales Page.
Trial Available? No
Developer: Peltier Technical Services
Chart-Me Add-in
The Chart-Me add-in is an advanced charting tool that allows you to create very intricate and complex charts through it’s interface. Some examples include Contribution Margin analysis, ROI Trees, YTD Variances, and P&L Statements. You can learn more about this Excel add-in by visiting the Chart-Me Sales Page.
Trial Available? Yes
Developer: Hi-Chart
X-Y Chart Labeler Add-in
This is a great little add-in that helps to interact with those pesky chart labels a whole lot easier. You can download this add-in for free on the X-Y Chart Labeler Sales Page.
Trial Available? This add-in is FREE
Developer: Apps Pro
My First Add-in
My First Add-in allows you to create your very own Microsoft Office add-ins in Excel, PowerPoint, or Word by simply toggling on/off variables within the VBA code. Think of it as flipping on/off light switches. The tools come with over 150 buttons you can link your macros to (including dropdown menus) and also gives you access to the entire Microsoft Office Icon Library! My First Add-in will allow you to create a professional-looking add-in within hours and will give you a perfect way to access your favorite macros.
There is also an online course you can add on with video lessons to teach you even tips/techniques to provide even more capabilities to your add-in and even show you how to professionally protect/distribute your add-ins. You can learn more about this Excel template by visiting the My First Add-in Sales Page.
Trial Available? No
Original Release Date: 2018
Developer: TheSpreadsheetGuru
myBrand Add-in
The myBrand Excel add-in allows you to integrate your personal or corporate brand colors into your Excel Ribbon. This app allows you to create custom formatting presets with whatever colors you need. You can also import up to 3 logos/images directly from your Excel Ribbon. This is the ultimate tool to incorporate your company-specific brand formats into Excel. You can learn more about this Excel add-in by visiting the myBrand Sales Page.
Trial Available? Yes
Developer: TheSpreadsheetGuru
CF Shapes Add-in
CF Shapes allows you to create beautiful and responsive workbook dashboards using conditionally formatted shape objects. You can learn more about this Excel add-in by visiting the CF Shapes Sales Page.
Trial Available? Yes
Developer: Ryan Wells
There are also tools available that are standalone pieces of software but do great things to increase Excel’s capabilities. These forms of Excel software tools are often overlooked because they do not integrate directly into Excel (and therefore cannot be called «add-ins»). Here are some great utility tools that fit into this category.
XL Styles Tool
This is a great utility tool for Excel that can greatly clean up an excel file. It removes unused cell styles and named ranges that contain errors or are hidden. This can greatly reduce the file size of a bloated file and reduce the chance of file corruption. This program is not available on the Microsoft App Store and you can learn more about the program by visiting the XL Styles Tool Sales Page.
Trial Available? No, This Is Free!
Developer: XL Geek
Unviewable Plus
Unviewable + is a great app for VBA add-in developers to protect their IP from potential hackers or re-distributers. This application can take your VBA add-in and apply various levels of protection to prevent users/customers from viewing the VBA source code. The application only takes a few seconds to run and has worked great for me and the add-ins I sell for TheSpreadsheetGuru. You can learn more about this application by visiting my review of Unviewable Plus.
Trial Available? No
Developer: Spreadsheet1
Custom UI Editor
The Custom UI Editor is a developer tool that allows you to easily create proper XML code for Excel’s Ribbon Interface. You can learn more about this program by visiting the CustomUI Editor Download Page.
Trial Available? No, This Is Free!
Developer: OpenXMLDeveloper.org
What Do You Think?
Hopefully this little add-in directory was helpful in bringing to light some great tools available for Excel. Like I said, I have not used very single one of the add-ins listed in the article, so I would love for you to leave an honest review about some of the tools you have used to help other visitors decide if an add-in is right for them. I look forward to reading about your recommendations and experience in the comments section below!