
Свойство Selection объекта Application, которое применяется в VBA для возвращения выбранного объекта на активном листе в активном окне приложения Excel.
Свойство Selection объекта Application возвращает выбранный в настоящее время объект на активном листе в активном окне приложения Excel. Если объект не выбран, возвращается значение Nothing.
Если выделить на рабочем листе диапазон «B2:E6», то обратиться к нему из кода VBA Excel можно через свойство Selection объекта Application, например, присвоить выбранный диапазон объектной переменной:
|
Sub Primer1() Dim myRange As Object Set myRange = Selection MsgBox myRange.Address End Sub |
При использовании свойства Selection в коде VBA Excel указывать объект Application не обязательно. Результат работы кода:

На рабочем листе Excel может быть выбран не только диапазон ячеек, но и другие объекты: рисунок, надпись, диаграмма, элемент управления формы и другие.
Применение функции TypeName
Для программного выбора объекта в VBA Excel используется метод Select, а для определения типа ранее выбранного объекта — функция TypeName.
TypeName — это функция, которая возвращает данные типа String, предоставляющие информацию о типе переменной или типе объекта, присвоенного объектной переменной.
Выберем диапазон «D5:K9» методом Select и определим тип данных выбранного объекта с помощью функции TypeName:
|
Sub Primer2() Range(«D5:K9»).Select MsgBox TypeName(Selection) End Sub |
В качестве переменной для функции TypeName здесь используется свойство Selection. Результат работы кода:

Следующий пример кода VBA Excel очень хорошо иллюстрирует определение типа выбранного объекта с помощью функции TypeName. Он взят с сайта разработчиков, только в блок Select Case добавлены еще два элемента Case:
|
1 2 3 4 5 6 7 8 9 10 11 12 13 14 15 16 17 18 |
Sub TestSelection() Dim str As String Select Case TypeName(Selection) Case «Nothing» str = «Объект не выбран.» Case «Range» str = «Выбран диапазон: « & Selection.Address Case «Picture» str = «Выбран рисунок.» Case «ChartArea» str = «Выбрана диаграмма.» Case «TextBox» str = «Выбрана надпись.» Case Else str = «Выбран объект: « & TypeName(Selection) & «.» End Select MsgBox str End Sub |
Если из предыдущей процедуры VBA Excel удалить переводы отдельных типов объектов и учесть, что рабочий лист без выбранного объекта встречается редко, то ее можно значительно упростить:
|
Sub TestSelection2() MsgBox «Выбран объект: « & TypeName(Selection) & «.» End Sub |
Пример рабочего листа без выбранного объекта: лист диаграммы, на котором диаграмма не выбрана (выделение снимается кликом по одному из полей вокруг диаграммы). Для такого листа в информационном окне MsgBox будет выведено сообщение: Выбран объект: Nothing.
Свойство Selection при выборе листа
Если метод Select применить к рабочему листу, то свойство Application.Selection возвратит объект, который ранее был выбран на данном листе. Проверить это можно с помощью следующего примера:
|
Sub Primer3() Worksheets(3).Select Select Case TypeName(Selection) Case «Range» MsgBox «Выбран диапазон: « & Selection.Address Case Else MsgBox «Выбран объект: « & TypeName(Selection) & «.» End Select End Sub |
Свойство Selection при выборе книги
Выбрать рабочую книгу Excel методом Select невозможно, так как у объекта Workbook в VBA нет такого метода. Но мы можем выбрать книгу, сделав ее активной с помощью метода Activate:
|
Sub Primer4() Workbooks(«Книга2.xlsx»).Activate Select Case TypeName(Selection) Case «Range» MsgBox «Выбран диапазон: « & Selection.Address Case Else MsgBox «Выбран объект: « & TypeName(Selection) & «.» End Select End Sub |
В данном случае, свойство Application.Selection возвратит объект, который ранее был выбран на активном листе активированной книги.
Обычно, свойство Application.Selection используется для работы с выделенным диапазоном ячеек, а для обращения к одной активной ячейке используется свойство Application.ActiveCell.
Excel VBA Selection Property
VBA Selection is used for selecting the range from excel worksheet. We can do anything and whatever with the selected range. But while using VBA Selection, we will not be seeing the list of functions we want to perform from where we can choose any as per our need. For this, we need to type that thing manually and it should be correct. So while using VBA Selection, we have to make sure that we will be using the correct function to avoid any kind of error.
How to Use Selection Property in Excel VBA?
Below are the different examples to use Selection property in excel by using VBA code.
You can download this VBA Selection Excel Template here – VBA Selection Excel Template
Excel VBA Selection – Example #1
In this example, we will see a very simple method of applying VBA Selection. For this follow the below steps:
Step 1: Go to the VBA window and open a new Module from the list of Insert menu as shown below.

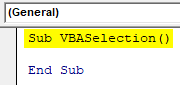
Step 2: Now in the newly opened module write the subcategory for VBA Selection as shown below.
Code:
Sub VBASelection()

End Sub
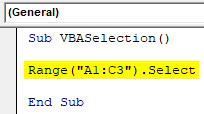
Step 3: Select any range of cells. It can be any random or specific range of cells with the help of Select command.
Code:
Sub VBASelection()

Range("A1:C3").Select

End Sub
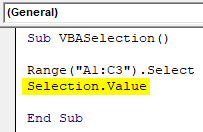
Step 4: Now, we would try to insert some text in the selected range of cell. For this in the next line of code write Selection.Value. This is used for selecting the cells for putting the value in.
Code:
Sub VBASelection()

Range("A1:C3").Select
Selection.Value

End Sub
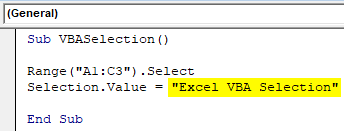
Step 5: At last, we will write any text which we would like to see in the selected range of cell. Let that text be “Excel VBA Selection”.
Code:
Sub VBASelection()

Range("A1:C3").Select
Selection.Value = "Excel VBA Selection"

End Sub
Step 6: Now run the code by clicking on the Play button which is placed below the menu bar as shown below.
We will see, from cell A1 to C3, our selected text value has been inserted and the whole is selected as well.
Excel VBA Selection – Example #2
In this example we will see, how Offset function will work along with VBA Selection. For this, follow the below steps:
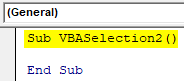
Step 1: Write the subcategory of VBA Selection as shown below.
Code:
Sub VBASelection2()

End Sub
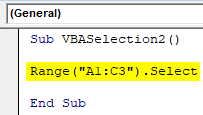
Step 2: Select the range of cell as per your need or else we can keep off using the same range of cells which we had seen in the above example.
Code:
Sub VBASelection2()

Range("A1:C3").Select

End Sub
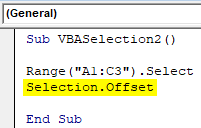
Step 3: Now choose Offset function along with Selection as shown below. By this Offset function, we would try to offset or move the selection from the next matrix.
Code:
Sub VBASelection2()

Range("A1:C3").Select
Selection.Offset

End Sub
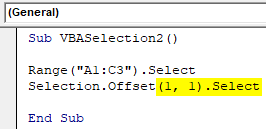
Step 4: After that select the offset location where we want to move the selection box from range cells A1 to C3. Let’s try to move it by 1 row and 1 column away from the current position.
Code:
Sub VBASelection2()

Range("A1:C3").Select
Selection.Offset(1, 1).Select

End Sub
Step 5: Now again run the code by pressing F5 key or by clicking on Play Button.
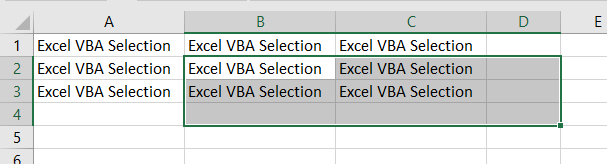
We will see, now our new selection will be from cell B2 to D4 as shown below. And we had used Select command so that range is in a current selected mode.
Excel VBA Selection – Example #3
In this example, we will see how could we use and change the cell’s interior color with the help of VBA Selection. For this, follow the below steps:
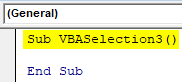
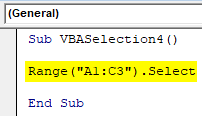
Step 1: Write the subcategory of VBA Selection or in any name as per your choice as shown below.
Code:
Sub VBASelection3()

End Sub
Again, we will keep on using the same range of cells as we have seen previously with the same inserted text.
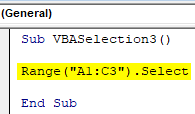
Step 2: Select the range of required cell, which is from cell A1 to C3 here.
Code:
Sub VBASelection3()

Range("A1:C3").Select

End Sub
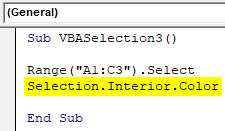
Step 3: Now for changing the interior color of any cell, we need to use Interior.Color function together along with Selection. This will allow us to use all available vb Color we have in VBA.
Code:
Sub VBASelection3()

Range("A1:C3").Select
Selection.Interior.Color

End Sub
Step 4: Here we have a variety of colors but all are BASE COLORS. To select any base color we will use vb followed by the name of the color. Let’s consider the interior color to be Green as shown below.
Code:
Sub VBASelection3()

Range("A1:C3").Select
Selection.Interior.Color = vbGreen

End Sub

Step 5: Now again run the code by pressing F5 key or by clicking on the Play Button.
We will see, our selected range of cells are colored as Green.
Excel VBA Selection – Example #4
In this example, we will insert a text in any range of cells and simultaneously we will change the font color for those cell text as well. For this, follow the below steps:
Step 1: Write the subcategory of VBA Selection as shown below.
Code:
Sub VBASelection4()

End Sub

Step 2: Again select the range of cells where we want to see all this happening. Here, we are again considering the same range.
Code:
Sub VBASelection4()

Range("A1:C3").Select

End Sub
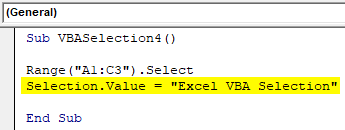
Step 3: Again insert any text as we have seen in example-1. We will again use the same line of code here.
Code:
Sub VBASelection4()

Range("A1:C3").Select
Selection.Value = "Excel VBA Selection"

End Sub
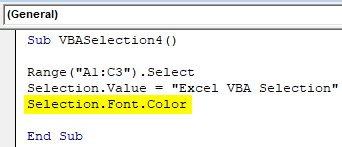
Step 4: Now with the help of Selection use Font.Color function together as shown below. By this, we would be able to select the color which we want to give to selected cell fonts.
Code:
Sub VBASelection4()

Range("A1:C3").Select
Selection.Value = "Excel VBA Selection"
Selection.Font.Color

End Sub
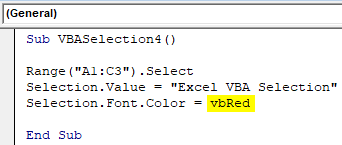
Step 5: Again, we will use VBA base colors for cell font colors. Let’s use Red color this time starting with vb as shown below.
Code:
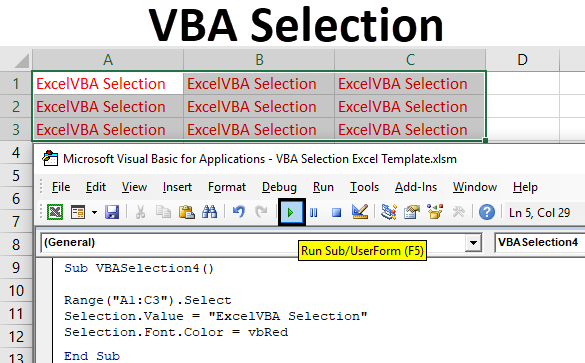
Sub VBASelection4()

Range("A1:C3").Select
Selection.Value = "Excel VBA Selection"
Selection.Font.Color = vbRed

End Sub
Step 6: Now again run the code by pressing F5 key or by clicking on Play Button.
We will see, in the selected range of cells we will have our text inserted and the color those cells are now Red from default Black.
Pros & Cons of Excel VBA Selection
- This the direct way of selecting any function.
- This is applicable to all type of functions.
- VBA Selection is a much easier way of coding as compared to other forms.
- As it does not allow the list of possible functions after it, so it becomes little complex to use VBA Selection.
Things to Remember
- Make sure you use exact function after VBA Selection, to avoid getting error.
- It is easy and possible to use complex code structure VBA Selection.
- Once implementation is done, save the file in Macro enabled excel so that you will not lose written code ever.
Recommended Articles
This is a guide to VBA Selection. Here we discuss how to use selection property in Excel by using VBA code along with practical examples and downloadable excel template. You can also go through our other suggested articles –
- VBA Conditional Formatting
- VBA Get Cell Value
- VBA Named Range
- VBA RGB
|
Программирование в Word |
217 |
Select() — позволяет просто выделить весь документ. Этот метод существует для очень большого количества объектов, в том числе для Selection
и Range.
TransformDocument() — исключительно мощный метод, но только для программистов, которые хорошо разбираются в XML и XSLT. Позволяет применить к документу таблицу преобразований стилей (Extensible Stylesheet Language Transformation, XSLT), при помощи которой можно поменять все, что угодно.
Undo() — отменяет определенное количество последних действий. По синтаксису и принципам работы — полный аналог метода Redo().
UndoClear() — очищает буфер отмены изменений, чтобы пользователь не смог откатить произведенные действия.
UnProtect() — снимает защиту с документа (определенную методом Protect() или в графическом интерфейсе). Может быть очень полезным перед программным внесением изменений в защищенный документ.
Часто используемых событий у объекта Document всего три: New (можно определить только для шаблона, срабатывает, когда на основе этого шаблона создается новый документ), Open и Close. Все эти события очевидны и изначально доступны в окне редактора кода Visual Basic.
10.5.1. Работа с объектом Selection
После того как мы запустили приложение, нашли и активизировали нужный нам файл, следующее действие, которое выполняется чаще всего, — ввод или редактирование текста в нужном месте. Для этого используются объекты Selection, Range и Bookmark. Каждое из них используется в своих ситуациях и для своих задач.
Первый объект, который мы рассмотрим, — это объект Selection.
Обычно перед тем, как что-либо сделать в окне документа Word, пользователь либо выделяет нужный фрагмент текста, либо переставляет указатель вставки текста в нужное место. Объект Selection представляет именно такой выделенный участок текста (а если ничего не выделено пользователем, то место, где находится указатель вставки). Именно этот объект обычно использует макрорекордер.
Создавать объект Selection и получать на него ссылку в переменную совершенно не нужно. Дело в том, что объект Selection в документе может быть
только один. Он создается автоматически при запуске Word и всегда доступен. Обращаться к нему можно так:
Application.Selection.Text = «Вставляемый текст»
или просто:
Selection.Text = «Вставляемый текст»
Обычно нам нужно правильно определить то место, на которое указывает объект Selection, чтобы выделить нужный нам участок текста или точку для ввода.
Существует несколько способов для настройки выделения в документе Word:
самый простой способ — положиться на выделение нужного текста пользователем. Обычно такой способ применяется для сложного редактирования или форматирования участков текста и для ввода информации в указанное пользователем место документа, когда в автоматическом режиме нужное место не найти;
воспользоваться методом Select(), который предусмотрен для огромного числа объектов (Document, Range, Bookmark, Table со всеми подобъектами типа столбцов и строк, PageNumber, Field и т. п.). Этот метод просто выделяет весь документ, закладку, таблицу и т. п.;
воспользоваться многочисленными методами объекта Selection, чтобы преобразовать уже существующее выделение;
воспользоваться объектом Find для поиска нужного фрагмента текста. Подробнее об этом объекте — в разд. 10.6.5;
если вам нужно ввести информацию в самое начало документа, можно вообще ничего не делать. По умолчанию указатель вставки устанавливается на начало документа. Только не забудьте сделать этот документ активным.
Если вы полагаетесь на выделение нужного места пользователем, то помните, что пользователь может ухитриться выделить одновременно несмежные участки текста (при помощи клавиши <Ctrl>) или выделить не текст, а часть таблицы, рисунок или другой нестандартный объект в документе. Чаще всего поведение программы, работающей с объектом Selection, в этом случае становится совершенно непредсказуемым, поэтому рекомендуется всегда использовать дополнительные проверки при помощи свойств Type и Information
объекта Selection.
Несмотря на то, что применение объекта Selection — самый простой и наглядный метод редактирования текста, и чаще всего именно он используется макрорекордером, на практике программисты применяют его редко. Объясняется это очень просто: при использовании этого объекта мы слишком зави-
|
Программирование в Word |
219 |
сим от действий пользователя. Если во время выполнения нашего кода пользователь проявит инициативу и начнет щелкать по документу мышью, результат может быть непредсказуемым. Защититься от вмешательства пользователя можно двумя способами:
работать со скрытым (т. е. невидимым) документом или, возможно, со скрытым экземпляром Word. Для включения и отключения видимости можно использовать свойство Visible объектов Document или Application;
более удобный способ — вместо объекта Selection использовать объекты Range и Bookmark, о которых будет рассказано в следующих разделах.
10.5.2. Свойства и методы объекта Selection
Вначале расскажем о самых часто используемых свойствах объекта
Selection.
Bookmarks — возвращает коллекцию Bookmarks, т. е. все закладки, которые имеются в выделенном фрагменте текста. Закладки — один из самых часто используемых объектов в приложениях VBA с использованием Word. Подробнее о них будет рассказано в разд. 10.5.
Start и End — свойства, которые определяют номера первого и последнего символа в выделении (по отношению к тексту документа или другим его частям, например, к сноске). Первая позиция в тексте документа — всегда 0. Если вы создаете документ из неизменяемого шаблона, можно использовать эти свойства, чтобы найти нужное место в документе для ввода текста (однако этот способ не очень рекомендуется, потому что при правке шаблона вам придется править много программного кода).
ExtendMode — переключает пользователя в режим выделения текста, когда нажатие клавиш со стрелками, <Home> и <End> приводит не к перемещению указателя ввода, а к изменению выделения.
Find — очень важное свойство, которое возвращает объект Find. Подробнее об этом объекте и о его вложенном объекте Replace будет рассказано в
разд. 10.6.5.
Flags — свойство, которое позволяет проверить или изменить некоторые моменты, связанные с выделением: является ли оно активным, находится ли в конце строки и т. п. Регулирует одновременно пять параметров при помощи битовой маски.
Font — возвращает объект Font, при помощи которого можно управлять оформлением текста в выделении. Доступны все возможности, которые есть на графическом интерфейсе в меню Формат | Шрифт. Например, чтобы назначить выделенному тексту шрифт Arial 10 pt, можно использовать код:
Selection.Font.Name = «Arial»
Selection.Font.Size = 10
Information — важнейшее свойство объекта Selection для целей проверок. Возвращает огромное количество информации о выделении (в какой части документа, внутри таблицы или нет, включены ли клавиши <CapsLock> и <NumLock>, включен ли режим «Замена» при вводе текста, на какой странице находится выделение и сколько страниц и т. п.).
IPAtEndOfLine — возвращает True, если курсор ввода текста (insertion point — IP) находится в конце строки (в крайнем правом положении при выравнивании).
LanguageId — позволяет пометить выделение, как написанное на определенном языке. Правильное определение языка позволяет избежать проблем при проверке орфографии.
NoProofing — отменяет для выделения проверку орфографии и грамматики. Очень рекомендуется помечать таким образом текст с программным кодом, списками фамилий, названиями фирм, специфическими терминами и т. п.
Range — создает из выделения объект Range.
StoryType — еще одно свойство для проверок. Определяет тип текста документа, в котором находится выделение.
Text — самое важное свойство объекта Selection. Позволяет ввести текст на месте выделения (или в том месте, где стоит указатель). Например, чтобы 100 раз напечатать текст «Привет!», можно воспользоваться кодом:
For i = 0 To 100
Selection.Text = «Привет!»
Selection.EndOf
Next
Метод EndOf() здесь позволяет перейти в конец текущего выделения. Он нужен здесь для того, чтобы не перезаписывать один и тот же текст 100 раз, поскольку после ввода текст остается выделенным.
Type — еще одно проверочное свойство, которое позволяет предупредить ошибку, если пользователь выделил что-то неположенное. Например, при обычном выделении значение этого свойства будет равно 1, а если выделены несмежные участки текста — 2.
Words — позволяет вернуть коллекцию Words. Эта коллекция состоит из набора объектов Range, каждому из которых соответствует слово в выделенном тексте.
|
Программирование в Word |
221 |
Методов у объекта Selection гораздо больше, чем свойств.
Calculate() — позволяет посчитать математическое выражение прямо в процессе ввода текста и вернуть его результат (используя только тип дан-
ных Single).
ClearFormatting() — очищает форматирование (и на уровне текста, и на уровне параграфа). Этот метод можно применять не только для объекта
Selection, но и для объектов Find и Replace.
Collapse() — превращает выделение в указатель вставки. Можно использовать два варианта: указатель вставки помещается на начало выделения или на конец выделения. Очень удобно, если вам требуется только вставить новый текст без удаления старого.
Copy(), CopyAsPicture(), Cut(), Paste() и Delete() — эти методы можно использовать для копирования выделенного участка документа, копирования и вставки в виде изображения, вырезания, вставки и удаления соответственно.
EndKey() — этот метод так называется, поскольку он очень похож по функциональности на нажатие клавиши <End>. Он позволяет (в зависимости от переданных параметров) перейти на конец строки, столбца или записи в таблице (по умолчанию на конец строки) и либо выделить до этого места, либо установить на нем указатель вставки. Чтобы перевести курсор вставки на конец текста документа, можно воспользоваться кодом:
Selection.EndKey Unit:=wdStory, Extend:=wdMove
Если же нужно перейти на начало элемента, используется аналогичный метод HomeKey().
EndOf() — по функциональности практически идентичен методу EndKey(). Он позволяет перейти на конец символа, слова, предложения, абзаца, секции, текста документа, таблицы и т. п. Различие между этими методами заключается в том, что EndKey() работает только с текущим элементом текста, а при помощи EndOf() можно, например, найти следующую таблицу в выделенной части документа и перейти на ее конец. Чтобы перейти на начало элемента текста, существует метод StartOf().
Expand() — расширяет выделение на слово, предложение, абзац и т. п., в зависимости от переданного параметра. Метод Extend() позволяет расширить выделение (вместо слова — предложение, вместо предложения — абзац и т. п.). Метод, обратный методу Expand(), — Shrink().
GoTo() — работает практически аналогично такому же методу объекта
Document.
Insert…
GotoNext() — перейти на следующую строку, страницу, закладку и т. п. Аналогично работает метод GotoPrevious() (переход на предыдущий элемент).
Назначение многочисленных методов с префиксом очевидно. Чаще всего используются методы InsertBefore() (вставить перед выделением) и InsertAfter() (вставить после выделения).
Методы с префиксом Move… также встречаются едва ли не в любой программе, связанной с вводом текста в Word. Самые важные и удобные из этих методов:
•MoveLeft(), MoveRight(), MoveUp(), MoveDown(), MoveEnd(), MoveStart() —
эти методы позволяют переместить выделение соответственно влево, вправо, вверх, вниз, к концу существующего выделения или к его началу. Каждый из этих методов принимает дополнительные параметры, при помощи которых можно определить, на сколько символов будет перемещаться указатель, будет ли двигаться выделение, распространяясь на новую область, и т. п.;
•MoveStartUntil(), MoveStartWhile(), MoveEndUntil(), MoveStartWhile() —
отличаются тем, что курсор вставки перемещается не на определенное количество символов, а пока не будет найдено (или пока встречается) определенная последовательность символов. Также очень удобно использовать эти методы для установки курсора в нужное место в документе для ввода текста;
•Move() — более гибкий метод. Он позволяет отсчитывать не только оп-
ределенное количество символов, но и слов, предложений, абзацев, разделов, столбцов и строк в таблице и т. п. Позволяет обойтись минимальным количеством изменений в коде, если изменился исходный шаблон для ввода данных.
Next() — позволяет перейти вперед на определенное количество символов, слов, предложений, абзацев, разделов, столбцов и строк в таблице и т. п. Переход назад осуществляет метод Previous().
NextField() — позволяет перейти на следующее поле в форме или проверить, не кончились ли поля (в этом случае метод вместо объекта Field возвратит Nothing). Есть также метод PreviousField().
SelectColumn(), SelectRow(), SelectCell() — очень удобные методы для выполнения различных операций в таблице Word.
SelectCurrentAlignment(), SelectCurrentFont(), SelectCurrentIndent(),
SelectCurrentColor() и т. п. — выделяют текст до изменения выравнивания, шрифта, отступа, цвета и т. п. Также очень удобно использовать эти
Соседние файлы в предмете [НЕСОРТИРОВАННОЕ]
- #
- #
- #
- #
- #
- #
- #
- #
- #
- #
- #
In VBA, we can select any range of cells or a group of cells and perform different operations on them. For example, the selection is a range object, so we use the Range method to select the cells as it identifies the cells and the code to select the cells is the “Select” command. The syntax to use for selection is range(A1:B2).select.
Table of contents
- What is Excel VBA Selection Property?
- Examples of Selection Property in VBA
- Example #1
- Example #2
- Example #3
- Recommended Articles
- Examples of Selection Property in VBA
What is Excel VBA Selection Property?
Selection is the property available with VBA. Once the range of cells is selected, we must decide what to do. Using this VBA “Selection” property, we can do everything we can with selected cells. One of the problems with the Selection property is we do not get to see the IntelliSense list. So, when writing the code, we must be sure of what we are doing without the IntelliSense list.

You are free to use this image on your website, templates, etc, Please provide us with an attribution linkArticle Link to be Hyperlinked
For eg:
Source: VBA Selection (wallstreetmojo.com)
Examples of Selection Property in VBA
We look at the examples of selection in Excel VBA.
You can download this VBA Selection Excel Template here – VBA Selection Excel Template
Example #1
Here is a simple example of a “selection” property with VBA. Of course, we want to first select the cells from A1 to B5 to write the VBA codeVBA code refers to a set of instructions written by the user in the Visual Basic Applications programming language on a Visual Basic Editor (VBE) to perform a specific task.read more like this.
Range (“A1:B5”).Select
Code:
Sub Selection_Example1()

  Range("A1:B5").Select

End Sub
This code will select the VBA range of cellsThe selection range is the desired area by the user to put effects, add data, or make changes in those specific cells only. The range is defined by formulas by the addresses of two cells separated by a colon. The cell where the selection range begins is still active.read more from A1 to B5.
If we want to insert the value of “hello” to these cells, we can write the code like this.
Code:
Sub Selection_Example1()

  Range("A1:B5").Value = "hello"

End Sub
Similarly, once the cells are selected, it becomes “Selection.”
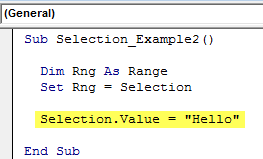
Code:
Sub Selection_Example1()

  Range("A1:B5").Select

  Selection.Value = "Hello"

End Sub
First, we have selected the range of cells from A1 to B5. So, this line will select the cells.
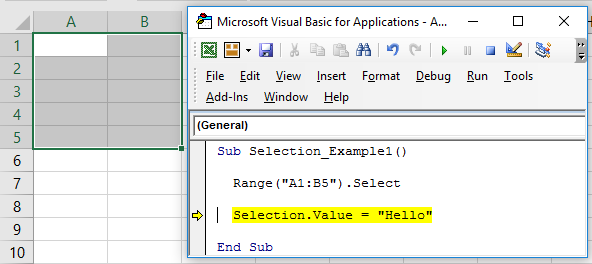
Once these cells are selected, we can refer to these cells by using the property “Selection” in Excel VBA. So, using the Selection property, we can insert the value of “Hello” to these cells.
It is the general overview of the “Selection” property in VBA.
Example #2
Now, we will see the VBA “Selection” property with variables. But, first, define the VBA variable as RangeRange is a property in VBA that helps specify a particular cell, a range of cells, a row, a column, or a three-dimensional range. In the context of the Excel worksheet, the VBA range object includes a single cell or multiple cells spread across various rows and columns.read more.
Code:
Sub Selection_Example2()

  Dim Rng As Range

End Sub

The range is an object variable since it is an object variable. Therefore, we need to set the range of cells using the “Set” keyword.
We will set the range as “Range(“A1:A6”).
Code:
Sub Selection_Example2()

  Dim Rng As Range
  Set Rng = Range("A1:A6")

End Sub
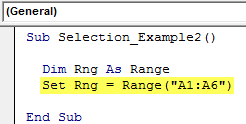
The variable “Rng” refers to the range of cells A1 to A6.
Now, we will write the code to insert the value of “Hello.”
Code:
Sub Selection_Example2()

  Dim Rng As Range
  Set Rng = Range("A1:A6")
  Rng.Value = "Hello"

End Sub
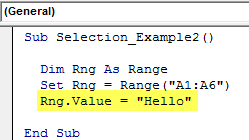
It will insert the value of “Hello” to the cells A1 to A6.
It does not matter where you are running the code. The active worksheet will insert the value “Hello” to cells A1 to A6.
But imagine the situation where you have to insert the word “Hello” wherever you select the cells with just a button click.
For this, we cannot set a specific range of cells. Rather we need to set the range as “Selection.”
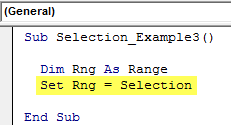
Code:
Sub Selection_Example2()

  Dim Rng As Range
  Set Rng = Selection

End Sub
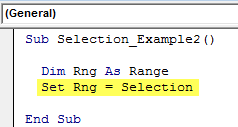
The variable “Rng” refers to the active cell or wherever we select the cells. For example, using this property (Selection) in Excel VBA, we can insert the value “Hello.”
Code:
Sub Selection_Example2()

  Dim Rng As Range
  Set Rng = Selection

  Selection.Value = "Hello"

End Sub
It will insert the word “Hello” into the cells of our selection. Now, we will select the cells from B2 to C6 and run the code. First, it will insert the “Hello” value.

Example #3
Now, we will see how we can change the interior color of the selected cells. Now, we want to change the interior color of the cells we will select. For this first, we have declared the variable as Range and set the range reference as “Selection.”
Code:
Sub Selection_Example3()

  Dim Rng As Range
  Set Rng = Selection

End Sub
Now, access the “Interior” property using the VBA Selection property.
Code:
Sub Selection_Example3()

  Dim Rng As Range
  Set Rng = Selection

  Selection.Interior

End Sub

Once the “Interior” property is selected, we need to decide what we need to do with this property. Since we need to change the color of the selected cell’s interior, select the property “Color.”
Code:
Sub Selection_Example3()

  Dim Rng As Range
  Set Rng = Selection

  Selection.Interior.Color

End Sub

Set the color property as “vbGreen.”
Code:
Sub Selection_Example3()

  Dim Rng As Range
  Set Rng = Selection

  Selection.Interior.Color = vbGreen

End Sub
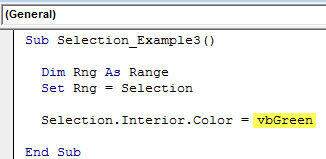
So this will change the interior color of the selected cells to “vbGreen.”
Like this, we can use the Excel VBA “Selection” property in coding and do many more things easily.
Note: One of the biggest threats with the “Selection” property is we don’t get the IntelliSense list access while coding. As a new learner, it is almost impossible to remember all the properties and methods of the Selection property, so you need to be proficient in VBA to start using the “Selection” property.
Recommended Articles
This article is a guide to VBA Selection. Here, we discussed what Selection Property is in Excel VBA, with some practical examples and a download template. Below are some useful Excel articles related to VBA: –
- VBA Text Function Examples
- VBA Operators
- Close UserForm in VBA
VBA Select
It is very common to find the .Select methods in saved macro recorder code, next to a Range object.
.Select is used to select one or more elements of Excel (as can be done by using the mouse) allowing further manipulation of them.
Selecting cells with the mouse:
Selecting cells with VBA:
    'Range([cell1],[cell2])
    Range(Cells(1, 1), Cells(9, 5)).Select
    Range("A1", "E9").Select
    Range("A1:E9").Select
Each of the above lines select the range from «A1» to «E9».
VBA Select CurrentRegion
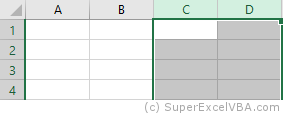
If a region is populated by data with no empty cells, an option for an automatic selection is the CurrentRegion property alongside the .Select method.
CurrentRegion.Select will select, starting from a Range, all the area populated with data.
Range("A1").CurrentRegion.Select
Make sure there are no gaps between values, as CurrentRegion will map the region through adjoining cells (horizontal, vertical and diagonal).
Range("A1").CurrentRegion.SelectWith all the adjacent data

Not all adjacent data
«C4» is not selected because it is not immediately adjacent to any filled cells.
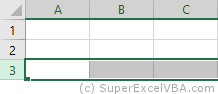
VBA ActiveCell
The ActiveCell property brings up the active cell of the worksheet.
In the case of a selection, it is the only cell that stays white.
A worksheet has only one active cell.
    Range("B2:C4").Select
    ActiveCell.Value = "Active"
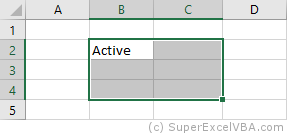
Usually the ActiveCell property is assigned to the first cell (top left) of a Range, although it can be different when the selection is made manually by the user (without macros).
The AtiveCell property can be used with other commands, such as Resize.
VBA Selection
After selecting the desired cells, we can use Selection to refer to it and thus make changes:
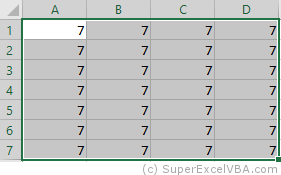
    Range("A1:D7").Select
    Selection = 7
Selection also accepts methods and properties (which vary according to what was selected).
    Selection.ClearContents 'Deletes only the contents of the selection
    Selection.Interior.Color = RGB(255, 255, 0) 'Adds background color to the selection
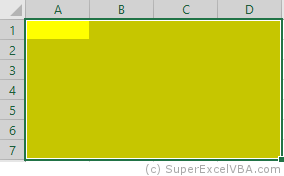
As in this case a cell range has been selected, the Selection will behave similarly to a Range. Therefore, Selection should also accept the .Interior.Color property.
RGB (Red Green Blue) is a color system used in a number of applications and languages. The input values for each color, in the example case, ranges from 0 to 255.
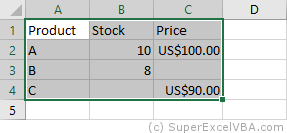
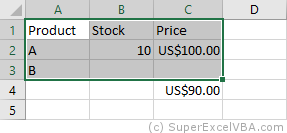
Selection FillDown
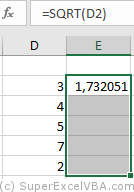
If there is a need to replicate a formula to an entire selection, you can use the .FillDown method
Selection.FillDown
Before the FillDown
After the FillDown
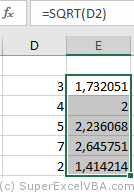
.FillDown is a method applicable to Range. Since the Selection was done in a range of cells (equivalent to a Range), the method will be accepted.
.FillDown replicates the Range/Selection formula of the first line, regardless of which ActiveCell is selected.
.FillDown can be used at intervals greater than one column (E.g. Range(«B1:C2»).FillDown will replicate the formulas of B1 and C1 to B2 and C2 respectively).
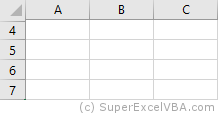
VBA EntireRow and EntireColumn
You can select one or multiple rows or columns with VBA.
    Range("B2").EntireRow.Select
    Range("C3:D3").EntireColumn.Select
The selection will always refer to the last command executed with Select.
To insert a row use the Insert method.
    Range("A7").EntireRow.Insert
    'In this case, the content of the seventh row will be shifted downward
To delete a row use the Delete method.
    Range("A7").EntireRow.Delete
    'In this case, the content of the eighth row will be moved to the seventh
VBA Rows and Columns
Just like with the EntireRow and EntireColumn property, you can use Rows and Columns to select a row or column.
    Columns(5).Select
    Rows(3).Select
To hide rows:
Range("A1:C3").Rows.Hidden = True
In the above example, rows 1 to 3 of the worksheet were hidden.
VBA Row and Column
Row and Column are properties that are often used to obtain the numerical address of the first row or first column of a selection or a specific cell.
    Range("A3:H30").Row 'Referring to the row; returns 3
    Range("B3").Column  'Referring to the column; returns 2
The results of Row and Column are often used in loops or resizing.
Consolidating Your Learning
Suggested Exercise
SuperExcelVBA.com is learning website. Examples might be simplified to improve reading and basic understanding. Tutorials, references, and examples are constantly reviewed to avoid errors, but we cannot warrant full correctness of all content. All Rights Reserved.
Excel ® is a registered trademark of the Microsoft Corporation.
© 2023 SuperExcelVBA | ABOUT
![]()