
Last update: July 2020; Applicability: Office 365,2019, 2016, 2013.
Sometimes, we would like to make our Word documents more interactive and even capture some user input. Enter message and input boxes .
As the name suggests a message box is a piece of information that is displayed to the document users. Input boxes are instrumental to capture information from the user.
This post has all the information and code samples you’ll need to create fully functional documents with Visual Basic for Applications (VBA) message and input boxes for Microsoft Word.
How to add VBA code into Word?
Before we go ahead and explain how to add message and input boxes, here’s a quick refresher on how to add your custom VBA code to a Word document.
- First off, go ahead and enable the Developer tab.
- Now, hit the Visual Basic button from the Developer tab. This will open the Visual Basic Editor.

- Highlight your Document.
- Click Insert and then select Module.

- Copy the code we provide below into the Module you just created into your module.
- Click on Save. Provide a name to your document if prompted.
- Close the Visual Basic Editor.
Message Boxes VBA code
Syntax:
MsgBox(prompt,buttons,title,helpfile,context)
Syntax explanation:
Prompt:
Required. It is the information that can be given to the user. It should be inserted inside the double quotation mark.
Buttons:
Optional. Buttons are those kind of buttons that are given to the users information. There are various buttons available for MsgBox() and they can be found on the pictures below.


Title:
Optional. It is the title for the information given to the user. If not given, Microsoft word will be the default title.
Helpfile and context:
- Optional. Helpfile will identify the Help file available in local disk which can be provided as a help in a dialog box
- Optional. Context is numeric expression which is used to identify the help topic by the unique number.
Sample Message box code
'VBA
Sub messagebox()

'Variables assigned

Dim buttonclick As VbMsgBoxResult

'Message box to display information to user

<strong>MsgBox "Hi, Visual Basic is easy to work with", vbExclamation, "VBA"</strong>

'Message box to ask question to user with yes or no question
<strong>buttonclick = MsgBox("Do you like VBA?", vbQuestion + vbYesNo, "VBA")</strong>
If buttonclick = vbYes Then
<strong>MsgBox "Yes, they are great!", vbExclamation, "VBA"</strong>
Else
<strong>MsgBox "Why not? They are great!", vbCritical, "VBA"</strong>
End If

End Sub
Output:


Dialog and Input Boxes VBA code
Input box is a simple dialog that allows us to prompt the user for some information. Let us get acquainted with the VBA code using an example.
Syntax:
InputBox(Prompt, Title, Default, XPos, YPos, HelpFile, HelpContextId, Type)
Syntax explanation:
Prompt:
Required. It is the information that can be given to the user. It should be inserted inside the double quotation mark.
Title:
Optional. It is the title for the information given to the user. If not given, Microsoft word will be the default title.
Default:
Optional. It displays the default value inside the text box, before user types for a value. If not specified, the text box will be empty.
XPos:
Optional. It is used as the position on the X axis. From left to right
YPos:
Optional. It is used as the position on the Y axis. From top to bottom
Helpfile and HelpContext ID:
- Optional. Helpfile will identify the Help file available in local disk which can be provided as a help in a dialog box
- Optional. HelpContext ID is the id number for the help file.
Input box code:
'VBA
Sub macro()

'Variables assigned
Dim a As Long
Dim b As Long

'Input box to get value from user

a = InputBox("Enter a value for a", "Question 1")
b = InputBox("Enter a value for b", "Question 2")

'Answer displayed in a message box
MsgBox ("Answer is " & Val(a) + Val(b))
End Sub
Output:


 Please Note:
This article is written for users of the following Microsoft Word versions: 2007, 2010, 2013, 2016, 2019, and Word in Microsoft 365. If you are using an earlier version (Word 2003 or earlier), this tip may not work for you. For a version of this tip written specifically for earlier versions of Word, click here: Using Message Boxes.
![]()
Written by Allen Wyatt (last updated May 22, 2021)
This tip applies to Word 2007, 2010, 2013, 2016, 2019, and Word in Microsoft 365
When you create macros in Word, you can easily incorporate the use of message boxes. These are typically used to convey information to the user and to get some rudimentary input. You include message boxes by using the MsgBox command. The following portion of a macro creates a very simple message box:
MsgBox "The macro is done"
You can also add symbols to your message boxes by including a symbol-type code as part of your MsgBox invocation. These symbols are used extensively in many Windows dialog boxes. The following four types of symbols can be used:
| Type | Enumeration | Symbol | ||
|---|---|---|---|---|
| 16 | vbCritical | White X in a red circle (and «ding») | ||
| 32 | vbQuestion | Question mark in a circle | ||
| 48 | vbExclamation | Exclamation point in a circle | ||
| 64 | vbInformation | Information symbol (lowercase i in a circle) |
You can use either the number in the Type column or the enumeration in the Enumeration column with the MsgBox statement. As an example, let’s suppose you wanted to include the exclamation point symbol. This is typically included in dialog boxes as a notice of when something important has happened or is about to happen. To include this symbol in your message box, you would include either of the following code lines:
MsgBox "Can't run the macro on the text", 48
MsgBox "Can't run the macro on the text", vbExclamation
So far, the MsgBox command has been used as a statement, but you can also use it as a function. If you do so, you can use it to get simple input from the user. To make the MsgBox function more useful, Word allows you to display more clickable buttons in the dialog box besides the OK button. This is done by adjusting the type code, which was used for the symbols displayed in the message box. The following are the different button combinations you can display in your message box:
| Type | Enumeration | Button Types | ||
|---|---|---|---|---|
| 1 | vbOKCancel | OK, Cancel | ||
| 2 | vbAbortRetryIgnore | Abort, Retry, Ignore | ||
| 3 | vbYesNoCancel | Yes, No, Cancel | ||
| 4 | vbYesNo | Yes, No | ||
| 5 | vbRetryCancel | Retry, Cancel |
To use the buttons, you simply add the value of the button type to the value you want used for the symbol. You can use either the values in the Type column or the enumerations in the Enumeration column; VBA doesn’t care which is used. In the previous example, you used the code of 48 or enumeration of vbExclamation to display the exclamation point symbol. If you wanted to also include the Abort, Retry, Ignore buttons, you could simply use the following code lines:
J = MsgBox("Can't run the macro on the text", 48 + 2)
J = MsgBox("Can't run the macro on the text", vbExclamation + vbAbortRetryIgnore)
If you choose to use numeric values, you can actually add the values together. In other words, you could use «50» instead of «48 + 2». After the code line is executed, J will be equal to a value that indicates which button was clicked. In doing your testing to see what J is equal to, it is best to use enumerations, but you could use values. Here are the possible return values:
| Value | Enumeration | Button Clicked | ||
|---|---|---|---|---|
| 1 | vbOK | OK | ||
| 2 | vbCancel | Cancel | ||
| 3 | vbAbort | Abort | ||
| 4 | vbRetry | Retry | ||
| 5 | vbIgnore | Ignore | ||
| 6 | vbYes | Yes | ||
| 7 | vbNo | No |
Should you use values or enumerations with MsgBox? It really boils down to personal preference, but there are two major advantages to using enumerations. First, when you are typing the VBA code, the editor automatically offers «hints» as to the available enumerations. Second, the enumerations are more descriptive in your code, meaning you can more easily see what their effect is within MsgBox. Third, the enumerations protect you against any possible changes that Microsoft may make to how MsgBox works in the future. This isn’t to say that Microsoft will make changes; the values shown in this tip have been static for years. But if they do change the values, the enumerations will continue to work because Microsoft simply changes the meanings of the enumerations behind-the-scenes.
If you would like to know how to use the macros described on this page (or on any other page on the WordTips sites), I’ve prepared a special page that includes helpful information. Click here to open that special page in a new browser tab.
WordTips is your source for cost-effective Microsoft Word training.
(Microsoft Word is the most popular word processing software in the world.)
This tip (8931) applies to Microsoft Word 2007, 2010, 2013, 2016, 2019, and Word in Microsoft 365. You can find a version of this tip for the older menu interface of Word here: Using Message Boxes.
Author Bio
With more than 50 non-fiction books and numerous magazine articles to his credit, Allen Wyatt is an internationally recognized author. He is president of Sharon Parq Associates, a computer and publishing services company. Learn more about Allen…
MORE FROM ALLEN
Printing Comments
Comments can be a boon when you want to annotate your worksheets. If you want, you can instruct Excel to print the …
Discover More
Protecting a Graphic
Need to make sure that someone cannot delete a graphic in a worksheet? The ability to protect the graphic depends on …
Discover More
Using the COLUMN Function
Need to know the column number for use in a formula? The worksheet function you want is the COLUMN function, described in …
Discover More
You can add, copy, or delete text boxes in your Microsoft Office applications. A text box lets you add text anywhere in your file. For example, you can create pull quotes or sidebars that call attention to important information. For Word, see Add, copy, or remove a text box in Word.
Add a text box
To learn how to add a text box, select an application from the drop-down list.
-
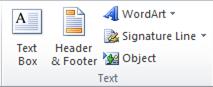
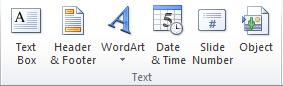
On the Insert tab, in the Text group, click Text Box.

-
In the worksheet, click and drag to draw the text box the size that you want.
-
To add text, click inside the box and type or paste your text.
Notes:
-
To format text in the text box, select the text, and then use the formatting options in the Font group on the Home tab.
-
To position the text box, click it, and then when the pointer becomes crossed arrows (
), drag the text box to a new location. -
You can also change or remove a border from a text box or shape.
-
 ), drag the text box to a new location.
Top of page
-
Click in the body of an open email message.
-
On the Insert tab, in the Text group, click Text Box, and then click Draw Text Box.
-
Click and drag in the message body to draw a text box the size that you want.
-
To add text, click inside the box and type or paste your text.
Notes:
-
To format text in the text box, select the text, and then use the formatting options in the Basic Text group on the Message tab.
-
To position the text box, click it, and then when the pointer becomes a
, drag the text box to a new location. -
To control how text wraps around the box, click Layout Options
, and then select an option from the list.
-
You can also change or remove a border from a text box or shape.
-
 , and then select an option from the list.
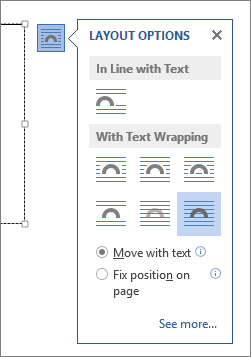
Top of page
-
On the Insert tab, in the Text group, click Text Box.
-
Click in the presentation, and then drag to draw the text box the size that you want.
-
To add text, click inside the box and type or your paste text.
If you aren’t using a mouse
-
Press Alt+N to go to the Insert tab.
-
Use the arrow keys to move to the Text Box button.
-
Press Ctrl+Enter to add the text box to your slide, then type your text.
Notes:
-
To format text in the text box, select the text, and then use the formatting options in the Font group on the Home tab.
-
To position the text box, click it, and then when the pointer becomes a
, drag the text box to a new location. -
You can also change or remove a border from a text box or shape.
-
Top of page
-
In a project with a Gantt chart, click the Format tab and click Drawing.
-
Click Text Box, and then drag in the Gantt chart to draw the text box to the size you want.
-
To add text, click inside the box and type or paste your text.
Notes:
-
To format text in the text box, select the text, click the Task tab, and use the formatting options in the Font group.
-
You can also change or remove a border from a text box or shape.
-
Copy a text box
-
Click the border of the text box that you want to copy.
-
Press Ctrl+C.
Note: Make sure the pointer is on the border of the text box, not inside it. If the pointer is inside, pressing Ctrl+C will copy the text, not the text box.
-
Select a location and press Ctrl+V to paste the text box.
Delete a text box
-
Click the border of the text box that you want to delete, and then press Delete.
Note: Make sure the pointer is on the border of the text box and not inside it. If the pointer is inside the box, pressing Delete will delete the text inside the text box, not the box.
Add a text box
To learn how to add a text box, select an application from the drop-down list.
-
On the Insert tab, in the Text group, click Text Box.
-
Click in the worksheet, and then drag to draw the text box the size that you want.
-
To add text to a text box, click inside the text box, and then type or paste text.
Notes:
-
To format text in the text box, select the text, and then use the formatting options in the Font group on the Home tab.
-
To position the text box, click it, and then when the pointer becomes a
, drag the text box to a new location. -
You can also change or remove a text box or shape border.
-
Top of page
-
Click in the body of an open email message.
-
On the Insert tab, in the Text group, click Text Box, and then click Draw Text Box.
-
Click and drag in the message body to draw a text box the size that you want.
-
To add text, click inside the box and type or paste your text.
Notes:
-
To format text in the text box, select the text, and then use the formatting options in the Basic Text group on the Message tab.
-
To position the text box, click it, and then when the pointer becomes a
, drag the text box to a new location. -
To control how text wraps around the box, click Layout Options
, and then select an option from the list.
-
You can also change or remove a border from a text box or shape.
-
Top of page
-
On the Insert tab, in the Text group, click Text Box.
-
Click in the presentation, and then drag to draw the text box the size that you want.
-
To add text to a text box, click inside the text box, and then type or paste text.
Notes:
-
To format text in the text box, select the text, and then use the formatting options in the Font group on the Home tab.
-
To position the text box, click it, and then when the pointer becomes a
, drag the text box to a new location. -
You can also change or remove a text box or shape border.
-
Top of page
Copy a text box
-
Click the border of the text box that you want to copy.
-
On the Home tab, in the Clipboard group, click Copy
.Make sure that the pointer is not inside the text box, but rather on the border of the text box. If the pointer is not on the border, pressing Copy will copy the text inside the text box and not the text box.
-
On the Home tab, in the Clipboard group, click Paste.
 .
.
Delete a text box
-
Click the border of the text box that you want to delete, and then press DELETE.
Make sure that the pointer is not inside the text box, but rather on the border of the text box. If the pointer is not on the border, pressing DELETE will delete the text inside the text box and not the text box.
Add a text box
To learn how to add a text box, select an application from the drop-down list.
-
On the Insert tab, in the Text group, click Text Box.
-
Click in the worksheet, and then drag to draw the text box the size that you want.
-
To add text to a text box, click inside the text box, and then type or paste text.
Notes:
-
To format text in the text box, use the formatting options in the Font group on the Home tab.
-
To position the text box, click it, and then when the pointer becomes a
, drag the text box to a new location. -
You can change or remove a border from a text box or shape or add a fill or effect to a shape or text box.
-
Top of page
-
In an e-mail message, on the Insert tab, in the Text group, click Text Box, and then click Draw Text Box.
-
Click in the e-mail message, and then drag to draw the text box the size that you want.
-
To add text to a text box, click inside the text box, and then type or paste text.
Notes:
-
To format text in the text box, use the formatting options in the Font group on the Format Text tab.
-
To position the text box, click it, and then when the pointer becomes a
, drag the text box to a new location. -
You can change or remove a border from a text box or shape or add a fill or effect to a shape or text box.
-
If you have drawn multiple text boxes, you can link them together so that text will flow from one box to another. Click one of the text boxes and then under Text Box Tools, on the Format tab, in the Text group, click Create Link.
-


Top of page
-
On the Insert tab, in the Text group, click Text Box.
-
Click in the presentation, and then drag to draw the text box the size that you want.
-
To add text to a text box, click inside the text box, and then type or paste text.
Notes:
-
To format text in the text box, use the formatting options in the Font group on the Home tab.
-
To position the text box, click it, and then when the pointer becomes a
, drag the text box to a new location. -
You can change or remove a border from a text box or shape or add a fill or effect to a shape or text box.
-
Top of page
Copy a text box
-
Click the border of the text box that you want to copy.
-
Right-click and select Copy from the menu.
Make sure that the pointer is not inside the text box, but rather on the border of the text box. If the pointer is not on the border, pressing Copy will copy the text inside the text box and not the text box.
-
Place your cursor where you want the copied text box to be, right-click, and then click Paste.
Delete a text box
-
Click the border of the text box that you want to delete, and then press DELETE.
Make sure that the pointer is not inside the text box, but rather on the border of the text box. If the pointer is not on the border, pressing DELETE will delete the text inside the text box and not the text box.
-
To delete multiple check boxes at the same time, hold down CTRL, and click the border of each text box in turn, and then press DELETE.
-
To delete a text box but save the text inside it, select the text inside the text box, and then press CTRL+C to copy the text onto the clipboard before you delete the text box.
-
1
Click the Insert tab.
-
2
On the right side of all of the things you can insert, look for ‘Text Box.’
Advertisement
-
3
Select the text box that you want to use and double click on it.
-
4
Cut and paste the text into the text box.


Advertisement
Ask a Question
200 characters left
Include your email address to get a message when this question is answered.
Submit
Advertisement
Video
-
To change the size of the text box, click on it once, and drag one of the 8 circles.
-
You can change the design of the text box you have selected by going into the format tab.
Thanks for submitting a tip for review!
Advertisement
About This Article
Thanks to all authors for creating a page that has been read 98,464 times.
Is this article up to date?
wikiHow Tech Help Pro:
Level up your tech skills and stay ahead of the curve
Let’s go!
Zack Mayo
-
#1
I am not a programmer but need to have a Word template display a message box
when the user clicks the print button. Can this be done. I need the box to
inform them that they need to have the form signed before it is faxed.
Any info would be great..
Advertisements
Jay Freedman
-
#2
Zack said:
I am not a programmer but need to have a Word template display a
message box when the user clicks the print button. Can this be done.
I need the box to inform them that they need to have the form signed
before it is faxed.Any info would be great..
See http://word.mvps.org/FAQs/MacrosVBA/InterceptSavePrint.htm. In step 4 of
the procedure, you can insert a MsgBox statement before the print command,
like this:
Sub FilePrint()
‘
‘ FilePrint Macro
‘ Prints the active document
‘
MsgBox «You must have the form signed before it is faxed.»
Dialogs(wdDialogFilePrint).Show
End Sub
Do the same for the FilePrintDefault command, which is what runs when you
click the Print button on the toolbar.
Zack Mayo
-
#3
It seemed to work pretty good until I saved it as a template. Should that
make a difference?
Jay Freedman
-
#4
Hi Zack,
If you stored the macro in the template, and then you used File > New to
make a new document based on that template, the macro will still work.
Can you give me a complete description of the steps you did, starting with
making the macros, and what you saw?
Are you sure the macro is in the template? Here are two ways to tell:
— Open the Tools > Macro > Macros dialog. Set the «Macros in» box to the
name of the template. Do the FilePrint and FilePrintDefault macros appear in
the list?
— Open the macro editor (Alt+F11). If you don’t see the Projects pane on the
left, press F4. Find the project with the template’s name next to it. If
necessary, click the + sign to expand that icon. Expand the Modules icon
under that. There should be a NewMacros icon there — double-click it. Does
the code of the macros appear in the editing window on the right?
Zack Mayo
-
#5
They are there. I get the following error when I hit print:
The macros in this project are disabled. Please refer to the online help or
documentation of the host application to determine how to enable macros.
Thanks for your help.
Advertisements
Jay Freedman
-
#6
Look in the Tools > Macro > Security dialog, on the Trusted Sources tab.
Check the box for «Trust all installed add-ins and templates». Then make
sure the template is stored in the Templates folder (the one indicated in
the Tools > Options > File Locations dialog as the «User Templates»
location), which is a trusted location.