
ELSEVIER LIMITED
Get started with the add-in:

Open in Word
This add-in works in: Word on iPad, Word 2016 or later on Windows, Word 2016 or later on Mac, Word on the web.
If you don’t have the above, try using Office Online.
Can’t find the add-in within Office
Enable editing, trust the add-in and look for the add-in in the insert tab under ‘My Add-ins’. Click here for step by step instructions
Need more help
For more on install Office add-ins, view our help documentation.
Last Updated on December 12, 2022
For those of you who want to use Mendeley as a citation software, but don’t know how to install it, this article will help you to install it easily. Mendeley is well-liked by many writers. Because one of the advantages is that you can use it for free, aka free of charge.
Read Also Introduction to Mendeley Citation Software
Mendeley has two types of platforms namely Web-based and Desktop-based. But, it requires users to sign up or register first before using this application. The benefit of having an account at Mendeley is that the data or paper that we put in Mendeley will be stored in the cloud. Therefore, it can be accessed through a computer or laptop or an application on a smartphone.
Here are the steps you need to do to install Mendeley Desktop:
Mendeley Desktop is no longer available for download as of 1st September 2022. You may consider using Mendeley Reference Manager instead. Fortunately, if you have Mendeley Desktop installed, you can still sign in and use it as usual. For more information, see https://blog.mendeley.com
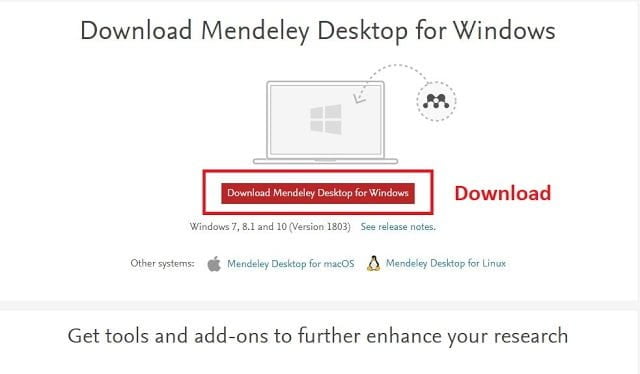
To download Mendeley Desktop, please visit Mendeley’s official website. Mendeley provides three operating systems on PCs that are compatible with this software, such as Windows 7, 8, and 10 (Version 1803), macOS, and Linux.
Next, install the software that you have downloaded. Then, wait for about one to 5 minutes until Mendeley has finished installing. Because it’s free, you don’t need to enter any serial key.
Log in to Mendeley Desktop
The first step that must be done before you can use Mendeley Desktop is to log in. Enter your email and password to start using Mendeley Desktop. The display of the Mendeley Desktop Login page is shown in Figure 4.
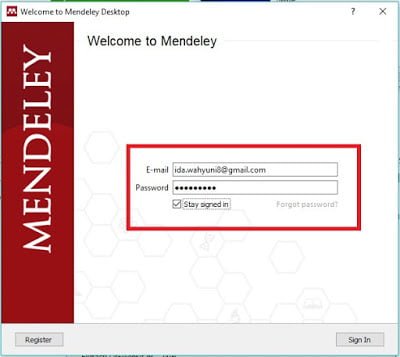
If you don’t have a Mendeley account, you must Register or Sign Up first. The way is to click the Register button in the lower-left corner. Then you will be directed to register via the Mendeley website. Next, enter the email you registered as an account and follow the next registration step. The display of the Mendeley register page is shown in Figure 4.
After completing registration, you will have a Mendeley account on the web and that account will sync with the account that we have on Mendeley Desktop. After having an account you can log in by entering the email and password that you created when registering (See Figure 2). The detail is shown in Figure 5.
Import File to Mendeley
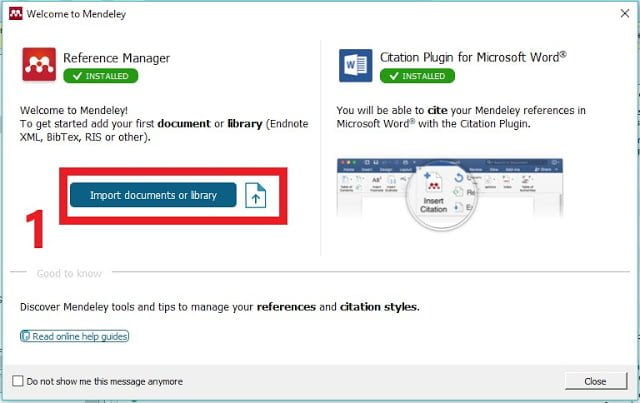
If you can enter Mendeley Desktop, the first step you need to do is insert a paper file, book, or other sources that you will refer to. You can see this in the initial appearance of Mendeley Desktop. It has been explained how to import files. You just need to select the Import Document or Library button and then select the file you want to add. Besides documents, you also can import libraries from Endnotes, XML, BibTex, RIS, and others. See Figure 6 for more detail.
Note:
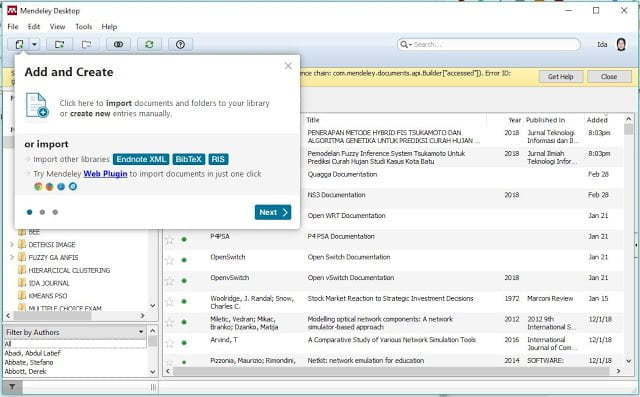
You can add more files after logging in. The way is easiest, is select Add File Icon or follow the instruction in Add and Create comment box. After that select the reference you want to add to Mendeley. See Figure 7 for more detail.
Install Mendeley Citation Plugin for Microsoft Word
The main benefit of Mendeley is it can cite references quickly. So, you don’t need to type references at the end of the paper or thesis manually. Other than that, the software provides a plugin for integration into Microsoft Word. But, the plugin is not automatically installed. You need to install it manually. Just follow the instructions here when you first log in to Mendeley and select >> Install Now. For more detail see Figure 8.

Note:
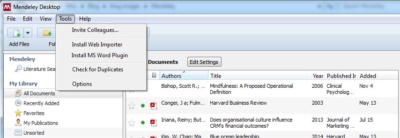
If you skip this step and haven’t had the time to install the Microsoft Word plugin, you can follow these steps: Select Tools menu >> Install MS Word Plugin. For more information see Figure 9.
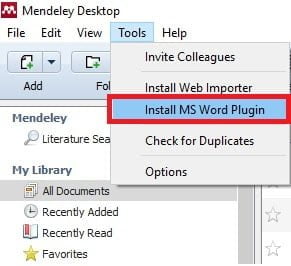
Note: Close all Microsoft Word applications when installing the Mendeley MS Word Plugin.
Then, you can start doing citations with Mendeley.
Read Also: Tutorial on Insert Citation and Bibliography Using Mendeley Desktop
Troubleshooting
Unable to install the Microsoft Word Plugin
For those who are unable to install the Microsoft Word Plugin, Mendeley was not able to find MS word, ActiveX runtime error 429, or other errors when installing the plugin, you might be able to use one of the following methods.
Method 1
This is the easiest method. I assume Mendeley is already installed on your computer. Then:[1]
- Open Ms. Word, click
File->Options->Add-Ins - At the bottom, in the
Manageoption, selectWord Add-ins, then clickGo... - After that, on the
Templatestab, in the Global templates and add-ins option, clickAdd... - Go to C:Program Files (x86)Mendeley DesktopwordPlugin
- Select the “Mendeley-x.xx.x.dotm” file (xx is the plugin version), then click
Open - Then on the
Templatestab, when the Mendeley file loaded, clickOK. - After that, try to check
Referencesmenu, whether theMendeley Cite-O-Maticmenu already exists.
Method 2
Before starting, we need to display hidden files and folders in settings. In the menu of Windows Explorer, click View -> Options -> Change folder and search options -> select the View tab -> Hidden files and folders -> select Show hidden files, folders, and drives. Then:[2]
- First, uninstall the Mendeley Desktop from your computer.
- Download the latest version of Mendeley from the Mendeley site (if you haven’t)
- Reinstall the latest version of Mendeley Desktop
- Then open Mendeley, click
tool->install MS word plugin - After that, please open C:Users[YourUserName]AppDataRoamingMicrosoftWordStartup. Or you can search on C:Program Files (x86)Mendeley DesktopwordPlugin
- Copy the “Mendeley-x.xx.x.dotm” file (xx is the plugin version)
- Then paste it in C:Users[YourUserName]AppDataRoamingMicrosoftWordAutostart
- After that, open Ms. Word, try to check
Referencesmenu, whether theMendeley Cite-O-Maticmenu already exists.
Method 3
- First, uninstall the Mendeley Desktop from your computer.
- Download the latest version of Mendeley from the Mendeley site (if you haven’t)
- Reinstall the latest version of Mendeley Desktop
- Then open Mendeley, click
tool->install MS word plugin - Then, click again
tool->uninstall MS word plugin(we need this process) - After that, please open C:Program Files (x86)Mendeley DesktopwordPlugin
- Copy the “Mendeley-x.xx.x.dotm” file (xx is the plugin version)
- Then paste it in C:Users[YourUserName]AppDataRoamingMicrosoftAddIns (the user name on your computer)
- Then, again, open Mendeley, click
tool->install MS word plugin - After that, open Ms. Word, try to check
Referencesmenu, whether theMendeley Cite-O-Maticmenu already exists.
Alternate way to get mendeley-x.xx.x.dotm file
Some people may be looking for a way to download Mendeley’s dotm file. Commonly, by downloading from the Mendeley site and installing it, we can find Mendeley’s dotm file in the installation folder (usually in C:Program Files (x86)Mendeley DesktopwordPlugin). Then, if you can’t find it after installing Mendeley Desktop, the installer may be corrupted. By the way, you could get Mendeley’s dotm file using these steps:
- Download 7-zip and install it.
- Download the latest version of Mendeley from the Mendeley site
- Right-click on Mendeley’s installer file, then select
7-zip->Open archive - Go to
wordPluginfolder, then you will find the “Mendeley-x.xx.x.dotm” file inside.
Insert citation button missing
When installing the Mendeley word plugin, the Mendeley menu successfully appears in Microsoft Word. But when Microsoft Word was restarted, the Insert Citation button is missing. If you experience this, then you could try the following method:[3]
- Click the
Filemenu ->Options - Select
Trust Center->Trust Center Settings ... - Select
Enable all macrosthen clickOK - Restart the Microsoft Word
But there is a risk in using this method. If the Word file has a harmful macro script, it can have an impact on your computer. So you may need to check the file using an antivirus before opening it in Microsoft Word.
The api-ms-win-crt-stdio-l1-1.0.dll is missing
When installing the Mendeley Desktop, it completes successfully. But you may see an error when opening the Mendeley Desktop, such as “the program can't start because api-ms-win-crt-stdio-l1-1.0.dll is missing from your computer“.
If it is the case, then you need to download the Microsoft Visual C++ Redistributable for Visual Studio as follows:[4]
- x86: vc_redist.x86.exe
- x64: vc_redist.x64.exe
Then install both of them. However, if your computer is 32-bit, you may need to install only the x86 version.
Ms. Word crashes/hang when using Mendeley
This generally happens when you install the EndNote and Mendeley plugins on Ms. Word. If you have crash/hang issues when using Mendeley, try disabling EndNote:[5]
- Open the
Filemenu in Ms. Word, - Select
OptionsthenAdd-Ins, - In the
Add-inslist, at the bottom, selectCOM Add-insand then clickGo, - Uncheck
EndNote Cite While you Write, - Click
OK.
Uninstalling Mendeley plugin from Ms.Word
It is recommended to remove Mendeley Word plugin via Mendeley Desktop. You could go to Tools menu > Uninstall MS Word Plugin. However, when you uninstalled Mendeley Desktop, this MS Word plugin is not automatically removed. Hence, you need to remove it manually using the following steps[6]:
- Open Ms. Word,
- Go to
File->Options, then selectAdd-Ins, - Then in the add-ins list, click on Mendeley-x.xx.x.dotm. In this step, you will see the directory in which it is located.
- Open Windows Explorer and navigate to the folder mentioned above.
- Close all Ms. Word if any.
- Delete the Mendeley *.dot file.
- Try to reopen Ms. Word, and the plugin should no longer be loaded.
If you can’t find the aforementioned folder, you may need to display hidden files and folders in settings. In the menu of Windows Explorer, click View -> Options -> Change folder and search options -> select the View tab -> Hidden files and folders -> select Show hidden files, folders, and drives.
Author: Ida Wahyuni
Instagram Direct Message: @idawahyuni92
References
-
[1]
K. Teponnou, “How to fix ‘ Unable to install the Mendeley MS word plugin’ in few clicks.,” Youtube, Nov. 10, 2018. https://www.youtube.com/watch?v=RtzaHWd4d6U (accessed Mar. 19, 2018).
4. Как добавить приложение Mendeley Cite в Word
Mendeley Reference Manager позволяет создать и организовать библиотеку Ссылок на литературные источники, аудио- и видео- материалы, патенты и т.д.
В то же время, для вставки Ссылок в текст документов и автоматического создания списков литературы необходимо приложение Mendeley Cite для Word.
Приложение Mendeley Cite можно добавить в Word только из магазина приложений Microsoft AppSource (Office Store).
Чтобы подключить Mendeley Cite вам необходимо авторизоваться со своей учетной записью Microsoft в программе Word и на странице подключения.
К слову, учетную запись Microsoft можно зарегистрировать бесплатно.
Чтобы войти в учетную запись в программе Word в верхнем меню кликните на пункт Файл и в открывшейся панели внизу выберите пункт “Учетная запись”. Введите e-mail и пароль.

Чтобы подключить приложение Mendeley Cite нужно в программе Reference Manager выбрать пункты меню Tools -> Install Mendeley Cite for Microsoft Word.
Страница подключения откроется в браузере.
Также можно просто перейти в браузере по ссылке на страницу подключения Mendeley Cite.

Чтобы авторизоваться со своей учетной записью Microsoft кликните по иконке в правом верхнем углу страницы.

В открывшейся панели введите e-mail и пароль от учетной записи Microsoft.
После авторизации нажмите кнопку “Получить” под названием приложения Mendeley Cite.

В обновившемся окне нажмите кнопку “Открыть в Word” и подтвердите действие при запросе на открытие ссылки ms-word.

В Word должен открыться файл “Mendeley-Cite.docx” и на вкладке “Ссылки” должна появиться панель меню “Cite with Mendeley” с кнопкой “Mendeley Cite”.
Этот документ можно закрыть. Панель Mendeley Cite станет доступна во всех новых файлах.

Учтите, что панель меню “Cite with Mendeley” запускает приложение прямо в окне Word и это приложение Cite получает данные с сервера Mendeley и никак не взаимодействует с Mendeley Reference Manager.
Таким образом, происходит разделение: Reference Manager позволяет создать и организовать библиотеку Ссылок и отправляет все данные на сервер Mendeley.
Приложение Word “Mendeley Cite” получает данные о Ссылках с сервера Mendeley и позволяет вставлять ссылки в текст документа Word и автоматически создавать списки литературы.
Работа Reference Manager и Mendeley Cite возможна только при наличии интернет-соединения.
5. Как вставить цитаты и библиографию в документ Word с Mendeley Cite
Создайте новый документ Word с произвольным текстом.
На вкладке “Ссылки” в панели меню “Cite with Mendeley” нажмите кнопку “Mendeley Cite”.
Откроется боковая панель Mendeley Cite. Внизу панели нажмите кнопку “Get started”.
В открывшемся окне нужно ввести данные учетной записи Mendeley – e-mail и пароль.

В боковой панели Mendeley Cite активна вкладка References (Ссылки) и ниже загружаются ранее добавленные ссылки.

По умолчанию открывается полная коллекция Ссылок – в первом поле сверху указано All References. Можно кликнуть по этому полю и выбрать нужную Коллекцию (Collections).

Для того, чтобы вставить ссылку в текст документа Word можно использовать такую последовательность действий:
- Кликнуть по полю All References и выбрать нужную Коллекцию (Collections). Название активной Коллекции появится в этом поле.
- Кликнуть мышкой, чтобы установить флажок рядом с нужной Ссылкой (одной или несколькими).
- На панели в верхней части окна проверить, верно ли выбраны ссылки.
- Нажать кнопку “Insert citation” в нижней части окна.

Ссылка появится в том месте документа Word, в котором был установлен курсор.

6. Как создать список литературы по ГОСТ с помощью Стилей цитирования
Список литературы в Mendeley Cite можно создать автоматически. После того, как нужные ссылки расставлены по тексту:
- Поместите курсор в нужное место документа.
- Кликните по вкладке “More” (Дополнительно) в верхней части панели.
- Выберите “Insert Bibliography” – “Вставить библиографию”.

Ссылки и созданный список литературы будут оформлены в соответствии с инструкциями, прописанными в файле Стиля цитирования. По умолчанию установлен стиль American Psychological Association 7th ed.
Для замены Стиля на вкладке “Citation Settiungs” нажмите кнопку “Change citation stile”.

Откроется список установленных стилей. Нужно опуститься в низ списка и нажать на поле “Search for another style”

В окне поиска напишите слово “gost”.
В итоге программа найдет несколько стилей Russian GOST в репозитории.
Кликните на название подходящего стиля и он активируется.

Ссылки в тексте документа и Список литературы будут отформатированы в соответствии с инструкциями стиля.
Есть возможность изменить язык терминов, использованных при форматировании библиографии.
Для этого на той же панели кликните на поле “Change citation language” и выбирите English GB или другой язык.

Кроме того, вы можете дополнительно изменить форматирование Ссылок в тексте.
Если кликнуть на Ссылку в тексте, то в панели Cite появится сообщение о возможности редактирования Ссылки.
Кликните на образец Ссылки в панели Cite.

Откроются дополнительные опции редактирования Ссылки. Здесь вы можете указать номер страницы в литературном источнике для отображения вместе с Ссылкой.

В репозитории Mendeley содержатся только те Стили, которые прошли валидацию. В то же время, для оформления ссылок в соответствии с ГОСТ и на двух языках (Ru – En) требуется использование дополнительных переменных, с которыми Стили не проходят валидацию.
Тем не менее, невалидные стили успешно обрабатываются процессором Mendeley Desktop и надстройкой Cite-O-Matic. В этой устаревшей версии программы возможно оформление Ссылок более близкое к требованиям ГОСТ.
Skip to content
Installing the Mendeley Citation plugin for Word
To use Mendeley with Microsoft Word, you need to install the Citation plugin. This allows Word and your Mendeley account to exchange information and, most importantly, lets you drop citations into your text as you type.
From your Mendeley Desktop. Click ‘Tools’ > ‘Install MS Word Plugin’ and follow the instructions. That’s it!
Now, open MS Word. Windows users, the Mendeley plugin should now appear on your Word Ribbon within the References tab. Mine looks like this. Mac users will find their menu in the Add-ins tab.
Congratulations! You are now ready to start citing with Mendeley’s plug-in. Any problems at all, contact Kings Norton Library or MIRC or check out Mendeley’s support materials online.

A Business Librarian since 2009, Karen leads support for the Cranfield MBA courses, both full-time and Executive.
You might also like…

How to present well as a group
Karyn Meaden-Pratt2023-04-11T18:04:48+01:0013/04/2023|Tags: barrington, group projects, knl, presentation skills, SOMLibrary, study skills|
You will have put a lot of work into your research or project and want to show everyone what you have achieved or discovered, so you need to impart this knowledge as clearly as possible. …

Using DMPonline to write an effective data management plan
Greg Simpson2023-04-11T13:20:40+01:0011/04/2023|Tags: barrington, data management plan, knl, rdm, research data management, SOMLibrary|
We are running a Lunch+Learn webinar on using DMPonline on Wednesday 19 April, 1-2pm. A data management plan (DMP) is a written document that outlines how research data will be collected, organized, stored, shared, and …

NAC Women in Aviation Scholarship winner Prathibha Perumal speaks about her passion for aircraft and pursuing her dreams
Antonia Molloy2023-04-05T16:51:34+01:0005/04/2023|Tags: aerospace, aerospace industry, aerospace vehicle design, scholarship|
Prathibha Perumal is one of two recipients of the Nordic Aviation Capital (NAC) Women in Aviation Scholarship fund, in partnership with Cranfield University. Here Prathibha, who is studying for an MSc in Aerospace Vehicle Design, …

Changes to Library Services over Easter, 7-10 April
Karyn Meaden-Pratt2023-04-03T14:52:13+01:0003/04/2023|Tags: barrington, easter, knl, opening hours, SOMLibrary|
Libraries on the Cranfield site Both Kings Norton Library and the School of Management Library (Building 111, first floor) will be open 24/7 over the Easter weekend. You will be able to use the study …

Trace Evidence – How the smallest clues can make the largest difference at a crime scene.
Gareth Hall2023-03-30T13:31:11+01:0030/03/2023|Tags: cranfield forensic institute, forensic, Forensic Biology, Trace Evidence|
When arriving at a crime scene, there are often signs or physical evidence such as hairs, fibres or shards of material that are often integral to solving how a crime was committed or providing critical …

The Mendeley Word for Windows Plugin
This is the Mendeley Word for Windows plugin code, extracted from the template that they ship with
Word as of version 1.5.1 and distributed under the terms of the Educational Community License. It is
based on the Visual Basic code I wrote 5 years ago for Zotero.
In 2009, I rewrote
the Zotero Word for Windows plugin
in C++. That code is cleaner, more
versatile, and not written in Visual Basic, and is probably a better starting point for any free (as
in AGPL) reference mangement software looking to implement integration with Word. However, I provide
this code because it’s partly mine and it wants to be free. Mendeley has already used my code in a
proprietary product, so I think anyone should be able to.
Do not ask me for support or assistance. I will never touch this code again. If you are having
trouble with the Mendeley Word plugin, my advice is to switch to Zotero, but I’m biased 
This distribution includes the following modules and class modules from Mendeley-1.5.1.dotm:
- Mendeley
- MendeleyLib
- ZoteroLib
- EventClassModule
It does not contain the following modules, which lack an ECL copyright notice and, in the absence of
further information from Mendeley Ltd., are assumed to be closed source.
- MendeleyDataTypes
- MendeleyRibbon
- MendeleyUnitTests
- StyleListModel
Compatible versions of some of these files may be available in Mendeley’s
openoffice-plugin repository.
Copyright (c) 2009-2012 Mendeley Ltd.
Copyright (c) 2006 Center for History and New Media, George Mason University, Fairfax, Virginia, USA
Для чего нужен Mendeley?
Mendeley — библиографический менеджер компании Elsevier. Он нужен для хранения, в первую очередь, библиографических описаний, чтобы автор имел перед собой правильно размеченный каталог всех текстов (преимущественно статей и глав из книг), которые считает необходимыми для своей работы. Это важно по двум причинам: во-первых, так исследователь точно не забудет ни про какой из отобранных для работы текстов, сможет искать внутри своей выборки и классифицировать документы разными способами; во-вторых, это сильно сэкономит время и ресурсы, необходимые для оформления ссылок по нужным стандартам. В то же время, Mendeley может хранить полные тексты документов в формате PDF и позволяет их читать и комментировать, в том числе, в мобильном приложении Mendeley.
Кроме того, у Mendeley есть специальное расширение для MS Word и LibreOffice, которое позволяет автоматически ссылаться на документы и составлять библиографические списки по необходимым стандартам.
Как пользоваться этой инструкцией
Эта инструкция описывает самые необходимые функции Mendeley, то есть не является исчерпывающей. Если вы освоили базовый уровень и хотите узнать про расширенные функции, напишите нам на
Адрес электронной почты защищен от спам-ботов. Для просмотра адреса в вашем браузере должен быть включен Javascript.
. Все элементы содержания инструкции интерактивны. Все описываемые компоненты программы, которые вынесены на картинки, выделены бордовыми прямоугольниками.
Содержание
Установка программы и регистрация
Установка
Регистрация
Загрузка данных в Mendeley
Загрузка библиографических описаний
Загрузка полных текстов
Как можно систематизировать данные в Mendeley
Создание папок
Присвоение собственных ключевых слов (тегов)
Возможности поиска в Mendeley
Возможности для работы с полными текстами в Mendeley
Плагин для MS Word
Приложение для чтения с мобильных устройств
Установка программы и регистрация
Установка
Для установки программы необходимо зайти на официальный сайт Mendeley —
mendeley.com
— и нажать кнопку download в правом верхнем углу. После этого вы попадёте на страницу, где сможете выбрать версию для своей операционной системы. Mendeley адаптирован для Windows 7 и выше, MacOS и Linux. Если у вас не Windows, нажмите на название своей операционной системы и красная кнопка для скачивания изменится на нужную вам.
После загрузки нажмите на иконку с этим файлов на панели загрузок в вашем браузере или найдите установочный файл в папке с загрузками на вашем компьютере и запустите его. Вам нужна установка по умолчанию, поэтому просто нажимайте кнопки «Install», «Next» и «I accept».
Регистрация
Чтобы начать пользоваться Mendeley, нужно зарегистрироваться.
Важно! Mendeley принадлежит корпорации Elsevier, поэтому, если у вас уже есть аккаунт для сервисов Elsevier (скорее всего, для Scopus), то вам не нужно регистрироваться заново — нажмите на кнопку «Sign In», которая тоже находится в правом верхнем углу страницы, с которой вы скачивали установочный файл, и введите данные своей учётной записи Elsevier.
Если у вас нет такой учётной записи, нажмите на кнопку «Create a free account» — она находится в правом верхнем углу рядом с кнопкой «Sign In».

Рис. 1. Кнопка «Create a free account» для регистрации на сайте Mendeley (и, соответственно, в любых сервисах компании Elsevier, включая Scopus)
Затем заполните все необходимые поля. После этого вам на почту должно прийти письмо с ссылкой для подтверждения учётной записи. Нажмите на ссылку в письме — после этого вы сможете пользоваться своим аккаунтом в Mendeley и во всех остальных сервисах компании Elsevier (прежде всего, в Scopus).
Загрузка данных в Mendeley
Как мы уже упоминали, в Mendeley можно загружать две категории данных: библиографические описания и полные тексты.
Загрузка библиографических описаний
Существуют стандартизированные форматы хранения библиографической информации, которые позволяют программам вроде Mendeley, считывать эти данные и автоматически распределять по нужным полям (автор, название, год публикации и т.д.). Оптимальный вариант — скачивать эти данные в формате RIS (файлы с расширением .ris), потому что обычно там хранятся наиболее полные библиографические описания текстов. В большинстве баз публикаций (например, JSTOR или SpringerLink) существует возможность сохранять библиографические описания в таком формате, обычно на странице статьи есть кнопка со словом «cite», то есть «процитировать».
Чтобы добавить описание, сохранённое в файле формата RIS, в Mendeley, просто перетащите файл из папки на компьютере в основное окно Mendeley, и все данные автоматически появятся в нужных полях. На всякий случай проверьте корректность данных, иногда файлы с описаниями заполнены с ошибками или пропусками, но их всегда можно исправить вручную.
Чтобы исправить данные, нажмите на строку с нужным текстом в основном окне — после этого справа появится панель со всей доступной информацией о документе.
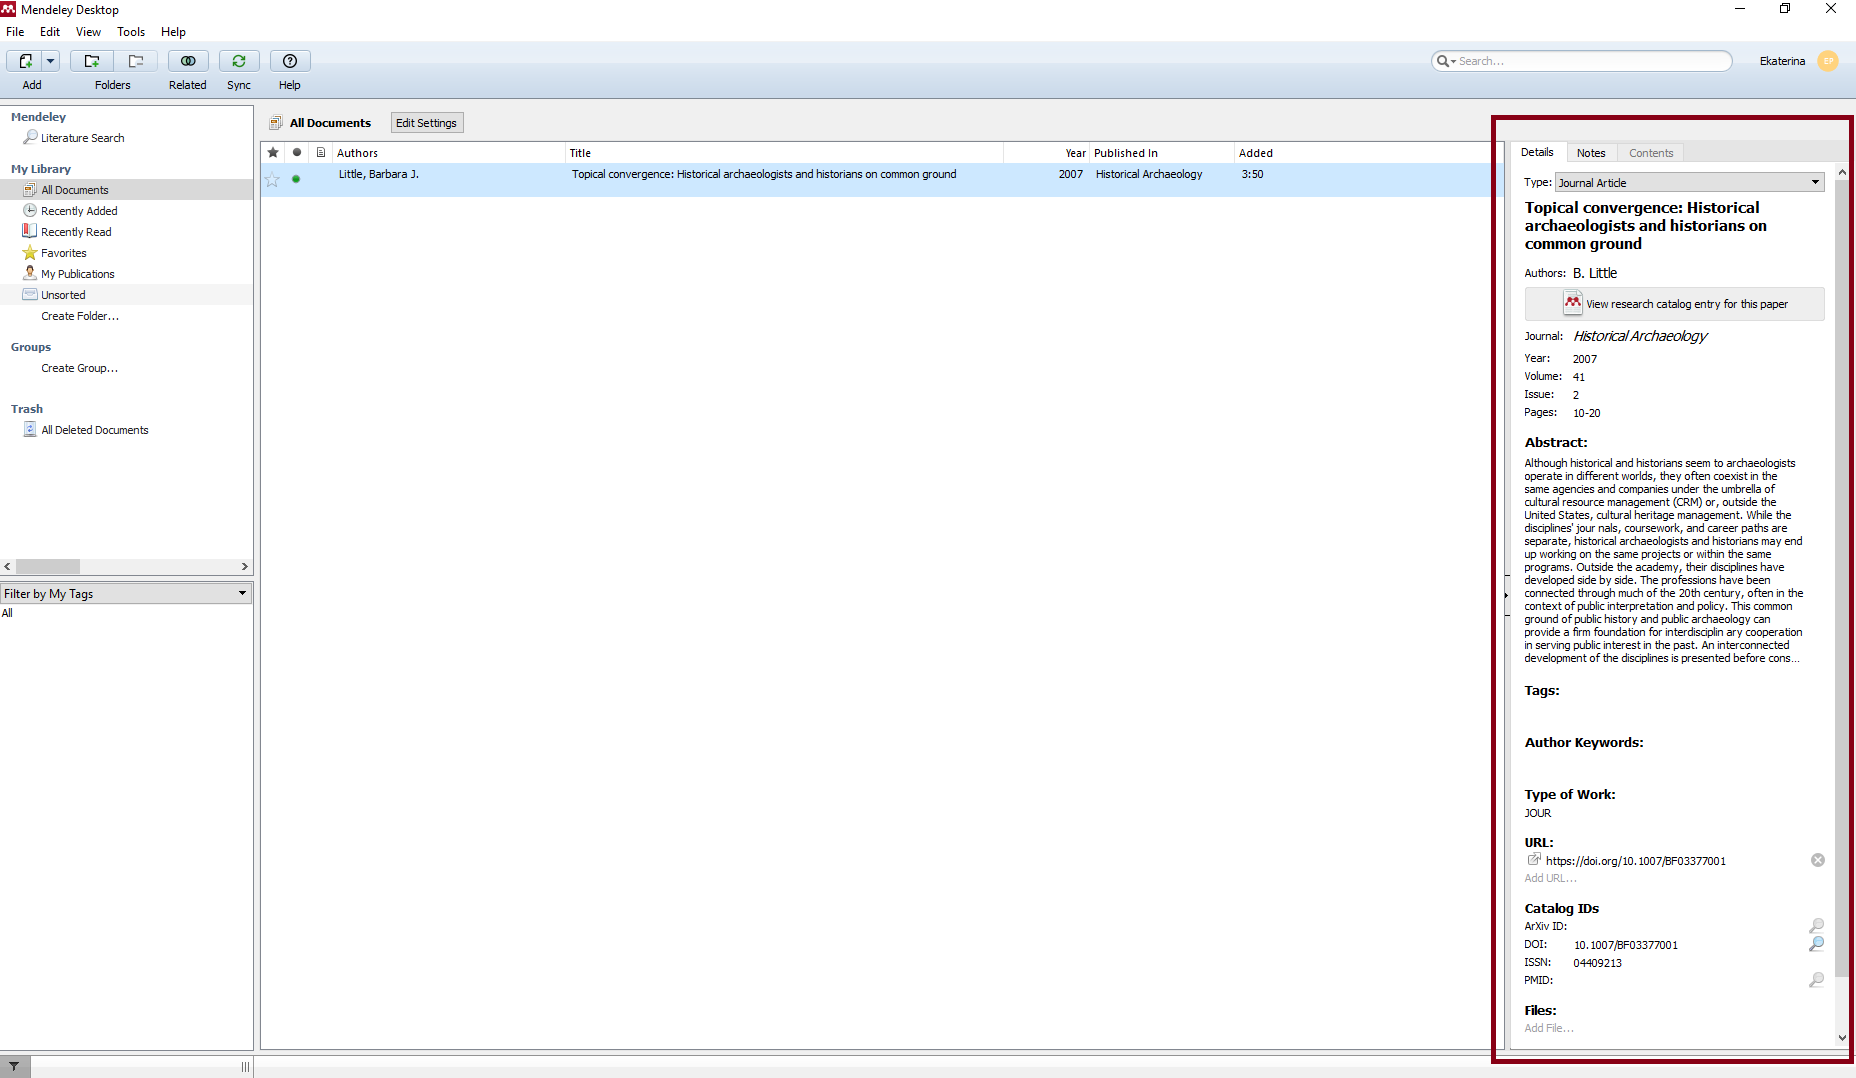
Рис. 2. Панель с описанием документа
Наведите курсор в область рядом с названием нужного поля — там появится серый прямоугольник, нажмите на него, чтобы открылся режим редактирования, внесите правки, после чего нажмите на любую область вне этого поля, чтобы выйти из режима редактирования.
Если вы хотите сохранить в своём списке библиографические данные текста, для которого вы не смогли найти описание в цифровом виде, вы можете ввести данные вручную, но это крайне редкий случай и лучше внимательно поискать данные в электронном виде. Тем не менее, на панели инструментов есть кнопка, открывающая окно для ручного ввода. Для этого нажмите на стрелку рядом с изображением документа с плюсом, которое находится в разделе «Add» во втором ряду верхней панели меню. После нажатия на стрелку появится список опций, выберите «Add Entry Manually» — после этого появится окно для ввода данных.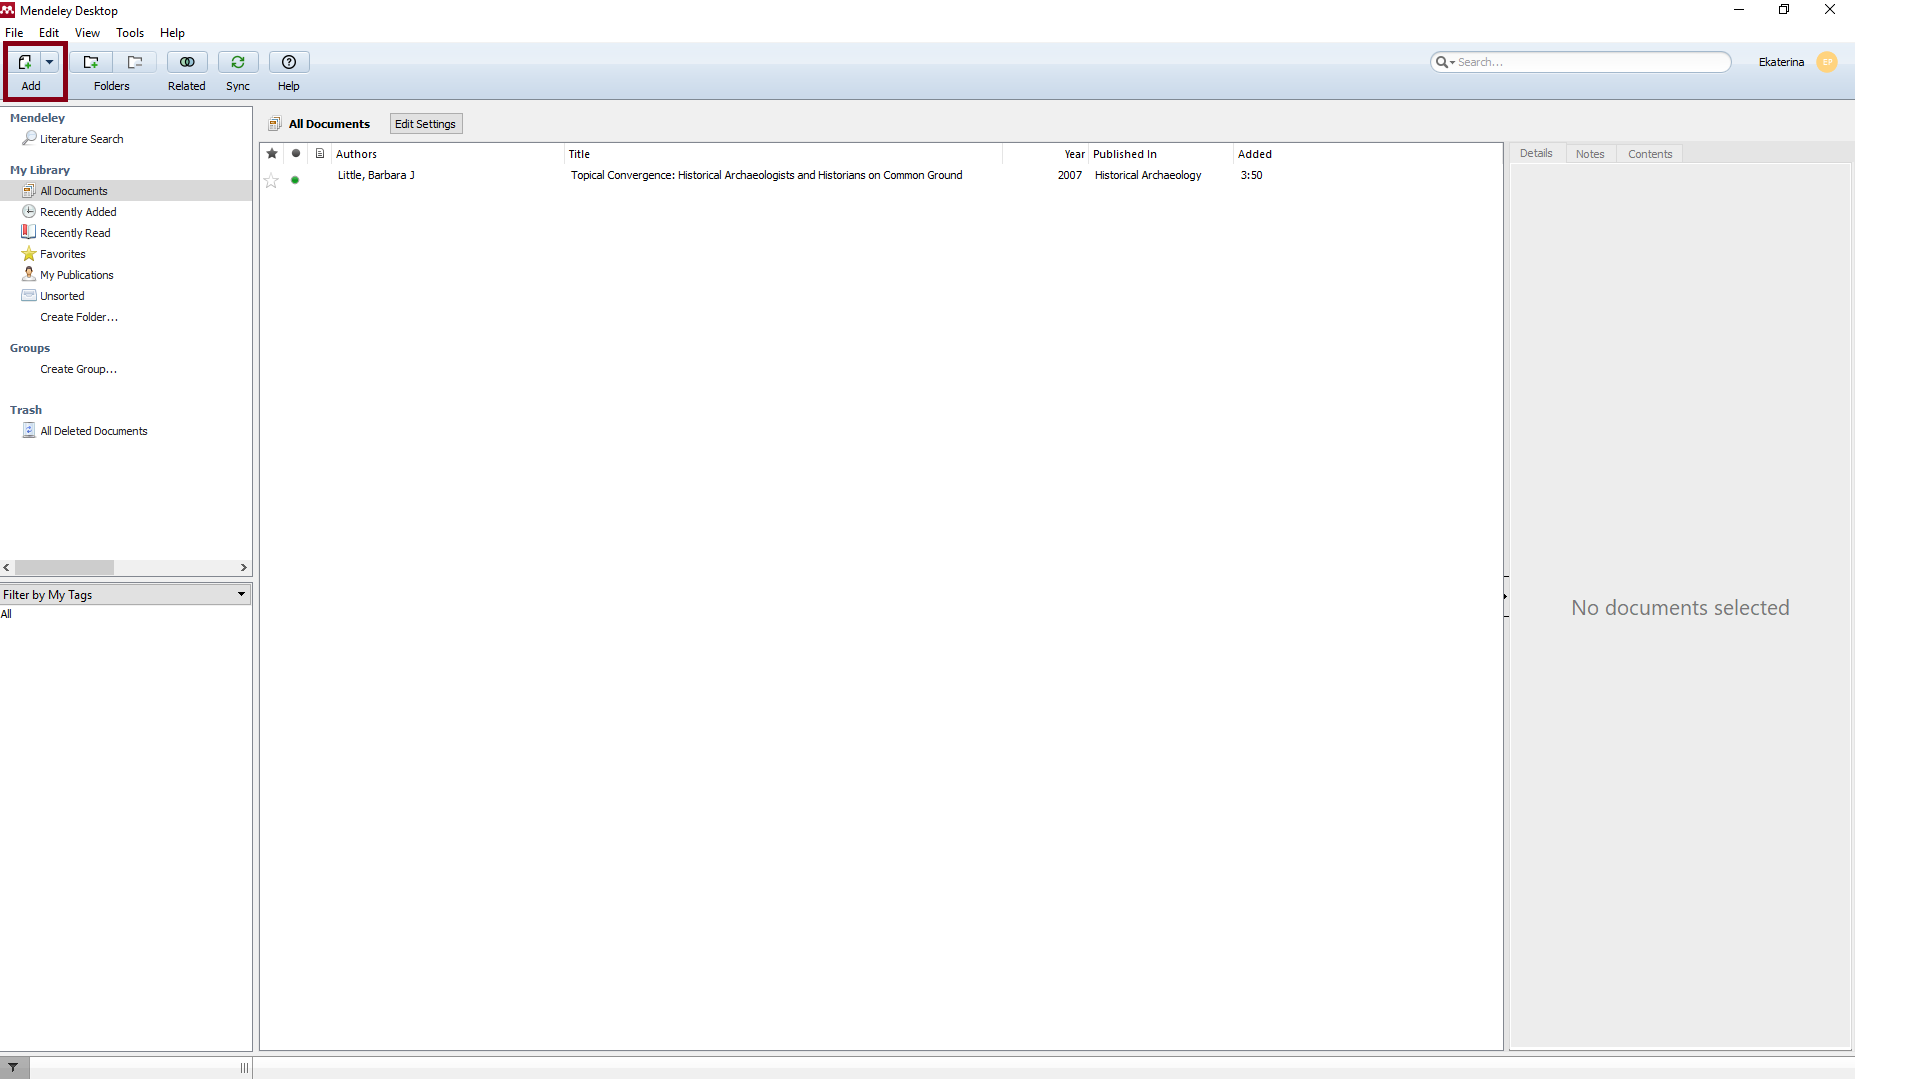
Рис. 3. Область, в которой находится кнопка для вызова поля ручного ввода данных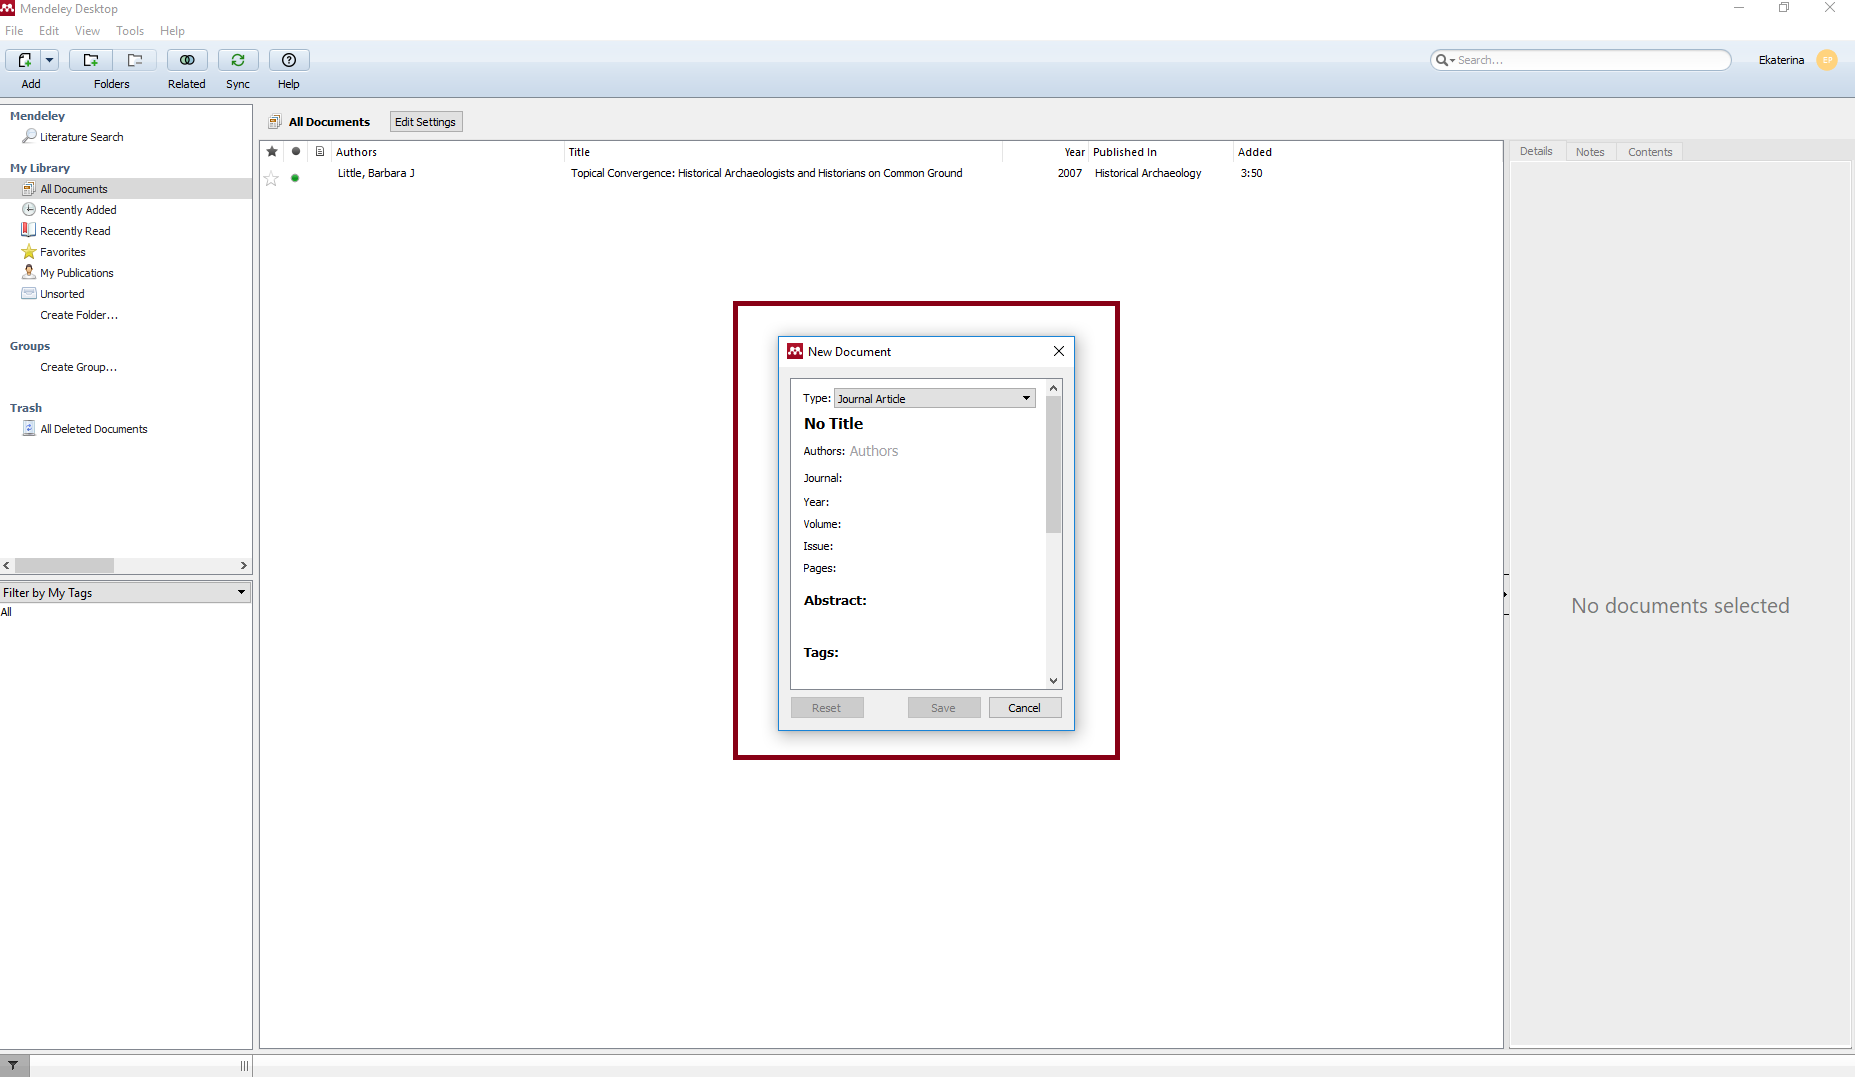
Рис. 4. Поле для ручного ввода данных
Загрузка полных текстов
В Mendeley можно загружать документы формата PDF, для этого нужно просто перетащить файл из папки, в которой он хранится на компьютере, в основное окно программы. В некоторых случаях Mendeley автоматически распознаёт, какой текст вы загрузили, тогда его библиографическое описание появится в основном окне в строке с этим документом. Если этого не произошло, вы можете отредактировать данные самостоятельно, как указано в предыдущем подразделе.
Как можно систематизировать данные в Mendeley
Создание папок
Если вы собираете тексты для нескольких разных задач или по нескольким разным обособленным темам, вы можете рассортировать их по папкам. Для этого создайте папку с помощью кнопки «Create Folder» на панели слева.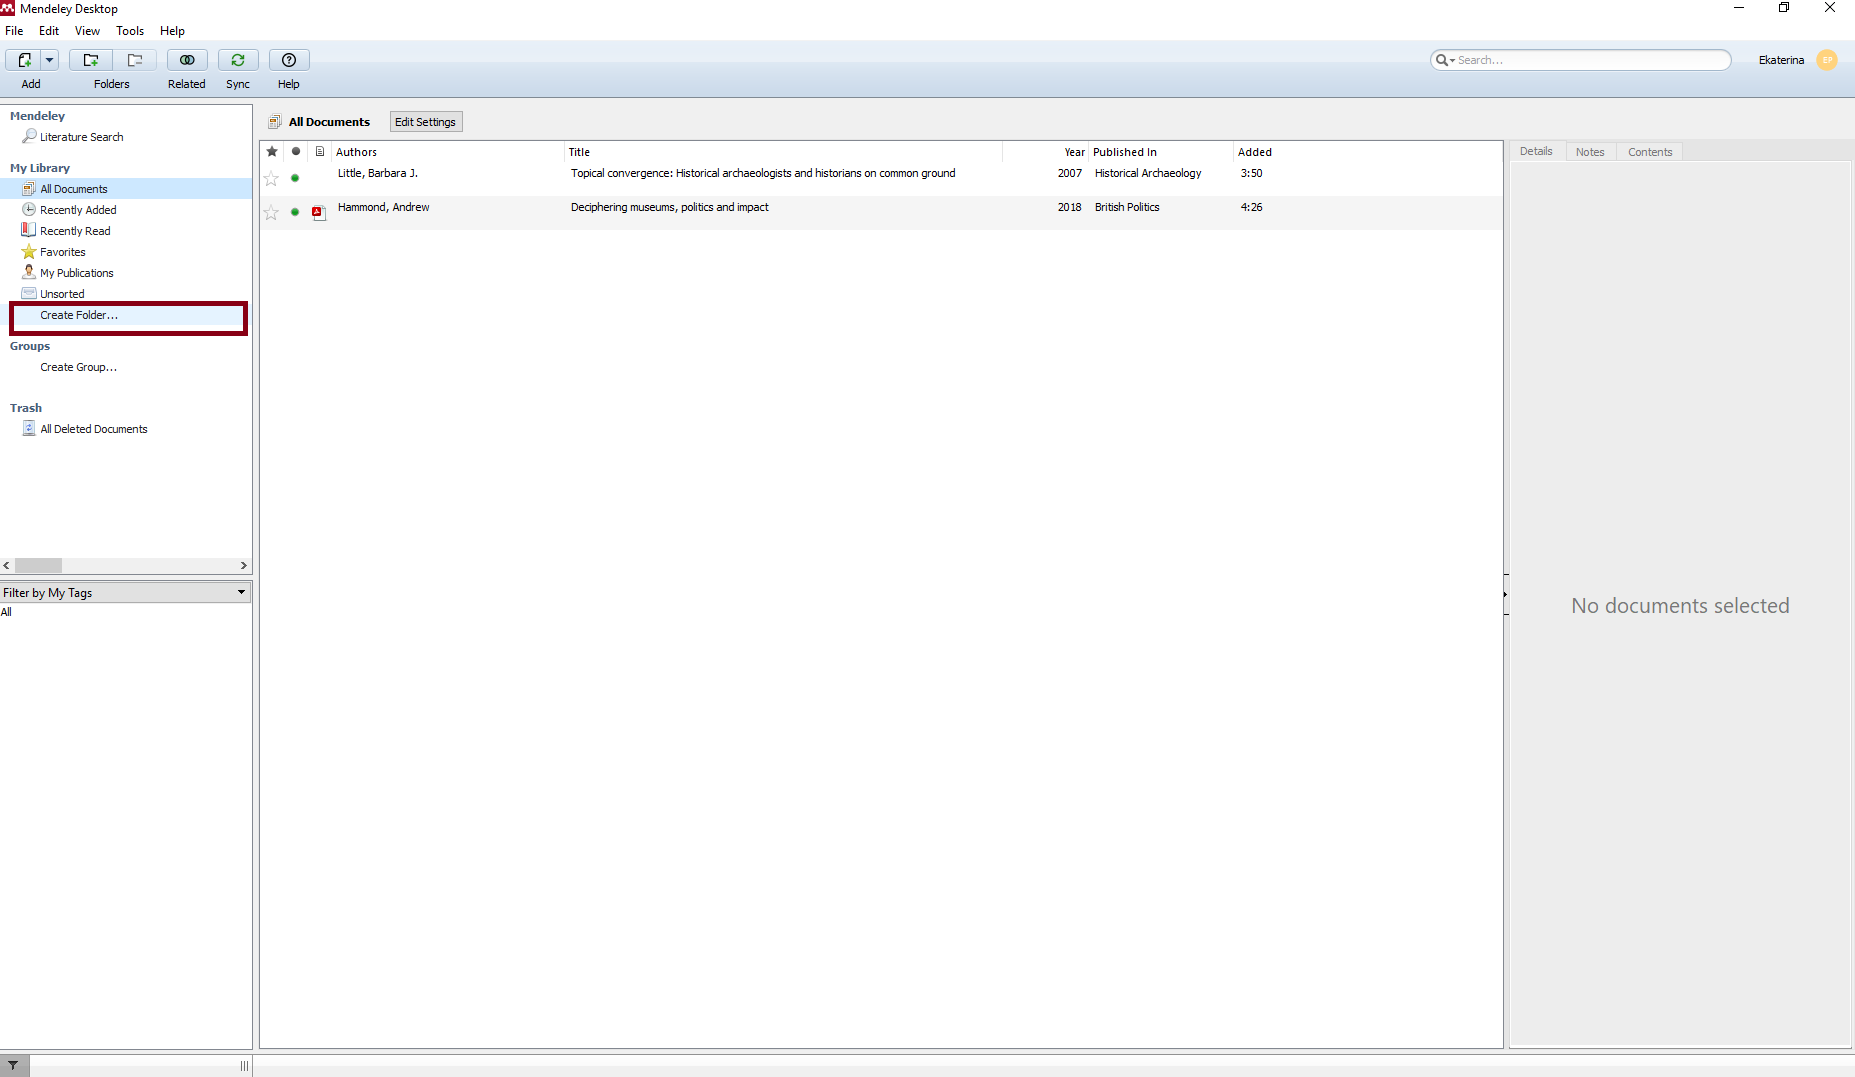
Рис. 5. Расположение кнопки «Create Folder» на панели слева
При нажатии на кнопку появится строка, в которую нужно ввести название папки, после чего нажать Enter. Если вы хотите создать ещё одну самостоятельную папку, повторите те же действия. Если вы хотите создать подпапку, в меню слева нажмите на папку, внутри которой она должна появиться, после этого нажмите на значок папки с плюсом в разделе «Folders» во втором ряду верхней панели меню.
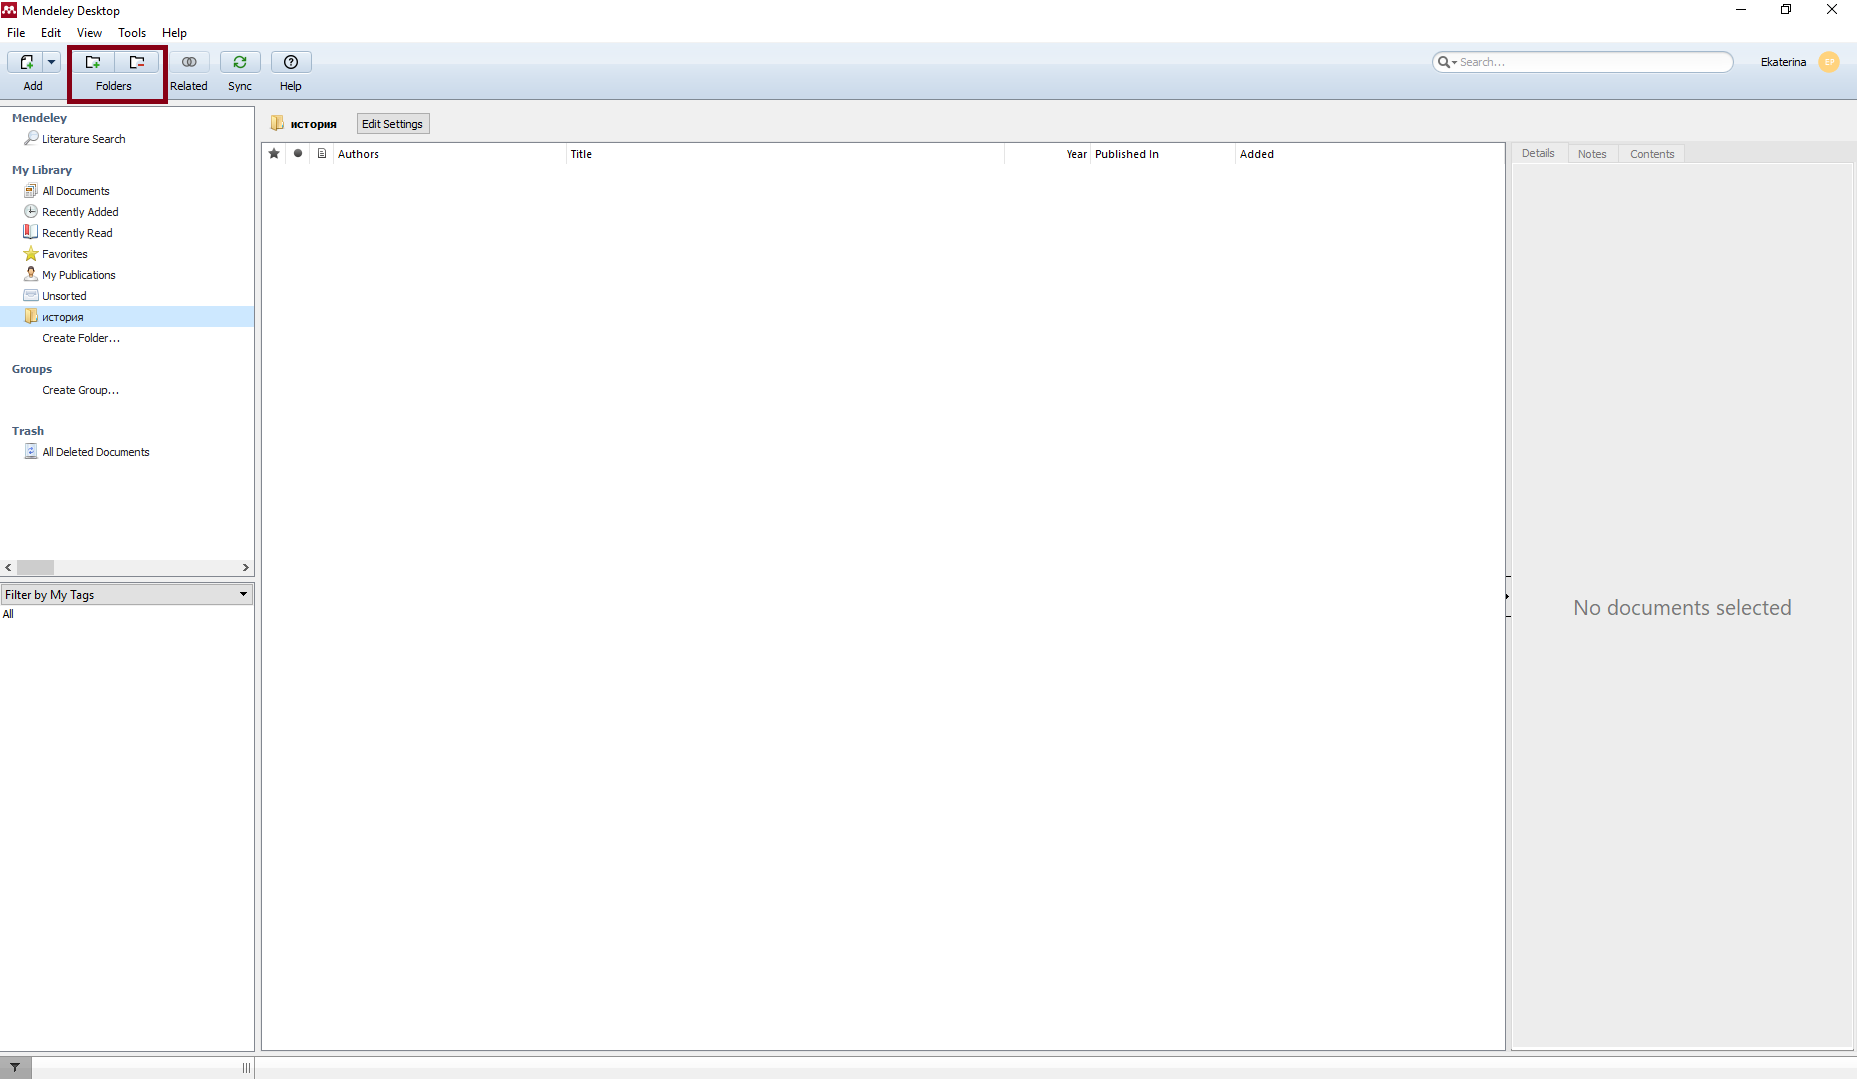
Рис. 6. Расположение кнопки для создания подпапки на панели инструментов
Чтобы добавить документ в папку, зайдите в «All documents» на панели слева, чтобы увидеть список всех ваших документов, найдите строку с документом, который вы хотите добавить в папку, и перетащите эту строку в нужную папку на левой панели.
Присвоение собственных ключевых слов (тегов)
Несмотря на то, что авторы сами присваивают статьям ключевые слова, они не всегда очевидно отображают содержание статьи или не включают категории, которые кажутся важными именно вам, поэтому вы можете размечать свою коллекцию самостоятельно, чтобы потом легко находить то, что вам нужно.
Ключевые слова, которые присвоил автор, отображаются в поле «Author keywords» на панели справа. Они подгружаются не всегда, в случае, если вы знаете, какие ключевые слова указывал автор, и вам важно их сохранить, впишите их самостоятельно, но не вписывайте сюда свои собственные ключевые слова, чтобы потом не запутаться.
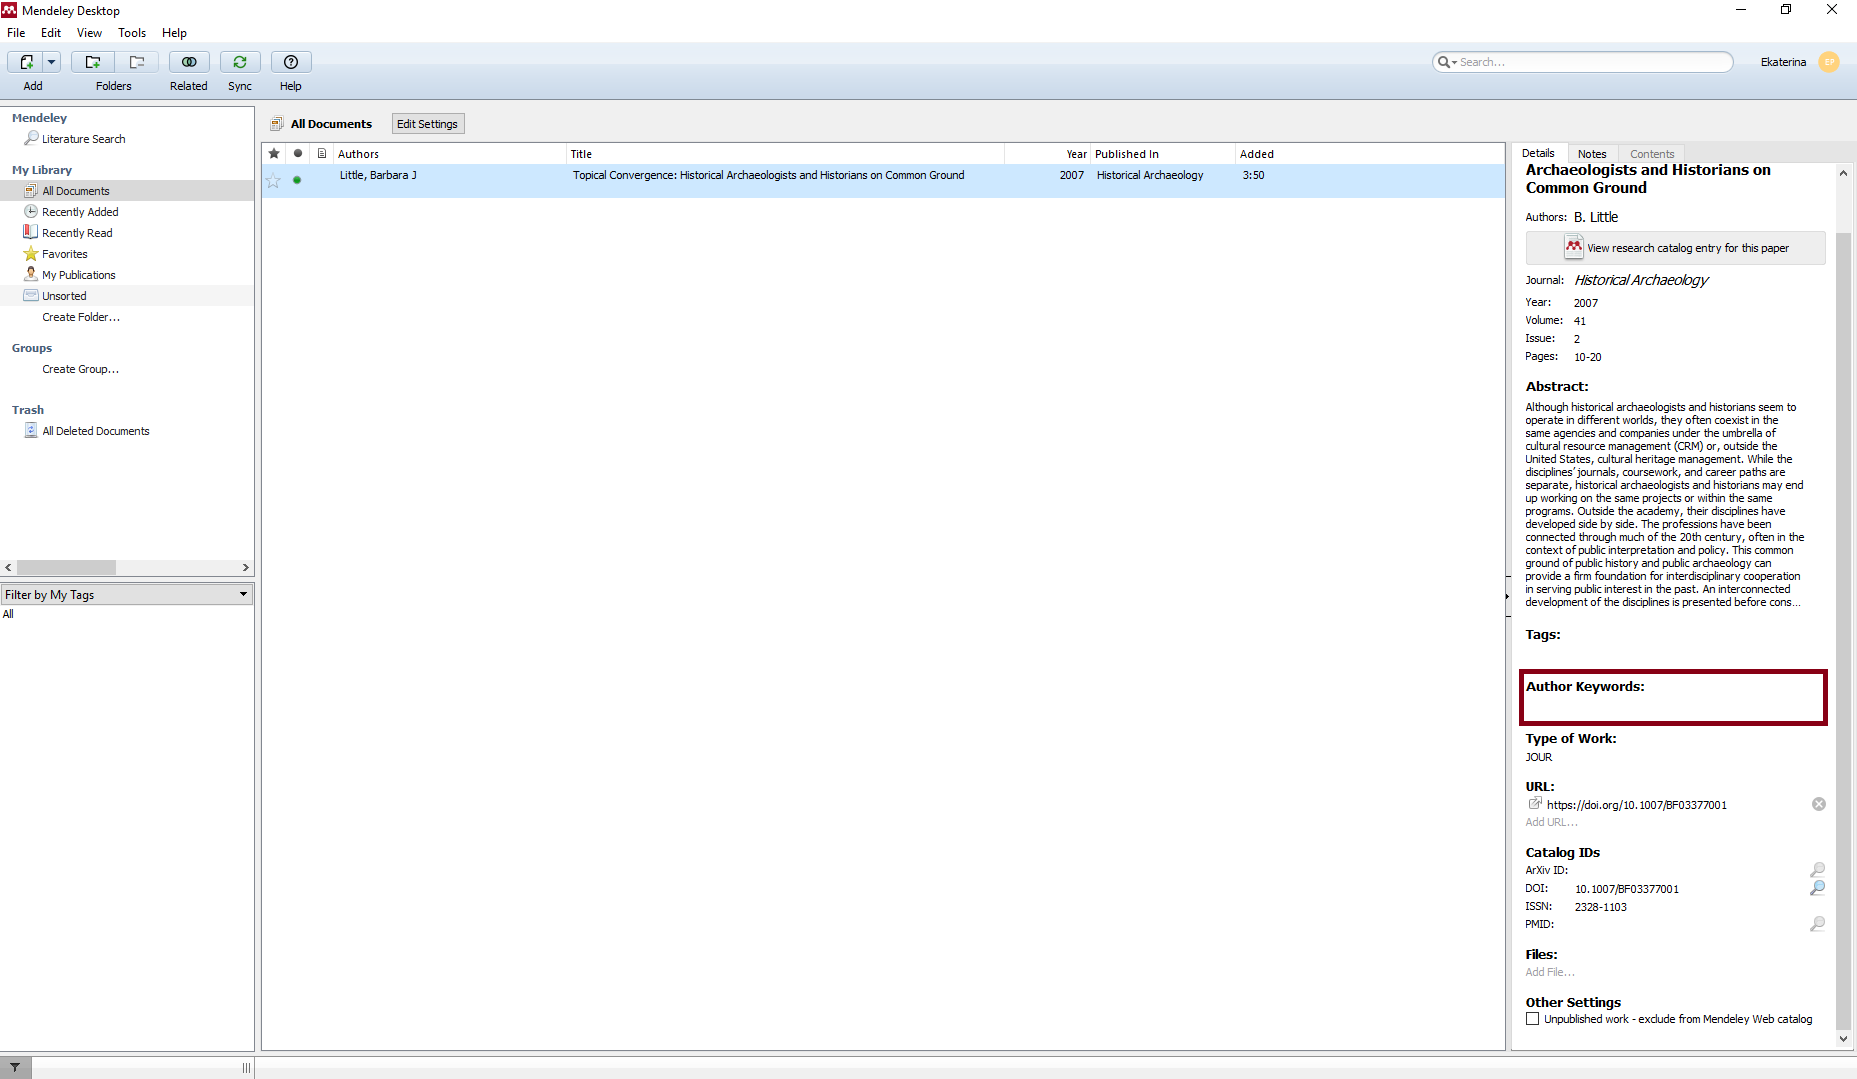
Рис. 7. Расположение поля «Author Keywords» на панели с описанием документа (справа)
Для ваших собственных ключевых слов существует поле «Tags», которое также находится на правой панели с описанием документа. Когда вы наведёте курсор на область под словом «Tags», вы увидите серую полоску — нажмите на неё и откроется режим редактирования этого поля. Если вы хотите присвоить тексту несколько ключевых слов, пишите их через точку с запятой.
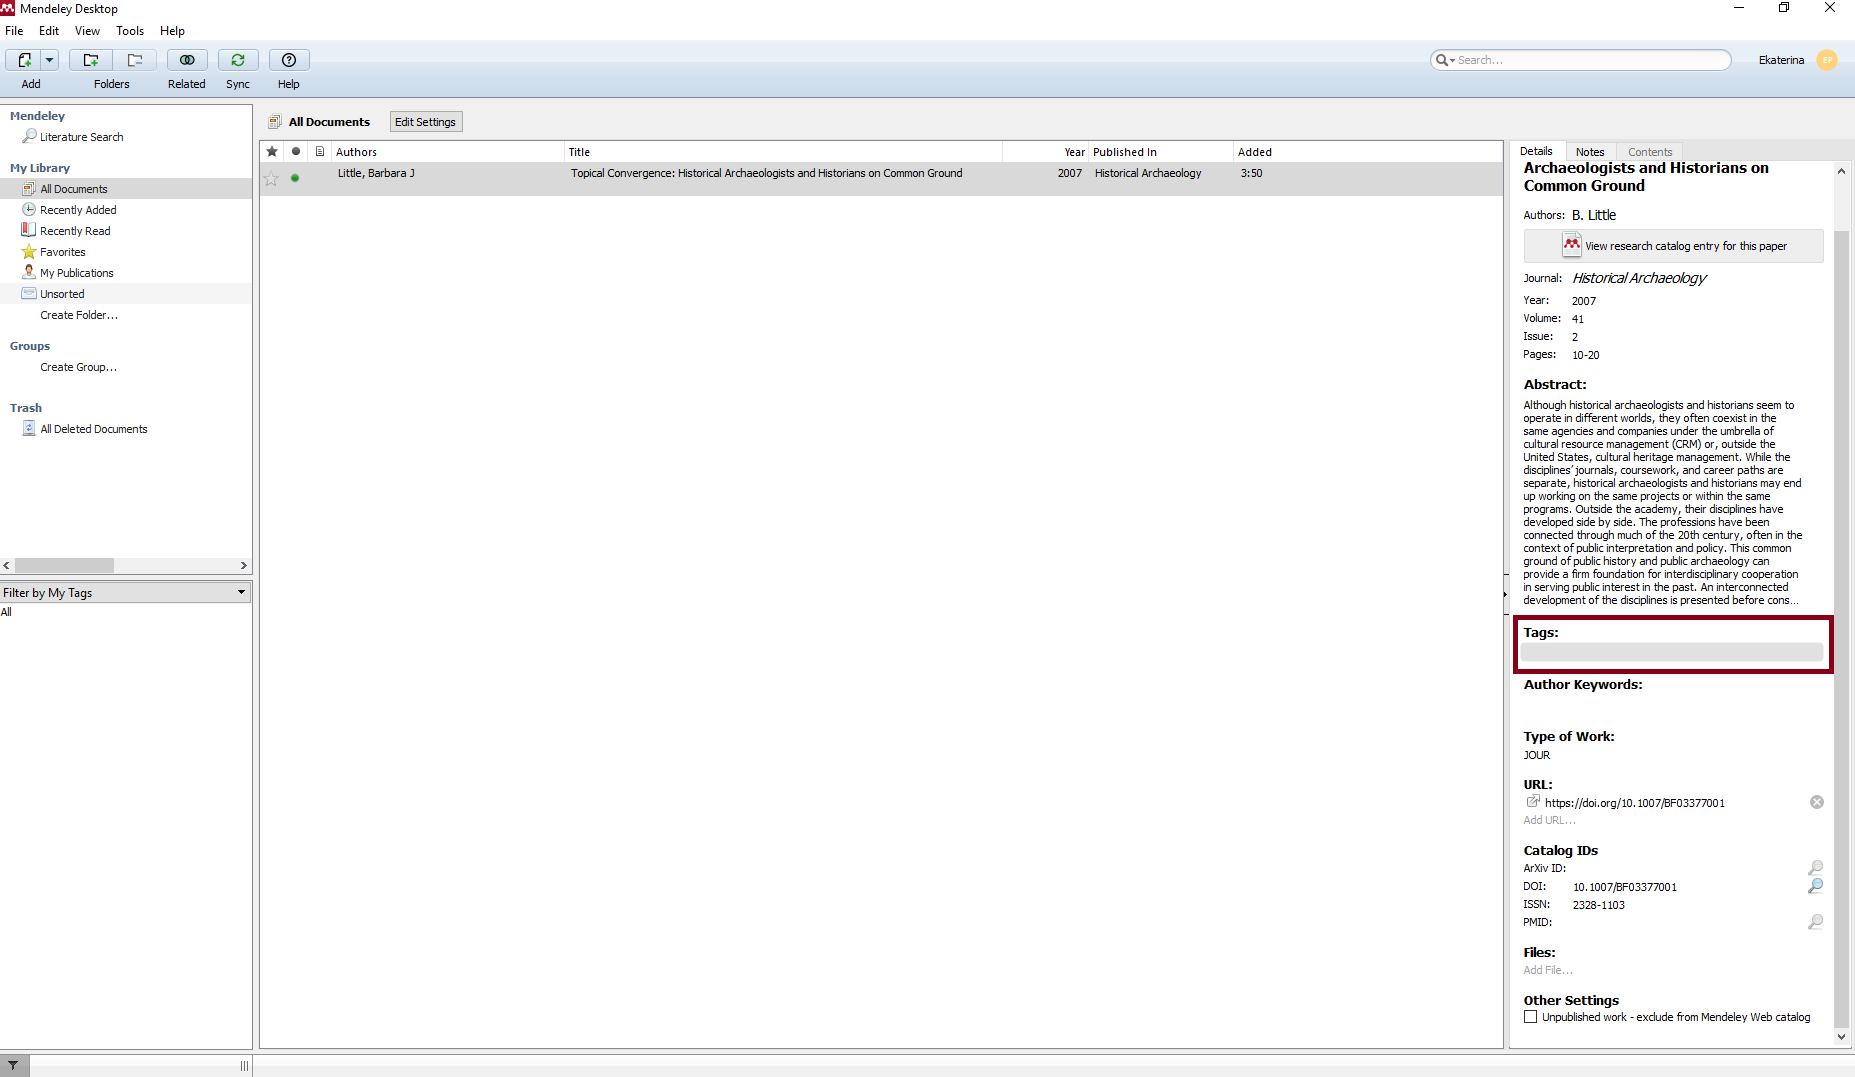
Рис. 8. Расположение поля «Tags» для добавления пользовательских ключевых слов на панели с описанием документа (справа)
Возможности поиска в Mendeley
Когда исследователь пользуется Mendeley длительное время и загружает туда информацию о большом количестве текстов, ему нужна навигация по документам. Для этого в Mendeley предусмотрен поиск по нескольким параметрам: автор, название, год публикации, заметки к документу (которые вы сами создали в режиме чтения). Если не выбирать параметр поиска, Mendeley будет искать по всем полям описания документа (включая издателей). Используйте поиск по всем полям, если хотите искать по своим тегам или авторским ключевым словам.
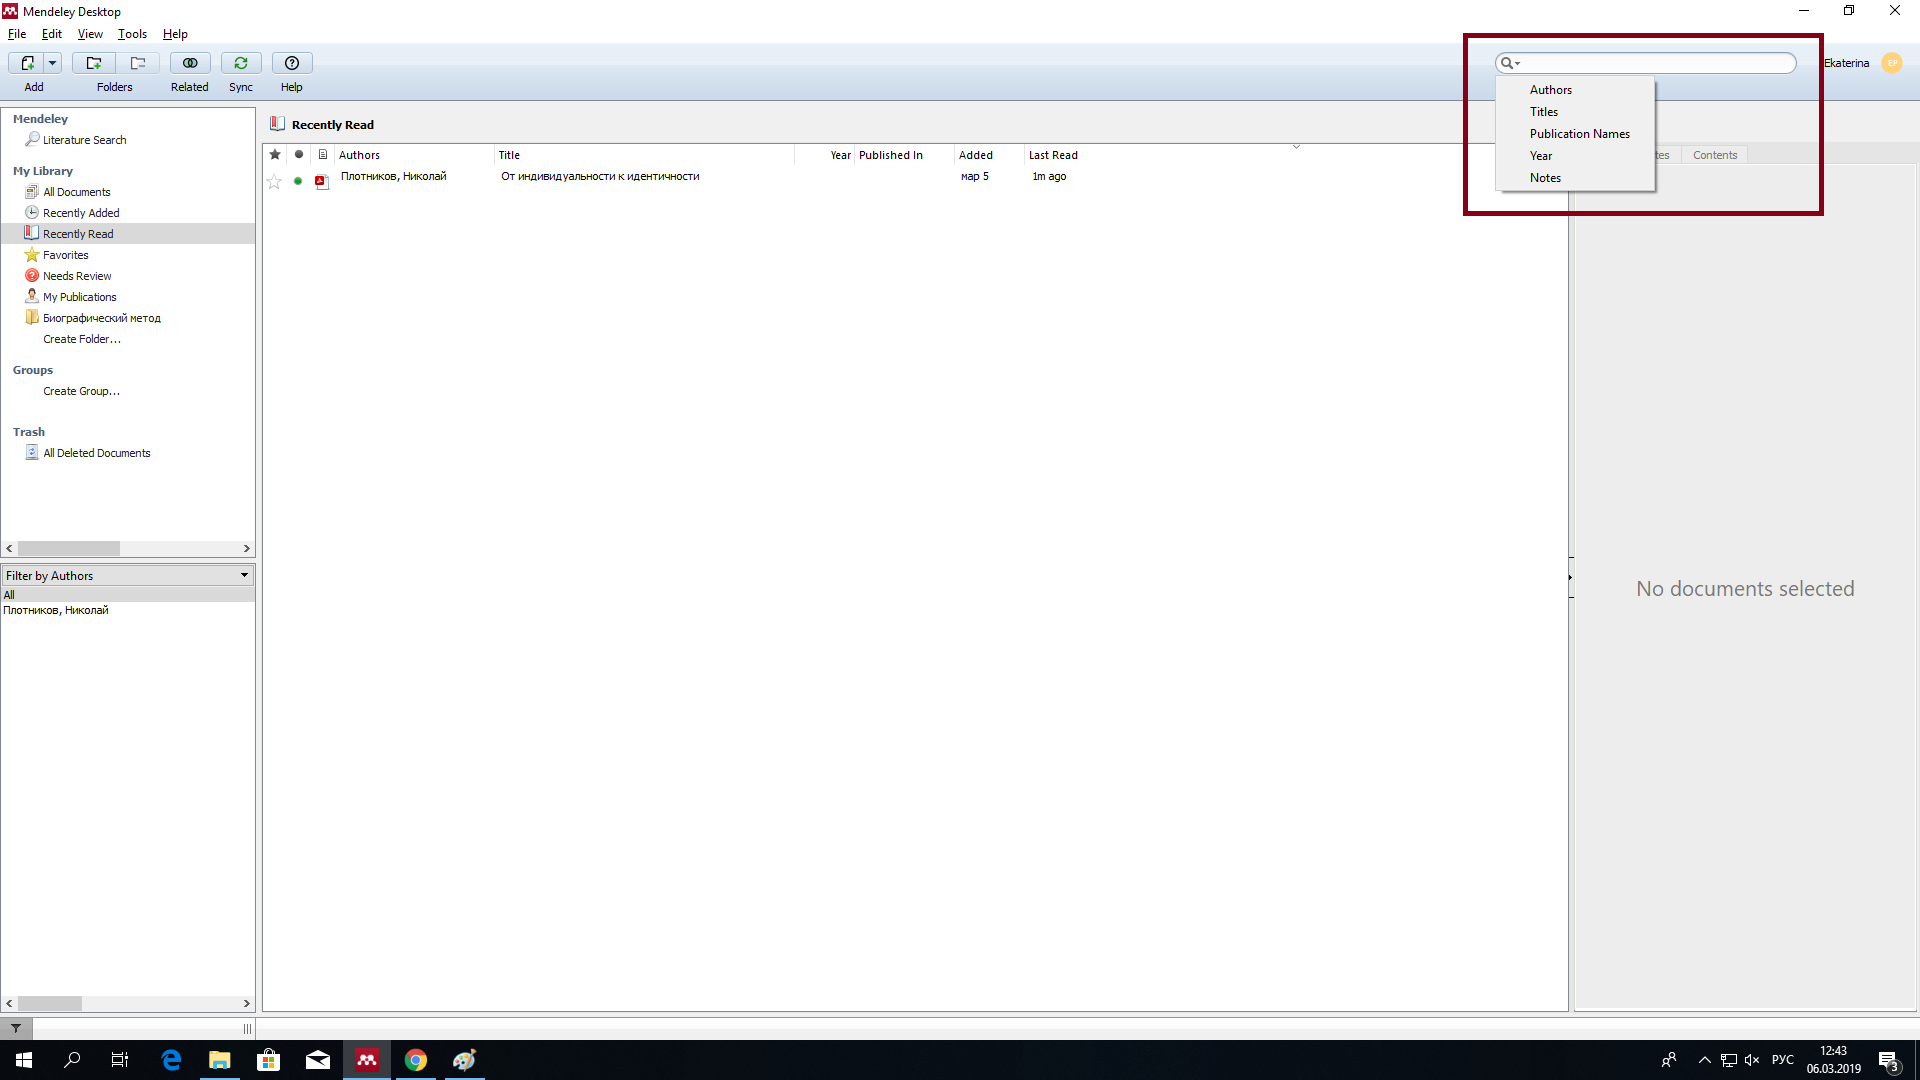
Рис. 9. Поисковая строка в Mendeley
Возможности для работы с полными текстами в Mendeley
В Mendeley встроены все минимально необходимые функции для чтения: возможность выделять фрагменты и комментировать текст. Эти функции доступны и на компьютере, и в приложении Mendeley для мобильных устройств, что делает работу с текстами удобной даже в пути или просто в отсутствии компьютера.
Чтобы открыть режим чтения документа, дважды нажмите на строку с его описанием — он откроется в новой вкладке внутри программы. При открытии документа автоматически выбран инструмент для выделения текста. Чтобы отметить цветом фрагмент текста, выделите его и нажмите на маркер в появившемся меню. Важно! Функция выделения текста работает только с файлами, текст в которых распознан, тексты обычных сканов выделить не получится.
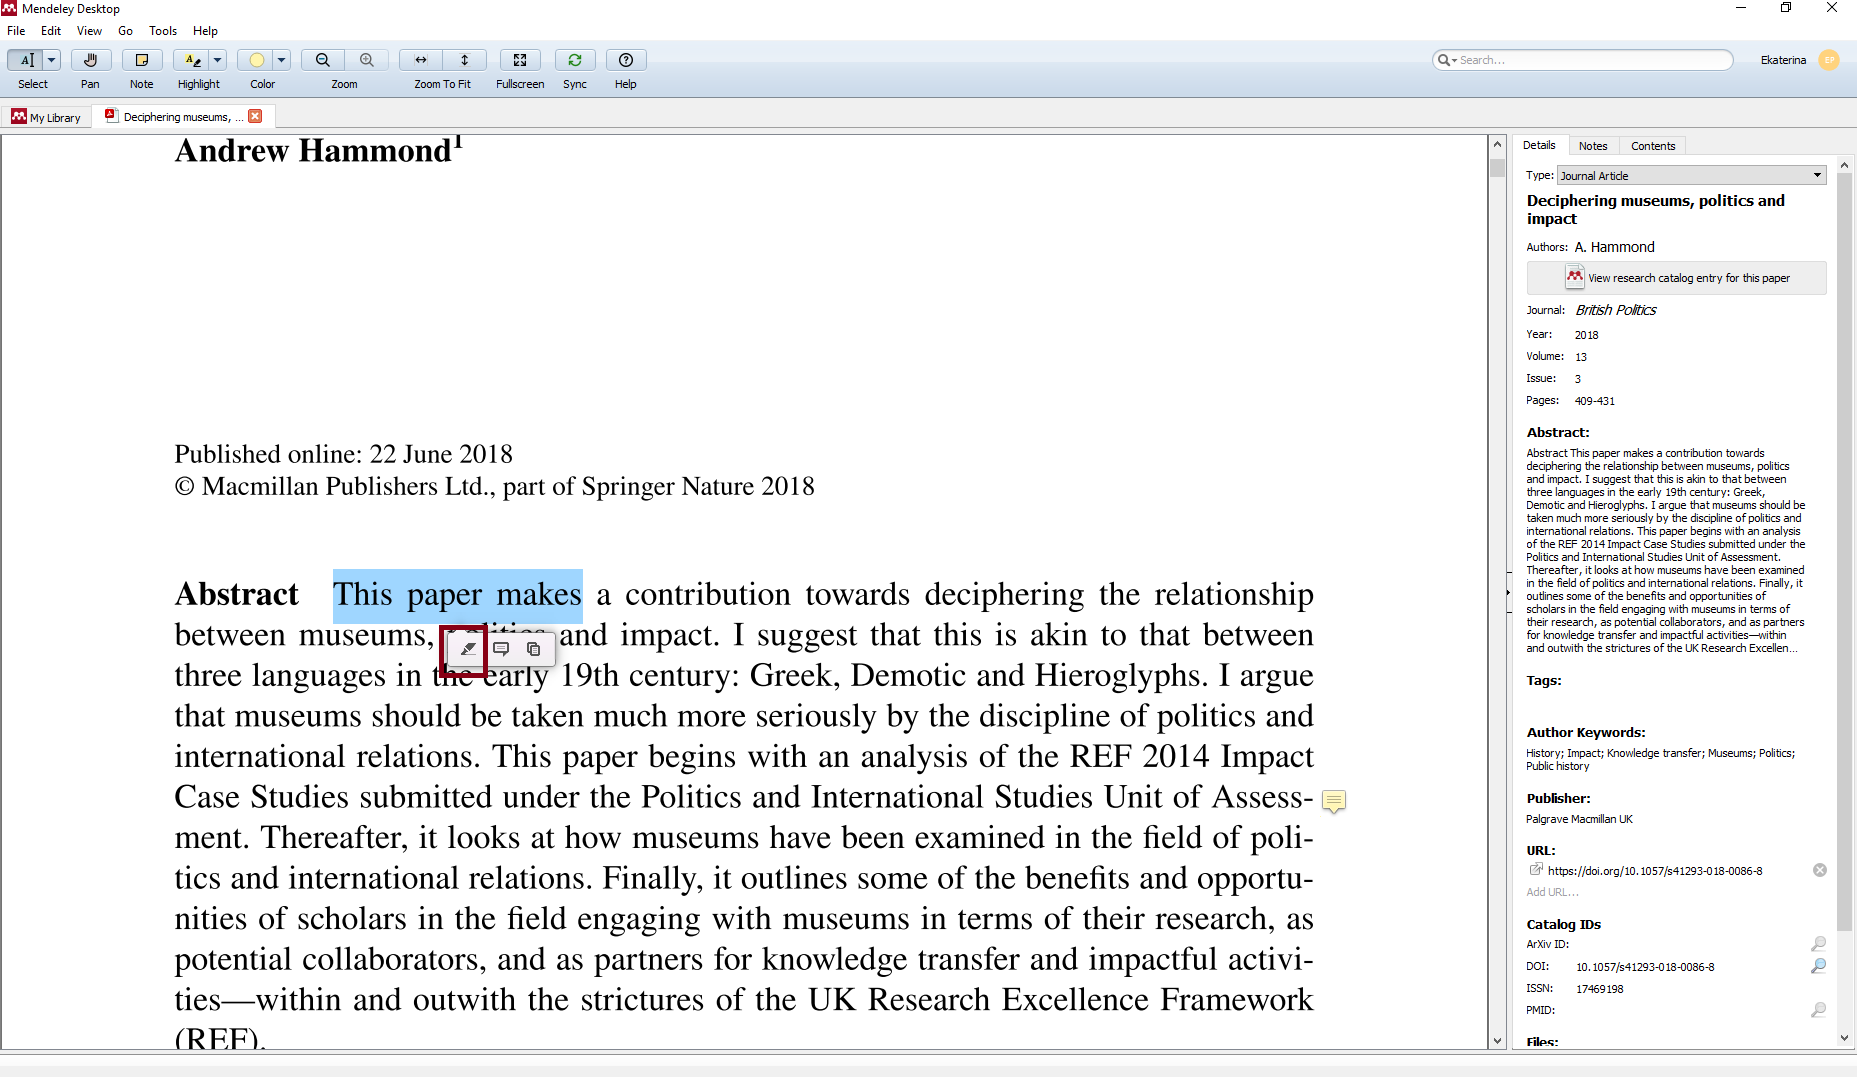
Рис. 10. Кнопка для выделения текста в режиме чтения
В этом же меню можно добавить к выделенному тексту заметку, нажав в том же меню значок посередине. Если вы работаете с файлом, в котором не распознан текст, то есть выделить его нельзя, выберите режим «Note» на верхней панели инструментов, тогда вы сможете поставить заметку в любом необходимом месте в документе, просто она не будет привязана к конкретным словам в тексте.
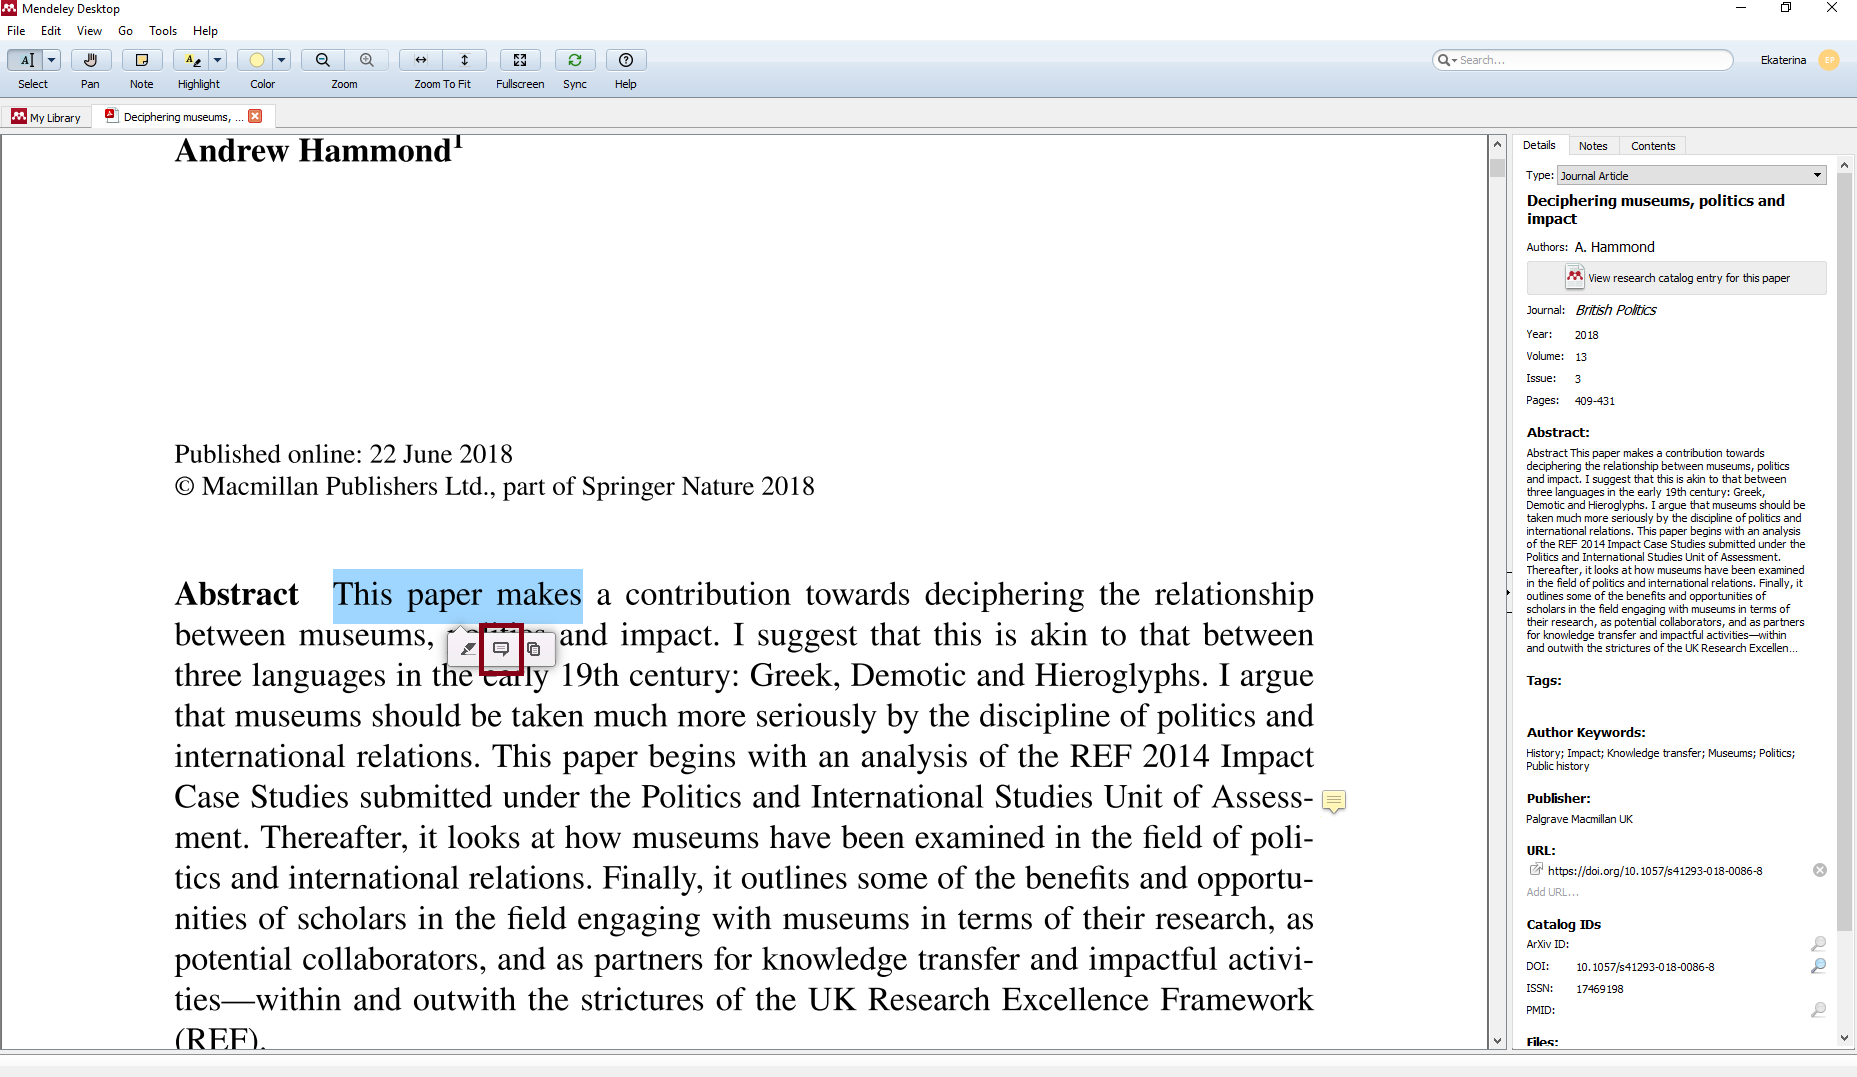
Рис. 11. Кнопка для комментирования выделенного текста в режиме чтения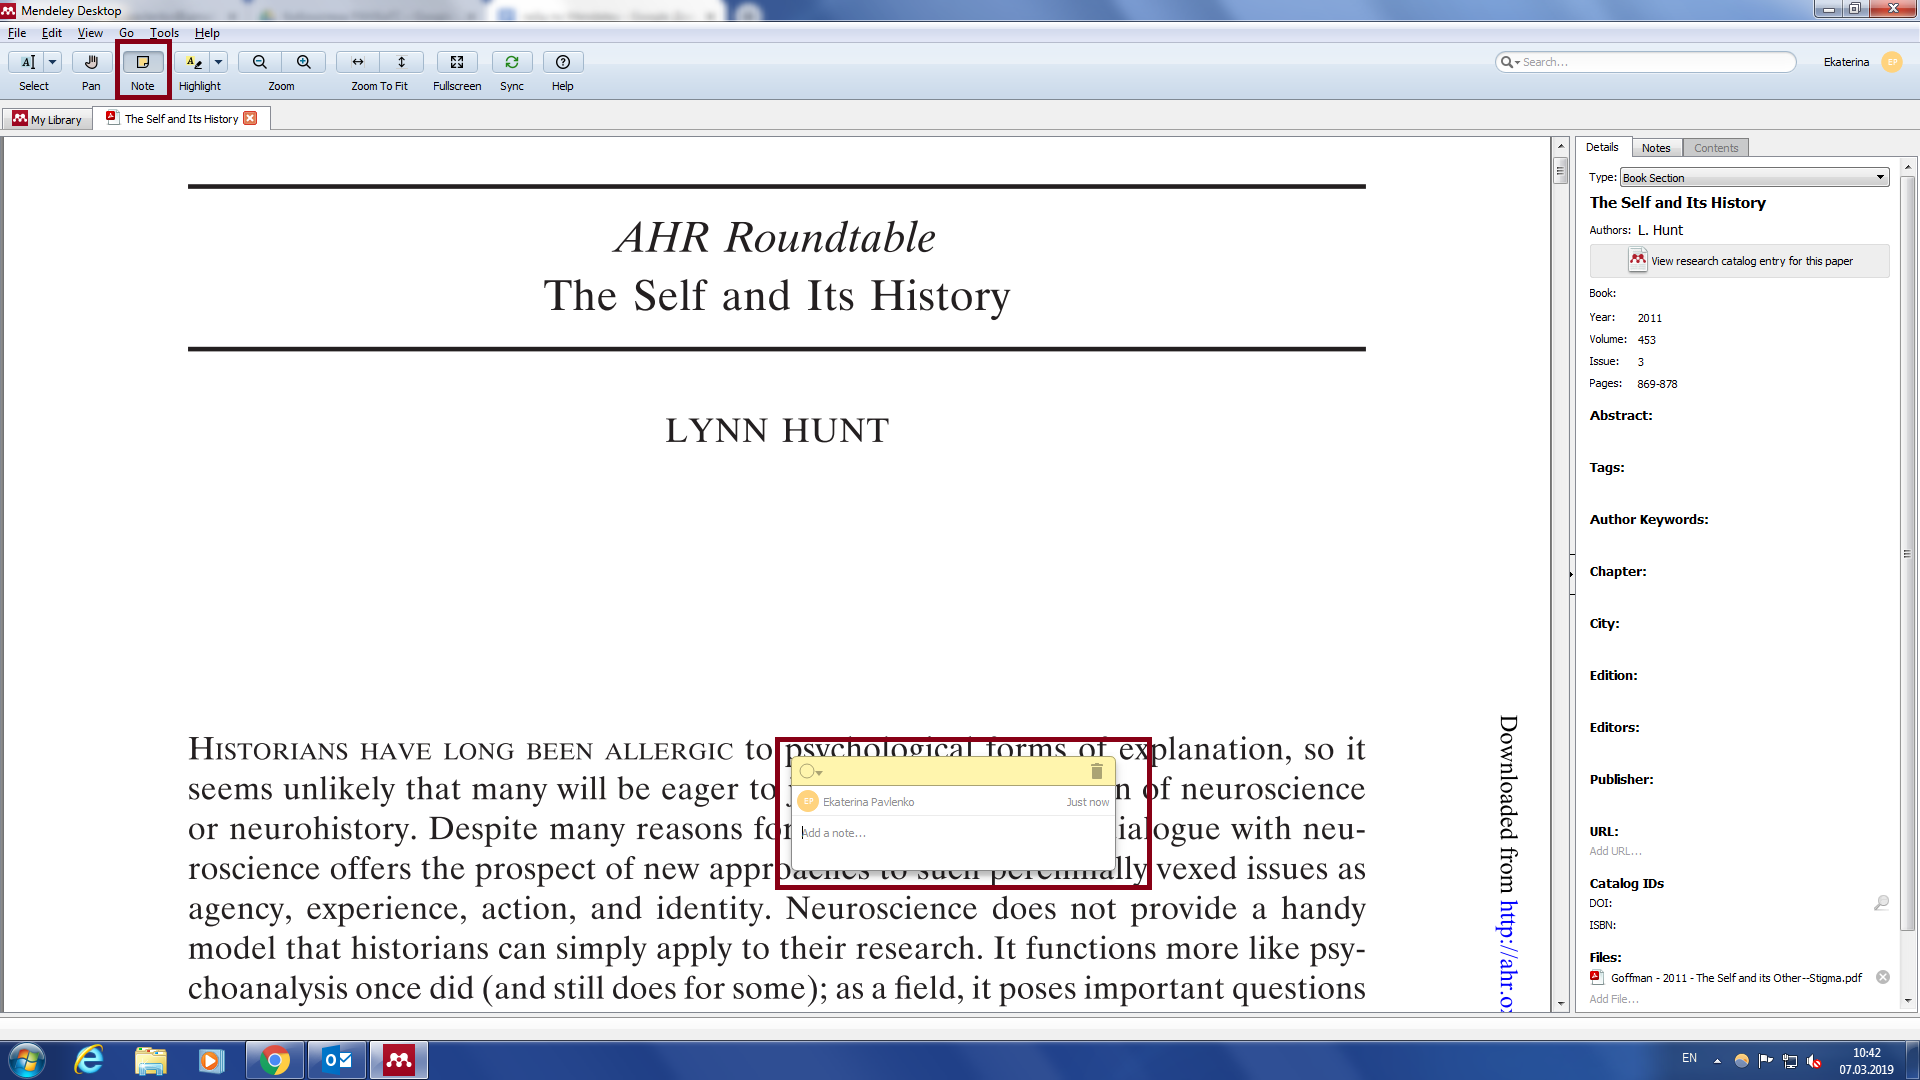
Рис. 12. Кнопка для добавления заметок на верхней панели меню и поле для написания самой заметки
Плагин для MS Word
Плагин Mendeley для MS Word позволяет быстро ссылаться на тексты, описания которых вы добавили в Mendeley, и создавать списки библиографии внутри MS Word.
Для установки плагина нужно зайти во вкладку «Tools» на верхней панели меню и нажать на «Install MS Word Plugin».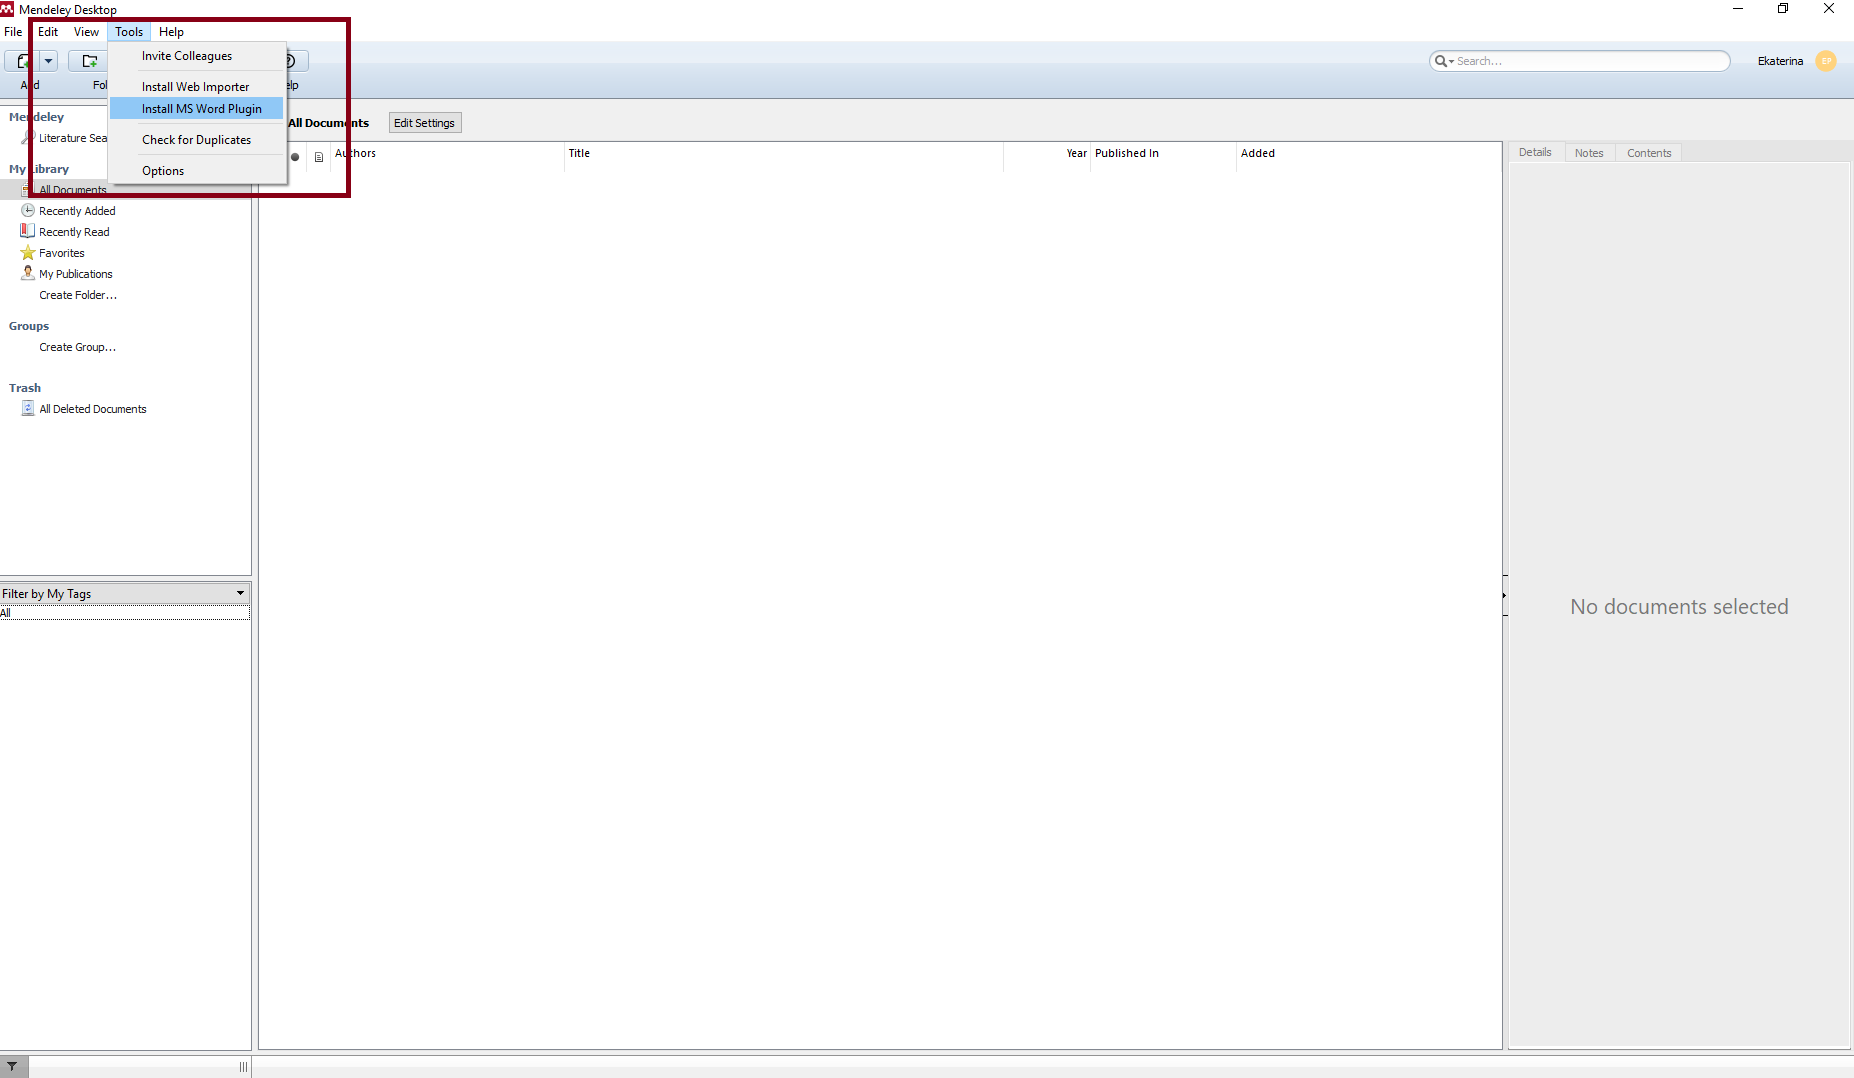
Рис. 13. Расположение кнопки «Install MS Word Plugin» во вкладке «Tools» на верхней панели меню
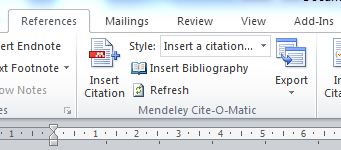
После установки кнопки для вставки ссылок на тексты и составления библиографических списков появятся во вкладке «Ссылки», которая находится на верхней панели меню MS Word.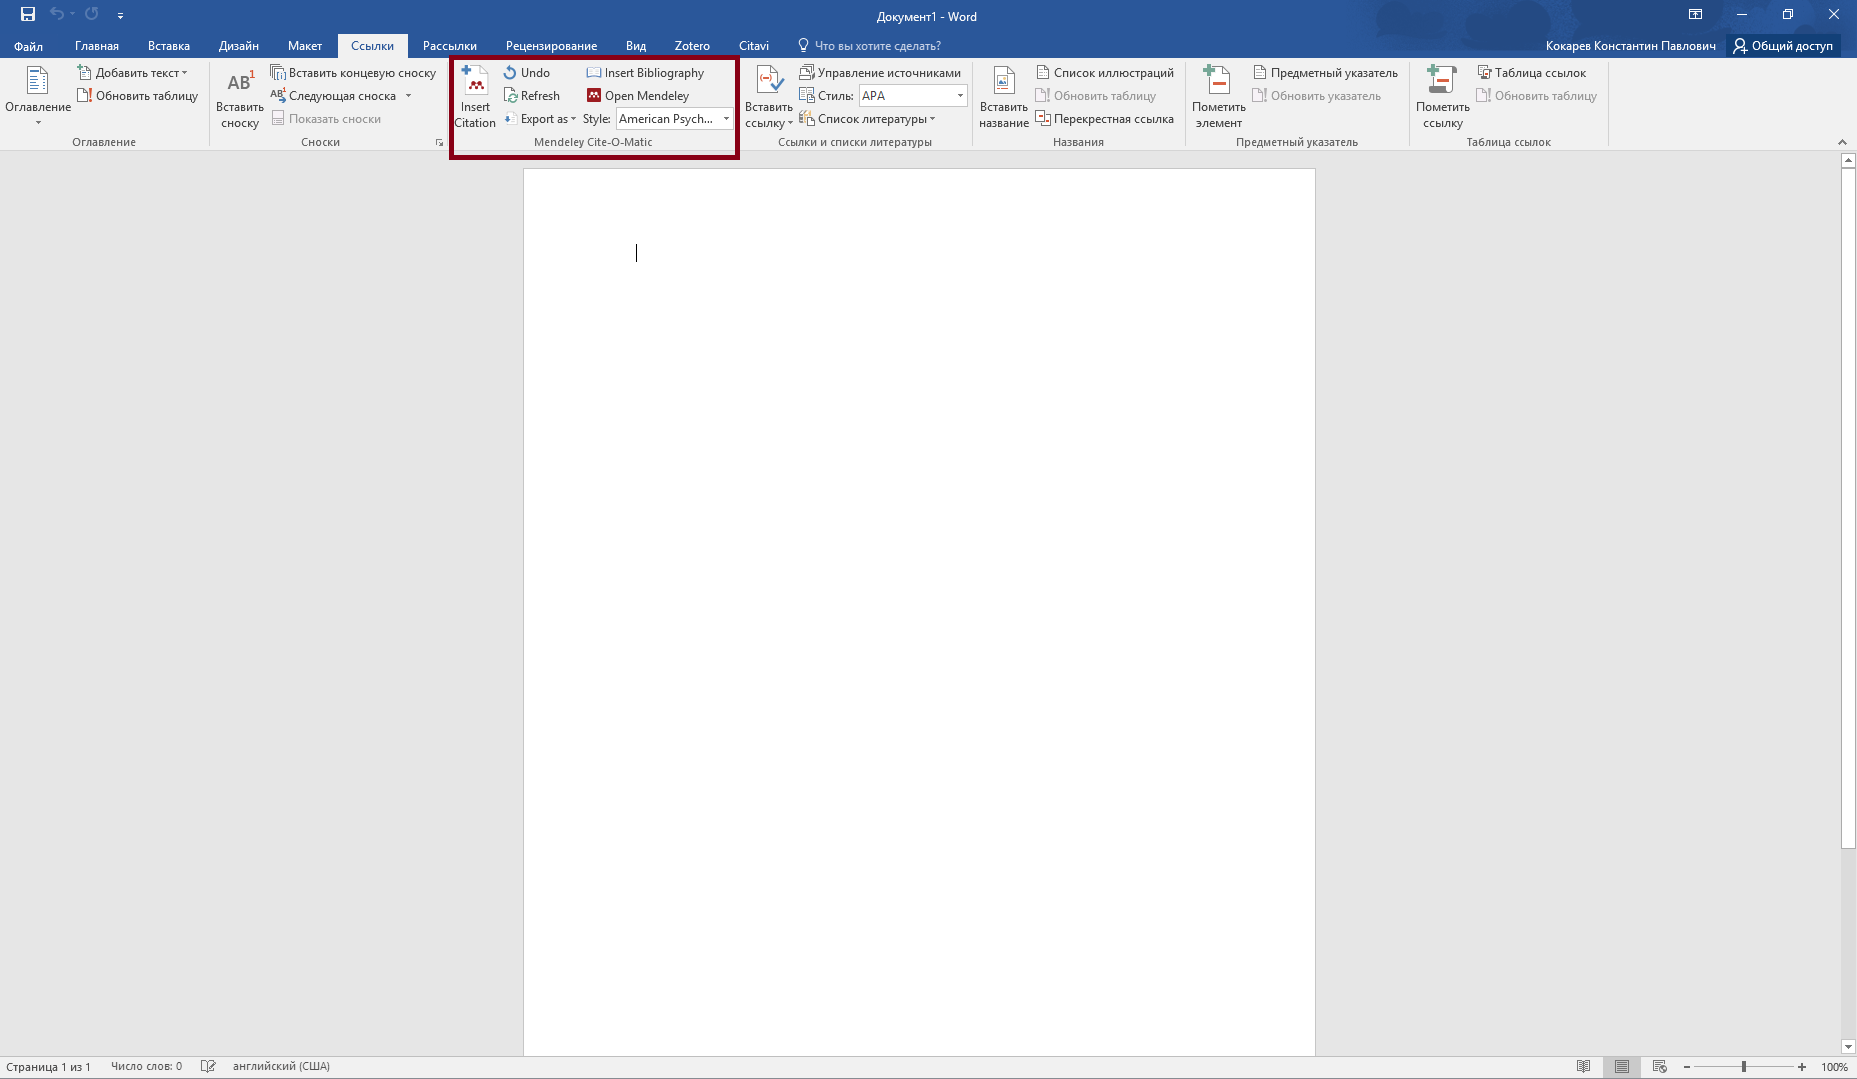
Рис. 14. Область с плагином Mendeley во вкладке «Ссылки» в MS Word
Mendeley позволяет настраивать цитирование в соответствии с очень многими существующими стандартами. В поле «Style» выберите нужный вам стандарт цитирования, например, установленный журналом, для которого вы готовите текст.
Если в предложенном базовом списке не оказалось того стандарта, который вам нужен, нажмите на «More Styles» в конце — после этого автоматически откроется Mendeley с окном поиска стандартов.
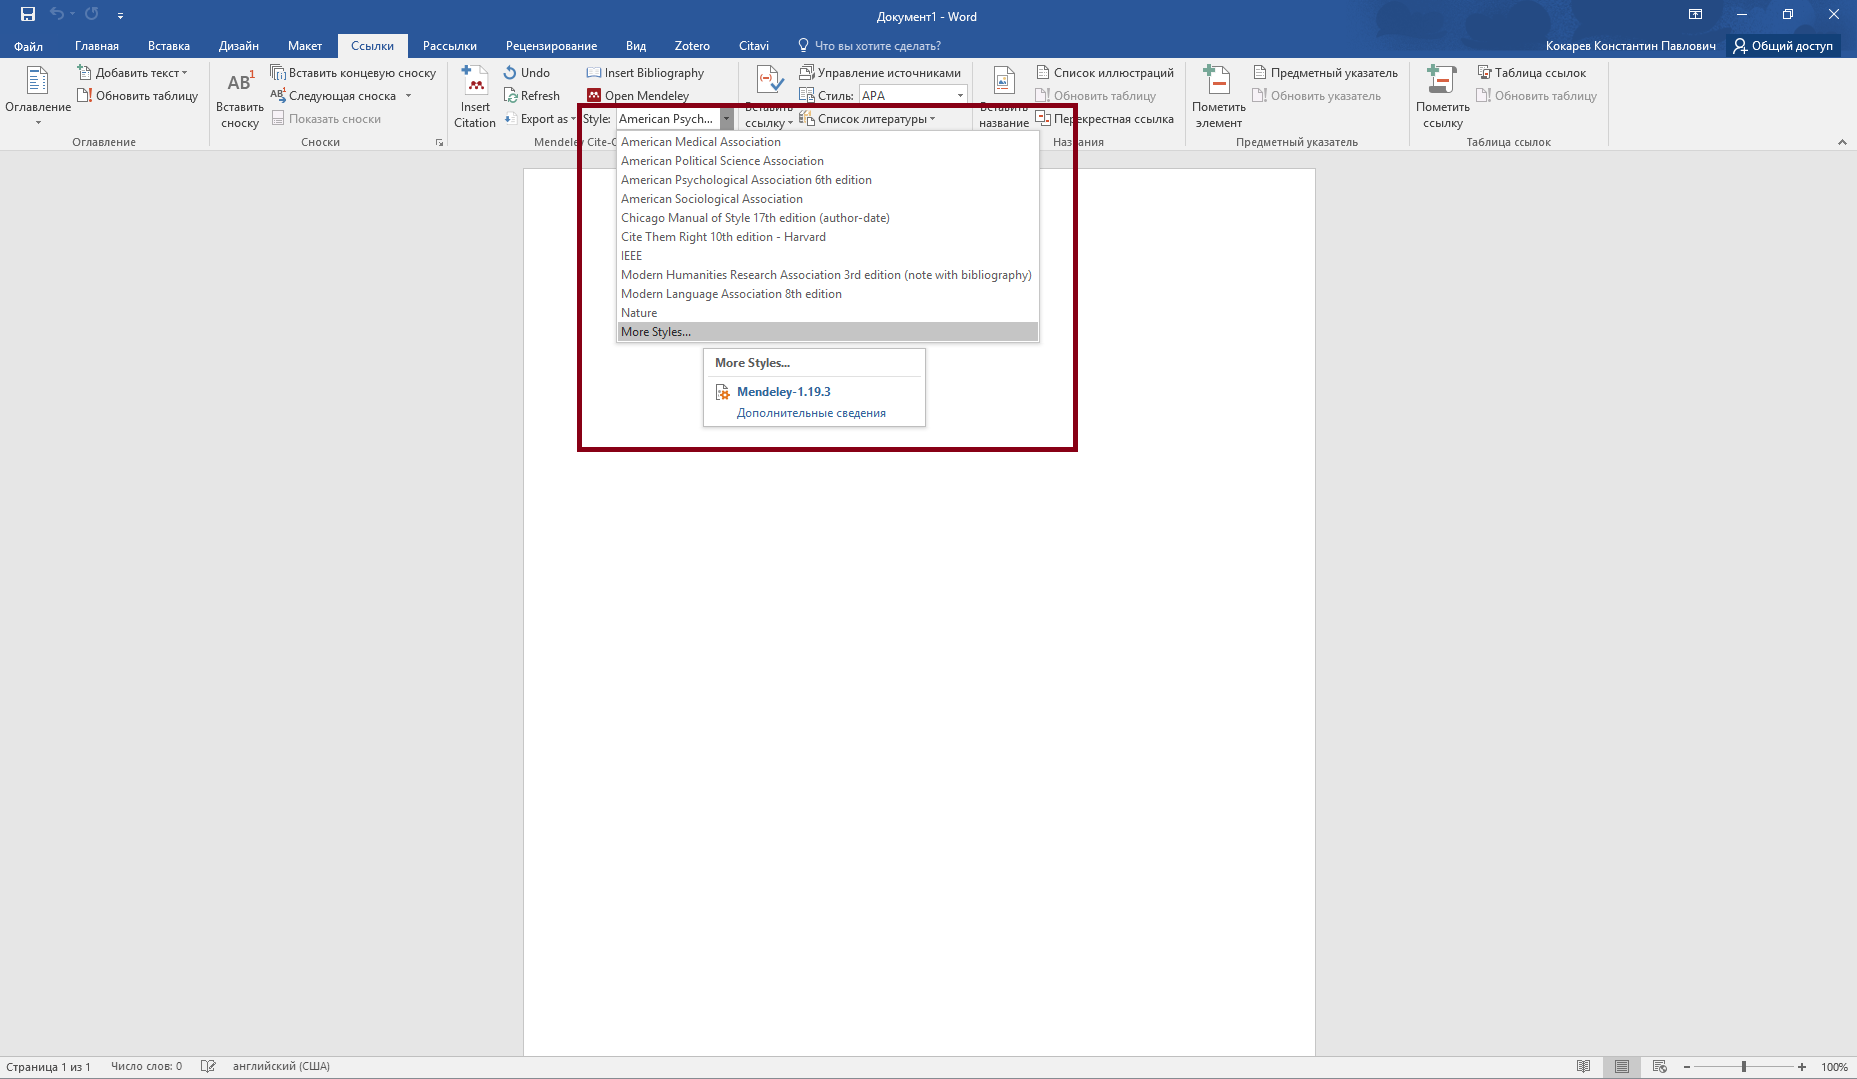
Рис. 15. Выпадающий список с доступными стандартами цитирования и кнопкой «More Styles» для загрузки новых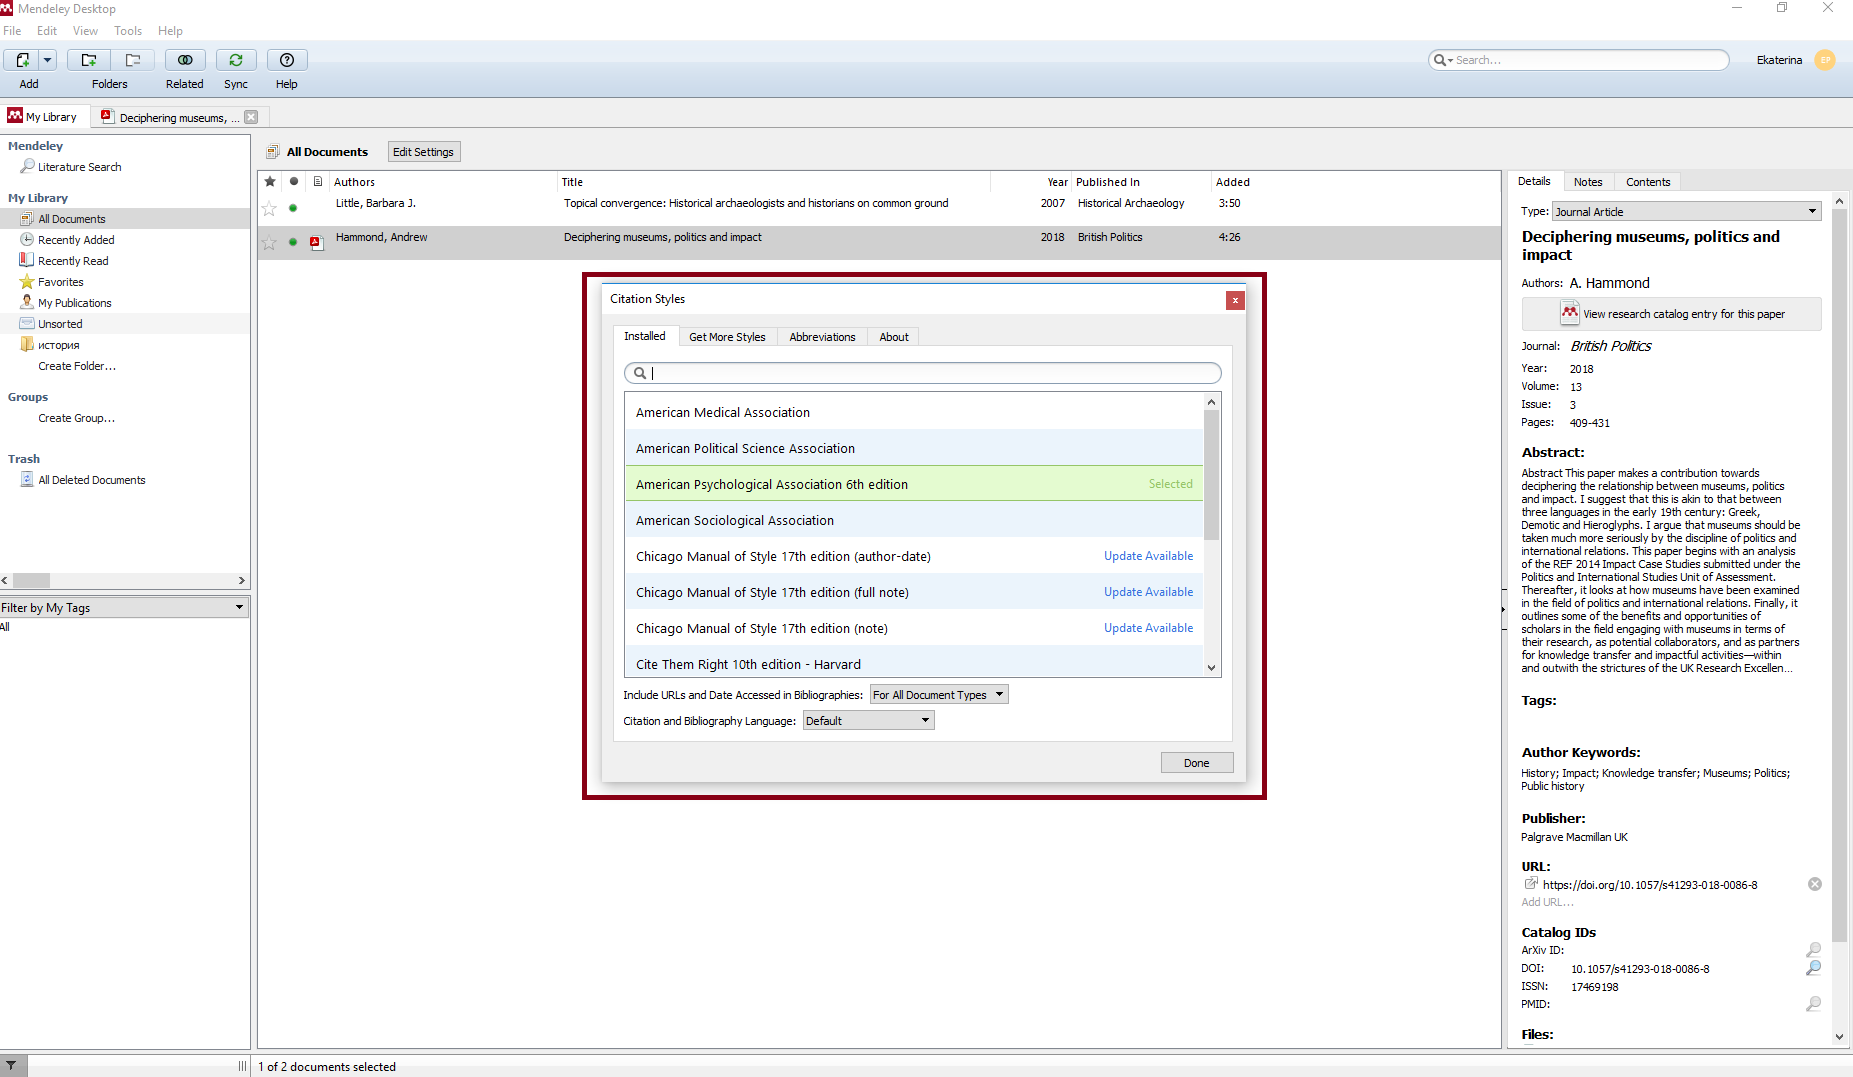
Рис. 16. Поле для поиска и скачивания стандартов цитирования внутри программы Mendeley
Чтобы скачать новый стандарт, зайдите во вкладку «Get more styles» и наберите его название. Если вы хотите установить ГОСТ, наберите GOST латинскими буквами. Нажмите на название нужного стандарта в поисковой выдаче, а после этого — на появившуюся справа кнопку «Install».
Важно! Mendeley предлагает 3 варианта ГОСТа, поэтому будьте внимательны при скачивании. GOST(Russian) — при цитировании в скобках указывается автор и год публикации; GOST(numeric) — при цитировании в скобках указывается номер цитируемого текста в библиографическом списке, в котором тексты указаны в порядке появления в вашей работе; GOST(sorted alphabetically, Russian) — при цитировании в скобках указывается номер цитируемого текста в библиографическом списке, в котором тексты указаны в алфавитном порядке.

Рис. 17. Вкладка «Get more styles» и строка с выбранным для скачивания стандартом с кнопкой «Install»
После того, как справа, рядом с названием выбранного вами стандарта появится слово «Installed», нажмите на название стандарта ещё раз, а затем — на появившуюся кнопку «Use this style», чтобы он появился в MS Word или Libre Office.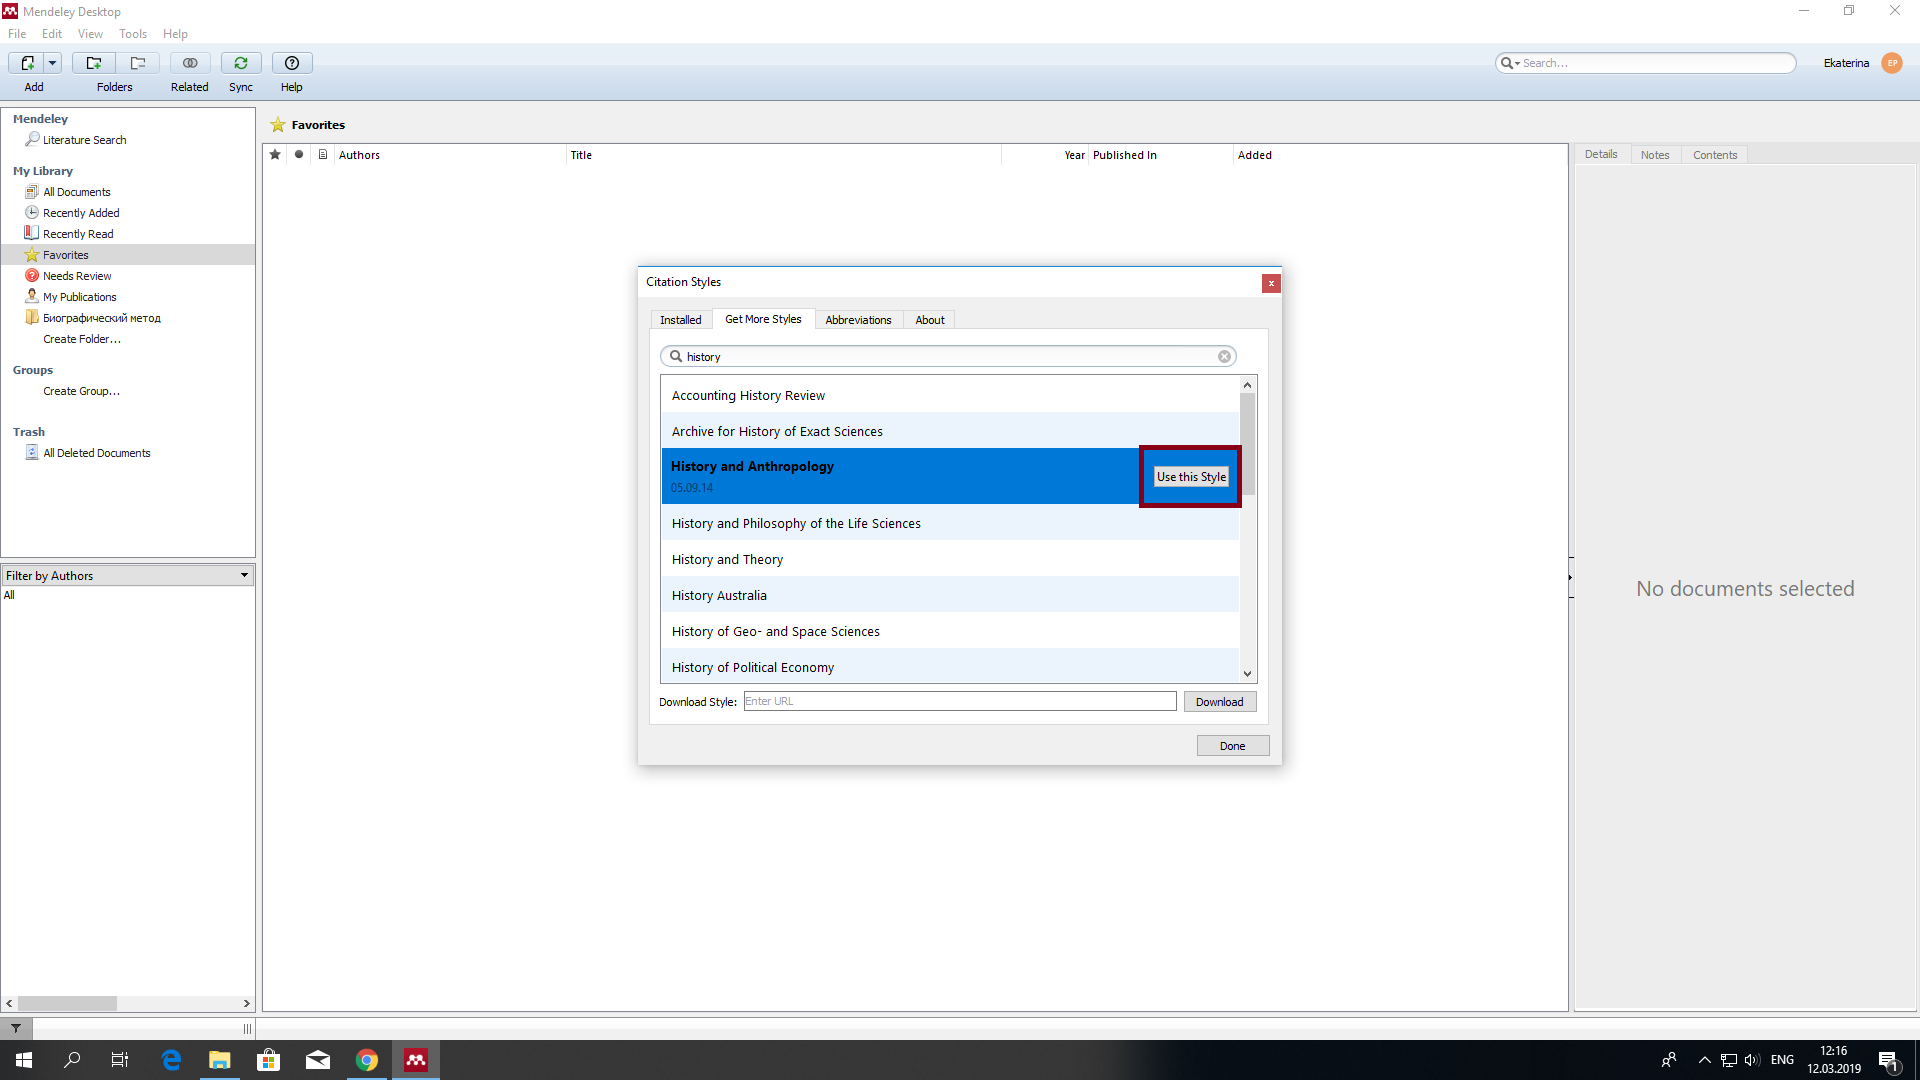
Рис. 18. Кнопка «Use this style» для установки скачанного стандарта в MS Word или Libre Office
Несмотря на то, что база данных Mendeley со стандартами цитирования обновляется регулярно, лучше перепроверять оформление, предложенное Mendeley, — для этого внимательно прочтите последние требования на сайте журнала или в методических рекомендациях диссертационного совета и сравните форматирование своего документа с ними.
После того, как нужный стандарт установлен, вы можете добавлять правильно оформленные ссылки на документы, которые вы загрузили в Mendeley, с помощью одной кнопки в MS Word — «Insert Citation».
Приложение для чтения с мобильных устройств
Разработчики Mendeley создали бесплатное мобильное приложение для iOs и Android, в котором можно читать тексты, загруженные в Mendeley с вашей учётной записи, и комментировать их — все ваши отметки будут отображаться на компьютере после синхронизации. Скачать приложение можно в Apple Store и Play Market.
Если у вас остались вопросы, пишите нам на
Адрес электронной почты защищен от спам-ботов. Для просмотра адреса в вашем браузере должен быть включен Javascript.
.
Екатерина Павленко,
сотрудник отдела поддержки исследований
Научная библиотека РАНХиГС
What is Mendeley Cite?
Mendeley Cite is an add-in for Microsoft Word that streamlines your citation and referencing workflow.
We believe that referencing should be a seamless part of the writing process.
Writing is inefficient and frustrating when you’re repeatedly interrupted by library cross-checking and looking up style guides.
With the Mendeley Cite plugin for Word you can:
- Insert citations as you write by linking to your reference library
- Generate a bibliography from your citations automatically
- Format your citations and bibliography to a style of your choice
Best of all, Mendeley is free!
Installing Mendeley Cite in Microsoft Word
To insert citations and bibliographies, Mendeley Cite connects to your online Mendeley library.
Sign up for an account here
if you don’t already have one.
Before installing Mendeley Cite, make sure Word is closed.
To install Mendeley Cite in Word:
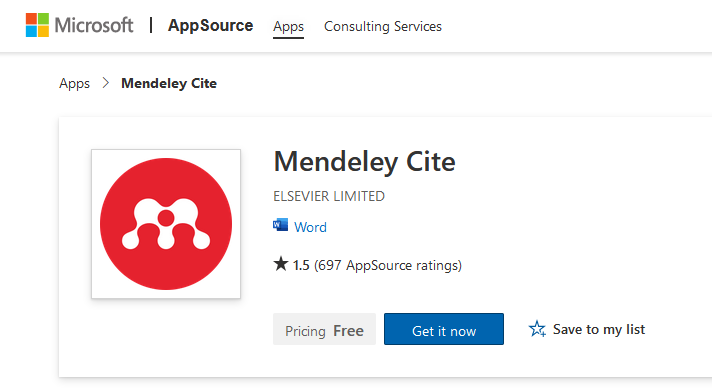
- Go to the Mendeley Cite app page on the Microsoft App store.
- Click Get it now.
- Follow the on-screen prompts to sign in to your Microsoft account. You’ll arrive at an app launch page.
- Click the Open in Word button. Your browser will request permission to open the link.
- Click Choose Application. Word should be highlighted.
- Click Open Link. Word will open a launch document showing you how to access the plugin.
- Click trust this add-in to install Mendeley Cite.
Note: There’s a shortcut to the Microsoft store from the Mendeley Reference Manager.
Open Mendeley Reference Manager on your desktop and Select Tools > Install Mendeley Cite for Microsoft Word.
Accessing Mendeley Cite
To access the plugin after installing:

- Go to the References menu in Word.
- Click the Mendeley Cite button. The Mendeley Cite side panel opens.
- Click Sign In. A browser window opens prompting you to sign in to your account.
- Enter your account e-mail and password, and click Sign in.
The Mendeley Cite panel opens your reference library.
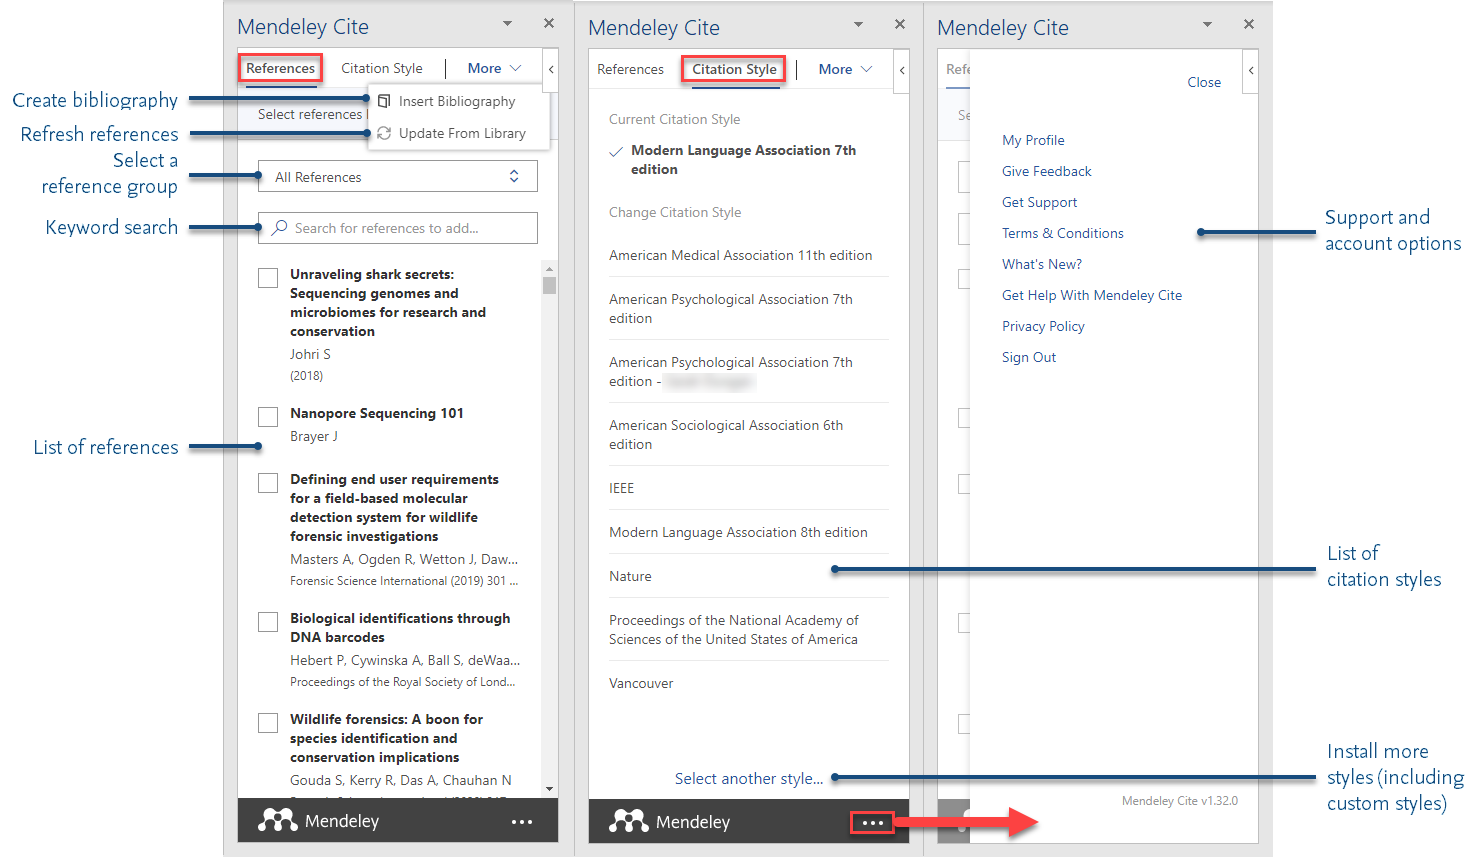
Overview of the Mendeley Cite plugin
The Mendeley Cite plugin has two main panels:
- The Reference panel—Pulls all the references from your Mendeley library. Use keywords to search for a specific reference (e.g. words from the title, author names) or narrow the list to a reference group you previusly created in the Mendeley Reference Manager.
- The Citation Style panel—Contains a list of citation styles. You can select additional styles to add to the list, or even install a custom style.
Use the References panel to insert in-text citations, and use the Citation Style panel to format your citations and bibliography to a specific style.
The plugin also has a function for automatically generating a bibliography based on your in-text citations and chosen style.
Lastly, the ellipses at the bottom of the panels pull up a support menu.
Using Mendeley Cite while writing
Mendeley Cite allows you to accomplish the three main referencing tasks—inserting citations, applying a style, and creating a bibliography—all without leaving your Word document.
Of coures, you’re also free to access your reference library at any time if doing so suits your writing process.
Click one of the tasks to learn more.


Signing up with Mendeley
You’ll need a Mendeley account to use Mendeley Cite. This account syncs your Mendeley library to the cloud.
To set up a new Mendeley account:
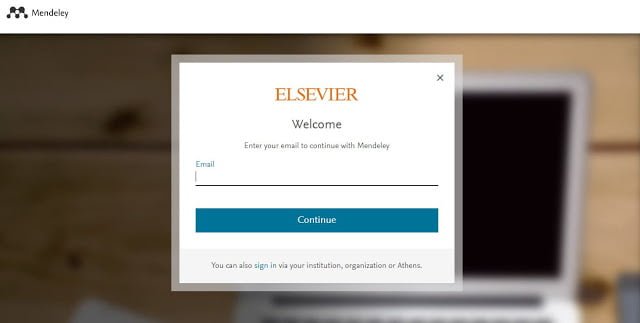
- Go to mendeley.com and click Create account in the header bar. You’ll be taken to an Elsevier sign-in form.
- (Optional) Click Sign in via your institution to associate your account with a university or college e-mail address.
- Enter a valid e-mail address and click Continue.
- Enter a password and click Sign in. You’ll recieve a confirmation e-mail with a verification link.
When your account is verified, access your Mendeley library to start gathering articles.
Be sure to also install our Web Importer, a browser plugin that lets you import online articles directly into your library.
To access your library from your Desktop rather than a browser, install the Mendeley Reference Manager.