
I’ve previously explained about the Address Block and Greeting Line features of Mail Merge in the articles below:
- Word Mailings Address Block (Mail Merge)
- Word Mailings Greeting Line (Mail Merge)
Basically what they do is, they generate a block of text containing the recipient’s address and a block of text containing a greeting line for each recipient. These blocks of text are generated specifically for each recipient. For example in the address text block you would expect to see the following things:
- Recipients First and Last Name
- Recipients City
- Recipients State
- Recipients Company
- …
As for the greeting line you might expect to see the following:
- Recipients First and Last Name
- Recipients Title
- Maybe the name of the recipient’s spouse or partner
- …
Previously I’ve explained how you can create a list of recipients with that data in it:
- Word, Mail Merge Recipient List
As you might remember from that article, in the recipient list there were columns. Each column stored a specific type of data. One column was used for the recipients First Name, another for their Last Name, another for their City, …
Although it might seem completely obvious for you what data is being stored in each column, but this may not be obvious for Word. Word will try to interpret which column contains what data. For example it will try to understand which column contains the First Name, which column contains the Phone number, ….
But it might not always be able to make this interpretation correctly. It is a good idea to use the Match Fields window to tell word exactly which field contains which data.
Note: In this article it is assumed that a Recipient List has already been defined. The Match Fields button will not be enabled until a recipient list is defined.
–
Step 1, Open the Match Fields Window:
This first step would be to open the Match Fields window. This can be done by clicking on the Match Fields button on the Mailings ribbon:

You could also open the Match Fields Window through the Address Block and the Greeting Line Window:


–
Match Fields
Upon clicking on the Match Fields button the following window will open:

As you will see there is a column on the left and a column on the right. The left column displays the fields word uses to generate the Address Block and Greeting Line. The fields on the right are the fields you have defined when creating the recipient list. Word will try to match the fields in our recipient list with its predefined fields. Note it may not always do this correctly. If there is a field that has been matched incorrectly you could use the drop down list on the right to correct it:

Note: You do not need to match every field on the left with a field on the right. As you can see in the figure above, word accepts 2 addresses, while only one has been provided in the recipient list. Or for example a job title or nickname was not used in the recipient list.
Note: If you scroll down the list you will see fields such as Spouse/Partner First Name, Spouse/Partner Last Name, … Again not all these fields are necessary. Though if you would like the name of the Spouse/Partner to appear on the Address or Greeting line blocks, you may need to define some of them.
–
Address Block Match Fields:
If you had opened the match fields window through the address block window, the match fields window would have looked slightly different. There will be a list of fields required for address block:

and a list of fields that are optional for the address block:

Note: Only the required fields will be displayed in the address block.
Note: The fields chosen to be optional and the fields chosen to be required depends on the choices made by the user on the Address Block window.
–
Greeting Line Match Fields:
Similar to the previous section, had you opened the Match Fields window through the greeting line window, depending on the choice made in the Greeting Line window, some fields will be marked optional while other fields will be marked required:

The required fields will be the fields that will be displayed in the greeting line.
See also:
- Word, Mail Merge
- Word Mailings Greeting Line (Mail Merge)
- Word Mailings Address Block (Mail Merge)
- Word, Mail Merge Recipient List
If you need assistance with your code, or you are looking for a VBA programmer to hire feel free to contact me. Also please visit my website www.software-solutions-online.com
I have a MS Word 2013 document that uses data from an Excel 2013 file as a source. I need to be able to match a custom field in Word to a specific column in Excel sheet. How can I do this? I know that with mail merge this can be done. My purpose is to have ready made custom fields in Word before doing the mail merge so that I can use the match field feature in mail merge.
The mail merge has common predefined fields already created for use, but I need to create my own since they are specific to the data I have in Excel file.
asked Aug 7, 2014 at 13:29
![]()
AmaniAmani
1094 bronze badges
1
(Not sure whether that is what you want but) you can simply create a «link» from your MS Word document to the MS EXcel document using OLE (object linking and embedding). Microsoft Word inserts this field when you copy information from another application and use the Paste Special command (Edit menu) to paste it into a Word document.
Copy the cell in Excel that you want to reference, then in Word, in the location where you want the link to be, you will ‘Paste Special’ > ‘Link & Merge Formatting’
answered Aug 7, 2014 at 14:08
![]()
Leo ChapiroLeo Chapiro
15.4k5 gold badges42 silver badges45 bronze badges
2
Summary
This article explains how to use the Mail Merge feature in Microsoft Word to create and to print form letters by using data from a Microsoft Excel worksheet.
When you use the Word Mail Merge feature, Word merges a main document with a recipient list to generate a set of output documents:
-
The main document contains the basic text that is the same in all of the output documents. It may contain a letterhead, text, and instructions in merge fields for inserting text (such as recipient names and addresses) that vary from one output document to another.
-
The recipient list is a database that contains the data that is to be merged into the output documents. For example, the recipient list is a Microsoft Access database file or an Excel worksheet.
This database is typically a list of names, addresses, phone numbers, and other categories of personal information.
-
The output documents are the result of the mail merge. The text in an output document can be the same in all output documents, but you can apply formatting to specific documents.
Step 1: Set Up the Excel Data File
Before you proceed with the Mail Merge Wizard, make sure that your Excel worksheet is well structured for this purpose. Note the following requirements for the data table:
-
The first row should contain field names for each column — for example, Title, Salutation, First Name, Middle Name, Last Name, Address1, and Address2.
-
Each field name should be unique.
-
Each row should provide information about a particular item. For example, in a mailing list, each row might include information about a particular recipient.
-
The table should contain no blank rows.
Create your Excel data file, and then arrange it by using the fields that you want to use for your letter, as shown in the following sample data file.
After you create your Excel data file, save it, and then close the data file.
For more information about how to create a mail-merge address list, click the following article number to view the article in the Microsoft Knowledge Base:
294688 How to design and set up a mail merge address list in Word 2002 and in later versions of Word
Step 2: Set Up the Main Document
-
In Microsoft Office Word 2003 and in earlier versions of Word, point to Letters and Mailings on the Tools menu, and then click Mail Merge Wizard.
In Microsoft Office Word 2007, click Start Mail Merge in the Start Mail Merge group on the Mailings tab, and then click Step by Step by Mail Merge Wizard.
-
Under Select document type, click Letters.
The active document becomes the main document. The main document contains the text and graphics that are the same for each version of the merged document. For example, the return address and the salutation in a form letter are the same for each version.
-
Click Next: Starting document.
-
Use one of the following methods:
-
Start with the document that is currently shown in the document window. To do this, click Use the current document.
You can then either type the letter in the document window or wait until the wizard prompts you to do so in a later step.
-
Start with a template. To do this, follow these steps:
-
Click Start from a template.
-
Click Select template.
-
On the Mail Merge tab, select the template that you want in the Select Template dialog box, and then click OK.
-
-
Start with an existing document. To do this, follow these steps:
-
Click Start from existing document.
-
In the Start from existing box, select the document that you want, and then click Open.
-
If you do not see the document, click More files, and then click Open. In the Open dialog box, locate the document that you want, and then click Open.
-
-
-
Click Next: Select recipients.
Step 3: Specify the Excel Data Source
-
Under Select recipients, click Use an existing list.
-
Click Browse.
-
In the Select Data Source dialog box, locate and then click the Excel worksheet that you want to use.
By default, Word opens the «My Data Sources» folder.
-
Click Open.
-
If your Excel worksheet contains information about multiple tabs, select the tab that contains the information that you want, and then click OK.
-
All entries in the data source appear in the Mail Merge Recipients dialog box. Here, you can refine the list of recipients to include in the merge.
Step 4: Select the Recipients
-
In the Mail Merge Recipients dialog box, select the recipients that you want to include. To do this, use one of the following methods:
-
Use the check boxes to designate recipients.
This method is most useful if the list is short. Click to select the check boxes next to the recipients that you want to include, and then click to clear the check boxes next to the recipients that you want to exclude.
Note If you know that you want to include most of the list in your merge, click Select All, and then click to clear particular records. Similarly, if you want to include only a few records in the list, click Clear All, and then select the records that you want.
-
Sort items in the list.
This method is useful if you want to see items in alphabetical or numeric order. Click the column heading of the element by which you want to sort. For example, if you want to display the list alphabetically by last name, click the Last Name column heading.
-
Filter items in the list.
This method is useful if the list contains records that you know you do not want to see or include in the merge. After you have filtered the list, you can use the check boxes to include and exclude records, as described earlier. To filter the list, follow these steps:
-
Click the arrow next to the column heading of the element that you want to filter by.
-
Click any of the following:
-
(Blanks): This option displays all the records in which the corresponding field is blank.
-
(Nonblanks): This option displays all the records in which the corresponding field contains information.
-
If the data source contains records that share the same information, and if there are 10 or fewer unique values in the column, you can filter by specific information. For example, if there are multiple addresses that list Australia as the country, you can filter by Australia.
-
-
-
The Mail Merge Recipients dialog box displays only the designated records. To display all the records again, click (All).
Notes
-
For advanced sorting and filtering, click the arrow next to any column name, and then click (Advanced). Use the Filter Records and Sort Records tabs to set up the sorting or filtering query that you want.
-
If you have installed address validation software, click Validate in the Mail Merge Recipients dialog box to validate your recipients’ addresses.
-
-
Click OK to return to the Mail Merge Wizard.
Word uses the recipients that you designated for the merge.
-
Click Next: Write your letter.
Step 5: Complete the Letter and Add Merge Fields
If you have not already done this, type the text that you want to appear in every form letter in the main document.
Insert Merge Fields
Insert merge fields where you want to merge names, addresses, and other information from the data source. To insert merge fields, follow these steps:
-
In the main document, click where you want to insert the field.
-
Insert any of the following:
-
Address block with name, address, and other information:
-
Click Address block.
-
In the Insert Address Block dialog box, select the address elements that you want to include and the formats that you want, and then click OK. For help on an option, click the question mark, and then click the option.
-
For help on an option, click the question mark, and then click the option. If the Match Fields dialog box appears, Word may be unable to find some of the information it needs for the address block. Click the arrow next to
(not available), and then select the field from your data source that corresponds to the field required for the mail merge.
-
-
Greeting line:
-
Click Greeting line.
-
Select the greeting line format that includes the salutation, name format, and following punctuation.
-
Select the text that you want to appear in the cases in which Word cannot interpret the recipient’s name. For example, Word cannot interpret the name when the data source contains no first or last name for a recipient, but only a company name.
-
Click OK.
-
If the Match Fields dialog box appears, Word may be unable to find some of the information it needs for the greeting line. Click the arrow next to (not available), and then select the field from your data source that corresponds to the field required for the mail merge.
-
-
Other fields of information:
-
Click More items.
-
Use one of the following methods:
-
Click Address Fields to select from address fields that will automatically map to corresponding fields in your data source, even if the data source’s fields do not have the same name as your fields.
-
Click Database Fields to select from fields that always take data directly from a column in a database.
-
-
In the Fields box, click the field that you want.
-
Click Insert, and then click Close.
-
If the Match Fields dialog box appears, Word may not be able to find some of the information it needs to insert the field. Click the arrow next to (not available), and then select the field from your data source that corresponds to the field required for the mail merge.
Note If you insert a field from the Database Fields list, and if you later switch to a data source that does not have a column with the same name, Word cannot insert that field information into the merged document.
-
-
Electronic postage:
To add electronic postage, you must first install an electronic postage program, such as one that you can purchase from a third-party provider on the Web. To use electronic postage, follow these steps:
-
Click Electronic postage.
If you do not have an electronic postage program installed, Word prompts you to install one, and offers to connect to the following Microsoft Office Web site:
Print Online Postage
http://office.microsoft.com/services/service.aspx?sid=2.4 -
Insert the postage according to the program’s instructions.
-
-
To add electronic postage, you must first install an electronic postage program, such as one that you can purchase from a third-party provider on the Web. To use electronic postage, follow these steps:Postal bar code: You must select a letter or envelope type that supports the POSTNET bar code. To use the Postal bar code, follow these steps:
-
Click Postal Bar Code.
-
In the Insert Postal Bar Code dialog box, select the appropriate address fields.
Note The Postal Bar Code option appears only if you are using the U.S. language version of Word.
-
Repeat steps a and b for all the fields that you want to insert. NOTES:
-
You cannot type merge field characters (» «) or insert them by using the Symbol command on the Insert menu.
-
If the merge fields appear inside braces, such as { MERGEFIELD City }, Word is displaying field codes instead of field results. This does not affect the merge, but if you want to display the results instead, right-click the field code, and then click Toggle Field Codes on the shortcut menu.
-
For example, by using the sample database shown earlier, your letter might contain the AddressBlock and GreetingLine fields, and therefore your first page appears similar to the following:
February 26, 2002
AddressBlock
GreetingLine
Type your letter here.
Sincerely,
Type your name here
-
Note You can also use the Mail Merge toolbar to insert merge fields, work with your mail-merge main document, or run a mail merge. To display the Mail Merge toolbar, point to Letters and Mailings on the Tools menu, and then click Show Mail Merge Toolbar.
The Mail Merge toolbar provides additional commands that are not included in the Mail Merge Wizard task panes. For example, you can use the Insert Word Field menu on the Mail Merge toolbar to insert Word fields for controlling the merge process. For example, you can insert an IF field that inserts text only if a particular merge field has a specified value.
Alternatively, you can click Check For Errors to make Word run the mail merge and report any errors that are contained in the main document.
-
Change the Format of the Merged Data
To format merged data, you must format the merge fields in the main document. Do not format the data in the data source, because its formatting is not retained when you merge the data into the document. To change the format of the merged data, follow these steps:
-
In the main document, select the field that contains the information that you want to format, including the enclosing merge field characters (<< >>).
-
In Word 2003 and in earlier versions of Word, click Font on the Format menu, and then select the options that you want.
In Word 2007, click the option that you want in the Theme Fonts box in the Font group on the Home tab.
Format by Using Field Codes
To control other aspects of formatting, press ALT+F9 to display field codes, and then add switches to the merge fields. When you work with fields, a switch is a special instruction that causes a specific action to occur. Generally, a switch is added to a field to modify a result.
Examples of how to use switches are as follows:
-
To display the number 34987.89 as $34,987.89, add the Numeric Picture switch (#).
-
To print client names in uppercase letters, add the Format switch (*).
-
To make sure that the merged information has the same font and point size that you apply to the merge field, add the Charformat switch (*).
Step 6: Save the Document
After you have completed the main document and inserted all the merge fields, make sure that you save the document before proceeding. To do this, follow these steps:
-
In Word 2003 and in earlier versions of Word, click Save As on the File menu.
In Word 2007, click the Microsoft Office Button, and then click Save As.
-
Name the document, and then click Save.
-
Click Next: Preview your letters.
Step 7: Preview the Letters and Fine-Tune the Recipient List
When the wizard displays the «Step 5 Mail Merge» task pane, the wizard replaces each of the merge fields in the main document that has the actual text from the first entry of the recipient list.Therefore, you can see how your first output document will look.
For example, if you were to continue to use the sample database shown earlier, the first page should resemble the following page after you click Next: Preview your letters:
February 26, 2002
Andrew Fuller
908 W. Capital Way
Tacoma 98401
Dear Andrew Fuller,
Type your letter here.
Sincerely,
Type your name here To preview additional entries, use one of the following methods:
-
To preview the items in order, click the left or right arrow buttons.
-
To locate and preview a specific item, click Find a recipient, and then enter the search criteria in the Find Entry dialog box.
Fine-tune the recipient list if you want. To do this, use one of the following methods:
-
To exclude a particular recipient from the merge operation, click Exclude this recipient.
-
To change the list of recipients, click Edit recipient list, and then make your changes in the Mail Merge Recipients dialog box.
Step 8: Complete the Merge
To complete the merge, use any of the following methods.
Personalize Individual Letters
To personalize individual items, you actually complete the merge, and then edit the information that you want in the resulting merged document. To do this, follow these steps:
-
Click Edit individual letters.
-
In the Merge to New Document dialog box, select the records that you want to merge.
-
Click OK.
Word creates and opens a new merged document. Your main document also remains open, and you can switch back to it if you want to change all the documents.
-
Scroll to the information that you want to edit, and then make your changes.
-
Print or save the document just as you would any regular document.
Print the Letters
To print the letters, use one of the following methods:
-
If you personalized the items and if the merged document is active, follow these steps:
-
In Word 2003 and in earlier versions of Word, click Print on the File menu.
In Word 2007, click the Microsoft Office Button, and then click Print.
-
Select the options that you want.
-
-
If you want to print directly from the Mail Merge Wizard, follow these steps:
-
In Step 6 of the Mail Merge Wizard (Complete the merge), click Print.
-
In the Merge to Printer dialog box, use one of the following methods, and then click OK:
-
To print all the documents, click All.
-
To print the document that you see in the document window, click Current record.
-
To print a range of documents, click From, and then type the record numbers in the From and To boxes.
-
-
In the Print dialog box, select the options that you want.
-
Save the Merged Letters for Later Use
If you want to edit merged letters or to save them for later use, you can collect them into a single document. To do this, follow these steps:
-
Click Edit individual letters.
-
In the Merge to a New Document dialog box, use one of the following methods, and then click OK:
-
To merge all the documents, click All.
-
To merge only the document that you see in the document window, click Current record.
-
To merge a range of documents, click From, and then type the record numbers in the From and To boxes.
-
-
Word opens a single new document that contains all the individual letters. You can then save the document for later use, just as you would any regular document.
References
For more information, click the following article numbers to view the articles in the Microsoft Knowledge Base:
318117 How to use addresses from an Excel worksheet to create labels in Word
318115 How to create a form letter by using information from an Access database in Word 2002
318112 How to use addresses from an Access 2002 database to create labels in Word 2002
294686 How to use mail merge to create a list sorted by category in Word 2002 and in later versions of Word
290408 Frequently asked questions about mail merge in Word 2002
294688 How to design and set up a mail merge address list in Word 2002 and in later versions of Word
294693 How to use mail merge to create a directory in Word 2002 and in later versions of Word
294683 How to use mail merge to create form letters in Word 2002 and in later versions of Word
| Mailmerge using Microsoft Office Word (WinWord) is an easy task, as long as you go the mainstream way .. But sometimes you need to format the text based on conditions. That’s where the IF clause comes into action.. |
The General Process
Setting Up the Excel Source
The first step is to set up the Excel file with information for people receiving the mailings. This may be provided for you already. If not, you will want to make sure that you put headings on all the columns. For example, on top of the column with first names, you will want a heading like FirstName. It is best not to use spaces or punctuation in this heading.
Setting Up the Letter
Next, open Word and write the letter, omitting any information that will be filled in from, or based on, the Excel file.
Starting the Mail Merge
Now, click on the Mailings tab. Click the Start Mail Merge button, and from the dropdown that appears, choose Letters. Nothing happens – don’t worry.

Connecting to the Excel File
To connect your document to the Excel file, click the Select Recipients button and choose Use Existing List… Find the Excel file on your computer. When you are presented with a list of all the spreadsheets in your Excel file, choose the one with the data you would like to use for the merge. There is a “My Data Has Headers” checkbox which is checked by default – if you set up your Excel file with headers as recommended above, you should leave it checked.
Inserting a Merge Field
Now that your Word document has been associated with your Excel spreadsheet, you’ll be able to insert data from any of your Excel columns. To do this:
- First put your cursor at a location in which you’d like to enter information from the spreadsheet. For example, you might put your cursor after the greeting where the first name will be displayed.
- Now, click Insert Merge Field. You will see a list of all Merge Fields available to you – in other words, headings from your Excel spreadsheet. Choose the one which holds the information you’d like to reference.
Repeat this process until you have added all of the fields you need.
Previewing the Results
To see what your letters will look like with the Excel data, click Preview Results and use the arrows to page through each individually generated letter.

Finishing Up
If the results look good, click the Finish and Merge button. Choose Edit Individual Documents. This will allow you to put all the letters into one long Word document, each starting a new page. You can make any necessary edits before printing.
More Advanced Tricks
Using Preformatted Blocks
Word has two preformatted items for letters – an Address Block and a Greeting Line. To add these, click the Address Block or Greeting Line button. You then have to make sure that Word knows which fields in your Excel sheet correspond to common fields such as first and last name. To do this, click the Match Fields button in the pop-up and choose the fields in your Excel that match the fields in Word.
Conditional Text (Rules)
Sometimes you don’t want to display a field directly from the spreadsheet, but use the field’s content to make a decision about what will appear in the letter. For example, if someone has donated more than a certain amount, you may want to use more effusive language than usual. This can be accomplished by adding an If…Then…Else rule.
To add a rule to your document:
- Click the “Rules” button and choose If…Then…Else
- Choose the field name you would like to examine
- Choose what kind of comparison you are making. You have a choice of: equal to, not equal to, less than, greater than, less than or equal to, greater than or equal to, is blank, is not blank.
- Type in what you would like to compare the field to. If you chose “is blank” or “is not blank”, don’t enter anything here.
- In the “Insert This Text” box, enter the text you’d like to appear if your comparison is true.
- In the “Otherwise Insert This Text” box, enter the text you’d like to appear if your comparison is NOT true.
If you’d like, you can leave either the “Insert This Text” or “Otherwise Insert This Text” boxes blank.
Viewing Merge Fields
To toggle between previewing your letters and viewing the code for your Merge Fields and Rules, use Alt-F9.
Your merge fields will look like
{ MERGEFIELD nameOfField }
Where nameOfField is replaced with the name of your field.
Inserting Merge Fields in Rules / Manually Editing Merge Code
Let’s say you want to use an If rule (a.k.a. conditional), but you also want to display the content of a merge field in the result. You might have noticed that Word doesn’t let you insert a merge field in the “Insert this text” or “Otherwise this text” areas of the pop-up when writing the rule. You can insert a merge field, but you will have to do it manually.
Here’s an example of when you might want to use this. If someone has just made a commitment, but not donated, you might want to thank them for their commitment. But if they have donated, you might want to include the amount of their donation in the letter.
To do this, insert a rule and modify the result manually to include a merge field:
- Follow the steps to add a rule to your document and make it as complete as possible (you just won’t be able to add the merge field).
- Then, click Alt-F9 to see the actual code for your If…Then…Else on the page.
- The last two sets of quotes are “Insert This Text” and “Otherwise Insert This Text”. For example:
{ IF { MERGEFIELD zPledgeDue } = “y” “commitment” “gift” }
Place your cursor inside the quotes of the one to which you’d like to add the merge field. Then, click the Insert Merge Field button at the top and choose the merge field you’d like to add.
If you’d like, you could also write all of the code from scratch. There isn’t really a reason to do this unless you are excited about the prospect, but if you’d like, you can insert a new piece of code into your document by clicking Control-F9.
Nested conditionals are also possible. In a nested conditional, you are doing another comparison inside the Then or Else section of a conditional. You can insert another Rule just as you insert a merge field into a conditional.
Example: Planning a Nested Conditional
You might be planning a more complex merge where you will have to nest conditionals. How will you know? If you describe your situation and find you have an ‘if’ followed by another question/choice, then you have a nested conditional.
For example, let’s say you’re writing a letter to everyone in your contact list. You want to personalize the letter based on how recently you have spent time with the person. If you haven’t met them, you’ll tell them you’re looking forward to it. If you have met them, have you met them in the last year? If not, let them know that it’s been a while. If so, tell them how happy you are about it. Sometimes, it helps to make a chart.

Now, let’s write the code. Let’s pretend we have two merge fields, one called Met (Y/N) and one called LastSeen (# of months ago you last saw them).
First Conditional – Have you met them?
First, insert an If…Then…Else rule to determine whether you have met them. We will use the dropdowns to select Met Equal to Y. To make it easier to find your place later, type notes to yourself in the Insert this Text – like: Check when you last met them. We are not doing a second check if we have not met them, so we can simply type a message in the Otherwise Insert This Text (I am looking forward to meeting you).
After this step, your code will look like:
{ IF { MERGEFIELD Met } = “Y” “Check when you last met them” “I am looking forward to meeting you.” }
Second Conditional – If you met them, when did you last see them?
Now, as per in the instructions in the Inserting Merge Fields in Rules section above, we are going to use Alt-F9 to view our Field Codes. Locate where you made your note to “Check when you last met them”. Select this text – leaving the quotes – and delete it. Now we will add that second conditional here to check when we last met them.
Insert an If…Then…Else rule, this time checking when we’ve last seen them. The dropdowns would look something like LastSeen Less Than 12 (since 12 months are in a year, and we’re checking if we met them this year. From here on it’s easy – we just write our happy message in Insert This Text (I’m so happy we’ve gotten to spend time together recently) and, in Otherwise This Text, It’s been a long time since we’ve seen each other.
Now, your code will look like:
{ IF { MERGEFIELD Met } = “Y” “{ IF { MERGEFIELD LastSeen } < 12 “I’m so happy we’ve gotten to spend time together recently.” “It’s been a long time since we’ve seen each other.”}” “I am looking forward to meeting you.” }
 Please Note:
This article is written for users of the following Microsoft Word versions: 2007, 2010, 2013, 2016, 2019, Word in Microsoft 365, and 2021. If you are using an earlier version (Word 2003 or earlier), this tip may not work for you. For a version of this tip written specifically for earlier versions of Word, click here: Searching for a Specific Field.
![]()
Written by Allen Wyatt (last updated December 10, 2022)
This tip applies to Word 2007, 2010, 2013, 2016, 2019, Word in Microsoft 365, and 2021
Other issues of WordTips have featured ways in which you can search for field codes in general. You may be wondering how you can search for a specific type of field code. You can do it by following these steps in Word 2007:
- Make sure field codes (the actual codes, not the results of the codes) are showing in your document. If not, press Alt+F9 to display them.
- Press Ctrl+F. Word displays the Find tab of the Find and Replace dialog box. (See Figure 1.)
- In the Find What box, type either ^d or ^19. This is the code to find the opening field brace.
- Type a space followed by the field name.
- If available, click the More button.
- Make sure no formatting is being searched for, and that no other check boxes in the dialog box are selected.
- Click on Find Next.
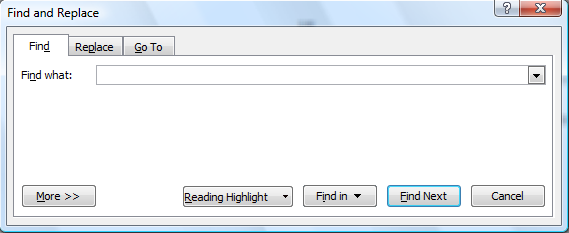
Figure 1. The Find tab of the Find and Replace dialog box.
As an example, if you wanted to find a DATE field, after following steps 3 and 4, you would be searching for «^d DATE» (without the quote marks, of course).
Simple searching in Word 2010 and later versions is different than in earlier versions of Word. You can, if you desire, follow the above steps, but in place of step 2 make sure that you display the Home tab of the ribbon, click the down-arrow next to the Find tool, and then choose Advanced Find. An alternative, though, is to use the simplified Navigation pane:
- Make sure field codes are showing in your document. If not, press Alt+F9 to display them.
- Press Ctrl+F. Word displays the Navigation pane at the left side of your document.
- In the box at the top of the pane, type either ^d or ^19. This is the code to find the opening field brace.
- Type a space followed by the field name.
Now the Navigation pane should show all matches for your desired field. Click the one that is the one you want, and Word jumps to that location in the document.
WordTips is your source for cost-effective Microsoft Word training.
(Microsoft Word is the most popular word processing software in the world.)
This tip (1430) applies to Microsoft Word 2007, 2010, 2013, 2016, 2019, Word in Microsoft 365, and 2021. You can find a version of this tip for the older menu interface of Word here: Searching for a Specific Field.
Author Bio
With more than 50 non-fiction books and numerous magazine articles to his credit, Allen Wyatt is an internationally recognized author. He is president of Sharon Parq Associates, a computer and publishing services company. Learn more about Allen…
MORE FROM ALLEN
Adding a Drop Shadow to a Text Box
One way to make your text boxes «stand off» the page is to add a drop shadow to them. This tip shows just how easy it is …
Discover More
Tab Key Won’t Move from Cell to Cell in Locked Worksheet
Normally the Tab key can be used to move from one cell to another in Excel. If this cell movement doesn’t work for you, …
Discover More
Typing Check Marks into Excel
Need to enter a check mark into a cell? There are a number of ways you can get the desired character, depending on the …
Discover More
More WordTips (ribbon)
Updating Fields in Locked Forms
Updating form fields in Word can be confusing, especially when the fields are locked in a form. This tips explains why …
Discover More
Referencing Fields in Another Document
Sometimes you may have two documents that are so integrally related to each other that the one document may require the …
Discover More
Adding a Dynamic Total in Your Document
You can use a few bookmarks and an equation field to add a dynamic total anywhere in your document. Once in place, you …
Discover More