
Цикл For Each… Next в VBA Excel, его синтаксис и описание отдельных компонентов. Примеры использования цикла For Each… Next.
Цикл For Each… Next в VBA Excel предназначен для выполнения блока операторов по отношению к каждому элементу из группы элементов (диапазон, массив, коллекция). Этот замечательный цикл применяется, когда неизвестно количество элементов в группе и их индексация, в противном случае, более предпочтительным считается использование цикла For…Next.
|
For Each element In group [ statements ] [ Exit For ] [ statements ] Next [ element ] |
В квадратных скобках указаны необязательные атрибуты цикла For Each… Next.
Компоненты цикла For Each… Next
| Компонент | Описание |
|---|---|
| element | Обязательный атрибут в операторе For Each, необязательный атрибут в операторе Next. Представляет из себя переменную, используемую для циклического прохода элементов группы (диапазон, массив, коллекция), которая предварительно должна быть объявлена с соответствующим типом данных*. |
| group | Обязательный атрибут. Группа элементов (диапазон, массив, коллекция), по каждому элементу которой последовательно проходит цикл For Each… Next. |
| statements | Необязательный** атрибут. Операторы вашего кода. |
| Exit For | Необязательный атрибут. Оператор выхода из цикла до его окончания. |
*Если цикл For Each… Next используется в VBA Excel для прохождения элементов коллекции (объект Collection) или массива, тогда переменная element должна быть объявлена с типом данных Variant, иначе цикл работать не будет.
**Если не использовать в цикле свой код, смысл применения цикла теряется.
Примеры циклов For Each… Next
Цикл для диапазона ячеек
На активном листе рабочей книги Excel выделите диапазон ячеек и запустите на выполнение следующую процедуру:
|
Sub test1() Dim element As Range, a As String a = «Данные, полученные с помощью цикла For Each… Next:» For Each element In Selection a = a & vbNewLine & «Ячейка « & element.Address & _ » содержит значение: « & CStr(element.Value) Next MsgBox a End Sub |
Информационное окно MsgBox выведет адреса выделенных ячеек и их содержимое, если оно есть. Если будет выбрано много ячеек, то полностью информация по всем ячейкам выведена не будет, так как максимальная длина параметра Prompt функции MsgBox составляет примерно 1024 знака.
Цикл для коллекции листов
Скопируйте следующую процедуру VBA в стандартный модуль книги Excel:
|
Sub test2() Dim element As Worksheet, a As String a = «Список листов, содержащихся в этой книге:» For Each element In Worksheets a = a & vbNewLine & element.Index _ & «) « & element.Name Next MsgBox a End Sub |
Информационное окно MsgBox выведет список наименований всех листов рабочей книги Excel по порядковому номеру их ярлычков, соответствующих их индексам.
Цикл для массива
Присвоим массиву список наименований животных и в цикле For Each… Next запишем их в переменную a. Информационное окно MsgBox выведет список наименований животных из переменной a.
|
Sub test3() Dim element As Variant, a As String, group As Variant group = Array(«бегемот», «слон», «кенгуру», «тигр», «мышь») ‘или можно присвоить массиву значения диапазона ячеек ‘рабочего листа, например, выбранного: group = Selection a = «Массив содержит следующие значения:» & vbNewLine For Each element In group a = a & vbNewLine & element Next MsgBox a End Sub |
Повторим ту же процедуру VBA, но всем элементам массива в цикле For Each… Next присвоим значение «Попугай». Информационное окно MsgBox выведет список наименований животных, состоящий только из попугаев, что доказывает возможность редактирования значений элементов массива в цикле For Each… Next.
|
Sub test4() Dim element As Variant, a As String, group As Variant group = Array(«бегемот», «слон», «кенгуру», «тигр», «мышь») ‘или можно присвоить массиву значения диапазона ячеек ‘рабочего листа, например, выделенного: group = Selection a = «Массив содержит следующие значения:» & vbNewLine For Each element In group element = «Попугай» a = a & vbNewLine & element Next MsgBox a End Sub |
Этот код, как и все остальные в этой статье, тестировался в Excel 2016.
Цикл для коллекции подкаталогов и выход из цикла
В этом примере мы будем добавлять в переменную a названия подкаталогов на диске C вашего компьютера. Когда цикл дойдет до папки Program Files, он добавит в переменную a ее название и сообщение: «Хватит, дальше читать не буду! С уважением, Ваш цикл For Each… Next.».
|
1 2 3 4 5 6 7 8 9 10 11 12 13 14 15 16 17 18 19 20 21 22 |
Sub test5() Dim FSO As Object, myFolders As Object, myFolder As Object, a As String ‘Создаем новый FileSystemObject и присваиваем его переменной «FSO» Set FSO = CreateObject(«Scripting.FileSystemObject») ‘Извлекаем список подкаталогов на диске «C» и присваиваем ‘его переменной «myFolders» Set myFolders = FSO.GetFolder(«C:») a = «Папки на диске C:» & vbNewLine ‘Проходим циклом по списку подкаталогов и добавляем в переменную «a« ‘их имена, дойдя до папки «Program Files«, выходим из цикла For Each myFolder In myFolders.SubFolders a = a & vbNewLine & myFolder.Name If myFolder.Name = «Program Files» Then a = a & vbNewLine & vbNewLine & «Хватит, дальше читать не буду!» _ & vbNewLine & vbNewLine & «С уважением,» & vbNewLine & _ «Ваш цикл For Each... Next.« Exit For End If Next Set FSO = Nothing MsgBox a End Sub |
Информационное окно MsgBox выведет список наименований подкаталогов на диске C вашего компьютера до папки Program Files включительно и сообщение цикла о прекращении своей работы.
В результате работы программы будут выведены не только наименования подкаталогов, видимых при переходе в проводнике к диску C, но и скрытые и служебные папки. Для просмотра списка всех подкаталогов на диске C, закомментируйте участок кода от If до End If включительно и запустите выполнение процедуры в редакторе VBA Excel.
Return to VBA Code Examples
In this Article
- For Each Item in Array
- For Next Loop
- Loop Through Part of Array
- Loop Through Entire Array
This tutorial will teach you how to loop through Arrays in VBA.
There are two primary ways to loop through Arrays using VBA:
- For Each Loop – The For Each Loop will loop through each item in the array.
- For Next Loop – The For Next Loop will loop through specified start and end positions of the array (We can use the UBound and LBound Functions to loop through the entire array).
For Each Item in Array
The For Each Loop enables you to loop through each element of the array.
Sub LoopForArrayStatic()
'declare a variant array
Dim strNames(1 To 4) As String
'populate the array
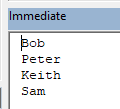
strNames(1) = "Bob"
strNames(2) = "Peter"
strNames(3) = "Keith"
strNames(4) = "Sam"
'declare a variant to hold the array element
Dim item as variant
'loop through the entire array
For Each item in strNames
'show the element in the debug window.
Debug.Print item
Next item
End SubThe above procedure will loop through all the names in the array.
For Next Loop
The For Next Loop will loop through each item at a specified start and end position of the array.
Loop Through Part of Array
You can manually specify the start and end positions for your loop. This may be appropriate if you know your array size and/or you only want to loop through part of an array.
Sub LoopForNextStatic()
'declare a variant array
Dim strNames(1 To 4) As String
'populate the array
strNames(1) = "Bob"
strNames(2) = "Peter"
strNames(3) = "Keith"
strNames(4) = "Sam"
'declare an integer
Dim i As Integer
'loop from position 2 to position 3 of the array
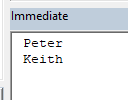
For i = 2 To 3
'show the name in the immediate window
Debug.Print strNames(i)
Next i
End SubIn the example above, we have looped through positions 2 and 3 of the array. The immediate window would return the names as follows.
Loop Through Entire Array
Next, we will use the UBound and LBound Functions to loop through an entire array. This is extremely useful if the start and end positions of the array might change (ex. a Dynamic Array):
Sub LoopForNextDynamic()
'declare a variant array
   Dim strNames() As String
'initialize the array
   ReDim strNames(1 to 4)
'populate the array
   strNames(1) = "Bob"
   strNames(2) = "Peter"
   strNames(3) = "Keith"
   strNames(4) = "Sam"
'declare an integer
   Dim i As Integer
'loop from the lower bound of the array to the upper bound of the array - the entire array
   For i = LBound(strNames) To UBound(strNames)
'show the name in the immediate window
      Debug.Print strNames(i)
   Next i
End Sub
VBA Coding Made Easy
Stop searching for VBA code online. Learn more about AutoMacro — A VBA Code Builder that allows beginners to code procedures from scratch with minimal coding knowledge and with many time-saving features for all users!

Learn More!
I have an array of Strings:
Dim sArray(4) as String
I am going through each String in the array:
for each element in sarray
  do_something(element)
next element
do_something takes a string as a parameter
I am getting an error passing the element as a String:
ByRef Argument Mismatch
Should I be converting the element to a String or something?
![]()
TylerH
20.6k64 gold badges76 silver badges97 bronze badges
asked Nov 19, 2010 at 18:22
![]()
Alex GordonAlex Gordon
55.8k284 gold badges666 silver badges1051 bronze badges
1
Element needs to be a variant, so you can’t declare it as a string. Your function should accept a variant if it is a string though as long as you pass it ByVal.
Public Sub example()
    Dim sArray(4) As string
    Dim element As variant

    For Each element In sArray
        do_something element
    Next element
End Sub


Sub do_something(ByVal e As String)

End Sub
The other option is to convert the variant to a string before passing it.
do_something CStr(element)
![]()
BigBen
43.9k6 gold badges27 silver badges40 bronze badges
answered Nov 19, 2010 at 19:27
![]()
2
A for each loop structure is more designed around the collection object. A For..Each loop requires a variant type or object. Since your «element» variable is being typed as a variant your «do_something» function will need to accept a variant type, or you can modify your loop to something like this:
Public Sub Example()

    Dim sArray(4) As String
    Dim i As Long

    For i = LBound(sArray) To UBound(sArray)
        do_something sArray(i)
    Next i

End Sub
answered Nov 19, 2010 at 18:51
![]()
FinkFink
3,31619 silver badges26 bronze badges
2
I use the counter variable like Fink suggests. If you want For Each and to pass ByRef (which can be more efficient for long strings) you have to cast your element as a string using CStr
Sub Example()

    Dim vItm As Variant
    Dim aStrings(1 To 4) As String

    aStrings(1) = "one": aStrings(2) = "two": aStrings(3) = "three": aStrings(4) = "four"

    For Each vItm In aStrings
        do_something CStr(vItm)
    Next vItm

End Sub

Function do_something(ByRef sInput As String)

    Debug.Print sInput

End Function
answered Nov 19, 2010 at 20:39
![]()
Dick KusleikaDick Kusleika
32.5k4 gold badges51 silver badges73 bronze badges
what about this simple inArray function:
Function isInArray(ByRef stringToBeFound As String, ByRef arr As Variant) As Boolean
For Each element In arr
    If element = stringToBeFound Then
        isInArray = True
        Exit Function
    End If
Next element
End Function
answered Jun 17, 2014 at 7:24
![]()
If alternatives are acceptable for this case, I would rather suggest UBound :
For i = 1 to UBound(nameofthearray)
   your code here
next i
answered Apr 28, 2021 at 23:55
![]()
На чтение 24 мин. Просмотров 90.8k.

Дональд Кнут
Список настолько же силен, как и его самое слабое звено
В таблице ниже краткая справка по использованию массивов в VBA. В статье постарался замахнуться на звание самого подробного руководства, которое вы найдете о массивах VBA.
Содержание
- Краткое руководство по массивам VBA
- Введение
- Быстрые заметки
- Что такое массивы и зачем они нужны?
- Типы массивов VBA
- Объявление массива
- Присвоение значений массиву
- Использование функций Array и Split
- Использование циклов с массивами
- Использование Erase
- ReDim с Preserve
- Сортировка массива
- Передача массива в Sub или функцию
- Возвращение массива из функции
- Двумерные массивы
- Чтение из диапазона ячеек в массив
- Как заставить ваши макросы работать на суперскорости
- Заключение
Краткое руководство по массивам VBA
| Задача | Статический массив |
Динамический массив |
| Объявление | Dim arr(0 To 5) As Long |
Dim arr() As Long Dim arr As Variant |
| Установить размер | Dim arr(0 To 5) As Long |
ReDim arr(0 To 5)As Variant |
| Увеличить размер (сохранить существующие данные) |
Только динамический |
ReDim Preserve arr(0 To 6) |
| Установить значения |
arr(1) = 22 | arr(1) = 22 |
| Получить значения | total = arr(1) | total = arr(1) |
| Первая позиция | LBound(arr) | LBound(arr) |
| Последняя позиция | Ubound(arr) | Ubound(arr) |
| Читать все записи (1D) | For i = LBound(arr) To UBound(arr) Next i Or For i = LBound(arr,1) To UBound(arr,1) Next i |
For i = LBound(arr) To UBound(arr) Next i Or For i = LBound(arr,1) To UBound(arr,1) Next i |
| Читать все записи (2D) | For i = LBound(arr,1) To UBound(arr,1) For j = LBound(arr,2) To UBound(arr,2) Next j Next i |
For i = LBound(arr,1) To UBound(arr,1) For j = LBound(arr,2) To UBound(arr,2) Next j Next i |
| Читать все записи | Dim item As Variant For Each item In arr Next item |
Dim item As Variant For Each item In arr Next item |
| Перейти на Sub | Sub MySub(ByRef arr() As String) | Sub MySub(ByRef arr() As String) |
| Возврат из функции | Function GetArray() As Long() Dim arr(0 To 5) As Long GetArray = arr End Function |
Function GetArray() As Long() Dim arr() As Long GetArray = arr End Function |
| Получить от функции |
Только динамический |
Dim arr() As Long Arr = GetArray() |
| Стереть массив | Erase arr *Сбрасывает все значения по умолчанию |
Erase arr *Удаляет массив |
| Строка в массив | Только динамический |
Dim arr As Variant arr = Split(«James:Earl:Jones»,»:») |
| Массив в строку | Dim sName As String sName = Join(arr, «:») |
Dim sName As String sName = Join(arr, «:») |
| Заполните значениями |
Только динамический |
Dim arr As Variant arr = Array(«John», «Hazel», «Fred») |
| Диапазон в массив | Только динамический |
Dim arr As Variant arr = Range(«A1:D2») |
| Массив в диапазон | Так же, как в динамическом |
Dim arr As Variant Range(«A5:D6») = arr |
Введение
В этой статье подробно рассматриваются массивы на языке программирования Excel VBA. Она охватывает важные моменты, такие как:
- Зачем вам массивы
- Когда вы должны их использовать
- Два типа массивов
- Использование более одного измерения
- Объявление массивов
- Добавление значений
- Просмотр всех предметов
- Супер эффективный способ чтения Range в массив
В первом разделе мы рассмотрим, что такое массивы и зачем они нужны. Вы можете не понимать часть кода в первом разделе. Это нормально. Я буду разбивать на простые термины в следующих разделах статьи.
Быстрые заметки
Иногда коллекции лучше, чем массивы. Вы можете прочитать о коллекциях здесь.
Массивы и циклы идут рука об руку. Наиболее распространенными циклами, которые вы используете с массивами, являются циклы For i и For Each.
Что такое массивы и зачем они нужны?
Массив VBA — это тип переменной. Используется для хранения списков данных одного типа. Примером может быть сохранение списка стран или списка итогов за неделю.
В VBA обычная переменная может хранить только одно значение за раз.
В следующем примере показана переменная, используемая для хранения оценок ученика.
' Может хранить только 1 значение за раз
Dim Student1 As Integer
Student1 = 55
Если мы хотим сохранить оценки другого ученика, нам нужно создать вторую переменную.
В следующем примере у нас есть оценки пяти студентов

Мы собираемся прочитать эти отметки и записать их в Immediate Window.
Примечание. Функция Debug.Print записывает значения в Immediate Window. Для просмотра этого окна выберите View-> Immediate Window из меню (сочетание клавиш Ctrl + G).


Как видите в следующем примере, мы пишем один и тот же код пять раз — по одному для каждого учащегося.
Public Sub StudentMarks()

    With ThisWorkbook.Worksheets("Лист1")

        ' Объявите переменную для каждого студента
        Dim Student1 As Integer
        Dim Student2 As Integer
        Dim Student3 As Integer
        Dim Student4 As Integer
        Dim Student5 As Integer

        ' Читайте оценки студентов из ячейки
        Student1 = .Range("C2").Offset(1)
        Student2 = .Range("C2").Offset(2)
        Student3 = .Range("C2").Offset(3)
        Student4 = .Range("C2").Offset(4)
        Student5 = .Range("C2").Offset(5)

        ' Печать студенческих оценок
        Debug.Print "Оценки студентов"
        Debug.Print Student1
        Debug.Print Student2
        Debug.Print Student3
        Debug.Print Student4
        Debug.Print Student5

    End With

End Sub
Ниже приведен вывод из примера

Проблема с использованием одной переменной для каждого учащегося заключается в том, что вам необходимо добавить код для каждого учащегося. Поэтому, если в приведенном выше примере у вас будет тысяча студентов, вам понадобится три тысячи строк кода!
К счастью, у нас есть массивы, чтобы сделать нашу жизнь проще. Массивы позволяют нам хранить список элементов данных в одной структуре.
Следующий код показывает приведенный выше пример с использованием массива.
Public Sub StudentMarksArr()

    With ThisWorkbook.Worksheets("Лист1")

        ' Объявите массив для хранения оценок для 5 студентов
        Dim Students(1 To 5) As Integer

        ' Читайте оценки учеников из ячеек C3: C7 в массив
        Dim i As Integer
        For i = 1 To 5
            Students(i) = .Range("C2").Offset(i)
        Next i

        ' Распечатывать оценки студентов из массива
        Debug.Print "Оценки студентов"
        For i = LBound(Students) To UBound(Students)
            Debug.Print Students(i)
        Next i

    End With

End Sub
Преимущество этого кода в том, что он будет работать для любого количества студентов. Если нам нужно изменить этот код для работы с 1000 студентами, нам нужно всего лишь изменить (от 1 до 5) на (от 1 до 1000) в декларации. В предыдущем примере нам нужно было добавить примерно пять тысяч строк кода.
Давайте проведем быстрое сравнение переменных и массивов. Сначала мы сравним процесс объявления.
 ' Объявляем переменные
        Dim Student As Integer
        Dim Country As String

  ' Объявляем массивы
        Dim Students(1 To 3) As Integer
        Dim Countries(1 To 3) As String
Далее мы сравниваем присвоение значения
    ' присвоить значение переменной
        Student1 = .Cells(1, 1)

    ' присваивать значение первому элементу в массиве
        Students(1) = .Cells(1, 1)
Наконец, мы смотрим на запись значений
  ' Вывести значение переменной
        Debug.Print Student1

  ' Вывести значение первого студента в массиве
        Debug.Print Students(1)
Как видите, использование переменных и массивов очень похоже.
Важным является тот факт, что массивы используют индекс (также называемый нижним индексом) для доступа к каждому элементу. Это означает, что мы можем легко получить доступ ко всем элементам в массиве, используя цикл For.
Теперь, когда у вас есть представление о том, почему массивы полезны, давайте пройдемся по ним шаг за шагом.
Типы массивов VBA
В VBA есть два типа массивов:
- Статический — массив фиксированного размера.
- Динамический — массив, в котором размер задается во время выполнения
Разница между этими массивами в основном в том, как они создаются. Доступ к значениям в обоих типах массивов абсолютно одинаков. В следующих разделах мы рассмотрим оба типа.
Объявление массива
Статический массив объявляется следующим образом
Public Sub DecArrayStatic()

    ' Создать массив с местоположениями 0,1,2,3
    Dim arrMarks1(0 To 3) As Long

    ' По умолчанию от 0 до 3, то есть местоположения 0,1,2,3
    Dim arrMarks2(3) As Long

    ' Создать массив с местоположениями 1,2,3,4,5
    Dim arrMarks1(1 To 5) As Long

    ' Создать массив с местоположениями 2,3,4 'Это редко используется
    Dim arrMarks3(2 To 4) As Long

End Sub
![]()
Как видите, размер указывается при объявлении статического массива. Проблема в том, что вы никогда не можете быть заранее уверены, какой размер вам нужен. Каждый раз, когда вы запускаете макрос, у вас могут быть разные требования к размеру.
Если вы не используете все расположения массива, ресурсы тратятся впустую. Если вам нужно больше места, вы можете использовать ReDim, но это по сути создает новый статический массив.
Динамический массив не имеет таких проблем. Вы не указываете размер, когда объявляете. Поэтому вы можете увеличиваться и уменьшаться по мере необходимости.
Public Sub DecArrayDynamic()

    ' Объявить динамический массив
    Dim arrMarks() As Long

    ' Установите размер массива, когда вы будете готовы
    ReDim arrMarks(0 To 5)

End Sub
Динамический массив не выделяется, пока вы не используете оператор ReDim. Преимущество в том, что вы можете подождать, пока не узнаете количество элементов, прежде чем устанавливать размер массива. Со статическим массивом вы должны указать размер заранее.
Присвоение значений массиву
Чтобы присвоить значения массиву, вы используете номер местоположения (пересечении строки и столбца). Вы присваиваете значение для обоих типов массивов одинаково.
Public Sub AssignValue()

    ' Объявить массив с местоположениями 0,1,2,3
    Dim arrMarks(0 To 3) As Long

    ' Установите значение позиции 0
    arrMarks(0) = 5

    ' становите значение позиции 3
    arrMarks(3) = 46

    ' Это ошибка, так как нет местоположения 4
    arrMarks(4) = 99

End Sub
![]()
Номер места называется индексом. Последняя строка в примере выдаст ошибку «Индекс вне диапазона», так как в примере массива нет местоположения 4.
Использование функций Array и Split
Вы можете использовать функцию Array для заполнения массива списком элементов. Вы должны объявить массив как тип Variant. Следующий код показывает, как использовать эту функцию.
  Dim arr1 As Variant
    arr1 = Array("Апельсин", "Персик","Груша")

  Dim arr2 As Variant
    arr2 = Array(5, 6, 7, 8, 12)
![]()
Массив, созданный функцией Array, начнется с нулевого индекса, если вы не используете Option Base 1 в верхней части вашего модуля. Затем он начнется с первого индекса. В программировании, как правило, считается плохой практикой иметь ваши реальные данные в коде. Однако иногда это полезно, когда вам нужно быстро протестировать некоторый код. Функция Split используется для разделения строки на массив на основе разделителя. Разделитель — это символ, такой как запятая или пробел, который разделяет элементы.
Следующий код разделит строку на массив из трех элементов.
 Dim s As String
    s = "Красный,Желтый,Зеленый,Синий"

    Dim arr() As String
    arr = Split(s, ",")
![]()
Функция Split обычно используется, когда вы читаете из cvs или txt-файла, разделенного запятыми, или из другого источника, который предоставляет список элементов, разделенных одним и тем же символом.
Использование циклов с массивами
Использование цикла For обеспечивает быстрый доступ ко всем элементам массива. Вот где сила использования массивов становится очевидной. Мы можем читать массивы с десятью значениями или десятью тысячами значений, используя те же несколько строк кода. В VBA есть две функции: LBound и UBound. Эти функции возвращают самый маленький и самый большой индекс в массиве. В массиве arrMarks (от 0 до 3) LBound вернет 0, а UBound вернет 3.
В следующем примере случайные числа присваиваются массиву с помощью цикла. Затем он печатает эти числа, используя второй цикл.
Public Sub ArrayLoops()

    ' Объявить массив
    Dim arrMarks(0 To 5) As Long

    ' Заполните массив случайными числами
    Dim i As Long
    For i = LBound(arrMarks) To UBound(arrMarks)
        arrMarks(i) = 5 * Rnd
    Next i

    ' Распечатайте значения в массиве
    Debug.Print "Место нахождения", "Значение"
    For i = LBound(arrMarks) To UBound(arrMarks)
        Debug.Print i, arrMarks(i)
    Next i

End Sub
Функции LBound и UBound очень полезны. Их использование означает, что наши циклы будут работать правильно с любым размером массива. Реальное преимущество заключается в том, что если размер массива изменяется, нам не нужно менять код для печати значений. Цикл будет работать для массива любого размера, пока вы используете эти функции.
Использование цикла For Each
Вы можете использовать цикл For Each с массивами. Важно помнить, что он доступен только для чтения. Это означает, что вы не можете изменить значение в массиве.
В следующем коде значение метки изменяется, но оно не меняет значение в массиве.
 For Each mark In arrMarks
        ' Не изменит значение массива
        mark = 5 * Rnd
    Next mark
Цикл For Each отлично подходит для чтения массива. Как видите, лучше писать специально для двумерного массива.
  Dim mark As Variant
    For Each mark In arrMarks
        Debug.Print mark
    Next mark
Использование Erase
Функция Erase может использоваться для массивов, но она работает по-разному в зависимости от типа массива.
Для статического массива функция Erase сбрасывает все значения по умолчанию. Если массив состоит из целых чисел, то все значения устанавливаются в ноль. Если массив состоит из строк, то все строки устанавливаются в «» и так далее.
Для динамического массива функция удаления стирает память. То есть она удаляет массив. Если вы хотите использовать его снова, вы должны использовать ReDim для выделения памяти.
Давайте рассмотрим пример статического массива. Этот пример аналогичен примеру ArrayLoops в последнем разделе с одним отличием — мы используем Erase после установки значений. Когда значение будет распечатано, все они будут равны нулю.
Public Sub EraseStatic()

    ' Объявить массив
    Dim arrMarks(0 To 3) As Long

    ' Заполните массив случайными числами
    Dim i As Long
    For i = LBound(arrMarks) To UBound(arrMarks)
        arrMarks(i) = 5 * Rnd
    Next i

    ' ВСЕ ЗНАЧЕНИЯ УСТАНОВЛЕНЫ НА НОЛЬ
    Erase arrMarks

    ' Распечатайте значения - там все теперь ноль
    Debug.Print "Место нахождения", "Значение"
    For i = LBound(arrMarks) To UBound(arrMarks)
        Debug.Print i, arrMarks(i)
    Next i

End Sub
Теперь мы попробуем тот же пример с динамикой. После того, как мы используем Erase, все места в массиве были удалены. Нам нужно использовать ReDim, если мы хотим использовать массив снова.
Если мы попытаемся получить доступ к членам этого массива, мы получим ошибку «Индекс вне диапазона».
Public Sub EraseDynamic()

    ' Объявить массив
    Dim arrMarks() As Long
    ReDim arrMarks(0 To 3)

    ' Заполните массив случайными числами
    Dim i As Long
    For i = LBound(arrMarks) To UBound(arrMarks)
        arrMarks(i) = 5 * Rnd
    Next i

    ' arrMarks теперь освобожден. Места не существуют.
    Erase arrMarks

End Sub
ReDim с Preserve
Если мы используем ReDim для существующего массива, то массив и его содержимое будут удалены.
В следующем примере второй оператор ReDim создаст совершенно новый массив. Исходный массив и его содержимое будут удалены.
Sub UsingRedim()

    Dim arr() As String

    ' Установить массив в слоты от 0 до 2
    ReDim arr(0 To 2)
    arr(0) = "Яблоко"

    ' Массив с яблоком теперь удален
    ReDim arr(0 To 3)

End Sub
Если мы хотим расширить размер массива без потери содержимого, мы можем использовать ключевое слово Preserve.
Когда мы используем Redim Preserve, новый массив должен начинаться с того же начального размера, например мы не можем сохранить от (0 до 2) до (от 1 до 3) или до (от 2 до 10), поскольку они являются различными начальными размерами.
В следующем коде мы создаем массив с использованием ReDim, а затем заполняем массив типами фруктов.
Затем мы используем Preserve для увеличения размера массива, чтобы не потерять оригинальное содержимое.
Sub UsingRedimPreserve()

    Dim arr() As String

    ' Установить массив в слоты от 0 до 1
    ReDim arr(0 To 2)
    arr(0) = "Яблоко"
    arr(1) = "Апельсин"
    arr(2) = "Груша"

    ' Изменение размера и сохранение исходного содержимого
    ReDim Preserve arr(0 To 5)

End Sub
Из приведенных ниже снимков экрана видно, что исходное содержимое массива было «сохранено».


Предостережение: в большинстве случаев вам не нужно изменять размер массива, как мы делали в этом разделе. Если вы изменяете размер массива несколько раз, то вам захочется рассмотреть возможность использования коллекции.
Использование Preserve с 2-мерными массивами
Preserve работает только с верхней границей массива.
Например, если у вас есть двумерный массив, вы можете сохранить только второе измерение, как показано в следующем примере:
Sub Preserve2D()

    Dim arr() As Long

    ' Установите начальный размер
    ReDim arr(1 To 2, 1 To 5)

    ' Изменить размер верхнего измерения
    ReDim Preserve arr(1 To 2, 1 To 10)

End Sub
Если мы попытаемся использовать Preserve на нижней границе, мы получим ошибку «Индекс вне диапазона».
В следующем коде мы используем Preserve для первого измерения. Запуск этого кода приведет к ошибке «Индекс вне диапазона»:
Sub Preserve2DError()

    Dim arr() As Long

    ' Установите начальный размер
    ReDim arr(1 To 2, 1 To 5)

    ' Ошибка «Вне диапазона»
    ReDim Preserve arr(1 To 5, 1 To 5)

End Sub
Когда мы читаем из диапазона в массив, он автоматически создает двумерный массив, даже если у нас есть только один столбец.
Применяются те же правила сохранения. Мы можем использовать Preserve только на верхней границе, как показано в следующем примере:
Sub Preserve2DRange()

    Dim arr As Variant

    ' Назначить диапазон массиву
    arr = Sheet1.Range("A1:A5").Value

    ' Preserve будет работать только на верхней границе
    ReDim Preserve arr(1 To 5, 1 To 7)

End Sub
Сортировка массива
В VBA нет функции для сортировки массива. Мы можем отсортировать ячейки листа, но это медленно, если данных много.
Функция быстрой сортировки ниже может использоваться для сортировки массива.
Sub QuickSort(arr As Variant, first As Long, last As Long)

  Dim vCentreVal As Variant, vTemp As Variant

  Dim lTempLow As Long
  Dim lTempHi As Long
  lTempLow = first
  lTempHi = last

  vCentreVal = arr((first + last) / 2)
  Do While lTempLow <= lTempHi

    Do While arr(lTempLow) < vCentreVal And lTempLow < last
      lTempLow = lTempLow + 1
    Loop

    Do While vCentreVal < arr(lTempHi) And lTempHi > first
      lTempHi = lTempHi - 1
    Loop

    If lTempLow <= lTempHi Then

        ' Поменять значения
        vTemp = arr(lTempLow)

        arr(lTempLow) = arr(lTempHi)
        arr(lTempHi) = vTemp

        ' Перейти к следующим позициям
        lTempLow = lTempLow + 1
        lTempHi = lTempHi - 1

    End If

  Loop

  If first < lTempHi Then QuickSort arr, first, lTempHi
  If lTempLow < last Then QuickSort arr, lTempLow, last

End Sub
Вы можете использовать эту функцию так:
Sub TestSort()

    ' Создать временный массив
    Dim arr() As Variant
    arr = Array("Банан", "Дыня", "Персик", "Слива", "Яблоко")

    ' Сортировать массив
    QuickSort arr, LBound(arr), UBound(arr)

    ' Печать массива в Immediate Window(Ctrl + G)
    Dim i As Long
    For i = LBound(arr) To UBound(arr)
        Debug.Print arr(i)
    Next i

End Sub
Передача массива в Sub или функцию
Иногда вам нужно будет передать массив в процедуру. Вы объявляете параметр, используя круглые скобки, аналогично тому, как вы объявляете динамический массив.
Переход к процедуре с использованием ByRef означает, что вы передаете ссылку на массив. Таким образом, если вы измените массив в процедуре, он будет изменен, когда вы вернетесь.
Примечание. Когда вы используете массив в качестве параметра, он не может использовать ByVal, он должен использовать ByRef. Вы можете передать массив с помощью ByVal, сделав параметр вариантом.
' Передает массив в функцию
Public Sub PassToProc()
    Dim arr(0 To 5) As String
    ' Передать массив в функцию
    UseArray arr
End Sub

Public Function UseArray(ByRef arr() As String)
    ' Использовать массив
    Debug.Print UBound(arr)
End Function
Возвращение массива из функции
Важно помнить следующее. Если вы хотите изменить существующий массив в процедуре, вы должны передать его как параметр, используя ByRef (см. Последний раздел). Вам не нужно возвращать массив из процедуры.
Основная причина возврата массива — это когда вы используете процедуру для создания нового. В этом случае вы присваиваете возвращаемый массив массиву в вызывающей программе. Этот массив не может быть уже выделен. Другими словами, вы должны использовать динамический массив, который не был выделен.
Следующие примеры показывают это:
Public Sub TestArray()

    ' Объявить динамический массив - не выделен
    Dim arr() As String
    ' Возврат нового массива
    arr = GetArray

End Sub

Public Function GetArray() As String()

    ' Создать и выделить новый массив
    Dim arr(0 To 5) As String
    ' Возвращаемый массив
    GetArray = arr

End Function
Двумерные массивы
Массивы, на которые мы смотрели до сих пор, были одномерными. Это означает, что массивы представляют собой один список элементов.
Двумерный массив — это список списков. Если вы думаете об одной строке электронной таблицы как об одном измерении, то более одного столбца является двухмерным. На самом деле электронная таблица является эквивалентом двумерного массива. Он имеет два измерения — строки и столбцы.
Следует отметить одну маленькую вещь: Excel обрабатывает одномерный массив как строку, если вы записываете его в электронную таблицу. Другими словами, массив arr (от 1 до 5) эквивалентен arr (от 1 до 1, от 1 до 5) при записи значений в электронную таблицу.
На следующем рисунке показаны две группы данных. Первый — это одномерный массив, а второй — двухмерный.

Чтобы получить доступ к элементу в первом наборе данных (одномерном), все, что вам нужно сделать, это дать строку, например. 1,2, 3 или 4.
Для второго набора данных (двумерного) вам нужно указать строку И столбец. Таким образом, вы можете думать, что 1-мерное — это несколько столбцов, а одна строка и двухмерное — это несколько строк и несколько столбцов.
Примечание. В массиве может быть более двух измерений. Это редко требуется. Если вы решаете проблему с помощью 3+-мерного массива, то, вероятно, есть лучший способ сделать это.
Вы объявляете двумерный массив следующим образом:
Dim ArrayMarks(0 To 2, 0 To 3) As Long
В следующем примере создается случайное значение для каждого элемента в массиве и печатается значение в Immediate Window.
Public Sub TwoDimArray()

    ' Объявить двумерный массив
    Dim arrMarks(0 To 3, 0 To 2) As String

    ' Заполните массив текстом, состоящим из значений i и j
    Dim i As Long, j As Long
    For i = LBound(arrMarks) To UBound(arrMarks)
        For j = LBound(arrMarks, 2) To UBound(arrMarks, 2)
            arrMarks(i, j) = CStr(i) & ":" & CStr(j)
        Next j
    Next i

    ' Вывести значения в массиве в Immediate Window
    Debug.Print "i", "j", "Знаечние"
    For i = LBound(arrMarks) To UBound(arrMarks)
        For j = LBound(arrMarks, 2) To UBound(arrMarks, 2)
            Debug.Print i, j, arrMarks(i, j)
        Next j
    Next i

End Sub
Видите, что мы используем второй цикл For внутри первого цикла, чтобы получить доступ ко всем элементам.
Результат примера выглядит следующим образом:

Этот макрос работает следующим образом:
- Входит в цикл i
- i установлен на 0
- цикл Enters j
- j установлен на 0
- j установлен в 1
- j установлен на 2
- Выход из цикла j
- i установлен в 1
- j установлен на 0
- j установлен в 1
- j установлен на 2
- И так до тех пор, пока i = 3 и j = 2
Заметьте, что LBound и UBound имеют второй аргумент 2. Это указывает, что это верхняя или нижняя граница второго измерения. Это начальное и конечное местоположение для j. Значение по умолчанию 1, поэтому нам не нужно указывать его для цикла i.
Использование цикла For Each
Использование For Each лучше использовать при чтении из массива.
Давайте возьмем код сверху, который выписывает двумерный массив.
 ' Для цикла For необходимо два цикла
    Debug.Print "i", "j", "Значение"
    For i = LBound(arrMarks) To UBound(arrMarks)
        For j = LBound(arrMarks, 2) To UBound(arrMarks, 2)
            Debug.Print i, j, arrMarks(i, j)
        Next j
    Next i
Теперь давайте перепишем его, используя цикл For Each. Как видите, нам нужен только один цикл, и поэтому гораздо проще написать:
 ' Использование For Each требует только одного цикла
    Debug.Print "Значение"
    Dim mark As Variant
    For Each mark In arrMarks
        Debug.Print mark
    Next mark
Использование цикла For Each дает нам массив только в одном порядке — от LBound до UBound. В большинстве случаев это все, что вам нужно.
Чтение из диапазона ячеек в массив
Если вы читали мою статью о ячейках и диапазонах, то вы знаете, что VBA имеет чрезвычайно эффективный способ чтения из диапазона ячеек в массив и наоборот.
Public Sub ReadToArray()

    ' Объявить динамический массив
    Dim StudentMarks As Variant

    ' Считать значения в массив из первой строки
    StudentMarks = Range("A1:Z1").Value

    ' Запишите значения обратно в третий ряд
    Range("A3:Z3").Value = StudentMarks

End Sub
Динамический массив, созданный в этом примере, будет двухмерным массивом. Как видите, мы можем прочитать весь диапазон ячеек в массив всего за одну строку.
В следующем примере будут считаны примеры данных студента ниже из C3: E6 Лист1 и распечатаны в Immediate Window.
Public Sub ReadAndDisplay()

    ' Получить диапазон
    Dim rg As Range
    Set rg = ThisWorkbook.Worksheets("Лист1").Range("C3:E6")

    ' Создать динамический массив
    Dim StudentMarks As Variant

    ' Считать значения в массив из листа 1
    StudentMarks = rg.Value

    ' Вывести значения массива
    Debug.Print "i", "j", "Значение"
    Dim i As Long, j As Long
    For i = LBound(StudentMarks) To UBound(StudentMarks)
        For j = LBound(StudentMarks, 2) To UBound(StudentMarks, 2)
            Debug.Print i, j, StudentMarks(i, j)
        Next j
    Next i

End Sub


Как видите, первое измерение (доступное через i) массива — это строка, а второе — столбец. Чтобы продемонстрировать это, взглянем на значение 44 в Е4 данных образца. Это значение находится в строке 2 столбца 3 наших данных. Вы можете видеть, что 44 хранится в массиве в StudentMarks (2,3).
Как заставить ваши макросы работать на суперскорости
Если ваши макросы работают очень медленно, этот раздел будет очень полезным. Особенно, если вы имеете дело с большими объемами данных. В VBA это держится в секрете.
Обновление значений в массивах происходит экспоненциально быстрее, чем обновление значений в ячейках.
В последнем разделе вы увидели, как мы можем легко читать из группы ячеек в массив и наоборот. Если мы обновляем много значений, то мы можем сделать следующее
- Скопируйте данные из ячеек в массив.
- Измените данные в массиве.
- Скопируйте обновленные данные из массива обратно в ячейки.
Например, следующий код будет намного быстрее, чем код ниже:
Public Sub ReadToArray()

    ' Считать значения в массив из первой строки
    Dim StudentMarks  As Variant
    StudentMarks = Range("A1:Z20000").Value

    Dim i As Long
    For i = LBound(StudentMarks) To UBound(StudentMarks)
        ' Обновление отметок здесь
        StudentMarks(i, 1) = StudentMarks(i, 1) * 2
        '...
    Next i

    ' Запишите новые значения обратно на лист
    Range("A1:Z20000").Value = StudentMarks

End Sub
Sub UsingCellsToUpdate()

    Dim c As Variant
    For Each c In Range("A1:Z20000")
        c.Value = ' Обновите значения здесь
    Next c

End Sub
Назначение из одного набора ячеек в другой также намного быстрее, чем с помощью копирования и вставки.
' Назначение - быстрее
Range("A1:A10").Value = Range("B1:B10").Value

' Копировать Вставить - медленнее
Range("B1:B1").Copy Destination:=Range("A1:A10")
Заключение
Ниже приводится краткое изложение основных моментов этой статьи.
- Массивы — это эффективный способ хранения списка элементов одного типа.
- Вы можете получить доступ к элементу массива напрямую, используя номер местоположения, который известен как индекс.
- Распространенная ошибка «Индекс вне диапазона» вызвана доступом к несуществующему местоположению.
- Существует два типа массивов: статический и динамический.
- Статический используется, когда размер массива всегда одинаков.
- Динамические массивы позволяют вам определять размер массива во время выполнения.
- LBound и UBound обеспечивают безопасный способ поиска самых маленьких и самых больших подписок массива.
- Основной массив является одномерным. Есть еще многомерные массивы.
- Чтобы только передать массив в процедуру, используйте ByRef. Вы делаете это так: ByRef arr() as long.
- Вы можете вернуть массив из функции, но массив, которому он назначен, не должен быть выделен в данный момент.
- Рабочий лист с его строками и столбцами по сути является двумерным массивом.
- Вы можете читать непосредственно из диапазона листа в двухмерный массив всего за одну строку кода.
- Вы также можете записать из двумерного массива в диапазон всего за одну строку кода.
I’ll show you how to loop through an array in VBA and macros in Excel. This is a fairly simple concept but it can be a little tricky.
First, I’m assuming you already know what an array is and how to create and array in VBA [LINK to Article]. Now, that you know that, let’s get to looping though arrays.
There are two main ways to loop through all of the elements of an array in VBA and both of those will be covered below.
Create the Array
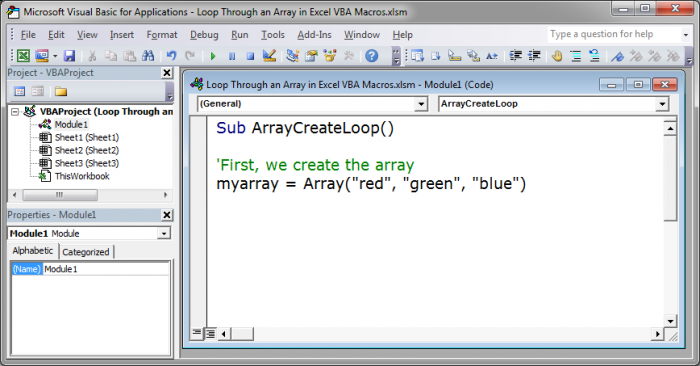
First, we need to create an array, and then we can loop through it.
myarray = Array("red", "green", "blue")
Loop through Array Method 1 — LBound and UBound Method
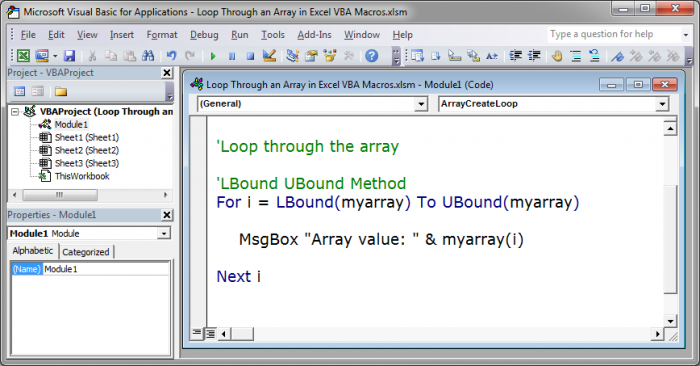
We use this code to loop though the array:
For i = LBound(myarray) To UBound(myarray)
MsgBox "Array value: " & myarray(i)
Next i
The MsgBox part of this code is simply what creates output so that we can see that this loop is working.
The actual loop is just this part:
For i = LBound(myarray) To UBound(myarray)
'inside the loop
Next i
To get this loop to work with your array, you simply need to replace myarray with the name of your array. If you want a more detailed explanation of everything, continue reading.
There are a few things going on here, so let’s start first with LBound and UBound.
LBound is a function in VBA that will find the lowest point of the array. This generates a number equal to the lowest index key for the array. The array that you want this to work on is put within this function, in this case, myarray.
UBound is a function in VBA that will find the highest point of the array. It outputs a number equal to the highest index key for the array. The array that you want this to work on is put within this function, in this case, myarray.
Now, we use these two functions within a basic For Next loop.
The For Next loop does this:
It sets a variable, in this case i (but it could be any name you want), equal to the LBound function’s output. Then, it says that this loop should continue running up to when it gets to the number provided by the UBound function, which will be the last index number in the array.
You need to close the loop with Next and then the variable i so that it will continue the loop, adding 1 each time.
Accessing Data from the Array within the Loop
You need to be able to get the data from the array variable and here is how you do it using this method:
While inside the loop, you put the name of your array and then inside parenthesis you put i or whichever variable you used in the loop in place of i; this will get the output from the array within the loop.
Download the accompanying workbook and test out the loop to see how it works. The result of running this loop is that three message boxes will open and show you the data that is stored in the array variable. This loop is contained in the macro titled ArrayCreateLoop_1.
Loop through Array Method 2 — For Each …Next Loop Method
Using the For Each …Next method, we use this code to loop through the array:
For Each element In myarray
MsgBox "Array value: " & element
Next element
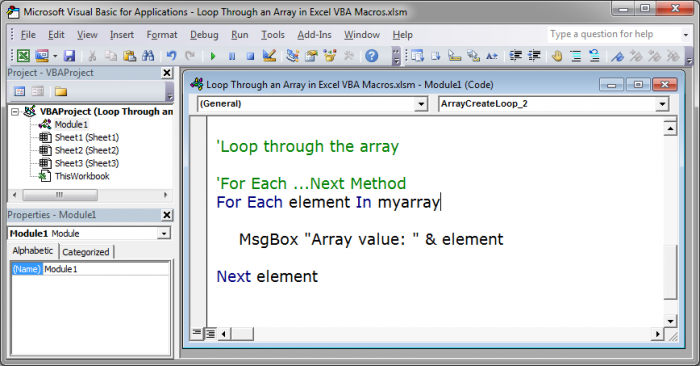
The name of the array is myarray and, in the middle of the loop, we have a line that starts with MsgBox that will output the contents of the array into a message box.
All you need to do to make this loop work for you is to change myarray to the name of your array variable.
If you want to learn more about the loop, keep reading.
This is the actual loop:
For Each element In myarray
'inside the loop
Next element
This loop will go through every part of the array and put it into a variable that we supply, in this case, the element variable.
You can name this variable whatever you want, you don’t have to call it «element». If you rename this, make sure to rename it in both paces, after where it says «For Each» and after «Next» — the «Next» part of the loop is what makes this a loop and tells the code to keep going through the variable until it is finished.
Accessing Data from the Array within the Loop
This is very easy to do using this method, simply use the variable that we used in the For Each loop, in this case element.
Anywhere you put this in the loop, the contents of the array will appear. You can see above how this was used in the line that starts with Msgbox.
Download the accompanying workbook and test out the loop to see how it works. The result of running this loop is that three message boxes will open and show you the data that is stored in the array variable. This loop is contained in the macro titled ArrayCreateLoop_2.
Notes
Both of these methods will work just fine for looping though a basic one dimensional array. For basic arrays, I would use the For Each loop since its syntax is quite a bit easier to understand and use.
However, don’t forget the LBound UBound method because you will often come across it when working with macros in Excel and it works great with more complex array functions.
Also, don’t forget to download the accompanying workbook so you can look at the code and play with it.
Similar Content on TeachExcel
Loop through All Worksheets in Excel using VBA and Macros
Tutorial: Ill show you how to loop through all of the worksheets in a workbook in Excel using VBA an…
Excel VBA — Create an Array — 3 ways
Tutorial: Ill show you three different ways to create an array in Excel VBA and Macros and how to ge…
How to Add a New Line to a Message Box (MsgBox) in Excel VBA Macros
Tutorial: I’ll show you how to create a message box popup window in Excel that contains text on mult…
Loop through a Range of Cells in Excel VBA/Macros
Tutorial: How to use VBA/Macros to iterate through each cell in a range, either a row, a column, or …
Data Validation List with Dynamic Arrays in Excel
Tutorial:
How to make a drop down menu list using data validation and dynamic arrays in Excel 365.
…
Select Cells in Excel using Macros and VBA
Tutorial: This is actually a very easy thing to do and only requires a couple lines of code. Below I…
Subscribe for Weekly Tutorials
BONUS: subscribe now to download our Top Tutorials Ebook!
This post provides a complete guide to the standard VBA For Loop and the VBA For Each Loop.
If you are looking for information about the VBA While and VBA Do Loop then go here.
If you want some quick info about the For loops then check out the Quick Guide table in the section below.
If you are looking for information on a particular topic then check out the Table of Contents below.
“History is about loops and continuums” – Mike Bidlo.
Related Links for the VBA For Loop
The Complete Guide to Ranges in Excel VBA.
The Complete Guide to Copying Data in Excel VBA.
VBA Do While Loop.
A Quick Guide to the VBA For Loop
| Loop format | Description | Example |
|---|---|---|
| For … Next | Run 10 times | For i = 1 To 10 Next |
| For … Next | Run 5 times. i=2,4, 6 etc. | For i = 2 To 10 Step 2 Next |
| For … Next | Run in reverse order | For i = 10 To 1 Step -1 Debug.Print i Next |
| For … Next | Go through Collection | For i = 1 To coll.Count Debug.Print coll(i) Next |
| For … Next | Go through array | For i = LBound(arr) To UBound(arr) Debug.Print arr(i) Next i |
| For … Next | Go through 2D array | For i = LBound(arr) To UBound(arr) For j = LBound(arr,2) To UBound(arr,2) Debug.Print arr(i, j) Next j Next i |
| For Each … Next | Go through Collection | Dim item As Variant For Each item In coll Debug.Print item Next item |
| For Each … Next | Go through array | Dim item As Variant For Each item In arr Debug.Print item Next item |
| For Each … Next | Go through 2D array | Dim item As Variant For Each item In arr Debug.Print item Next item |
| For Each … Next | Go through Dictionary | Dim key As Variant For Each key In dict.Keys Debug.Print key, dict(key) Next key |
| Both types | Exit Loop | For i = 1 To 10 If Cells(i,1) = «found» Then Exit For End If Next i |
The VBA For Loop Webinar
If you are a member of the website, click on the image below to view the webinar for this post.
(Note: Website members have access to the full webinar archive.)

Introduction to the VBA For Loop
Loops are by far the most powerful component of VBA. They are the rocket fuel of your Macros. They can perform tasks in milliseconds that would take humans hours. They also dramatically reduce the lines of code your applications need.
For Loops have been part of all major programming languages since they were first used with Fortan in 1957.
If you have never used loops before then this post is a great place to start. It provides an in-depth guide to loops, written in plain English without the jargon.
Let’s start with a very important question – what are loops and why do we need them?
What are VBA For Loops?
A loop is simply a way of running the same lines of code a number of times. Obviously running the same code over and over would give the same result.
So what is important to understand is that the lines of code normally contain a variable that changes slightly each time the loop runs.
For example, a loop could write to cell A1, then cell A2, A3 and so on. The slight change each time is the row.
Let’s look at a simple example.
VBA For Loop Example 1
The following code prints the values 1 to 5 in the Immediate Window(Ctrl + G to view).
Debug.Print 1
Debug.Print 2
Debug.Print 3
Debug.Print 4
Debug.Print 5
The Immediate Window
If you have not used the Immediate Window before then this section will get you up to speed quickly.
The function Debug.Print writes values to the Immediate Window. To view this window select View->Immediate Window from the menu( the shortcut is Ctrl + G)


VBA For Loop Example 2
Now imagine we want to print out the numbers 1 to 20. We would need to add 15 more lines to the example above.
However, using a loop we only need to write Debug.Print once.
    For i = 1 To 20
        Debug.Print i
    Next i
The output is:

Output
If we needed print the numbers 1 to 1000 then we only need to change the 20 to 1000.
Normally when we write code we would use a variable instead of a number like 20 or 1000. This gives you greater flexibility. It allows you to decide the number of times you wish to run the loop when the code is running. The following example explains this.
VBA For Loop Example 3
A common task in Excel is read all the rows with with data.
The way you approach this task is as follows
- Find the last row with data
- Store the value in variable
- Use the variable to determine how many times the loop runs
Using a variable in the loop makes your code very flexible. Your will work no matter how many rows there are.
Let’s have a look at an example. Imagine you receive a sheet with a list of fruit types and their daily sales. You want to count the number of Oranges sold and this list will vary in size depending on sales.
The following screenshot shows an example of this list

Sample Data of Fruit Sales
We can use the code to count the oranges
' https://excelmacromastery.com/
Sub CountFruit()

    ' Get the last row with text
    Dim LastRow As Long
    LastRow = Sheet1.Cells(Sheet1.Rows.Count, 1).End(xlUp).Row

    Dim i As Long, Total As Long
    ' Use LastRow in loop
    For i = 2 To LastRow
        ' Check if cell has text "Orange"
        If Sheet1.Cells(i, 1).Value = "Oranges" Then
            ' Add value in column B to total
            Total = Total + Sheet1.Cells(i, 2).Value
        End If
    Next i

    ' Print total
    Debug.Print "Total oranges sold was:"; Total

End Sub
You can try this code for yourself. Change the number of fruit items and you will see that the code still works fine.
If you were to increase the number fruit items to a large value like 10,000 then you will hardly notice the difference in the time it takes to run – almost instantly.
Loops are super fast. This is what makes them so powerful. Imagine performing a manual task on 10,000 cells. It would take a considerable amount of time.
Advantages of the VBA For Loop
4To conclude this section we will list the major advantages of using loops
- They reduce the lines code you need
- They are flexible
- They are fast
In the next sections we will look at the different types of loops and how to use them.
The Standard VBA For Loop
The VBA For loop is the most common loop you will use in Excel VBA. The For Loop is used when you can determine the number of times it will be run. For example, if you want to repeat something twenty times.
YouTube Video For Loop
Check out this YouTube Video of the For Loop:
Get the workbook and code for this video here
Format of the Standard VBA For Loop
The Standard VBA For Loop has the following format:
For <variable> = <start value> to <end value>
Next <variable>
The start and end values can be variables. Also the variable after Next is optional but it is useful and it makes it clear which for loop it belongs to.
How a For Loop Works
Let’s look at a simple for loop that prints the numbers 1 to 3
    Dim i As Long
    For i = 1 To 3
        Debug.Print i
    Next i
How this code works is as follows
i is set to 1
The value of i(now 1) is printed
i is set to 2
The value of i(now 2) is printed
i is set to 3
The value of i(now 3) is printed
If we did not use a loop then the equivalent code would be
    Dim i As Long
    i = i + 1
    Debug.Print i
    i = i + 1
    Debug.Print i
    i = i + 1
    Debug.Print i
The i = i + 1 line is used to add 1 to i and is a common way in programming to update a counter.
Using Step with the VBA For Loop
You can see that i is increased by one each time. This is the default. You can specify this interval using Step keyword.
The next example shows you how to do this:
    ' Prints the even numbers i.e. 2,4,6,8 ... 20
    For i = 2 To 20 Step 2
        Debug.Print i
    Next i
You can use a negative number with Step which will count in reverse
    ' Prints the even numbers in reverse i.e. 20,18,16,14 ... 2
    For i = 20 To 2 Step -2
        Debug.Print i
    Next i
Note: if Step is positive then your starting number must be lower than you ending number. The following loop will not run because the starting number 20 is greater than 10. VBA therefore, thinks it has already reached the target value 10.
    ' Will not run as starting number already greater than 10
    For i = 20 To 10 Step 1
        Debug.Print i
    Next i
If Step is negative then the start number must be greater than the end number.
Exit the For Loop
Sometimes you may want to leave the loop earlier if a certain condition occurs. For example if you read bad data.
You can use Exit For to automatically leave the loop as shown in the following code
    For i = 1 To 1000

        ' If cell is blank then exit for
        If Cells(i, 1) = "" Then
            MsgBox "Blank Cell found - Data error"
            Exit For
        End If

    Next i
Using the VBA For Loop with a Collection
The For loop can also be used to read items in a Collection.
In the following example, we display the name of all the open workbooks
    Dim i As Long
    For i = 1 To Workbooks.Count
        Debug.Print Workbooks(i).FullName
    Next i
Using Nested For Loops
Sometimes you may want to use a loop within a loop. An example of this would be where you want to print the names of the worksheets of each open workbook.
The first loop would go through each workbook. Each time this loop runs it would use a second loop to go through all the worksheets of that workbook. It is actually much easier to do than it sounds.
The following code shows how:
' https://excelmacromastery.com/
Sub ListWorksheets()

    Dim i As Long, j As Long
    ' First Loop goes through all workbooks
    For i = 1 To Workbooks.Count

        ' Second loop goes through all the worksheets of workbook(i)
        For j = 1 To Workbooks(i).Worksheets.Count
            Debug.Print Workbooks(i).Name + ":" + Worksheets(j).Name
        Next j

    Next i

End Sub
This works as follows:
The first loop sets i to 1
The second loop then uses the workbook at 1 to go through the worksheets.
The first loop sets i to 2
The second loop then uses the workbook at 2 to go through the worksheets.
and so on
It the next section we will use a For Each loop to perform the same task. You will find the For Each version much easier to read.
The VBA For Each Loop
The VBA For Each loop is used to read items from a collection or an array. We can use the For Each loop to access all the open workbooks. This is because Application.Workbooks is a collection of open workbooks.
This is a simple example of using the For Each Loop
    Dim wk As Workbook
    For Each wk In Workbooks
        Debug.Print wk.FullName
    Next wk
Format of the VBA For Each Loop
You can see the format of the VBA for each loop here(See Microsoft For Each Next documentation):
For Each <variable> in <collection>
Next <variable>
To create a For Each loop we need a variable of the same type that the collection holds. In the example here we created a variable of type Workbook.
If the collection has different types of items we can declare the variable as a variant.
VBA contains a collection called Sheets. This is a collection of sheets of type Worksheet(normal) and Chart(when you move a chart to be a full sheet). To go through this collection you would declare the variable as a Variant.
The following code uses For Each to print out the name of all the sheets in the current workbook
    Dim sh As Variant
    For Each sh In ThisWorkbook.Sheets
        Debug.Print sh.Name
    Next sh
Order of Items in the For Loop
For Each goes through items in one way only.
For example, if you go through all the worksheets in a workbook it will always go through from left to right. If you go through a range it will start at the lowest cell e.g. Range(“A1:A10”) will return A1,A2,A3 etc.
This means if you want any other order then you need to use the For loop.
Both loops in the following example will read the worksheets from left to right:
    ' Both loops read the worksheets from left to right
    Dim wk As Worksheet
    For Each wk In ThisWorkbook.Worksheets
        Debug.Print wk.Name
    Next

    Dim i As Long
    For i = 1 To ThisWorkbook.Worksheets.Count
        Debug.Print ThisWorkbook.Worksheets(i).Name
    Next
As you can see the For Each loop is neater to write. However if you want to read the sheets in any other order e.g. right to left then you have to use the for loop:
    ' Reading the worksheets from right to left
    Dim i As Long
    For i = ThisWorkbook.Worksheets.Count To 1 Step -1
        Debug.Print ThisWorkbook.Worksheets(i).Name
    Next
Using the VBA For Each Loop With Arrays
One thing to keep in my is that the For Each loop is that it is read-only when you use it with arrays.
The following example demonstrates this:
' https://excelmacromastery.com/
Sub UseForEach()

    ' Create array and add three values
    Dim arr() As Variant
    arr = Array("A", "B", "C")

    Dim s As Variant
    For Each s In arr
        ' Changes what s is referring to - not value of array item
        s = "Z"
    Next

    ' Print items to show the array has remained unchanged
    For Each s In arr
        Debug.Print s
    Next

End Sub
In the first loop we try to assign s to “Z”. When happens is that s is now referring the string “Z” and no longer to the item in the array.
In the second loop we print out the array and you can see that none of the values have changed.
When we use the For Loop we can change the array item. If we change the previous code to use the For Loop you it will change all the array values to “Z”
' https://excelmacromastery.com/
Sub UsingForWithArray()

    ' Create array and add three values
    Dim arr() As Variant
    arr = Array("A", "B", "C")

    Dim i As Long
    For i = LBound(arr) To UBound(arr)
        ' Changes value at position to Z
        arr(i) = "Z"
    Next

    ' Print items to show the array values have change
    For i = LBound(arr) To UBound(arr)
        Debug.Print arr(i)
    Next

End Sub
If your Collection is storing Objects the you can change the items using a For Each loop.
Using Nested For Each Loops
We saw already that you can have a loop inside other loops. Here is the example from above:
' https://excelmacromastery.com/
Sub ListWorksheets()

    Dim i As Long, j As Long
    ' First Loop goes through all workbooks
    For i = 1 To Workbooks.Count

        ' Second loop goes through all the worksheets of workbook(i)
        For j = 1 To Workbooks(i).Worksheets.Count
            Debug.Print Workbooks(i).Name + ":" + Worksheets(j).Name
        Next j

    Next i

End Sub
This time we will use the For Each loop to perform the same task:
' https://excelmacromastery.com/
Sub ReadAllWorksheets()

    Dim wk As Workbook, sh As Worksheet
    ' Read each workbook
    For Each wk In Workbooks

        ' Read each worksheet in the wk workbook
        For Each sh In wk.Worksheets
            ' Print workbook name and worksheet name
            Debug.Print wk.Name + ": " + sh.Name
        Next sh

    Next wk

End Sub
As you can see this is a neater way of performing this task than using the For Loop:
This code run as follows:
- Get the first Workbook from the Workbooks collection
- Go through all the worksheets in this workbook
- Print the workbook/worksheet details
- Get the next workbooks in the collection
- Repeat steps 2 to 3
- Continue until no more workbooks are left in the collection
How to Loop Through a Range
In Excel VBA, the most common use of a For Loop is to read through a range.
Imagine we have the data set in the screenshot below. Our task is to write code that will read through the data and copy the amounts to the column J. We are only going to copy amounts that are greater than 200,000.

The following example shows how we do it:
' Read through an Excel Range using the VBA For Loop
' https://excelmacromastery.com/
Sub ForLoopThroughRange()

    ' Get the worksheet
    Dim sh As Worksheet
    Set sh = ThisWorkbook.Worksheets("Sheet1")

    ' Get the Range
    Dim rg As Range
    Set rg = sh.Range("A1").CurrentRegion

    ' Delete existing output
    sh.Range("J1").CurrentRegion.ClearContents

    ' Set the first output row
    Dim row As Long
    row = 1

    ' Read through all the rows using the For Loop
    Dim i As Long
    For i = 2 To rg.Rows.Count

        ' Check if amount is greater than 200000
        If rg.Cells(i, 4).Value > 200000 Then

            ' Copy amount to column m
            sh.Cells(row, "J").Value = rg.Cells(i, 4).Value

            ' Move to next output row
            row = row + 1

        End If

    Next i

End Sub
This is a very basic example of copying data using Excel VBA. If you want a complete guide to copying data using Excel VBA then check out this post
Summary of the VBA For Loops
The Standard VBA For Loop
- The For loop is slower than the For Each loop.
- The For loop can go through a selection of items e.g. 5 to 10.
- The For loop can read items in reverse e.g. 10 to 1.
- The For loop is not as neat to write as the For Each Loop especially with nested loops.
- To exit a For loop use Exit For.
The VBA For Each Loop
- The For Each loop is faster than the For loop.
- The For Each loop goes through all items in the collectionarray.
- The For Each loop can go through items in one order only.
- The For Each loop is neater to write than a For Loop especially for nested loops.
- To exit a For Each loop use Exit For.
What’s Next?
Free VBA Tutorial If you are new to VBA or you want to sharpen your existing VBA skills then why not try out the The Ultimate VBA Tutorial.
Related Training: Get full access to the Excel VBA training webinars.
(NOTE: Planning to build or manage a VBA Application? Learn how to build 10 Excel VBA applications from scratch.)
Объявление массива очень похоже на объявление переменной, за исключением того, что вам нужно объявить размер массива сразу после его имени:
Dim myArray(9) As String 'Declaring an array that will contain up to 10 strings
По умолчанию массивы в VBA индексируются из ZERO , поэтому число внутри скобки не относится к размеру массива, а скорее к индексу последнего элемента
Доступ к элементам
Доступ к элементу массива осуществляется с использованием имени массива, за которым следует индекс элемента, внутри скобки:
myArray(0) = "first element"
myArray(5) = "sixth element"
myArray(9) = "last element"
Индексирование массива
Вы можете изменить индексирование массивов, разместив эту строку в верхней части модуля:
Option Base 1
С этой строкой все объявленные в модуле массивы будут проиндексированы с ONE .
Специфический указатель
Вы также можете объявить каждый массив своим собственным индексом, используя ключевое слово To , а нижнюю и верхнюю границы (= индекс):
Dim mySecondArray(1 To 12) As String 'Array of 12 strings indexed from 1 to 12
Dim myThirdArray(13 To 24) As String 'Array of 12 strings indexed from 13 to 24
Динамическая декларация
Когда вы не знаете размер своего массива до его объявления, вы можете использовать динамическое объявление и ключевое слово ReDim :
Dim myDynamicArray() As Strings 'Creates an Array of an unknown number of strings
ReDim myDynamicArray(5) 'This resets the array to 6 elements
Обратите внимание, что использование ключевого слова ReDim уничтожит любое предыдущее содержимое вашего массива. Чтобы предотвратить это, вы можете использовать ключевое слово Preserve после ReDim :
Dim myDynamicArray(5) As String
myDynamicArray(0) = "Something I want to keep"

ReDim Preserve myDynamicArray(8) 'Expand the size to up to 9 strings
Debug.Print myDynamicArray(0) ' still prints the element
Использование Split для создания массива из строки
Функция разделения
возвращает одномерный массив на основе нуля, содержащий указанное количество подстрок.
Синтаксис
Split (выражение [, разделитель [, limit [, compare ]]] )
| Часть | Описание |
|---|---|
| выражение | Необходимые. Строковое выражение, содержащее подстроки и разделители. Если выражение представляет собой строку нулевой длины («» или vbNullString), Split возвращает пустой массив, не содержащий элементов и данных. В этом случае возвращаемый массив будет иметь LBound 0 и UBound -1. |
| ограничитель | Необязательный. Строковый символ, используемый для определения пределов подстроки. Если опустить, символ пробела («») считается разделителем. Если разделителем является строка с нулевой длиной, возвращается одноэлементный массив, содержащий всю строку выражения . |
| предел | Необязательный. Количество подстрок, подлежащих возврату; -1 указывает, что все подстроки возвращаются. |
| сравнить | Необязательный. Числовое значение, указывающее, какое сравнение следует использовать при оценке подстрок. См. Раздел «Настройки» для значений. |
настройки
Аргумент сравнения может иметь следующие значения:
| постоянная | Значение | Описание |
|---|---|---|
| Описание | -1 | Выполняет сравнение, используя настройку оператора сравнения параметров . |
| vbBinaryCompare | 0 | Выполняет двоичное сравнение. |
| vbTextCompare | 1 | Выполняет текстовое сравнение. |
| vbDatabaseCompare | 2 | Только Microsoft Access. Выполняет сравнение, основанное на информации в вашей базе данных. |
пример
В этом примере показано, как Split работает, показывая несколько стилей. В комментариях будет отображаться результирующий набор для каждого из разных вариантов Split. Наконец, показано, как перебирать возвращаемый массив строк.
Sub Test

    Dim textArray() as String

    textArray = Split("Tech on the Net")
    'Result: {"Tech", "on", "the", "Net"}

    textArray = Split("172.23.56.4", ".")
    'Result: {"172", "23", "56", "4"}

    textArray = Split("A;B;C;D", ";")
    'Result: {"A", "B", "C", "D"}

    textArray = Split("A;B;C;D", ";", 1)
    'Result: {"A;B;C;D"}

    textArray = Split("A;B;C;D", ";", 2)
    'Result: {"A", "B;C;D"}

    textArray = Split("A;B;C;D", ";", 3)
    'Result: {"A", "B", "C;D"}

    textArray = Split("A;B;C;D", ";", 4)
    'Result: {"A", "B", "C", "D"}

    'You can iterate over the created array
    Dim counter As Long

    For counter = LBound(textArray) To UBound(textArray)
        Debug.Print textArray(counter)
    Next
 End Sub
Итерирующие элементы массива
Для … Далее
Использование переменной итератора в качестве номера индекса является самым быстрым способом для итерации элементов массива:
Dim items As Variant
items = Array(0, 1, 2, 3)

Dim index As Integer
For index = LBound(items) To UBound(items)
    'assumes value can be implicitly converted to a String:
    Debug.Print items(index)
Next
Вложенные циклы могут использоваться для итерации многомерных массивов:
Dim items(0 To 1, 0 To 1) As Integer
items(0, 0) = 0
items(0, 1) = 1
items(1, 0) = 2
items(1, 1) = 3

Dim outer As Integer
Dim inner As Integer
For outer = LBound(items, 1) To UBound(items, 1)
    For inner = LBound(items, 2) To UBound(items, 2)
        'assumes value can be implicitly converted to a String:
        Debug.Print items(outer, inner)
    Next
Next
Для каждого … Далее
A For Each...Next цикл также может использоваться для повторения массивов, если производительность не имеет значения:
Dim items As Variant
items = Array(0, 1, 2, 3)

Dim item As Variant 'must be variant
For Each item In items
    'assumes value can be implicitly converted to a String:
    Debug.Print item
Next
A For Each цикла будут выполняться итерация всех измерений от внешнего к внутреннему (в том же порядке, что и элементы, выделенные в памяти), поэтому нет необходимости в вложенных циклах:
Dim items(0 To 1, 0 To 1) As Integer
items(0, 0) = 0
items(1, 0) = 1
items(0, 1) = 2
items(1, 1) = 3

Dim item As Variant 'must be Variant
For Each item In items
    'assumes value can be implicitly converted to a String:
    Debug.Print item
Next
Обратите внимание, что For Each петли лучше всего использовать для итерации объектов Collection , если имеет значение производительность.
Все 4 фрагмента выше дают одинаковый результат:
 0
 1
 2
 3
Динамические массивы (изменение размера массива и динамическая обработка)
Динамические массивы
Добавление и уменьшение переменных в массиве динамически является огромным преимуществом, когда информация, которую вы обрабатываете, не имеет определенного количества переменных.
Добавление значений динамически
Вы можете просто изменить размер массива с помощью ReDim , это изменит размер массива, но если вы сохраните информацию, уже сохраненную в массиве, вам понадобится часть Preserve .
В приведенном ниже примере мы создаем массив и увеличиваем его на еще одну переменную в каждой итерации, сохраняя значения уже в массиве.
Dim Dynamic_array As Variant
' first we set Dynamic_array as variant

For n = 1 To 100

    If IsEmpty(Dynamic_array) Then
        'isempty() will check if we need to add the first value to the array or subsequent ones

        ReDim Dynamic_array(0)
        'ReDim Dynamic_array(0) will resize the array to one variable only
        Dynamic_array(0) = n

    Else
        ReDim Preserve Dynamic_array(0 To UBound(Dynamic_array) + 1)
        'in the line above we resize the array from variable 0 to the UBound() = last variable, plus one effectivelly increeasing the size of the array by one
        Dynamic_array(UBound(Dynamic_array)) = n
        'attribute a value to the last variable of Dynamic_array
    End If

Next
Удаление значений динамически
Мы можем использовать ту же логику для уменьшения массива. В этом примере значение «последний» будет удалено из массива.
Dim Dynamic_array As Variant
Dynamic_array = Array("first", "middle", "last")

ReDim Preserve Dynamic_array(0 To UBound(Dynamic_array) - 1)
' Resize Preserve while dropping the last value
Сброс массива и повторное использование динамически
Мы также можем повторно использовать массивы, которые мы создаем, чтобы не иметь много памяти, что замедлит работу. Это полезно для массивов разных размеров. Один фрагмент кода можно использовать повторно использовать массив в ReDim массив обратно (0) , приписывать одной переменной в массив и снова свободно увеличивать массив.
В нижеприведенном фрагменте я создаю массив со значениями от 1 до 40, пуст массив и пополняем массив значениями от 40 до 100, все это выполняется динамически.
Dim Dynamic_array As Variant

For n = 1 To 100

    If IsEmpty(Dynamic_array) Then
        ReDim Dynamic_array(0)
        Dynamic_array(0) = n

    ElseIf Dynamic_array(0) = "" Then
        'if first variant is empty ( = "") then give it the value of n
        Dynamic_array(0) = n
    Else
        ReDim Preserve Dynamic_array(0 To UBound(Dynamic_array) + 1)
        Dynamic_array(UBound(Dynamic_array)) = n
    End If
    If n = 40 Then
        ReDim Dynamic_array(0)
        'Resizing the array back to one variable without Preserving,
        'leaving the first value of the array empty
    End If

Next
Жесткие массивы (массивы массивов)
Ядра массивов НЕ многомерные массивы
Массивы массивов (Jagged Arrays) не совпадают с многомерными массивами, если вы думаете о них визуально. Многомерные массивы будут выглядеть как Matrices (Rectangular) с определенным количеством элементов по их размерам (внутри массивов), в то время как массив Jagged будет похож на ежегодный календарь с внутренними массивами, имеющими различное количество элементов, например, дни в разные месяцы.
Хотя Jagged Arrays довольно беспорядочны и сложны в использовании из-за их вложенных уровней и не имеют большой безопасности типов, но они очень гибкие, позволяют вам легко манипулировать различными типами данных и не нужно содержать неиспользуемые или пустые элементы.
Создание поврежденного массива
В приведенном ниже примере мы инициализируем зубчатый массив, содержащий два массива один для имен, а другой для чисел, а затем доступ к одному элементу каждого из них
Dim OuterArray() As Variant
Dim Names() As Variant
Dim Numbers() As Variant
'arrays are declared variant so we can access attribute any data type to its elements

Names = Array("Person1", "Person2", "Person3")
Numbers = Array("001", "002", "003")

OuterArray = Array(Names, Numbers)
'Directly giving OuterArray an array containing both Names and Numbers arrays inside

Debug.Print OuterArray(0)(1)
Debug.Print OuterArray(1)(1)
'accessing elements inside the jagged by giving the coordenades of the element
Динамическое создание и чтение массивов с зубцами
Мы также можем быть более динамичными в нашем приближении, чтобы построить массивы, представьте, что у нас есть личный лист данных клиентов в excel, и мы хотим построить массив для вывода информации о клиенте.
   Name -   Phone   -  Email  - Customer Number
Person1 - 153486231 - [email protected] - 001
Person2 - 153486242 - [email protected] - 002
Person3 - 153486253 - [email protected] - 003
Person4 - 153486264 - [email protected] - 004
Person5 - 153486275 - [email protected] - 005
Мы будем динамически строить массив заголовков и массив Customers, заголовок будет содержать заголовки столбцов, а массив Customers будет содержать информацию каждого клиента / строки в виде массивов.
Dim Headers As Variant
' headers array with the top section of the customer data sheet
    For c = 1 To 4
        If IsEmpty(Headers) Then
            ReDim Headers(0)
            Headers(0) = Cells(1, c).Value
        Else
            ReDim Preserve Headers(0 To UBound(Headers) + 1)
            Headers(UBound(Headers)) = Cells(1, c).Value
        End If
    Next

Dim Customers As Variant
'Customers array will contain arrays of customer values
Dim Customer_Values As Variant
'Customer_Values will be an array of the customer in its elements (Name-Phone-Email-CustNum)

    For r = 2 To 6
    'iterate through the customers/rows
        For c = 1 To 4
        'iterate through the values/columns

            'build array containing customer values
            If IsEmpty(Customer_Values) Then
                ReDim Customer_Values(0)
                Customer_Values(0) = Cells(r, c).Value
            ElseIf Customer_Values(0) = "" Then
                Customer_Values(0) = Cells(r, c).Value
            Else
                ReDim Preserve Customer_Values(0 To UBound(Customer_Values) + 1)
                Customer_Values(UBound(Customer_Values)) = Cells(r, c).Value
            End If
        Next

        'add customer_values array to Customers Array
        If IsEmpty(Customers) Then
            ReDim Customers(0)
            Customers(0) = Customer_Values
        Else
            ReDim Preserve Customers(0 To UBound(Customers) + 1)
            Customers(UBound(Customers)) = Customer_Values
        End If

        'reset Custumer_Values to rebuild a new array if needed
        ReDim Customer_Values(0)
    Next

    Dim Main_Array(0 To 1) As Variant
    'main array will contain both the Headers and Customers

    Main_Array(0) = Headers
    Main_Array(1) = Customers
To better understand the way to Dynamically construct a one dimensional array please check Dynamic Arrays (Array Resizing and Dynamic Handling) on the Arrays documentation.
Результатом приведенного выше фрагмента является массив с чередованием с двумя массивами, один из тех массивов с 4 элементами, 2 уровня отступа, а другой сам по себе является другим массивом Jagged, содержащим 5 массивов из 4 элементов каждый и 3 уровня отступа, см. Ниже структуру:
Main_Array(0) - Headers - Array("Name","Phone","Email","Customer Number")
          (1) - Customers(0) - Array("Person1",153486231,"[email protected]",001)
                Customers(1) - Array("Person2",153486242,"[email protected]",002)
                ...
                Customers(4) - Array("Person5",153486275,"[email protected]",005)
Чтобы получить доступ к информации, которую вы должны иметь в виду о структуре созданного массива Jagged Array, в приведенном выше примере вы можете видеть, что Main Array содержит массив Headers и массив массивов ( Customers ), следовательно, с различными способами доступ к элементам.
Теперь мы прочитаем информацию о Main Array и распечатаем каждую из данных Клиентов в виде Info Type: Info .
For n = 0 To UBound(Main_Array(1))
    'n to iterate from fisrt to last array in Main_Array(1)

    For j = 0 To UBound(Main_Array(1)(n))
        'j will iterate from first to last element in each array of Main_Array(1)

        Debug.Print Main_Array(0)(j) & ": " & Main_Array(1)(n)(j)
        'print Main_Array(0)(j) which is the header and Main_Array(0)(n)(j) which is the element in the customer array
        'we can call the header with j as the header array has the same structure as the customer array
    Next
Next
ЗАПОМНИТЕ, чтобы отслеживать структуру вашего Jagged Array, в приведенном выше примере для доступа к имени клиента, Main_Array -> Customers -> CustomerNumber -> Name к Main_Array -> Customers -> CustomerNumber -> Name который состоит из трех уровней, для возврата "Person4" вам понадобится расположение клиентов в Main_Array, затем местоположение клиента 4 в массиве Jagged Customers и, наконец, местоположение Main_Array(1)(3)(0) элемента в этом случае Main_Array(1)(3)(0) который является Main_Array(Customers)(CustomerNumber)(Name) .
Многомерные массивы
Многомерные массивы
Как видно из названия, многомерные массивы представляют собой массивы, которые содержат более одного измерения, обычно два или три, но могут иметь до 32 измерений.
Массив массива работает как матрица с различными уровнями, например, сравнение между одним, двумя и тремя измерениями.
Одно измерение — ваш типичный массив, он выглядит как список элементов.
Dim 1D(3) as Variant

*1D - Visually*
(0)
(1)
(2)
Два измерения будут выглядеть как сетка Sudoku или лист Excel, при инициализации массива вы определяете, сколько строк и столбцов будет иметь массив.
Dim 2D(3,3) as Variant
'this would result in a 3x3 grid

*2D - Visually*
(0,0) (0,1) (0,2)
(1,0) (1,1) (1,2)
(2,0) (2,1) (2,2)
Три измерения начнут выглядеть как кубик Рубика, при инициализации массива вы будете определять строки и столбцы, а также уровни / глубины, которые будет иметь массив.
Dim 3D(3,3,2) as Variant
'this would result in a 3x3x3 grid

*3D - Visually*
       1st layer                 2nd layer                  3rd layer
         front                     middle                     back
(0,0,0) (0,0,1) (0,0,2) ¦ (1,0,0) (1,0,1) (1,0,2) ¦ (2,0,0) (2,0,1) (2,0,2)
(0,1,0) (0,1,1) (0,1,2) ¦ (1,1,0) (1,1,1) (1,1,2) ¦ (2,1,0) (2,1,1) (2,1,2)
(0,2,0) (0,2,1) (0,2,2) ¦ (1,2,0) (1,2,1) (1,2,2) ¦ (2,2,0) (2,2,1) (2,2,2)
Дальнейшие измерения можно рассматривать как умножение 3D, поэтому 4D (1,3,3,3) будет представлять собой два боковых боковых 3D-массива.
Двухмерный массив
Создание
Пример ниже будет компиляцией списка сотрудников, каждый сотрудник будет иметь набор информации в списке (имя, фамилия, адрес, электронная почта, телефон …), пример, по существу, будет храниться в массиве ( сотрудник, информация), являющееся (0,0), является первым именем первого сотрудника.
Dim Bosses As Variant
'set bosses as Variant, so we can input any data type we want

Bosses = [{"Jonh","Snow","President";"Ygritte","Wild","Vice-President"}]
'initialise a 2D array directly by filling it with information, the redult wil be a array(1,2) size 2x3 = 6 elements

Dim Employees As Variant
'initialize your Employees array as variant
'initialize and ReDim the Employee array so it is a dynamic array instead of a static one, hence treated differently by the VBA Compiler
ReDim Employees(100, 5)
'declaring an 2D array that can store 100 employees with 6 elements of information each, but starts empty
'the array size is 101 x 6 and contains 606 elements

For employee = 0 To UBound(Employees, 1)
'for each employee/row in the array, UBound for 2D arrays, which will get the last element on the array
'needs two parameters 1st the array you which to check and 2nd the dimension, in this case 1 = employee and 2 = information
    For information_e = 0 To UBound(Employees, 2)
    'for each information element/column in the array

        Employees(employee, information_e) = InformationNeeded ' InformationNeeded would be the data to fill the array
        'iterating the full array will allow for direct attribution of information into the element coordinates
    Next
Next
Изменение размера
Изменение размера или ReDim Preserve Multi-Array, как и норма для массива One-Dimension, приведет к ошибке, вместо этого информация должна быть перенесена в массив Temporary с тем же размером, что и оригинал, плюс число добавляемых строк / столбцов. В приведенном ниже примере мы увидим, как инициализировать Temp Array, передать информацию из исходного массива, заполнить оставшиеся пустые элементы и заменить массив temp на исходный массив.
Dim TempEmp As Variant
'initialise your temp array as variant
ReDim TempEmp(UBound(Employees, 1) + 1, UBound(Employees, 2))
'ReDim/Resize Temp array as a 2D array with size UBound(Employees)+1 = (last element in Employees 1st dimension) + 1,
'the 2nd dimension remains the same as the original array. we effectively add 1 row in the Employee array

'transfer
For emp = LBound(Employees, 1) To UBound(Employees, 1)
    For info = LBound(Employees, 2) To UBound(Employees, 2)
        'to transfer Employees into TempEmp we iterate both arrays and fill TempEmp with the corresponding element value in Employees
        TempEmp(emp, info) = Employees(emp, info)

    Next
Next

'fill remaining
'after the transfers the Temp array still has unused elements at the end, being that it was increased
'to fill the remaining elements iterate from the last "row" with values to the last row in the array
'in this case the last row in Temp will be the size of the Employees array rows + 1, as the last row of Employees array is already filled in the TempArray

For emp = UBound(Employees, 1) + 1 To UBound(TempEmp, 1)
    For info = LBound(TempEmp, 2) To UBound(TempEmp, 2)

        TempEmp(emp, info) = InformationNeeded & "NewRow"

    Next
Next

'erase Employees, attribute Temp array to Employees and erase Temp array
Erase Employees
Employees = TempEmp
Erase TempEmp
Изменение значений элементов
Изменение / изменение значений в определенном элементе может быть выполнено путем простого вызова координаты для изменения и предоставления ей нового значения: Employees(0, 0) = "NewValue"
В качестве альтернативы, итерация по координатам использует условия для соответствия значениям, соответствующим требуемым параметрам:
For emp = 0 To UBound(Employees)
    If Employees(emp, 0) = "Gloria" And Employees(emp, 1) = "Stephan" Then
    'if value found
        Employees(emp, 1) = "Married, Last Name Change"
        Exit For
        'don't iterate through a full array unless necessary
    End If
Next
Доступ к элементам в массиве может выполняться с помощью вложенного цикла (итерация каждого элемента), цикла и координат (итерации строк и доступа к столбцам напрямую) или прямого доступа к обеим координатам.
'nested loop, will iterate through all elements
For emp = LBound(Employees, 1) To UBound(Employees, 1)
    For info = LBound(Employees, 2) To UBound(Employees, 2)
        Debug.Print Employees(emp, info)
    Next
Next

'loop and coordinate, iteration through all rows and in each row accessing all columns directly
For emp = LBound(Employees, 1) To UBound(Employees, 1)
    Debug.Print Employees(emp, 0)
    Debug.Print Employees(emp, 1)
    Debug.Print Employees(emp, 2)
    Debug.Print Employees(emp, 3)
    Debug.Print Employees(emp, 4)
    Debug.Print Employees(emp, 5)
Next

'directly accessing element with coordinates
Debug.Print Employees(5, 5)
Помните , всегда удобно хранить карту массива при использовании многомерных массивов, они могут легко стать путаницей.
Трехмерный массив
Для 3D-массива мы будем использовать ту же предпосылку, что и 2D-массив, с добавлением не только хранения Employee и Information, но и построения, в котором они работают.
В трехмерном массиве будут присутствовать сотрудники (могут рассматриваться как строки), информация (столбцы) и здание, которые можно рассматривать как разные листы на документе excel, они имеют одинаковый размер между ними, но каждый лист имеет различный набор информации в своих ячейках / элементах. 3D-массив будет содержать n число 2D-массивов.
Создание
3D-массив нуждается в трех координатах для инициализации Dim 3Darray(2,5,5) As Variant первой координатой массива будет количество строений / таблиц (разные наборы строк и столбцов), вторая координата будет определять строки и третью Столбцы. В результате Dim выше будет создан трехмерный массив с 108 элементами ( 3*6*6 ), эффективно имеющий 3 разных набора 2D-массивов.
Dim ThreeDArray As Variant
'initialise your ThreeDArray array as variant
ReDim ThreeDArray(1, 50, 5)
'declaring an 3D array that can store two sets of 51 employees with 6 elements of information each, but starts empty
'the array size is 2 x 51 x 6 and contains 612 elements

For building = 0 To UBound(ThreeDArray, 1)
    'for each building/set in the array
    For employee = 0 To UBound(ThreeDArray, 2)
    'for each employee/row in the array
        For information_e = 0 To UBound(ThreeDArray, 3)
        'for each information element/column in the array

            ThreeDArray(building, employee, information_e) = InformationNeeded ' InformationNeeded would be the data to fill the array
        'iterating the full array will allow for direct attribution of information into the element coordinates
        Next
    Next
Next
Изменение размера 3D-массива аналогично изменению размера 2D, сначала создайте временный массив с тем же размером оригинала, добавляя его в координату параметра для увеличения, первая координата увеличит количество наборов в массиве, второе и третьи координаты увеличат количество строк или столбцов в каждом наборе.
Пример ниже увеличивает количество строк в каждом наборе на единицу и заполняет те недавно добавленные элементы новой информацией.
Dim TempEmp As Variant
'initialise your temp array as variant
ReDim TempEmp(UBound(ThreeDArray, 1), UBound(ThreeDArray, 2) + 1, UBound(ThreeDArray, 3))
'ReDim/Resize Temp array as a 3D array with size UBound(ThreeDArray)+1 = (last element in Employees 2nd dimension) + 1,
'the other dimension remains the same as the original array. we effectively add 1 row in the for each set of the 3D array

'transfer
For building = LBound(ThreeDArray, 1) To UBound(ThreeDArray, 1)
    For emp = LBound(ThreeDArray, 2) To UBound(ThreeDArray, 2)
        For info = LBound(ThreeDArray, 3) To UBound(ThreeDArray, 3)
            'to transfer ThreeDArray into TempEmp by iterating all sets in the 3D array and fill TempEmp with the corresponding element value in each set of each row
            TempEmp(building, emp, info) = ThreeDArray(building, emp, info)

        Next
    Next
Next

'fill remaining
'to fill the remaining elements we need to iterate from the last "row" with values to the last row in the array in each set, remember that the first empty element is the original array Ubound() plus 1
For building = LBound(TempEmp, 1) To UBound(TempEmp, 1)
    For emp = UBound(ThreeDArray, 2) + 1 To UBound(TempEmp, 2)
        For info = LBound(TempEmp, 3) To UBound(TempEmp, 3)

            TempEmp(building, emp, info) = InformationNeeded & "NewRow"

        Next
    Next
Next

'erase Employees, attribute Temp array to Employees and erase Temp array
Erase ThreeDArray
ThreeDArray = TempEmp
Erase TempEmp
Изменение значений элементов и чтение
Чтение и изменение элементов в 3D-массиве может быть выполнено аналогично тому, как мы делаем 2D-массив, просто отрегулируйте дополнительный уровень в петлях и координатах.
Do
' using Do ... While for early exit
    For building = 0 To UBound(ThreeDArray, 1)
        For emp = 0 To UBound(ThreeDArray, 2)
            If ThreeDArray(building, emp, 0) = "Gloria" And ThreeDArray(building, emp, 1) = "Stephan" Then
            'if value found
                ThreeDArray(building, emp, 1) = "Married, Last Name Change"
                Exit Do
                'don't iterate through all the array unless necessary
            End If
        Next
    Next
Loop While False

'nested loop, will iterate through all elements
For building = LBound(ThreeDArray, 1) To UBound(ThreeDArray, 1)
    For emp = LBound(ThreeDArray, 2) To UBound(ThreeDArray, 2)
        For info = LBound(ThreeDArray, 3) To UBound(ThreeDArray, 3)
            Debug.Print ThreeDArray(building, emp, info)
        Next
    Next
Next

'loop and coordinate, will iterate through all set of rows and ask for the row plus the value we choose for the columns
For building = LBound(ThreeDArray, 1) To UBound(ThreeDArray, 1)
    For emp = LBound(ThreeDArray, 2) To UBound(ThreeDArray, 2)
        Debug.Print ThreeDArray(building, emp, 0)
        Debug.Print ThreeDArray(building, emp, 1)
        Debug.Print ThreeDArray(building, emp, 2)
        Debug.Print ThreeDArray(building, emp, 3)
        Debug.Print ThreeDArray(building, emp, 4)
        Debug.Print ThreeDArray(building, emp, 5)
    Next
Next

'directly accessing element with coordinates
Debug.Print Employees(0, 5, 5)