
-

1
Open the Word document. You can double-click the document’s name to open it in Word. Alternatively, open Word (it’s in the Windows menu on a PC and the Applications folder on a Mac), click File, click Open, then select the document.
-
2
Click the Review tab. It’s at the top of the screen.
Advertisement
-
3
Click Track Changes. It’s also at the top of the screen. Look for the sheet of paper icon with a yellow pencil. Now all future changes to the document will appear as colored markup.
- For example, if you delete something you’ve typed, it won’t actually disappear. Instead, it’ll will appear crossed-out. Newly typed text will be underlined.[1]
- Click Track Changes again to turn off further markups.
- For example, if you delete something you’ve typed, it won’t actually disappear. Instead, it’ll will appear crossed-out. Newly typed text will be underlined.[1]


Advertisement
Ask a Question
200 characters left
Include your email address to get a message when this question is answered.
Submit
Advertisement
Thanks for submitting a tip for review!
About This Article
Article SummaryX
1. Open the document.
2. Click Review.
3. Click Track Changes.
Did this summary help you?
Thanks to all authors for creating a page that has been read 66,523 times.
Is this article up to date?

Try it!
Turn on Track Changes to show edits made in a document, and use Show Markup to show the types of revisions you’d like to display.
Use Track Changes
-
Select Review > Track Changes to turn it on.
Make edits in your document and Word captures any edits you make.
-
Select Review > Track Changes to turn it off.
Word stops making new edits, and any made stay in the document.
Use Show Markup
-
Select Review > Display for Review.
-
Select the option you want:
-
Simple Markup points out where changes are made with a red line in the margin.
-
All Markup shows all edits with different colors of text and lines.
-
No Markup hides markup to show what the incorporated changes will look like.
-
Original shows the document in its original form.
-
-
In the Show Markup list, select the types of revisions you’d like to see:
-
Comments
-
Insertions and Deletions
-
Formatting
-
Balloons
-
Specific People
-
Want more?
Track changes in Word
Turn off track changes
Discover more Word training at LinkedIn Learning
Need more help?
Show or hide comments or tracked changes
- On the Review tab, go to Tracking.
- Select Show Markup.
- Point to Balloons and select Show All Revisions Inline.
Contents
- 1 Why are markups not showing in Word?
- 2 How do I show markup in Word 2016?
- 3 How do I see redlines in Word?
- 4 Why won’t my track changes show up?
- 5 How do I enable editing on a Word document?
- 6 How do I save a document without markup?
- 7 How do you make comments appear in bubbles in Word?
- 8 Where is the show Markup toolbar button?
- 9 How do I create a signature in Markup?
- 10 How do you redline edits in Word?
- 11 How do I highlight changes in Word?
- 12 Why are my track changes not showing different colors?
- 13 How do I make Word not show edits?
- 14 How do I use Track Changes in Word 2010?
- 15 How do I show different authors in track changes?
- 16 How do I unlock a document for editing?
- 17 Why does my Word document open in markup view?
- 18 How do you copy a Word document without track changes?
- 19 How do I show comments at the bottom of the page in Word?
- 20 How do I use markup?
Why are markups not showing in Word?
Step 1: Go to the ‘Review’ tab and select ‘All Markup’ in the drop down menu (Word 2019). Step 2: Click on ‘Show markup’ below ‘All Markup’ (Word 2019) and make sure all options are ticked.
How do I show markup in Word 2016?
Here’s how to get Word 2016 to show changes.
- Open a document in Word if one is not already open; it can be a blank one.
- Click the Review Tab.
- Select “All Markup” from the pulldown menu that’s to the right of the Track Changes button. It shows “Simple Markup” by default.
How do I see redlines in Word?
Use Show Markup
Select Review > Display for Review. Select the option you want: Simple Markup points out where changes are made with a red line in the margin. All Markup shows all edits with different colors of text and lines.
Why won’t my track changes show up?
If you don’t see the status of track changes in your status bar at the bottom of Word, then you probably want to turn that feature on. Right click anywhere on the status bar and where it says Track changes make sure there is a checkmark beside it.
How do I enable editing on a Word document?
Enable editing in your document
- Go to File > Info.
- Select Protect document.
- Select Enable Editing.
How do I save a document without markup?
Follow these steps:
- Display the Word Options dialog box.
- Click the Trust Center option at the left of the dialog box.
- Click the Trust Center Settings button.
- Click Privacy Options at the left of the dialog box.
- Clear the Make Hidden Markup Visible when Opening or Saving check box.
Click the Review tab on the Ribbon, then click the Balloons command. In the drop down list, click on Show Revisions in Balloons or Show Only Comments and Formatting in Balloons.
Where is the show Markup toolbar button?
The Markup toolbar contains buttons that invoke operations that manipulate the markup in a document. You can hide or display the toolbar by choosing View > Toolbars > Markup.
How do I create a signature in Markup?
In the Markup toolbar, tap + and then Signature. Tap Add or Remove Signature and then tap + to add a signature. In the New Signature panel, sign your name.
How do you redline edits in Word?
In the toolbar at the top of the screen, click the “Review” tab. This tab contains tools to help with spell checking and editing, including the “Track Changes” feature. Click the “Track Changes” button to enable Track Changes. This feature places a red line in the margins next to any edited text.
How do I highlight changes in Word?
Turn on Track Changes
- Open Microsoft Word.
- Choose the Review tab at the top of the document.
- Either click the Track Changes button (PC) or toggle the Track Changes switch (Mac).
- Make sure that you change ‘Simple Markup’ to ‘All Markup’ from the drop down bar next to Track Changes.
Why are my track changes not showing different colors?
The Track Changes tab of the Options dialog box. Make sure that all the Color settings (with the exception of the color setting for the change bars) are set to “By Author.” If these settings are for a specific color, then it can affect how changes are displayed in the document.
How do I make Word not show edits?
Click the Review tab on the Ribbon. Click the down arrow on Track Changes > Track Changes to turn it on or off. Track Changes: On or Track Changes: Off will display on the status bar (bottom bar in the document.)
How do I use Track Changes in Word 2010?
To turn on Track Changes:
- Click the Review tab.
- Click the Track Changes command. It should now be highlighted in gold to show that it is active. The Track Changes command.
- Any changes you make to the document will be shown as colored markups. Tracked changes.
- Click the Track Changes command again to turn it off.
Track Changes with Multiple Authors
Selecting the option, “show revisions in balloons”, displays the name of the author together with the author’s respective changes. Users can easily display the document showing a specific author’s changes using the “Specific People” option in the Show Markup settings.
How do I unlock a document for editing?
Unlock a protected document
- On the Review tab, in the Protect group, click Restrict Editing.
- In the Restrict Formatting and Editing task pane, click Stop Protection.
- If you are prompted to provide a password, type the password.
Why does my Word document open in markup view?
This is because when you open a document that contains tracked changes, the document appears in the Final Showing Markup view to indicate that the document contains tracked changes. This behavior is by default.
How do you copy a Word document without track changes?
Make sure that Track Changes is turned off in the source document. (If you don’t do this, Word assumes you want to copy the text as if all the changes in the selection were accepted.) Press Ctrl+C to copy the text to the Clipboard, or Ctrl+X to cut the text.
Displaying Document Comments
- Make sure the Review tab of the ribbon is displayed.
- In the Tracking group you see the Reviewing Pane tool. Click the down-arrow at the right of the tool.
- Choose either Reviewing Pane Vertical or Reviewing Pane Horizontal, according to your desires.
How do I use markup?
To use this feature in Books:
- Tap the document you want to mark up.
- Tap anywhere to exit the full-screen view.
- Select the Markup icon at the top-center of the page.
- Once done, tap the Markup icon again to exit the Markup environment.
- If you want to remove or modify a markup, simply tap the Markup icon again.

Now that you’ve setup the template for your document in Lesson 1, and the first draft of your document has been written, it’s editing time. If you have multiple people collaborating on the document, you can use the Track Changes feature in Word to know what changes were made and who made them.
When you change a document with “Track Changes” turned on, every change you make to the document displays as a colored markup, each reviewer being assigned a different color.
Deleted text doesn’t disappear — it’s crossed out and added text displays underlined. This allows you to view all the changes in the document before making them permanent and choose to accept or reject each change. We will show you how to accept and reject changes later in this lesson.
In this lesson, we will show you how to turn on the “Track Changes” feature and use the different views. To make sure other reviewers track their changes, you can lock the “Track Changes” feature on. Once all changes have been made, each change must be reviewed. We will show you how to accept and reject changes. Customize the “Track Changes” feature using the many options available.
Turn on Track Changes
To turn on “Track Changes”, click the Review tab and click “Track Changes.”

When “Track Changes” is on, the button displays with a blue background.
Now, any changes you make to the document will display as colored markups.
Change the Markup View and Hide Tracked Changes
When you turn on “Track Changes,” there are different ways to view the markup. The “All Markup” view displays all the actual revisions in your document, as shown above. This is the default view for documents opened with “Track Changes” on. However, if you have a lot of revisions in the document, it may get confusing to read it with all the revisions showing.
To improve readability of your document, you can use the “Simple Markup” view, which hides complex markups. Notice that each change is marked by a vertical bar to the left of the text. Click this bar to switch from “All Markup” view to “Simple Markup” view.
NOTE: Switching markup views affects all the tracked changes in the document, not just the one where you clicked the vertical bar.
The “Simple Markup” view hides the tracked changes in the text and collapses comments (discussed in Lesson 3) into small balloons, and the vertical bars indicating tracked changes display in red. Click the bar again to switch to the “All Markup” view and see all the inline tracked changes.
You can also change markup views using the “Display for Review” drop-down menu in the “Tracking” section of the “Review” tab.
In addition to the “Simple Markup” and “All Markup” views, you can also choose “No Markup” to view the final version of the document, as if all the tracked changes were accepted (we will discuss accepting and rejecting changes later in this lesson) or “Original” to view the original version of the document. The “No Markup” and “Original” options both hide the inline markup.
NOTE: The “No Markup” and “Original” options also help when printing a document that has marked up changes in it. If you hide the tracked changes, they won’t print.
Show Revisions in Balloons Rather than Inline
By default, most revisions display inline, with the text itself being marked up. However, you can choose to show the revisions in balloons, which moves most revisions into the right margin. This can make the document easier to read and the balloons provide more detailed information about some markups.
To show revisions in balloons, click the “Review” tab and then click “Show Markup” in the “Tracking” section. Select “Balloons” and then “Show Revisions in Balloons” from the drop-down menu.
Most revisions display in the “Markup Area” in the right margin. However, any added text still displays inline.
To view the markups inline again, select Balloons from the “Show Markup” drop-down menu again and then select either “Show All Revisions Inline” or “Show Only Comments and Formatting in Balloons.”
NOTE: Hiding the tracked changes does not get rid of them. You must accept or reject each change to remove them completely before distributing your final document. We will discuss accepting and rejecting changes a little later in this lesson.
Keep Track Changes Locked On
To make sure that all reviewers of a document use the Track Changes feature to mark their changes, you can lock the Track Changes feature on. This doesn’t mean that you necessarily don’t trust your colleagues, but anyone can click a button by mistake.
To lock the Track Changes feature on, click the lower-half of the “Track Changes” button in the “Tracking” section of the “Review” tab and select “Lock Tracking” from the drop-down menu.
The “Lock Tracking” dialog box displays. Enter a password twice and click “OK.”
NOTE: Be sure to remember this password as you cannot turn off the Track Changes feature without it and you cannot accept or reject changes while Track Changes is locked on.
Now, when you click on the lower-half of the “Track Changes” button, the option is grayed out. Notice that the “Track Changes” button is not blue anymore.
To unlock the Track Changes feature, select “Lock Tracking” from the “Track Changes” drop-down menu again.
Enter the password and click “OK.”
The “Track Changes” option is available again and the Track Changes button turns blue again.
Accept and Reject Changes
The only way to remove tracked changes from a document is to accept or reject them. Using the “No Markup” view option discussed earlier helps you see what the final document will look, but the tracked changes are only hidden temporarily. The changes are not deleted and they will display again the next time someone opens the document. As we mentioned earlier, “All Markup” is the default view when a document with tracked changes is opened. To remove tracked changes permanently, you must accept or reject them.
To accept a tracked change and automatically move to the next change, click the top part of the “Accept” button in the “Changes” section of the “Review” tab.
The change is incorporated into the document, the markup is removed, and the next change is highlighted.
Additional options for accepting changes are available by clicking on the bottom part of the “Accept” button to access a drop-down menu. For example, if you want to accept a change but not move to the next change, select “Accept this change” from the drop-down menu. You can also select “Accept All Changes” to automatically accept all the tracked changes in the document or “Accept All Changes and Stop Tracking” to accept all the changes and then turn off the “Track Changes” feature.
Notice that the “Accept and Move to Next” option is the first option available. This is the default choice when you click the top part of the “Accept” button.
To reject a change and put the text back to the way it was before the change was made, put the cursor in the text that was changed and use the “Reject” button. The “Reject” button works the same way as the “Accept” button with the same options on the drop-down menu.
To move through the changes in a document without accepting or rejecting the changes, use the “Previous” and “Next” buttons.
If the “Accept” and “Reject” buttons are grayed out, the document either has the “Track Changes” feature locked or has been locked for editing (to be discussed in Lesson 4).
Accept a Change without Moving to the Next Change with One Click
To accept a change and move to the next change, all you have to do is click the “Accept” button. However, to accept a change and NOT move to the next change, you need to click the bottom part of the “Accept” button and select “Accept This Change” from the drop-down menu. You can make this option a one-click process as well by adding the command to the Quick Access Toolbar. To do this, click the bottom part of the “Accept” button in the “Changes” section of the “Review” tab and right-click the “Accept This Change” option. Then, select “Add to Quick Access Toolbar” from the popup menu.
Now, you can simply click the “Accept This Change” button on the Quick Access Toolbar to accept a change without moving to the next change.
Customize the Track Changes Feature
There are additional options you can set for the “Track Changes” feature that are available on the easily accessible “Track Changes Options” dialog box.
To access this dialog box, in the “Tracking” section of the “Review” tab click the “Change Tracking Options” dialog box launcher in the lower-right corner of the section.
On the “Track Changes Options” dialog box, turn options on and off by checking or clearing the check box next to the feature name in the “Show” section of the dialog box.
You can also change specify how much markup to display in balloons for the “All Markup” view (“Revisions,” “Nothing,” or “Comments and formatting”) and whether and where the “Reviewing Pane” is displayed (“Off,” “Vertical,”,or “Horizontal”).
The “Pictures By Comments” feature shows pictures next to each reviewers comments. If you don’t want to see the pictures, clear this check box. We will discuss comments in the next lesson.
There are also advanced track changes options that give you control over every aspect of how tracked changes display in your documents. To access the advanced options, open the “Track Changes Options” dialog box as described above (if it’s not already open) and click “Advanced Options.”
On the “Advanced Track Changes Options” dialog box, you can change how the insertions and deletions are indicated and with which color they are marked. The “Changed lines” option allows you to specify where the lines displays indicating a change has been made.
You can also change options for how moved text is indicated and how changes in formatting are indicated.
NOTE: Assigned colors may change when the document is closed and reopened or when someone opens the document on another computer.
You can’t choose which color Word assigns to each reviewer, but you can choose different colors for different types of markup. If you prefer to have colors determined by the type of markup, rather than “By author,” select a specific color from the drop-down menu.
Click “OK” when you are finished making changes to the options. You are returned to the “Track Changes Options” dialog box, so click “OK” to close that as well.
Turn off “Track Changes”
To turn off “Track Changes,” click the “Track Changes” button. Word stops marking up new changes however, all of the previously tracked changes stay marked up in the document until you remove them by either accepting or rejecting each change.
Coming Up Next…
That concludes our second lesson in this How-To Geek School series. You should be able to keep track of all changes made in a document and require all reviewers to do the same. You should also have an understanding about reviewing changes using the “Accept” and “Reject” features.
In the next lesson, we’re going to cover using comments to communicate with other reviewers of the document. Comments are useful for asking questions of other reviewers and explaining changes you made. We will show you how to add comments, reply to comments, mark comments as done, and even how to communicate directly with other reviewers who add comments.
READ NEXT
- › The New NVIDIA GeForce RTX 4070 Is Like an RTX 3080 for $599
- › HoloLens Now Has Windows 11 and Incredible 3D Ink Features
- › Google Chrome Is Getting Faster
- › BLUETTI Slashed Hundreds off Its Best Power Stations for Easter Sale
- › This New Google TV Streaming Device Costs Just $20
- › How to Adjust and Change Discord Fonts
When collaborating on a Microsoft Word Document the easiest way to keep an eye on all of the edits being made is by tracking your changes.
Tracked Changes is an easy to use built-in tool that allows you to do exactly what it sounds like; track any edits or changes that are made to the original text in a word document.
If you aren’t sure how to turn on your tracked changes in word, we wrote a post about this last week. Click here for a refresher.
Now that you have tracked changes in your word document, how do you view them all?
Sometimes they are hidden, which does make it easier for you to read the document without the red strikethroughs and edits. But when it comes time to reviewing all of the changes or understanding where edits were made, viewing all tracked changes is the way to go.
In this post, we will take you through how to view tracked changes at the click of a button.
Viewing all tracked changes in Microsoft Word
- Open your word document
- Click Review in the tool bar
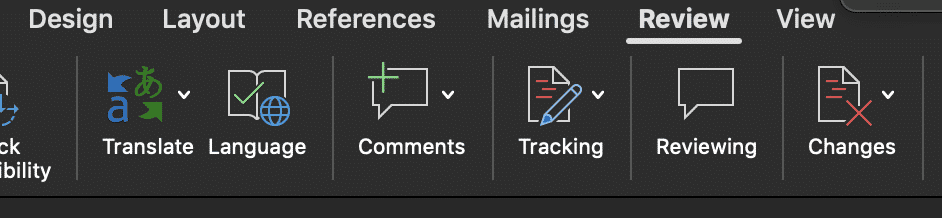
- Find and click Tracking
- In the Tracking drop-down click Display for Review
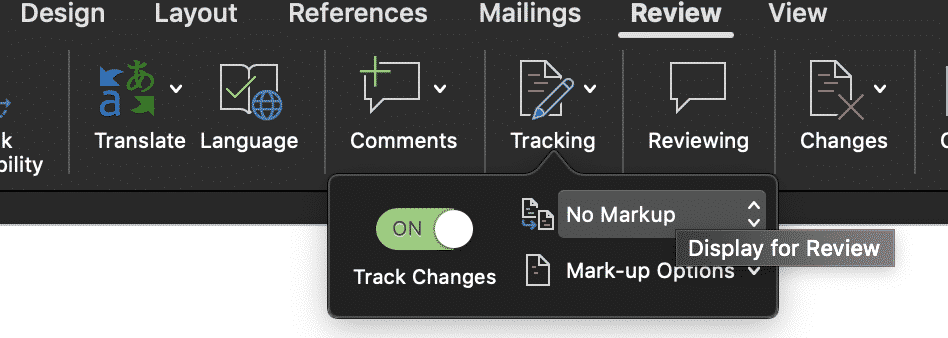
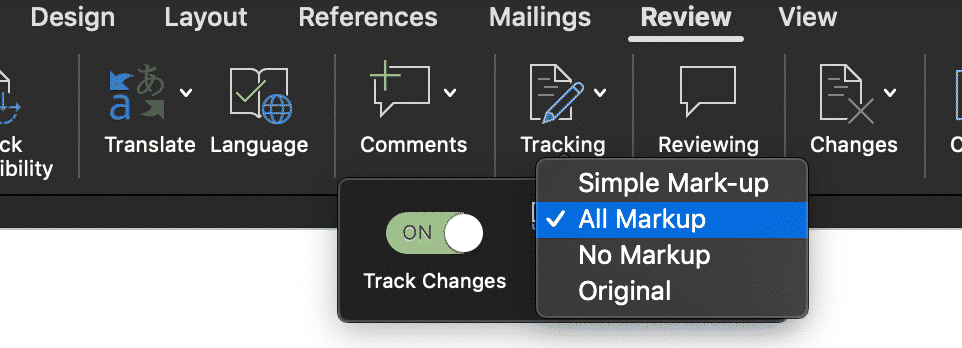
- Under Display for Review, you will be given four options
- Simple Mark-up
- All Markup
- No Markup
- Original
- Select All Markup
You have no successfully made all tracked changes visable.
Microsoft Word – Simple Mark-up vs All Markup, what is the difference?
With so many of us now using Microsoft word to track changes and collaborate on documents. Microsoft has built in more than one option for us to view these changes, depending on what your desired outcome is.
So what is the difference between Simple Markups and All Markups? And if No Markups does just that, then what is Original?
Here is a quick explanation of each feature’s function:
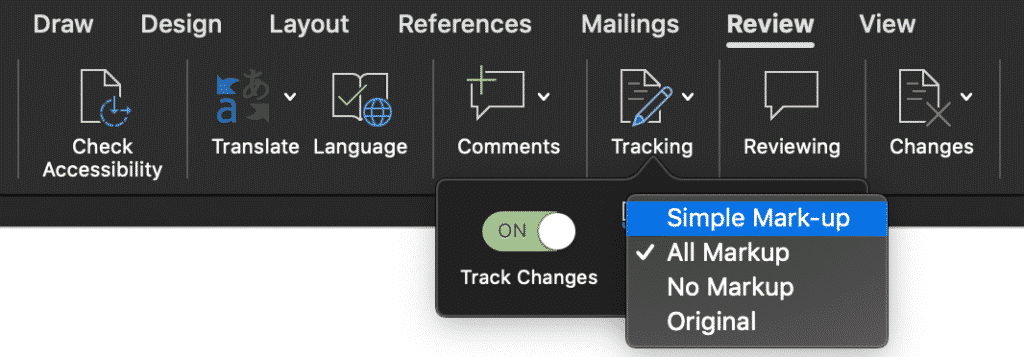
- Simple Markup displays the markups with a red line in the page margin where a change has been made.
- All Markup shows all edits, using strikethrough formatting.
- No Markup shows you how the changes will look in the document.
- Original shows you the original document, pre any makeups.
Need a better way to collaborate on a Microsoft Word Document?
It’s a frustration we all know too well. When you are working on the 15th version of the same document, accepting and rejecting comments and changes. Knowing in the back of your mind that this won’t even be the last round of edits.
With all of these edits, come multiple versions of the same document. The shared drive now looks like a shemozzle with Version6_JMsEDITS_v8_final1 the most recent final but defiantly not the last.
While two colleagues unknowingly open the latest version at the same time, make their edits and press save. Now you’re left with two separate versions of the same document and no way to merge them together without manually making the changes yourself.
This happens too often.
And to too many of us.
Luckily, enough of us screamed help and the tech gods have listened. There are now some pretty cool purpose-built tools out there to help us solve all of our collaborating problems. Companies such as Simul Docs.
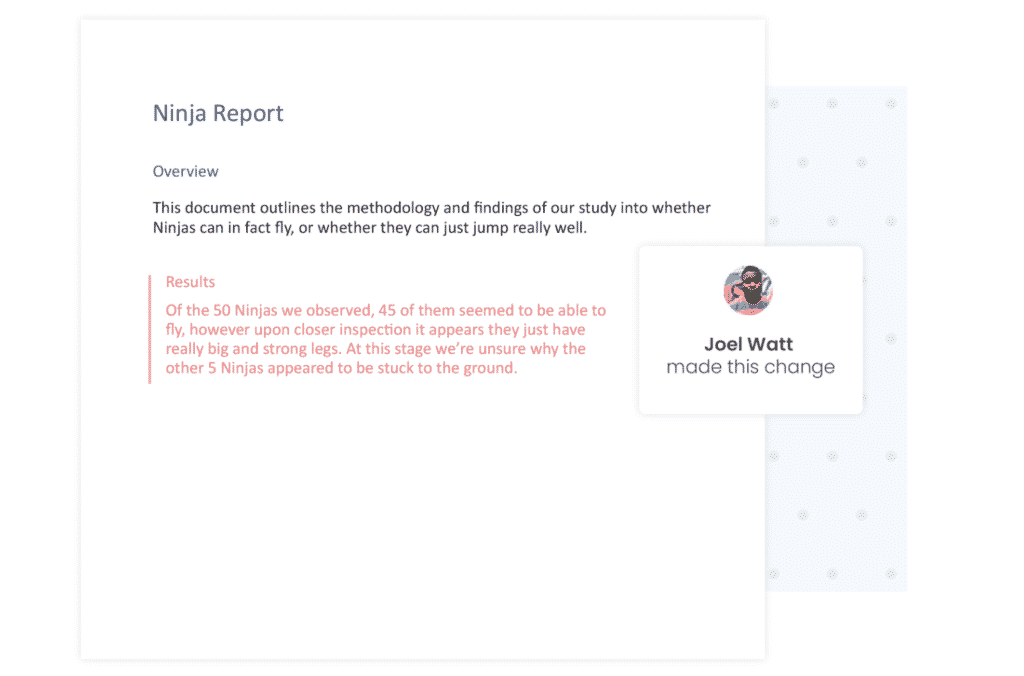
Simul Docs works seamlessly with Microsoft Word and allows you to upload and edit your word document without having to worry about version control or merging two versions together if they had been opened and changed at the same time. Simul will fix all of this for you, at the click of the button.
Most of the time Simul will just fix the problem without you even asking because we all have the same issues, and Simul knows that when you open the document and make changes you will want them tracked – you don’t have to remember to turn them on, Simul Docs will automatically track them for you.
Simul also knows that when you start making changes to the document you are going to want it saved as a new version, allowing you to refer back to old changes at any time and avoid saving over anyone else’s edits. It also does that for you, automatically.
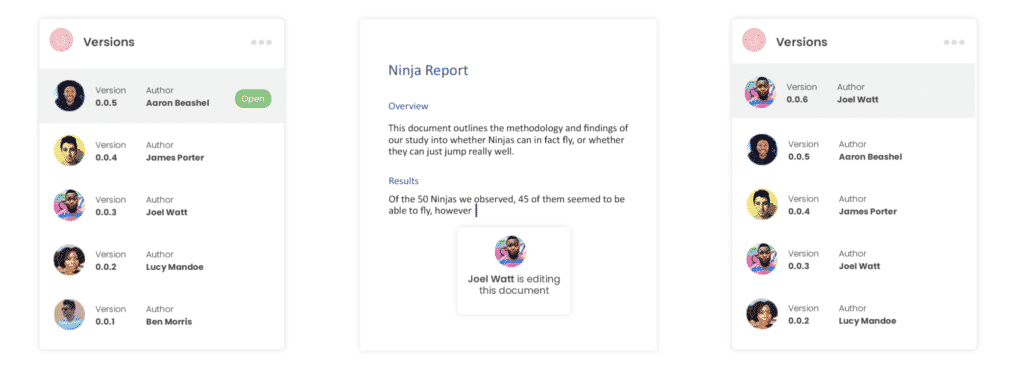
Now without sounding too smug, Simul will also keep a neat list of all versions saved for you. So now even your shared drive is feeling less confused as well.
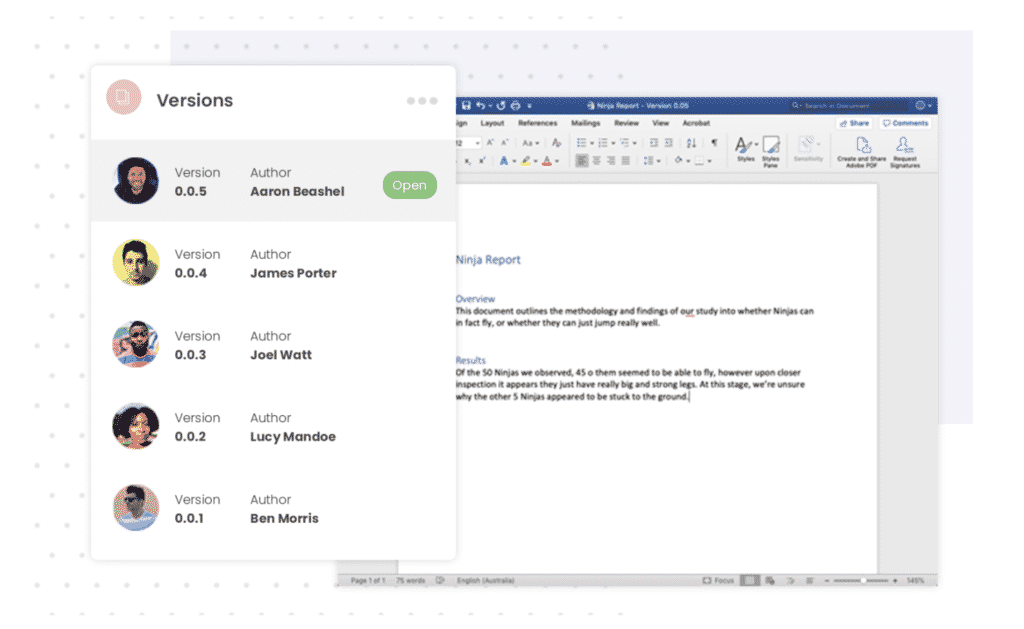
So if you are tired of managing a messy shared drive and struggle with version control, a tool such as Simul Docs is quite literally, made for you.
Give it a try, your shared drive will thank you.