
Change margins

In Word, each page automatically has a one-inch margin. You can customize or choose predefined margin settings, set margins for facing pages, allow extra margin space to allow for document binding, and change how margins are measured.
-
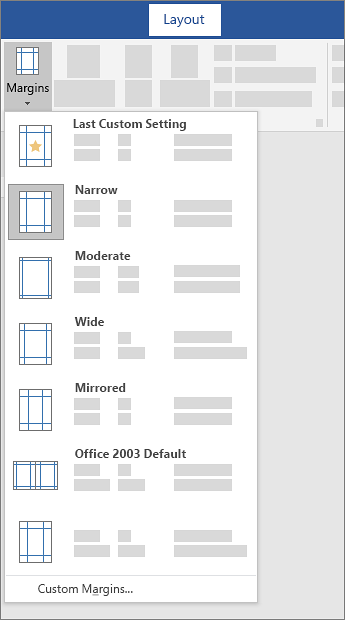
Select Layout > Margins.
-
Select the margin configuration you want, or select Custom Margins to define your own margins.
Important:
Office 2010 is no longer supported. Upgrade to Microsoft 365 to work anywhere from any device and continue to receive support.
Upgrade now
What would you like to do?
-
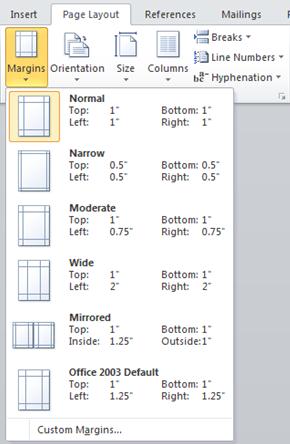
On the Page Layout tab, in the Page Setup group, choose Margins and the Margins gallery appears.

-
Choose the margin type that you want to apply.
Note: If your document contains multiple sections, the new margin type will only be applied to the current section. To apply the new margin type to multiple sections, be sure to select each one.
3. Make your new margin settings the default for your template. Each new document based on that template will automatically use the new margin settings.
-
Choose Margins after you select a new margin, and then choose Custom Margins.
-
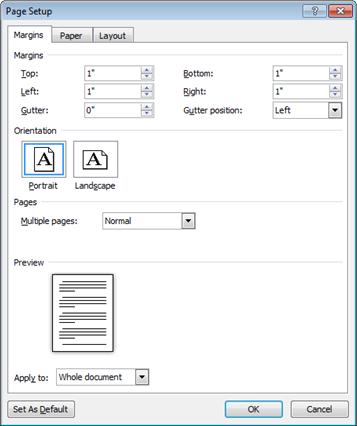
In the Page Setup dialog box, choose Set As Default.
-
On the Page Layout tab, in the Page Setup group, choose Margins and the Margins gallery appears.
-
At the bottom of the Margins gallery, choose Custom Margins.
-
In the Page Setup dialog box, enter new values for the margins.
More tips about margins
-
Change the margins for only a section of a document by selecting the text and entering the new margins in the Page Setup dialog box. In the Apply to box, click Selected text. Microsoft Word automatically inserts section breaks before and after the text with new margin settings.
-
Most printers require a minimum width for margin settings. If your settings are too narrow, Microsoft Word displays the message One or more margins are set outside the printable area of the page. Click Fix to automatically increase the margin width. If you ignore the message, Word will display another message asking whether you want to continue.
-
Minimum margin settings for printing depend on your printer, printer driver, and paper size. To learn about your minimum settings, check your printer manual.
Use mirror margins to set up facing pages for double-sided documents, such as books or magazines. When you choose mirror margins, the margins of the left page are a mirror image of those on the right page. The inside margins are the same width, and the outside margins are the same width.
-
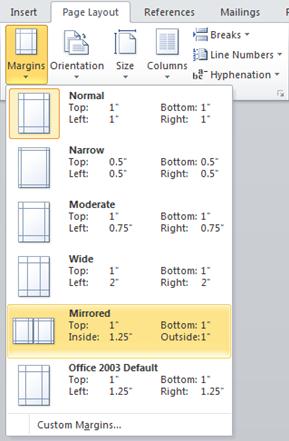
On the Page Layout tab, in the Page Setup group, click Margins >Mirrored.
Note: To change margin widths, click Custom Margins at the bottom of the Margins gallery. Enter new values in the Inside and Outside boxes.
A gutter margin adds extra space to the side margin, top margin, or inside margins of a document that you plan to bind to help ensure that text isn’t obscured by binding.
1. Gutter margins for binding
2. Mirror margins for facing pages
To set the gutter margin
-
On the Page Layout tab, in the Page Setup group, click Margins.
-
Click Custom Margins.
-
In the Gutter box, enter a width for the gutter margin.
-
In the Gutter position box, click Left or Top.
Note: The Gutter position box is not available when you use the Mirror margins, 2 pages per sheet, or Book fold option. For those options, the gutter position is determined automatically.
Word can display lines in your document to represent text boundaries.
-
On the File tab, click Options.
-
Click Advanced, and then select the Show text boundaries check box under Show document content.
The page margins appear in your document as dotted lines.
Note: You can view page margins in either Print Layout view or Web Layout view, and the text boundaries don’t appear on the printed page.
Important:
Office 2007 is no longer supported. Upgrade to Microsoft 365 to work anywhere from any device and continue to receive support.
Upgrade now
What would you like to do?
Microsoft Word offers several page margin options. You can use the default page margins or specify your own.
-
Add margins for binding
A gutter margin adds extra space to the side margin, top margin, or inside margins of a document that you plan to bind to help ensure that text isn’t obscured by binding.
1. Gutter margins for binding
2. Mirror margins for facing pages
-
Set margins for facing pages
Use mirror margins to set up facing pages for double-sided documents, such as books or magazines. In this case, the margins of the left page are a mirror image of those of the right page. The inside margins are the same width, and the outside margins are the same width. -
Note: You can set gutter margins for a document that has mirror margins if the document needs extra space for binding.
-
Add a book fold
Using the Book fold option in the Page Setup dialog box, you can create a booklet. Use the same option to create a menu, invitation, event program, or any other type of document with a single center fold.

1. Word inserts a single, center book fold
After you set up a document as a booklet, work with it just as you would any document to insert text, graphics, and other visual elements.
-
Most printers require a minimum width for margin settings. If you try to set margins that are too narrow, Microsoft Word displays the message One or more margins are set outside the printable area of the page. Click Fix to automatically increase the margin width. If you ignore the message, Word will display another message asking whether you want to continue.
-
Minimum margin settings depend on your printer, printer driver, and paper size. To learn about your minimum margin settings, check the printer manual.
-
On the Page Layout tab, in the Page Setup group, click Margins.
-
Click the margin type that you want. For the most common margin width, click Normal.
Note: When you click the margin type that you want, your entire document automatically changes to the margin type that you have selected.
-
You can specify your own custom margin settings. Click Margins, click Custom Margins, and then in the Top, Bottom, Left, and Right boxes, enter new values for the margins.

-
To change the default margins, click Margins after you select a new margin, and then click Custom Margins. In the Page Setup dialog box, click the Default button, and then click Yes. The new default settings are saved in the template on which the document is based. Each new document based on that template automatically uses the new margin settings.
-
To restore the original margin settings, click Margins and then click Custom Margins. Change the margins for Top, Bottom, Left, and Right to 1″. Then click the Default button and click Yes.
-
To change the margins for part of a document, select the text, and then set the margins that you want by entering the new margins in the Page Setup dialog box. In the Apply to box, click Selected text. Microsoft Word automatically inserts section breaks before and after the text that has the new margin settings. If your document is already divided into sections, you can click in a section or select multiple sections and then change the margins.
-
Click the Microsoft Office Button
, and then click Word Options. -
Click Advanced, and then click the Show text boundaries check box under Show document content.
The page margins appear in your document as dotted lines.
 , and then click Word Options.
Note: You can view page margins in either Print Layout view or Web Layout view, and the text boundaries do not appear on the printed page.
When you choose mirror margins, the margins of the left page are a mirror image of those on the right page. The inside margins are the same width, and the outside margins are the same width.
-
On the Page Layout tab, in the Page Setup group, click Margins >Mirrored.
-
Click Margins > Custom Margins, and in the Inside and Outside boxes, enter the widths that you want.
A gutter margin setting adds extra space to the side margin or top margin of a document that you plan to bind. A gutter margin helps ensure that text isn’t obscured by the binding.
-
On the Page Layout tab, in the Page Setup group, click Margins >Custom Margins.
-
In the Multiple pages list, click Normal.
-
In the Gutter box, enter a width for the gutter margin.
-
In the Gutter position box, click Left or Top.
Note: The Gutter position box is not available when you use the Mirror margins, 2 pages per sheet, or Book fold option. For those options, the gutter position is determined automatically.
-
Click on the text box you created to highlight it.
-
Click on the Format tab in the ribbon.
-
Click the small button in the lower left of the Size group.
-
In the Format Text Box window, click the Text Box tab.
-
In the Internal margin section, you can customize the margins to your desired size.
-
Click OK.
If this article did not answer your question, you can chat with a Microsoft virtual agent or a person at any time.
Need more help?
Margins are the blank spaces that line the top, bottom, and left and right sides of a document. They are important because they help make a document look neat and professional. To change margins, click on the Margins button, found on the Page Layout tab.
Contents
- 1 How do you set the margins on Microsoft Word?
- 2 What is margin setting?
- 3 What are the types of margin in MS Word?
- 4 Why are my margins off in Word?
- 5 Why do we use margins?
- 6 What is 1 margins mean?
- 7 How many margins are on a page?
- 8 What are margins class 9?
- 9 What does no margin mean?
- 10 Can’t delete Space word?
- 11 Why does notebook paper have margins?
- 12 What should resume margins be?
- 13 What is margin in Google Docs?
- 14 What are the margins for A4 paper?
- 15 What are margins class 12?
- 16 What is top margin in MS Word?
- 17 What is margin and types of margin?
- 18 How do you use margin?
- 19 Is a margin call bad?
- 20 What happens during a margin call?
How do you set the margins on Microsoft Word?
Select Layout > Margins. Select Custom Margins. In Margins, use the Up and Down arrows to enter the values you want.
Change default margins
- Select Layout > Margins > Custom Margins.
- Set your margins.
- Select Set As Default.
- Confirm your selection.
What is margin setting?
A margin is a space separating text or other elements from the edge of the paper commonly adjusted through the page setup.Most programs allow for the top, bottom, left, and right margins to be set. The standard margin settings are 1″ top and bottom and 1.25″ left and right.
What are the types of margin in MS Word?
There are four margins on a Microsoft word page – top , bottom , left , right.
Why are my margins off in Word?
If your document is in Print Layout view and the top and bottom margins appear to be cut off, the option for hiding margins has been switched on. Here’s how to switch it off: Point to the top or bottom of a page until the pointer becomes a double-pointed arrow, and then double-click.
Why do we use margins?
The margin helps to define where a line of text begins and ends. When a page is justified the text is spread out to be flush with the left and right margins. When two pages of content are combined next to each other (known as a two-page spread), the space between the two pages is known as the gutter.
What is 1 margins mean?
The unit of measurement in those boxes is an inch so if you type 1″ in a text box, Word sets that margin to 1 inch. The Margins tab in the Page Setup window also has a “Set as Default” button. Click that when you want your margin settings to apply to all documents.
How many margins are on a page?
Page margins should be consistent throughout the text. Required Margins: The top, bottom, and right margins are required to be 1 inch, but the left margin can either be 1 inch or 1.25 inches.
What are margins class 9?
In typography, a margin is the area between the main content of a page and the page edges. The margin helps to define where a line of text begins and ends. When a page is justified the text is spread out to be flush with the left and right margins.
What does no margin mean?
If you do not meet the margin call, your brokerage firm can close out any open positions in order to bring the account back up to the minimum value. Your brokerage firm can do this without your approval and can choose which position(s) to liquidate.
Can’t delete Space word?
Position the cursor at the start of the line below the space. Make sure the cursor is placed ahead of any text. Hit the backspace on the keyboard to remove the single space. If multiple unwanted spaces are present, continue pressing the backspace key until everything unwanted is removed.
Why does notebook paper have margins?
Margins come in handy for notes, but at one time they had a more unique purpose. Mice and rats may not be able to read, but they love the taste of paper.So, paper manufacturers added margins as a safeguard to satisfy the rodents’ journalistic appetites while also helping to protect the written works.
What should resume margins be?
Resume margins should be one-inch on all sides. The resume margins can be reduced if you need more space, but they shouldn’t be less than half an inch. If the margins are too small, your resume will look crowded and be hard to read.
What is margin in Google Docs?
Margins are the blank and unused spaces between the document’s content and edges. Margins don’t contain any text or image, and their prime purpose is to prevent text from colliding with document boundaries.
What are the margins for A4 paper?
This A4 page has margins of 1 inch (25.4 mm) top and bottom and 1 1/4 in (31.7 mm) side margins.
What are margins class 12?
1 Answer
- The distance from the written text to the edge of the paper is called margin.
- Bottom Margin: Distance between the text and the bottom edge of the paper.
- Left Margin: Distance between the text and the left edge of the paper.
- Right margin: Distance between the text and the right edge of the paper.
What is top margin in MS Word?
1-inch
Both the MLA and APA style guides require 1-inch margins on the top, bottom and both sides of the page. In most cases, when you open Microsoft Word, the margins will already be set to 1-inch. To be sure you have the margins set to 1-inch: Click on the Page Layout tab.
What is margin and types of margin?
The stock exchange collects margins in various forms like Gross Exposure Margin, Special Margin, Daily/Initial Margin, Mark to Market Margin, Ad-hoc Margin and Volatility Margin.Special Margin: In some cases, stocks may witness abnormal movements in its prices or volumes due to excessive speculation.
How do you use margin?
Buying on margin involves borrowing money from a broker to purchase stock. A margin account increases purchasing power and allows investors to use someone else’s money to increase financial leverage. Margin trading offers greater profit potential than traditional trading, but also greater risks.
Is a margin call bad?
A margin call occurs when your equity in a margin account goes below a certain threshold, and it can become very bad very quickly.A margin call has the potential to be catastrophic for investors, turning a poor investment choice into a much bigger issue.
What happens during a margin call?
A margin call occurs when the value of an investor’s margin account falls below the broker’s required amount.When a margin call occurs, the investor must choose to either deposit additional funds or marginable securities in the account or sell some of the assets held in their account.
![]()
Download Article
A user-friendly guide to changing a Word document’s margins to wide, narrow, and more
![]()
Download Article
- Applying Preset Margins (Desktop)
- Creating Custom Margins (Desktop)
- Using the Mobile App
- Q&A
- Warnings
|
|
|
|
Are you trying to adjust your margins in Microsoft Word? The margins are the empty space between the edge of the page and the contents of the document. Depending on your needs, you can change the margins to become wider, narrower, or a mix of both. You’ll be able to select from a few preset options or customize your own. This wikiHow will show you how to fix and change the default 1-inch margins in Microsoft Word using your iPhone, Android, or Windows or Mac computer.
Things You Should Know
- On desktop, click «Layout» → «Margins» → select a margin preset.
- For custom margins, click «Custom Margins…» and enter the values for Top, Left, Bottom, and Right.
- On mobile, tap «•••» → «Home» → «Layout» → «Margins» → select a preset or «Custom Margins». Enter a new value and tap «Done».
-
1
-
2
Click Layout. This will be in the top toolbar, between Design and References.
Advertisement
-
3
Click Margins. You can find this in the upper-left corner of the Layout tab. This looks like a rectangle with blue lining the margins.
- A pop-up menu will open.
-
4
Select a margin type. You’ll see a list of preset margins: Normal, Narrow, Moderate, Wide, Mirrored, and Office 2003 Default. Click a preset margin to apply it to your document. It should be applied immediately.
- If you don’t like how it looks, you can select Normal again, or press CTRL + Z (Windows) or CMD + Z (Mac) to undo the change.
Advertisement
-
1
Click Layout. This will be in the top toolbar, between Design and References.
-
2
Click Margins. You can find this in the upper-left corner of the Layout tab. This looks like a rectangle with blue lining the margins.
- A menu will open.
-
3
Click Custom Margins…. This will be at the bottom of the drop-down menu.
- A new window will open.
-
4
Set your new margins. On the desktop application, you’ll be able to edit the margin sizes for: Top, Left, Bottom, Right, Gutter, and Gutter Positions. On the web version, you’ll only be able to edit the margin sizes for: Top, Left, Bottom, and Right. You’ll see a preview of the document layout at the bottom of the window.
- Click the field and enter your new margin size, or use the up/down arrow to adjust the current margins.
- For Gutter Positions, select Left or Top.
- Only adjust the Gutter margin if you intend to use the document in a bound format, like a book or report, and you need space for the binding. In this case, type a number in Gutter that will allow enough room for the binding and use the drop-down to indicate whether the binding will be on the top or on the left.
- Make sure Apply to is set to Whole document, unless you only want to change the margins from This point forward.
-
5
Set new default margins (optional). If you want to use this margin for all new documents in Microsoft Word, click Set as default in the bottom-left corner. Click Yes to confirm.
- When you create a new document, the margins will reflect the change.
-
6
Click OK when finished. The changes will be applied immediately.
Advertisement
-
1
Open the Microsoft Word app. Microsoft Word is available for iOS in the App Store and for Android in the Google Play Store.
- If you aren’t already logged in to your Microsoft account, enter your email address and password to do so now.
-
2
Open a new or existing project. Tap a recent project on your homepage, or tap the + tab to create a new one.
-
3
Tap ••• . This is the «•••» located at the top of your on-screen keyboard. If you don’t see your keyboard, tap the document to open it.
- A new menu will open at the bottom.
-
4
Tap Home. This is located at the top of the new menu.
- A pop-up menu will open.
-
5
Tap Layout. You can find this between Draw and Review.
-
6
Tap Margins. This is the first listing in the Layout tab.
-
7
Select a margin type. You’ll see a list of preset margins: Normal, Narrow, Moderate, Wide, and Mirrored. Tap a preset margin to apply it to your document. It should be applied immediately.
- If you don’t like how it looks, you can select Normal again, or pick a new preset.
- Be sure to save your document when you’re finished.
-
8
Create a custom margin (optional). Tap Custom Margins at the bottom of the Margins menu. You’ll be able to edit the margin sizes for: Top, Left, Bottom, and Right.
- Tap a margin to edit it.
- Tap the backspace button to erase the existing margin.
- Enter a new margin value.
- Tap Done in the top-right corner.
- Tap Margins → Custom Margins to edit another margin.
- The changes will be applied immediately.
Advertisement
Add New Question
-
Question
I want the page ruler. What can I do?

To get the ruler, go into the View tab (Word 2010 and newer) and select the Ruler checkbox.
-
Question
Can I ever allow one more letter on a line to finish a long word rather than wrap to the next line?
No. The only thing you could possibly do would be to make all the margins wider. Making only one word go to the next line is impossible unless you do the same for all words.
Ask a Question
200 characters left
Include your email address to get a message when this question is answered.
Submit
Advertisement
Thanks for submitting a tip for review!
-
Leaving the margin under .25″ may lead to text being cut off when printed.
Advertisement
About This Article
Article SummaryX
1. Open a Microsoft Word document.
2. Click the Layout tab.
3. Click Margins.
4. Click Custom Margins….
5. Set the margins.
6. Click the Apply to drop-down.
7. Select how to apply the margins.
8. Click OK.
Did this summary help you?
Thanks to all authors for creating a page that has been read 493,209 times.
Is this article up to date?
Lesson 9: Page Layout
/en/word2013/formatting-text/content/
Introduction
One formatting aspect you’ll need to consider as you create your document is whether to make adjustments to the layout of the page. The page layout affects how content appears and includes the page’s orientation, margins, and size.
Optional: Download our practice document.
Page orientation
Word offers two page orientation options: landscape and portrait. Landscape means the page is oriented horizontally, while portrait means the page is oriented vertically. Compare our example below to see how orientation can affect the appearance and spacing of text and images.
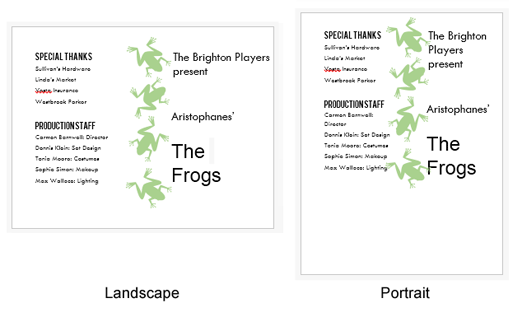 Landscape and portrait orientation
To change page orientation:
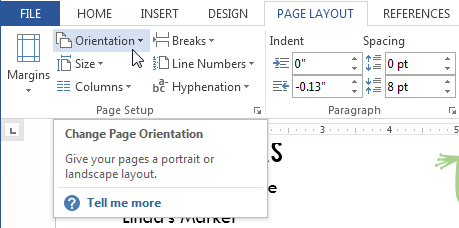
- Select the Page Layout tab.
- Click the Orientation command in the Page Setup group.
 Clicking the Orientation command
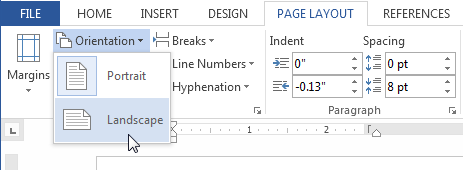
 - A drop-down menu will appear. Click either Portrait or Landscape to change the page orientation.
 Changing the page orientation
 - The page orientation of the document will be changed.
Page margins
A margin is the space between the text and the edge of your document. By default, a new document’s margins are set to Normal, which means it has a one-inch space between the text and each edge. Depending on your needs, Word allows you to change your document’s margin size.
To format page margins:
Word has a variety of predefined margin sizes to choose from.
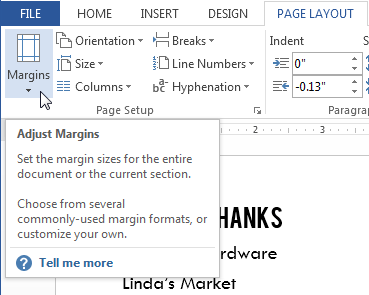
- Select the Page Layout tab, then click the Margins command.
 Clicking the Margins command
 - A drop-down menu will appear. Click the predefined margin size you want.
 Changing the page margins
 - The margins of the document will be changed.

To use custom margins:
Word also allows you to customize the size of your margins in the Page Setup dialog box.
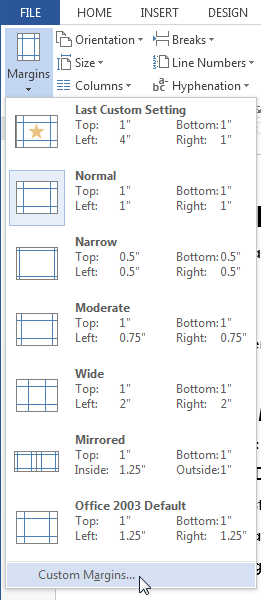
- From the Page Layout tab, click Margins. Select Custom Margins… from the drop-down menu.
 Selecting Custom Margins…
 - The Page Setup dialog box will appear.
- Adjust the values for each margin, then click OK.
 The Page Setup dialog box
 - The margins of the document will be changed.

Page size
By default, the page size of a new document is 8.5 inches by 11 inches. Depending on your project, you may need to adjust your document’s page size. It’s important to note that before modifying the default page size, you should check to see which page sizes your printer can accommodate.
To change the page size:
Word has a variety of predefined page sizes to choose from.
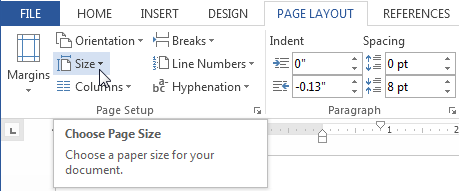
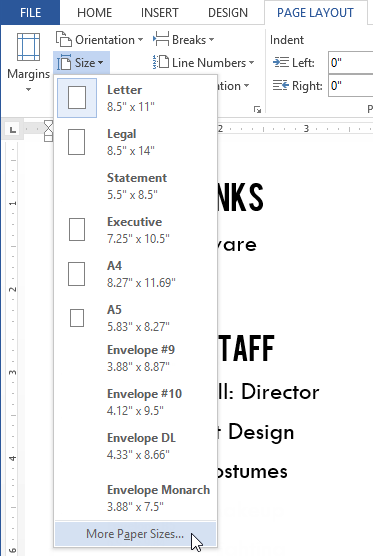
- Select the Page Layout tab, then click the Size command.
 Clicking the Size command
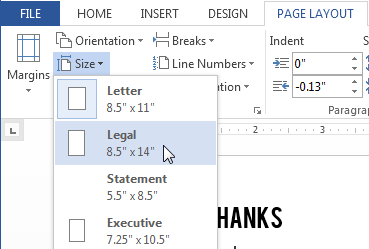
 - A drop-down menu will appear. The current page size is highlighted. Click the desired predefined page size.
 Changing the page size
 - The page size of the document will be changed.
To use a custom page size:
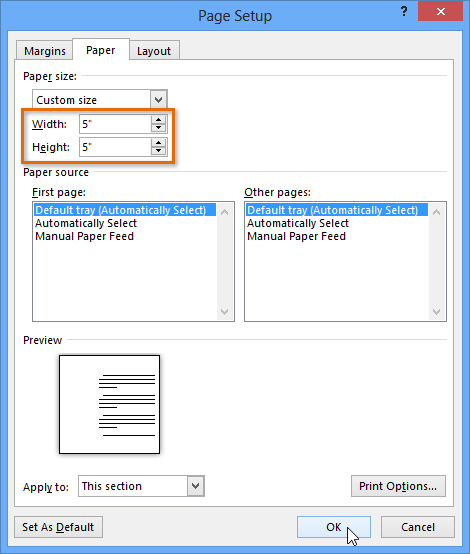
Word also allows you to customize the page size in the Page Setup dialog box.
- From the Page Layout tab, click Size. Select More Paper Sizes… from the drop-down menu.
 Selecting More Paper Sizes…
 - The Page Setup dialog box will appear.
- Adjust the values for Width and Height, then click OK.
 Adjusting page size
 - The page size of the document will be changed.
Alternatively, you can open the Page Setup dialog box by navigating to the Page Layout tab and clicking the small arrow in the bottom-right corner of the Page Setup group.
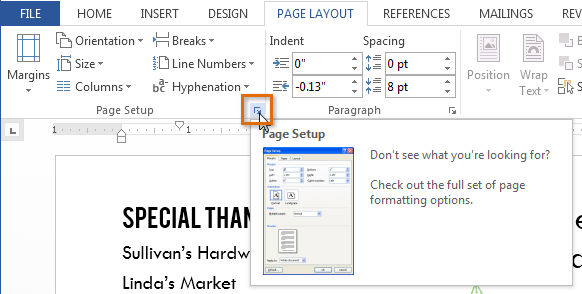 Opening the Page Setup dialog box
You can use Word’s convenient Set as Default feature to save all of the formatting changes you’ve made and automatically apply them to new documents. To learn how to do this, read our article on Changing Your Default Settings in Word.
Challenge!
- Open an existing Word document. If you want, you can use our practice document.
- Change the page orientation. If you are using the example, change the orientation to Landscape.
- Change the margins. If you are using the example, change the margins to Narrow.
- Try adjusting the margins using Custom Margins.
- Change the paper size. If you are using the example, try changing the paper size to Legal.
- Try customizing the page size.
/en/word2013/printing-documents/content/
Microsoft Word or MS-Word (officially called word) is a graphical word processing program by Microsoft Corporation. The purpose of MS Word is to permit the users to type and save documents. Same to other word processors, it has various helpful tools to make documents.
Sometimes the data you include in your document is best displayed in columns. Not only can columns help improve readability, but some varieties of documents—like newspaper articles, newsletters, and flyers—are often written in column format. Word also allows you to regulate your columns by adding column breaks.
Adding Page Numbers
Page numbers will help keep long documents organized and make them easier to read. Text entered within the page number will appear on each page of the document. Let us see a demonstration.
Step 1. Click on the Insert menu.

Step 2. Go in Header & Footer column.

Step 3. Click on the Page number and then there are 4 options displayed:
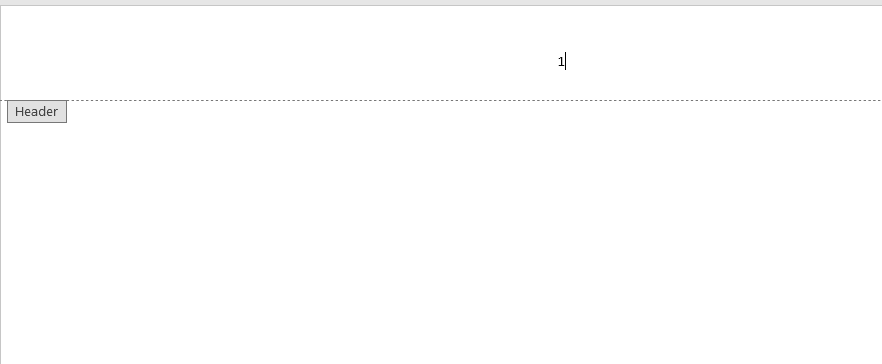
- Top page: Display the page number on the top page.
- Bottom Page: Display the page number on the Bottom page.
- Page Margins: Display the page number on the page margins.
- Current Position: Display the page number on the current page.
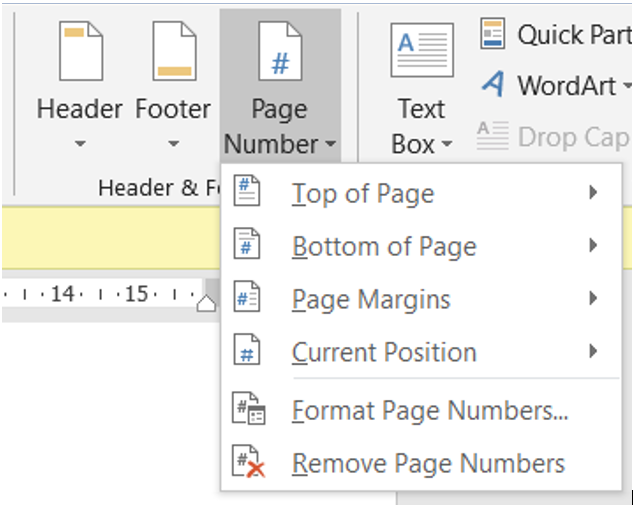
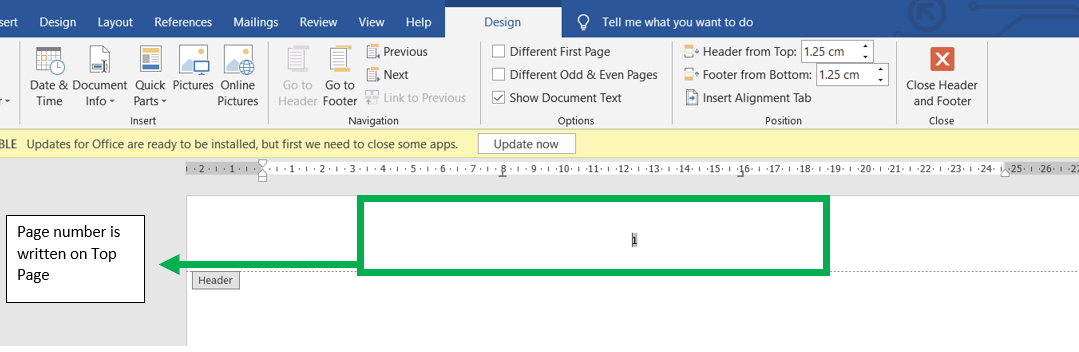
The page number is written at the Top of the page.
Closing the Page Number
Step 1. Double-tap on the Page number.
https://media.geeksforgeeks.org/wp-content/uploads/20210530220207/6.png
Step 2. Click on “Close Header and Footer”, then the page number will not appear on the document.

Adding Page Margins
Page Margins help to define the beginning and end of lines and statements on the pages of a document. Following are the steps to add page margins:
Step 1. Click on Layout menu.

Step 2. Go to the page setup column.
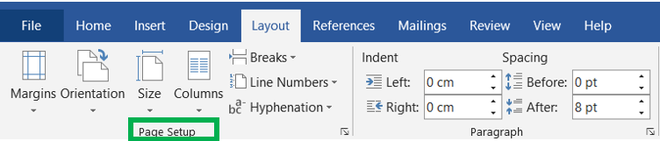
Step 3. Click on the margin button.
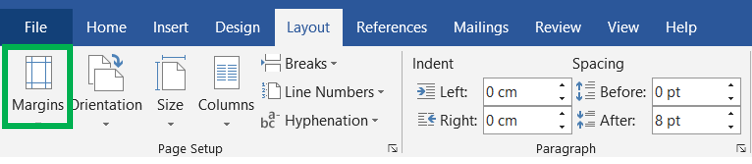
Step 4. Then there are some options are given:
- Normal:
- Narrow:

- Moderate:
- Wide:
- Mirrored:
- Customize margins:
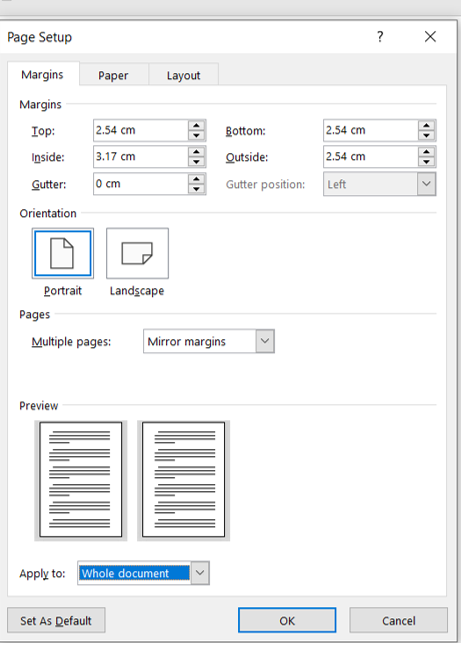
This option is more efficient as compare to other options because in this you can customize the margins and make it more efficient.