
![]()
Download Article
![]()
Download Article
This wikiHow teaches you how to create a poster-sized document in Microsoft Word for Windows or macOS. Before you get started, make sure your printer is capable of printing larger sizes and that you have the desired paper size. If you can’t (or don’t want to) print the poster from home, you can send or bring the file to a professional printing service.
Steps
-

1
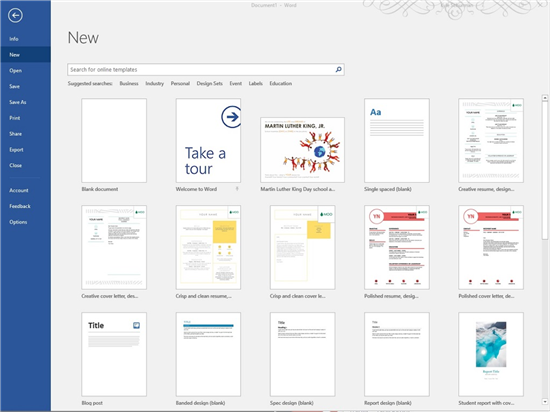
Open Microsoft Word. If you haven’t already done so, launch Microsoft Word from the Start menu (Windows) or Applications folder (macOS). This opens the app to the «New» page.
-
2
Click the Blank Document option. It should be the first option in the list of new file types.
Advertisement
-
3
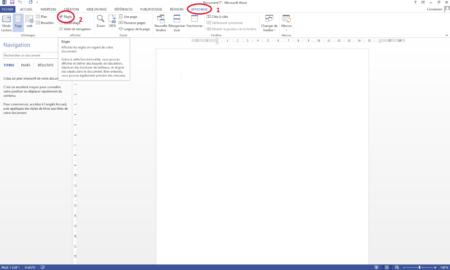
Click the Layout or Page Layout tab. The name of the tab will vary by version, but you’ll always find one of these options at the top of the app.
-
4
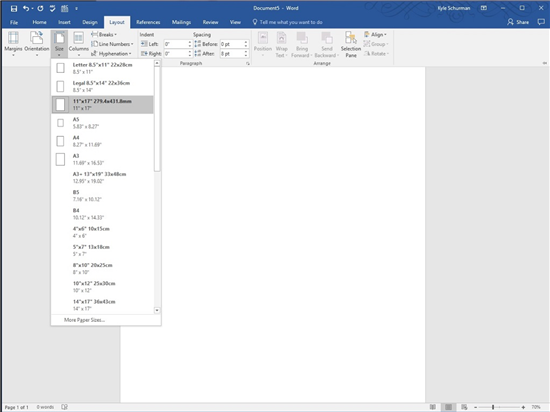
Click the Size button on the toolbar. It’s near the top-left corner of the app. This displays different size options for your document.
-
5
Select a size for your poster. Keep in mind that if you’re using a home printer, it may not support larger paper sizes. To specify a custom size, click More Paper Sizes at the bottom of the menu and make your selections.[1]
- If you definitely need a larger poster made, you can create the file, save it to a flash drive, and then print it at a professional printing location like FedEx or Staples.
- A common poster size supported by most home printers is 11×17 inches. You can find 11×17 paper anywhere that sells printer paper.
-
6
Select a poster orientation. If you want your poster to print in landscape (horizontal) mode, click the Orientation menu on the Page Layout tab and select Landscape. If you’re okay with the poster being set up in Portrait (vertical) mode, you can skip this step.
-
7
Create a headline. Many posters have a large text headline at the top. If you’d like to add a headline, follow these steps:
- Click the Insert tab at the top.
- Click Text Box near the top-right corner of Word.
- Select Simple Text Box option to insert a text box.
- Type a few words you want to appear large on the poster.
- Highlight the text in your headline.
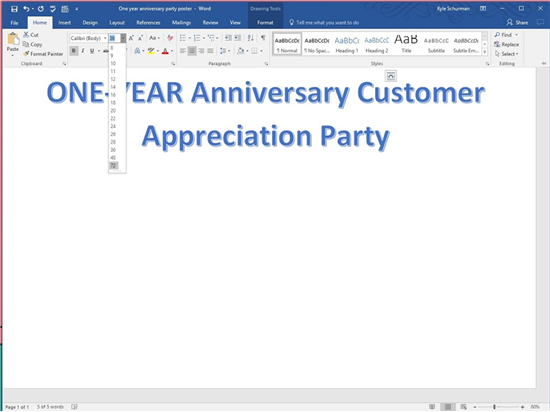
- Click the Home tab to return to the font options, and then choose an easy-to-read font at a large size. You can also choose colors if you plan to make a color poster.
- Drag the edges of the text box to the desired size. You can also move the text box to another location by hovering the mouse cursor over one of the lines and then dragging.
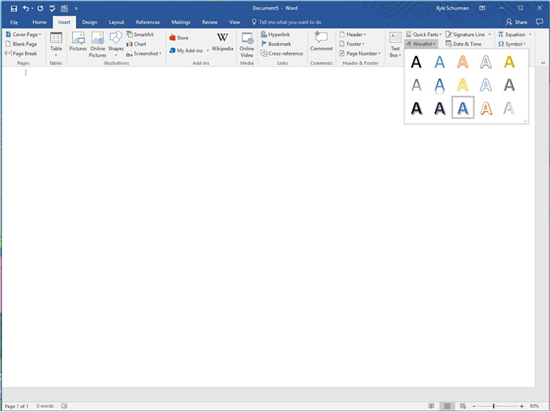
- Another way to insert a headline is to click Word Art on the Insert tab and then select a design. This is a quick way to stylize text without having to specify font colors and sizes. Check out How to Create Word Art to learn more about this feature.
-
8
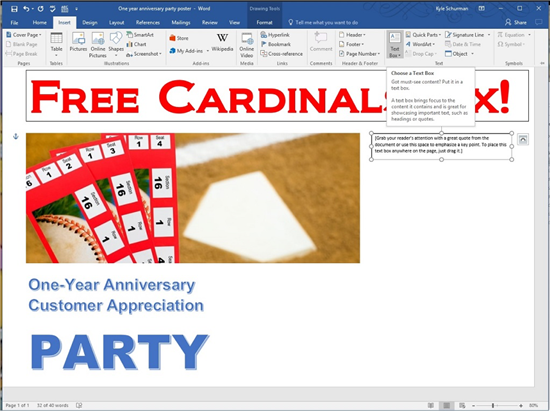
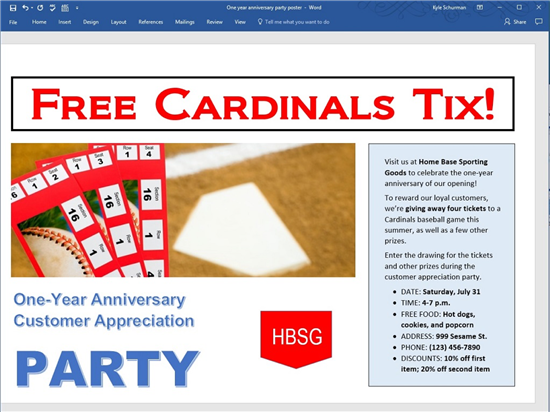
Insert graphics into the poster. If you have a certain photo or illustration you want to include in the poster, you can insert it by clicking the Insert tab and selecting Pictures. If you want the photo to appear below the headline, drag the headline’s text box above the photo.
- You can also insert shapes and customize them. To insert a shape, click the Insert tab and select Shapes. You can then choose a shape and use the mouse to draw it at the desired location. You can type on shapes by double-clicking them to activate the cursor.
-
9
Add regular text. To insert text into your poster, add another text box like you did when creating the headline (on the Insert tab), and then type anything you wish. You can then format the text with the desired fonts and orientation back on the Home tab.
- If you want to add text to multiple areas on the poster, put each block of text into its own text box. This makes it easier to format areas of text individually and move them around if necessary.
- To change the orientation of your text, click one of the orientation options in the «Paragraph» section of the Home tab.
- To learn about wrapping text around images, see How to Wrap Text in Word.
- For tips on orientating text, see How to Change the Orientation of Text in Microsoft Word.
-
10
Save your finished poster. To do so, click the File menu at the top-left corner, select Save As, and then save to your desired location.
-
11
Print the poster. If you plan to print the poster at home, follow these steps:
- Load the appropriate paper size into your printer. Make sure it matches the paper size you selected for your poster.
- Click the File menu at the top-left corner.
- Click Print.
- Select your printer, color preferences, and other settings.
- Click Print.


Advertisement
Add New Question
-
Question
How do I overlap a picture in Microsoft word?

Right-click on the image and click the Options. Press either «send to front» or «send backwards».
-
Question
How do I save the poster as a .JPG file?
Go to File, Save As and choose JPG from the drop-down menu under file name. Click JPG, and you’re done.
-
Question
How do I rotate phrases on my poster?
Left click and hold on the top-right corner (or any corner), then move your mouse.
See more answers
Ask a Question
200 characters left
Include your email address to get a message when this question is answered.
Submit
Advertisement
Video
-
To add a border around the poster, click the Design tab and select Page Borders.
Thanks for submitting a tip for review!
Advertisement
About This Article
Article SummaryX
1. Create a blank document.
2. Click the Layout tab.
3. Click Size.
4. Select a paper size.
5. Design your poster.
6. Save and print.
Did this summary help you?
Thanks to all authors for creating a page that has been read 561,336 times.
Is this article up to date?
the posters have become one of the elements currently most usedsince they allow the user can capture information in it so that it can be transmitted to other people in an easy and fast waywhich makes it an excellent choice for announce an event or offer your services and products.
They have also become a very helpful element, especially for those people who loses an object, a pet or a family memberas posters can request help in the search for the missing individual.
Microsoft Word not the best tool of all create these bannerssince there are many programs specialized designs in thisbut if it becomes a very good alternative for create conventional posters in a very simple way, to do this follow in detail everything that we will teach you in the post.
What Word tools and features are useful for making posters?
The posters in Word can be created in different ways, either using the pre-made templates of the program or making them yourself from scratchbut you should keep in mind that performing these posters from scratch means more work.
According to all this, here we show you what tools and functions are necessary to create these elements in the word processor:
- Use pre-designed Word templates.
- Use the insert tab to add images, shapes and other items you want.
- Use the layout tab if you want make it from scratch, Either for set margins, size, orientationamong others.
- The function of header.
- You must use the function “Save as” Y “To print” once you have finished the poster.
Steps to make a poster in Microsoft Word like an expert
There are two main forms of power. create these banners from Microsoft Wordwith which you can start transmit some specific information to other people. Therefore, you will be able to design either from the predesigned templates of the program or completely from scratch, follow each of the steps that we are going to indicate below:
From pre-designed templates
- Once you have entered Microsoft Wordyou must select the tab “File, Archive” and in the drop down menu “New”.

- Then another window will appear with all the templates available in the system, to make your search easier and faster you must write “Poster” in the system browser and press the key “Enter”.

- As you can see, a new page where you can find different templates to create your posters, in this case you just have to do click on the one you like.

- When you have selected it, a window will open with the template description and the button “To create” which you must select so that it opens in the text sheet.

- Then it will appear the template entered in the text sheet. When you have reached this point the next thing will be to start replace each part of the template. If you click on the image you can delete it and add a new image, in this case the one you need, the same happens with each part of the text.

- In this way, all you have to do is change each of the parts. from the poster to completionwhen you have finished and have the poster what do you wantthe following will be save it and print it in case you have a printer connected to your computer.
- Otherwise you will have to store it in an external memory to print it later. To save it you can press “Ctrl + G” or enter “File” > “Save As” and there you select the location where you want to store it. In this way you will created your first poster in Word.

Right from the start
the other way to power creating these banners from Word is from scratch, This procedure is usually a little more tedious in the making since you will be the one who takes care of flesh out the posterso you will have to start it completely from scratch.
To do this, you will need to perform the steps that we are going to indicate below:
- the first thing will be start a new document in Word.
- When you have entered the text sheet you must click on the tab of “Provision” so you can have the tools of margins, size, column and orientation at your disposal.
- Here you must choose the option “Size”, The first step will be to choose the poster sizePlease note that if you have a home printer perhaps do not allow you to print in large dimensionsalthough you can find a way to print it on a industrial machine if you need it large.
- At this point you should choose the size of the posterfor this you can select some of the options available there or click on “More paper size” to have other options.

- common size of posters to be printed on domestic machines is of So you must enter these measurements and click on “To accept”.

- The next thing is to select sheet orientationin case you want print it horizontally then you should select the option of “Orientation” and choose “Horizontal”, now if you want it to print on vertical just skip this step as it comes with that orientation by default.

- next thing will be to create the headerkeep in mind that these types of posters are usually characterized by presenting a large text header at top of sheetin some cases this usually goes in the center of the sheet.
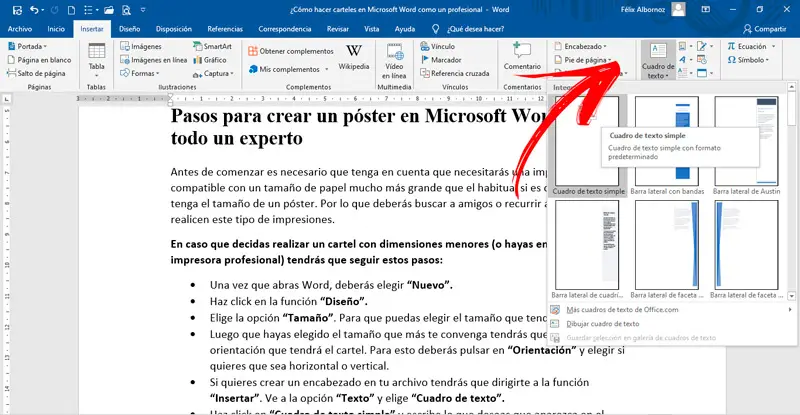
- To insert the header you must click on the tab “Insert”.
- There select the item of “text box” which is on the right side of your screen.
- Here you can choose the painting that you like the most, although it is best to select the “Simple text box”.

- A once inserted into the sheet you should write the title What do you want the banner to have?
- When you have written it you must select everything and go to the tab of “Start” to have the font options. Here you must choose the type of font you want and its size, as well as the colors of the letter.
- You may drag text box buttons so you can adjust the size you want and get the most suitable location for the header.

- Another way to create a header is by clicking on “wordart” located in the tab “Insert”, This option is located right next to the “Text box”. This is an easier and faster way to create the title since you won’t have to specify neither the style of the letter, size, nor color.
- To do this, you simply have to enter said tool and choose the model you like best.

- In this image you can see a comparison between both models, text box or word art. In this case you can work with the one you like the most.

- once you have defined title, the next will be to insert an imagekeep in mind that this will depend on the design that you want to give it, you can also add text first and then the image.
- To be able to insert an illustration you must click on the “Insert tab” and select the item from “Images”.

- Here it will be opened to you windows explorer where you will have to find the location of the image you want add to text sheet. When you have inserted it, it will appear as follows:

- You can also insert shapes in the text, to do this select the item of “Shapes” in “Insert” and there you choose the one you like the most to add it to the text sheet.

- Now you can add textyou can do this below the image or on it, for insert the text again use the “Text box”, here you can locate it above the image to write on it.

- Once you have finished your banner and have added all the necessary details, the next thing is to click on “File, Archive” Y “Save as”, this will allow you store it on your computer. You can too “Print it out” if you so wish.
Tips to create your posters in Word and make them more visually appealing
from a while ago posters have started to be used much more frequently around the worldthis is how you can currently see in the avenues, shopping malls, airport and many other places. They take care of display an information referring to a product or service in order to attract more customers.
All this has led to today the competition between those who make these banners is getting bigger and more competitiveso it is important that you have the basics of how to create a professional poster.
It is because of that here we are going to teach you the best tips so you can start designing the best posters today:
Define your main ideas

Please note that these Posters must be direct and precise with the information that you want to convey on them. So you must be very clear about what audience is addressed and what is the message you really want to convey in it.
Take into account your target audience

It is essential that the information contained therein is aimed primarily at your target audiencesince they will be the ones who offer you the best results. Note that it is very different capture the attention of a child to that of an adult, or that of an athlete with that of a doctor, that’s why you should define your ideas very well to attract people’s main attention to which is focused.
Be careful with the font you choose

When it’s made an ad that will be targeted to a large audience it’s necessary that the font chosen is legible, has an adequate size and correct use of uppercase, lowercase and accents. Keep in mind that this will be your cover letter, so depending on it will be the results you get.
Add only valuable information
It is understood that you may want convey many ideas and information to the publicbut in this kind of elements the secret is to be direct and express only what is really interesting and worthwhile. If your company is about earn moneythen it is best to indicate there possible amounts to winthis being a factor very conspicuous to most people.
Combine the text with the images correctly
It is essential that both images and text are well configured with each otherkeep in mind that the disorders in this type of elements are not favorable. The text must have a color that matches the imageavoiding that the image overshadows the text or vice versa.
Use quality images

Images are the component. most valuable of any postersince on many occasions people get carried away by them and not so much for the text that appears there. Also, if the image has managed to attract the person’s attention, they will stop to read the text of the image. This means that the illustrations that you add to the poster must be of quality and that directly reflects what you want to convey.
Be creative
Finally, it is very important that you are completely creative with your design, avoid copying other third party designs as this will not bring you good results. Here you must use your imagination and use colors, styles, fonts that you think can generate an impact image. If it is a product, highlight it and do not forget to place its main function.
List of websites where I can download resources to make my poster in Word
Today you can find different types of websites that they can offer you from images, fonts, templates and other resources to help you create very professional posters with excellent quality. So if you like working with Microsoft’s word processor.
Here we are going to leave you several alternatives so that you can download elements for each of your posters:
OpenPhoto.net
This online tool will offer you one of the most complete image banks on the net, he will allow you download images completely free which you will be able to add in Word to create your own posters. Here you will find thousands of photography of all types and sizes.
blockposters.com
As its name indicates, on this website you will find one of the largest poster pads on the market. Here you can get a lot of free templates which you can use in Microsoft Word. In addition, you will also get a large number of models of them that will serve you to Get an idea or guide you if you are starting with this type of design.
UrbanFonts.com
With City Fonts you will have the opportunity to get with the best collection of free typographic fonts, so you can get different types of sources according to your needsEither for use in images, text sheet, videos, among other. Here you will find chinese, russian, spanish, greek, arabic style typographyamong many others.
Commons.Wikimedia.org
This is another one of the web portals who is in charge of offering you a lots of images from different categories So you can download for free to your computer or mobilethey can be used in different programs such as Microsoft Word, among others. Here you will not only have the opportunity to get photographs of all types, but also very varied icons.
Templatesonline.com
Here you will also have the opportunity to get some templates for free to bring about your poster designs, which you will be able to use directly in the Microsoft program. Ideal for those users who do not like to start to work from scratch.
FontDiner.com
Finally, we present you another website that will offer you a great variety of fonts so you can start inserting into each of your designs. Here you can get yourself style of modern and old letters, such as those of the 50s and 60sall these types of letters can be used in videos, photos and documents. It is available for windows and mac.
Creating a poster with Word seems much easier than Photoshop or other photo software. I hear people say, “It’s not made for that!” Or “The most boring posters are made on Word!” But you know what, those people actually didn’t bother to go further in the matter. By digging well in the features of this good old Word, we can get an enticing visual rendering that has nothing to envy of the quality of a photo editing software. So, forget about all these terrible posters that are difficult to lay out on a page. Instead, follow the 3 steps that I’ll give you here to create a beautiful poster with Word 2013.
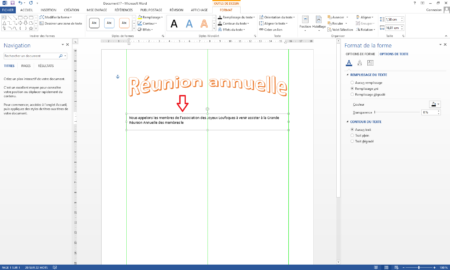
Making a poster in Word: add both a design and catchy title
First of all, you have to create a new document. Start by clicking on “File”, then “New”, and choose “Blank Document”. Here, we must already consider the formatting of all the content and therefore, display the margins (in green line). To do this, go to “View” and untick “Rulers”.
Note that before creating a poster, you must first define the format. In this example, we chose an A4 format of 21 by 29.7 cm in real size.
To add a title in the document, just go to the “Insert” tab in the Menu bar at the top, and then go to “WordArt”. We then obtain a kind of text box on the document – where we can put our title. Obviously, we can add as much content as we wish, but we must be mindful of the presentation – whether it’s an ad poster, a recruitment poster, a promotional poster, etc. (For more types of posters and when to use which, click here).
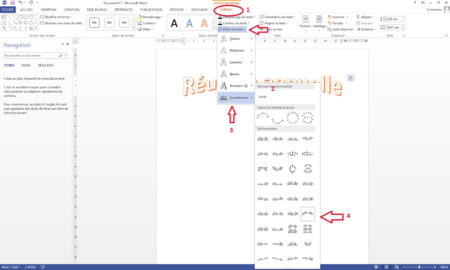
In this practical case, we will add effects to embellish the title. Thus, in the “Format” tab, then in the “Text Effect” category, we chose the “Transform” option. There, we got a long list of transformation options.
Insert the content or message of the poster
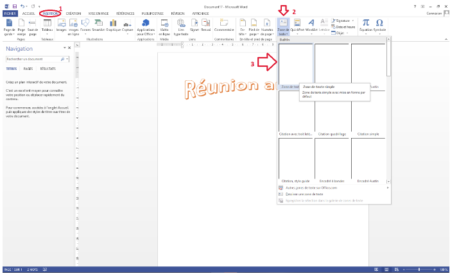
You have to consider the background and the form of the message to create a appealing poster with Word. Do you want to know the secret? To add the message, we’ll not type the text directly in the document, but we’ll insert a text box. To do this, we always go to “Insert”, then to “Text box”, then we choose “Simple text box”. The text box is more practical and appropriate because you can move it anywhere in the document.
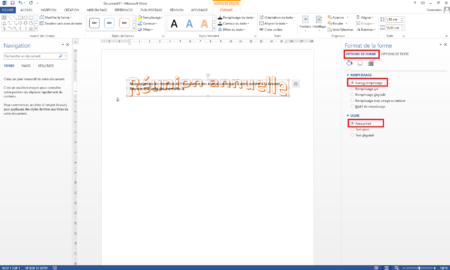
It should be noted that a text box background is white by default. It distinguishes itself when interacting with other elements. It is therefore recommended to make it transparent to anticipate some adjustments to be made later.
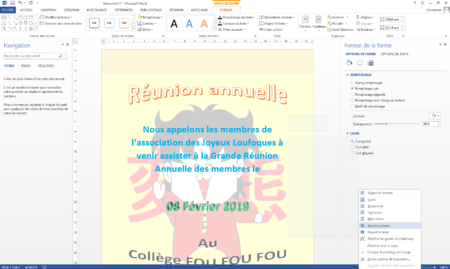
To make the background of a text box transparent, just right click on the text box and choose “Format Shape” from the drop-down list. A dialog box opens to the right. In “Shape Options”, you must pick “No Fill” in “Fill” and “No Line” in “Line”. It’s as simple as that!
To center the text (and it is also valid for the title), just select it and go to “Home”, then “Paragraph”, and center it (as you center a text in a Word document).
It’s important to remember that creating a nice poster on Word implies perfect alignment with margins. By stretching the text box on the left and on the right, the text will then align well on the page when the green line appears.
To change the font, size, and colour of the characters, it’s the same as with the usual texts in Word (in the font, size and colour bar at the top). You just need to select the text and customise it with all the choices of modifications.
To insert additional information on the poster (in this example: date, place, participation fees), you can choose either text box or WordArt. As we chose WordArt, we can always style the text. To do this, click on “Form format” in the drop-down list and then “Text options” this time. And as always, we can adorn our text at will.
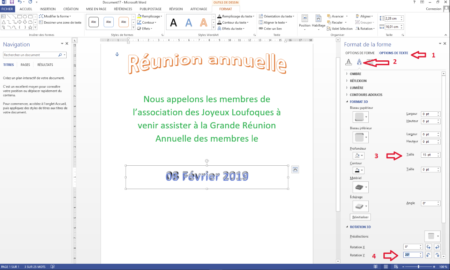
At this stage, we should not overload our poster and still ensure that each text is legible. We must therefore strive to choose appropriate colours.
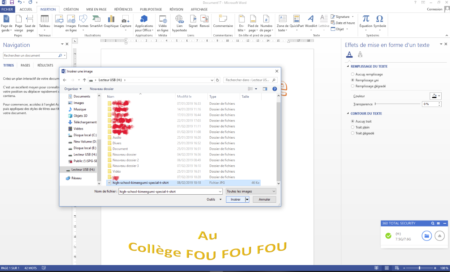
Add a background image
Last step to create an outstanding poster with Word: add a background image.
Simply go to “Insert”, then click on “Image”. There, you just have to browse the files and insert the image you want. To make it really a background image, click on the small square at the top right of our image to display “Layout Options”. Then you choose “Behind the text”. Then, select the image and right-click to display the drop-down list. This time, you click on “Image format”. To format the image, click on “Crop”.
We can then enlarge the image, but there will always be empty bands at the top and bottom of the document. To fill them, we will insert a text box (same procedure as mentioned above). But even in this text area, it will not completely cover the empty strips. Oh yes! When we want to create a poster with Word, we are faced with this kind of concern. But rest assured, it can be adjusted: to fix it, we first need to go in the “Format” tab, then in “Position”, and finally choose “With text wrapping”. And Ta-daaa!
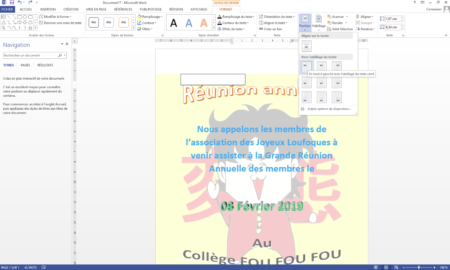
Now, to position this text box behind the text, we still go to “Format”, but this time in “Arrange”, then we choose “Behind the text”.
We will then assign a colour to the text box, one that is close to the colour of the image. To do this, you have to right click on it, then on “Form format” in the drop-down list. In the “Form Format” dialog box on the right, you just choose the right colour and adjust the transparency. Now we can enlarge this text box until we cover all the empty bands. 
That’s it. Creating a poster with Word is pretty elementary, isn’t it?
At this point, you still have to take precautions: be sure to save this new poster created in Word – in PDF format. Thus, its formatting won’t change! Simple precaution.
Why pay to have someone else make a poster when you can do it yourself in Microsoft Word? We’ll guide you step-by-step just how to do it.
 |
| © CreditDonkey |
Steps:
- Starting the Poster
- Picking a Poster Size
- Add a Headline
- Adjust the Text Size, Font, and Orientation
- Adding an Art Object
- Adding Secondary Text
- Adding a Logo
- Adding a Colored Background
- Bottom Line
Before starting the project, think about how large you want to make the poster. One common mistake people make when creating posters is making them too small. Larger posters grab the attention of people, as the text and art is easier to spot from a distance. Larger posters also cost more to print, though. Pick a poster size as large as you can afford to print (keeping in mind how many copies you want to make, of course).
Think about what you want to accomplish with the poster, including which message you’re trying to convey, and collect artwork that fits that message. Some people prefer to sketch a general layout of the poster with a paper and pencil to organize their thoughts, while others prefer to do all of the work on the computer screen.
One final piece of advice: Save the project often. You don’t want to have a computer crash destroy the work you’ve done on your poster.
1. Starting the Poster
Though it offers a large number online templates through Word, Microsoft doesn’t offer many business poster templates. (We used templates to show you how to create business flyers and postcards in Word in previous articles.) For this tutorial, we’re going to switch things up a bit and work from scratch.
Start by opening the New window in Word. (If you don’t see the New window when you initially open Word, click the File menu, followed by New.)
In the New window, click Blank Document, and you’ll be able to start with a fresh slate.
2. Picking a Poster Size
For the poster, we want a larger than normal size document. Keep in mind that some home printers can’t handle large paper, so you may need to send this poster elsewhere to be printed (or use a smaller document size).
To change the document size,
Click the Layout menu and click Size.
We’re going to use the 11-by-17-inch document, because we have a photo printer than can handle this size. If you want a larger size, scroll to the bottom of the menu and pick More Paper Sizes.
You can make your poster any size you want. Just make sure your professional printer can handle whatever size you pick and carries the required paper size.
Next, we want to create a horizontally aligned poster. We again click the Layout Menu followed by Orientation. We then click Landscape.
3. Add a Headline
Click the Insert menu followed by either Text Box or Word Art to pick the font style you want to use with the headline.
It’s important to use a large and to-the-point headline to gain the attention of people who see your poster.
Additionally, it’s important to create separate text boxes for whatever text groupings you want to use. This allows you to drag these boxes to whatever location you want in the Word document. Don’t just start typing at the cursor in the upper left corner, or you’ll lose control over the layout. Use the Insert Menu and place text boxes or word art.
4. Adjust the Text Size, Font, and Orientation
Once you’ve created a text box or word art headline, highlight it to adjust the size and orientation. (The text will have a gray background behind it when it’s highlighted.)
Now click the Home Menu and pick the font style and size you want to use.
Think big with the font size, as you want customers to see and read the headline of the poster easily from a distance (this headline is how you’re grabbing attention).
You also can pick a different font size for various letters or words inside the headline. Just highlight the letter or word that you want to change and pick the new text size. You can change the text color and alignment through the Home menu too.
To change the orientation of the text, highlight it. You’ll see a box around it with dots at the corners of the box and on the sides. You can drag these dots to change the size of the text box. To change the location, just place the cursor over the border of the text box. Then click and hold to drag it to the new location. We dragged our first text box to the lower left corner of the poster.
You can add as many text boxes as you want using these commands. We decided to create two headlines, one for the top of the poster and one for the lower right.
5. Adding an Art Object

By default, Word will place the art object in the upper left corner of the document. Unfortunately, you can’t really adjust this position much. You can move the art down the page a little bit by placing the cursor in the upper left corner and hitting Enter a few times before inserting the photo, which is what we did. We could then drag a text box to the blank space above the art.
With the cursor located where you want, click the Insert Menu and click Pictures. Then select the image you want to use from your computer’s hard drive.
To resize the photo, click on it and then drag the dots that appear on the border. As with the text, think big here too. The art image should dominate the viewer’s attention.
6. Adding Secondary Text
Use smaller text in a new text box to explain a bit more about your event. This text doesn’t have to grab the attention of the viewer, because hopefully the larger text and the art already caused them to notice the poster, and they’re now moving in closer to learn more.
Click Insert and Text Box to add the secondary text. You can drag the border of the text box to place it in the desired location and drag the dots to resize it.
Then highlight the sample text in the box and retype the message you want to use. As discussed before, highlight any text to resize it or to choose a new font. We decided to give a bold accent to a few words inside the secondary text.
The text box will have a visible black outline around it by default. To remove this outline, right click on the border of the text box and left click on Outline at the top right in the popup menu. Then click on No Outline. (Or if you want a thicker border, you can do that in the Outline menu too.)
7. Adding a Logo
![]()
We want to add a logo to the bottom of the poster. We don’t have a logo, so we’re going to create a quick and simple logo.
Click Insert and Shapes, followed by the shape you want to use. With the plus-shaped cursor on the screen, click and drag the cursor to create the shape. Once you’ve created the shape, you can resize it by clicking on it and dragging the borders.
You can change the color of the shape by highlighting it and right clicking on it. Then left click on the Fill Menu and pick a new color. You can make other changes to the shape in the same manner.
Then we’ll add our business’ initials inside the logo using a text box.
8. Adding a Colored Background
Finally, we want to add a colored background box behind the secondary text, just to give it a bit more emphasis and attention.
Click the Insert Menu and Shapes. We then clicked on a rectangle shape. With the plus-shaped cursor on the screen, drag the cursor to create the rectangle.
The colored box is now covering our secondary text, but we can edit the box to make it work better.
First, we’ll change the color. Right click on the border of the color box and left click on the Fill Menu near the top of the popup menu. Then pick a color you want to use for the box. We chose a pale blue so the black text would show up nicely.
Next, we need to make sure the text is visible. Right click on the border of the colored box and then left click on Send to Back. In the secondary popup menu that appears, click .
The area behind the text box may now appear as a white box that covers most the pale blue color, but we can fix this as well. Highlight the text. Then right click on the border of the text box and left click on Fill. (Be sure you’re clicking on the text box border and not the colored box border.) Then click on No Fill.
Bottom Line
After you’ve finished your poster and proofread it a couple of times, we’d suggest setting it aside for a few hours and then returning to it. You may find an error after you look at it with fresh eyes, or you may decide to word something a little differently. Make sure the largest areas of text and art grab the attention.
Another smart idea with a poster is to expand it to fill your entire computer screen. Then step back several feet and look at the poster. Do the right areas grab your attention?
Once you’ve finished your tweaks and given it a final proofreading look, you’re ready to have the poster printed. If you’re going to have the poster printed at a professional printer, we’d suggest shopping around for quotes, especially if you’re only looking for a few prints. Cost quotes can vary quite a bit for small print runs.
Additionally, if you’re going to hang the printer in a window in your store, you may want to hang two posters back-to-back. This means the poster will be visible to people outside the store looking in the window, as well as people inside the store looking out through the window. You don’t want a blank white paper visible on either side of the window.
Note: This website is made possible through financial relationships with some of the products and services mentioned on this site. We may receive compensation if you shop through links in our content. You do not have to use our links, but you help support CreditDonkey if you do.
Introduction: How to Make a Poster From a Word Document
I needed a poster for the Maker’s Faire, but had my text and graphics laid out in Microsoft Word. These are the techniques I used to make a large poster using my plain old printer and freely available software.
Before you begin, check your printer driver to see if printing in poster format is an option. It will save you a lot of time and effort. Big thanks to the aware Karel Jansens for the printer driver tip.
Step 1: Save Your Word Document As a TIFF File
Let’s hear how Microsoft would instruct you how to do this (from Office «Help»):
1. On the File menu, click Print.
2. In the Name list in the Print dialog box, click Microsoft Office Document Image Writer.
3. Click Properties.
4. In the Microsoft Office Document Image Writer Properties dialog box, click the Advanced tab.
5. Under Output format, select the TIFF — Monochrome Fax option, Superfine 300 DPI and then click OK.
6. In the Print dialog box, click OK.
7. In the Save as dialog box, select the View Document Image check box, and any additional options you want, and then click OK.
Step 2: Download and Install Picture Window Pro
Download and install the trial version of Picture Window Pro.
http://dl-c.com/content/view/23/54/
A 30-day evaluation version of Picture Window Pro 4.0. The evaluation version can be converted to a full working version by purchasing a serial number.
For Windows 2000, Windows XP, and Vista
The evaluation verion is not disabled in any way, but if you need this function often, please consider buying a license. They make a pretty handy piece of software.
Step 3: Open the TIFF File in Picture Window Pro and Print Your Heart Out
Open the TIFF file you saved in step 1. Select File > Print, then hit the «Print» button.
You will see the following page. Select how many pages you want to tile horizontally and vertically (how big) you want the poster, what size paper (letter or legal), and the orientation (portrait or landscape).
Set the «Print pages» numbers to the total pages of yoru poster, in my case it should be 1 to 16.
Hit «OK»
Step 4: Trim the Boarders
Your printer can not print all the way to the edge of your paper.
This leaves white borders around the edge of each sheet.
You only need to trim two edges of each sheet, since you can overlap your pages as you glue them down.
I like to start with the lower right most sheet, so I need to trim the bottom and the right hand side of each sheet.
Step 5: Dry Fit Your Pages
As a backerboard, I used a large remnant of old drywall, you can use any large flat surface. For a more professional look, choose foamcore, for the economy appearance use cardboard.
Lay your pages out without any glue to properly size and center your backerboard. This is caled a dry fit and will let you see any problems you may have beore you have to fix things with a page dripping with wet glue.
Fix any problems you can find.
Step 6: Glue Down Your Pages
I used rubber cement for my pages, but most adheasives should work fine. You can test your glue with a blank sheet of paper on the back of your board. If it wrinkles up, your glue has too much moisture.
Apply the glue to the backboard and carefully lay the page down watching your alignment to the backerboard and the other pages.
Using rubber cement, I was able to slide the paper around a little to get it alligned properly. Spray adheasives may not be so kind.
I painted a brushfull on the backboard where each corner of the page would be and spread it inward with the brush.
Step 7: Admire Your Fine Work
Once your last page is glued down and dry, you may need to go back and re-glue down some of the seams.
Once you’re finished you can display your poster on an easel for all to enjoy.
Be the First to Share
Recommendations
Posters are very easy to make with Word when you know how to handle all the tools available to the word processor . In this way, you can achieve unique and striking designs, giving them a touch of distinction.
There are a variety of functions you can use to do this type of work. . You just need to know where to find them and what their specific job is.
In order for you to become an expert in creating posters, we have prepared this post for you. You can find a guide that will help you create the best banners step by step.
What tools in Microsoft Word are useful for creating posters?
Word gives you the option of creating different types of documents that you can edit and attach different types of figures, videos or special letters . This way you can create a poster that strikes, giving it your own style.
To achieve this, you will need to use different resources that will help you edit in a few steps and have eye-catching designs. The tools you need to integrate are as follows:
- WordArt: It is a function that allows you to create different designs in the text, it works in a special way with letters, giving them effects of different textures, shadows, indoor or outdoor lighting, creating graphics, etc.
- Insert images: You will have to go to the option Insert then click on Pictures ou Pictures in line for find the photo you need to embed in your text file. In this way, you can have a poster with unique designs according to the images you choose on your computer or on the Internet.
- SmartArt: when you need to create a flowchart, you can do it by incorporating figures in a very easy way. You will have to work with this tool which is in the option Insert .
- Graphic: If you want to grab the attention of people reading your poster and need to demonstrate some data by means of a drawing, you can do so using this tool.
- Text zone: this tool is ideal when you need to have an area in the middle of the text you are creating, without having to resort to a table. This option is better than Insert table because you will be able to manage the margins in a simpler way.
Steps to Create a Poster in Microsoft Word Like an Expert
Before you begin, it is necessary to keep in mind that you will need a printer that is compatible with a much larger paper size than usual if your poster is the size of a poster. So you should look for friends or go to places that make these kinds of impressions.
In case you decide to make a poster with smaller dimensions (or if you have found a professional printer), you will need to follow these steps:
- Once you open Word, you need to choose «New».
- Click on the function «Design».
- Choose the option «Cut» . You can therefore choose the size of your poster.
- After choosing the size that works best for you, you will need to choose the orientation of the poster. To do this, you must click on «Orientation» and choose if you want it to be horizontal or vertical.
- If you want to create a header in your file, you will need to go to the function «Insert» . Access the option «Text» and choose «Text zone».
- Click on «Simple text box» and write what you want to appear on the poster.
- Select the text you wrote and go to the function «Start» to choose the font type and size.
- Choose the color that the letters will have.
- To get the desired size of the text box, drag the edges with the mouse until it is the size you need.
- Import the desired graphics onto the poster. For this you will have to go to «Insert» then click on «Forms».
- You can choose what you want and use the cursor to place it where you need it.
- If you prefer, you can add text to the image. To achieve this you need to double click on it to edit whatever you want.
In this way, you will be able to add different text boxes according to your taste, so the steps will be the same. You just need to save the poster. For that you will have to click on «File» , to choose «Save as» and write the name you assigned to your document.
Find out how to download and add WordArt illustrations to enhance your posters
When you need to incorporate another type of art into your font types, you can use different resources for your posters and so you can include it in WordArt. To perform this task, you must follow these instructions:
- Open your browser and go to one of the platforms used to download the fonts. In this case, we choose DaFont as an example. «Https://www.dafont.com/»
- Choose the type of font you want to download.
- Click on «Download».
- After a few seconds you should click on «Install». This will allow Word to recognize that you have a new font.
To use it in your posters or in any other document you will just have to go to start and it will look for a Font function for the name of the letter you recently downloaded.
List of the best portals to download WordArt and find resources for your posters
If you want to design the best posters using Word, you need to consider these portals that will help you download WordArt in order to have more resources in your work:
Pixabay.com
“UPDATE ✅ Do you want to learn how to create attractive and original posters in Word like an expert? ⭐ ENTER HERE ⭐ and find out how to do it FROM SCRATCH! ”
This platform is an image bank which will help you find the best photos, illustrations and also videos entitled to use them for free. This way you will find many high quality WordArt resources.
You will have to type in the search bar what is the theme of your poster and then filter by the type of image or video you want to find. Finally, you will need to «Click on Download» .
Canva.com
On this site you will find the tool you need to create and design the best posters. You will need to register with your email or Facebook username and then you can start uploading all the photos you need.
You will find pre-designed models as well as a wide variety of technical resources that will facilitate your work.
autotracer.org
If you want your photo to not lose quality, you can vectorize it so that it becomes a drawing and thus enlarge it to the size you want. To perform this task, you will need a platform like Autotracer, which will help you with very simple steps to have the best image with vectors.
You must write the URL or select the file and stick it in the area provided for this purpose. After a short time, you can download it for free. You will be able to download any type of image in JPG, PNG, PDF or JPEG format.
Fotor.com
When you don’t have much experience using Photoshop or similar programs, you can go to this page and edit photos in a very easy way. You will need to upload the file after pressing the Edit Photos Now button.
You will have a good number of filters which will help you make the image look the way you like. Then you can free download . It also has a premium version where you can use cloud storage and other kinds of editing effects.
1001FreeFonts.com
If you want to turn Word into a real editing tool, you can’t miss a wide variety of fonts . This will help you give your files a better interpretation and get more attention from your readers.
The steps you will need to follow are very simple, it you just have to choose one or more types of typography then download them so that it recognizes them automatically. This way you can create very simple and colorful text boxes.
If you have any questions, please leave them in the comments, we will get back to you as soon as possible, and it will be a great help for more community members as well. Thank you!
