Initially, Word was created to be used as a text editor. You can use it for creating digital documents such as notes, reports, letters, quizzes, homework assignments, and sometimes even books.
But is it a good fit for creating certificates?
Let’s check that out.
Microsoft Word as a certificate maker
Word offers a selection of certificate templates good for many occasions. This software lets you find aesthetic templates that can be modified and adjusted to your needs. You can choose the font and change the color or orientation. It is possible to make it from scratch or to use a pre-made template.
But are they appealing?
It seems that a long time has passed since Word’s templates were updated. Their appearance is far from professional so they might be a good option for individual usage, but not for companies.
What’s more, to make certificates for a bigger group of attendees, you have to write everything manually. There is no other way of saving all the certificates on your computer or in the cloud.
Unfortunately, you have to copy the name from your list and paste them into a Word document. If you have lots of participants, it can take hours to create certificates for them in this software.
How to make certificates with Word?
Nevertheless, Word is pretty easy to use, and you are already familiar with its interface. So if you still wish to create certificates with Word – we will show you the easiest way to do that.
Firstly, think of the topic of the course or workshop. How do you want it to appear on a certificate? Funny, elegant? Think of certificate colors, fonts, and general appearance.
Using the template
To use a template, follow these steps.
-
Open the word and click on the File tab
-
Then click New
-
Type certificate in the Search text box to find some certificates templates
You can find a ready-to-fill-in template for different occasions. These can be business, casual, and also fun, kid-friendly certificates. For examples Certificate of Achievement, Certificate of Excellence, Certificate of Participation, Thank You Certificate, Most Valuable Player Certificate, Diploma Certificate, Christmas Gift Certificate, and some more. Choose the one that suits you best.
-
Choose the template.
-
Select Create.
Then the template is downloaded to your Word document from the cloud where Microsoft Words keeps them all.
-
Now you can edit the template as you want.
Customize the template as you need to use different fonts, sizes, and colors. There are many to choose from. Add the date and the recipient’s name, and if you want, add a personal message on the certificate.
You can change the position of the text, but it can be difficult to do it smoothly. There are no guidelines that are helpful in terms of placing the text, so it’s challenging to get any reference points.
All of the templates are available for users who have a legally registered version of Microsoft Word. This is the only way they can use the templates as their own. To use Word for certificates, you have to pay for the Microsoft Office application pack. Alternatively, you can use Word docs in your browser.
Creating a certificate from scratch in Word
It is possible to create certificates in Word on your own. These are the steps you need to follow:
-
Open a new Word document.
You will see a blank document.
-
Click the Layout tab.
-
Change the orientation into Landscape.
It is a typical format for certificates, but if you want to keep it vertically, skip this part.
-
Go to the Design tab.
Select Page Borders.
Choose a Style or Art, the color and size you like. Click the Box option. To see the outcome, click OK.
-
Then add text boxes. Change the font, sizes, and colors as you want.
You can select an image from the internet or a computer and upload it if needed.
Drawbacks of making certificates in Word
Word is a great program for many things – but making a certificate is not one of them.
⛔️ It is hard to make certificates intuitively
Microsoft Word is not a tool whose main feature is creating certificates. There are many other options it’s better suited for — writing notes, resumes, newsletters, business reports, marketing materials, calendars, team collaborations, and many more. It’s great to have that many opportunities, but it is easy to get lost.
⛔️ Word documents do not provide precision
The templates are colorful but a little bit out-of-date. Making them from scratch is possible, but you need to write all the details manually. Even if you have a list, you need to copy and paste each entry, name by name.
⛔️ Sending certificates to your attendees takes a lot of time
There is also another issue with sending certificates to all your participants. It is not a problem if you only have a handful of people to send them to. But if there are hundreds of attendees, it can get messy. In such a case, you need to send the certificates to all of your course participants manually, one by one.
Writing the names one by one is time-consuming. Additionally, sending certificates to your participants does not speed up the process. You would spend hours creating end sending them.
Word is not intended to be used as a certificate generator. The templates and possibility to generate the diplomas are rather one the options than the purpose of it. That is why you can face some troubles while creating certificates for your attendees.
As mentioned, Word is one of the most popular text editors – millions of people use it. Once you choose a Word template, there is a high chance that your certificates will look the same as everyone else’s.
But what would you say, regardless of the number of participants, about designing and sending the certificates in 15 minutes?
Yes, it is possible. Also, it is easy, accessible, and enjoyable.
A better alternative for creating a Certificate in Word
Certifier will help you save time and will make the process easy and fast. It is a certificate issuer and creator. This tool allows you to build custom digital certificates in minutes, not hours. Only with a few steps and a few clicks.
The tool is oriented in that task; to build and send the certificates to the recipients. That is why it is so intuitive. You do not need to look for options that you can use to change, add a text box, or to change the color. All the options there are to make your certificates visually appealing.
Certifier offers over 200 templates for literally every occasion. Ready-made certificate templates are available in the gallery. They are suitable for business and casual purposes. Everyone can find what they need.
Webinar Certificates, Marketing Course Certificates, Social Media Workshops, Certificate for the Employee of the Month, Certificate for the Most Effective Player in a Team, Diploma for the Scariest Halloween Costume, and many more.
You can find everything that you need or design it from scratch. And be happy with the results.
If you want to create a modern certificate in minutes ➡️ sign up for a free trial
Certifier Features
Now you know what Certifier is, so let us show you some more advantages of this tool.
#1 Certificates can be shared effortlessly
Certifier enables creating visually appealing certificates. It is an important factor, especially if you run a business. With Certifier, you can make elegant, clear, and appealing certificates or diplomas that can be easily shared on LinkedIn, Facebook, or Twitter.
If certificates are unattractive, there are lower chances of sharing them on social media. Thanks to Certifier, these problems are solved.
#2 High-quality user experience
Additionally, the interface makes the experience really enjoyable and intuitive. Task manager contains only 5 tabs, and each of them is used for creating certificates. The whole process can be done quickly and painlessly.
#3 Marketing insights provided
After sending the certificates to your recipients’ group, you can get the statistics of who opened, downloaded, or shared the certificates. You can get information about sharing to LinkedIn, Twitter, or Facebook. So, it is also a way of promoting your business.
➡️ See more free Word certificate templates: 64 Free Word Certificate Templates
#4 You can edit after sending
Another feature that none of the certificate generators has on the market, is the ability to edit certificates after you’ve sent them out. You can easily correct mistakes if there were some. All you need to do is find the certificate with a mistake, correct it and resend it with a couple of clicks.
How to create certificates in Certifier?
Similarly to Word, Certifier provides pre-made templates of certificates and also gives the opportunity to make a certificate from the ground up. Follow these steps to make your own certificates.
Sign up
To create certificates, you should create an account. All the certificates will be in one place, stored safely in the cloud. No need to create a separate folder with documents. After creating the account, confirm your email address. Confirmation is in the email box that you gave.
Make a list of participants
All you need to do is make a CSV file with 2 columns — the participants’ names and email addresses.
Design a certificate
Choose Design to make certificates. You can use a pre-made template or do your own and adjust it and change it as you like. All the tools for editing are in one place, close at hand.
👉🏻 If you want to create a certificate from scratch
- Choose your certificate paper size and orientation.
- Upload a background.
- Fill the document with text, adjust the font size, decide on colors upload your logo or other elements.
👉🏻 Using certificate templates
Head to the library and choose the template suitable for the occasion. For sure, you will find an appropriate option for you. A webinar, online schooling, a course, and workshops.
Add attributes
If the design is done in both cases: editing a template or making certificates from scratch, add attributes. This option enables to sending of certificates in bulk to the recipients.
Attributes include Recipient Name, Certificate ID, Issuer Name, Issue Date, Expiry Date, and Course Name. Remember that placing all the mentioned data is not a good idea.
Do you want to know about good practices in certificate design? Learn from the best ➡️ 14 Best Practices of Certificate Design (Google, Harvard, AWS, etc.)
Send to the attendees
You have uploaded the spreadsheet with names and email addresses, so it is almost ready. Now all you need to do is to click Publish and Send. And a printer-friendly PDF document is already in your participants’ email boxes.
In a nutshell — Comparison Table
Here is a table with the aspects that we already mentioned to give you a broader look.
If you want to create beautiful, professional-looking certificates and not spend forever on sending and writing them, Certifier is a great option. It is tailored for your needs – templates for every occasion, easy to use, and fast to send.
Also, it offers many benefits that give marketing insights and promote your business.
Sign up for a free trial and take advantage of the enjoyable and easy process of making certificates!
Tutorials
Certificates are essential in every large organization, when you want to congratulate your workers for a job well done, sending them an email may not be enough. You need to give them something tangible that will remind them of their achievements any time they cast their glances at it. A good example of a reward or something to encourage them is a certificate. Use MS Word to make beautiful certificate templates and you won’t have to suffer looking for someone to design them for you. All this is achievable thanks to the collection of templates provided by Word.
Word allows you to create and print simple certificates easily on your computer and gives you a chance to be creative. You can put together a certificate for a sports event, a student graduation ceremony certificate, and much more. The following is a guide that should help you in creating a free sample certificate template in all the designs and styles you want.
> Step 1: Start MS Word
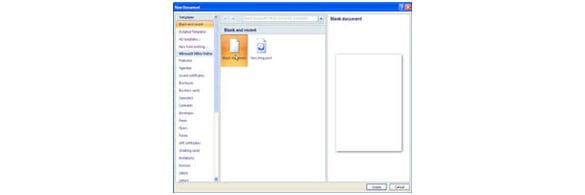
Click on the start button at the bottom left end of the desktop. This will launch a panel on the left side, click to select the Microsoft Word option. This will open a blank MS Word document; alternatively, you can click the “New button” on the home button to open a blank document as shown below:
> Step 2: Choose the Layout you Want for your Certificate
Once a new word document has been opened, click the “Page Layout” tab on top of the window and select “Portrait” or “Landscape” orientation for your certification as shown below.
> Step 3: Select Page Color for your Certificate
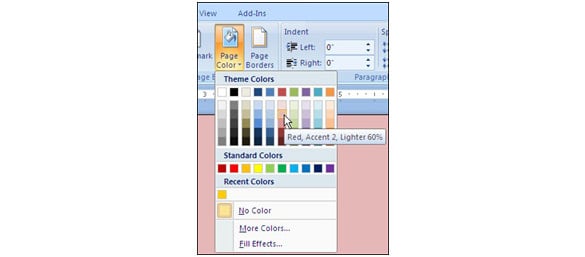
Click on the “Page Layout” tab and select the “Page color” option. Then select the color you want to use while preparing your custom certificate.
> Step 4: Change the Page Border and its Layout
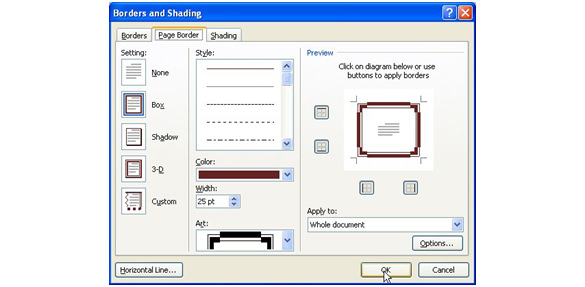
Click on the “Page Layout” menu to select the “Page Border” option. Click on the color you want and apply a color fix up to your preferred width. Lastly, add a fixed Art to your border or any other part you want and click “OK”.
> Step 5: Insert WordArt
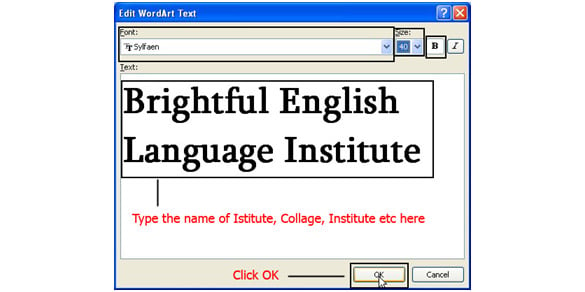
On the “Insert” tab at the top of the window, click on the “WordArt” command to select the style you want in your creative certificate. There are many styles which you can choose from depending on your taste and preferences. When you click on a word style, a menu will be displayed. Type the mane of the organization, college name, high school name, etc. Then click “OK” to apply the fix, the following should guide you into achieving the perfect WordArt.
The drop-down button on the menu should help you in selecting the right style to use on your printable certificate.
> Step 6: Insert WordArt Text
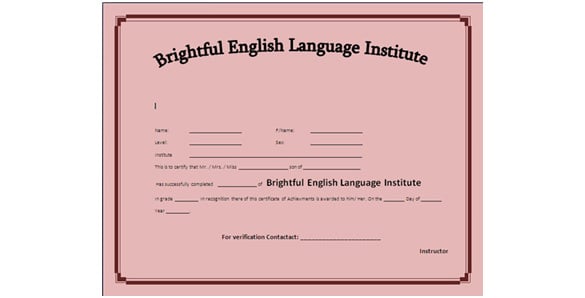
Select the right word text for your modern certificate. This might include the name of the employee, level of occupation, sex, company or organization, and any other relevant information as shown in the following screenshot:
> Step 7: Insert a Picture or Logo
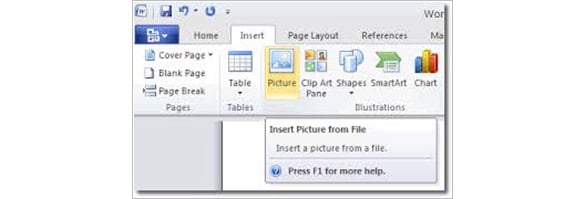
On the Insert button, click the Text box and choose the Alphabet quote. To fix a photo or logo, type the word “picture” instead of “Alphabet Quote”. To insert a photo or logo of the company, click on the “Insert” tab and select the picture button. Browse the picture you want to use and double-click on it to select. You can follow this procedure to add graphics or a sample logo.
> Step 8: Format the Certificate
As you get closer to completing your academic certificate, make sure that your fonts and sizes are well-formatted. Make any adjustments that you find necessary for your certificate.
> Step 9: Save and Print
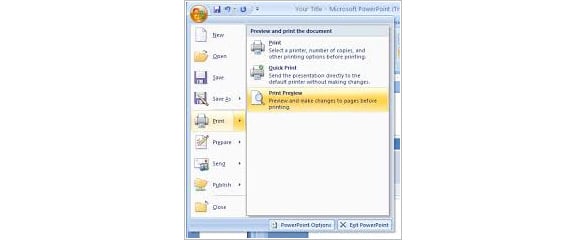
Click the office button once more then choose “Save As”. Select the folder or location in which you want to save the file and click save. Lastly, select print preview on the print menu on the office button to preview the word certificate.
If it is complete and well-formatted, print the number of sample sheets you want.
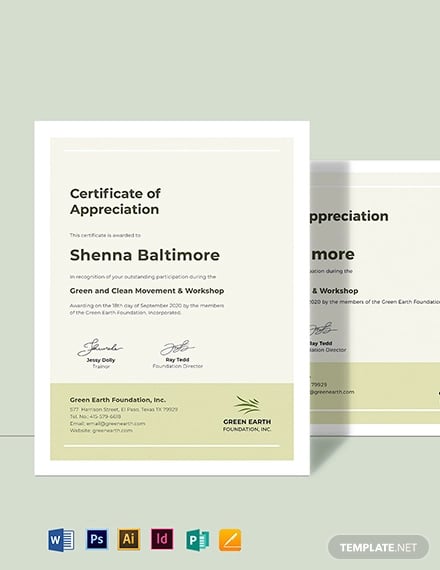
Modern Certificate Template
Details
File Format
- Illustrator
- InDesign
- MS Word
- Pages
- Photoshop
- Publisher
Size: 8.5×11 inches + Bleed
Download
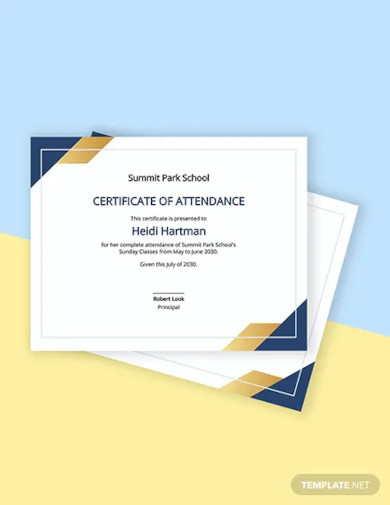
Sunday School Student Certificate Template
Details
File Format
- PSD
- Google Docs
- Illustrator
- InDesign
- Word
- Apple Pages
- Publisher
Download
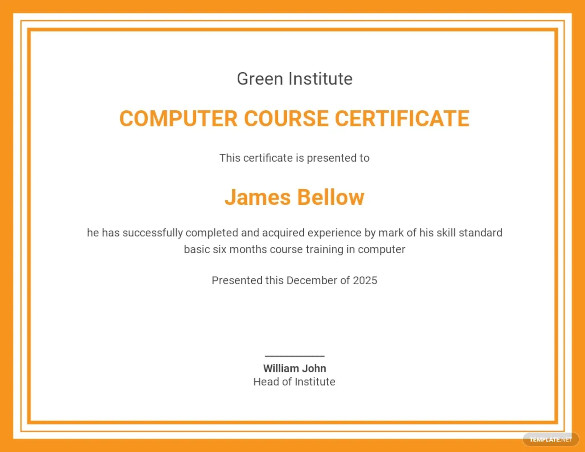
Computer Course Certificate Template
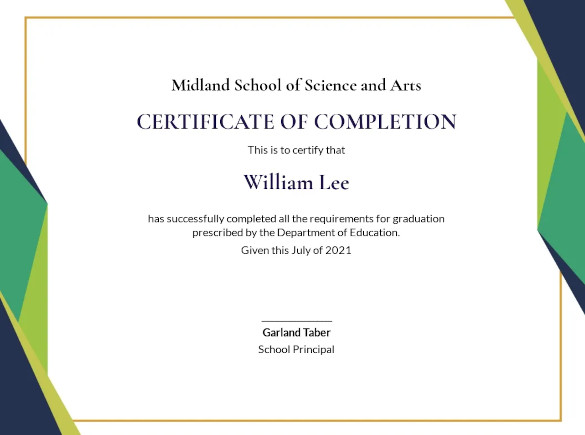
Graduation Certificate Template
Details
File Format
- MS Word
- Google Docs
Download
Sports Participation Certificate Template
Details
File Format
- Illustrator
- InDesign
- MS Word
- Pages
- Photoshop
- Editable PDF
- Publisher
Size: 8.5×11 inches + Bleed
Download
Completion Certificate Design Template
Details
File Format
- Illustrator
- InDesign
- MS Word
- Pages
- Photoshop
- Publisher
Size: 8.5×11 inches + Bleed
Download
Award Certificate Template
Details
File Format
- Google Docs
- Illustrator
- InDesign
- MS Word
- Pages
- Photoshop
- Publisher
Size: 8.5×11 inches + Bleed
Download
Completion Certificate InDesign Template
Details
File Format
- Illustrator
- InDesign
- MS Word
- Pages
- Photoshop
- Publisher
Size: 8.5×11 inches + Bleed
Free Download
Birth Certificate Illustrator Template
Details
File Format
- Illustrator
- InDesign
- MS Word
- Pages
- Photoshop
- Publisher
Size: 8.5×11 inches + Bleed
Free Download
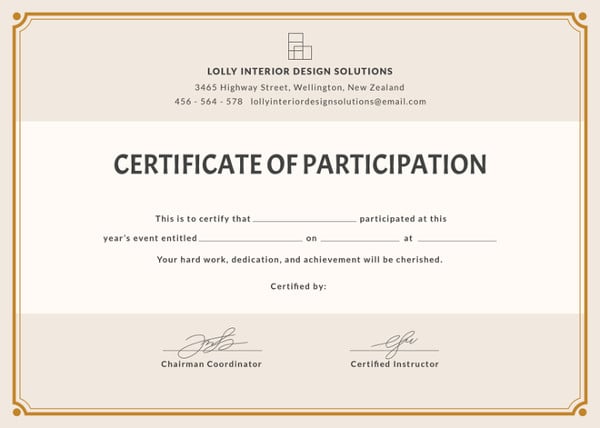
Blank Certificate of Participation Template
Details
File Format
- Illustrator
- InDesign
- MS Word
- Pages
- Photoshop
- Publisher
Size: 8.5×11 inches + Bleed
Free Download
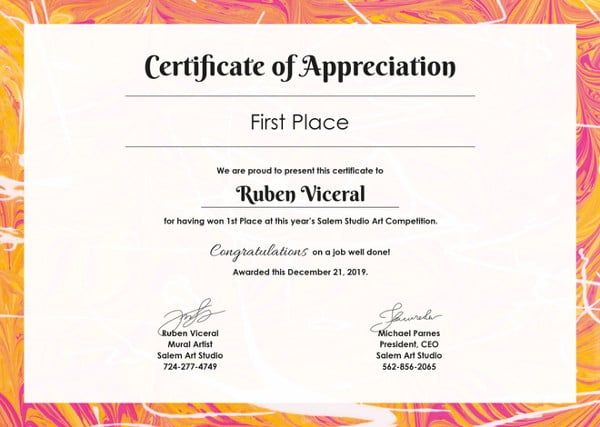
Appreciation Certificate Template in iPages
Details
File Format
- Illustrator
- InDesign
- MS Word
- Pages
- Photoshop
- Publisher
Size: 8.5×11 inches + Bleed
Free Download
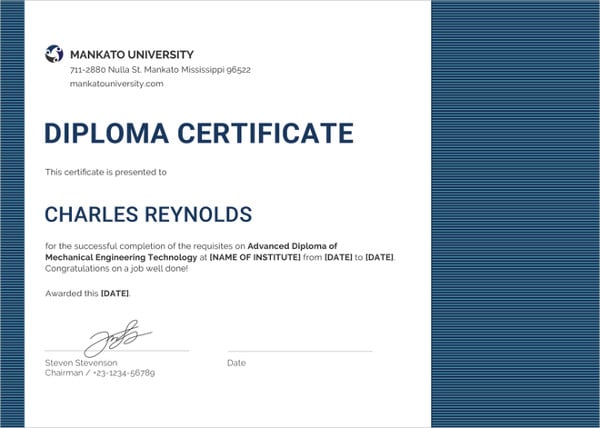
Simple Mechanical Diploma Certificate Template
Details
File Format
- Illustrator
- InDesign
- MS Word
- Pages
- Photoshop
- Publisher
Size: 8.5×11 inches + Bleed
Free Download
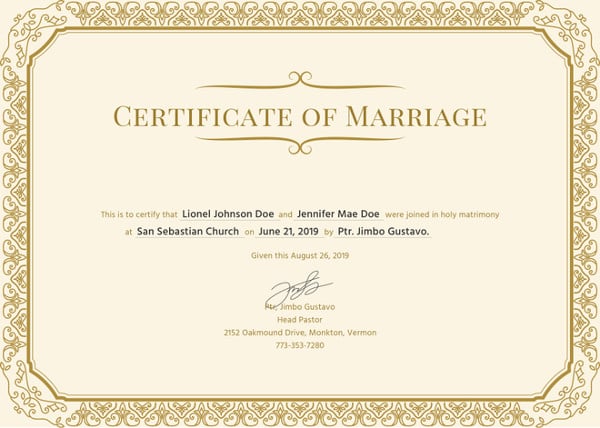
Printable Marriage Certificate Template
Details
File Format
- Illustrator
- InDesign
- MS Word
- Pages
- Photoshop
- Publisher
Size: 8.5×11 inches + Bleed
Free Download
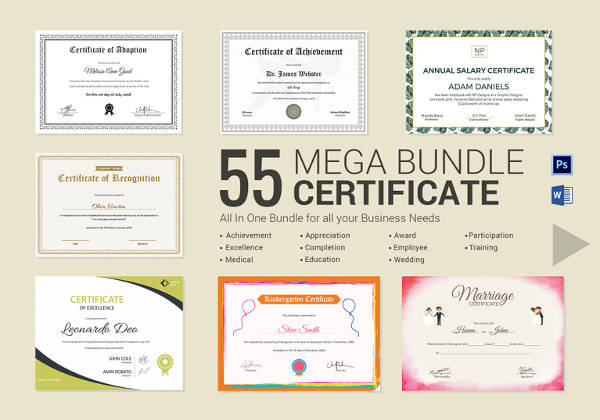
Certificate Bundle – Microsoft Word Format
Details
File Format
- Photoshop
- MS Word
Size: US
Download
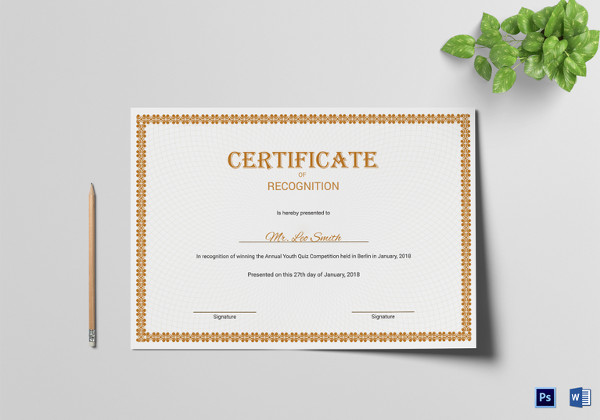
Recognition Certificate Template
Details
File Format
- MS Word
- Photoshop
Size: US
Download
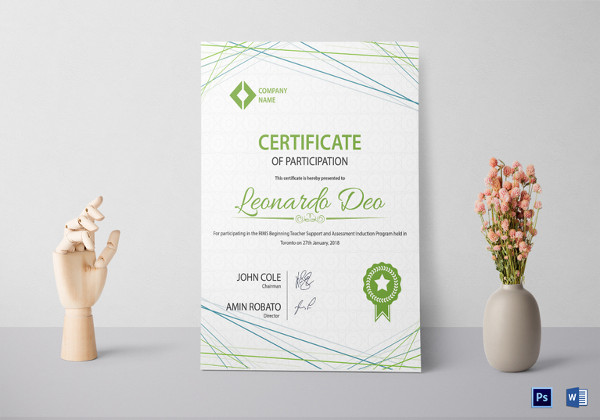
Sample Participation Certificate Template
Details
File Format
- MS Word
- Photoshop
Size: US
Download
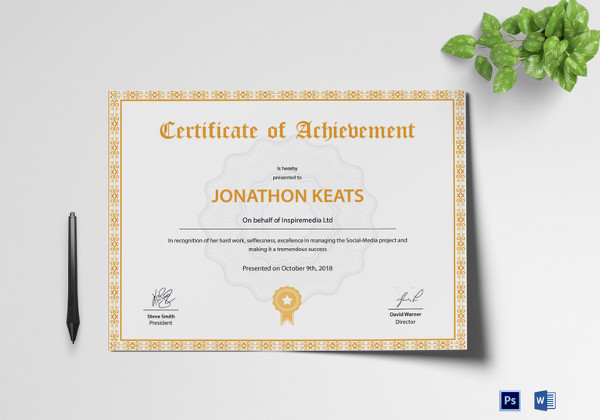
Achievement Certificate Template
Details
File Format
- Photoshop
- MS Word
Size: US
Download
Completion Certificate Template
Details
File Format
- MS Word
- Photoshop
Size: US
Download
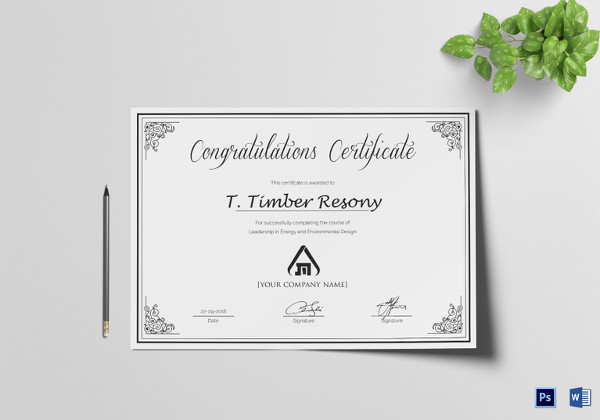
Simple Congratulation Certificate Template
Details
File Format
- MS Word
- Photoshop
Size: US
Download
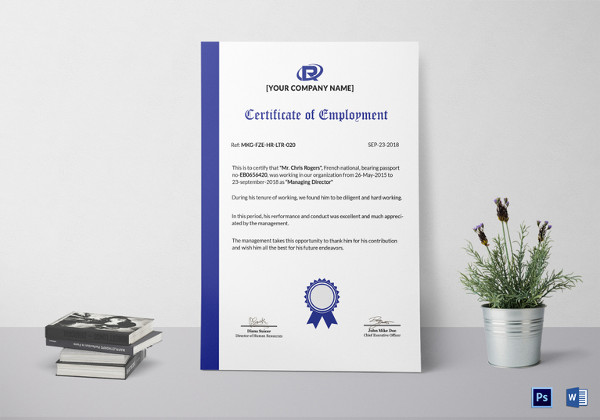
Sample Employment Certificate Template
Details
File Format
- MS Word
- Photoshop
Size: US
Download
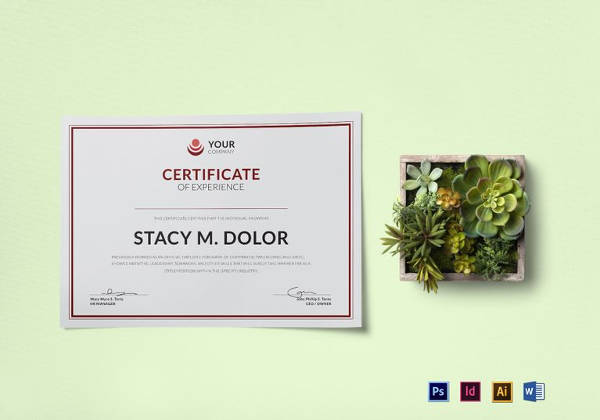
Employee Experience Certificate in Doc
Details
File Format
- Illustrator
- InDesign
- MS Word
- Photoshop
Size: US
Download
More in Tutorials
Open Word, and on the side menu, click on New. Click on the Search Box and type certificate to display a number of certificate templates. Select a certificate template from the options provided and click on Create. The selected certificate will open as your new document.
Contents
- 1 How do I create a certificate template?
- 2 How do you make a certificate on Microsoft Word 2007?
- 3 What is a Microsoft Word certificate?
- 4 How do I make an editable certificate?
- 5 How do I Create a certificate in Windows?
- 6 How do I Create a certificate on my computer?
- 7 How do I edit a certificate template in Word?
- 8 How do I get my word certification?
- 9 Is Microsoft certification free?
- 10 How do I prepare for Microsoft Office certification test?
- 11 How do I create a digital certificate?
- 12 How do I get a free e certificate?
- 13 How do I create a webinar E certificate?
- 14 How do I install a certificate in Windows 10?
- 15 How do I create a self-signed certificate in Windows 10?
- 16 How do I create a root certificate in Windows?
- 17 Where do I find certificates in Windows 10?
- 18 How do I register a certificate remotely?
- 19 How do I print a certificate name?
- 20 How do I print multiple certificates with different names in Word?
How do I create a certificate template?
To add the new template to your CA, click Windows Start > Run, enter certsrv. msc , and click OK. In the Certification Authority window, expand the left pane if it is collapsed. Right-click Certificate Templates and select New > Certificate Template to Issue.
How do you make a certificate on Microsoft Word 2007?
Type “Certificate” into the small text field in the middle of the window. Click the right-pointing arrow and scroll through the certificate templates. Each template may be fully customized to your requirements. Click on a certificate, then click the “Download” button.
Microsoft Office Specialist Word certification
Certified individuals will establish their ability to perform a number of Word tasks, such as creating and managing documents, formatting text, paragraphs and sections, creating tables and lists, applying references and inserting and formatting objects.
How do I make an editable certificate?
How to make a certificate
- Open Canva. Launch Canva and search for “Certificates” to start making your own certificates.
- Select a template. Browse different styles and themes of certificate designs for your needs.
- Personalize your design.
- Add more design elements.
- Order your prints.
How do I Create a certificate in Windows?
In the center panel, double-click Server Certificates. In the Actions menu from the right-side, click Create Certificate Request. In the Distinguished Name Properties window, complete the following fields: Common name – the fully qualified domain name (FQDN) or the URL for which you want to use the certificate.
How do I Create a certificate on my computer?
Launch the Certificate Console
- Log into your Windows server running IAS or NPS (RADIUS Server).
- Launch the Microsoft Management Console (mmc.exe).
- Select File menu > Add/Remove Snap-in.
- Choose Certificates from Available Snap-ins and click Add.
- Choose Computer account for snap-in management and click Next.
How do I edit a certificate template in Word?
Edit templates
- Click File > Open.
- Double-click This PC. (In Word 2013, double-click Computer).
- Browse to the Custom Office Templates folder that’s under My Documents.
- Click your template, and click Open.
- Make the changes you want, then save and close the template.
How do I get my word certification?
How to access your Certification Dashboard
- Below the description on any certification or exam details page on Microsoft Learn.
- On the Certifications overview, in the upper right corner, there is a link to “Go to Certification Dashboard”.
- In the “Certifications” section of your Microsoft Learn profile.
Is Microsoft certification free?
Currently, Microsoft offers free certification passes for 12 of its certifications. You can see the certifications and relevant challenges here. Each certification will cost you 165 USD if you decide to pay it yourself (the price may vary depending on your location).
How do I prepare for Microsoft Office certification test?
Six Tips for Passing a Microsoft Certification Exam (from Someone Who Hates Taking Tests)
- Step 1: Know what you need to know. Microsoft certification exams are usually hard, really hard.
- Step 2: Find good study material.
- Step 3: Take notes.
- Step 4: Practice.
- Step 5: Relax.
- Step 6: Manage your time when taking the exam.
How do I create a digital certificate?
Click Start, point to All Programs, click Microsoft Office, click Microsoft Office Tools, and then click Digital Certificate for VBA Projects. The Create Digital Certificate box appears. In the Your certificate’s name box, type a descriptive name for the certificate. Click OK.
How do I get a free e certificate?
How to make a certificate in 5 steps:
- Sign up for Venngage for free.
- Pick a certificate template that fits the occasion.
- Customize the text and colors of your certificate.
- Change the background design, add icons, and adjust the text placement as you see fit.
How do I create a webinar E certificate?
How to create certificates for webinar participants
- Create a list of webinar participants.
- Choose a template of certificates for webinar participants.
- Upload a list of webinar attendees.
- Send certificates in bulk to all webinar attendees.
How do I install a certificate in Windows 10?
Adding certificate snap-ins
Choose My user account. Choose Add again and this time select Computer Account. Move the new certificate from the Certificates-Current User > Trusted Root Certification Authorities into Certificates (Local Computer) > Trusted Root Certification Authorities.
How do I create a self-signed certificate in Windows 10?
How to: Installing Self-Signed CA Certificate in Windows
- Step 1: Open MMC on the machine that you are getting the warning.
- Step 2: Click on File -> Add/Remove Snap-in…
- Step 3: Click on Certificates -> Add>
- Step 4: Click on User Account -> Finish.
How do I create a root certificate in Windows?
The key and certificate is needed for each app.
- Generate root CA (private key and public key).
- Add CA key to machine.
- Create both a certificate signing request and a key.
- Create a new certificate.
- Make off with your new files (server.key, server.csr, server.crt).
- Create a certificate signing request from the existing key.
Where do I find certificates in Windows 10?
To view certificates for the current user
- Select Run from the Start menu, and then enter certmgr. msc. The Certificate Manager tool for the current user appears.
- To view your certificates, under Certificates – Current User in the left pane, expand the directory for the type of certificate you want to view.
How do I register a certificate remotely?
In the Details pane, expand the computer name. Right-click Certificate Templates, and then click Manage. Right-click Workstation Authentication, and then click Duplicate Template. On the General tab, change the Template display name to Client Server Authentication, and select Publish certificate in Active Directory.
How do I print a certificate name?
how can I do this? Create a document with the text are positioned to match the position of the name space on the certificate then print the document on your certificate or use the document for the basis of a letter type mail merge.
How do I print multiple certificates with different names in Word?
To do this, follow these steps:
- Click Edit individual letters.
- In the Merge to New Document dialog box, select the records that you want to merge.
- Click OK.
- Scroll to the information that you want to edit, and then make your changes.
- Print or save the document just as you would any regular document.
68
68 people found this article helpful
Make your own certificates quickly and easily in Microsoft Word
Learn how to use certificate templates and produce professional-looking award certificates in almost no time. Microsoft Word comes with a selection of certificate templates to make the process easy.
Instructions in this article apply to Word for Microsoft 365, Word 2019, Word 2016, and Word 2013.
Use a Certificate Template in Word
The easiest way to make certificates in Word is to use a Word template. There are templates for many occasions, and the text can be modified for your specific award or event. Here’s how to create a certificate in Word.
-
Open Word and select New.
-
In the Search text box, type Certificate to filter for certificate templates.
-
Choose a template, then select Create. The certificate opens as a new document.
-
To add a custom border, select the Design tab and, in the Page Background group, choose Page Borders.
-
In the Borders and Shading dialog box, select the Page Border tab.
-
In the Setting section, select Custom and choose a border.
-
Choose OK to apply the template border you selected.
-
To change the certificate colors, select a different theme. Go to the Design tab and, in the Document Formatting group, select Colors. Hover over a theme to preview it in the document, then select the color theme you want to use.
-
Save the changes.
Personalize the Text
The text of the certificate is fully editable. Edit the text to say whatever you want, then change the font, color, and spacing of the text.
-
In the Word document, double-click the sample text to select it.
-
Select the Home tab.
-
In the Font group, choose a font and a font size.
-
Select Bold, Italic, or Underline, if desired.
-
Select the Font Color drop-down arrow and choose a color to apply to the text.
-
Type the custom text you want to use.
-
Repeat the process with every section of text on the certificate, then save the file.
Make a Certificate Without a Template
You don’t have to use a template to create a certificate. Microsoft opens to an 8.5 x 11 vertically oriented sheet by default, but most certificates are made in landscape orientation, so you’ll make that change to get started.
To make a certificate from scratch:
-
Open a new Word document.
-
Select the Layout tab.
-
In the Page Setup group, select Orientation, then choose Landscape.
-
Select the Design tab.
-
Choose Page Borders.
-
On the Page Border tab, select either a Style or Art, assign a size and color, then select the Box icon. Choose OK to see the result.
To adjust the margins, select Options, then enter new values.
-
Add text boxes to the document and customize the appearance of the font styles, sizes, and colors as desired. Save the changes to the custom template.
Thanks for letting us know!
Get the Latest Tech News Delivered Every Day
Subscribe
Everyone loves to be recognized. That means it’s important to award certificates that look their best. By using a certificate template Word design, you can do exactly that.
When you think of how to design a certificate in Microsoft Word, consider your mission. You’re recognizing someone for a special achievement or accomplishment. While a certificate template Word is often simple, it can mean the world to the recipient.
Let’s learn how to make a certificate in Word that the recognized person will love. What’s more: it only takes a few quick steps.
Find Your Own Certificate Template Word Designs on Elements
The best place to design your own award certificate is a template from Envato Elements. It’s an all-you-can-download creative resource with a powerful offer: unlimited downloads.
For a flat monthly rate, you can download as many certificate template Word designs as you want. Then, you can customize them in moments.
Elements doesn’t only offer Word certificates. In fact, you’ll see a vast array of creative content. As a subscriber, you’ve got unlimited access to custom fonts, stock photos, icons, and more. All of these can be used to build a beautiful certificate fast.
If you prefer to buy a single template, Envato still has you covered. If this is your goal, head for GraphicRiver. There, you’ll find hundreds of stunning certificate template Word designs for sale individually.
How to Make Certificate Designs in Word Quickly (With Templates)
Once you choose your template from Envato Elements, download it and launch it in Word. You’ve got the blueprint. to learn how to create a certificate in Word. Now, it’s time to learn how to create a certificate in Word using templates.
Want to follow along with our tutorial? We’ll be using the beautiful Certificates Word template from Envato Elements. Join Elements and download it today!
This tutorial was written using a macOS and Office 365. If you’ve got a different operating system or a different version of PowerPoint, your steps may be slightly different.
1. Customize the Certificate Text
When you think of how to design a certificate using Microsoft Word, know that you won’t be starting from scratch. This is the true beauty of premium templates. Instead of spending time creating your own layout, you can fill in the blanks instead.
This has two key advantages. First, it saves you time and effort. Second, it guarantees a good impression. Most of us aren’t expert designers. Templates let us leverage the work of those who are.
Text, of course, is the most important component of any certificate design. Specifically, the name comes first and foremost. Everyone loves seeing their name in print, so this is the perfect place to start.
Notice that the certificate template Word has text already on it. This is placeholder text, and it shows you where to put your own words. For example, to customize the name, begin by clicking into the name text box. Then, select the contents. Finally, type in the recipient’s name, using your keyboard. The placeholder text will disappear, replaced with the name you’ve typed.
From here, you can click into the other text boxes on the certificate. Repeat these same steps: select existing text and replace it. In moments, you’ll have the certificate customized to fit the lucky recipient. This is how to make an award certificate that’s personalized and looks its absolute best.
Don’t forget the small details, like the signature lines and the company name up at the top. Again, the steps are the same, but it’s essential that you don’t forget and leave any placeholder text behind.
2. Change the Font Design
Customizing the certificate text isn’t the only font adjustment you can make. Once again, this demonstrates the power of premium Word certificate templates. Text placeholders save time, but they don’t require you to give up any creative control. You can still add a variety of font effects and style changes to make every certificate unique.
To get started, make sure that you’ve got some text selected. Any adjustments you make to fonts and text effects will apply only to selected text. Once you’ve got text selected, go to the Home tab. You’ll find this on Word’s ribbon, the series of menus across the top of your screen.
Clicking on Home, you’ll see an array of options in the Font group. From the dropdowns, you can change the font style and size. The buttons below control the effects. For example, you can apply bold font, add italics, or underline a few key words.
Wondering how to make an award or gift certificate in Word unique? Try using a custom font design. Everyone has seen a basic font. Why not try something special?
Once again, Envato Elements has you covered. As a subscriber, you’ve got access to thousands of unique font designs. Every one can be used on your certificate template Word. This is another example of how to create a certificate in Word that’s sure to impress.
3. Rearrange Objects
As you can see on the template, this certificate has a variety of objects on it. Of course, we’ve already customized the text, which itself is contained in a series of text boxes. But you can see other objects, like the border shapes and the ribbon in the bottom center.
While you might think these objects are static, they’re in fact editable and dynamic. By moving them around, you can change up the look and feel of the certificate.
For example, the shape immediately above the name placeholder can be moved. In this case, you can click and drag the shape to move it downward. Word will display guidelines to help keep the shape aligned with other content.
Having repositioned objects, you can also resize them. The ribbon at the bottom center has room to grow. Enlarging it helps it stand out and make the award certificate look even better. To resize an object on your certificate, click to select it. Then, you can pull on one corner to enlarge or shrink it.
Notice that when you pull on the shape, it may become distorted. That’s because the aspect ratio isn’t locked by default. In other words, it’s easy to make the shape too wide or too narrow. To avoid this, hold down Shift on your keyboard as you pull on the corner. This locks the aspect ratio, ensuring that the object keeps its shape.
Again, you can repeat these same steps anywhere on the slide. It’s how to design a certificate using Microsoft Word that works best for you.
4. Change the Color Scheme
Wonder how to make an award certificate that fits with your style and brand? The answer: creative use of color. Fortunately, premium templates in Microsoft Word make this easy. In this case, you might want to change the color of the border. The gold default style is beautiful, but you can always adjust it.
To change the color scheme of your certificate, you’ll first need to select an object. Here, that might be the solid gold outside border. When you click anywhere on the border, you’ll see that Word selects the entire object. And when you click, you’ll see a new tab on the ribbon: Shape Format.
Click on Shape Format with your object still selected. On the menu, you’ll see a collection of options. The one you need here’s Shape Fill, which looks like a paint bucket.
Click the dropdown arrow beside it, and you’ll see a color chooser menu appear. Each of the colorful squares is a new color that you can apply. Choose one and click to change the color of the selected object. Watch as Word instantly changes the color of your selection.
Once more, you may need to repeat these steps to complete the transformation. Click on other areas that you want to modify, return to the Shape Fill menu, and choose new colors.
5. Export the Finished Certificate
We’ve just learned how to make a certificate in Word. Now, it’s time to export the finished product and share it with recipients. Keep in mind: the last thing that you want is for your design to change after the fact. That’s why it’s a great idea to export your Word certificate in PDF format.
By choosing PDF format, you unlock many advantages. Your design will lock in and won’t alter if someone opens it in a different version of Word. Plus, you’ll be able to share it with more people. PDF files are readable on almost any device. People won’t have to install Word to open a PDF.
Once you’ve finished your design work, find the File > Save As menu. File is in the top left corner of your screen. When the Save As menu appears, begin by giving your certificate a name. Then, click on the File Format dropdown.
From the list of options, choose PDF from the Export Formats section. Finally, click Export. Of course, Word will default to the standard .docx format if you prefer not to use PDF.
That’s all it takes! You learned how to make an award certificate in Microsoft Word. Now, your beautiful design is ready to share with the proud recipient. This is how you make a lasting impact in a short span of time.
More Options for Certificate Template Word Designs
Need more options while you learn how to make an award certificate? We’ve got you covered with the web’s best certificate template Word designs.
Check out more options for certificate template Word designs below. You can use these to create an award or recognition that’s sure to wow someone. Use some of them to even learn how to make a gift certificate in Word!
Learn More About How to Use Microsoft Word
You’ve learned how to design a certificate using Microsoft Word. You might want to learn more about how to work within the app we’re using, Microsoft Word. We’ve built a deep learning library in our guide, Learn How to Use Microsoft Word (Beginner Tutorial Guide.)
Check out these tutorials to learn more about how to use Microsoft Word. Many of these tips will help you design your own award certificate, too!
You Just Learned How to Design a Certificate Using Microsoft Word
In this tutorial, you learned how to create a certificate in Word. With the help of templates, it’s easier than ever to design a certificate to award an employee, team member, or friend. Make your own certificate template customizations with these designs to save time and create great results.
Stop what you’re doing, and ask yourself: who should I recognize with a certificate template Word design today? Grab a design, then follow this tutorial to make someone feel appreciated.
Did you find this post useful?
I believe that life is too short to do just one thing. In college, I studied Accounting and Finance but continue to scratch my creative itch with my work for Envato Tuts+ and other clients. By day, I enjoy my career in corporate finance, using data and analysis to make decisions.
I cover a variety of topics for Tuts+, including photo editing software like Adobe Lightroom, PowerPoint, Keynote, and more. What I enjoy most is teaching people to use software to solve everyday problems, excel in their career, and complete work efficiently. Feel free to reach out to me on my website.

