
Create a bulleted or numbered list

Create a list
To start a numbered list, type 1, a period (.), a space, and some text. Word will automatically start a numbered list for you.
Type* and a space before your text, and Word will make a bulleted list.
To complete your list, press Enter until the bullets or numbering switch off.
Create a list from existing text
-
Select the text you want to change into a list.
-
Go to Home> Bullets or Home> Numbering.

Note: Find different bullet styles and numbering formats by clicking the down arrow next to Bullets or Numbering.
See Also
Add and format text
Change the line spacing in Word
Apply styles
Apply themes
Need more help?
Word for Microsoft 365 Word for Microsoft 365 for Mac Word 2021 Word 2021 for Mac Word 2019 Word 2019 for Mac Word 2016 Word 2016 for Mac Word 2013 Word 2010 Word 2007 Word for Mac 2011 More…Less
Custom picture bullets or symbols can add visual interest to a list in Word. If someone sends you a document with a bullet style that you like, you can add the style to the Bullet Library to use again.
Note: You cannot create custom bullets in Word for the web. If you own the desktop version of Word, you can use it to do more with bullets. If not, you can try or buy the latest version of Office now.
The Bullet Library includes symbol and picture bullet styles. If you don’t see the style that you want in the library, you can define a new bullet style.
-
Click in the list to which you want to add picture bullets or symbols.
To change an entire list level in a multilevel list, click one bullet or number at that level in the list.
-
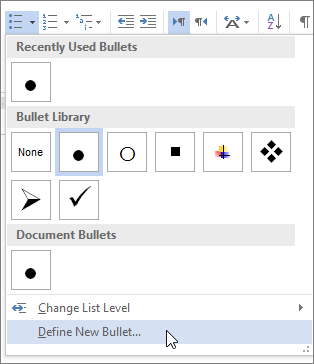
On the Home tab, in the Paragraph group, click the arrow next to Bullets, and then click Define New Bullet.
-
In Word for Windows:
Click Symbol or Picture, and then choose any symbol or picture that you want to use.
-
In Word 2013 and Word 2016, you can upload a picture file from your computer, search the Internet for a picture, or sign in to insert photos from another location, such as OneDrive or Flickr.
-
In Word 2007 and Word 2010, you can upload a picture from your computer (click Import), or search for an image, with the option to include content from Office Online.
In Word for Mac:
Click Bullet (for symbols) or Picture (to use a picture file stored on your computer).
-
-
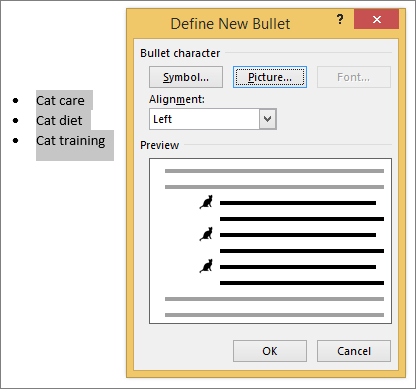
Click Insert or OK to preview the new bullet in the Define New Bullet dialog box (Windows) or the Customize Bulleted List dialog box (Mac), and then click OK.
After you create a bulleted item, your new bullet style is available in your Document Bullets list.
If you receive a document with a bullet style that you want to reuse in your own documents, you can add it to your Bullet Library, where it will always be available for use in your documents.
Note: In Word for Mac, custom bullet styles are automatically added to the Bullet Library.
-
Open the document that contains the bullet that you want to add to your Bullet Library.
-
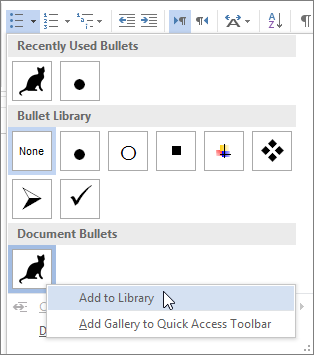
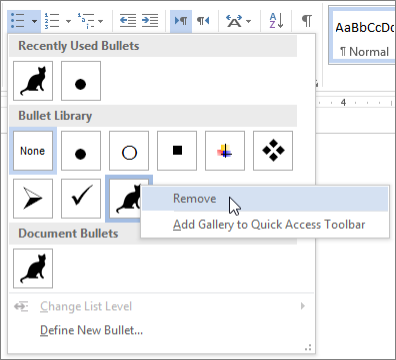
On the Home tab, in the Paragraph group, click the arrow next to Bullets, and then under Document Bullets, right-click the bullet style that you want to add to the Bullet Library and click Add to Library.
Note: You cannot remove custom bullet styles from the Bullet Library in Word for Mac. The following applies to Word for Windows only.
-
On the Home tab, in the Paragraph group, click the arrow next to Bullets, and then under Bullet Library, right-click the bullet style that you want to remove and click Remove.
Notes:
-
Any bullets currently being used in a document are always available in the Bullet Library.
-
If you remove a bullet from the Bullet Library and it is still available in the Document Bullets area, you can easily add the bullet back to the Bullet Library for use in other documents.
See also
Create a bulleted or numbered list in Word for Mac
Insert a check mark or other symbol
Need more help?

This tutorial shows two ways to create bulleted lists in Microsoft Word. We will also look at how to change list levels and how to change the size and color of bullets.
Quick Links:
- How to Create Bulleted Lists — Basic Method 1
- How to Create Bulleted Lists — Basic Method 2
- How to Change Bulleted List Levels
- How to Change the Size and Color of Bullets
Do you want to customize your bullets by using different symbols or your own images? See “How to Create Custom Bullets in Microsoft Word.”
This tutorial is available as a YouTube video showing all the steps in real time.
Watch more than 200 other writing-related software tutorials on my YouTube channel.
The images below are from Word for Microsoft 365. These steps will also work in Word 2021, Word 2019, Word 2016, Word 2013, and Word 2010. However, your interface may look slightly different in those older versions of the software.
This is the basic method of creating a bulleted list in Word. This method requires you to type each item as you create the list. If you have already typed your list items, see the other basic method shown below.
- Place your cursor where you want to start your bulleted list.
- Select the Home tab in the ribbon.

- Select the menu arrow next to the Bullets button.
![]()
- Choose a bullet style from the Bullet Library.

The first bullet will appear in your document.

- Type your first list item after the bullet and press the Enter key on your keyboard. The next bullet will appear.

- Continue typing your list items and pressing the Enter key until your list is complete.
- After typing the final item, press the Enter key twice to remove your cursor from the list.
How to Create Bulleted Lists in Microsoft Word — Basic Method 2
This method is for existing text formatted as a list.
- Select and right-click the text.
- Select the menu arrow next to the Bullets button in the Mini toolbar. (Alternately, you can select the menu arrow next to the Bullets button in the Home tab, as shown in figure 2.)
![]()
- Choose a bullet style from the Bullet Library (see figure 3).
Your selected items should become a bulleted list.

How to Change Bulleted List Levels in Microsoft Word
Word lets you create bulleted lists with up to nine nested levels. Here are two ways to change the level of list items:
How to Change Bulleted List Levels — Method 1
Important note: This method will not work for the first item in your list.
- Select one or more list items.

- Press the Tab key on your keyboard. Each time you press the Tab key, the bullet will move to the right one level (in this case, from level one to level two).

How to Change Bulleted List Levels — Method 2
This method will work for any item in your list, including the first item.
- Select one or more list items (see figure 8).
- Select the Home tab in the ribbon (see figure 1).
- Select the menu arrow next to the Bullets button (see figure 2).
- Select Change List Level from the drop-down menu.

- Select a list level from the submenu.

Your list item(s) should move to the next level.
How to Change the Size and Color of Bullets in Microsoft Word
By default, the size and color of your bullets will be the same as your text. However, you can manually change the size and color of bullets by selecting them separately from the text.
- Select one bullet. All bullets on that level will also be selected.

- Select the Home tab in the ribbon (see figure 1).
- Select a new font size, font color, or both from the Font group.

Your bullets should change to the new formatting. Repeat these steps for each level in your list, as necessary.

As always, remember to save your file to save your changes.
Related Resources
How to Create and Modify Numbered Lists in Microsoft Word
How to Write Vertical Lists (Ordered and Unordered)
Parallel Structure—The Secret to Beautiful Bullet Points
How to Insert Playing Card Symbols in Microsoft Word
Updated January 11, 2023
Place the cursor at the position where you want the bullet, from Insert menu, choose “Symbol”. ii. On the symbols tabe, click on the bullet symbol you want to insert.
Contents
- 1 How do I make bullet points Horizontal in Word?
- 2 How do you do horizontal Numbering in Word?
- 3 How do I put bullet points on the right side in Word?
- 4 How do I make a horizontal list Vertical in Word?
- 5 How do I make bullets parallel in Word?
- 6 How do I make custom bullets in Word?
- 7 How do I put bullet points side by side in pages?
- 8 How do you make two rows of bullets in Word?
- 9 How many types of bullets are there in Microsoft Word?
- 10 How do you make a bullet point in Word using the keyboard?
- 11 How do you make a bullet on the computer?
- 12 What is Bullets in MS Word?
- 13 How do you type vertically in pages?
- 14 How do you insert sub Bullets in pages?
- 15 How do I split a Word document into 3 sections?
- 16 How do you change Windows from vertical to horizontal?
- 17 How do I make my computer screen horizontal?
- 18 How do I make my laptop screen horizontal?
- 19 What’s the difference between vertical and horizontal?
- 20 How do I paste a vertical list horizontally in sheets?
How do I make bullet points Horizontal in Word?
Select all of the text containing the bulleted list or lists you’ve created. Open the “Page Layout” tab, and then click “Columns.” Choose the number of columns you want to show from the drop-down menu.
How do you do horizontal Numbering in Word?
Thereafter, to number the items in the table horizontally, select the table and from the Home tab, click the Numbering icon in the Paragraph group. Presented below are before (highlighted in gray) and after (numbered items) images of this process.
How do I put bullet points on the right side in Word?
Bullets
- Within your Microsoft document, place your cursor or highlight the text where you wish to insert a bulleted list.
- Under the [Home] tab in the “Paragraph” section, click the [Bullets] drop-down menu.
- Choose a bullet style or select “Bullets and Numbering” to create a customized bullet style.
How do I make a horizontal list Vertical in Word?
Case 1: Convert Vertical Texts to Horizontal Texts
- First off, select the target text.
- Then click “Home” tab.
- Next go to “Editing” group and click “Replace” option.
- Now place cursor at the “Find what” text box, enter “^p”.
- And in “Replace with” text box, type a space.
- Next just click “Replace All”.
How do I make bullets parallel in Word?
Insert multiple bullets in a single line in Word document
- Click Insert > Table.
- Fill the cells with words and select the whole table with clicking the button.
- Click Home > Bullets, and choose a bullet from the drop-down menu.
- Keep the table selected, click Home > Borders > No Border to hide the table borders.
How do I make custom bullets in Word?
How to Create Custom Bullets in Microsoft Word
- From the Home tab, in the Paragraph group, select the Bullets drop-down list.
- Select Define New Bullet .
- Select a bullet character and alignment options, and click OK .
- The custom bullet is inserted.
How do I put bullet points side by side in pages?
Select the pages where you want to create columns and separate these pages with section breaks and then apply the column command to split in two columns. In the first column select the bullets command and type the text in bullets. Then move to second column and for bullets list again use bullets command.
How do you make two rows of bullets in Word?
How to add a two-column bullet list in Word
- Click on the “Page layout” tab. To add a second column to your document, you can change the layout format.
- Choose to create two columns. Inside of the “Page layout” tab, click on “Columns” to see your column options for the document.
- Adjust your margins.
- Add bullet points.
How many types of bullets are there in Microsoft Word?
Word lets you make two types: bulleted and numbered lists. A bullet is a dot or other symbol used to highlight items in a list. Use bullets to list items that do not have to be in any particular order.
How do you make a bullet point in Word using the keyboard?
Keyboard shortcut to add bullet points in Microsoft Word
- Press CTRL + Shift + L.
- Word will automatically apply bullet points and insert indents to the paragraphs.
How do you make a bullet on the computer?
Type a Bullet Point
If you’re using Microsoft Windows, you can type a bullet by holding down the “Alt” key on your keyboard and typing the bullet alt code, which is “0149,” on your numeric keypad, on the right side of your keyboard.
What is Bullets in MS Word?
Alternatively referred to as a bullet point, a bullet is an asterisk, black dot, circle, or another mark found before the text. They are utilized to identify key items or denote significance.
How do you type vertically in pages?
Use vertical text in an entire document in Pages
- With the document open, click the Document button in the toolbar.
- Select the checkbox next to Vertical Text. All existing body text is automatically converted to vertical. Any new text boxes and shapes you add will also use vertical text.
How do you insert sub Bullets in pages?
If the list is in a text box, table or shape, first click the Text tab at the top of the sidebar, then click the Style button. Click the disclosure arrow next to Bullets & Lists, then click the pop-up menu below Bullets & Lists and choose a bullet style (text bullets, image bullets or numbers).
How do I split a Word document into 3 sections?
Creating a Split Page
- Open a new document and set the paper orientation and margins the way you want.
- Insert a three-column, single-row table in your document.
- Remove the borders around the table, if desired.
- Format the second (center) column to be rather narrow.
- Adjust the width of the other columns as desired.
How do you change Windows from vertical to horizontal?
Rotate the screen with a keyboard shortcut
Hit CTRL+ALT+Up Arrow and your Windows desktop should return to landscape mode. You can rotate the screen to portrait or upside-down landscape by hitting CTRL+ALT+Left Arrow, Right Arrow or Down arrow.
How do I make my computer screen horizontal?
To flip your screen, hit the Ctrl + Alt + up/down arrow keys at the same time. Hold down and press the Ctrl + Alt + Up arrow. Holding down and pressing these keys will rotate your screen to its default position, which is the horizontal orientation.
How do I make my laptop screen horizontal?
Hold down the “Ctrl” and “Alt” keys and press the “Left Arrow” key. This will rotate your laptop screen view. Return to the standard screen orientation by holding down the “Ctrl” and “Alt” keys together and pressing the “Up Arrow” key. If you were unable to rotate your screen with “Ctrl + Alt + Left,” go to step 2.
What’s the difference between vertical and horizontal?
A vertical line is any line parallel to the vertical direction. A horizontal line is any line normal to a vertical line. Horizontal lines do not cross each other. Vertical lines do not cross each other.
How do I paste a vertical list horizontally in sheets?
To accomplish that maneuver, follow these steps:
- Select the vertical data.
- Type Ctrl C to copy.
- Click in the first cell of the horizontal range.
- Type Alt E, then type S to open the Paste Special dialog.
- Choose the Transpose checkbox as shown in Figure 1.
- Click OK.
(Note: This guide on how to add bullet points in Word is suitable for all MS Word versions including Office 365)
Microsoft Word is a very effective software used for documentation purposes and also helps in keeping track of lists. Instead of just having the items one after the other without any visual cues, it’d be better if you could have some bullet points to emphasize the points.
Bullet points help pinpoint certain important information and help the reader understand important points easily. In this article, I will tell you how to add bullet points in Word using 4 easy methods.
You’ll Learn:
- How to Add Bullet Points in Word?
- Add Bullet Points to an Existing List
- Add Bullet Points to a New List
- Add Bullet Points Using Symbols
- Add Bullet Points in Word Using Keyboard Shortcut
- Using the Alt Key
- Using Asterisk or Number
- Define a New Bullet
Related Reads:
How to Insert Watermark in Word? 3 Easy Ways
How to Double Space in Word? 4 Easy Ways
How to Wrap Text in Word? 6 Wrap Text Options Explained
How to Add Bullet Points in Word?
Add Bullet Points to an Existing List
When you download or copy any data, the data might not have bullet points. Also, when you create a list of points in a hurry, you might not have the patience to add bullet points to each entry in the list. In such cases, you can add bullet points to an existing list using this method.
Consider a Word document that has a list of colors.
- To add bullet points, first, select the data.
- Then, navigate to Home. Under the Paragraph section, click on Bullets or Numbering based on your choice.

Note: Instead of navigating between tabs, you can add bullet points to the list using the toolbar which pops up when you select the data.
- When you click on the bullets option, only the default bullet pointer (•) gets added to the list. If you want to add a different bullet to the list, select the data and click on the dropdown from Bullets.
- Then, select the bullet you want to add.

If you want to add more entries to the list, press Enter. This adds a bullet point onto a new line and you can type in the next entry.
To exit the bullet mode, press Enter twice. This will revert the list from bullet mode to normal paragraph mode.
Add Bullet Points to a New List
If you want to add bullet points to a list as you create them, you can easily do that using this method.
- First, place the cursor where you want to add bullet points.
- Then, navigate to Home. Under the Paragraph section, select the default bullet point or any bullet point from the dropdown. In this case, let us add the square bullet point.

- Once you click on the bullet point, the indented pointer appears with the cursor next to it.
- You can then type in the data you want to add to the list.
- To add another point or list, press Enter.
- The cursor moves to a new line and a new bullet point is added where you can add your data.

By pressing Enter as you input the data, you can easily create a list in Word. And if you want to stop adding bullet points to the list, press Enter twice.
Add Bullet Points Using Symbols
This is one way to add a variety of bullet points to your lists.
- First, place the cursor where you want to add the bullet point.
- Navigate to Insert. Click on the dropdown from Symbols and select More Symbols.
- This opens up a Symbols dialog box. In the dialog box, scroll up and down, and choose the symbol of your choice for the bullet points.
- Select the symbol and click Insert.

- This adds the selected bullet point to the list.
- Now, you can copy and paste the bullet point to add them anywhere you want in the list.

Suggested Reads:
How to Recover a Word Document ? 4 Proven Ways
How to Convert Speech to Text in Word? A step-by-Step Guide
How to Add Columns in Microsoft Word? All You Need to Know
Add Bullet Points in Word Using Keyboard Shortcut
There is a keyboard shortcut for almost every operation. In Word, using the shortcut keys to add bullet points is easy and effective. There are two ways to add bullet points in Word using shortcut keys.
Using the Alt Key
- Place the cursor in the destination where you want to add the bullet point.
- Now, hold the Alt key and press the Numpad keys 0, 1, 4, and 9 one after the other, i.e. Alt+0149.
- Once you leave the Alt key, the bullet point appears.

Unlike other methods to add the bullet points, pressing Enter won’t add a bullet point in the next line.
Though this method is easy, you cannot add bullet points using shortcut keys to an existing list and can only be added using number keys in the Numpad. You can only use the shortcut keys to insert a bullet point and then add the list.
Note: The number 0149 is the code for the default bullet pointer. If you want to use another symbol for the bullet pointer, navigate to Insert. Click on the dropdown from Symbol and select More Symbols. In the dialog box, click on the symbol you want and remember the shortcut key given below.

Using Asterisk or Number
Using the Alt key and codes is one way to insert bullet points, but there is an easier method to add them.
- If you want to add bullet points, first, place the cursor in the destination.
- Enter an asterisk (*) and press Space.
- This inserts the bullet point in the location.
- In the same way, if you want to insert a numbered list, enter any number and press Space.
- This adds the number pointers to the list.

- You can press Enter and add bullets one after the other.
- And, if you want to exit the bullet mode, press the Enter button twice.
Note: This method works with a new list or an existing list, but the cursor should be placed at the start of the new line for this method to work.
Define a New Bullet
If you take a particular liking to a bullet point, you can add it to the bullet point repository and use them whenever you like with just the click of a button.
- To define a new bullet, navigate to Home. Click on the dropdown from bullet points and select Define New Bullet.

- This opens up a Define New Bullet dialog box.
- From the dialog box, select either the symbol, picture, or font option and choose the bullet point.
- You can also see the preview of how the bullet point will appear in the Preview pane.
- Click OK.

- Now, your selected bullet gets added to the repository.
When you need to use the bullet, just click on the dropdown and select the bullet point.
Also Read:
How to Find and Replace in Word? 7 Simple Methods
How to Superscript in Word? 4 Easy Methods
How to Make a Checklist in Word? 3 Simple Steps
Frequently Asked Questions
How to add bullet points in Word?
First, select the data that you want to list and then navigate to Home. Under the Paragraph section, click on Bullets or Numbering based on your choice. This helps you to add bullet points in Word in an easy way.
What is the shortcut key for adding the bullet points in Word?
Place the cursor in the destination where you want to add the bullet point. Now, hold the Alt key and press the Numpad keys 0, 1, 4, and 9 one after the other i.e. Alt+0149. Once you leave the Alt key, the bullet point appears.
How to add bullet points in Word on Mac?
Place the cursor in the destination where you want to add a bulleted or numbered list. Navigate to Home, click the arrow next to Bullets or Numbering. Click on a bullet to insert it into the destination.
Closing Thoughts
Bullet points and numbered lists are very powerful visual cues to help the user easily ascertain and categorize the information.
In this article, we have seen how to add bullet points in Word in 4 easy ways. You can either choose to add the bullets to an existing list or while creating a new list. You can also use a variety of symbols and shortcut keys to add bullet points in Word.
For more high-quality guides on MS Word or Excel, please visit our free resources section.
SimonSezIT has been effectively teaching Excel for 15 years. We have a very comprehensive set of courses with in-depth training modules covering all major business software.
You can access all these 140+ courses for a low monthly fee. Please visit our courses section for more information about our offers.

Simon Calder

Chris “Simon” Calder was working as a Project Manager in IT for one of Los Angeles’ most prestigious cultural institutions, LACMA.He taught himself to use Microsoft Project from a giant textbook and hated every moment of it. Online learning was in its infancy then, but he spotted an opportunity and made an online MS Project course — the rest, as they say, is history!