
Create a booklet or book
-
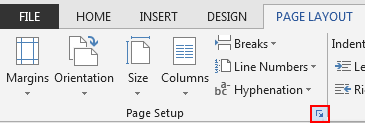
Go to Layout and select the Page Setup dialog launch icon at the bottom-right corner.

-
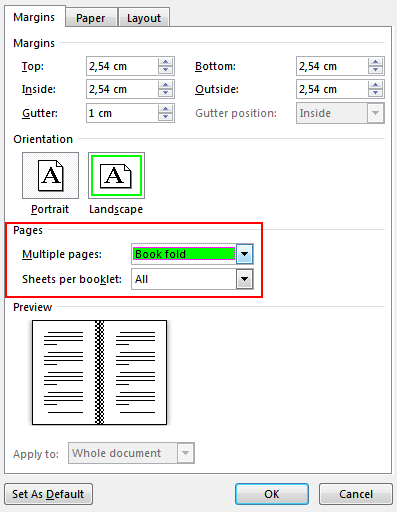
On the Margins tab, change the setting for Multiple pages to Book fold. The orientation automatically changes to Landscape.
Tip: If you have a long document, you might want to split it into multiple booklets, which you can then bind into one book. Under Sheets per booklet, choose how many pages to print per booklet.
-
Select and increase the value of Gutter to reserve space on the inside fold for binding.
-
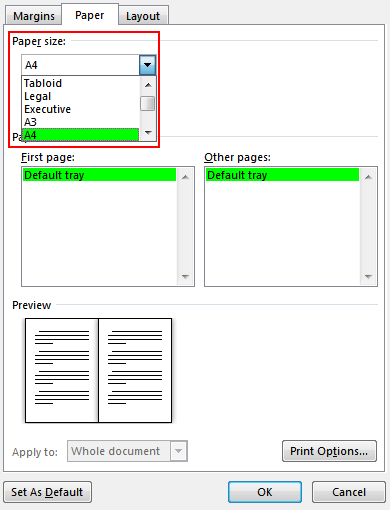
Go to the Paper tab and select the Paper size. The final size of the booklet is one half width of the paper size.
Tip: You can add many embellishments to your booklet’s appearance. For example, to add borders to every page, on the Layout tab of the Page Setup window, click Borders.
-
Click OK. If your document already has content, the text is formatted automatically, but you might need to adjust objects like images and tables manually.
Print settings for booklets
When you print the booklet, check the print settings to make sure you print on both sides of the paper and flip the papers correctly for the printing to work as intended.
-
Go to File > Print.
-
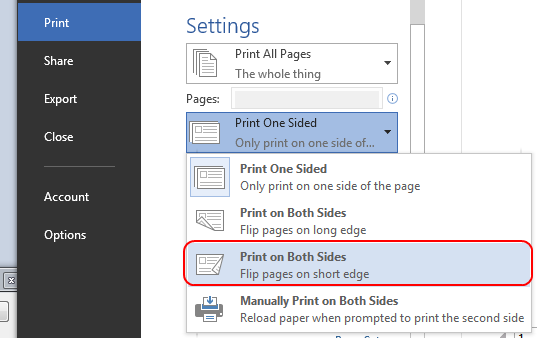
If your printer supports automatic printing on both sides, change Print One Sidedto Print on Both Sides. Choose the option Flip pages on short edge to avoid printing the second side of each sheet upside down.
-
If your printer doesn’t support automatic printing on both sides, select Manually Print on Both Sides, and feed the pages back to the printer when prompted. To avoid pages from printing upside down, flip the sheets on the short edge of the paper according to your printer’s instructions.
Tip: For a professional touch, consider adding page numbers in the header or the footer. For more info, see Add page numbers.
See Also
Create a booklet using a Word template
Booklet: Page numbering tips.
Create different headers or footers for odd and even pages
Get Microsoft publishing templates
Create a booklet or book
-
Go to Layout > Margins > Custom Margins.
-
Change the setting for Multiple pages to Book fold. The orientation automatically changes to Landscape.
Tip: If you have a long document, you might want to split it into multiple booklets, which you can then bind into one book. Under Sheets per booklet, choose how many pages to print per booklet.
-
To reserve space on the inside fold for binding, increase the width of the Gutter.
-
You can add many embellishments to your booklet’s appearance. For example, to add borders to every page, on the Layout tab of the Custom Margins window, select Borders.
-
Select OK.
If your document already has content, the text is formatted automatically, but you might need to adjust objects like images and tables manually.
-
Go to File > Page Setup and check the paper size. Keep in mind that the final size of the booklet is one half of the paper size. Make sure your printer is stocked with paper of the right size.
Print settings for booklets
When you print the booklet, check the print settings to make sure you print on both sides of the paper and flip the papers correctly for the printing to work as intended. If your printer supports automatic printing on both sides, follow these steps.
-
Click File > Print.
-
Under Two-sided, select Booklet.
Tip: For a professional touch, consider adding page numbers in the header or the footer. For more info, see Add page numbers.
Note: If your printer doesn’t support automatic printing on both sides, you’ll need to print each page manually.
See Also
Create a booklet using a Word template
Booklet: Page numbering tips.
Create different headers or footers for odd and even pages
Get Microsoft publishing templates
Создание книги или брошюры
-
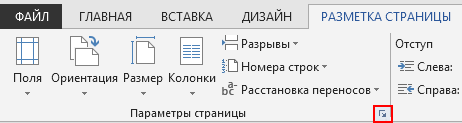
Перейдите в окно Макет и выберите значок запуска диалогового окно «Настройка страницы» в правом нижнем углу.
-
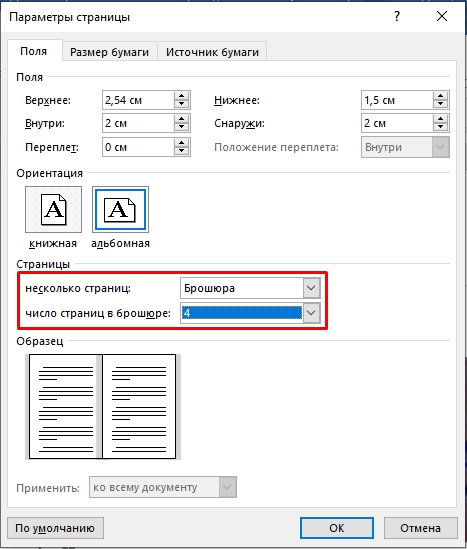
На вкладке Поля измените для параметра Несколько страниц параметр Брошюра. Ориентация автоматически изменится на Альбомная.
Совет: Если документ длинный, может потребоваться разделить его на несколько брошюр, а затем соединить их в одну книгу. В разделе число страниц в брошюре выберите нужное количество страниц в каждой брошюре.
-
Вы можете выбрать и увеличить значение переплета, чтобы зарезервировать место во внутренней сгиб для переплета.
-
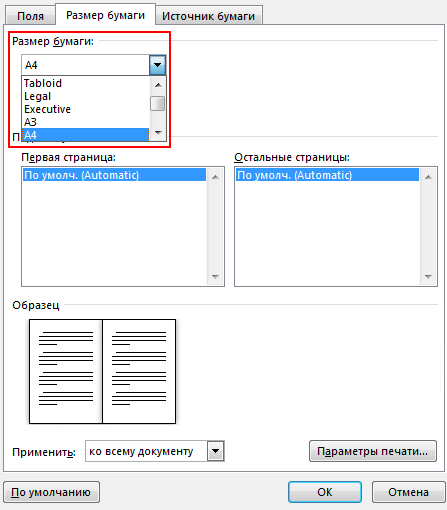
Перейдите на вкладку Бумага и выберите размер бумаги. Конечный размер брошюры — половина размера бумаги.
Совет: Вы можете оформить свою брошюру, используя различные средства. Например, чтобы добавить границы к каждой странице, на вкладке Макет окна Параметры страницы нажмите кнопку Границы.
-
Нажмите кнопку ОК. Если в документе уже есть содержимое, текст будет отформатирован автоматически, но вам может потребоваться вручную настроить такие объекты, как изображения и таблицы.

Параметры печати брошюр
При печати брошюры проверьте параметры печати, чтобы убедиться, что вы печатаете на обеих сторонах листа, а листы переворачиваются, как нужно.
-
Щелкните Файл > Печать.
-
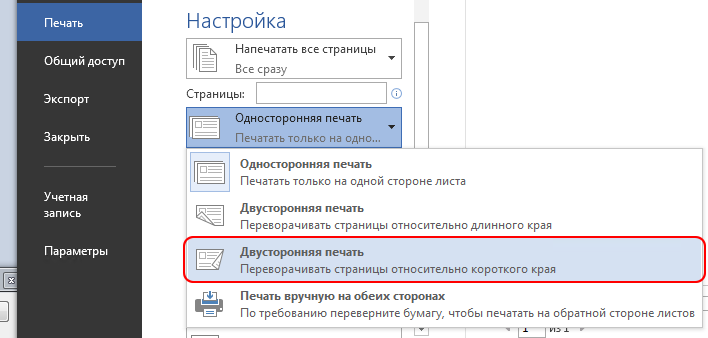
Если ваш принтер поддерживает автоматическую печать на обеих сторонах, измените Печататьодностороннюю на Печать на обеих сторонах. Выберите параметр Переворачивать страницы относительно короткого края, чтобы текст на обратной стороне не был перевернут.
-
Если ваш принтер не поддерживает автоматическую двустороннюю печать, выберите Печать вручную на обеих сторонах и вставляйте страницы в принтер при появлении соответствующего запроса. Чтобы страницы печатались правильно, переворачивайте их относительно короткого края бумаги согласно инструкциям принтера.
Совет: Чтобы документ выглядел профессионально, вы можете добавить номера страниц в верхний или нижний колонтитул. Дополнительные сведения см. в добавлении номеров страниц.
См. также
Создание брошюры на использование шаблона Word
Брошюра: советы по номеру страниц.
Создание разных колонтитулов для четных и нечетных страниц
Получить шаблоны публикации Майкрософт
Создание книги или брошюры
-
Перейдите в >макета поля >настраиваемые поля.
-
Измените параметр для параметра Несколько страниц наБрошюра. Ориентация автоматически изменится на Альбомная.
Совет: Если документ длинный, может потребоваться разделить его на несколько брошюр, а затем соединить их в одну книгу. В разделе число страниц в брошюре выберите нужное количество страниц в каждой брошюре.
-
Чтобы оставить место для переплета, увеличьте значение параметра Переплет.
-
Вы можете оформить свою брошюру, используя различные средства. Например, чтобы добавить границы к каждой странице, на вкладке Макет окна Настраиваемые поля выберите Границы.
-
Нажмите кнопку ОК.
Если в документе уже есть содержимое, текст будет отформатирован автоматически, но вам может потребоваться вручную настроить такие объекты, как изображения и таблицы.
-
Перейдите в >страницы и проверьте размер бумаги. Помните, что конечный размер брошюры — половина размера бумаги. Убедитесь в том, что в принтер загружена бумага необходимого размера.
Параметры печати брошюр
При печати брошюры проверьте параметры печати, чтобы убедиться, что вы печатаете на обеих сторонах листа, а листы переворачиваются, как нужно. Если принтер поддерживает автоматическую печать на обеих сторонах, выполните указанные здесь действия.
-
На вкладке Файл выберите пункт Печать.
-
В области Двунабнаявыберите Брошюра.
Совет: Чтобы документ выглядел профессионально, вы можете добавить номера страниц в верхний или нижний колонтитул. Дополнительные сведения см. в добавлении номеров страниц.
Примечание: Если ваш принтер не поддерживает автоматическую печать на обеих сторонах, необходимо напечатать каждую страницу вручную.
См. также
Создание брошюры на использование шаблона Word
Брошюра: советы по номеру страниц.
Создание разных колонтитулов для четных и нечетных страниц
Получить шаблоны публикации Майкрософт
If you want to write a book, you’ll need book writing software that’s up to the task. Yes, you can invest in dedicated book writing programs. But you don’t have to: a great writing tool is likely already at your fingertips, if you know how to write a book using Microsoft Word.
There’s a lot of book writing software out there. Many of these programs claim to offer intuitive use, help with organization, and even say they’ll keep you from distraction. The options can be overwhelming.
There’s still one tried and true option if you’re not interested in all that (or can’t afford the fancier programs): Microsoft Word.
I write most of my books in Microsoft Word, not to mention short stories. Here’s the rundown of how to write a book using Microsoft Word, and why that might be your best choice.
The Benefits of Microsoft Word for Book Writing
You most likely already have it. And so does everybody else. Word is the standard, accepted across platforms, and is easy to access for non-writers (your beta readers). It’s been around forever, so most people know how to use it.
There are book formatting templates. A ton of them. They have them for short story format and for manuscript format. Personally, I don’t use those templates, but they’re a nice baseline for beginners, or even old hats that just want to hurry up and write without setting up their document first.
It’s simple and uncluttered. There are a ton of apps and programs out there that will allow you to keep your plot structure notes close at hand, to rearrange your chapters with the click of a button, and to keep detailed character profiles right in the program. That’s all a little too much for me. I prefer handwritten notes and nothing else blocking my screen while I’m typing and Word gives me that.
It is worth noting that if all that sounds appealing to you, you can do those things in Word as well, it just won’t be as fancy as other programs.
Hey writer: the first step to writing a book is coming up with a great idea. The second step is figuring out the structure of your book. If you have an idea but you need help with the structure, check out our new book The Write Structure. In it, we’ll teach you how to apply timeless story structure principles to write a great book. Get The Write Structure »
How to Navigate Your Book in Microsoft Word
When you have a 90,000-word manuscript, navigating becomes daunting. Luckily there are ways to do it in Word that make it easier if you know where to look.
Chapter Headings
Word doesn’t divide your book into chapters for you like some other programs. There will be no easy way to click and drag to rearrange chapters.
What I recommend is using headings. On Word’s Home page, there are already standard headings listed. Definitely mess with them and change their formatting to something simple.
No one needs giant blue words as their chapter headings. (You can set your simpler formatting as your default style as well, so you don’t have to change it every time.)
Make the title or number of each chapter a heading. Then you can easily bounce around to different chapters through the navigation pane (check the Navigation Pane box under the View menu).
Bookmarks
These basically work the same way as headings, but they’re for anywhere in your document. Have a specific scene you need to do more research on? You can bookmark it and jump back to it later.
Bookmark by going to the Insert menu and clicking Bookmark. Name your bookmark and voilà. You can delete them easily from the popup menu as well.
Find and Replace
CTRL+F brings up a simple search option to find words and phrases in your document. CTRL+H brings up the full gambit. From that dialogue box, you can search, replace certain words with others (i.e. Jennifer now becomes Julia all through the manuscript), and go to any page, section, heading, bookmark, etc. that you need to go to.
Microsoft Word is Great for Editing Your Book
Word has a ton of options for editing your story, including comments, tracking changes, and comparing documents. All of these are under the Review menu.
I use the comments feature to make notes to myself where I need to recheck facts or add description later. It’s easy to navigate through the comments with the search feature or the buttons under the Review menu. Don’t forget to remove them all before saving your document as a PDF or sending it off to an editor.
Tracking changes is awesome and a lot of editors (for short stories anyway) will use this feature to collaborate with you during the editing process. You can accept or reject changes or even revert back to the original.
Finally, make sure you have grammar and spellcheck on! Grammar check even allows you to check style issues (like how to use an ellipsis correctly) and passive voice. It’s invaluable.
Pro tip: To keep you on track while you’re writing, turn off some of the more fine-tuning features of grammar check. There’s nothing that will ruin your flow more than a bunch of underlining you feel like you need to take care of immediately. I recommend running the full check when you’re done (or at least done for the day).
Formatting Your Book in Microsoft Word
Make sure you’re familiar with standard manuscript format for novels and formatting short stories. Take a look at those links and follow their instructions. You don’t want to get rejected out of hand because you tried some weird formatting that’s hard to look at.
One of the biggest gripes I see from editors is writers using spaces to indent paragraphs. Don’t do this. It makes it super hard on them when they’re putting a book together. Instead, use the ruler in Word (under the View menu) or the paragraph settings (under the Home menu) to adjust your tabs. A half inch is standard.
Despite what most of us were taught in school, the standard is now one space after periods, not two. This is another sticking point with editors, so don’t do it. If you’re used to two, there’s a grammar check feature in Word you can turn on to highlight every time you use two spaces.
Finally, use the page break option to break for a new chapter, not enter or a million spaces. You can find the page break under the Insert menu.
Pro tip: When in doubt about your formatting, you can turn on the Show/Hide option under the Home menu (looks like a paragraph symbol) to see all your formatting symbols.
Now That You’ve Mastered Microsoft Word, Go Write Your Book
Don’t let choosing writing software stagnant your writing. Don’t overthink it. You don’t need to keep up with the Joneses with the latest writing technology that’s trotted out on tech forums and in writing chats.
The important thing about writing a book is actually writing it. No fancy book writing software is going to help you with that.
So get writing!
Ever used Word to write a book? Do you have any more tips for how to write a book using Word? Let me know in the comments!
PRACTICE
Take fifteen minutes to write. Just write. Don’t worry about page setup, formatting, or which program you’re going to use. Open up Word or get out a pen and paper if you’d like!
When you’re done, share your writing in the comments. Don’t forget to comment on your fellow writers’ work!

Sarah Gribble
Sarah Gribble is the author of dozens of short stories that explore uncomfortable situations, basic fears, and the general awe and fascination of the unknown. She just released Surviving Death, her first novel, and is currently working on her next book.
Follow her on Instagram or join her email list for free scares.

Microsoft Word comes with pre-built page settings for creating books. Whether you’re creating a memoir or event guide, these settings let you create a beautiful book or booklet, from start to finish.
Create a Book or Booklet
First, go ahead and open Word. It’s recommended that you adjust these setting before writing the content of your book to prevent formatting issues late on.
Once you’re in Word, head over to the “Layout” tab. In the “Page Setup” group, click the small arrow at the bottom-right.

This opens the “Page Setup” window, where you will automatically be on the “Margin” tab. In the “Margins” group, you’re able to set the margins of the page. By default, the “Gutter” margin will be set to 0. This could cause issues further on, as the gutter margin is the amount of space between the content of your book and the fold where the pages of the book will be bound together. That said, go ahead and give the gutter a 1” margin, so the content of your book doesn’t get lost in the fold.
Next, select the arrow next to “Multiple Pages” in the “Pages” group, then select “Book Fold” from the drop-down menu. Once selected, you’ll notice your page orientation automatically changes from “Portrait” to “Landscape.”
Tip: You may notice a “Reverse Book Fold” option. This is for content that reads from right to left, such as Japanese-style books.
Once you’ve adjusted the settings, click “OK.”
The page setup for creating a book or booklet is now complete. There’s a ton of stuff you can do from here depending on what you require for your book. You may want to add a header or footer, create a table of contents, or give your book page numbers for easier navigation. We’ll leave the content and add-ons to you—we’re just here to show you how to create the setup.
It’s also worth noting that, depending on the length of your document, you may need to split it up into multiple booklets due to the sheer size of the document. That’s fine—you can bind them into one book later.
RELATED: How to Reduce the Size of a Microsoft Word Document
Print Your Book or Booklet
Once you’ve finished composing your book, it’s time for printing. Select the “File” tab, then select “Print” found in the left-hand pane.
Next, select the second option in the “Settings” group.
A drop-down menu will appear, presenting a few different printing-style options. If you have a duplex printer, select (1) “Print on Both Sides” (and whether or not to flip the page on the long or short edge). If your printer doesn’t have this functionality, you’ll need to select the (2) “Manually Print on Both Sides” option.
All that’s left to do now is select Print, and you’re good to go!
READ NEXT
- › How to Search for Text in Word
- › How to Use Outline View in Microsoft Word
- › How to Adjust and Change Discord Fonts
- › HoloLens Now Has Windows 11 and Incredible 3D Ink Features
- › This New Google TV Streaming Device Costs Just $20
- › Google Chrome Is Getting Faster
- › The New NVIDIA GeForce RTX 4070 Is Like an RTX 3080 for $599
- › BLUETTI Slashed Hundreds off Its Best Power Stations for Easter Sale
How-To Geek is where you turn when you want experts to explain technology. Since we launched in 2006, our articles have been read billions of times. Want to know more?
Всем привет! В нашем сегодняшнем уроке я покажу вам, как легко можно сделать и распечатать книгу в Ворде. Статью я разбил на два шага. В первой главе я покажу вам, как правильно подготовить текст и документ. Во второй мы уже приступим к печати. Советую прочесть статью от начала и до самого конца, так как по ходу я буду рассказывать о мелких нюансах, о которых вы должны знать заранее. Если у вас что-то будет не получаться, или возникнут вопросы – пишите в комментариях под этой статьей.
Содержание
- ШАГ 1: Создание самой книги
- ШАГ 2: Печать
- Задать вопрос автору статьи
ШАГ 1: Создание самой книги
В первую очередь откройте сам документ, который вы хотите оформить и превратить в книжку. Или вы можете создать его заново, напечатав сам текст. Если вы хотите попрактиковаться, то можете взять любой текст. Самое главное, чтобы там было как минимум 4 странички.
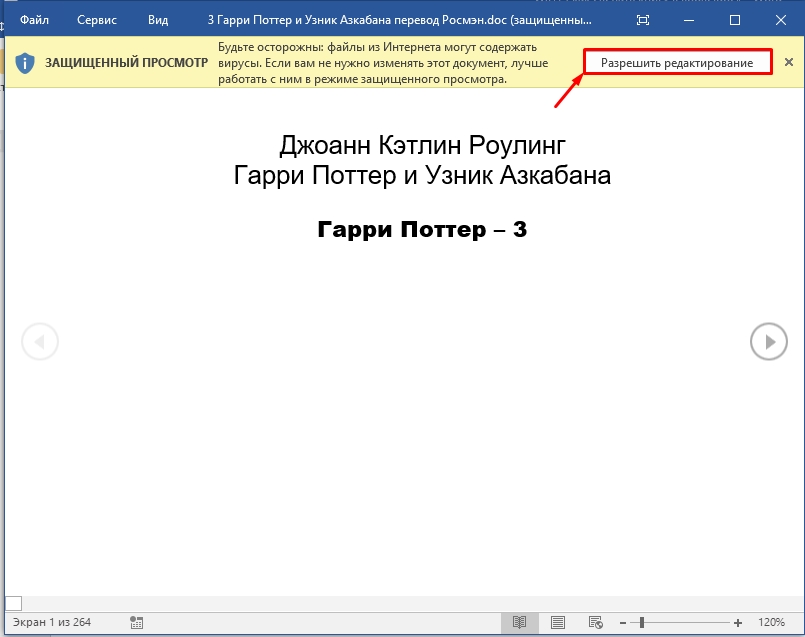
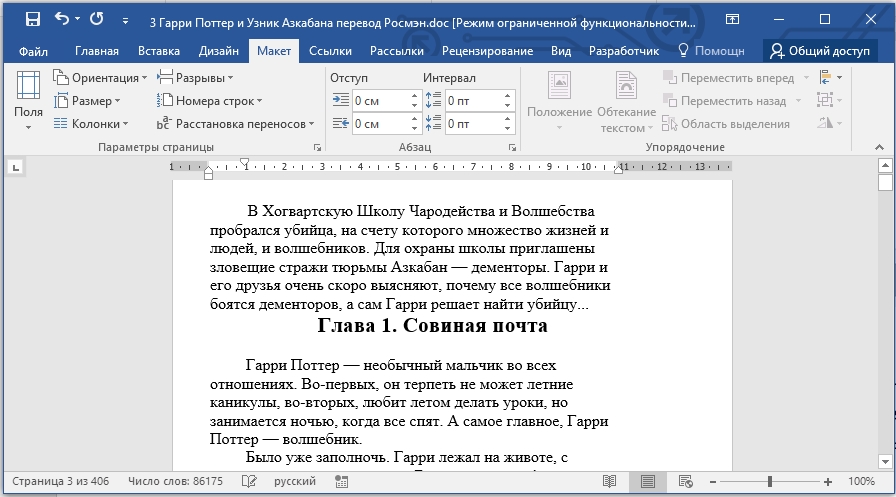
- В качестве примера я покажу на книге Джоанн Кэтлин Роулинг – Гарри Поттер и Узник Азкабана. Не переживайте, книгу я прикупил достаточно давно, поэтому авторские права не нарушаю. При открытии скаченных документов из интернета вы можете увидеть сообщение «Защищённый просмотр» – жмем «Разрешить редактирование».
- Если вы скачали книгу с интернета или облака, то я вам советую перед началом пройтись по всем страницам и отредактировать её. Например, стоит удалить некоторые пустые страницы, или посмотреть, чтобы слова и символы отображались корректно.
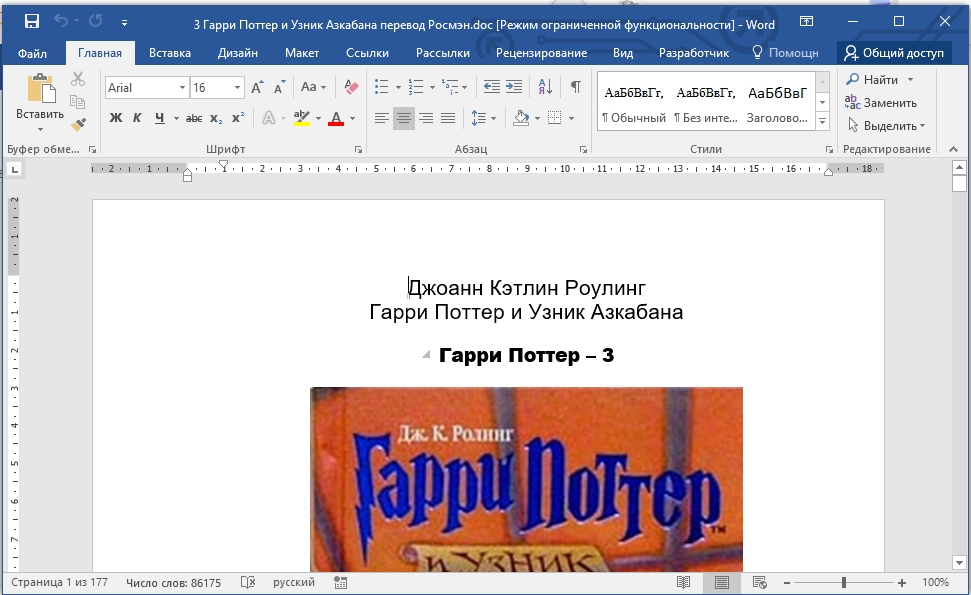
- Теперь нам нужно выделить весь текст. Чтобы не делать это вручную с помощью мыши, мы воспользуемся волшебными горячими клавишами. Зажимаем сначала кнопку «Ctrl», теперь, не отпуская её, жмем по английской букве «A» (Ctrl + A). Текст полностью выделится и будет подсвечен темным.
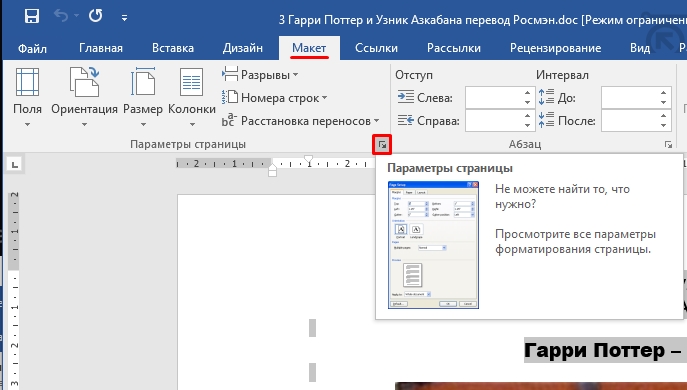
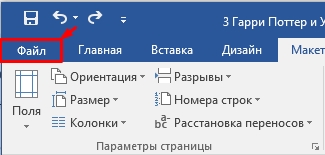
- Теперь сверху перейдите на вкладку «Макет». Если у вас старая версия Microsoft Word (2007 или 2010 года выпуска), то вам нужен раздел под названием «Разметка страницы». Теперь нам нужно открыть дополнительное меню с параметрами, для этого жмем по маленькой стрелочке с квадратиком в правом нижнем углу блока.
- В первой вкладке в блоке «Страницы» выставляем тип – «Брошюры», а ниже ставим число страниц на двух листах. Как вы уже догадались, на двух листах будет 4 странички с одной и с другой стороны. Ниже вы можете смотреть на образец.
- Теперь немного сложнее, нам нужно правильно указать отступ от переплета, в противном случае какой вообще толк от данной затеи. Сейчас вы все поймете. Посмотрите в первый блок под названием «Поля». В первую очередь нам нужно установить два отступа:
- «Внутри» – отступ текста непосредственно от переплета. Если страничка в книге расположена слева, а переплет справа, то это и есть правый переплет.
- «Снаружи» – отступ от внешней границы, так где заканчивается лист.
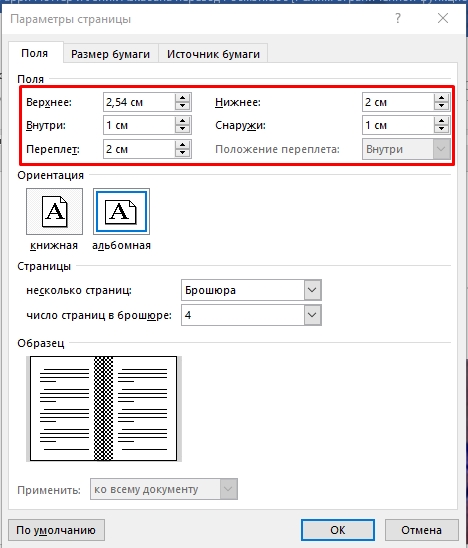
- «Верхний» и «Нижний» отступ выставляйте уже по своему вкусу. Ну и самое главное – это сам «Переплет», если вы выставите слишком маленькое значение, то текст при сшивании может попасть в слепую зону. Лучше ставить это значение не меньше 2 см, а лучше даже 2,5 – особенно если книга будет очень большой.
- Жмем «ОК» и проверяем, чтобы текст в документе не поплыл. Если вы видите, что отступы слишком большие, то можете их изменить. Помните, что значение «Переплета» и «Внутренний» отступ складываются. Возможно, нужно немного уменьшить отступ «Внутри»
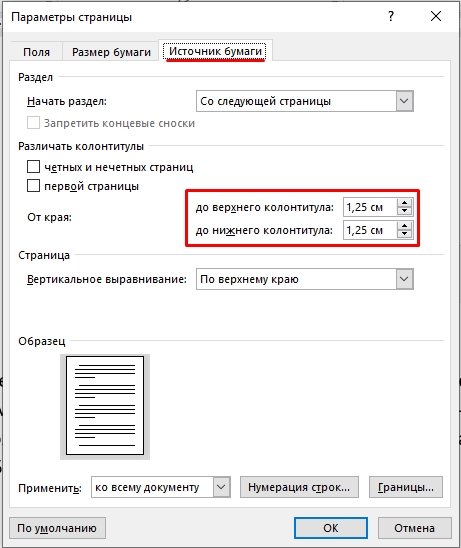
- Следующая проблема, с которой вы можете столкнуться – это неправильно выставленные отступы от колонтитулов. Нумерация страниц, которая расположена снизу или сверху, может дополнительно прибавлять расстояние – и их можно уменьшить. Зайдите в «Параметры страницы» и перейдите в «Источник бумаги». Здесь немного уменьшите нижний или верхний колонтитулы.
СОВЕТ! Вы можете почитать про колонтитулы отдельную статью. Также советую ознакомиться и с правильной нумерацией в документе.
- Еще раз просмотрите весь документ. Чтобы немного отдалить странички и просмотреть на разметку издалека – зажмите кнопку «Ctrl» и покрутите колесико мыши. Вы можете изменить шрифт текста или даже отдельных глав. Также в многих книгах добавляют разрыв страницы после каждой крупной главы – об этом подробно можно почитать тут.
СОВЕТ! Советую почитать про то, как добавить другой шрифт. Также посмотрите статью про изменение отступов – это может сильно сэкономить вам бумагу в будущем при распечатывании книжки.

Теперь давайте посмотрим, как можно напечатать книгу в Ворде. Проверьте, чтобы ваш принтер был подключен к компьютеру, а в нем было достаточно бумаги и краски. Теперь давайте приступим непосредственно к печати документа в книжном формате.
СОВЕТ! На всякий случай держите запасной картридж.
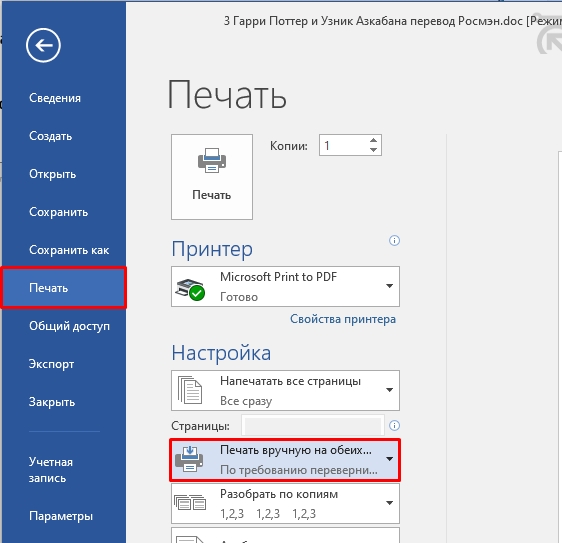
- Жмем по надписи «Файл» в правом верхнем углу окна.
- В блоке слева откройте подраздел «Печать». Кстати туда же можно попасть с помощью горячих клавиш Ctrl + P. Теперь устанавливаем настройку (как на скриншоте ниже), которая позволяет делать ручную печать на двух сторонах каждого листа. В таком случае вам придется в определенное время перевернуть листы с бумагой. Если ваш принтер позволяет, то можно выставить настройку «Двусторонняя печать» – в таком случае устройство сделает все само.
Теперь жмем печать. Если вы выбрали ручной режим, то после того, как все листы будут напечатаны, вам нужно будет взять этот блок бумаги, перевернуть другой стороной и установить его обратно в лоток. Как только вы выполните все правильно, нажмите по кнопке «ОК».
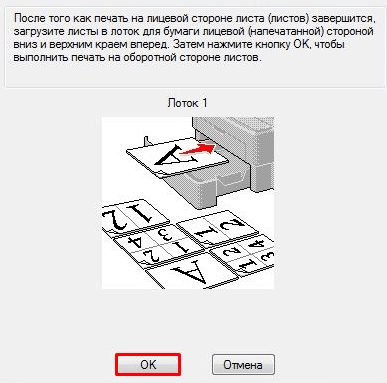
Но тут хочу вас предупредить – вы увидите стандартную инструкцию, которая может немного отличаться в зависимости от вида и типа принтера. Поэтому вам нужно будет самостоятельно понять, какой стороной класть бумагу в лоток, таким образом, чтобы текст напечатался правильно.
СОВЕТ! Если вы не можете понять, каким образом класть бумагу, то советую выполнить пробную печать первых четырех страничек.
После этого можете склеивать или сшивать все листы. Ориентируйтесь на нумерацию. На этом все, дорогие друзья. В этом уроке мы узнали, как создать, отредактировать и распечатать документ в виде книги. Если я что-то упустил, или у вас остались дополнительные вопросы – пишите в комментариях.