Contents
- 1 Does Word have a book cover template?
- 2 How do I make a cover page for my book?
- 3 Can you design a book in Word?
- 4 How do you make a paperback book cover?
- 5 How do I add a custom cover page in Word?
- 6 What app can I use to make a book cover?
- 7 What software is used to design book covers?
- 8 What makes a book cover stand out?
- 9 Is Microsoft Word good for writing?
- 10 How do you format a book for publishing?
- 11 Is Microsoft Word free?
- 12 How do you cover a hardcover book?
- 13 How do you make a book cover without tape?
- 14 How do I create a custom cover page in Word for Mac?
- 15 How do I copy and paste a cover page in Word?
- 16 How do you create a cover page?
- 17 Is DIY book covers free?
- 18 What format should my book cover be?
- 19 How do you make an amazing book cover?
- 20 What should a book cover include?
Does Word have a book cover template?
Free book cover templates and tutorials
Here are some resources to get you started designing book covers in MS Word. You can download a free package below with a guide and some book cover templates.Then play with the templates, add your own images and change the fonts to make your own unique book cover design.
How do I make a cover page for my book?
The book design process in 7 steps —
- Understand the elements of a cover.
- Research the market.
- Choose a design direction.
- Figure out what the design needs to emphasize.
- Choose graphics and fonts.
- Collect feedback.
- Know what the printer needs.
Can you design a book in Word?
Microsoft Word comes with pre-built page settings for creating books. Whether you’re creating a memoir or event guide, these settings let you create a beautiful book or booklet, from start to finish.
How do you make a paperback book cover?
Here’s the steps for how to make a paper bag book cover, with more info on each step below.
- Prepare your paper bag.
- Cut paper to size.
- Fold top and bottom edges.
- Wrap jacket around book evenly.
- Slide book securely into paper bag book cover.
- Let your imagination run wild with decoration ideas!
How do I add a custom cover page in Word?
1] How to insert a custom Cover Page into a Word document
Click the Insert tab. On the Insert tab in the Pages group, click Cover Page. A drop-down list will appear displaying built-in style templates of cover pages; select the style you want. A cover page will appear in the document; make your changes to it.
What app can I use to make a book cover?
Book Cover Design Software: The Best Paid and Free DIY Apps
| Software | Price | Templates |
|---|---|---|
| Canva | Free | Yes, free |
| Blurb BookWright | Free | Yes, free |
| Visme | Free | Yes, free |
| GIMP | Free | No |
What software is used to design book covers?
Adobe InDesign (Paid)
The reigning champion for book designers everywhere is Adobe Indesign. The undisputed titan of publishing design, InDesign is one of Adobe’s flagship products alongside other Creative Suite products, Photoshop and Illustrator.
What makes a book cover stand out?
Introduce your main characters, and simply outline the plot. Then entice the reader with an emotional hook, and allude to the journey the characters will go on – what they stand to achieve or lose. Make sure the blurb conveys the tone of your book; if it’s humorous, readers will think your book is too.
Is Microsoft Word good for writing?
Microsoft Word: The Bottom Line. Word is a powerful writing tool. And it has amazing in-line editing options. If you write novels or memoirs, it’s probably all you’ll ever need to create, edit, and design your book files.
How do you format a book for publishing?
How To Format Your Book: Tips for Nailing Your Book Format
- Use black, 12-point, Times New Roman as the font.
- Use the U.S. standard page size of 8.5×11 inches and set your margins to 1 inch on all sides.
- Set alignment to left justified.
- Use a single space after periods.
- Use double-spaced line spacing.
Is Microsoft Word free?
Much like Google Docs, Microsoft has Office Online and in order to access it all you need to do is sign up for a free Microsoft account. You can use Word, Excel, PowerPoint, OneNote and Outlook at no cost.
How do you cover a hardcover book?
If you’d like to cover your book with a dust jacket, measure a piece of thick decorative paper as tall as your book and as wide as the entire book, plus a few extra inches to fold over the edge of the cover. Fold the dust jacket over the bound book.
How do you make a book cover without tape?
No Tape Book Cover
- Step 1: Materials. This is easy, you only need a couple things:
- Step 2: Cut Apart the Bag. To start out, cut out the bottom of the bag and make a cut down the length so you have one big rectangle.
- Step 3: Cover Length.
- Step 4: Cover Height.
- Step 5: Put It On.
- Step 6: You’re Done!
How do I create a custom cover page in Word for Mac?
How to Insert a Cover Page in a Word for Mac Document
- Click the Insert tab.
- Click the Cover Page button to open a drop-down gallery of cover page templates.
- Click a cover page template to insert it into your document.
- Customize the cover page with your text.
How do I copy and paste a cover page in Word?
If your Word document has multiple pages, the best way to copy a single page is to manually select and copy the text you want.
- Place your cursor at the beginning of the page you want to copy.
- Click and drag the cursor to the bottom of the page you want to copy.
- Press Ctrl + C on your keyboard.
How do you create a cover page?
Customize an essay cover page with EDIT.org
- Go to formats on the home page and choose Cover pages.
- Choose the template that best suits the project.
- You can add your images or change the template background color.
- Add your report information and change the font type and colors if needed.
- Save and download it.
Is DIY book covers free?
Combine them with the free templates at DIYBookCovers.com for some eye-catching book marketing graphics you can use on social media, launch emails or advertising campaigns. This tool is 100% free, and we don’t even ask you to sign up.
What format should my book cover be?
Ideal dimensions for cover files are 2,560 x 1,600 pixels. 1.6:1 is a ratio you will see in paperback fiction — especially with the smaller, mass-market formats. You might notice, however, that it results in a ‘thinner’ design than you would expect from most novel covers on Amazon.
How do you make an amazing book cover?
How to Choose a Great Book Cover
- Be Smart About Your Title. The title is one of the most important elements on your cover.
- Use a Teaser. A good strategy of manipulating the reader into buying your book is providing a teaser on the cover.
- Pick the Right Font and Background Image.
- Make the Cover Personal.
- You Can Go Simple.
What should a book cover include?
The main elements of the front cover include the book title and the author’s name, subtitle or quotations, and images. More on that later. Here are the main front cover design tips: Aim for clarity, don’t overload your book cover with too many hidden messages and elements.
MAKE A BOOK COVER IN MS WORD
Free book cover templates and tutorials
Here are some resources to get you started designing book covers in MS Word. You can download a free package below with a guide and some book cover templates. If you want the Word templates to look like my samples, you need to check the font list and download the same fonts, or else look for alternates that are similar using the «fonts per genre» pdf.
I recommend you watch these videos first, and then download the sample package and read through the guide as well. Then play with the templates, add your own images and change the fonts to make your own unique book cover design.
How to make an ebook cover in Microsoft Word (1)
How to make an ebook cover in Microsoft Word (2)
How to make an ebook cover in Microsoft Word (3)
Here’s another video I found on YouTube that is super helpful (and slower-paced.)
FREE BOOK COVER TEMPLATES MS WORD
 Book Cover Templates and Guide (Sample)
Here’s a link to the sample package; you can use the Quickstart Guide or «Cheat Sheet» to troubleshoot and learn the ropes. There are a few fiction and non-fiction cover template samples to play with. The instructions are based on Word 2010.
Don’t forget there are lots more templates in the Epic Book Design package.
A few years ago I put out a package of DIY book cover templates in Microsoft Word and revolutionized publishing with a how-to guide to designing amazing book covers in an easy to use program you’re already familiar with. But it took me a while longer to figure out how to customize your front cover into a full print cover for Createspace or other POD providers.
I shared a guide to doing just that on DIY Book Covers a couple months ago but am now sharing it with you, for free, so that you can design your own full print covers in MS Word.
Disclaimer: This is a hack or a workaround, so it involves a lot of steps and isn’t a smooth, seamless process. It’s *much* easier to make covers in photoshop or a graphic design tool. I’m currently rebuilding my online book cover maker so when that’s ready, I’ll make more templates for it. In the meantime, if you already have a front cover, you can hire someone cheap on fiverr to make the fullprint covers for you, and it’ll probably look much better.


HOW TO MAKE A FULL PRINT COVER IN MS WORD
If you’ve never used MS Word as a design tool, you should first check out www.diybookcovers.com and sign up to get the free sample package and guides. Your full print cover will only be as good as your front cover; so getting the best possible front cover is a necessary first step.
Ideally you’ve already finished a book cover you’re happy with, converted it to a JPG and used it to sell your ebook. But now you want to make a full print cover for Createspace KDP Print (or Lightning Source, or others).
You need to know the final word count of your formatted book, so if you haven’t formatted your book for print yet, you need to do it before you start your full print cover.
I set up some free templates and guides to book formatting here to help you out:
www.diybookformats.com
Once that’s all done, you can download a print template that’s specific for your book. You’ll need to add your content and format it, so you know the final page count to calculate the right spine width. But once you’ve got it, you can use a template generator, open the template into MS word or a design program like Photoshop, and add your images and text.
Createspace KDP and Lightning Source IngramSpark templates
Createspace is dead, but the original links now forward to the KDP dashboard for convenience. Lightning Source now has an easier to use dashboard… but I don’t recommend it.
You can just click this link to get there: be careful to choose print or cream pages, it makes a difference in total spine width. You’ll probably want “no bleed” for the interior, unless you have fullpage images that go to the margin.
If you’re using IngramSpark, you can download a template here.
However, I’m pretty sure the KDP print templates still round to the nearest 4th page or so, which can make a little difference especially on longer books, so I recommend using Bookow’s KDP print template generator.
Most books will be “black and white” – set your book size and page count. “Cream” paper is better for most fiction and non-fiction. “White” is only good for specialized non-fiction or coursebooks, or if you’re printing color pictures.
Once you click “Build Template” you’ll get a .zip file to download which includes a PDF and a PNG file.
PS. BookBaby also offers print book services.
PPS. I keep saying “createspace” down below because this is an older article; but KDP print works basically the same, just with a new name.
Calculating the Book Cover Size
The templates come with a lot of extra white space. I usually use Photoshop to trim this off. If you want to set up a Word file that’s just the right size, you’ll need to calculate this yourself:
For Createspace, you need to add .125” of trim size to all the edges.
So for a 6”x9” book:
Height= 9″ + 0.125″ (top margin) + .125″ (bottom margin) = 9.25″
Width= 6″ + 0.125″ (outside margin) + 6″ + 0.125″ (outside margin) + spine width.
To calculate the spine width,
White paper: multiply page count by 0.002252
Cream paper: multiply page count by 0.0025
So, for a 6”x9” book of 200 pages, my height= 9.25” and my width equals spine (200×0.0025= 0.5”) + 6″ + 0.125″ + 6″ + 0.125″ = 12.75.”
But you can also just open one of the files you downloaded, and it will tell you the spine width clearly. Interestingly though, my sample template generated by Createspace came out to a spine width of .49” instead of .5” as it should have; I’ve also noticed the spine can be off especially for very large books (600+pages) so Createspace’s calculations aren’t perfect.

In the generated template on the left side, it will tell you the “Page Layout Size” (the size of the sheet of paper they are printing on) and the Black Dotted Line = Trim Edge. So another simple way to calculate would be to take those dimensions, 12.49” x 9.0” and add .25” to each for the trim. I’m going to go ahead and round that .49” up to .50”.
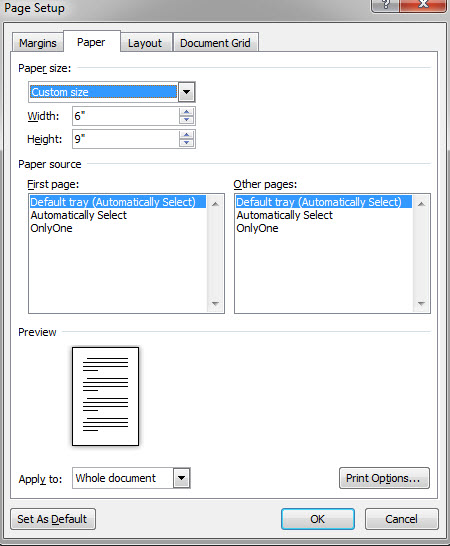
So now I can set up a new Word document, with custom page size of 9.25” x 12.75”
When you download your template from Createspace you’ll get a PDF and a PNG version – the PNG version you can use in Word.

All I have to do is set up my new document, with the custom size 9.25” x 12.75”.
I don’t need any margins, so I’ll set all my margins at zero.

Then I can drag that PNG template into the Word file.
At first it will center somewhere in the middle of the page and be too small, because there’s a lot of extra white space around the template.
I’ll use the “Crop” tool to crop pretty close to the edges of the template. The closer you can crop, the better. You can zoom in to be even more precise. Try to crop it right on the line, to get rid of all the outside white space without cutting into the pink borders.

book cover design templates in MS Word
Then, I’ll double click on the template, choose the “Wrap Text” options and set the image to “behind text.”

That makes it so I can drag, move and resize the image however I want.
Now I can drag and move the template until the edges of the template line up with the edges of my document.
You’ll probably have to zoom in and out to match it up perfectly. It can be hard to do with the mouse alone; you can also use the arrow keys on your keyboard to move it up, down, left or right just a tiny bit at a time.
If you make it too big, you won’t be able to grab the edges anymore and you’ll have to move it over to the side until you can grab an edge to resize. If you get the top and left corner perfect, you can focus on stretching the bottom right corner – zooming in close will let you resize with more accuracy.

The advantage of this is that the document is now the perfect size, and you can organize the elements without worrying about the parts that go off the page. What you see is what you get. Once you finish all the art and text, you can Just save it as a PDF and your full print cover is done.
AN EASIER WAY
But another, much simpler way to do all that, is using an online converter to change your PDF template into a Word file
http://www.pdfonline.com/pdf-to-word-converter
That gives me a page that looks like this.

In this case, the template is already the right size, and all the white space is “extra” – it will get cut off during printing. So you can fit the art over the template, leave the white space as is, save as PDF and it will still work just fine.
(The same goes with Lightning Source Templates: the one you download comes with a lot of extra paper space, which you can leave in or crop out, it doesn’t matter).
Preparing the Book Cover Art
The easiest way to bring the art into your full print cover template, is to make the front, spine and back art unique, 1 piece layers, without the text. If you’ve already made an ebook / front cover using my templates, you’ll have to adjust the text a bit, because now you have extra margins on the top, bottom and sides.
So the text on your front cover will all need to be made a little smaller, moved away from the edges and a little to the left side (because there is extra trim on only the right side on the front, and only the left side on the back).
I’m going to open up one of my front cover templates (#71fiction) and get started.
PS. I have a big list of places you can find the best stock photography for book cover art. Though more recently I’ve been playing with AI tools like midjourney.

First, I’m going to open the Selection Pane and select all the text layers. Then I’ll hit CTRL+C to copy those layers, click into my other document with the template, and CTRL+V to paste the layers. I can move them around to get them centered.

Then I’ll click the eye symbol on the selection panel to hide all the text layers, and do the same thing with all the images – selecting, copying and pasting them all into the new document.
That worked, but if I’m using the full template (without cropping at the edges) it looks pretty messy, and now it’s hard to see where my edges are.

I’m going to try it again… this time I’ll hide the text layers and save the art as a PDF. I had trouble saving directly from Word to PDF this time…
So I used an online converter:
http://www.freepdfconvert.com
Rather than saving as a PDF, you can also try using Word’s “Print” feature to Print/Save is as a PDF with Adobe, Nitro PDF or another PDF tool. Sometimes this will save beyond the borders of the image, but you can crop it after you save as a JPG and import it to your cover file.
There are many workarounds or online converters you can try.
Then I used my PDF to JPG converter:
Now I have a clean, 6×9 @300dpi (1800 x 2700 pixels) JPG image of the cover, that I can just drag and drop into my Word file (or insert>>image). I’ll set it to Wrap Text>>Behind Text again, then resize and position it to fill the front and line up with the dotted line of the spine.
NOTE: since we’re preparing this for print, you should read Chris McMullen’s article on preserving image quality in MS Word.
Some of his tips include:
“The first step is to disable automatic picture compression, while realizing that this step – all by itself – is not sufficient. In Word 2010, for example, click the File tab, scroll down below Help to find Options (at first hidden toward the bottom of the list), select Advanced, scroll down to Image Size and Quality, and check the box that says, “Do not compress images in file.” Do this before inserting any images into the file.
Don’t copy and paste pictures into the Word document. Instead, click Insert and then Picture.
Don’t use Save As to convert the Word document to PDF. Instead, print the file to PDF using a Word-to-PDF converter. For self-publishing, find a PDF converter that allows fonts to be embedded in the file and transparency to be flattened.”
Now I can move around my text to center it – make sure to keep away from the edges (unless your text purposely goes near the edge). Createspace is very picky about its trim space though; if you have anything that looks like text extending of the edge of the cover, Createspace will flag it and not let it through (unless you manually contact customer service and ask them to ignore it).
Something else to keep in mind – since you have extra trim space now you’ll have to extend your top, bottom and right border a bit. If you have a central image or character, that fits nicely between the text, you may need to keep those the same size and only stretch the background to fill the extra space (in which case, you’d need to do that in the original front cover file while you still have layers, by making the center objects smaller and a little to the left, before saving the whole think as a JPG).

So this time I just saved the image art as a PDF>>JPG and put it in, and resized it until it filled the front.
Usually I can just take a little bit of the front cover, like a strip of the very left side, and use it as the spine. In this one, I just copied the front cover image, put it behind the front cover, and shifted it to the left until it hit the dotted line on the other side of the spine. Then I made another copy, put it behind the spine layer, and shifted it all the way over to the other side. Because the horizon isn’t even, I flipped the back cover image so the horizons would match up evenly.

For the spine, I can just copy the text layers, rotate them 90degrees clockwise, and resize them to fit in the spine. If I have a publisher logo or anything I can add it in as well.
The back is more complicated: I don’t want the character there, and there’s a lot more text that needs to stand out. So there are a few options: If you have more landscape you can just use it. For example the original picture of this girl is much wider. I could start over and keep all the extra landscape, maybe stretch it out a bit, use the same gradients, and use it for the back. It would look OK… but it would be a little tricky because of the lighter, almost white sky and the dark treeline.
You need your text to stand out by contrast. You can use a light shadow or glow, but it’s preferable to use natural contrast by putting light text over dark areas and vice versa.
You could also just use a flat pattern or grunge background for a lot of books – search google for “Grunge desktop” or “background texture” and you’ll see what I mean. You may find something with the right feel or style, and if you change the colors a bit it will match nicely with the front. (Something like this for example):

You’ll have to be careful with the spine text – it has to fit inside of the pink margins, so make sure there’s no overlap. You might want to copy the background template layer, and put a new layer on top of everything, that you can toggle on and off to check (or, just hide the image layers while you put in the text, then set them to show again).
What I’m actually going to do for this cover, is add a new shape. Normally I’d add a rectangle and make it near black or white. I can also go to “more colors” and set a transparency level if I want some of the background to show through; but in this case I mostly want to hide the girl. Just for fun, I chose a shape with some rounded corners and added a yellow stroke. It’s a little strange but fine for YA.

Then I add in a text layer, matching the fonts with the front cover. I usually like to start with a quote, review or callout text (something larger to grab attention).
Then you can add in the rest of your edited, killer, captivating and extremely important back cover copy – the same copy you’ll use for your Amazon description probably. It’s really important to make this awesome, so get help on Fiverr.com from someone who knows what they’re doing (most writers have difficult writing their own summary… you need to give away just enough, but not too much, and use compelling language).
ISBNS and Barcodes
If you’re using Createspace, you could just save as a PDF and upload: Createspace will add in a barcode (I have to make sure I’ve left enough space on the back, where that yellow rectangle is on the template). However, CS won’t add in a price, and a lot of bookstores won’t store your book without a price on the book and in the barcode.
Since you may want to try and work with some bookstores, and it’s pretty easy, you might as well add in your own price. I always recommending pricing higher, so that you can discount in person (you can still experiment with your book’s pricing – the Amazon price doesn’t have to match the price on the book.)
So you might set it to $14.95, for example, even if you plan to sell it for $10. That way you can say it’s 35% off.
If you don’t have an ISBN yet, you can start your project on Createspace to get one, or buy some directly from Bowker. If you get a free one from Createspace, the publisher listed on Amazon will be “Createspace.” You can pay a little more to change that (it will display your publisher name on Amazon, even though if anybody looks up the real ISBN on Bowker they will still find Createspace listed) or you can pay even more to have it registered to your publisher name in Bowker.
Once you have an ISBN, you can use my free barcode generator here.
Or alternatively, Bookow has a free ISBN barcode tool too.
There are instructions on how to use it. But the barcode files it gives are PDF or EPS, so I’ll have to use my PDF to JPG converter again:
Then I’ll insert the JPG. The price is embedded, but written in code, so I’ll add a normal $Price and add it into the white barcode box. I can also add a link to my website, a short author bio or picture, or social media icons. They’re kind of fun… they won’t actually click of course so you need to add your Twitter handle or Facebook page link. When you add links, just start from www.

As long as everything is in the right place, it should be ready to upload.
You can test it at home but the colors and quality probably won’t be as good as KDP’s printers. You should also make sure the barcode works – if you have a smart phone, download a barcode scanner app and scan the barcode straight from your computer screen (it will only work if your ISBN is already registered to your book though).
Matte or Glossy?
KDP offers both options now. Generally speaking, glossy is better for fiction, especially for covers with a lot of dark patches or rich colors. Colors don’t show up as brightly on matte… however matte can look more professional and sturdy. Matte is usually best for simple, white covers like non-fiction.
But you may want to print out one of each (just order, switch the setting and re-order) before you decide for sure.
Also, when you upload, you’ll be prompted to use KDP’s automatic previewer – be warned that it’s sensitive and will often flag things that aren’t really problems. So if it’s giving you a lot of grief but you think things are OK, just submit the file, wait for approval and order a proof.
That’s it! If you want a PDF version of this guide, along with the four full cover templates I put in the top of this post, you can download those for free here:
DOWNLOAD the cover design templates (click here)
If you like them, please share!
Book Cover Design Resources for Authors
-
Best Book Cover Software, Designers and Services
-
How to Design the Best Book Cover in 8 Simple Steps
- Custom book cover design (Creativindie)
- Book cover design templates and 3D mockups
- My favorite book cover designers
- where to find images for your cover design
- Best fonts for cover design
Cover Design Secrets: download my free guide
I’ve helped design over 1000 book covers, including hundreds of bestsellers – download my free book to learn all the insider secrets I use to sell more books. Click here to get it now. I’ll also share some of the advanced book marketing tactics I’ve used to make a full-time income with my writing.

Full print book cover design Templates
Honestly I’m exhausted just reading this post. I’m sure I’ve made videos about it, but if you’re still here I’d like to point out, Microsoft Word is not meant for book cover design. You *can* do it, but there are better and easier options. If you already have a front cover, you can just hire someone on Fiverr.com to do the spine and back for you; or my new design tool should work pretty well once I sort out the details, so you can just grab a template, upload it to my tool, and start adding text.
Front and ebook covers especially are crucial for book sales, so even though I try to help people DIY their book design, you really need to consider whether you shouldn’t just get someone else to handle it, or buy a cheap premade, or start with one of my genre templates at least. The spine and back are less important – unless you plan to sell a lot of print/paperbacks at events or something, and even then it’s very easy to look rough and homemade if you don’t know what you’re doing.
That said, I hope this book design tutorial helped or solved your specific problem. If not, I hope you’ll browse around my resources for a better solution – I have lots of useful things for authors!

I’m a philosophy dropout with a PhD in Literature. I covet a cabin full of cats, where I can write fantasy novels to pay for my cake addiction. Sometimes I live in castles.
MAKE A BOOK COVER IN MS WORD
You can download a free package below with a guide and some book cover templates. If you want the Word templates to look like my samples, you need to check the font list and download the same fonts, or else look for alternates that are similar using the “fonts per genre” pdf.
Therefore, How do I design my own book cover?
The book design process in 7 steps
—
- Understand the elements of a cover. …
- Research the market. …
- Choose a design direction. …
- Figure out what the design needs to emphasize. …
- Choose graphics and fonts. …
- Collect feedback. …
- Know what the printer needs.
As well, Can you design a book in Word? Microsoft Word comes with pre-built page settings for creating books. Whether you’re creating a memoir or event guide, these settings let you create a beautiful book or booklet, from start to finish.
Furthermore, How do I make a beautiful cover page in Word?
To make a cover page, follow these steps:
- Open a new Word document.
- Click on the Insert menu on the ribbon.
- The dropdown for Cover Page is the first feature you will spot on the menu (under Pages). …
- Pick one from the 16 pre-formatted templates and three more on Office.com.
- Select the one you like and click on it.
How do you make a paperback book cover?
How do you make a paper book cover?
Let your imagination run wild with decoration ideas!
- Prepare your paper bag. …
- Cut paper to size. …
- Fold top and bottom edges. …
- Wrap jacket around book evenly. …
- Slide book securely into cover. …
- Extra ideas:
How do you make a hardcover book cover?
- Step 1: Stack Your Paper Neatly in (at Least 4) Piles of 8 Sheets. …
- Step 2: Fold Each Stack in Half. …
- Step 3: Unfold the Paper and Turn Over. …
- Step 4: Staple the Pages Together. …
- Step 5: Glue the Binding Onto the Folios. …
- Step 6: Trim the Bound Folios. …
- Step 7: Mark and Cut Out the Cover Boards. …
- Step 8: Make the Book Spine.
What can I use to cover a book?
Sometimes at home we use clear, plastic book covers — the professional-grade types used at libraries — to cover books with jackets on them. But for books without jackets, a paper cover is just right. Once you’ve picked out the paper you like, you’ll want to make sure it’s just the right size.
How do you protect a book cover?
Wrap the covered jacket around the book. Apply Demco® Film Fiber Tape to the outside cover of the book. Wrap the tape around the edge and secure to the book jacket cover inside. Tape the top and bottom of both the front and back covers.
How do you cover a book easily?
For books without covers or to protect your textbooks, make a paper cover for your book. You can cover your books with foreign or old newspapers, old or new maps, sheet music, old wall paper, a brown paper bag, etc.. Unless you are covering a smaller book, you will need a large piece of paper to make your cover.
How do you cover a novel?
Covering a book in plastic is a good way to extend its life, whether it’s a school workbook or your favorite novel. Cut a piece of thick, clear plastic to create a durable cover that will protect your book from wear and tear.
How do you put a book cover on?
What can I use as a hard book cover?
Decorative paper for endpapers, such as wrapping paper or cardstock. Davey board (aka bookbinder’s board), thin chipboard, or cardboard for the book covers. Craft knife. Polyvinyl acetate (PVA) glue such as Elmer’s glue.
What are paperback book covers made of?
Paperback (also called soft cover or perfect-bound) books usually have a cover made from paperboard or a very thick stock, and the pages are attached to the binding with glue.
What is perfect book binding?
In book printing terminology, what exactly is perfect bound binding or a perfect bound book? All softcover books use perfect bound binding. In the perfect binding process, the cover and pages of the book are glued together at the spine and then the edges are “perfectly” trimmed to give your book its sharp, even edges.
How do you cover books aesthetically?
How do you make a white paper book cover?
How do you cover a notebook beautifully?
Washi tape and paper crafting just seem to go together. Attach strips of colored tape in rows onto the notebook cover, and you will have a journal that is pretty and one-of-a-kind. Wrap matching washi tape around pencils to coordinate with your notebook. Making a strong design statement has never been easier!
How do you put a clear book cover on?
What is the front cover of a book called?
Frontispiece: an illustration on the verso (left page) that faces the title page. This illustration could be art related to the book’s subject matter or a portrait of the author. Series title page: a list of any previously published books by the same author. These are usually organized alphabetically by book title.
How do you protect book sleeves?
What paper is used for book covers?
The most common paper used for book covers is 80# white paper (glossy on one side). It is highly recommended that you have your book cover printed at a professional copy shop unless you have high quality, wide format printing equipment (see an example under “Resources”).
How do you cover a hardcover book with paper?
Layout out paper under the book, with the book OPEN. Make sure to leave about 3 inches on either side, so they can be folded over the book cover and the book can be closed. Using the Frog Tape, fold paper over front cover and secure. This will help keep the paper straight, as you fold over the paper on the back cover.
What makes a book cover stand out?
Focusing on the big picture. Strong composition. An intriguing focal point. Clear title and subtitles.
How do I make a book cover in Canva?
How to make a book cover
- Open Canva. Open up Canva and search for “Book Covers” to get started.
- Select a template. Explore Canva’s wide range of book cover designs for your self-publishing needs. …
- Customize your book cover design. …
- Try out different features. …
- Publish and share.
What kind of paper is used for book covers?
What Type of Paper are Books Printed on? Most printed books, use uncoated paper stocks for the inside pages of the book, and a coated cover stock for the book cover. Uncoated stocks come in different finishes and paper weights. Uncoated paper comes in two different finishes, either a vellum or smooth finish.
- Reference 1
- Reference 2
- Reference 3
- Reference 4
- Reference 5
OLD POST ALERT! This is an older post and although you might find some useful tips, any technical or publishing information is likely to be out of date. Please click on Start Here on the menu bar above to find links to my most useful articles, videos and podcast. Thanks and happy writing! – Joanna Penn
Caring about fantastic book cover design is one of those non-negotiables for all authors.
 Derek Murphy of Creativindie Covers is a brilliant designer and has designed a number of my own book covers.
But although I personally believe in paying professionals, I’m also aware that some people want to have a go themselves, or need to because of budget restraints.
This post is for the avid DIY-ers! (If you’d rather hire a professional, click here for a list of book cover designers.)
Most indie publishing experts will warn you against making your own book cover, with good reason: the cover design is too crucial an element to self-publishing success to take lightly.
Making your book a bestseller is hard enough without an ugly cover sabotaging your efforts.
However there are many reasons why you may be tempted to give it a shot anyway:
- You want to play with cover ideas so you know what you want before hiring a designer
- You want more control over your cover design
- You’re launching a small project, a short ebook or guide, and you don’t want to invest too much
- You’re writing a series and don’t want to pay full price for each cover design
So I’d like to share with you something I’ve been working on for a few months: the secrets of designing a bestselling book cover in Microsoft Word, and then I’ll give you some easy-to-use Word templates so you can get started quickly.
This will be a ‘crash course’ in the minimal skills you need to create a winning cover in MS Word
You’ll learn how to use Word to blend images, add layers and transparency, use font effects and space letters (kerning), strip background, and the general principles of cover design.
These instructions are for MS Word 2010, so they won’t work for everyone, but if you have an older or newer version of Word, the process will be similar. This is a long post, so you should bookmark it. You can also download a PDF version of these instructions and the source files of the cover we’re building so you can follow along; click here to get those.
Ready? Let’s begin.
Finding and choosing the right pictures
The quality of your book cover will mostly depend on what pictures or art you use, and how well they fit together, so in this section I’m going to teach you what kind of art works the best, where you can find royalty free images, and where you can get cheap Photoshop work done (if you need it).
The RULES for picking photos:
1) Simple is better
2) Needs to cause immediate emotional reaction
3) Not too busy or too many colors
4) Don’t use a GREAT picture: use the overlooked one
5) Blend and match colors
You can use a color wheel to find complimentary colors (opposites/across from each other). Blockbuster movie posters usually use orange and teal (a lot of my book covers do also).
Green and purple can work also.
Unfortunately, Christmas ruined red and green, but red still goes well with black or white.
Too many colors can be distracting, so try to go for one or two main colors (if the whole background is blue, you could use yellow text to stand out…)
What kind of images should you choose?
First find a dramatic background or scene; it can be a building, landscape… think “place.” Where does your novel happen? What’s the setting? See if you can find something that refers to this. That will be your background.
Then find something for the foreground – faces or bodies can work well here.
Models from stock photography sites are good, but the better the model, the more chance someone else will use them for their covers. You can avoid showing their face by just showing some of their body or posture.
You could also post something on Craigslist and see if you can hire someone local to pose for an hour or two. I’m sure you have a friend with a camera… describe what type of model you’re looking for and have them send samples. I would pay $50~$100 for a couple hours photoshoot, with the rights to use a picture on the cover.
Take the pictures against a white, or black background (depending on whether your cover’s background will be mostly light or dark.)
If that sounds like too much work, find a model on a stock photography site, but keep in mind: the better the photo, the more likely other people are already using it on their book covers. That’s why you don’t want to find a beautiful, breathtaking photo that’s just perfect. You can… but there may be another book with a cover that looks almost exactly the same.
Instead, try to find something a little plainer, mix the model and background together yourself, or choose to focus on a unique angle (I often cut off the top half of a model’s face and show just the mouth and chin). You could also put some unique objects, symbols or elements in the foreground. Something that also works well is to place the models large on top, and add a scene/landscape on the bottom half of the cover.
Make a list of your character’s physical descriptions, and any other relevant places, scenes, rooms, objects or symbols, and start searching.
Where to find stock photography
“Stock photography” means images you can buy the rights to and use in your book cover. More expensive sites will ask you for more details like how many copies you plan to print, but there are a lot of cheap options.
I use these sites, where photos usually cost less than $10 to download (although you should buy the more expensive “Extended License” if you are using it for your book cover). Each site has different rules and fees. For now, just download samples of everything you like so you can play around with them. Once you’re sure what you want, you can go back and buy them.
What size do I need?
I make book covers at 6”X9”, which is 1800×2700 pixels. That’s already a good size for print, and for Kindle and other ebook sites. If you want a taller, narrower book cover, use 5”x8” – that will produce the 1.6 ratio recommended by Amazon (which most publishers ignore, because the covers are too tall and look strange on most devices).
On most stock photography sites, a medium or large size will work, just check the pixel ratio. Keep in mind, if you choose two horizontal photos, they don’t need to be as long as the full cover.
Here are the sites I use most often:
- 123rf.com
- Bigstockphotos.com
- Depositphotos.com
- Photodune.net
- Shutterstock.com
There are others though – even some free options, like Stock Exchange photos.
They reel you in, showing you nice photos from iStock, which usually cost between $20 and $80.
Other options
The disadvantage to stock photography, as I’ve mentioned, is you’ll see it on other covers, so here are some ways to find something unique.
1) Find a professional photo from a photographer’s website.
Photographers often charge at least $1500 to use a photo as a book cover; however, many are open to a special deal or agreement. Something I’ve negotiated in the past, is paying around $250 now, but an additional $1000 or so if the book sells more than 10,000 copies. This is pretty fair to you both – if you do sell so well, the photographer deserves to get paid his normal wage.
2) Find something on Etsy.com
Etsy is a site for craftspeople and artists, but they often have some very pleasing photography of their wares. There’s also some unique paintings and art. Most artists won’t mind if you use their photos, especially if you buy the relevant product they’re selling. Just make sure to ask.
3) Find something on Flickr.com
A lot of Flickr users post photos in the Creative Commons area, which means you can use their photo as long as you put attribution (on the back cover, and on the title page). No harm searching this area. The photos may not look great at first, but you can adjust them in Word.
http://www.flickr.com/creativecommons
4) Look on DeviantArt for photography
DeviantArt is a community for artists and graphic designers. They have a resources section of stock photography, that you can use as long as you attribute the source (different artists have different rules of use, and can be quite cautious how their work is used, so you should read their rules and maybe send them a message).
The stock photography on Deviant is usually very raw – it’s for graphic designers to use in their designs.
If you see a photo that could work, maybe see about finding someone to make it awesome for you (read 5 and 6).
http://www.deviantart.com/resources/stockart
5) Hire an artist from DeviantArt
Browse DeviantArt for the subjects on your list and you may find some beautiful art and photography. Especially for a children’s book or fantasy novel, if you need a really specific scene, you may need to hire an artist. A lot of artists on DeviantArt are young or just starting out (or in other countries where the minimum wage is much lower). I would offer $100 to use some art on a book cover, or $250 for them to draw something custom for you. Some artists will work for less, some will demand more – but I think those are good starting offers.
http://www.deviantart.com/resources/stockart
6) Pay someone on Fivver.som to make it awesome
I’m going to teach you how to style and blend photos in MS Word, but if you need something prettier, or are getting frustrated trying to do it yourself, search on Fivver.com for a Photoshop expert. Many providers will strip out background, combine images, or add a dramatic style for $5. It’ll save some time and probably look better. Especially for YA, fantasy, science fiction, thriller… anything that needs to be “edgy” or a little more exciting, could probably use a touch-up.
http://www.fiverr.com
7) Find an old painting
Thinking of using a historical painting? Almost all old paintings should be free to use if they’re older than 70 years. Check out this site, it has tons of high resolution painting and art pictures:
http://www.wga.hu/index.html
Got your pictures? Let’s start!
I’m going to walk you through making a book cover in MS Word from scratch.
Step One
Open up MS Word.
Go to “File>>New>>” and then hit “Create” on the right side.
You should have a blank document.
You’ll want to adjust the size to 6”x9”, so go to “Page Layout” and hit “Size.” Scroll down to “More Paper Sizes” and type in 6” and then 9” in the relevant input boxes.
We also don’t need the margins so big, so click again on “Page Layout”, select “Margins” and then set them to “Narrow” or .5” all around.
Step Two
Now we’re going to add our pictures.
I’ll take my scenery or background picture and drag/drop it into my template. I could also use “insert>>picture” and then select the image I want to use.
When the picture gets dropped in, it will automatically stretch to the margins, but you can’t move it where you want. Double click on the picture, go up to “Wrap Text” and choose “Behind Text.”
This will let you scale, resize and move the picture around. I’m going to move it down to fill up the bottom of my book cover.
Quick Tip: if you need to get a better handle on things, you can either zoom in or zoom out under “View” and then “Zoom.”
Now I’m going to take another picture, drag and drop it in, select “Behind Text,” and put it in the top half. The picture is too big, so I lose half of it under the other one (we’ll fix that later).
Now that I have two layers, I’ll want to click on “Page Layout” and open up the “Selection Pane.”
This will show all my layers, and make it easier to keep track of them. If I want to hide one for a while, I can click on that “eye” button, and show it again when I’m ready. Sometimes it can get tricky to select the right layer when I have a bunch of them. If it’s hard to select the image you want, try double-clicking right on the border of the picture, rather than the middle.
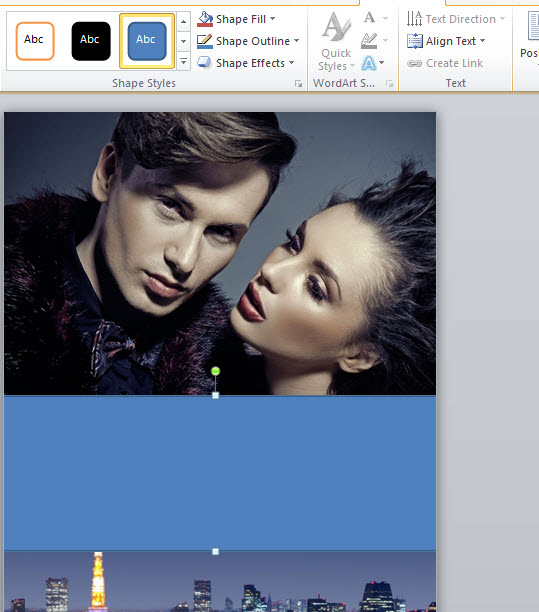
Just for fun, double click on the picture of the couple again, and hit the “Remove Background” button on the top left. It doesn’t work so well with this picture, because the background is too similar to the portraits in color, so we’d have to use “Mark areas to keep” and “Mark areas to remove” until we got it right. Then we could add something else behind it, like a nice starry night sky…
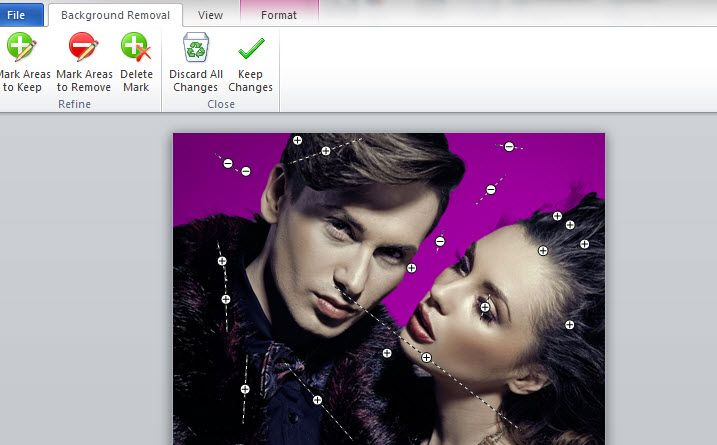
But we won’t do that right now.
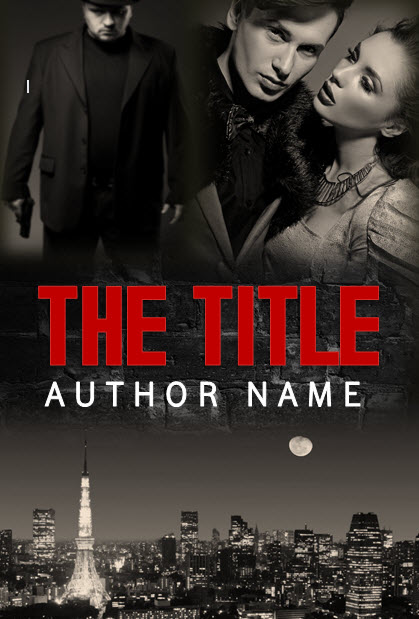
The simplest way to finish up this cover would be to add a flat banner across the middle.
Quick Tip: if you need to go back and remove some changes, hit the backwards curving blue area on the very top left, next to the save disk icon.
Step Three
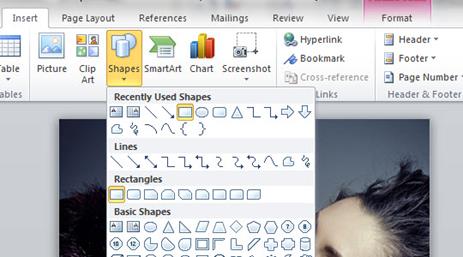
To insert a banner, go up to “insert,” click on “shapes,” and then select the rectangle.
Now we can drag out a rectangle. It’s OK if it’s not perfect, you can resize it and move it around. I’m going to double click on the rectangle to select it, go up to “Shape Outline” and hit “No Outline.”
I’ll do that again, go up to “Shape Fill” this time, and select the color black.
Step Four
Now I can add some text.
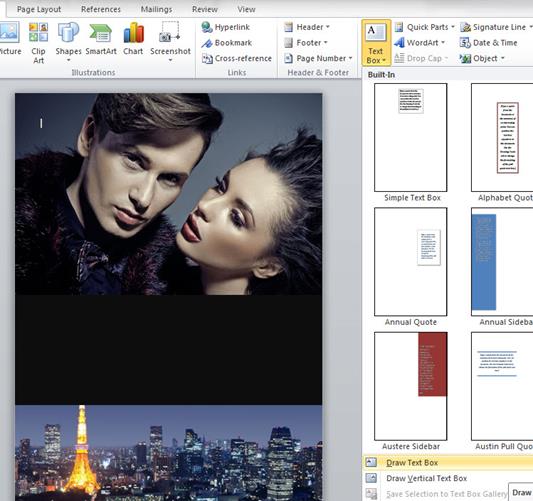
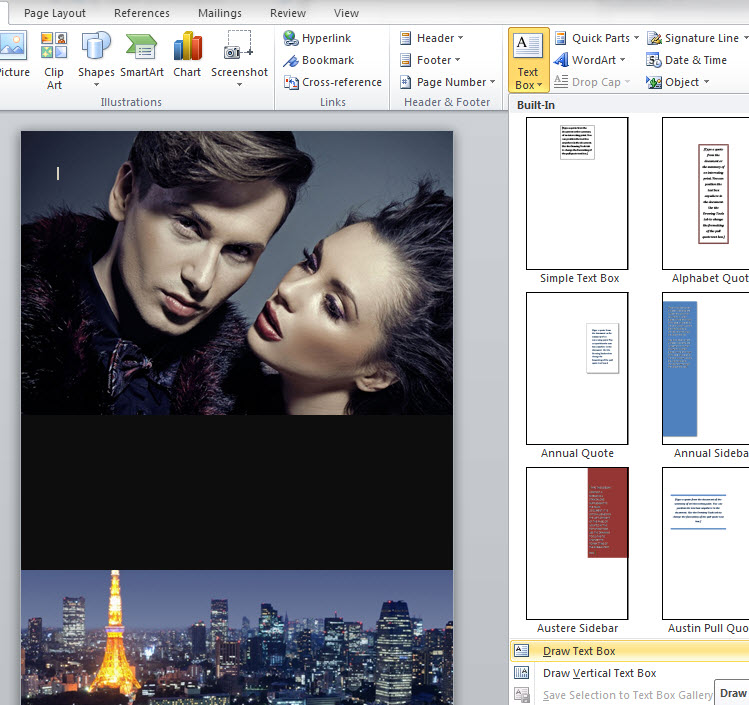
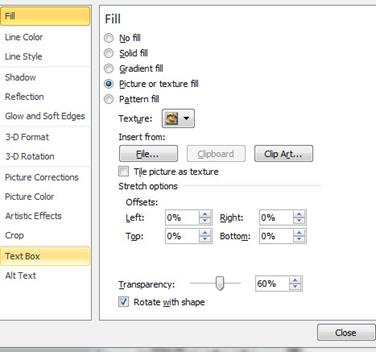
I go back to “Insert” and hit “Text Box,” and choose “Draw Text Box” from near the bottom of the choices.
At first my text box has a solid white background. So I’ll double click on it, go up to “Shape Fill” and choose “No Fill.” The box also has a border I want to get rid of, so I double click on it again, go up to “Shape Outline” and pick “No Outline.”
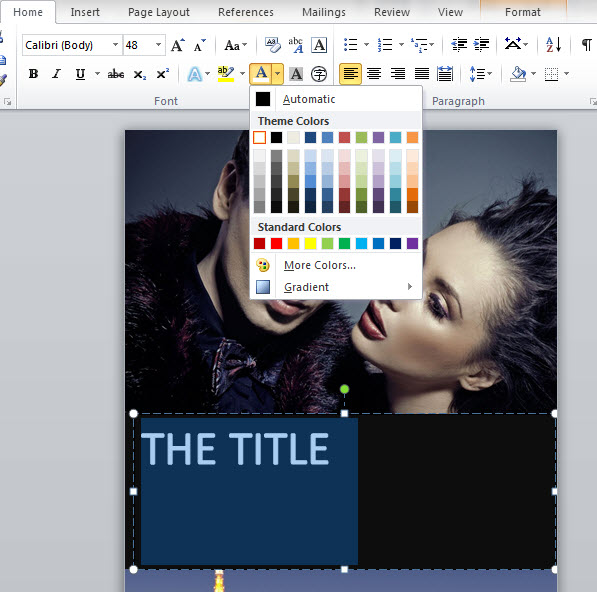
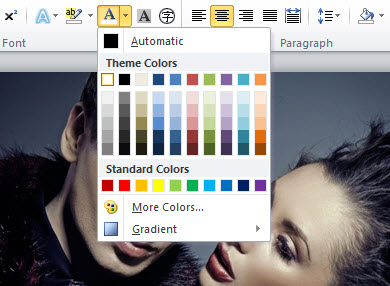
But now if I type my title, I can’t see the black text… so I’ll highlight the text and go up to the “A” symbol to change the color. For now I’ll just pick white, then make the text a little bigger.
Rules for using fonts:
Using the right font for your book’s genre is important.
You can’t go wrong with some fonts. Here are some of my favorites:
Lato, open sans, liberation sans, English gothic, bebas neue, Optimus princeps, trajan pro, garamond, pandama, Shonar Bangla… here are some things to keep in mind:
- Don’t use anything that comes with Windows – your basic fonts like Comic Sans, Times New Roman, or Mistral.
- Try to use two fonts, something “cool” for the title, and something clean and simple for the author name (although if you want to create an author brand, you could reverse this, and make something memorable for the author name.)
- Three fonts is OK if two are pretty simple (for example, to use in the tagline or review)
- Don’t use more than one super creative, unusual font.
- Search around. There are thousands of fonts. Find a great one. Understand that you may have to pay for it.
MS Word’s maximum font size is 72pt, but you can just type in a new number.
I’ve set mine to 120pt. I’m going to use a font called “Accidental Presidency.” It’s a narrow, bold, sans-serif font, similar to English Gothic or Bebas Neue.
But I want to space out the letters a bit, so we need to learn the very important skill of spacing letters.
I need to go up to the Home tab, and underneath the “Font” section I click on that tiny little diagonal arrow.
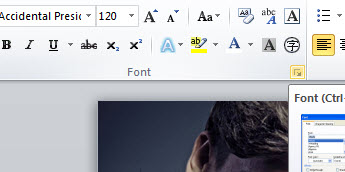
That’ll bring up a new “Font” window. Click on the “Advanced” tab to see the “Spacing” option.
You can set the text at “Expanded, Normal or Condensed.”
I choose Expanded, and set it at 1pt. That’s not as spaced as I want, so I do it again and choose “by: 3.5pt.”

I want to center my text, so I drag the walls of my text box to the edges of my cover, then click the center text icon. If it seems like the text isn’t lining up right, go up to the Paragraph section, hit the tiny diagonal arrow, and make sure the Indentation is set at zero.
Now I want to add an author name under the title.
But if I hit Enter/Return, the next line is too far down. I could try to fix the line height, by hitting the Paragraph options and setting the line-height to 0.8”, but too much and it will start cutting the top off the text. So the better option is to select my title text box, by clicking once on the border of the box, right click and choose “Copy Here” (or use the ctrl+”C” shortcut).
Now you have a duplicate text layer. Make the font size smaller, and increase the spacing. I set the size at 36pts, and the spacing to Expanded by 10pts. Accidental Presidency looks a little too bold, so I changed the font to Vodafone Rg.
Finally, I want my title text to “Pop” a bit more. If I click the little “A” symbol with the blue glow, I’ll get some special text features. If one of these styles doesn’t work, I can customize the Outline, Shadow, Reflection or Glow.
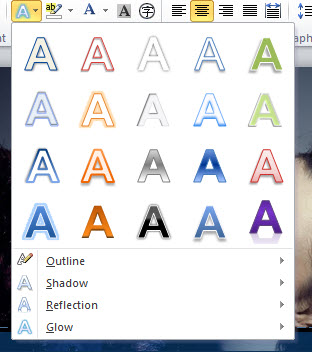
The “Reflections” is interesting, but only if I go to “More Reflection Options” and change the transparency a little.

But it’s not quite what I want. So instead, I’ll highlight the text and go up to the “A” with the white bar underneath to select the Font Color options.
Besides changing the color, I can also select a Gradient option. With a light border and subtle reflection, the cover looks pretty good.
Step Five
But I think I can make it better. Try selecting that black rectangle shape behind the text.
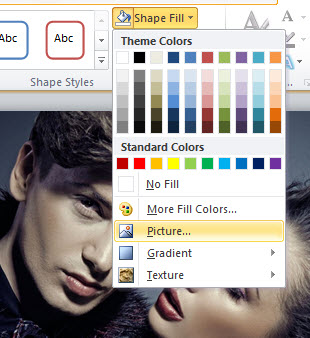
First I’m going to search online for a “black, textured background”. I want something “grungy” so I picked this brick wall.

If I click on the border of my black rectangle, I can go up to Shape Fill, choose “Picture” and upload my brick wall background.
Quick Tip: if you’re having trouble selecting the black rectangle from behind the two text layers, use the “Selection Pane” which should still be on the right hand side of your workspace. You can select the layer there, or hide the two text layers for now.
That looks OK. But now the straight lines of the rectangle box are starting to bother me.
Let’s get rid of them.
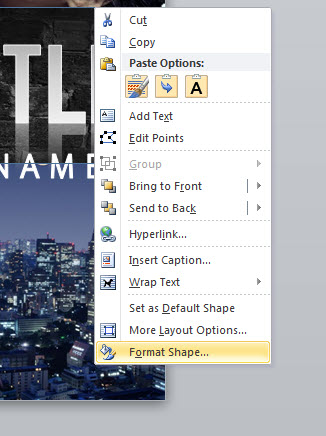
Select the background rectangle again by clicking once on the border, but this time right click and choose the last option, “Format Shape.”
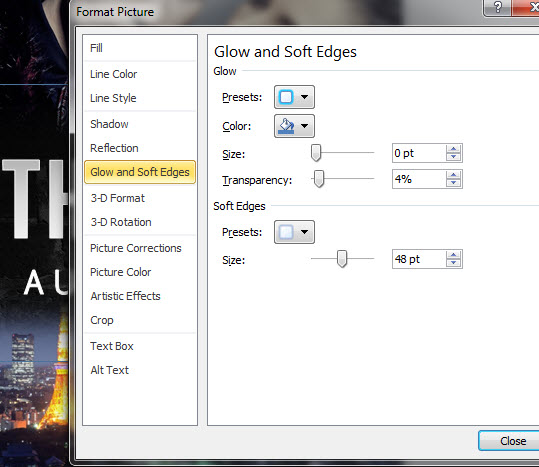
This opens a new window, and we can now access the “Glow and Soft Edges tab.”
You want to make the soft edges big enough so the image transitions smoothly into the other pictures.
It still doesn’t look smooth, so I’ll try adjusting the colors.
I selected the background Paris shot, and used the “Corrections” and “Colors” tabs on top to change the picture to a dark brown that matches the bricks better.
Step Six
That doesn’t look bad at all.
But let’s see if we can add an element of danger by blending in another picture of this bad guy.

First we need to make some space, so we’ve got to select the picture of the couple, grab one of the corners, and pull it down to scale the size.
You may need to move it over first so the corners are visible.
Then, since this is a dark cover, let’s get rid of that white background.
Go up to “Page Layout” and click on “Page Color.”

Quick Tip: If you wanted to fill the page with a gradient, you would hit “Page Color” and then “Fill Effects.” Gradients are handy for non-fiction.
I click on “More Colors” and try to match that dark brown of the Paris sky as closely as possible.
Now I can drag in the bad guy picture, “Wrap Text”/”Behind Text” to move him around, and “right click/format picture” to soften the edges.
I also used “Corrections” and “Color” to make him fit in with the background color better.
I added soft edges to the couple picture as well, but unfortunately these two images don’t fit so well together. I may be over-reaching.
I changed the color of the couple picture, to blend them together better, but now the cover is monochrome and a little boring. I could add red text…
But I think the colors were stronger before.
So I hit the “revert” back arrow about 200 times…
Quick Tip: Save frequently! And if you like something, save it, and then save again as a new file before making big changes or trying something else.

This time I use the “Remove Background” button (once you click on the picture, it will be on the top left, under “File”). It does a good job of stripping everything out.
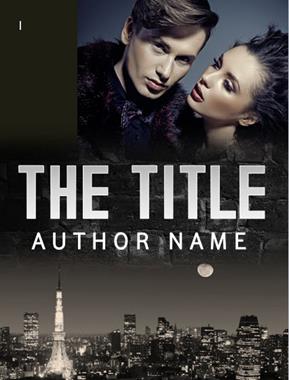
I want to put him really small, on the bottom half of the cover.
And this is where I hit one of the big limitations in MS Word.
For some reason, “Shapes” have to be in front of “Picture Layers.” What this means is I can’t bring my bad guy in front of that brick layer.

Luckily, there’s a work-around this time.
I started that layer as a shape, and I used “Fill” with the brick picture.
The cool thing about shapes is I can change the Transparency. You can use Transparency to put an image right over another one.
Normal pictures though, don’t have that transparency option, only shapes do. And shapes have to be in front of pictures.
But, since I don’t need transparency right now on the brick layer, I can just delete it, insert the brick picture directly, by itself, and set the edges to soft.
Now that it’s a picture, I can put it behind the bad guy.
I like him so much, I’m going to make the author name a little more condensed so that I can fit him in better.
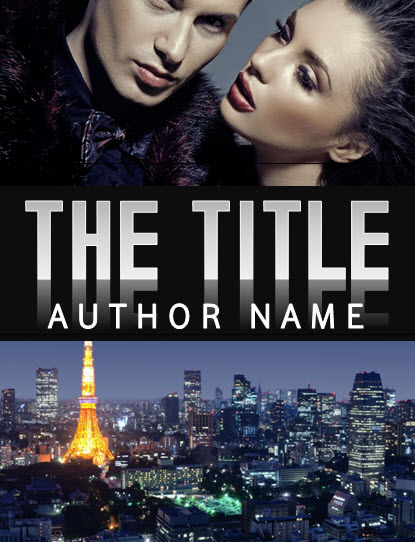
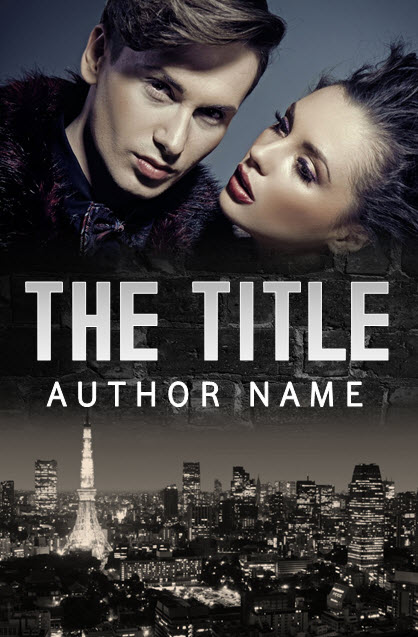
And…. Tadaa! For a cover made in MS Word in under an hour… it’s pretty good.
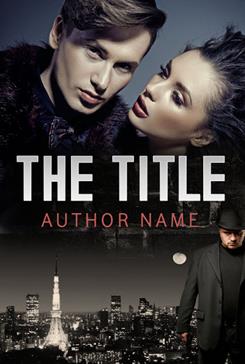
The fonts aren’t ideal… I’d try to find something a little edgier/rougher for the title and cleaner for the author name.
Quick Tip: A white outline on text with a gradient will make a ‘gleaming edges’ look, like in this sample. It’s good for strong, clean fonts, but not good for rough or messy fonts with uneven edges. An outline will also make the text a little bit fatter and not quite as clean and sharp, so it should be used carefully.
If you didn’t get it earlier, link to the source files and template used in this tutorial.
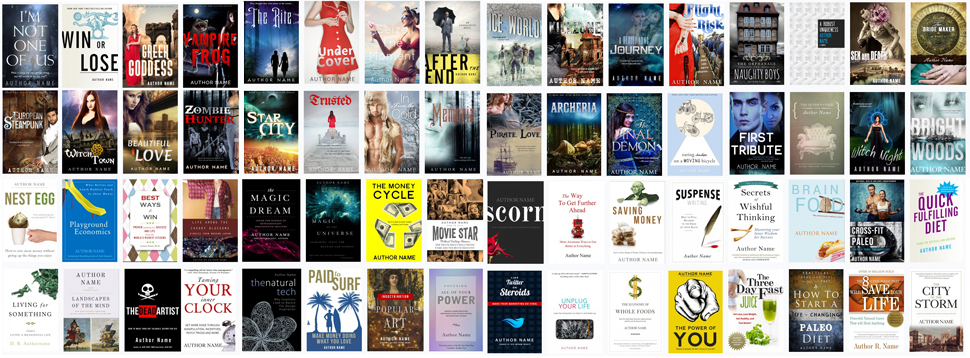
DIY Book Cover Templates
With the methods you’ve just learned, you can make a pretty great cover by yourself in MS Word. But there’s also a lot of potential to fail. When you’re starting out learning a new skill, it’s good to have limitations, structure, guidelines, a roadmap. That’s why I’ve been working on over 100 DI Y book cover templates based on best-selling book covers, which are a lot faster and easier than making your own cover from scratch. You can just about point and click your way through customizing one of my templates in 5 minutes.
If you’d like to find out more about that and download some free templates to play with, check out DIYbookcovers.com.
If you’d rather work with a professional book cover designer, you’ll find a list here.
Please leave any questions or comments below!