
Additional FAQs Go to the “Insert” tab on the Ribbon. In the “Illustrations” section, click the “Shapes” button. Under the “Line” tab, click on “Curve.” Left-click where you want the curve to start. Move your cursor to draw the line. Left-click to add a curve. Double-click where you want the curve to end.
How do I make text curve without changing in Word?
Select the curved or bent text you want to modify. Select Text Effects. Select Transform > No Transform. The curved or bent text transformation effect is removed.
How do I curve text in Word for Mac?
Hit the “Format” button, right next to “Home”. One of your new selections under “Text Styles” should be “Effects”. Click on Effects and select the last selection, “Transform”. You should have a whole selection of options including curving text up or down, and making circles.
How do I make an image curve in Word?
Draw a curve On the Insert tab, in the Illustrations group, click Shapes. Under Lines, click Curve . Click where you want the curve to start, drag to draw, and then click wherever you want to add a curve. To end a shape, do one of the following: To leave the shape open, double-click at any time.
How do I add text effects in Word?
Add an effect to text Select the text that you want to add an effect to. On the Home tab, in the Font group, click Text Effect. Click the effect that you want. For more choices, point to Outline, Shadow, Reflection, or Glow, and then click the effect that you want to add.
How do I make a curved text box?
Create curved or circular WordArt Go to Insert > WordArt. Pick the WordArt style you want. Type your text. Select the WordArt. Go to Shape Format > Text Effects > Transform and pick the effect you want.
How do I make an image oval in Word?
Select the photo in the document to make the Format menu beneath Picture Tools appear. Click the “Format” menu, then “Crop” and select the “Crop to Shape” option that appears in the drop-down menu. Clicking the “Oval” in the list of shapes crops the photo into an oval.
What is text effects in Microsoft Word?
Change the look of your text or WordArt by changing its fill or outline, or by adding an effect, such as a shadow, reflection, or glow. Select your text or WordArt. Click Home > Text Effects.
How do I create a shadow in Word?
Select the text or WordArt that you want to format. On the Format tab, under Text Styles, click Effects , point to Shadow, and then click the shadow style that you want.
Can you curve a text box in PowerPoint?
Curve text in PowerPoint Select your text and go to Insert > WordArt. Select the style you want from the menu. Now go to Shape Format/Drawing Tools Format and select Text Effects >Transform. Here you will see a whole range options to change the shape of your text.
How do you make an oval function one object in Word?
To select one object, click or tap the object. To select multiple shapes in a group, press and hold Shift or Ctrl while you click or tap the shapes.
How do you crop a picture into an oval shape?
Step 1: Crop the image into an oval Select the image. Click the Picture Tools Format or Picture Format tab in the Ribbon. In the Size group, click the arrow below Crop. From the drop-down menu, choose Crop to Shape and then click the oval.
What is font effect?
Font psychology is the deliberate use of particular styles and sizes of characters in content to produce a desired effect in the viewer.
How do I use small caps font effect in Word?
To do Small Caps in your Word document: Open a black document and go to the top menu ribbon. Go to the Home tab and Font section, you will see a small downward arrow(font button) Click on that arrow and go to Effects. Check the box saying, Small Caps’ Click OK and you are done.
What font is good for making text stand out?
Serif or Sans-Serif Sans-serif fonts are easier to read when there just a few words, so are great for making statements.
How do you shade text in Word?
Apply shading to words or paragraphs Select the word or paragraph that you want to apply shading to. On the Home tab, in the Paragraph group, click the arrow next to Shading. Under Theme Colors, click the color that you want to use to shade your selection.
What is shadow in MS Word?
Adding shadows to the objects you insert into your Word document can give those objects a 3D look. You can add shadows to virtually any object you can insert: pictures, Clip Art, shapes, SmartArt and charts. To remove a shadow previously applied, select the picture and click Picture Effects > Shadow > No Shadow.
How do you draw on Microsoft Word?
How to draw in Word Click the ‘Shapes’ button and select ‘Scribble’ Open up your Microsoft Word document. Hold down your mouse to draw. Click and hold down your mouse to draw. Release the mouse. As soon as you release your mouse, the drawing will be finished. Edit your drawing. Double-click your drawing.
Why is there no circle shape in PowerPoint?
One such scenario is when you need to draw a circle, you’ll find that PowerPoint’s Shape gallery has no Circle shape! Don’t worry, all is not lost because there is an Oval shape and that can be used to draw a perfect circle. Most of the time, PowerPoint will open with a new slide in a presentation.
How do you format shapes in Word?
Under Text Box Tools, on the Format tab, in the Text Box Styles group, click Change Shape, and then click the shape that you want.
How do I fit text into a shape in PowerPoint?
Resize a shape to fit text Right-click the border of the shape or text box. On the shortcut menu, click Format Shape . , click Text Box , and then select Resize shape to fit text .
How do you make an arrow straight in Word?
Hold Shift while drawing What DOES work is drawing a line/arrow while holding down the Shift key. Holding Shift while drawing forces the line to horizontal, vertical or 45° angles.
Use the WordArt feature to bend and shape words
Updated on February 6, 2021
What to Know
- Use Transform in Text Effects to curve text as you wish.
- Text Effects is part of Microsoft Word’s Word Art Feature.
This article demonstrates how to bend words into an arch or around a shape or image in Word for Microsoft 365, Word 2019, Word 2016, Word 2013, and Word for Mac 2016 and 2011.
How to Curve Text With WordArt
Microsoft Word uses the WordArt feature to curve text:
-
Open a Word document and select Insert > WordArt.
You can also select the WordArt icon from the toolbar. It looks like a capital letter A. However, the icon’s appearance and location vary depending on the version and platform.
-
In the WordArt menu, choose the WordArt style you want. Placeholder text appears in the document. Type your text over the placeholder text.
-
Select the text to display the Drawing Tools tab.
-
Go to either the WordArt Styles or Text Styles group, then select Text Effects, which is represented by a blue and white letter A.
In Word 2016, Text Effects displays when you hover the mouse cursor over it. In earlier versions, it’s clearly labeled.
-
Select Transform.
-
From the submenu, choose from a variety of effects, including curved and bent text. Select an option to apply it to the text.
How to Undo Curved Text
To remove a curved or bent text effect without deleting your text:
-
Select the curved or bent text you want to modify.
-
Select Text Effects.
-
Select Transform > No Transform. The curved or bent text transformation effect is removed.
Thanks for letting us know!
Get the Latest Tech News Delivered Every Day
Subscribe
Click on the “Format” tab in the toolbar. Click on the “Text Effects” button. Hover your cursor over “Transform.” In the fourth row of the “Warp” section, choose between the “Curve: Up” or the “Curve: Down” option.
Contents
- 1 How do I curve text in Word for Mac?
- 2 How do you make words into a shape?
- 3 How do you curve text in design space?
- 4 How do you make circles around letters?
- 5 What is a single path or mesh?
- 6 Do you need to curve text for tumblers?
- 7 How do you curve text in design space on IPAD?
- 8 How do you bend text in Canva?
- 9 How do you curve text on the bottom of the circle in silhouette?
- 10 Where is the warp tool in silhouette?
How do I curve text in Word for Mac?
To create curved or circular WordArt text, you add a Transform text effect.
- Select the WordArt. When you do that, the Shape Format tab appears.
- Click Text Effects >Transform and pick the effect you want.
How do you make words into a shape?
Use WordArt to shape text
- On the Insert tab, in the Text group, click WordArt, and then click the WordArt style that you want.
- Type the text that you want.
- Change the font size, if needed, and then click OK.
How do you curve text in design space?
Curving Text in Design Space
- Click the Text tool in the Design panel to the left of the Canvas.
- Enter text into the text box, choose your font and font style, and use the Letter Space tool to adjust letter spacing as needed.
- Click on the Curve tool.
- Drag the slider to the right to curve the text downward.
How do you make circles around letters?
You can use one of the alt keys and type the decimal numbers using number pad. For example, alt + 9411 will produce circled capital N like Ⓝ. If you do not have a keyboard with number pad then try the alt + x method. Type the hexadecimal codes and then press alt + x to convert it into a circled letter.
What is a single path or mesh?
A single path, by definition is a path that does not contain multiple paths. (
Do you need to curve text for tumblers?
Generally, text at the top of the tumbler should be curved with a diameter of 45 and text at the bottom should be curved at 30 with the lines in between adjusted accordingly.
How do you curve text in design space on IPAD?
Once you’ve added your text, scroll to the right on the menu and select the “Curve” option. Slide the bar left for a downward curve or right for an upward curve. Once you’re happy with your curved text, tap the export button again and select “Save Image”. Now you’re ready to upload your design to Cricut Design Space!
How do you bend text in Canva?
How to Create Curved Text in Canva
- Type Your Image Text. Click on the text icon to add a text block to your Canva page.
- Edit Image Effects. The next step is to click the effects button.
- Curve Text Effect. Next, you need to click on the curve button under the shapes tab.
- Adjust The Curve.
How do you curve text on the bottom of the circle in silhouette?
What you want to do is type out your text. Draw your circle. Double click the text so you get the green box around it with the little directional arrow circle in the lower left corner. Grab that arrow icon and drag it over to the bottom of your circle.
Where is the warp tool in silhouette?
Silhouette Studio® 4.1 introduced a basic Warp Tool for users of Designer Edition and higher. The Warp panel can be accessed near the bottom of the panels on the right. If your screen is small, look for an arrow to pull out more options. The Warp Panel looks like a warped grid.
Even if you’ve been a Microsoft Word user for a long time, there are certain formatting options or objects that you need, but might not know where to find. For example, you might need to know how to curve text in Word if you’re designing a document that would benefit from having that effect.
A traditional Microsoft Word document, such as one that you might create for school or your job, is rarely more than plain text and maybe a picture or graph. But there are a lot of other elements that can be included in a Word document, including curved words.
You can curve text in Microsoft Word selecting the text, clicking the Insert tab, clicking the WordArt button and choosing an option from the drop down menu. You can then select the Format tab > Text Effects > Transform > then choose a curved path.
Whether you’re designing a flyer or a newsletter, or anything else that needs to be visually appealing, there are many cases where you might find yourself needing to curve a Word in your document. Our guide below will show you how to use the tools in Microsoft Word to achieve your curved text.
How to Arch Microsoft Word Text
The steps in this article were performed in Microsoft Word for Office 365, but will also work in most other versions of Word.
This first part of this section provides a brief overview of how to curve text.
If you would like to see the full tutorial with pictures, simply keep scrolling, or click this link to jump to that section. We also discuss how to curve text without WordArt further down in this article.
- Open the Word document.
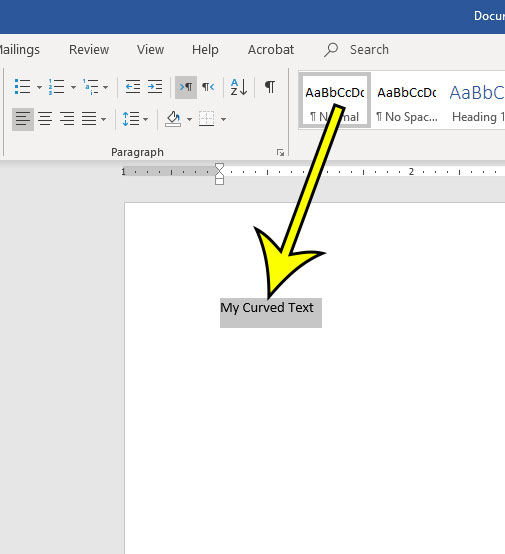
- Choose where to add the curved text, then type it.
- Select the text.
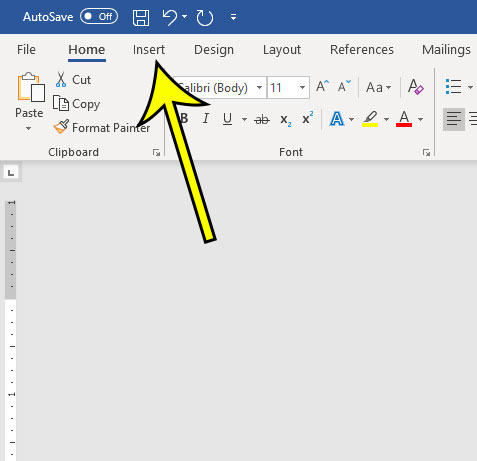
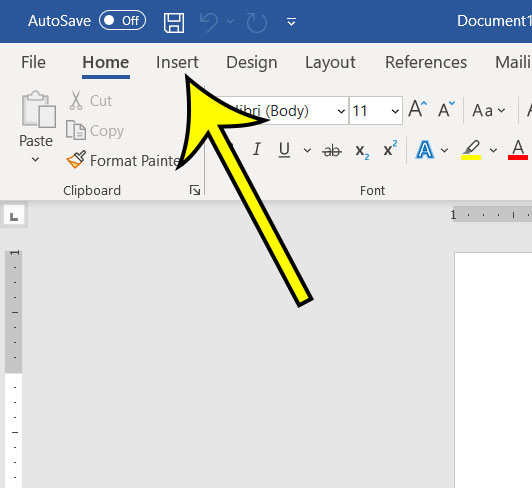
- Click the Insert tab.
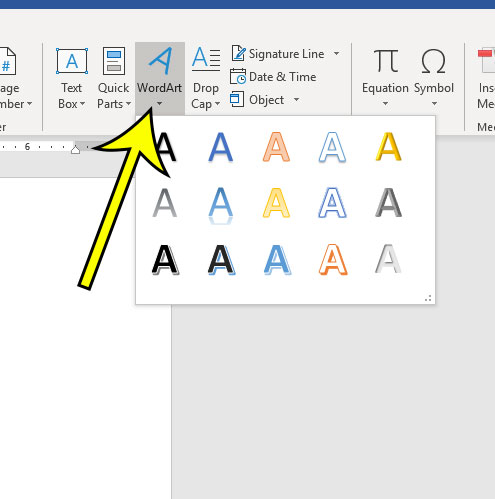
- Choose the WordArt button, then select a style.
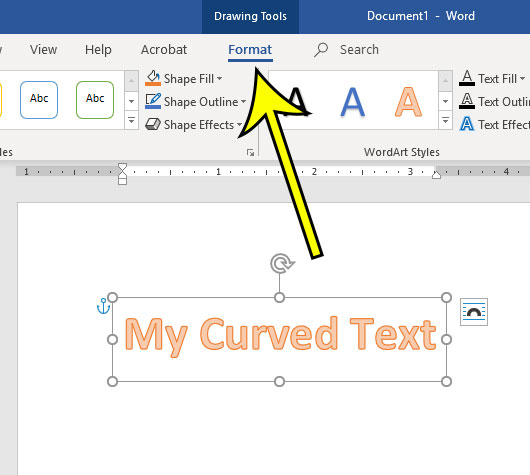
- Click the Drawing Tools – Format tab.
- Select Text Effects, then Transform, then a curved text style.
- Adjust the WordArt text box as needed.
Our guide continues below with additional information on how to curve text in Word, including pictures of these steps.
Would you like to include the number of pages next to your page numbers? Our page 1 of 2 in Word tutorial can show you how to set that up.
Full Tutorial – How to Curve Text in Microsoft Word
As mentioned above, this section provides additional information on curving text in Microsoft Word, including pictures.
Note that this method uses WordArt. However, you can also curve text without WordArt. That method is discussed in the section below this one.
Step 1: Open your document in Word.
Step 2: Click at the point where you want to place the curved text, then type it.
Step 3: Use your mouse to select the text that you wish to curve.
Step 4: Select the Insert tab at the top of the window.
Step 5: Click the Word Art button, then choose the desired style for your curved text.
Step 6: Select the Drawing Tools Format tab at the top of the window.
Step 7: Choose the Text Effects option, select Transform, then click the desired curve type under Follow Path.
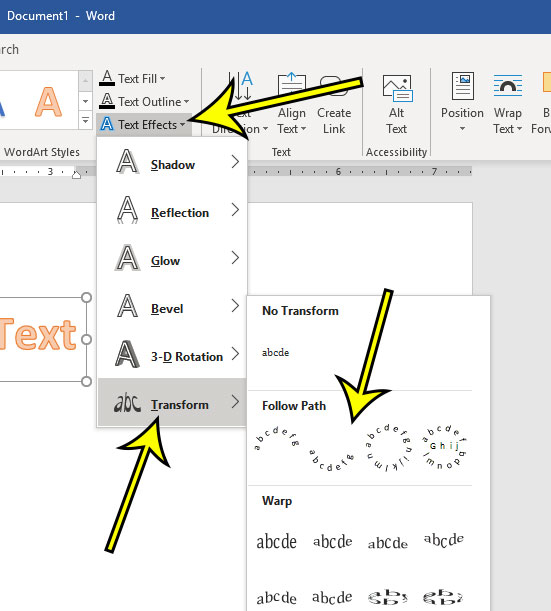
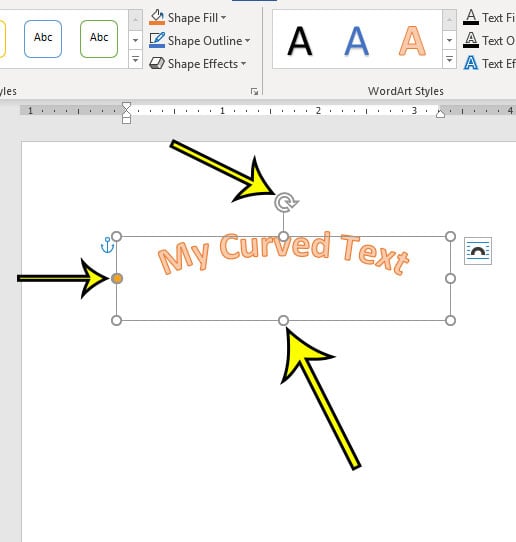
Step 8: Adjust the layout options for your curved text by clicking the white anchors to change the size of the text box, clicking and dragging the orange anchor to adjust the curvature, or clicking on the arrow to rotate the text.
The next section provides an alternate method for curving text.
If you’re adding math equations or other similar text to your document, then this how to do fraction on Word guide can show you a useful tool in the application.
How to Curve Text in Microsoft Word Without WordArt
Sometimes you will want to avoid using certain types of objects in Microsoft Word, including WordArt. Therefore you might want to try this method of curving text instead.
Step 1: Click the Insert tab.
Step 2: Click the Text Box button and choose your text box type.

Step 3: Enter the text into the text box.
Step 4: Right-click the text box and choose Format Shape.
Note that you need to right-click on the text box border, not inside the text box.
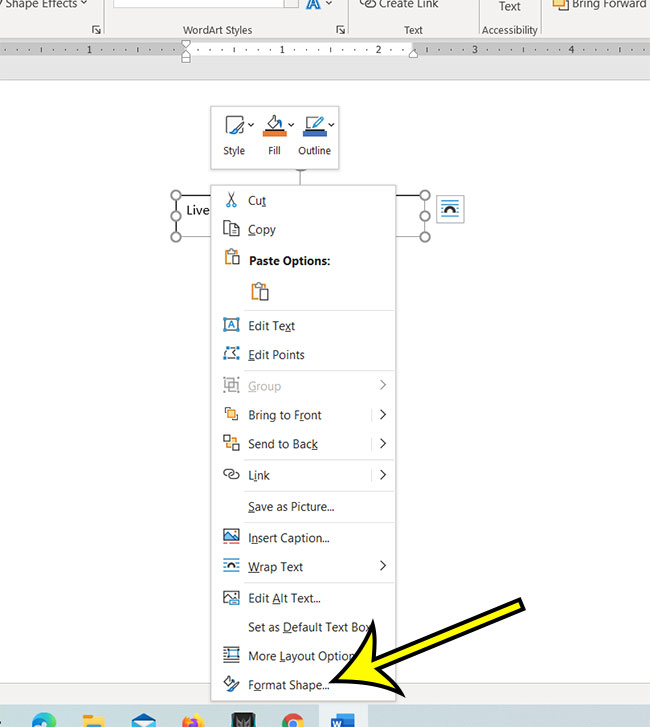
Step 5: Select No Fill and No Line from the column at the right side of the window.
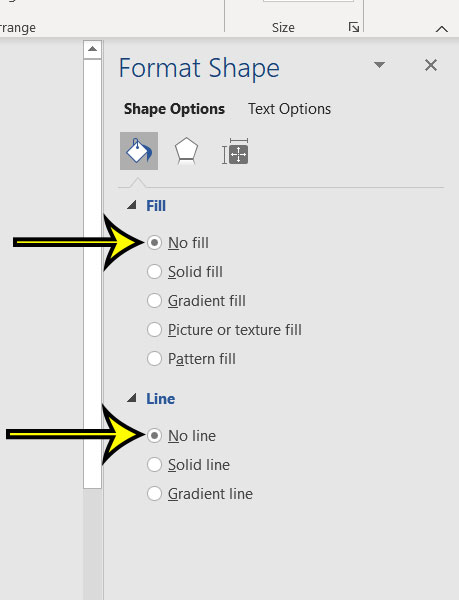
Step 6: Click the Text Effects button, select Transform, then click one of the curved text options under Follow Path.

Depending on the version of Word that you are using you may or may not see a preview of the curved text after you select the shape transformation. Otherwise, you will need to click outside of the text box.
You can edit the text in the text box and adjust its formatting until it looks the way that you want it to look. You can also adjust the size of the text box or rotate it using the controls that surround the text box when it’s selected.
Our tutorial continues below with additional discussion about ways of adding curves to text in Word.
If you see a lot of weird symbols in your document that you can’t remove, then read this how to remove paragraph symbols in Word 2013 article to stop showing all of those different marks.
Frequently Asked Questions About How to Bend Words in Word
Where do I find the different Word Art styles in Microsoft Word?
When you select the Insert tab at the top of the window, you will see a WordArt button in the Text group of the ribbon.
If you click that button it will display the WordArt drop down menu where you can choose from one of the different options that is shown there.
Whichever WordArt icon you select will be applied to the existing text that you used your mouse cursor to select.
How do I add a curved line in Microsoft Word?
If you want to place a curved line in your document instead of choosing to curve or bend text, then you will need to utilize the Shapes tool instead.
You can select the Insert tab at the top of the window, then click the Shapes button in the Illustrations group in the ribbon.
You can then select the Curved line option in the Lines section of the dropdown menu, then draw the line in the document.
Note that the curved line can take some getting used to, as it won’t start curving until you single click your mouse. You can double click your mouse when you are done drawing the curved line, which will create the shape box.
Drawing a line like this in Word takes a little practice, so you might need to try it a couple of times first.
More Information on Curving Text to a Custom Shape in Word
There are a lot of WordArt styles that you can pick from when you are using the Word Art option to create the curved text effect. Plus, you can always go back and choose a different WordArt option or WordArt style after you use the transform option if you don’t like the result.
The placeholder text in a text box can be selected and deleted.
One of the benefits of using a text box to create curved text is that you can move a text box almost anywhere in the Word window, which gives you far more placement options than you have when you use WordArt text.
If you format your curved text and find that you made a mistake, you can undo curved text by pressing the Ctrl + Z keyboard shortcut.
Do you need your curved text to be a specific size? Find out how to show the ruler in Microsoft Word so that you can tell how large part of your document will be when you print it.
Active Time
5 minutes
Additional Time
2 minutes
Total Time
7 minutes
Difficulty
Medium
Materials
- Microsoft Word document
Instructions
- Open the document with the text you want to curve.
- Find the text to curve, or type it.
- Select the text to curve with your mouse.
- Click the Insert tab.
- Choose the Word Art option, then click the text icon that looks the way you want your curved text to look.
- Click the Drawing Tools Format tab at the top of the window.
- Choose the Text Effects option, click Transform, then click a curve type from the options on the menu.
- Adjust the layout options for your curved text.
Notes
After applying the transformation to your text, there will be a text box around it.
— Click the circular arrow to rotate the text box.
— Click one of the white circular anchors to change the size of the text box.
— Click and drag on the orange circular anchor to adjust the curvature of the text.

Kermit Matthews is a freelance writer based in Philadelphia, Pennsylvania with more than a decade of experience writing technology guides. He has a Bachelor’s and Master’s degree in Computer Science and has spent much of his professional career in IT management.
He specializes in writing content about iPhones, Android devices, Microsoft Office, and many other popular applications and devices.
Read his full bio here.
-

1
Open your Word document. Double-click the document in which you want to bend a word or phrase.
-
2
Select a word or phrase. Click and drag your mouse cursor across the word or phrase that you want to bend.
Advertisement
-
3
Click the Insert tab. It’s at the top of the Word window. The Insert toolbar will appear at the top of the window.
-
4
Click WordArt. This option is in the «Text» section of the toolbar. Clicking it prompts a drop-down menu.
-
5
Select a WordArt appearance. Click one of the icons in the WordArt drop-down menu to set it as your selected text’s appearance.
-
6
Click Text Effects. It’s in the «WordArt Styles» section of the Format tab that opens. A drop-down menu will appear.
- If this tab doesn’t automatically open after applying a WordArt appearance to your selected text, click the Format tab before proceeding.
-
7
Select Transform. This option is in the drop-down menu. Selecting it prompts a pop-out menu.
-
8
Click a curved option. You should see four curved options in the «Follow Path» section of the drop-down menu. Click the one you want to use to apply it to your selected text.[1]
- If you want to bend your text around a circular object, click the Rotate option (e.g., the circular text with no word in the middle) in this drop-down menu.
-
9
Adjust your WordArt’s appearance. If you want to change the size and/or curvature of your WordArt word or phrase, do the following:
- Click and drag in or out any of the white dots to shrink or enlarge the word or phrase.
- Click and drag the yellow dot to adjust the curvature of the word or phrase.
-
10
Save your changes. When you’re done adjusting the text, click File and then click Save to save your changes to the document.


Advertisement
Add New Question
-
Question
How do I start a title in MS Word with small letters, gradually increasing the size of the letters to the end of the title?

You have to individually increase the size of the writing by using the «Larger Word» pull-down bar. This is in the Home section of the app.
-
Question
How do I bend heading text in MS Word?
It’s done the same way, just follow the article’s methods.
-
Question
How do I curve a word more/less in MS Word?
Use the yellow dot. The yellow dot is used for adjusting shapes in Word and PowerPoint.
Ask a Question
200 characters left
Include your email address to get a message when this question is answered.
Submit
Advertisement
Video
-
You can also bend words in other Microsoft Office products such as PowerPoint.
Thanks for submitting a tip for review!
Advertisement
-
Applying WordArt to a word or phrase will affect nearby text. For this reason, it’s best to use WordArt on things like titles and headings rather than on a word or phrase in the middle of a paragraph.
Advertisement
About This Article
Thanks to all authors for creating a page that has been read 367,253 times.