
![]()
Download Article
![]()
Download Article
Is your life too rushed or unorganized? Follow the steps below to find out how to make a schedule that will help you organise your life!
-

1
Go to ‘Insert’ in your Word document. Then, click on the button that says ‘Table’, then just go down to ‘Insert Table’.
-
2
Look for a little box with a choice of columns and rows. Plan the table based on your hours; for example, for the columns, type in ‘8’. For the rows, type in ’16’. Unless, of course, you wake up earlier than 8:00am or go to bed later than 9:00pm, in which case you should adjust the columns/rows to fit your daily hours.
Advertisement
-
3
Highlight the top row of the table. Then go ‘Layout’ and click ‘ Merge Cells’.
-
4
Go to the row underneath. Write the days of the week in each cell. You should leave the very first cell because you will be putting each hour of your day in that column.
-
5
Move onto the first column. Begin to type in each hour of your day, still leaving the top cell blank. For example, if you wake at 8:00am, put in the first cell ‘8:00am’; then in the cell beneath that one, type ‘9:00am’, and so on.
-
6
Move into the cell that says ‘Monday, 8:00am’, and begin to write out your daily schedule/routine.
- If, for example, you have a long class that lasts, let’s say, two hours, starting at 10:00am and ending at 12:00pm, then you should highlight those cells and click ‘Merge Cells’ again. Then, click ‘Text Direction’ which will change the direction of the text. Then simply type in the event and… tada!
-
7
Don’t forget your title. The most likely title would be ‘Daily Time Management Schedule’ but you can choose whatever title you want.


Advertisement
Add New Question
-
Question
I need a weekly schedule to know what times I have to be at my client’s houses and what clients on what days.

You should open Word, then go to Insert at the top of the upper left screen. Once you do that, press Table then select how many rows and columns you may need, depending on the clients and the days.
-
Question
How do I make a table in Microsoft Word?
Go into Insert, then Table, and choose how big you want your table to be.
-
Question
Can I adjust my timetable I made in MS Word any time I want to?
Yes, you can just make sure you save afterwards. Move the lines around if you need more space. Insert cell columns or rows in you left something out or even move whole tasks to other times/days.
Ask a Question
200 characters left
Include your email address to get a message when this question is answered.
Submit
Advertisement
-
Use funky fonts and colours to make your schedule look cool.
-
Try to focus on 2–3 things that you want to accomplish each day since it’s a more manageable goal than completing your full to-do list.
Advertisement
About This Article
Thanks to all authors for creating a page that has been read 117,418 times.
Is this article up to date?
Blog
Schedules are important tools for time management that can be used by individuals and organizations alike. This provides users with a list of tasks, deadlines, activities, and other important matters they should take note of.

Table of Content
- Build a Schedule Template for Microsoft Word – Step-by-Step Instructions
- Schedule Templates & Examples in Microsoft Word
- Weekly Restaurant Cleaning Schedule Template
- Event Program Schedule Template
- Work Shift Schedule Template
- Employee Training Schedule Template
- Residential Construction Project Schedule Template
- Electrical Panel Schedule Template
- Editable Rent Schedule Design
- Yearly Meeting Schedule Template
- Basic Payroll Schedule Template
- Rent Payment Schedule Template
- Class Schedule School Planner Template
- University Weekly Schedule Template
- Modern Daily Schedule Template
- Monthly Work Schedule Template
- Sample Time Schedule Template
- Printable Hourly Schedule Template
- Free Student Study Schedule Template
- Free Elementary School Schedule Template
- Free Preschool Schedule Creative Template
- Business Event Schedule Template
- Project Schedule Calendar Template
- Sample Gym Schedule Template
- Simple Contract Payment Schedule Design
- FAQs
Build a Schedule Template for Microsoft Word – Step-by-Step Instructions
Microsoft Word or MS Word, founded and launched in 1983, is one of the most widely used word-processing applications in the world. Users can create, edit, and print their reports, research papers, planning documents, schedules, and other business, academic and personal documents.
Step 1: Open Microsoft Word

First, you need to open the Microsoft Word application found on your desktop, laptop, or digital device. This is where you will edit and save your documents.
Step 2: Search for a Schedule Template (Option 1)

Look for a schedule template you can edit on Template.net. You will find a wide selection of templates in different layouts and designs that will cater to different types of scheduling documents.
Step 3: Search Text Box (Option 2)

As an alternative, you can use the search text box to look for a general or specific type of schedule template. Just type in the keyword in the text box.
Step 4: Pick Out a Schedule Template to Edit

Pick out a schedule template that will fit your requirements and click on the image to obtain a much larger view.
Step 5: Select a File Format and Download the Template

In order to access the template on MS Word, make sure you select it as its file format. After that, you can now download the template.
Step 6: Save the Zip File

Once you click download you will be downloading a ZIP file. Save the file on your laptop or personal computer.
Step 7: Add a Header

On the uppermost portion, add a header or a title so that readers can identify what the document is all about. Larger font sizes on Microsoft Word and bold lettering are usually used to write down titles/headers.
Step 8: Insert a Table and Add Colors

To organize the details found in a schedule document, incorporate columns and rows by adding a table in Microsoft Word. Also adding background colors to a particular column or row helps readers separate one piece of information from the other making it more organized and pleasing to look at.
Step 9: Add the Details To the Template

Right after adding a table, it’s time to write down the details in the template. Like most schedule documents this should include the date and time and details and remarks pertaining to each schedule.
Step 10: Save the Template

After editing the template it’s time to save the template to your digital device. Click on the File tab, and on the drop-down menu, you can simply select the ‘Save’ button to directly save the file. Or select the ‘Save As’ button to change the file name and select a specific location where you want to save the document and then print the template in Microsoft Word.
Schedule Templates & Examples in Microsoft Word
A schedule is one of the most widely used documents that help organize one’s tasks, activities, travels, and events. That said, there are different kinds of schedule templates that can inspire you to create this management tool to keep you right on track and set your priorities straight.
Weekly Restaurant Cleaning Schedule Template

Cleanliness is one of the main priorities of those in the food service industry. Thus a weekly restaurant cleaning schedule ensures that the establishment remains clean and hygienic not just for the staff but more importantly for the customers as well.
Event Program Schedule Template

An event program schedule is a tool used by event planners to organize activities and their deliverables. This document is also given to guests so they would know what to expect during the said event.
Work Shift Schedule Template

A work shift schedule is used by management to organize their employee’s work schedule. This is particularly important for companies that manage more than one shift to ensure that everyone is accounted for.
Employee Training Schedule Template

Download
Residential Construction Project Schedule Template

Download
Electrical Panel Schedule Template

Download
Editable Rent Schedule Design

Download
Yearly Meeting Schedule Template

Download
Basic Payroll Schedule Template

Download
Rent Payment Schedule Template

Download
Class Schedule School Planner Template

Download
University Weekly Schedule Template

Download
Modern Daily Schedule Template

Download
Monthly Work Schedule Template

Download
Sample Time Schedule Template

Download
Printable Hourly Schedule Template

Download
Free Student Study Schedule Template

Download
Free Elementary School Schedule Template

Download
Free Preschool Schedule Creative Template

Download
Business Event Schedule Template

Download
Project Schedule Calendar Template

Download
Sample Gym Schedule Template

Download
Simple Contract Payment Schedule Design

Download
FAQs
How do I create a schedule template in Word?
To create a schedule template in MS Word, download a template from Template.net and open the document in MS Word to begin customizing.
Why do we use schedule templates?
We make use of schedule templates because these are pre-designed documents which makes it easier for anyone else to organize their scheduling plans.
What are the important elements found in a schedule template?
A schedule template should consist of an outline of tasks, dates and times, deliverables, deadlines, and other relevant information.
More in Blog
| 20+ Weekly Schedule Templates | Excel Calendar Schedule Template — 15+ Free Word, Excel, PDF Format Download! |
| 12+ Weekly Schedule Templates | Blank Schedule Template — 23+ Free Word, Excel, PDF Format Download! |
| 34+ Payment Schedule Templates — Word, Excel, PDF | 15+ Production Schedule Templates |
| 16+ Project Schedule Templates | School Schedule Template — 19+ Word, Excel, PDF Format Download! |
| Shift Schedule Template — 20+ Free Word, Excel, PDF Format Download! | 11+ Film Shooting Schedule Templates |
| Amortization Schedule Template — 13+ Free Word, Excel, PDF Format Download! | 21+ Study Schedule Templates |
For those who do not really know what we are talking about, it is worth mentioning that a schedule is a graphic tool that helps us in these tasks. The reason for this is that this element, if properly designed, offers us in detail the activities that must be carried out in the times that we have indicated. This means that, if we create our schedule correctly in principle, and keep it updated, it will be very useful to us.

In fact, for many these types of objects are essential when carrying out a series of activities or projects with different phases. For this we can use a multitude of tools and applications, but below we will show you how to do this in the Microsoft Word text editor. Keep in mind that this is a functional office program that offers us a multitude of additional features. In these lines we are going to show you two functions that will be useful to us to create a schedule.
Create a timeline in Word with SmartArt
The first thing we are going to show you is how to create these custom task management layouts through the SmartArt feature . We can use it for a multitude of organizational tasks at a graphic level . The text editor itself offers us a multitude of designs in this section, which allows us to choose the one that best suits our needs. To access this element we only have to go to the Insert / SmartArt menu.
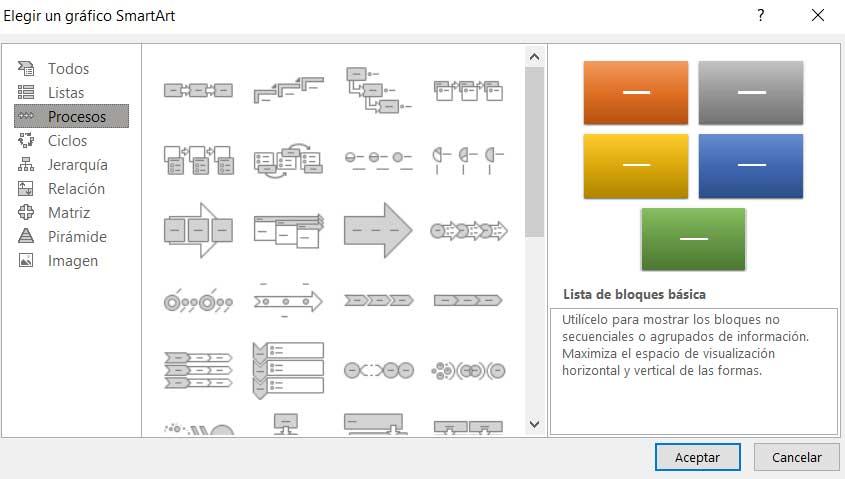
In the new window that appears, we only have to choose the design that most interests us depending on the type of schedule that we want to create. In addition, we must take into account that this is a completely customizable element in terms of its appearance.
These are changes that we can carry out once the object appears in our Word document. However, this method has a significant drawback compared to the next one that we are going to talk about. And it is that, if we create a schedule with the SmartArt function, in the future we will not have the possibility of expanding it .
Use the Table function for planning
But it may be the case that we need to design a schedule to plan certain tasks in Word, but that it is variable. That is to say that we can eliminate or insert new boxes as time goes by. While the aforementioned SmartArt feature won’t allow us to do this, the second method we’re talking about is through the Table feature .
We find this in the menu option called Insert / Table, where the first thing we do is define the number of rows and columns that our schedule will have.
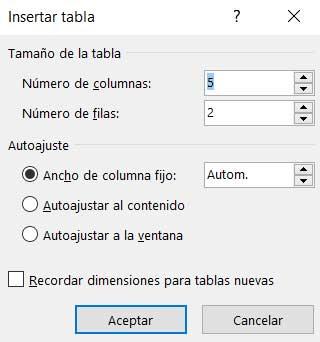
From there, we recommend starting to fill in the fields with the corresponding planning data . For example, in the first column we can set all the tasks that must be carried out. In the same way, the first row could integrate either the participants in the schedule, or the deadlines to be met. Everything will depend on the type of design that we want to use. The interesting thing about this method is that at any time we have the possibility of adding or deleting rows or columns to the schedule that we are designing.
Содержание
- 1 Вставка шаблона календаря в документ
- 2 Редактирование шаблонного календаря
- 3 Помогла ли вам эта статья?
- 4 Метод 1 Шаблоны
- 5 Метод 2 Вручную
В наше время очень легко купить календарь на следующий год на рынке или в магазине. Их выбор достаточно большой: карманные и настенные, в виде блокнота или перекидные, также отличаются цвета, рисунки и сама бумага. Но если Вы хотите, чтобы он был уникальный, например, с фотографиями близких или друзей, с отмеченными датами, важными именно для Вас, нужного размера, тогда все можно сделать самим.
Вот в этой статье мы научимся, как сделать календарь в Ворде, используя для этих целей один из готовых шаблонов, который немного изменим, чтобы результат порадовал Вас или другого человека, которому Вы подарите свою работу.
Откройте редактор Microsoft Word, сделать это лучше всего через Пуск или соответствующий ярлык на Рабочем столе. У меня установлен 2010, в других версиях может немного отличаться вид меню, но принцип создания будет такой же. Вверху выберите «Файл», а слева пункт «Создать». Пролистайте открывшийся список немного вниз и нажмите по пункту «Календари».

Затем нужно определиться с шаблоном. Календарь будет размещен на листе книжной или альбомной ориентации, показан полностью или один только месяц, и подобное. Если хотите чтобы календарь был на конкретный год, тогда воспользуйтесь строкой поиска.
Если через поиск Вы не нашли нужный год, тогда можно сделать по-другому. Например, даты и дни недели полностью совпадают в 2007 и 2018 году. Значит, ищите его на 2007, а потом просто поменяете данное число на нужное.

После того, как определитесь с видом, выделите нужный шаблон. Он откроется справа в области предварительного просмотра. Там же будет кнопочка «Загрузить» – нажмите на нее. После того, как загрузка закончится, выбранный календарь откроется в Ворде. Здесь с ним можно работать, как и с любым другим документом: изменять цвет, размер, фон и прочее.

Если у Вас установлен Ворд 2016, тогда перейдя вверху на «Файл» и выбрав пункт «Создать», окошко будет иметь такой вид. В строке «Поиск шаблонов» можно найти подходящий в Интернете, или нажмите на слово «Календари».

Если нужно, то через поиск выберите подходящий год, выделите шаблон и скачайте его.

Просмотреть все доступные варианты календарей, можно на официальном сайте Microsoft Office: Перейдя по ссылке, откроется страница с шаблонами. Внизу каждой миниатюры будет написано Word, Power Point, Excel, это редактор, в котором он откроется (то есть, в нем был создан). Выбирайте один из календариков, сделанных в Ворде, и жмите по нему.

Теперь нужно скачать файл – нажмите на соответствующую кнопку.

После этого, заходите в папку Загрузки на компьютере и открывайте только что скачанный документ. У меня его название было странное, на скриншоте видно – набор букв и цифр.
Теперь нужно выйти из режима защищенного просмотра. Кликайте по кнопке «Разрешить редактирование».

Календарь откроется в привычном нам Ворде и с ним можно работать, как и с любым другим документом. Если не нужны какие-то блоки с рисунками, выделите их по очереди и удалите, нажав «Delete».

Поменяйте год. Если страниц в календаре, который Вы выбрали несколько, например, 12 или 6, то его менять нужно на каждой отдельно.

Поскольку создан он с использованием таблицы, то, чтобы легче было работать, включите видимость непечатаемых знаков. На вкладке «Главная» есть специальная кнопка.

Еще удобно отобразить сетку, чтобы видеть границы таблицы. Поставьте курсор возле любой даты, и на вкладке «Работа с таблицами» – «Конструктор» выберите «Границы» и нужный пункт в выпадающем списке.

Если хотите изменить ширину и высоту ячеек для дат, месяца, или дней недели, тогда делать это удобно на вкладке «Макет». Выделяйте ячейки и указывайте конкретные значения для них в соответствующих полях.

В том случае, если Вы выбрали шаблон, в котором даты и дни недели не соответствуют подходящему году, нужно поменять числа в ячейках. Ставьте курсив в ячейку, удаляйте старое значение и пишите новое. Для перехода воспользуйтесь кнопкой «Tab» (находится слева на клавиатуре, на ней нарисованы стрелочки в разные стороны). Она автоматически перенесет курсив в следующую ячейку, и можно будет набрать число.

Если в соседней ячейке было вписано значение, оно автоматом выделится и останется только напечатать новое.

После того, как измените размеры ячеек, поменяете числа, размеры таблицы, можно отключить непечатаемые знаки и на вкладке «Макет» убрать выделение с пункта «Отобразить сетку».

Переходим к изменению внешнего вида календаря. В статье форматирование в Ворде, прочтите, как изменить шрифт и размер букв, сделать его курсивом или жирным, поменять цвет и другое.
Выберите другой шрифт для названия месяцев. Сначала выделяйте его, а потом ищите нужный в списке.

Поменяйте размер дат. Выделяйте их по очереди в каждом месяце и выбирайте подходящее значение.

Точно так же увеличьте или уменьшите названия дней недели, смените для них шрифт.

Если Вы выбрали простой шаблон, залейте страницу цветом. На вкладке «Разметка страницы» кликните по стрелке на кнопке «Цвет страницы» и выберите из списка подходящий.
Вместо однотонного цвета, можно установить картинку фоном для календаря. Как поставить рисунок в качестве фона в Ворде, я описала в соответствующей статье.

Выбирать изображение для фона нужно осторожно, чтобы на нем были видны все даты. Или на вкладке «Главная» измените цвет текста для цифр, месяцев и дней недели.

Чтобы выделить название месяца, залейте эту ячейку цветом. Выделите его, и в меню быстрого доступа нажмите на ведерко с краской, потом кликните по подходящему варианту.

Вот такой календарь получилось создать у меня в Ворде, во время написания статьи. Вы можете добавить на него фото близких, тогда это будет интересный подарок. Вставьте надписи, она у меня вверху слева. Как сделать надпись в Ворде, есть отдельная статья на сайте.

В общем, все, что относится к оформлению, полностью зависит от фантазии. Главное, чтобы на выбранном фоне хорошо было видно месяц и даты. Изменяйте их размер, цвет, шрифт, заливайте ячейки. Не забудьте сделанный календарь, и, думаю, он обязательно понравится тому, для кого был сделан, или просто будет висеть в офисе или дома и радовать глаз.
Поделитесь статьёй с друзьями:

В Microsoft Word есть большой набор шаблонов документов разного типа. С выходом каждой новой версии программы этот набор расширяется. Те же пользователи, кому и этого покажется мало, могут скачать новые с официального сайта программы (Office.com).
Урок: Как в Ворде сделать шаблон
Одной из представленных в Word групп шаблонов являются календари. После добавления в документ их, конечно же, нужно будет подредактировать и подстроить под собственные нужды. Именно о том, как все это сделать, мы и расскажем вам в данной статье.
Вставка шаблона календаря в документ
1. Откройте Ворд и перейдите в меню “Файл”, где необходимо нажать на кнопку “Создать”.

Примечание: В последних версиях MS Word при запуске программы (не готового и ранее сохраненного документа), сразу открывается необходимый нам раздел “Создать”. Именно в нем мы и будем искать подходящий шаблон.
2. Чтобы долго не искать все шаблоны календарей, доступные в программе, тем более, что многие из них хранятся в вебе, просто напишите в строке поиска “Календарь” и нажмите “ENTER”.
3. В списке параллельно со встроенными шаблонами будут также показаны и те, что находятся на сайте Microsoft Office.
Выберите среди них понравившийся шаблон календаря, нажмите “Создать” (“Скачать”) и дождитесь, пока он будет скачан из интернета. Это может занять некоторое время.
4. Календарь откроется в новом документе.
Примечание: Элементы, представленные в шаблоне календаря, можно редактировать точно так же, как и любой другой текст, меняя шрифт, форматирование и другие параметры.
Урок: Форматирование текста в Ворде
Некоторые шаблонные календари, доступные в Word, автоматически “подстраиваются” под любой, указанный вами год, черпая необходимые данные из интернета. Однако, некоторые из них придется изменять вручную, о чем мы подробно расскажем ниже. Ручное изменение также необходимо и для календарей за уже прошедшие года, которых в программе тоже немало.
Примечание: Некоторые календари, представленные в шаблонах, открываются не в Ворде, а в Excel. Инструкция, описанная в этой статье ниже, применима только для вордовских шаблонов.
Редактирование шаблонного календаря
Как вы понимаете, если календарь автоматически не подстраивается под необходимый вам год, сделать его актуальным, правильным придется вручную. Работа, конечно, кропотливая и продолжительная, но оно явно того стоит, ведь в результате вы получите уникальный календарь, созданный своими руками.
1. Если на календаре указан год, измените его на текущий, следующий или любой другой, календарь для которого вы хотите создать.
2. Возьмите обычный (бумажный) календарь на текущий или тот год, календарь для которого вы создаете. Если календаря нет под рукой, откройте его в интернете или на мобильном телефоне. Вы также можете ориентироваться на календарь на компьютере, если вам так будет удобнее.
3. А теперь самое сложное, точнее, самое продолжительное — начиная с января месяца, измените даты во всех месяцах в соответствии с днями недели и, соответственно, календарем, на который вы ориентируетесь.
В нашем примере вместо выделенной цифры 1 (первое февраля) будет установлена 5, соответствующая первой пятнице февраля 2016 года.
Примечание: Переключаться между месяцами с помощью клавиши “TAB”, к сожалению, не получится, поэтому делать это придется с помощью мышки.
4. Изменив все даты в календаре в соответствии с выбранным вами годом, вы можете перейти к изменению стиля оформления календаря. При необходимости, вы можете изменить шрифт, его размеры и прочие элементы. Воспользуйтесь нашей инструкцией.
Урок: Как в Word изменить шрифт
Примечание: Большинство календарей представлены в виде цельных таблиц, размеры которых можно изменять — достаточно потянуть за угловой (правый нижний) маркер в нужном направлении. Также, эту таблицу можно переместить (плюсик в квадрате в левом верхнем углу календаря). О том, что еще можно сделать с таблицей, а значит, и с календарем, находящимся внутри нее, вы можете прочесть в нашей статье.
Урок: Как сделать таблицу в Ворде
Сделать календарь более красочным можно с помощью инструмента “Цвет страницы”, который меняет ее фон.
Урок: Как в Word изменить фон страницы
5. В конечном итоге, когда вы выполните все необходимые или желаемые манипуляции по изменению шаблонного календаря, не забудьте сохранить документ.
Рекомендуем включить функцию автосохранения документа, которая предостережет вас от потери данных в случае сбоев в работе ПК или при зависании программы.
Урок: Функция автосохранения в Ворде
6. Обязательно распечатайте созданный вами календарь.
Урок: Как в Word документ
Вот, собственно, и все, теперь вы знаете, как сделать календарь в Ворде. Несмотря на то, что мы с вами использовали готовый шаблон, после всех манипуляций и редактирования на выходе можно получить действительно уникальный календарь, который не стыдно будет повесить дома или на работе.
Мы рады, что смогли помочь Вам в решении проблемы.
Задайте свой вопрос в комментариях, подробно расписав суть проблемы. Наши специалисты постараются ответить максимально быстро.
Помогла ли вам эта статья?
Да Нет
2 метода:ШаблоныВручную
Благодаря данной статье вы узнаете, как создать календарь в программе Microsoft Word на ПК под управлением Windows или Mac. Потребуется использовать шаблон календаря от Microsoft, чтобы быстро справиться с задачей, или создать календарь вручную с помощью таблицы.
Метод 1 Шаблоны
-
Запустите Microsoft Word. Найдите темно-синюю иконку с белой буквой «W».
- Нажмите строку поиска.
Она находится в верхней части окна Word.
- На компьютерах Mac сначала нажмите Файл в левом верхнем углу, затем выберите Создать из шаблона… в выпадающем меню.
- Напечатайте календарь и нажмите клавишу ⌅ Enter.
Эта команда выполнит поиск шаблона календаря в магазине шаблонов.
- Данный шаг невозможно выполнить, если отсутствует подключение к интернету.
-
Выберите шаблон календаря. Нажмите на желаемый календарь, после чего откроется страница календаря.
- Нажмите Создать.
Кнопка находится справа от календаря. После этого произойдет загрузка шаблона.
- Если нужно включить макросы, выберите Включить макросы, чтобы вам было проще сделать дополнительные календари для последующих месяцев и дат.
-
Дождитесь, пока календарь загрузится. Когда загрузка шаблона будет завершена, он автоматически откроется в Microsoft Word.
Метод 2 Вручную
-
Запустите Microsoft Word. Найдите темно-синюю иконку с белой буквой «W». Откроется домашняя страница программы Word.
- Нажмите Новый документ.
Этот пункт находится в левой верхней части домашней страницы.
- Пропустите этот шаг для Mac.
-
Укажите месяц. Напечатайте название месяца, для которого нужно создать календарь, а затем нажмите ⌅ Enter. Благодаря этому название месяца будет указано над календарем.
-
Откройте вкладку Вставка. Вкладка находится на синей ленте в верхней части окна Word. Под лентой отобразится панель инструментов вкладки Вставка.
-
Нажмите Таблица. Раздел «Таблицы» также находится на этой панели.
-
Создайте таблицу. Перетащите курсор мыши на семь клеток вправо и семь (или шесть, зависит от месяца) клеток вниз, затем нажмите левую кнопку. На странице появится таблица 7х6 (или 7х7) ячеек, которая станет вашим календарем.
- Укажите дни недели.
В верхнем ряду ячеек укажите название дня недели для каждого столбца.
- Например, напечатайте «Понедельник» в левой верхней ячейке, «Вторник» — справа от нее и так далее.
-
Увеличьте размеры ячеек. Начиная с третьей горизонтальной линии от верха календаря, зажмите и потащите линию вниз, чтобы увеличить вторую строку ячеек. Повторите действие для всех строк календаря, пока они не станут подходящего размера.
-
Добавьте числа. Выберите ячейку, которая соответствует первому дню месяца, введите 1, нажмите клавишу Tab ↹ и введите оставшиеся числа.
-
Внесите необходимую информацию. Когда все числа будут указаны, добавьте в календарь свои события, праздники, встречи и другую информацию. Выберите ячейку с соответствующей датой и нажмите клавишу ⌅ Enter, чтобы начать с новой строки, затем введите название и детали события.
-
Создайте другие месяцы. Добавьте в календарь другие месяцы. Поставьте курсор ниже текущего месяца и пару раз нажмите клавишу ⌅ Enter, а затем повторите все вышеописанные действия.
-
Сохраните календарь. Нажмите клавиши ^ Ctrl+S (Windows) или ⌘ Command+S (Mac), затем выберите подходящее место, введите название календаря и нажмите Сохранить.
Информация о статье
Категории: Microsoft Word
На других языках:
English: Make a Calendar in Word, Español: hacer un calendario en Word, Italiano: Creare un Calendario in Word, Português: Fazer um Calendário no Word, Deutsch: In Word einen Kalender erstellen, Bahasa Indonesia: Membuat Kalender di Word, 中文: 在Word中制作日历, Français: créer un calendrier avec Microsoft Word, Nederlands: Een kalender maken in Word, Čeština: Jak ve Wordu vytvořit kalendář, ไทย: สร้างปฏิทินด้วยโปรแกรม Word, Tiếng Việt: Tạo lịch với Word, العربية: إنشاء تقويم في برنامج وورد
- Печать
- Править
- Написать благодарственное письмо авторам
Эту страницу просматривали 67 251 раз.
Была ли эта статья полезной?
【 Make Schedule in Microsoft Word 】 Step by Step Guide ▷ 2022
when you need create a schedule to follow all your projects, you can use Microsoft Word without any problem. With this program you will be able to carry out this task in a quick and easy.
For your work to have a professional result, you should know all the secrets of using the schematic tool. This will allow you to choose the best option for you.
If you want to know in detail the steps you must take, we invite you to read this article until the end. We will also teach you some tips that you should keep in mind when making an efficient schedule.
Outline or SmartArt? What is the best tool to make schedules in Word?
although, with you will have a much better and more striking preset format, you will not have the possibility of incorporating other options into your schedule. So it is always convenient to carry out this type of task by means of a scheme.
With this last tool you will be able to choose the number of rows and columns what will your timeline. In addition, if you have made a mistake in the calculation, you can add or remove any element in a simple way.
Finally, when you choose the scheme as a work tool, you can give it a different one through the “Design” menu and so you will get a schedule with incredible results.
Steps to make a schedule for your projects in Word easy and fast
The steps you must take to create a schedule for your projects are the following:
- The first thing you should do is establish the priorities that your schedule will have. That is, you will have to put all the activities that you will carry out during the days of the week. Then, you must choose if you want to add hours to the table or directly do it for a full day.
- Choose the place within the document in which you will add the schedule.
- Then click on the menu “Insert” and then click on “Table”which is the only function inside the group “Boards”.
- A window will appear in which you can choose the amount of that you can enter Choose the items you need. Do not worry if you do not calculate correctly, since you will be able to add or remove cells anytime.
- Suppose you have 4 activities and that you will do it from Monday to Friday. you will have to choose 5 rows and 6 columns.
- In case you want to add morning and afternoonyou will have to add one more column.
- Leave the first cell free and start typing the days of the week in each of the column header cells.
- Then enter the name of the activities in the first column. Do not forget that the first cell must be free.
- When you’re done, you’ll be able to choose a format for the . To do this, you will have to select it and go to “Design”then choose the border style, color and any other elements you want to modify.
To split the row, you’ll need to address the function “Table” and then click on “Draw Table”. You will see that the pointer has turned into a pencil, you will have to draw a line in the middle of each cell so that every day has 2 divisions.
In the first row you can also use the function “He drew” and form a diagonal. You can write days and activity in the first cell you left empty. In this way, you can have a double entry box in a professional manner.
Tips to make your schedules and better organize your projects
When you want to make a schedule you will have to take into account these tips:
Adaptable
This is one of the features that you should arrange your schedule in relation to the tasks that you want to put in it. By this we mean that the painting you make, it should fit all the projects you want to include in it.
This will allow you to have, in an orderly way, all the activities and thus be able to organize them in a simpler way.
It should be easy to read
This is another of the points that you will have to take into account when making your schedule. If you include too many elements in the two-entry table, you will have the inconvenience that you will lose yourself, visually.when following the projects.
In this way, so that you schedule meets targetyou should design it in a simple way so that it is easy and quick to read.
Summarized
Many people put more detail into their schedules than they need to. You’re actually going to have to create a table that allows you to put all the information you need about your projects, but in a summarized way.
With this you will gain efficiency, since you will be able to have all the events controlled.
Size
A schedule should be useful to you. Therefore, the size of the table that you have designed should be practical enough so that you do not have problems when moving it. You must bear in mind that it cannot be small either, since you will lose sight of a project that you have entered in the box.
Also, if you are not going to print it and you will have it together with a text of a document, you should consider that the size does not exceed the print margins of the pages. Since, in this way, it would not be neat and could affect the reading of the rest of the writing.
Cash
Beyond the above advice, You should keep in mind that the schedule has to be effective to fulfill the purpose for which you have designed it. That is, you will have to take into account its colors, its style, the typography of the letters and any other point that helps to increase its efficiency.