
How To Insert Picture Frame Or Canvas In Word? There are a few ways to insert a picture frame or canvas in Microsoft Word. One way is to go to the Insert tab and select the Picture Frame button. This will give you a variety of frame options to choose from. Another way is to go to the Insert tab and select the Picture button. This will give you a variety of picture options, including frames and canvases.
How do you insert a new drawing canvas in Word? To insert a new drawing canvas in Word, you can go to the Insert tab and select Drawing. Then, you can choose the desired shape to insert.
How do I insert a picture into a canvas in Word? There is no direct way to insert a picture into a canvas in Word. However, you can copy and paste the picture into the canvas.
How do I insert a canvas in Word? To insert a canvas in Word, go to the Insert tab and click on the Drawing Tools Format tab. Then, click on the Insert Canvas button and select the size of the canvas.
Frequently Asked Questions
How Do You Add A Picture On Top Of A Video In Imovie?
To add a picture on top of a video in iMovie, you need to import the picture into iMovie and then drag it to the timeline.
How Do You Make Two Boxes In Word?
There are several ways to make two boxes in Microsoft Word. One way is to use the text box feature. To do this, click on the insert tab and then select text box. Another way is to use the table feature. To do this, click on the insert tab and select table. Then, create a two-by-two table. Finally, another way is to use the border feature. To do this, click on the design tab and select border. Then, draw a box around the text you want to be in the box.
Where Is The Drawing Canvas In Word?
There is no drawing canvas in Word.
How Do I Make Boxes Around Boxes In Word?
There are a few ways to do this. One is to use the border tool in Word, which allows you to draw boxes around boxes. Another way is to use tables, which can be formatted to create boxes around other boxes. Finally, you could use text boxes, which can be placed around other boxes to create frames.
What Is A Drawing Canvas In Microsoft Word?
A drawing canvas is a Microsoft Word feature that enables you to create drawings and diagrams. It consists of a grid with drawing tools that allow you to draw lines, shapes, and text.
How Do You Put A Picture In A Frame?
There are a few ways to put a picture in a frame. You can use a frame with a built-in mount, like a poster frame, or you can use a mat and frame. If you’re using a mat and frame, first cut the mat to the same size as the picture. Then, place the picture face down on the mat and trace around it with a pencil. Cut out the traced area with scissors, then place the picture face up in the frame.
How Do You Use Frame Canva?
Frame Canva is a web-based design platform that helps users to easily create professional designs, including digital artwork, online graphics, and posters. Frame Canva offers a wide variety of templates and tools to help users easily create their desired designs.
How Do You Put A Picture In Front Of A Video?
There are a few ways to do this. One way is to use the Picture in Picture (PiP) feature on your device. This will allow you to have a small window of the video playing while you browse other apps or watch something else. Another way is to use an app like Facebook or Instagram. These apps allow you to post a picture and then include a short video clip that will play automatically when someone scrolls over it.
How Do You Overlay Text Boxes In Word?
There are a few ways to overlay text boxes in Microsoft Word. One way is to select the text box you want to overlay, and then use the Format tab to change the transparency setting. You can also copy and paste text boxes, and then use the Arrange tab to stack them on top of each other.
How Do You Insert A Drawing Canvas In Word?
There are a few ways to insert a drawing canvas in Word. One way is to go to the Insert tab and select Drawing. This will give you a number of options, including a blank canvas. You can also drag and drop an image from your computer onto the document. If you have an image that you want to use as a canvas, you can copy and paste it into the document.
How Do You Put A Picture In A Video Frame?
You can put a picture in a video frame by importing the picture into the video editing software and placing it in the correct spot in the timeline.
How Do You Get The Drawing Feature On Word?
There is no built-in drawing feature on Microsoft Word, but you can use a third-party plugin to add this functionality. One popular plugin is called Drawboard PDF.
Where Is The Drawing Toolbar In Word 2013?
The drawing toolbar is one of the toolbars in Word 2013. It is located below the menu bar and above the ribbon. It contains tools for creating and editing drawings and graphics.
How Do You Insert A Picture Into A Video?
There are a few ways to insert a picture into a video. One way is to import the picture into the video editing software and then drag it into the timeline. Another way is to use the Picture in Picture effect to insert the picture into the video.
How Do I Enable Drawing In Word?
In order to enable drawing in Microsoft Word, you first need to install the software. Once it is installed, open the application and click on the “Drawing Tools” tab. Click on the “AutoShape” button and select a shape to insert into your document. To draw a freeform shape, click on the “AutoShape” button and then select the “Drawing Tools” tab.
How Do I Make A Picture Frame In Word?
There are a few ways to make a picture frame in Word. One way is to create a border around the picture using the draw tool. Another way is to use a table and insert the picture into the table. Then, create a border around the table.
How Do You Attach A Drawing To A Canvas?
To attach a drawing to a canvas, use masking tape or another type of adhesive to attach the drawing to the back of the canvas.
How Do I Put A Box Inside A Box In Word?
In Microsoft Word, you can create a box by selecting the “Box” tool from the Drawing toolbar. To create a box within a box, first create a basic rectangular box and then use the “Shape Outline” tool to create a smaller rectangular box inside of the first one.
How Do I Use Word Canvas?
Word canvas is a Microsoft Word add-in that allows you to create custom menus and toolbars for quick access to the commands and features you use most often. To use word canvas, open Microsoft Word and go to the Tools menu. Select Add-Ins, then select Word Canvas. The Word Canvas toolbar will appear on the screen. You can then customize the toolbar by adding or removing commands.
How Do I Do A Simple Frame In Word?
There are a few ways to do frames in Microsoft Word.
One way is to create a table and insert a border around the table.
Another way is to create a text box and insert a border around the text box.
Can You Add A Picture On Top Of A Video In Imovie?
Yes, you can add a picture on top of a video in iMovie by importing the picture into the project and then placing it where you want it in the timeline.
Can You Insert A Picture Box In Word?
Yes, you can insert a picture box in Word.
How Do I Make My Word Document Look Like A Picture?
There are a few ways that you can make your Word document look like a picture. One way is to insert an image into the document and then set the image to be in landscape orientation. Another way is to create a text box and format it to look like a picture.
How Do You Make A Word Document Look Like A Magazine?
There are a few ways to make a Word document look like a magazine. One way is to use the built-in Publisher program to create a magazine layout. Another way is to use special formatting features in Word to create a magazine-style layout.
How Do I Use Canvas In Word?
The Microsoft Word 2013 help file has a tutorial on using the canvas feature. The help file is available from the ‘File’ tab on the Ribbon, and then select ‘Help’. Under ‘Search all of Office’, type ‘canvas’ and then select ‘Canvas (pictures) in Word’. The help file will provide instructions on how to insert a picture into a document, resize it, and then move it to the desired location.
There are a few ways to insert a picture frame or canvas in Microsoft Word. One way is to click on the Insert tab and then select the Picture Frame icon. Another way is to select the Insert tab and then select the Picture icon. A third way is to right-click on the desired location in your document and select the Insert Picture option. After you have inserted your picture, you can resize it by clicking and dragging one of the corner handles.
Download PC Repair Tool to quickly find & fix Windows errors automatically
What if you want to put a picture into a shape to create a collage or any other creation? Microsoft Word has tools that allow this to happen. Shapes in Microsoft Office are ready-made shapes offered by Office for users to use in their documents, such as circles, squares, and arrows. In this tutorial, we will explain how to:
- Inserting Pictures into shape.
- Crop the Picture inside the shape.
- Crop Picture into shape.
Open Microsoft Word
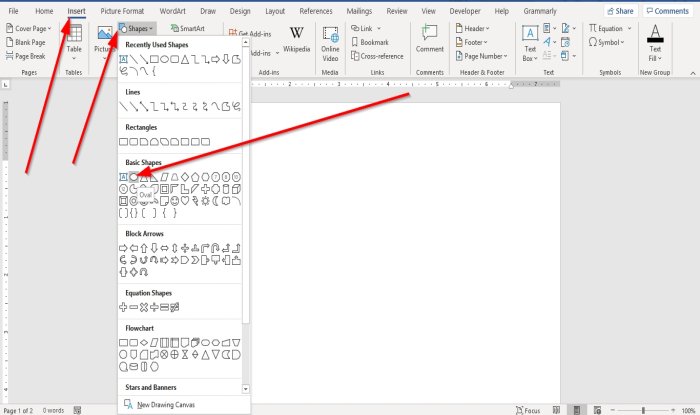
Go to the Insert tab in the Illustration group, select Shapes.
In the Shapes drop-down list, choose an oval or any other shape you desire.
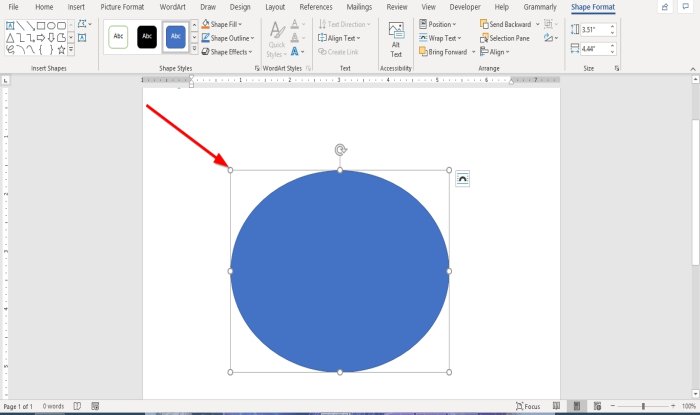
Now draw the shape into the document.
To make the shape bigger, drag the points on the end of the shape.

When a shape is drawn into the document, a Shape Format tab will appear.
Click the Shape Format tab.
On the Shape Format tab in the Shape Styles group, select the Shape Fill Tool.
In the Shape Fill, drop-down list, select Picture.
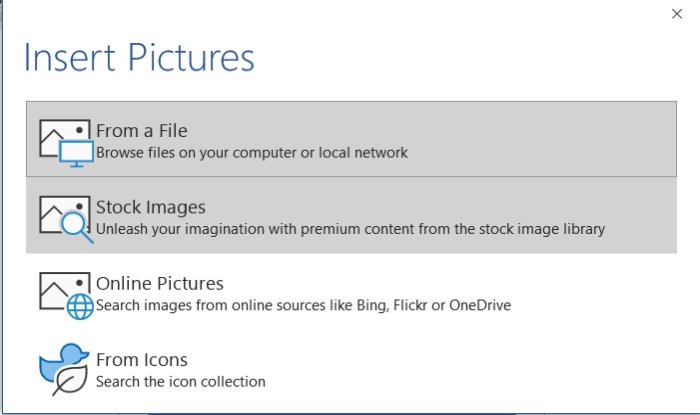
An Insert Picture dialog box will pop up.
Choose From a File.
When you select From a File, an Insert Picture window will appear, select your desired picture file and click Insert.
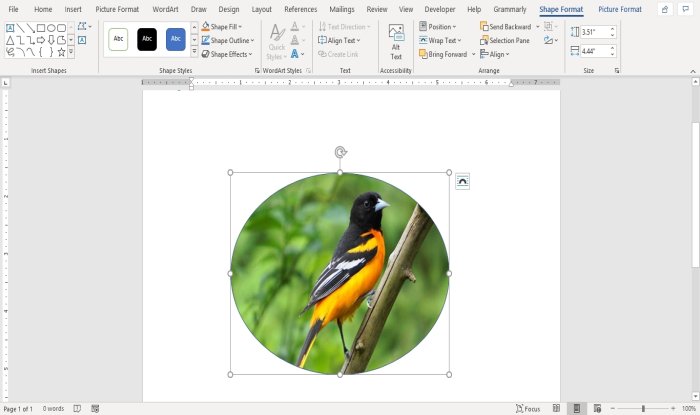
The picture is inserted into the shape.
Crop the Picture inside the shape
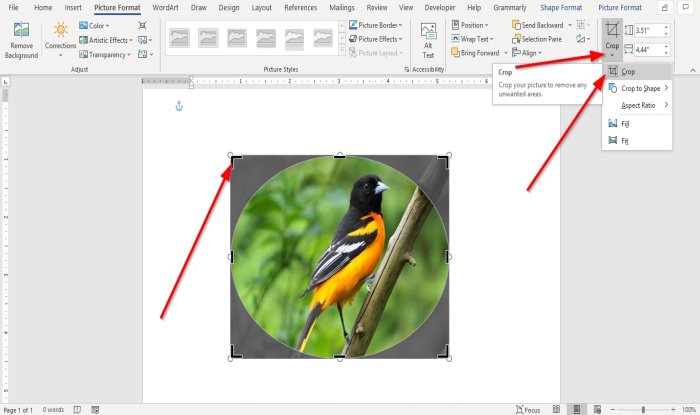
Click on the shape containing the picture.
Go to the Picture Format tab in the Size group and Click Crop.
In the Crop drop-down list, select Crop.
You will see pointers at the end of the image to crop the image.
Crop Picture into shape
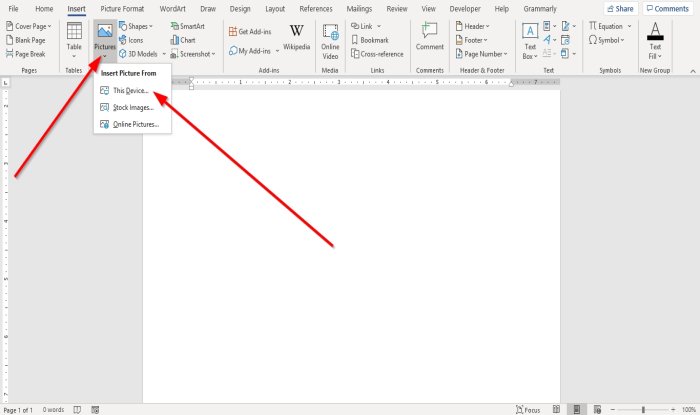
Go to the Insert tab and click Pictures in the Illustration group.
In the Picture drop-down list, click This Device.
An Insert Picture window will open, choose your picture file and click Insert.
The picture is in the Document.
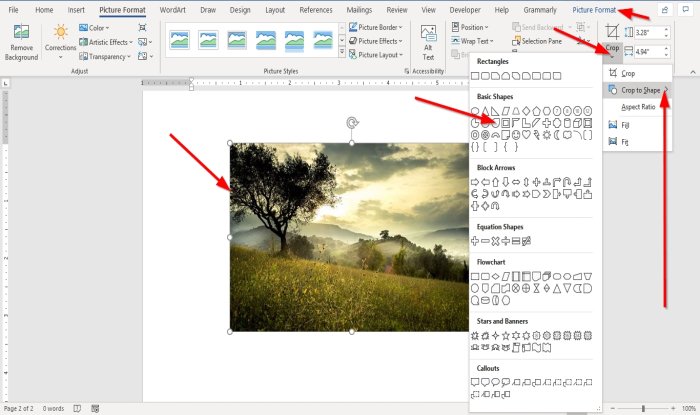
Click on the picture and go to The Picture Format tab.
On the Picture Format tab in the Size group, click Crop.
In the Crop drop-down list, click Crop to Shape.
In the Crop to Shape list, in the Basic Shapes group, select a teardrop.

You will see a teardrop shape with a picture inside it.
Now read: How to add Text Effects to WordArt in Office apps.

Shantel has studied Data Operations, Records Management, and Computer Information Systems. She is quite proficient in using Office software. Her goal is to become a Database Administrator or a System Administrator.
Word for Microsoft 365 Word for Microsoft 365 for Mac Word for the web Word 2021 Word 2021 for Mac Word 2019 Word 2019 for Mac Word 2016 Word 2016 for Mac Word 2013 Word 2010 Word for Mac 2011 More…Less
You can easily resize pictures, text boxes, shapes, and WordArt in your Office file. You can also remove unwanted portions of a picture by cropping it.
Resize a picture, shape, WordArt, or other object
-
Select the picture, shape, WordArt, or other object to resize.
-
To increase or decrease the size in one or more directions, drag a sizing handle away from or toward the center, while doing one of the following:
-
To keep the center in the same place, press and hold Ctrl while you drag the sizing handle.
-
To maintain the proportions, press and hold Shift while you drag the sizing handle.
-
To both maintain the proportions and keep the center in the same place, press and hold both Ctrl and Shift while you drag the sizing handle.

-
Note: Resizing a WordArt object doesn’t resize the text, only the container. If you want to resize the text, select the text and change the font size on the Home tab.
Resize an item to an exact height and width
-
Select the picture, shape, WordArt, or other object to resize.
To resize multiple objects at the same time, press and hold Shift while selecting each object.
-
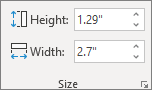
Select Shape Format, Picture Tools Format, or Drawing Tools Format and enter the new measurements into Height and Width.
Notes:
-
If you don’t see Height and Width, press the down arrow in the Size group
-
-

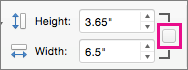
If you’re not able to change the height and width independently, you’ll need to unlock the aspect ratio:
-
Select the dialog box launcher
in the Size group. -
Clear the Lock aspect ratio check box.
 in the Size group.
Resize to an exact proportion
-
Select the picture, shape, WordArt, or other object to resize.
To resize multiple objects at the same time, press and hold Shift while selecting each object.
-
Go to Shape Format, Picture Tools Format, or Drawing Tools Format, in the Size group, select the dialog box launcher
.Notes:
-
If your screen size is smaller, you might need to select the down arrow in the Size group to see the dialog box launcher.
-
-
-
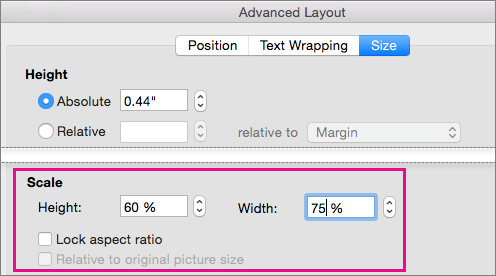
To choose between the original or a different proportion, select or clear Lock aspect ration and enter a Scale percentage for Height or Width.
 .
.Resize a picture, shape, text box, or WordArt
Resize manually
-
Select the picture, shape, WordArt, or other object to resize.
-
To increase or decrease the size in one or more directions, drag a sizing handle away from or toward the center, while doing one of the following:
-
To keep the center of an object in the same place, press and hold CTRL while you drag the sizing handle.
-
To maintain the object’s proportions, press and hold SHIFT while you drag the sizing handle.
-
To both maintain the object’s proportions and keep its center in the same place, press and hold both CTRL and SHIFT while you drag the sizing handle.
-
Resize to an exact height and width
-
Select the picture, shape, WordArt, or other object to resize.
-
Under Picture Tools or Drawing Tools, on the Format tab, in the Size group, enter the measurements that you want into the Height and Width boxes.
-
In the Size group, select the Size and Position dialog box launcher
. -
On the Size tab, under Size and rotate, clear Lock aspect ratio.
Resize to an exact proportion
-
Select the picture, shape, WordArt, or other object to resize.
-
Under Picture Tools or Drawing Tools, on the Format tab, in the Size group, select the Size and Position dialog box launcher
. -
On the Size tab, under Scale, enter the percentages of the current height and width that you want to resize to, in the Height and Width boxes.
-
Clear the Lock aspect ratio check box.
Tip: To apply the same size to different objects, select all objects to have the same dimensions, and then set Height and Width. To select multiple objects, click the first object, and the press and hold SHIFT while you click the other objects.
Quickly resize a picture, shape, WordArt, or other object
-
Select the picture, shape, WordArt, or other object to resize.
-
To increase or decrease the size in one or more directions, drag a sizing handle away from or toward the center, while doing one of the following:
-
To keep the object’s center in the same place, press and hold the OPTION key while you drag the sizing handle.
-
To maintain an object’s proportions while resizing it, press and hold the SHIFT key while you drag a corner sizing handle.
-
-
Select the picture, shape, WordArt, or other object to resize.
-
Select Picture Format or Shape Format and then make sure the Lock aspect ratio check box is cleared.
-
Go to Picture Format or Shape Format and enter the measurements in the Height and Width boxes.

-
Select the picture, shape, WordArt, or other object to resize.
-
Go to Picture Format or Shape Format > Position > More Layout Options.
-
Go to Size and under Scale, make sure the Lock aspect ratio check box is clear.
Enter percentages you want for Height and Width.
-
Select OK when finished.
Tip: To apply the same dimensions to different objects, select all objects and then enter the dimensions in the Height and Width boxes. To select multiple objects, select the first object, and then press and hold SHIFT while you select the other objects.
Resize a picture, shape, WordArt, or other object
-
Select the picture, shape, WordArt, or other object to resize.
-
To increase or decrease the size in one or more directions, drag a sizing handle away from or toward the center, while doing one of the following:
-
To keep the center in the same place, press and hold Ctrl while you drag the sizing handle.
-
To maintain the proportions, press and hold Shift while you drag the sizing handle.
-
To both maintain the proportions and keep the center in the same place, press and hold both Ctrl and Shift while you drag the sizing handle.
-
Note: Resizing a WordArt object doesn’t resize the text, only the container. If you want to resize the text, select the text and change the font size on the Home tab.
For more precise control, use the desktop version of Word Size options on the Picture Tools Format tab or the Drawing Tools Format tab.
Need more help?
It is easy to have great success with Microsoft Word and your labels by knowing a few tips and tricks working with image placement.
Table of Contents:
-
Open Your Template
-
How to Wrap Your Images
-
Working with Text Boxes
-
Setting Precise Positions for Text & Images
-
Changing the Size of Your Images
-
Copy and Paste your Label
open your template
![]()
Dashleigh Label and Hangtag templates now compatible with Canva Online Designer.
Sign up for free.
Use our “Find your Template” page to download your label or hang tag Word template.
We recommend using the “Tables” version of our Word templates.
Un-hiding Gridlines
Certain versions of Microsoft Word hide the grid-lines of tables upon opening the file.
To un-hide your grid-lines:
-
TABLE > Show Grid-lines
-
LAYOUT > View Grid-lines
Now that you have opened your Microsoft Word template, you are ready to start designing.
Adding an image
-
Click the place in your document where you want the picture to appear.
-
Access the «Insert Picture» dialog box.
-
Browse to the photo you want to insert.
-
Click the file, then click «Insert.»
-
Modify the picture as necessary.
Print a Test Page
Before you add your label sheets to your printer, we recommend printing a test page before hand.
-
Make sure the printer settings are set to “Actual Size”
-
All margins and spacing measurements are available on the template download page of your specific labels.
Extra Tips & Tricks
How to Wrap Your Images:
Sometimes adding a new image can cause your previously placed images to move around your template.
The best way to make sure your images to stay in place is to change the «wrapping».
Best Image Layout Options:
Select the image after adding it to your template. Right click to select «Wrap Text» from the menu.

1. Set your Image to «Behind Text«. This is allow you to place an image in an exact place regardless of new images or text that you add to your template.
2. Set the image «fix position on page«. This will allow you to type into your template and the text will move around your image.
You can also set these wrapping conditions under the top menu select Format under the Drawing Tools tab. Select Wrap Text > More Layout Options.

Working with Text
We highly recommend adding your text to a text box instead of typing directly in the table cell. By adding your text to a text box, you can treat it like an image. This will allow you to move the text, rotate it and have the text float above or next to your image.
Select the text box after adding it to your template.
1. Add a text box from the Insert. Set the fill color to «No Fill» and set the outline to «no outline».

2. Set your Text Box to «In Front Text». This is allow you to place an image in an exact place regardless of new images or text that you add to your template.
3. Set the image «Fix Position on Page». This will allow you to type into your template and the text will move around your image.

Setting Precise Positions for Your Images and Text
If you want to be ultra precise with your images, we recommend setting the images in the Layout Options > Position Window.

You can find the exact margins and dimensions of your template on the same page that you downloading your templates. You can use these margins to define exactly where you want your images to place on the page.
Select the Image. In the top menu select Format under the Drawing Tools tab. Select Wrap Text > More Layout Options.
Use the specifications below to set your image in an exact spot. Change the inches in the absolute positions to move your images exactly into place. Use the «page» option under the absolute position dropdown to set your image exactly from the right and top borders of your page.
Selecting «Lock Anchor» will guarantee that the image does not move as you add new images.
Unselect «Move Object with Text» will also help keeping the image in place.
Changing the Size of Your Image

Select the Image. In the top menu select Format under the Drawing Tools tab.
Select Wrap Text > More Layout Options. In the Size Tab- use either the Absolute checkbox to use the inches.
Check the «lock aspect ratio» if you do not want the image to stretch or distort.
Moving the Image Behind the Template Outlines

Right Click the image you want to move. From the fly out menu select «Send to Back».
Select «Send to Back» again to move the image behind object on your Microsoft Word template.
How to Copy and Paste Your Label
Now that you have created your first label, you are ready to paste this label into the other template spaces on the page.

1. Select all components that you want to copy. While holding the «shift» key on the keyboard, select with your mouse all of the images and text boxes that are included in your label.
If you are having trouble selected all of the elements, you will need to set the Text Wrap to «Tight» for all components. (Picture Tools > Format > Text Wrap > Tight)

When all elements are selected.

2. Once everything is selected- you will want to group them as one image. To do this, while the elements are selected, in Picture Tools > Format > Group > Group. This will make the individual components look like one.
3. Once grouped, you image is now ready to copy. Select Ctrl+C on your keyboard to copy the element. Click into the next label. Select Ctrl+P to paste the grouped label. Continue this throughout the template.


Word allows you to do much more than simply insert or place graphics. For our fourth lesson in this series, we will focus on the graphic design functions in Word such as pictures, SmartArt, screenshots, and other items that can be found on the “Insert” tab.
These functions really breathe life into your drab black and white text documents. With a simple picture or chart, you can turn your term paper from meh to yeah! Luckily, there’s a whole range of ways you can add images to better illustrate (no pun intended) your point.
We’ll wrap the lesson by changing gears a bit and discussing how to use more than one language in Word 2013.
Images and Multimedia
You don’t have to think of Word as simply a word processing program. It has requisite tools for doing some pretty nifty page layout. While it’s not a feature-complete or robust as a professional page layout program such as Adobe InDesign. You can still get very professional looking results if you know what’s in your toolbox and how to use it.

Pictures and Online Pictures
Both “Pictures” and “Online Pictures” accomplish the same goal. The only difference is that “Pictures” means you can insert pictures locally, while “Online Pictures” allows you to insert images from an internet-based source such as clip art from Office.com, Bing, or OneDrive (formerly SkyDrive).
You can also insert pictures from your Facebook profile or Flickr although you could always just save the pictures you want to insert to your computer and then insert them from there if you don’t want to connect Office to these profiles.
Picture Tools
As always, when you want to edit a picture or any element place in a Word document, you can click on it and the appropriate tab will appear on the Ribbon.
With pictures, that tab is “Picture Tools.” Here we see you can make all kinds of corrections to the picture on-the-fly. For example, you can correct brightness and contrast, the color, add a border.
Where you position and how you wrap text will also play a large role in formatting your documents.
Here we see those controls. In our documents, we don’t worry so much about word wrapping or positioning because Word isn’t the final step toward publishing online. However, if you’re going to produce something WYSIWYG (What You See is What You Get), such as for a PDF or print publication, then these things will definitely matter.
Also, there are a couple ways you make changes to your pictures inline, such as resizing, rotating, and moving them. In the following image, you see these controls, many of which you will likely be familiar with.
When you click on an image in your document, you get a box on each corner, which will let you resize a picture. At the top, in the middle, is a circular arrow, grab this to freely rotate your picture. To move the image, hover the mouse over the image until the pointer is the four arrows, you can then click and drag the image anywhere you like.
Finally, if you click on the little “Layout Options” button, you can change your text wrapping without going to the Ribbon.
Clicking on “See more…” at the bottom of the “Layout Options” opens the full-blown “Layout” dialog.
Note, the size tab both on the Ribbon the “Layout” dialog allows you to specifically resize, rotate, and scale your pictures, rather than relying wholly on winging it:
We’d like to spend the whole day talking about formatting images in Word, but as you can see, there’s a ton of options at your disposal. Let’s move on now to other objects you can insert into your documents, starting with “Shapes.”
Shapes
Microsoft Word 2013 comes with an array of built-in shapes, which you can use to create callouts, boxes, stars, and other shapes.
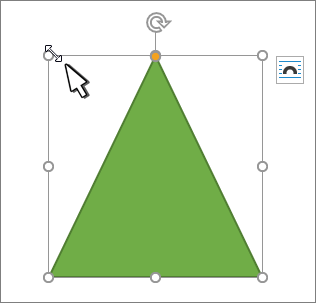
When you choose a shape, you simply draw it on a blank space on the page. It doesn’t matter if you get it perfect or just the way you want it because you can adjust it to your heart’s content once it is placed in your document.
Note in the screenshot, the previously mentioned little “handles” you can use to resize and rotate your shapes.
At the bottom of the “Shapes” menu, there’s an option to create a “new drawing canvas.” This will open, what is essentially a text box for shapes. With this drawing canvas, you can create drawings using these shapes allowing you to create things like diagrams and flowcharts.
SmartArt and WordArt
SmartArt and WordArt tend to have some overlap, particularly if you create something using WordArt and then customize any of the text within it. Of course, you can use one or the other and never the twain shall meet, but we’re going to talk about them in the same section because one often leads to the other.
Think of SmartArt as premade drawing canvases that you can insert into your document and then customize as you like. Simply pick an arrangement, such as a list, process, or cycle.
As you can see, we created a graphic based on a “Continuous Block Process.” When we click on the text boxes, we can edit what is inside. There are also the usual grab handles needed to resize the image, and the “Layout Options” allowing you to wrap text to your preference.
If you use SmartArt, note that the Ribbon changes to reflect this. The “SmartArt Tools” features two tabs: “Design” and “Format.” Let’s cover each one and its features.
The right half of the “Format” tab allows you to pick from a number of “SmartArt Styles” and you can also “Change Colors.”
If you look at our previous example, you can see we applied an embossed, shiny effect and changed the colors of our text boxes and arrow.
On the left half of the “Design” tab, you can “Create Graphic” so you can add shapes, bullets, text, and move things around.
The “Layouts” section lets you change how your graphic looks on the fly. Simply hover over any of the built-in options to see how it would look utilizing a different layout. Changes to the layout are not applied unless you first click on a style.
The right side of the “Format” tab is used for affecting changes to text. These include “WordArt Styles” and other effects suchs as fill and outline. Beyond that, you can arrange multiple layers by sending them forward and backward.
The “Layout” dialog pops out if you select the little arrow in the bottom-right corner of the “size” section or you can choose more options from any of the drop-down menus including “Position”, “Align”, and “Rotate.”
On the left side of the “Format” tab you can select any of your shapes and change them to another, and also make them larger or smaller.
If you click on “Shape Styles” you will be able to choose from a selection of pre-defined shapes and colors.
Shift right just slightly and you will find controls to alter the fill. Choose from various “Theme Colors” or select your own. You an also use pictures, gradients, and textures for even more fill options.
If you want to refine the outline around your shape(s), you can choose any color, weight, or dashes.
Finally, “Shape Effects” has quite a few options for enhancing your shapes, many of which will give them a cool 3D effect that you can adjust by clicking 3D Options at the bottom of the of the menu.
Format Text Effects
Let’s take a closer look at this because it contains a pretty sizable amount of features. We’ll cover the basics so that you’re more aware of them. The pane titled, “Format Text Effects,” slides out from the right edge.
As with any other panes in Word 2013, it can be detached, which you can then stick out of the way to save screen area, or keep it nearby so it is handy. Regardless, this dialog box will allow you to quickly work with text, so you don’t have to repeatedly keep going to the ribbon to change things. Note also that the dialog is split into functions, “Text Fill and Outline” and “Text Effects.” “Text Fill and Outline” is simple enough to figure out, and is used to enhance how text appears.
Say, for instance, we want to write How-To Geek School and enhance it so that it is size 48 pt., blue with a black 1 pt. outline. We simply select the text we want, increase to the size to 48, then in the “Format Text Effects” dialog, we can change the color (we can also do this in the “Font” section of the “Home” tab. Then under “Text Outline” we choose “Solid line” and choose block and 1 pt. for the outline width.
That looks pretty good, but we really want it to pop, let’s add some more text effects, such as a shadow, a reflection, and we’ll add a bit of a 3d bezel to round the lettering out.
The result is a bit more striking and while it’s not likely to make it into any final designs, it does give you an idea of what you can do with WordArt.
Chart
Who doesn’t like charts? Charts are a great way to visually display data sets and Word 2013 comes jam packed with a large assortment of Charts to choose from, including columns, pie, bar charts and much, much more. Check out the screenshot for an idea of just how many options there are:
When you choose a style, you’ll get a spreadsheet, which will allow you to enter the data points on your x and y axes. As you enter data, the chart will change.
Manipulating and formatting charts is easy. Whenever you click on a chart in your document, you’ll get the “Chart Tools,” which, as you might have guessed, is the Ribbon tab devoted solely to charts.
Using the “Design” tab, if you don’t like the colors or style of your chart, you can instantly apply changes to it without having to generate a new one.
If you decide you don’t think the layout works for this particular type of data, change it using “Quick Layout” or add another element such as another axis, chart title, gridlines, and more.
On the right side of the “Design” tab you will find essential tools for altering your data and you can also go back and completely change the type of chart you’re using.
So, if you think a pie chart would work better, you can change to that. Note however, some data points, such as “breakfast,” “lunch,” and “dinner” aren’t represented on this chart.
The “Chart Tools” also give you a “Format” tab so you can dress things up a bit by adding shapes and then being able to change the style, fill, and outline.
Turning to the right side of the “Format” tab, you are given options for adding and changing WordArt, arranging elements, and adjusting the size of your chart (which you can also do with the grab handles).
It’s easy also to affect changes inline too. When you click on a chart in your document, formatting controls appear along the upper-right corner. From top-to-bottom, you get “Layout options” so you can set your text wrapping. You can change chart elements with the plus (+) symbol, so if you want to change chart titles, add gridlines, and stuff like that.
The paintbrush icon is for setting a style and color them, and finally, the sieve icon is for “Chart Filters,” so you can edit data points and names on your chart.
Screenshot
The “Screenshot” feature will allow you to take a screen clip, which is automatically pasted in you document.
When you use the screenshot function, it will let you choose between any currently open windows, or you can select “Screen Clipping,” which will minimize Word allowing you to take a selection or full shot of your desktop. So for example, if you want to simply insert a shot of your desktop and its icons, you would first need to minimize everything you have open.
There’s a myriad of ways you can take and add screenshots, so we’re not going to dwell on it. Just note this feature, if you’re unfamiliar with adding screenshots, and you want an easy way to do it in Word.
Online Video
You can insert “Online Video” such as Bing, YouTube, or video embed code into your document.
When you embed a video, it will appear as if it is a regular picture, complete with grab handles and text wrap controls.
Further, you can adjust how the emedded video thumbnail appears (as a picture) using the “Picture Tools” so you can make adjustments to the color, add a border, correct the contrast and brightness, and more.
So you see, we simply applied a “picture style” and add a purple border. This is only a fraction of the stuff you can do, so if you to add some really nice looking effects and create a nice looking document that really pops, you should take your time to familiarize yourself with everything.
On the other hand, if you don’t like your changes and you want to go back to the default, simply click “Reset Picture” and it will revert to normal.
Other Text Features
Here are few more text features that you might want to be aware of though you will probably rarely use them.
Text Box
Text boxes are like their own little islands in Word. What we mean is, when you add a “Text Box” to your documents, it is immune to changes you make to the rest of the document. It is like a document within a document.
This is useful if you want to present something “as is” in your work, be able to make overarching changes to the document’s formatting, but have something you’ve pasted remain unchanged.
For the most part, text boxes are something of a bane to an editor’s existence because they don’t play nice with styles (Lesson 5). You may find them extremely convenient and that’s perfectly fine, but if you want something that conforms to your document’s style and formatting, but still place it in a box or have a border around it, then we recommend simply adding a border, which we covered in Lesson 2 – Shading and Borders.
Drop Cap
Drop caps are simply that one letter at the beginning of a chapter or book that is larger than the rest:
You can either make your drop cap “Dropped” (the text below it shifts underneath it) or “In Margin.” Check out the “Drop Cap” options for more power over how your drop caps behave.
Using More than One Language
If you want to produce content in a language other than the one that comes with Word by default, you will likely need to purchase it. Open the Word “Options” and click on “Language.”
Pick the language you want to add from the dropdown list and then click the “Add” button. When you add a language, you will need to enable it, which means that you will have to turn it on in the “Control Panel.”
From here, you can write in the language, but Word won’t display in it, in other words, menus and help systems will still appear in the default language. To get the full multilingual experience, you may need to purchase a language pack from Microsoft.
To see what languages are available for purchase, and how much, click on “Not installed” and you will be whisked to the Microsoft Office website.
If you want to add proofing tools, such as spellcheck, grammar check, and/or screen tooltips, then you may be able to simply download them for free.
While it’s doubtful you’ll be using Word in full multilingual mode, it’s nice to know how you can affect those changes. Moreover, most languages are freely available to use system-wide so actually creating a document in another language is well within your reach, for free.
Coming up Next…
So that concludes this section. We know it’s been a lot to absorb but you’ll see that after a while, this stuff is a cinch!
Once you get the hang of one skill, the rest is pretty similar and comes easier. By now you should have more than enough knowledge to create awesome documents with lists, tables, pictures, video, and anything you need to create a true multimedia publication!
Don’t forget though, if you’ve missed anything in this series you can always go back and read our introduction in Lesson 1, all that stuff on paragraphs and lists in Lesson 2, and all-important tables and other formatting options in Lesson 3.
In our final lesson, Lesson 5, we will cover styles, templates, and themes. It doesn’t sound like much, but they can be a fantastic way to not only save tons of time and create consistently formatted documents, but quickly apply themes that will instantly affect the entire appearance of your documents, as well as create templates that you can later use over and over again!
READ NEXT
- › This New Google TV Streaming Device Costs Just $20
- › HoloLens Now Has Windows 11 and Incredible 3D Ink Features
- › BLUETTI Slashed Hundreds off Its Best Power Stations for Easter Sale
- › How to Adjust and Change Discord Fonts
- › Google Chrome Is Getting Faster
- › The New NVIDIA GeForce RTX 4070 Is Like an RTX 3080 for $599
![]()
Written by Allen Wyatt (last updated June 22, 2019)
This tip applies to Word 97, 2000, 2002, and 2003
You know that Word allows you to insert pictures in your document. Most pictures are rectangular in shape. What happens if you want your picture to be oval or some other non-rectangular shape, however?
Perhaps the most universal solution is to use a picture-editing program to make your edits to the picture. For instance, you could use Adobe PhotoShop or Paint Shop Pro or Microsoft’s Photo Editor to change the picture directly, before placing it into Word. This approach will work with any version of Word.
If you don’t have access to picture-editing software, you can use AutoShapes within Word to create your oval (or some other shape), and then fill that AutoShape with your picture. To do this, follow these steps:
- Make sure the Drawing toolbar is displayed. You can either click on the Drawing tool on the standard toolbar, or you can use the Toolbars option from the View menu.
- Click on the AutoShapes tool on the Drawing toolbar. Word displays a menu of shape categories.
- Select the shape category desired. If you want to create an oval, choose the Basic Shapes category. Word displays a collection of shapes in the category.
- Click on the exact shape wanted. If you want an oval, pick the shape closest to what you desire. (There is actually an oval shape in the category; it is the first shape in the third row.) Your mouse pointer turns into cross hairs.
- Click in your document where you want the shape to appear and drag the mouse until the shape appears as you desire. Release the mouse button when the shape is correct. The shape should remain selected.
- Beside the Fill tool on the Drawing toolbar is a small down-arrow. Click on this down-arrow. Word displays a palette of fill colors and a couple of other options.
- Choose Fill Effects from the palette. Word displays the Fill Effects dialog box.
- Make sure the Picture tab is selected. (See Figure 1.)
- Click on Select Picture. Word displays the Select Picture dialog box, which looks like a standard Open dialog box.
- Use the controls in the dialog box to select the picture you want to place in the oval.
- Click on the OK button. The Fill Effects dialog box reappears with your selected picture displayed.
- Click on OK. The shape you created is filled with the picture you selected.
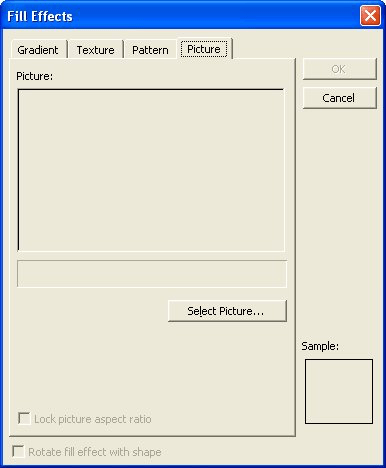
Figure 1. The Picture tab of the Fill Effects dialog box.
Once the picture appears in the shape, you can adjust the size of the shape as you normally would to make it appear as desired. You may need to play with this method of creating pictures a bit, as Word has been known to distort the pictures slightly. With a little practice, however, you may get exactly the effect you desire, without resorting to using an external picture-editing program.
There is also another way to place a picture within an oval in Word (any version), but it requires just a bit more work. In this approach, you really use two images: your original picture and an AutoShape. Follow these general steps:
- Place your picture in Word and format it to the size wanted.
- Create an oval and place it over the top of your picture. (Make sure the oval is in front of the picture.)
- Right-click on the oval to display a Context menu.
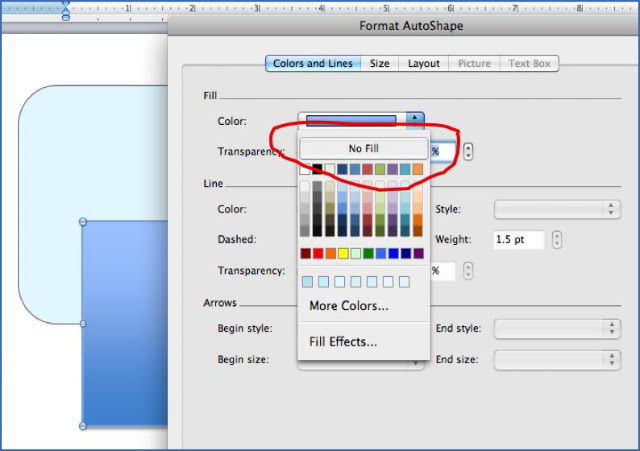
- Choose Format AutoShape from the Context menu. Word displays the Format AutoShape dialog box. (See Figure 2.)
- Using the tabs and other controls in the dialog box, make sure the oval is formatted so it has no fill and so the line used for the oval is white and very thick. (Typically, the line width should be 40 or more points.)
- Click on OK.
- Adjust the size of the oval as desired. You may need to change the line width again so that all the edges of your picture are covered.
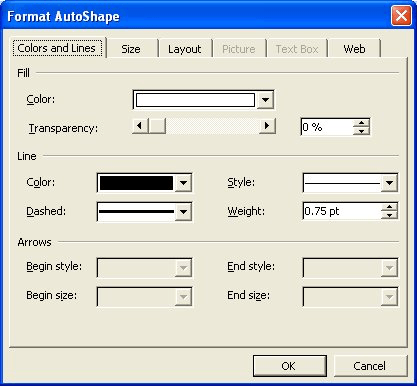
Figure 2. The Format AutoShape dialog box.
This can be viewed as a brute-force method of placing your photo in an oval, but it does have the advantage that the picture is not distorted in the oval at all.
WordTips is your source for cost-effective Microsoft Word training.
(Microsoft Word is the most popular word processing software in the world.)
This tip (1859) applies to Microsoft Word 97, 2000, 2002, and 2003.
Author Bio
With more than 50 non-fiction books and numerous magazine articles to his credit, Allen Wyatt is an internationally recognized author. He is president of Sharon Parq Associates, a computer and publishing services company. Learn more about Allen…
MORE FROM ALLEN
Creating a Mail Merge Data File
An easy way to perform a mail merge starts with creating a data file in a Word document. This tip shows how you can …
Discover More
Preventing Changes to Formatting and Page Size
When you create workbooks for others to use, you might want to make sure that they can’t change the formatting and paper …
Discover More
Making Quoted Text Bold and Underlined
If your document contains quoted text, you might want a way to remove the quotes and format the text in some way. This …
Discover More
The best way to do things is to do what works for you. And if you don’t have fancy software, Adobe Illustrator, or even photoshop, you can always create graphics the semi-old-fashioned way, using Microsoft WORD.
Yes! It’s true.
And easy.
Word isn’t really intended as a “graphics” program but it’s pretty straight-forward and equally frustrating since the program does have limitations. For instance, you can’t stretch or squeeze a font, flip images, place them at an angle, or many other things. Some resources that are good for that are:
picnik (easy to use photo site)
Inkscape (downloadable software)
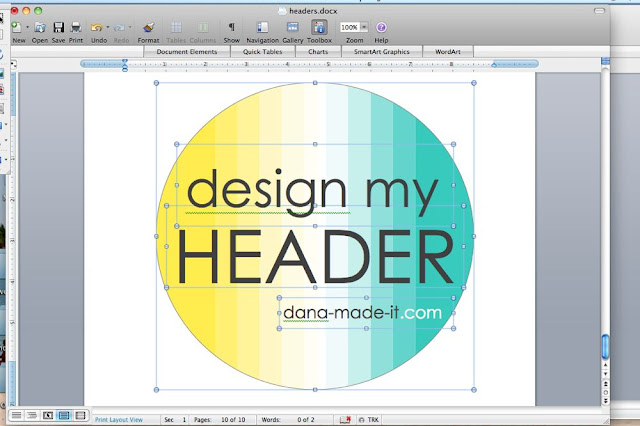
But if you’re looking for the quick and simple method you’ve come to the right place. Today, we’ll create this header for the Design My Header Contest:

Now, don’t be scared.
A bunch of screen-grab images with instructions looks overwhelming. But we’ll walk through each step and soon you’ll be a pro!
Let’s get started.
Your version of WORD might be slightly different than mine (if you like nitty gritty details, my version is Word for MAC: 12.2.0) But whatever version you have, the concepts are similar.
– Start by opening a new document.
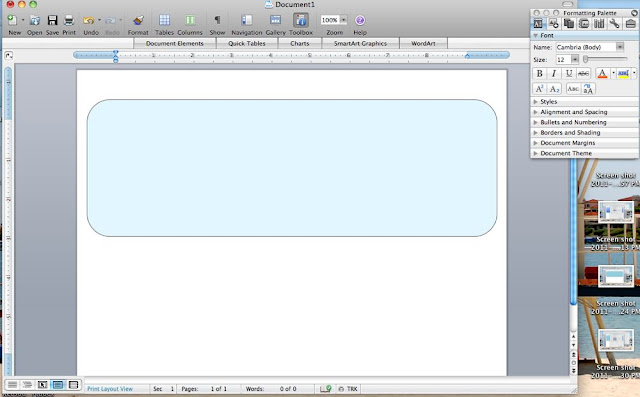
– When making headers, set-up the document as “landscape”, so you can create a very wide image.
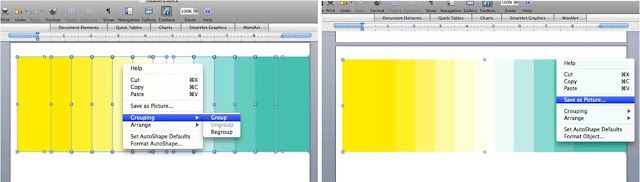
– To create graphics we’ll use layers of boxes and shapes, group them together, and then right-click on the whole thing and “save as picture”. Here are the details…..
– Grab a shape for your image. In the toolbox (which usually pops up to the right of your document–and is also located at the top toolbar), click on the object palette and you’ll see tons of shape options. I typically use the first two–the rectangle or the rounded rectangle.
– Click on the shape you want, then go to the document and click/drag to make the shape. Make the shape as wide as possible on your document, so the image is the highest quality possible.
 And it looks like this:
 Let’s format and customize the box.
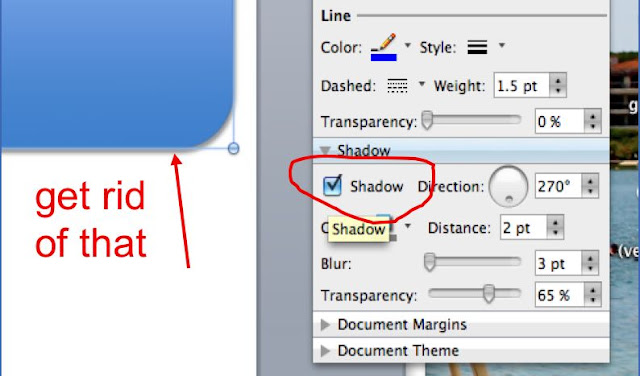
– First, get rid of the shadow. I don’t care for how the shadow looks and it affects the font as well. So just uncheck that box down there:
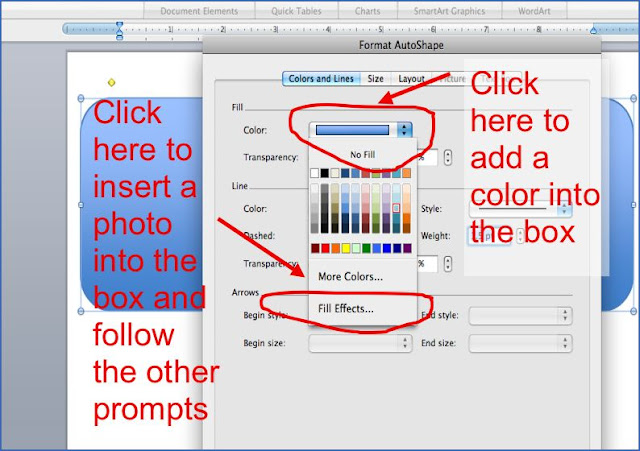
 – Choose a color for the border, a color for the inside of the box, or you can insert a photo into the box:
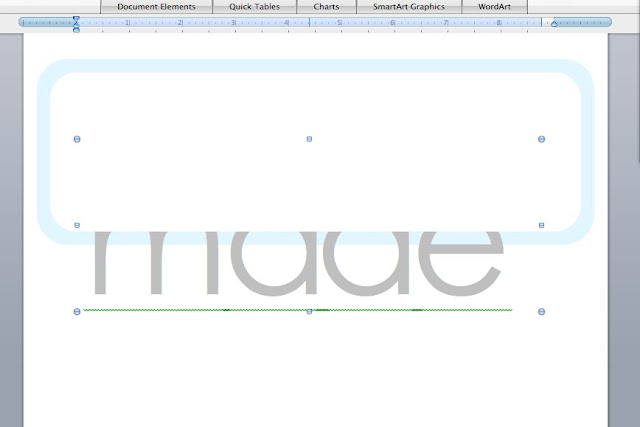
 I chose light blue. And now the box looks like this:
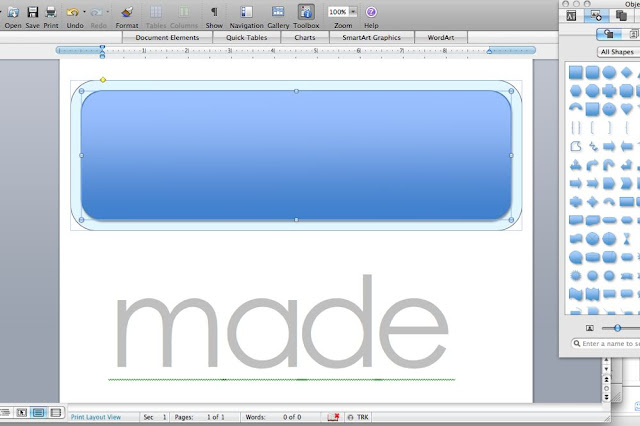
 But I don’t really like that shade of blue…or any of the colors they have listed. So let’s customize that too.
– Click on “more colors”” and a color wheel pops up.
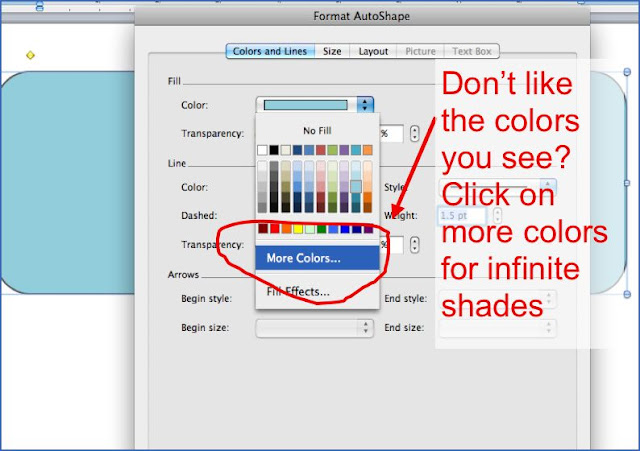 – Select the exact shade you want from the color wheel. There are infinite shades to choose from.
 Okay, it’s looking better.
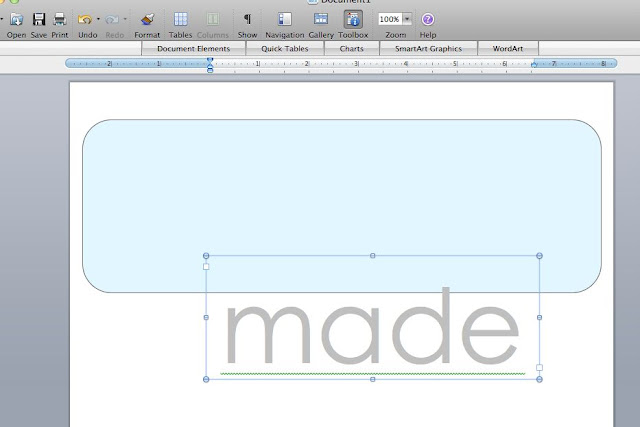
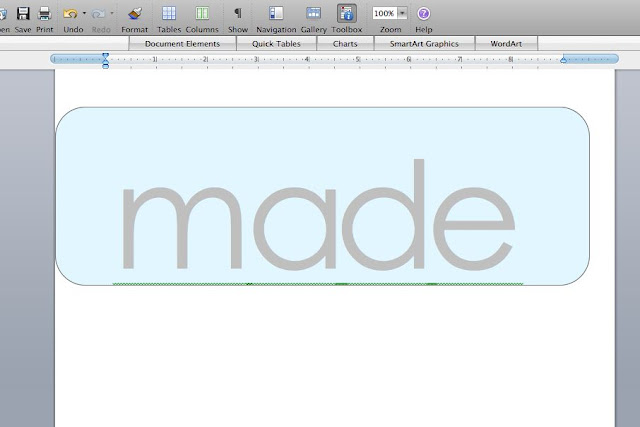
 Now let’s add text to the image.
– RIGHT-click on your mouse and select “add text”
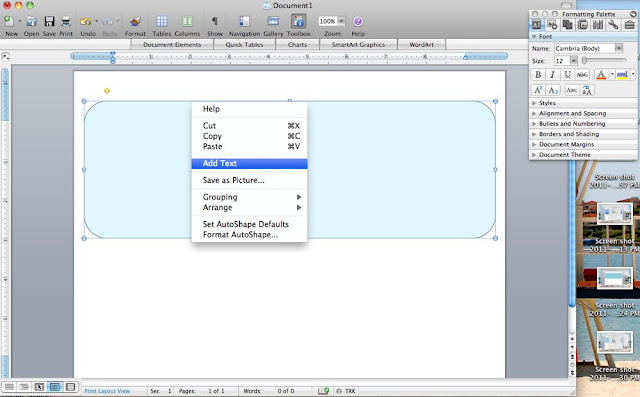 – Use the toolbox to the right to pick your font type, size, and color. I used Century Gothic.
 Now, a major drawback with WORD, is that you can’t move the text around very easily inside the box, unless you place the text inside another layer….meaning…..unless you place it in another image/box, and then make that box transparent. Here’s what you do:
– Select another image.
 – Format it so that there is NO shadow, NO border, and NO fill. This makes the box totally see-through. (btw, side-note here….if you want to make your layer partially transparent–so you can see a photo behind it, etc–select a fill color for the box and then use the transparency slider to vary the opacity. But that’s for another day).
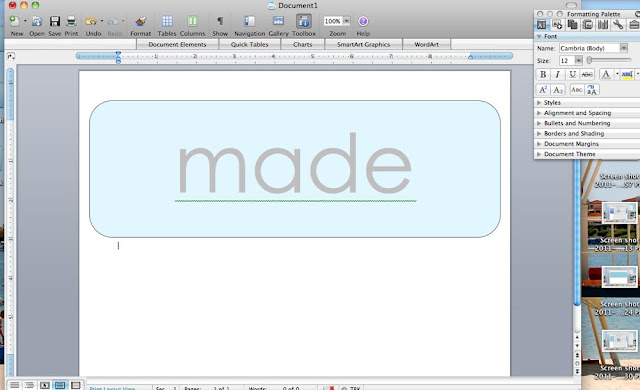
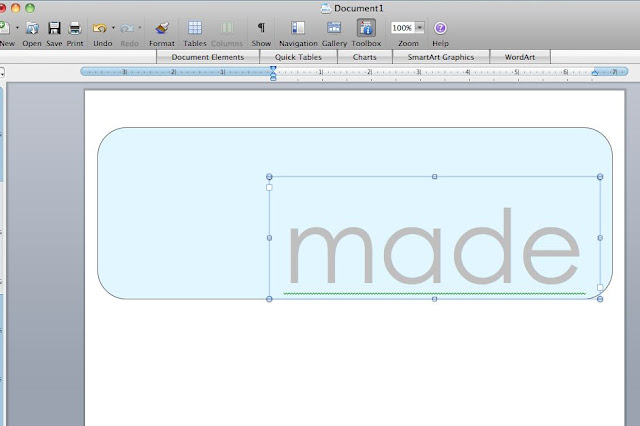
 Okay, now you have another layer. RIGHT-click to “add text” and place the words inside the new box:
 Now you can move that box around and place the words wherever you like…almost.
 I wish the individual letters were a bit closer together. But in WORD, I’m limited with the font size and can’t squish them closer. So let’s cheat it.
– Just as you created the layered box above, create 4 individual transparent boxes–one for each letter and smash them as close as you like:
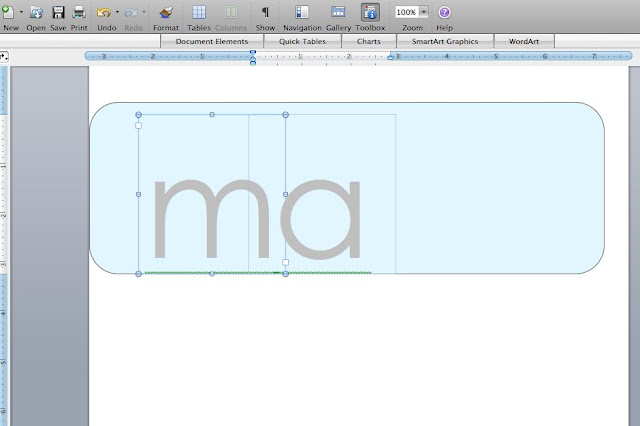 TIP: You can always cheat the letters even more by placing your cursor in front of a letter, selecting a very small font size (such as 5), and then hitting the spacebar a few times. I also do this with the Return key if I want to move something up or down just slightly.
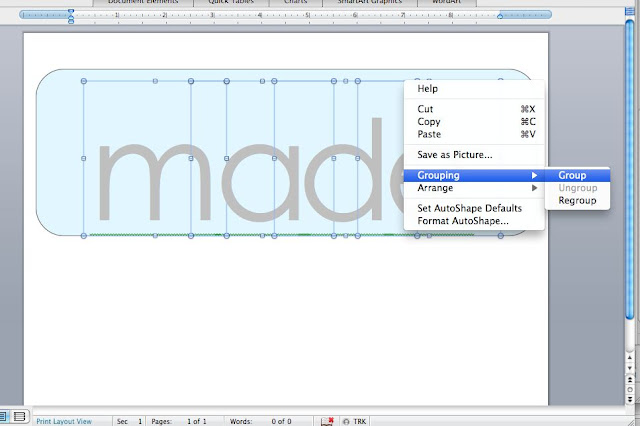
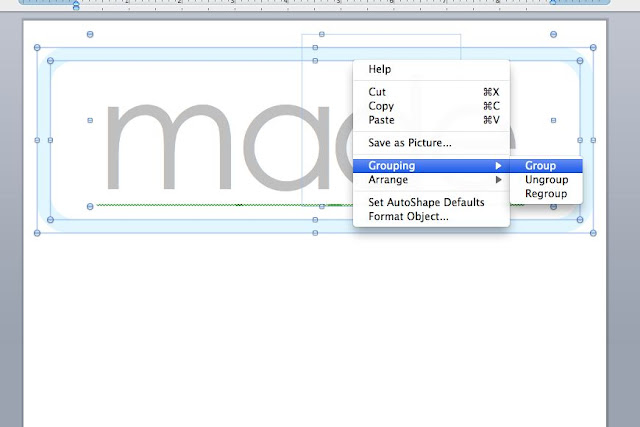
– To group the letters together, hold the Shift key down and click on each image to select them all, then RIGHT-click, and select “group”. Now you can move the letters around as one complete image.
 And there you go. Big letters, close together.
But I’m not done yet. It needs something more.
 Let’s add another layer in there.
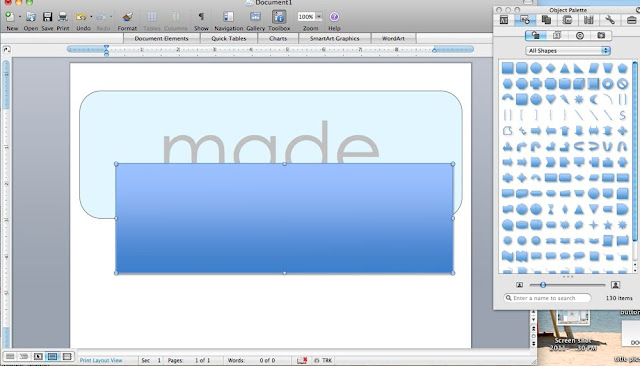
– Pull the text box out of the image.
– Select another rounded rectangle and center it inside the original image.
 – Format the box to be white, without a border (I also removed the border from the outer box).
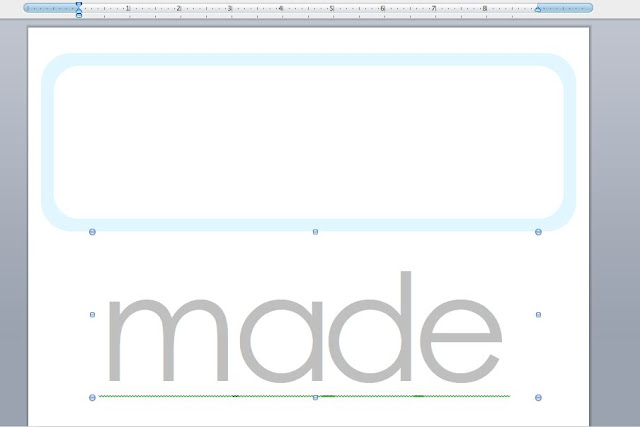 Now, with WORD, you’re also limited to the order in which you’ve created things. Meaning….since I created the transparent box before this new white box, I can’t pull the text box up on top of the white, or the white box will cover it. WORD accepts images in the order you create them–with the newest layer on top. You can see that here:
 So…simply click on the text box (the one that says “MADE”), hit copy and then paste and now you’ve created a newer version of the box. Now you can easily pull it up over the white box and the letters will show up.
– Then, as we did above, hold the Shift key down and click on all the layers of your image (all the boxes). When they’re all selected, RIGHT-click and select “group”. You have one complete image now!
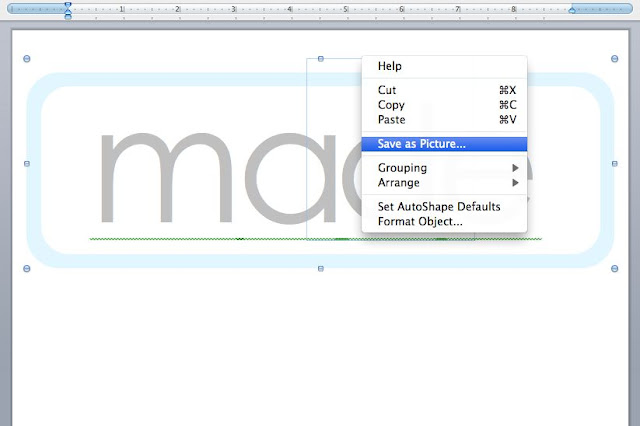
 – RIGHT-click and hit “save as picture” and your image will be saved as a png file (portable network graphics). Your computer and software programs will recognize the file in a similar way as a jpg. Or, you can always import it into your photo software (such as iPhoto on my Mac) and then export it again as a jpg.
 Okay, one last step!
Here’s what it looks like when I import the image into iPhoto. When we created the image in WORD, one of the image layers extended above the blue border image….so there’s a bit of white space at the top. Let’s get rid of that:
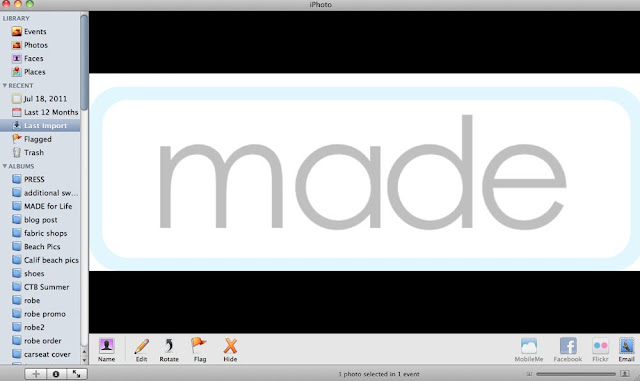 I simply cropped it off in iPhoto and now I have a header!
 Of course when all was said and done, I thought it needed one more touch.
So I added another text box to the top:
And we’re done!
The image quality is not as great as other programs, which is a drawback to WORD. But the finished header size (if you make it as wide as a landscape document) is large enough for the top of my blog.
– To place it on the top of your blog in Blogger, click on Design, and “edit” under the header. Then add the image!
————————————-
Here’s one more idea:
– To create the graphic/button for the contest, I created many boxes in varying shades of the same color, grouped them all together, then saved as a picture.
 – Next, I created a new image–using a circle shape–and inserted the image above as a picture (rather than selecting a color). I added many layers of text boxes, grouped them together, and there you go!
 New button:
 There are many, many other options and tweaks you can do in WORD.
So have fun designing and exploring!
Lesson 18: Pictures and Text Wrapping
/en/word2013/headers-footers-and-page-numbers/content/
Introduction
Adding pictures to your document can be a great way to illustrate important information or add decorative accents to existing text. Used in moderation, pictures can improve the overall appearance of your document.
Optional: Download our practice document.
To insert a picture from a file:
If you have a specific image in mind, you can insert a picture from a file. In our example, we’ll insert a picture saved locally on our computer.
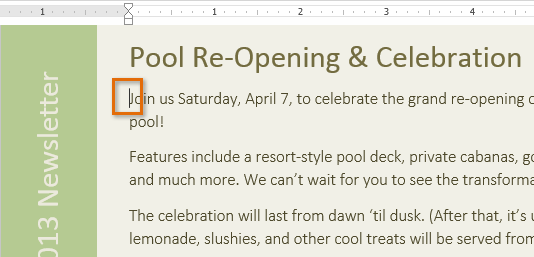
- Place the insertion point where you want the image to appear.
 Placing the insertion point
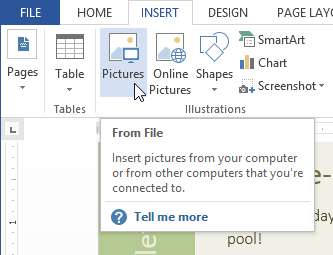
 - Select the Insert tab on the Ribbon, then click the Pictures command.
 Clicking the Pictures command
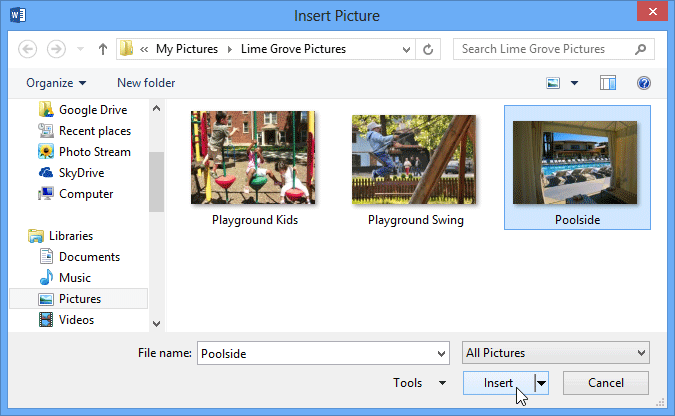
 - The Insert Picture dialog box will appear. Select the desired image file, then click Insert.
 Selecting a picture to insert
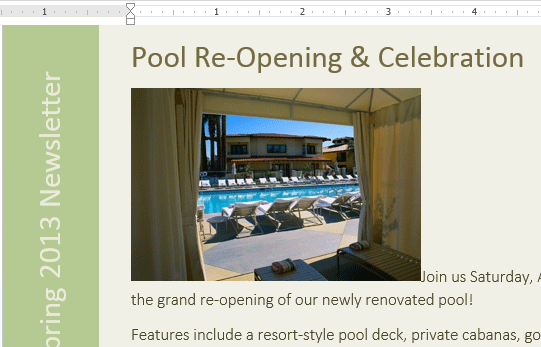
 - The image will appear in the document.
 The inserted image
To resize an image, click and drag one of the corner sizing handles  . The image will change size while keeping the same proportions. If you want to stretch it horizontally or vertically, you can use the side sizing handles
  .
.
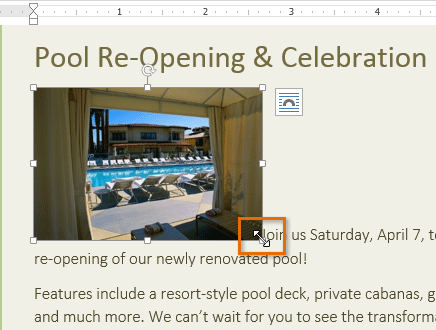 Resizing an image
Inserting online pictures
If you don’t have the picture you want on your computer, you can find a picture online to add to your document. Word offers two options for finding online pictures:
- OneDrive: You can insert an image stored on your OneDrive (previously called SkyDrive). You can also link other online accounts with your Microsoft account, such as Facebook or Flickr.
 Office.com Clip Art results
 - Bing Image Search: You can use this option to search the Internet for images. By default, Bing only shows images that are licensed under Creative Commons, which means you can use them for your own projects. However, you should go to the image’s website to see if there are any restrictions on how it can be used.
Bing Image search results

Previously, you also had the option to insert clip art images from Office.com, but this service has been discontinued. Instead, you can use Bing Image Search to find images for your document.
To insert an online picture:
- Place the insertion point where you want the image to appear.
 Placing the insertion point
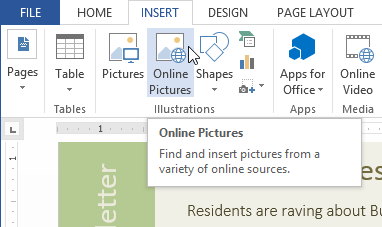
 - Select the Insert tab, then click the Online Pictures command.
 Clicking the Online Pictures command
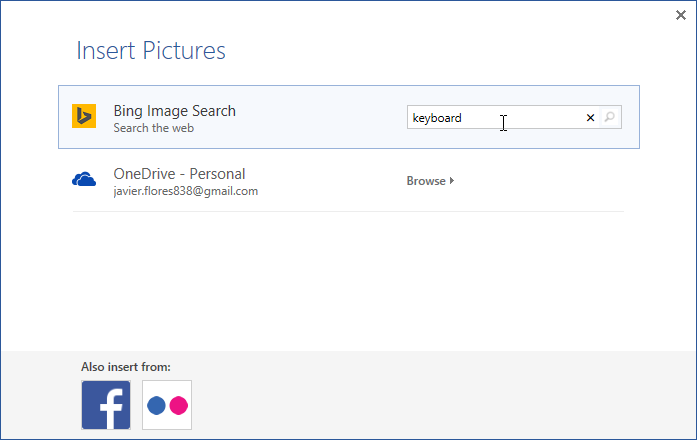
 - The Insert Pictures dialog box will appear.
- Choose Bing Image Search or your OneDrive. In our example, we’ll use Bing Image Search.
Typing a search term
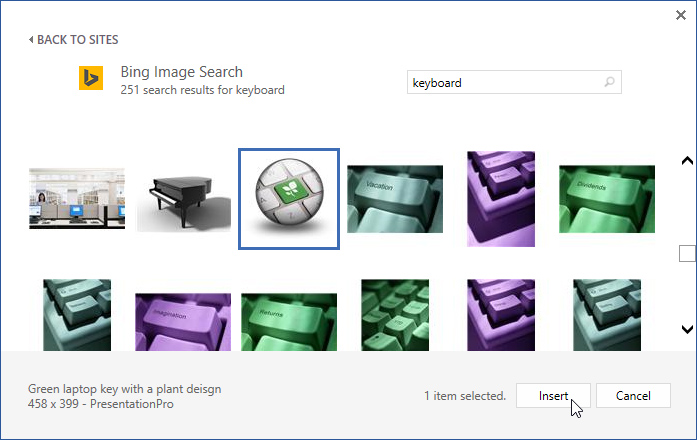
- Press the Enter key. Your search results will appear in the dialog box.
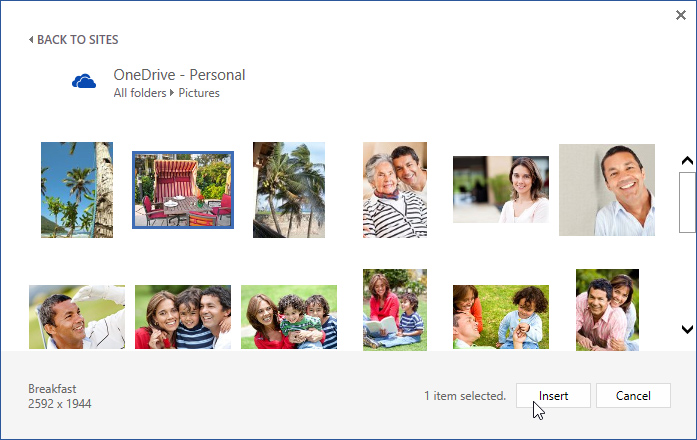
- Select the desired image, then click Insert.
Inserting a search result
- The image will appear in the document.
 The inserted clip art
When adding images, videos, or music to your own projects, it’s important to make sure you have the legal right to use them. Most things you buy or download online are protected by copyright, which means you may not be allowed to use them. For more information, visit our Copyright and Fair Use lesson.
Changing text wrapping settings
When you insert an image, you may notice that it’s difficult to move it exactly where you want. This is because by default the image is in line with the text. If you want to move the image freely, you’ll usually need to choose a different text wrapping setting. The text wrapping for an image is set to In Line with Text. You’ll need to change the text-wrapping setting if you want to move the image freely or if you want the text to wrap around the image in a more natural way.
To wrap text around an image:
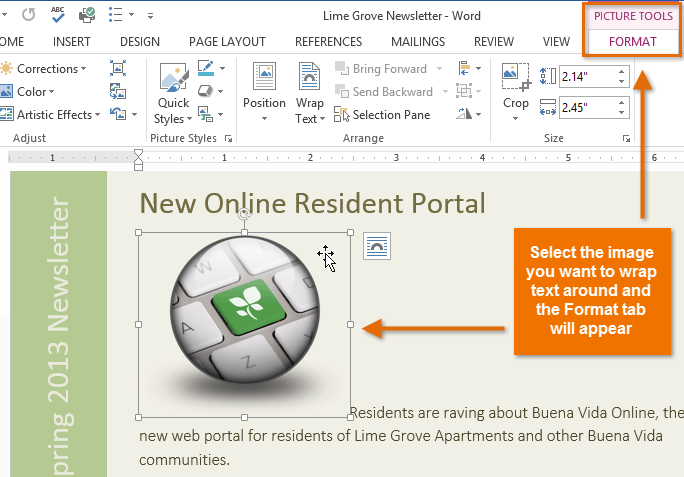
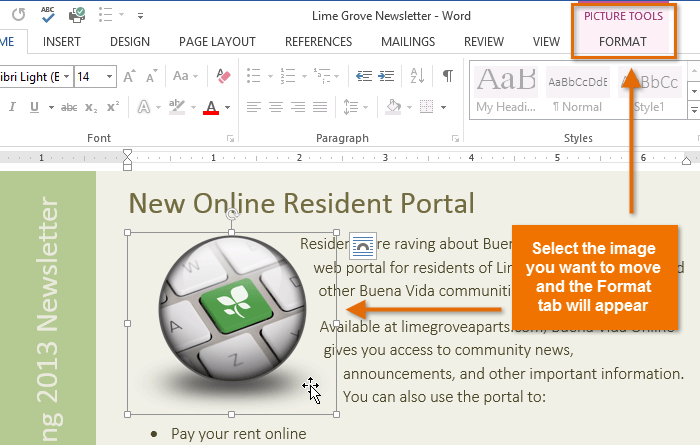
- Select the image you want to wrap text around. The Format tab will appear on the right side of the Ribbon.
 Selecting an image
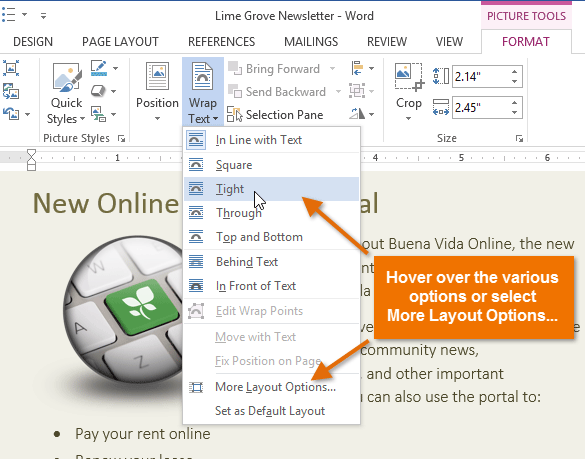
 - On the Format tab, click the Wrap Text command in the Arrange group. A drop-down menu will appear.
- Hover the mouse over the various text-wrapping options. A live preview of the text wrapping will appear in the document. When you’ve found the text-wrapping option you want to use, click it. Alternatively, you can select More Layout Options… to fine tune the layout.
 Selecting a text wrapping setting
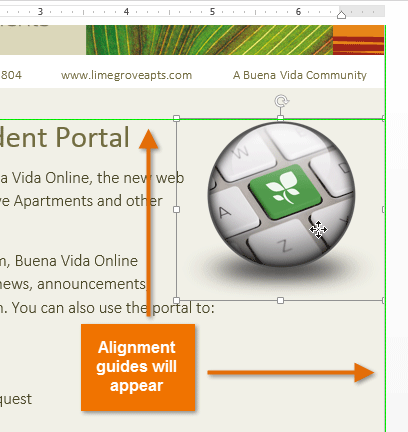
 - The text will wrap around the image. You can now move the image if you want. Just click, hold, and drag it to the desired location. As you move it, alignment guides will appear to help you align the image on the page.
 Alignment guides
Alternatively, you can access text-wrapping options by selecting the image and clicking the Layout Options button that appears.
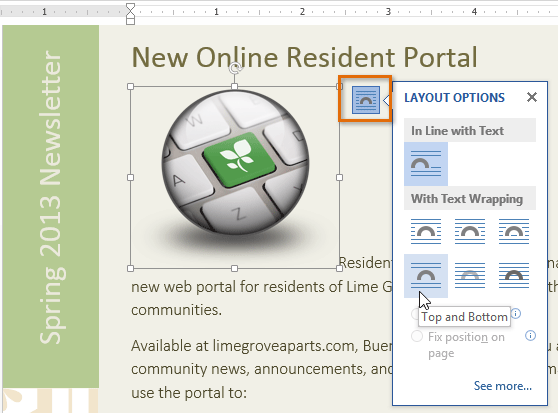 The Layout Options menu
If the alignment guides do not appear, select the Page Layout tab, then click the Align command. Select Use Alignment Guides from the drop-down menu that appears.
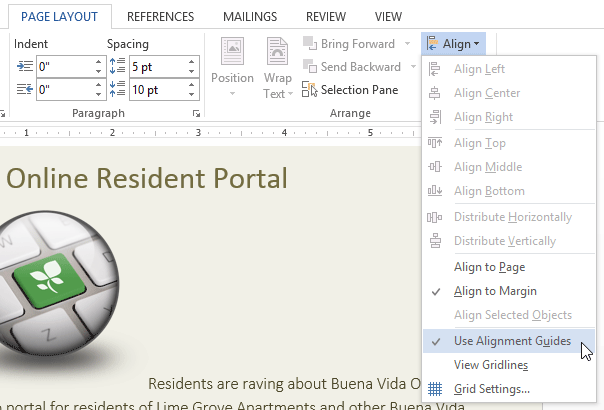 Turning on the alignment guides
To use a predefined text wrapping setting:
Predefined text wrapping allows you to move the image to a specific location on the page.
- Select the image you want to move. The Format tab will appear on the right side of the Ribbon.
 Selecting an image
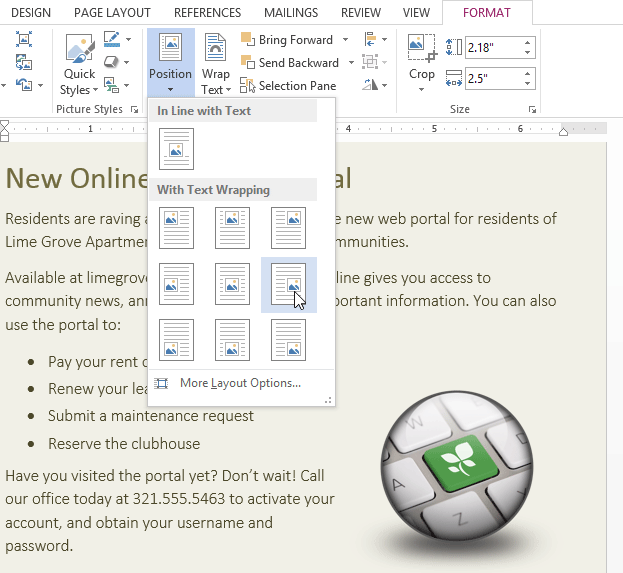
 - On the Format tab, click the Position command in the Arrange group.
- A drop-down menu of predefined image positions will appear. Select the desired image position. The image will adjust in the document, and the text will wrap around it.
 Selecting a text wrapping setting
Challenge!
- Create a new Word document. If you want, you can use our practice document.
- Insert a picture from a file into the document.
- Resize the picture.
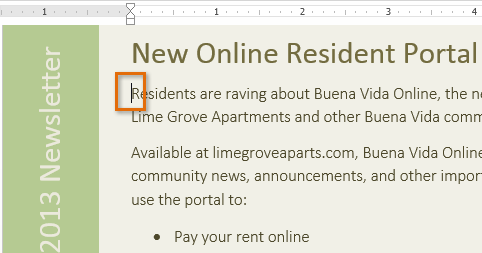
- Find a picture with Bing Image Search and insert it into your document. If you are using the example, search for computer and insert it in the New Online Resident Portal section.
- Change the text-wrapping setting of one of the images. If you’re using the example, change the text-wrapping setting of the computer to Through.
- Try moving an image to a new location.
/en/word2013/formatting-pictures/content/