
Word for Microsoft 365 Word 2021 Word 2019 Word 2016 Word 2013 Word 2010 More…Less
You can list and organize the figures, pictures, or tables in your Word document by creating a table of figures, much like a table of contents. First add captions to your figures, and then use the Insert Table of Figures command on the References tab. Word then searches the document for your captions and automatically adds a list of figures, sorted by page number.
Before you begin
Before you create a table of figures, you must add captions to all the figures and tables that you want included in your table of figures. For more information, see Add, format, or delete captions in Word.
Insert a table of figures
-
Click in your document where you want to insert the table of figures.
-
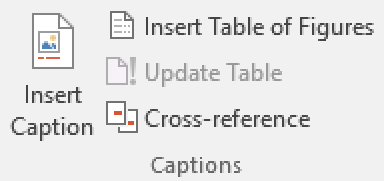
Click References > Insert Table of Figures.

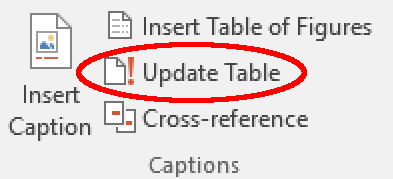
Note: If your Word document is not maximized, the Insert Table of Figures option might not be visible. Some minimized views show only the Insert Table of Figures icon
. -
You can adjust your Format and Options in the Table of Figures dialog box. Click OK.

 .
.Update a table of figures
If you add, delete, change, or move captions, use Update Table so the table of figures reflects your changes.
-
Click on the table of figures in your document. This will highlight the entire table.
-
Click References > Update Table.
Note:
Update Table becomes an option only when you click the table of figures in your document. You can also press F9 to update your table of figures. -
Select an Update in the in the Update Table of Figures dialog box.
-
Select Update page numbers if you need to adjust the page numbers.
-
Select Update entire table if you have moved figures or altered captions.
-
-
Click OK.

See Also
Add, format, or delete captions
Create a table of contents
Insert a table
Need more help?
Want more options?
Explore subscription benefits, browse training courses, learn how to secure your device, and more.
Communities help you ask and answer questions, give feedback, and hear from experts with rich knowledge.
Click in your document where you want to insert the table of figures. Click References > Insert Table of Figures. You can adjust your Format and Options in the Table of Figures dialog box. Click OK.
Contents
- 1 How do I create a list of tables and figures in Word?
- 2 How do I automatically number figures in Word?
- 3 How do you create a figure caption and table of figures in Word?
- 4 How do you add multiple figures in Word?
- 5 How do I generate a list of figures?
- 6 How do you write a list of figures?
- 7 How do I create a chapter header in Word?
- 8 How do I create a chapter heading in Word?
- 9 How do I keep track of figures in Word?
- 10 How do you label figures?
- 11 How do I make 3 figures side by side in Word?
- 12 How do you write a list of figures in thesis?
- 13 How do I edit a list of figures in Word?
- 14 What is a list of figures?
- 15 How do you make a list of figures in a research paper?
- 16 Do I need a list of figures?
- 17 How do you create chapter headings?
- 18 How do I link Header and title in Word?
- 19 How do I automatically label a table in Word?
- 20 How do you reference figures in text?
How do I create a list of tables and figures in Word?
On the References Ribbon, in the Captions Group, click the Insert Table of Figures icon (even for lists of tables and equations). In the Table of Figures dialog box, select the label for which you want to make a list from the Caption Label pulldown (such as “Equation”, “Figure”, or “Table”).
How do I automatically number figures in Word?
Figure 1: To have Word magically number your figures for you
- Type the name of the figure.
- Click in front of the name of the figure.
- In Insert menu on top of screen, select Caption.
- Under Options: Label, select Figure.
- Click OK.
- Add a space and/or a colon if necessary. Be tidy and consistent.
How do you create a figure caption and table of figures in Word?
Add captions
- Select the object (table, equation, figure, or another object) that you want to add a caption to.
- On the References tab, in the Captions group, click Insert Caption.
- In the Label list, select the label that best describes the object, such as a figure or equation.
How do you add multiple figures in Word?
Inserting Multiple Graphics in a Document
- Place the insertion point at the place in the document where you want the graphics inserted.
- Display the Insert tab of the ribbon.
- Click the Picture tool.
- Use the controls in the dialog box to locate the folder that contains the images.
- Press Ctrl+A.
- Click Insert.
How do I generate a list of figures?
Click in your document where you want to insert the table of figures. Click References > Insert Table of Figures. You can adjust your Format and Options in the Table of Figures dialog box. Click OK.
How do you write a list of figures?
Title this section in all capital letters as “LIST OF FIGURES”. List each new figure caption on a new line and capitalise the start of each word. Write the figure number on the left, then caption label and finally the page number the figure corresponds to on the right-hand side.
Click where you want to insert the new chapter heading and insert a page break (see Section and Page Breaks). In the Styles Pane, click Heading 1 style. The word “Chapter” and the chapter number will appear. Click after the chapter number and enter the text for the chapter heading.
How do I create a chapter heading in Word?
Open the header in the first chapter. Go to References > Captions > Cross-reference. Select Heading from the menu as your reference type. Pick the relevant chapter title and click Insert.
How do I keep track of figures in Word?
More videos on YouTube
- Right-click the object you wish to caption and select Insert Caption… from the shortcut menu.
- In the Caption dialog box, select the label that applies to the object you have selected (e.g. “Figure” or “Table”) and select the positioning of the caption (e.g. above or below the object).
How do you label figures?
Figures should be labeled with a number followed by a descriptive caption or title. Captions should be concise but comprehensive. They should describe the data shown, draw attention to important features contained within the figure, and may sometimes also include interpretations of the data.
How do I make 3 figures side by side in Word?
Click and drag the second image next to the first, where you want it to align. As the sides come close to each other, Word will automatically snap the second image into place next to the first. Release the mouse button when the images are aligned next to each other as you need them to be.
How do you write a list of figures in thesis?
Lists of Tables, Figures, and Illustrations
- Include the heading(s) in all capital letters, centered 1″ below the top of the page.
- Include one double-spaced line between the heading and the first entry.
- Each entry must include a number, title, and page number.
Here’s one way: On the References tab, click Insert Table of Figures. Click the Modify button. In the Style dialog, click Modify again, and make the desired changes. When you are done, click OK until you are back in the Table of Figures dialog box.
What is a list of figures?
Readers use the list of figures to locate visual information. The list of figures identifies the titles and locations of visuals (figures, drawings, photos, maps) in administrative or research documents.Readers often review them independently of other sections of a report.
How do you make a list of figures in a research paper?
- Click on the Reference tab.
- Click on Insert Table of Figures in the Captions section.
- Under General, make sure that Caption label is set to Figure.
- Also make sure that Include label and number is unchecked.
- Click on Modify.
- Click on Modify.
Do I need a list of figures?
APA doesn’t require you to include a list of tables or a list of figures. However, it is advisable to do so if your text is long enough to feature a table of contents and it includes a lot of tables and/or figures.
How do you create chapter headings?
Here are a few ideas for ways you can go about designing a chapter header that’s as great as your manuscript:
- Use text and a simple divider only.
- Accompany your text with a small graphic, symbol, or image.
- Opt for large and intricate artwork that fills the whole page, or even stretches across two pages!
How do I link Header and title in Word?
Go to Insert > Header or Footer. Select Edit Header or Edit Footer. Select Quick Parts, and select Field. In the Field names list, choose the field you want (such as FileName, Date, Author, or Title), choose the format you want in the Field properties section.
How do I automatically label a table in Word?
Follow these steps to insert captions:
- Click on the figure or table where you want the caption to appear.
- On the References tab, click the Insert Caption button.
- In the Caption window, in the Label menu, select the label Figure or Table.
- In the Position menu, select where you want the caption to appear.
How do you reference figures in text?
All figures and tables must be mentioned in the text (a “callout”) by their number. Do not refer to the table/figure using either “the table above” or “the figure below.” Assign table/figure # in the order as it appears, numbered consecutively, in your paper – not the figure # assigned to it in its original resource.
When you add several tables and figures or any other objects in your report, it is a best practice to create a list of tables and figures or lists of other objects in the report’s preface. In academic writing, this is a must-have section of your report. Like the table of contents, you can also generate a list of tables and figures or any other objects in Microsoft Word.
Table of Contents
Step 01: Add captions to tables and figures
The lists of tables and figures or lists of any other objects are generated from the captions you added for those objects in your report. If you haven’t added captions yet, you can learn how to add captions in Microsoft Word fro the following post.
How to add Captions in Microsoft Word
Step 02: Insert list of tables and figures
After you add a few captions to tables or figures in your document, you generate a list of those objects.
To generate a list of tables and figures or any other objects;
- Place the cursor where you want to add the list.
- Go to the References tab
- Click Insert Table of Figures in the Caption group
- In the Table of the Figures dialog box select the relevant Caption Label (Table, Figure, & Equation, etc…)
- Do the necessary formatting using the available options in the Table of Figures dialog box,
- Click OK.
The following animation demonstrates the above steps for creating a list of tables and figures.
Updating the lists
You need to update these lists in order to include the tables and figures or other objects you added later in the report. To update these lists,
- Click anywhere in the middle of the list to be updated
- Go to the References tab
- In the Caption group, click Update Table
- In the Update Table of Figures dialog box select the Update Entire Table option
- Click OK.
 As shown in this tutorial, you can quickly create a list of tables or figures in Microsoft Word if you used Word’s caption tool to number your tables and figures. (See “How to Insert Figure Captions in Microsoft Word” for step-by-step instructions on using the caption tool.)
We will also look at how to update the list as you add, move, or delete tables or figures.
Terminology Note: This tutorial uses the terms list of tables and list of figures, which are common terms in the publishing industry. However, Word refers to a list of tables or figures as a table of figures.
This tutorial is also available as a YouTube video showing all the steps in real time.
Watch more than 200 other writing-related software tutorials on my YouTube channel.
The images below are from Word in Microsoft 365 (formerly Office 365). The steps are the same in Word 2021, Word 2019, Word 2016, and Word 2013. However, your interface may look different in those older versions of the software.
Remember that these steps will only work if you used Word’s caption tool to number your tables or figures before creating the list.
- Insert your cursor where you want to place your list.
- Select the References tab in the ribbon.

- Select Insert Table of Figures from the Captions group.

- Select a visual style from the Formats menu in the Table of Figures dialog box. (The From Template option is based on the styles established in your current template.)

- Select Figure or Table from the Caption label menu. (There is no option for listing figures and tables together.)

- Ensure that Include label and number is checked if you want the label (i.e., Figure or Table) and the number to be included in the list. (Recommended)

- (Optional Step) Select additional options concerning page numbers and the tab leaders, which are the dots, dashes, or lines that appear before the page numbers.

Pro Tip: The Web Preview section shows how your list will look if you convert your Word file to a web page.
- Select the OK button.

- Manually type a title above your list.

- Save your file to save your changes.
The next section shows how to update a list of tables or figures.
How to Update a List of Tables or Figures
Word will not automatically update your list as you add or delete tables or figures. Instead, you can manually trigger updates, as necessary.
- Right-click the list and select Update Field from the shortcut menu.

- Select Update entire table from the Update Table of Figures dialog box.

- Select the OK button.

Your updates should appear immediately.
- Save your file to save your changes.
Important Note: Word’s caption tool, which inserts table titles and figure captions, will automatically number new tables and figures as you add titles and captions (e.g., Table 1, Table 2, Table 3). However, Word will not automatically update the numbering if you move or delete tables or figures.
See “How to Update Table and Figure Numbers in Microsoft Word” to learn how to force an update after moving or deleting a table or figure.
Related Resources
How to Create and Customize Charts in Microsoft Word
How to Insert and Modify Images in Microsoft Word
Three Ways to Insert Tables in Microsoft Word
How to Change the Style of Table Titles and Figure Captions in Microsoft Word
How to Cross-Reference Tables and Figures in Microsoft Word
How to Reference Tables and Figures in Text
Updated December 14, 2022
How to make a Table of Figures in Microsoft Word.
By Michael Barden
In last week’s issue, we looked at how to make a table of contents.
This week, we’ll look at the similar concept of how to make a table of figures. That’s a list of the images, graphs, tables or equations in a document.
In Word a ‘figure’ can mean anything you like. Normally it’s the obvious things like pictures and graphs but it can also mean tables, equations or (as we’ll see) any place in the document you put a special field code.
Like the table of contents, you can have page references or links to each figure.
A Table of Figures can be useful for creating a proper appendix of figures or tables within more formal documentation. It can be handy to have a list of all the images used in a document either for publication or just for ‘in-house’ use during writing.
Since ‘Figures’ can mean anything in a document you can make reference “Tables of ” beyond anything intended by Word’s developers.
ADDING CAPTIONS TO FIGURES
To create a table of figures, you must first add captions beneath the figures in your document. These captions are usually in the format of “Figure #: Short Description of Figure”, although they can be tailored to suit more specific needs.
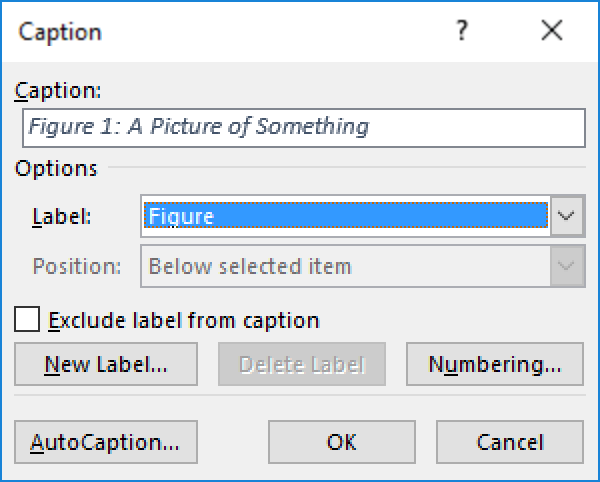
To manually add a caption to a figure, first select the item under which you want to create the caption. Navigate to Insert | Reference | Caption to bring up the “Caption” dialog box.

The “Label” drop-down list effectively groups the type of figure the caption belongs to, and has the following preset options: Figure, Equation, and Table. The ‘Label’ is used to define the type of table it will belong in.
For example ‘Figure 1’ will appear in a Table of Figures while a label ‘Equation 1’ will be in a ‘Table of Equations’.
The “New Label” button allows you to replace the currently selected “Label” with a label of your choice. You can remove this custom label by clicking the “Delete Label” button. Just some ideas of additional labels are: Recipe, Diagram, Illustration, Chart or Quiz.
The “Numbering” button brings up a dialog that allows you to format the numbering system to be used on the label. These formats include the usual Word options.
The “Include chapter number” checkbox allows you even more control of the numbering format. It treats headings of a particular heading style (e.g. Heading 1) as the start of a new chapter, and the caption numbers increment accordingly. The first figure in the second chapter of a document using an ABC numbering format would appear as: Figure 2-A.
The “AutoCaption” button allows you to set up preferences that will automatically create a default caption when a particular type of object is inserted into the document. Selecting the “Microsoft Word Picture” or “Microsoft Word Table” options in this dialog would prevent you from having to manually create labels every time a new object of these types was inserted.
MAKING A SIMPLE TABLE OF FIGURES
How you have some ‘figures’ in the document you can make a reference table of them.
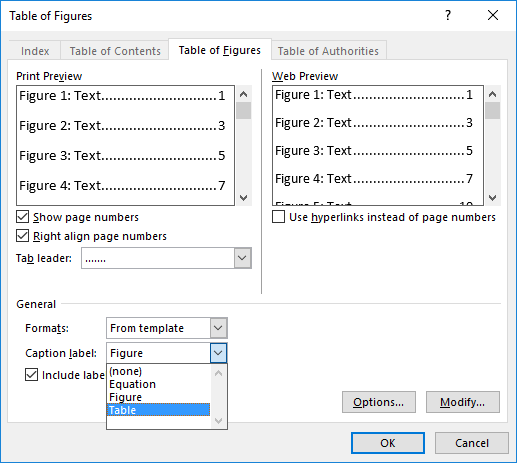
To create a simple table of figures, you must first click where you want the table to appear (most likely as an appendix or close to your table of contents). Navigate to Insert | Reference | Index and Tables to bring up the “Index and Tables” dialog then choose the “Table of Figures” tab. The options are similar to the TOC options discussed in the last issue.

To start off, take a look at how the table of figures will appear in the “Print Preview” and “Web Preview” panes. By default, page numbers are displayed and aligned to the right, although you can change this.
The “Caption label” drop down list allows you to select which type of caption (a figure, equation, table or user-defined label) will appear in this table of figures. You can only select one grouping of caption labels per table of figures. Captions relating to images and tables for example, will not normally both appear within the same table of figures (although this can be done as we’ll see below). Instead, they can be placed in separate table of figures, for images and another for tables, thereby keeping the grouping of the image and table entries separate.
The “Formats” drop-down list directly affects the style of the table of figures as can be seen in the preview panes. The available options are:
- From template
- Classic
- Distinctive
- Centered
- Formal
- Simple
To design a custom table of figures layout, click the “Modify” button and create your own style.
When you are happy with the layout, and click “OK” to build you table of figures, Word will search for the captions, sort them by number, and display the table of figures in the document.
If all this seems familiar, that’s because it’s almost exactly the same as the ‘Table of Contents’ options. In fact, a Table of Figures uses the same underlying Word technology as Table of Contents (the {TOC } field).
UPDATING A TABLE OF FIGURES
Updating a table of figures to reflect changes to captions or page numbers works the same way as it does with a table of contents. Right-click on the table and choose the “Update Field” option.
In the “Update Table of Figures” dialog you are given the option to “Update page numbers only” or “Update entire table”. Just like ‘Table of Contents’, it is generally a good idea to choose the “Update entire table” option to make sure any and all changes made within the document are reflected within the table of figures.

REORDERING FIGURES AND CAPTIONS
The caption numbers will not automatically update themselves if you decide to add, delete or reorder the caption numbering for figures throughout your document after they have been labeled and numbered.
Let’s say you move “Figure 1” below “Figure 2”. Ideally, Word would recognize this and the numbering would be updated for each of the captions. In reality, the first figure as it appears within the document will now be labeled as “Figure 2”.
To fix this you must select the caption (or just the number within the caption), and press F9. This will correctly change the number for that particular caption, but NOT the numbers for the rest of the captions.
Your best bet is to select the entire document (excluding the table of figures) and press F9. This will completely update the numbering in all of the captions throughout the entire document. Then proceed to update the table of figures as described above.
Alternative: select the entire document and press F9 twice. This will update the captions then the table of figures (regardless of where it is in the document).
If you add, delete, move, or edit captions or other text in a document, you should always remember to update the table of figures before printing.
STYLISTIC OPTIONS
If you want a single table of figures that includes all of your captions in order of appearance regardless of whether they are a figure, table, equation or belong to a label you have created. Simple – group by style.
By default, Word applies a “Caption” style to any caption inserted into the document. If all of your captions are kept in this default style, or are all changed into another customized style, then you can create a complete table of figures.
Click where you want to insert the table of figures and navigate to Insert | Reference | Index and Tables, and click on the “Table of Figures” tab as before. Click on the “Options” button and select the “Style” checkbox. Now click the style name that you have used for the figure captions (by default this is “Captions”, although other options include “Normal”, “Heading 1” and so on), and then click the “OK” button.
The corresponding table of figures will now appear with all of your different types of captions placed within the same table in the order that they appear within the document.
You may have an MS Word document with many figures and tables. For long documents, it is easier for the reader to have a list of contents at the beginning for reference. In the same way, a list of figures at the start of the document helps in locating them easily.
Note: The publishing industry commonly uses the terms list of figures and list of tables. However, MS Word refers to both the terms as a table of figures.
It is easy to create a list of figures or a table of figures. Provided, you have been using Word’s Caption Tool. The tool is for numbering the tables and figures in your document.
You may add or delete a figure or table in your document. The Caption Tool adjusts the numbering. Likewise, it also helps to adjust the list of figures at the start of your document.
We will show you in simple steps how to insert the list of figures. We will also show you how to update it after modifications.
Let us begin.
Step #1: Open the Word document
Open the Word document that has several images, tables, and charts.

Follow the next step if you have not used the Caption tool.
If you have numbered your images, tables, and charts, go to Step #3.
Step #2: Caption the images, tables, and charts
Select the first image, table, or chart and right-click.
From the menu that opens, click on Insert Captions.

This opens the Caption tool
Under Caption, Word has provided the number of the figure.
Enter the name of the figure after the number.
Click OK to close the tool.

Word will number the selection.

Repeat Step #2 for all images, tables, and charts in your document.
Note that Word treats all images, tables, and charts as figures and numbers them serially.
Step #3: Insert Table of Figures
Place the cursor where you want the table of figures to appear in the document.
Click on the Reference tab on the top menu bar to change the ribbon

In the section Captions, click on Insert Table of Figures.

This will open the Table of Figures dialog box.

Make sure there is a tick mark against:
- Show page numbers — remove the tick mark if you do not want to show page numbers.
- Right align page numbers — remove the tick mark if you do not want right alignment.
- Use hyperlinks instead of page numbers — hyperlinks appear for Web Preview.
- Include label and numbers — include the label and numbering you have added.
Under General,
- Select From template against Formats.
- Select Figure against Caption label.
Click on OK to close the dialog box.

Word creates the Table of figures or list of figures.

Type a title above your list or table of figures.

Step #4: Update the Table of Figures.
If you make any changes to your document, Word will not update the table of figures by itself. To update it,
Select the table of figures.

Right-click to open a menu.
Click on Update Field

A dialog box for Update Table of Figures will open.
Click on Update entire table
Click on OK to close the dialog box.

Word will update the entire table.
Conclusion
Follow our step-wise guideline for inserting a list of figures anywhere in your document. We have also shown how to update the list after you have made changes.
Some requirements demand listing figures, tables, and other visual objects at the end of a document. They are named List of Figures and List of Tables. Microsoft Word offers the functionality named Table of Figures that helps generate and update a list of the captions for pictures, charts, graphs, diagrams, slides, photos, or other illustrations of the document, along with the numbers of the pages on which the captions appear.
Table of Figures pretty much like Table of Content:
- Is helping readers and reviewers navigate to the visual objects in the document,
- Is generated from the figure and table captions or other object captions. All captions you need to include in the appropriate Table of Figures should be added using the Caption functionality.
Depending on the selected type of objects (captions label), the list generated by Table of Figures may contain:
- List of figures (see How to create automatic numbers and captions for figures: images, pictures):

- List of tables (see How to create automatic numbers and titles for tables):

- List of custom objects, labeled in the Caption functionality as a separate item. E.g., a List of photographs (see How to insert numbers, captions, and cutlines for photographs):


Note: See how to transform captions and titles for including or excluding different text parts to the Table of Figures.
Prepare items for a List of Tables or Figures
Before starting a Table of Figures functionality in Word, ensure that all visual objects have captions (or at least style you will use for creating a list). These allow Word to recognize and include them in the appropriate list.
You can create a list of objects and add a caption to the missed object later. Don’t forget to update caption numbering and already created lists!
Create a List of Figures or Tables in Word
To create a list of some objects in a Word document, position the cursor to insert the list. Then, on the Reference tab, in the Captions group, click the Insert Table of Figures button:

In the Table of Figures dialog box, on the Table of Figures tab (is displayed by default, all other tabs are grayed):

- In the General section (we recommend starting from this section because its options can change the selected parameters in other sections):
- From the Format dropdown list, select a visual format:

- From template is based on the styles established in the current template
- Classic
- Distinctive
- Centered
- Formal
- Simple
Note: Choose any proposed formats and see how the new list will look in the Print Preview section. E.g., the Formal format:

- From the Caption label dropdown list, select the type of items you want to include in the Table of Figures:
- (none)
- Figure (selected by default) – see how to create captions for figures,
- Equation – see how to create captions for equations,
- Table – see how to create captions for tables,
- Any other label (in this example, My Caption, Photo) was created using the New Label… button of the Caption dialog box. E.g., see how to create captions for photographs.
Note: There is no option for listing different labels in that list, such as figures and tables together. See how to create a list of all captions in the document below.
- Ensure that the Include label and number check box is selected if you want the label (i.e., Figure or Table) and the number to be included in the list. E.g.:
- With the selected Include label and number check box, the list displays the entire captions:
- With unselected Include label and number check box, the list displays only text from captions:
- From the Format dropdown list, select a visual format:


See all the changes and choices in the Print Preview and Web Preview sections:
- In the Print Preview section (all changes in that section can be changed by the selected options in the General section):
- Clear the Show page numbers check box if you prefer to hide page numbers from the list:
If you deselect this option, all other options in the Print Preview section will disappear.
- Clear the Right align page numbers check box to display page numbers right after items text:
If you deselect this option, you can’t choose the tab leader for page numbers.
- From the Tab leader dropdown list, select the tab leader you need. You can select dots, dashes, or lines that appear before the page numbers:
- Clear the Show page numbers check box if you prefer to hide page numbers from the list:
- In the Web Preview section (shows how your list will look if you convert your Word file to a web page):
- Clear the Use hyperlinks instead of page numbers check box if you prefer to see the same view as in Print Preview:


Create a list for the style or Table entry fields
In the Table of Figures dialog box, on the Table of Figures tab:
- Click the Options… button to use styles and Table entry fields for the Table of Figures instead of caption labels:

In the Table of Figures Options dialog box:
- Select the Style from the dropdown list (check box will be selected automatically) to add all text with the selected style in a Table of Figures:
Note: The Style dropdown list contains all styles already used in the Word document.
So, Word creates a list of all text blocks in a document with that style. E.g., if you select the Caption style, you will see all captions in a List:

Note: You can create a custom style for some titles or blocks of text and include them in the list. See some examples below.
- Select the Table entry fields check box to insert Table of Contents entries (see how to create and use the Table of Contents Entries):

For example, if you have the table titles in the separate line of the label and number, you can create the Table entry fields for such tables:

***

So, the List of Table will display specified titles:

Note: The issue of this example can also be solved using the transformation of the captions and titles.
- Select the Style from the dropdown list (check box will be selected automatically) to add all text with the selected style in a Table of Figures:


Customize the Table of Figures style
In the Table of Figures dialog box, on the Table of Figures tab:
- Click the Modify… button to modify a predefined style for a Table for Figures.
In the Style dialog box:
- In the Styles list, is selected a style that Word will use for a created Table,
- In the Preview field, check how the style looks,
- Under Preview, the main options for the style are listed:

- Click the Modify… button to change the style.
In the Modify Style dialog box, make changes you need, then click the OK button:

For example, the Table of Figures with double spacing and indentation for the long captions:

See how to customize the Table of Figure style for more details.


Add a title to the custom Table of Figures
After inserting a new Table of Figures, manually type a title above the list. E.g.:

Attention! We highly recommend checking the formatting requirements, accepted by your college, university, company, or established on the project, etc. For example:

See also how to customize the Table of Figures style.
Empty Table of Figures or Table of Tables
After creating a Table of Figures, Word can create a message “No table of figures entries found”:
![]()
The leading cause for this message is that Word could not find the text with the Caption style for the selected caption label (e.g., Figures, Tables, etc.).
To solve that problem, check the style for items captions such as figures and tables which you want to be displayed in the Table of Figures.
Don’t forget to update captions and any related items in a document!
Update a List of Tables or Figures
Microsoft Word inserts Table of Figures as a field:
So, you can change the TOC field using switches.
Word will not automatically update any Table of Figures after adding, deleting, or modifying included items and pages. To manually update them, follow the next steps:
1. Click on the list and do one of the following:
- On the References tab, in the Captions group, click the Update Table button:

Note: Only if your cursor is positioned on any of the generated Tables (Table of Figures, Table of Content, etc.), that button is not grayed.
- Right-click the list and select Update Field from the shortcut menu:


2. In the Update Table of Figures dialog box, select elements you need to update:

We recommend selecting the Update entire table option always.
3. Click the OK button to start updating.
Note: See how to turn on or turn off highlighting of fields in a Word document to display all fields in a document with a gray background.
Edit an existing Table of Figures or Table of Tables
If you need to modify an existing Table of Figures, you can:
- Delete existing Table of Figures and create a new one,
- Edit an existing field.
To edit the existing Table of Figures, follow the next steps:
1. Do one of the following:
- Click anywhere on the Table, then on the References tab, in the Captions group, click the Insert Table of Figures button.
- Select all the lines of the Table, then right-click on the selection and choose Edit Field… in the popup menu:

In the Field dialog box, click the Table of Contents… button:

Note: The button is visible only if you have selected all the existing Table of Figures lines.
2. In the Table of Figures dialog box, on the Table of Figures tab, select the options you need.
Be careful! Word opens the Table of Figures dialog box with default options. All the options selected for the existing Table disappear.
Delete a Table of Figures
To delete a List of Figures (List of Tables, or List of any objects), select all the lines of a Table of Figures and press Delete.

Highlights
- Before adding a list of figures in your Word document, you need to add captions to them.
- You can add a list of figures in Word from the references ribbon.
- The method of adding a list of figures in an MS Word document is the same as adding a list of tables.
Working on a report and want to add a list of figures to it? If you want to know how to add a list of figures in Word, read this article.
If you are searching how do I automatically insert a list of figures in word, here is the answer. This is a quick guide on how to insert a list of figures in MS word documents.
If your Microsoft Word document has many tables and figures in the appendices, you need to create a separate list of tables and figures in it. This how-to will make creating lists of figures less time-consuming.

Before adding a list of figures in Word 2013, make sure you have given appropriate captions to them. But if you haven’t, follow the below steps to add captions to figures.
Firstly, click on the figure and then click on REFERENCES. Then click on Insert Caption.

From the dropdown against Label, choose Figure. By default, Word will caption it as Figure 1. Click OK.

Repeat this process for all the figures in your Word document. After captioning all the figures, you are ready to insert a list of figures into it.
Steps To Insert List Of Figures In Word 2013
- Type the heading List of Figures, assign the Heading 1 style, and click where you want to insert the list.

- Click on REFERENCES and then click List of figures.

- In the resulting dialog, choose Figure from the Caption Label dropdown.
- Uncheck the Use Hyperlinks Instead Of Page Numbers option.
- Click OK.

You will see that the list of figures has been added successfully.

How To Update List of Figures In Word
If you add, delete, change, or move captions, use Update Table so the list of figures reflects your changes.
- Click on the list of figures in your document. This will highlight the entire list.
- Click References > Update Table.

- Note: Update Table becomes an option only when you click the table of figures in your document. You can also press F9 to modify your list of figures.
- Select an Update in the in the Update Table of Figures dialog box.
- Select Update page numbers if you need to adjust the page numbers.
- Select Update entire table if you have moved figures or altered captions.

- Click OK.

Back to top button

Adding charts and figures to a college paper or business report adds visual impact, which can help you make your point more clearly. However, if you are using charts or figures, you also need to make them easy to find for your reader. This is why Microsoft Word offers a quick way of adding a list of charts and figures to a document. Read on to find out how this works.

Adding Images and Captions
You can add pictures or charts to a document in Microsoft Word via the Illustrations section of the Insert tab on the main ribbon (you can also import charts from Excel).
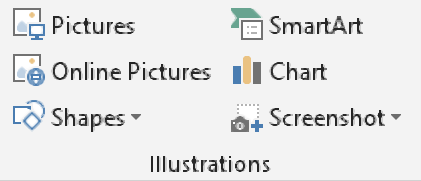
To create a list of the figures and charts, though, you’ll also need to add captions. There are two main ways to do this:
- Right click the image or chart and select Insert Caption from the menu
- Place the cursor where you want to add a caption and select Insert Caption from the References tab on the ribbon (or from the Insert tab if you’re using Word for Mac)
This will open a new window where you can add your caption text and select a label type. For charts and figures, the “Figure” label is usually best. Make sure all images and charts that you want to list have captions with the same label type.
Find this useful?
Subscribe to our newsletter and get writing tips from our editors straight to your inbox.
Creating a List of Charts and Figures
Once you have added all the captions to your document, you can generate an automatic list of charts and figures. To do this on a PC, you need to:
- Place the cursor where you want to add the list
- Go to the Captions section of the References tab
- Click Insert Table of Figures
- Pick a label type from the menu and click OK
To do the same thing on Mac computers, select Table of Figures from the Index and Tables section of the Insert menu. This will generate a list of charts and figures based on the caption text for images with that label type. If you make further edits to the document, you can update the list at the touch of a button (simply select it and click Update Table).
Contents
- 1 How do I create a list of figures in Word?
- 2 How do I list tables and figures in Word?
- 3 How do you add multiple figures in Word?
- 4 How do I make a list of figures?
- 5 How do you cross reference a figure in Word?
- 6 What is cross-reference example?
- 7 How do you add a caption to a floating object?
- 8 How do I reference a picture in Word?
- 9 How do you add captions to photos?
- 10 How do you credit a photo?
- 11 What is a caption for a picture?
- 12 What is the best app to add text to photos?
- 13 How can I write my name on a photo?
- 14 Can you add text to an Iphone photo?
- 15 How do you add notes to photos on iPhone?
- 16 How do I add markup fonts to my iPhone?
- 17 How do I bring text to front in markup?
- 18 How do I download and use fonts?
How do I create a list of figures in Word?
To create a combined list of tables and figures
- After the table of contents, click where you want to insert the list.
- In the Insert menu, pull down to Index and Tables.
- Click Table of Figures.
- Check Include label and number, Show page numbers, Right align page numbers.
- Click Options.
- Click OK.
- Click OK.
How do I list tables and figures in Word?
On the References Ribbon, in the Captions Group, click the Insert Table of Figures icon (even for lists of tables and equations). In the Table of Figures dialog box, select the label for which you want to make a list from the Caption Label pulldown (such as “Equation”, “Figure“, or “Table“).
How do you add multiple figures in Word?
Inserting Multiple Graphics in a Document
- Place the insertion point at the place in the document where you want the graphics inserted.
- Display the Insert tab of the ribbon.
- Click the Picture tool. Word displays the Insert Picture dialog box.
- Use the controls in the dialog box to locate the folder that contains the images.
- Press Ctrl+A.
- Click Insert.
How do I make a list of figures?
Click in your document where you want to insert the table of figures. Click References > Insert Table of Figures. You can adjust your Format and Options in the Table of Figures dialog box. Click OK.
How do you cross reference a figure in Word?
Creating cross–references in Word
- select the References tab.
- select Cross reference.
- choose the Reference type (Numbered item, Figure or Table)
- select the correct option in Insert reference.
What is cross-reference example?
The term cross–reference (abbreviation: xref) can refer to either: An instance within a document which refers to related information elsewhere in the same document. For example, under the term Albert Einstein in the index of a book about Nobel Laureates, there may be the cross–reference See also: Einstein, Albert.
How do you add a caption to a floating object?
Add a caption to a floating object
- Insert your figure.
- Choose Layout Options and select one of the With Text Wrapping choices.
- Add your caption using the steps listed in “Add captions” above.
- Select your caption then hold down the shift key and select your figure.
- Right click on either item and choose Group > Group.
How do I reference a picture in Word?
Word
- Click the picture you want to add a caption to.
- Click References > Insert Caption.
- To use the default label (Figure), type your caption in the Caption box.
How do you add captions to photos?
Writing captions in your smartphone takes just all the same steps. To use Google Photos, download them from the Play Market for Android or App Store for IOS. Open the photo that you want to caption and tap it to expand. At the screen bottom, tap the i button and add a description to the field.
How do you credit a photo?
If you’re using it in a blog post or on your website, put the name of the creator and a link to their website or the source of the image beneath it. The format should be something like this: “Photo by [artist name with their website hyperlinked]” or “Image by [artist name] via [website hyperlinked].”
What is a caption for a picture?
Photo captions, also known as cutlines, are a few lines of text used to explain and elaborate on published photographs.
What is the best app to add text to photos?
Phonto. It is brilliantly designed, user-friendly app for adding text to your photos, which is available for both Android and iOS. It is very easy to use: snap the shot or import an image into the app, add the text and tweak it to your liking.
How can I write my name on a photo?
Click the watermark image and position it where you want on the photo. Press Ctrl+A to select the watermark and the photo, and click Picture Tools > Format > Group. Right-click the photo, click Save as Picture, and save the watermarked photo with a new name.
Can you add text to an Iphone photo?
Photos. Go to Photos and select the photo you want. Tap Edit, tap , then tap Markup . Tap the plus button to add text, shapes, and more.
How do you add notes to photos on iPhone?
Create a new image note
- On your iPhone or iPad, open the Keep app .
- At the bottom right, tap Add image .
- Pick one. To take a photo, tap Take photo . To pick a photo from your library, tap Choose image .
- Enter any body text in Note.
- Enter a title in Title.
- When finished, tap Back .
How do I add markup fonts to my iPhone?
Tap the Fonts tab in the bottom bar. Tap Install Fonts under one that you like, tap Install again. You can see new fonts that you’ve installed by heading to Settings > General > Fonts. Now open a custom font compatible app like Pages, Keynote, or Mail.
How do I bring text to front in markup?
Bring to Front (CTRL+SHIFT+]) : Moves the selected markup in front of any other overlapping annotations. Demonstrated on yellow square. Send to Back (CTRL+SHIFT+[) : Moves the selected markup behind any overlapping annotations. Demonstrated on yellow square.
How do I download and use fonts?
How to Install Fonts on a PC
- Shut down any program you want to use the font in.
- Download the font to your computer and open zip files if necessary. It may have a . zip, . otf, or .
- Right click on each font you’d like to add, then choose “Open.”
- Once open, click “Install” to add the font to your computer.