
How to type Text over a Line in Word
- Highlight the text and click the Underline button on the Home tab in the Font group, and you will notice that the text will be on the line.
- The second technique is to click the Insert tab and click the Text box button in the Text group.
Contents
- 1 How do you make lines to write on in Word?
- 2 How do you write on top of a line?
- 3 How do you put a line above text in Word?
- 4 How do you type Overbar?
- 5 How do you put a line under a letter in Word?
- 6 How do you type a horizontal line on a keyboard?
- 7 How do you write on lined paper?
- 8 How do I edit lines in Word?
- 9 How do you put a line above and below text in Word?
- 10 How do you get a line above a letter on a keyboard?
- 11 How do you make an O with a line through it?
- 12 How do you pronounce a with a line over it?
- 13 How do you add lines to a resume in Word?
How do you make lines to write on in Word?
Use the Shapes Menu to Insert a Line in Word
- Place the cursor in the spot where you want to insert a line.
- Go to the Insert tab.
- In the Illustrations group, select the Shapes drop-down arrow.
- In the Lines group, choose a line shape.
- In the Word document, drag across the location where you want the line to appear.
How do you write on top of a line?
In the drop-down menu, click on the button labeled “Special Characters” and then “More Symbols.” You will find a list of special characters under this section. Scroll through them until you find the specific overlined letter you want to add, such as an a with a line over it, and then click on it.
How do you put a line above text in Word?
Type the text you want to overline into your Word document and make sure the “Home” tab is active on the ribbon bar. Click the down arrow on the “Borders” button in the “Paragraph” section of the “Home” tab. Select “Top Border” from the drop-down menu.
How do you type Overbar?
Method 1: Use Word’s Equation Editor
- Go to the Insert tab > Symbols group (far right), then click Equation.
- Select Insert New Equation from the bottom of the list.
- Click Accent on the Design tab > Structures group.
- Scroll down past the Boxed Formulas section to the Overbars and Underbars section.
- Click the Overbar icon.
How do you put a line under a letter in Word?
Hold the “Ctrl” key and press “U” to put a line under the letter. Press the combination again to remove the line.
How do you type a horizontal line on a keyboard?
Press and hold the “Shift” key, then press and hold the hyphen “-” key, located two keys to the left of “Backspace” on a PC or “Delete” on a Mac. This creates a solid, horizontal straight line.
How do you write on lined paper?
Always on your left.
Also, don’t write in the white space above the first line. You can write your name and date there, but that’s all. And don’t write outside the red lines – you should leave at least an inch of white space all around the outside edge of the paper.
How do I edit lines in Word?
In Excel, Outlook, PowerPoint, and Word
- Select the line that you want to change.
- Under Drawing Tools, on the Format tab, in the Shape Styles group, click the arrow next to Shape Outline.
- Point to Dashes, and then click the line style that you want.
How do you put a line above and below text in Word?
To insert a line in Word above and / or below a paragraph using the Borders button:
- Select the paragraph(s) to which you want to add a line.
- Click the Home tab in the Ribbon.
- Click Borders in the Paragraph group. A drop-down menu appears.
- Select the line you want to use.
How do you get a line above a letter on a keyboard?
These keyboard shortcuts will help you display text more accurately in your business documents.
- Open a document in Microsoft Word.
- Press “Ctrl-Shift” and the caret (” ^ “) key and then the letter to insert a circumflex accent.
- Press “Ctrl-Shift” and the tilde (” ~ “) key and then the letter to insert a tilde accent.
How do you make an O with a line through it?
ø = Hold down the Control and Shift keys and type a / (slash), release the keys, and type an o. Ø = Hold down the Control and Shift keys and type a / (slash), release the keys, hold down the Shift key and type an O.
How do you pronounce a with a line over it?
For instance, a line over the letter “i” would be pronounced like “eye” like in the word “pie,” and a line over the letter “o” would be pronounced “oh” like in the word “toe.” A line over the vowel “a” would be pronounced “ay” like in “stray,” and a line over the letter “e” would be pronounced like “ee” in “tree.”
How do you add lines to a resume in Word?
To add a line under a header or line of text, highlight the text and select the bottom border option under Paragraph/Borders. Another way is to Insert>Shapes>choose the Line shape and drag the line under the text from left to right.
Word for Microsoft 365 Outlook for Microsoft 365 Word 2021 Outlook 2021 Word 2019 Outlook 2019 Word 2016 Outlook 2016 Word 2013 Outlook 2013 Word 2010 Outlook 2010 Word 2007 Outlook 2007 More…Less
You can add horizontal lines, sometimes called horizontal rules, to a document or email message to help separate sections of text and add visual appeal.
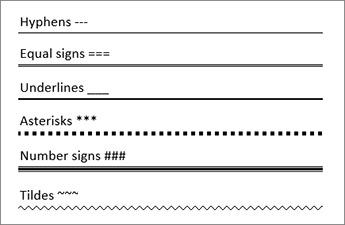
By default, Word and Outlook have a three-character shortcuts that inserts a full-width horizontal rule in your document or message. The appearance of that rule—thinner, thicker, double-line, dotted, wavy—depends on which shortcut you use, as illustrated in the image below.
If this automatic line feature doesn’t suit you, you can turn off this feature in Word or turn it off in Outlook.
If you want to draw a line for illustration purposes, see Draw a line in Word or Outlook instead.
Insert a horizontal line by typing a few characters
The fastest way to add a horizontal line or rule is to use the AutoFormat feature. When you type certain characters three times in their own paragraph and then press Enter, those characters instantly become a full-width horizontal line.
-
Place the cursor where you want to insert the horizontal line.
-
Type three of the characters illustrated below, and then press Enter.

The line is inserted for the full width of the page. When inserted into a column, the line is inserted to match the width of the column. To add text above the line, put your cursor where you want the text and begin typing.
Format the horizontal line after you create it
The shortcut described above creates an empty paragraph with a bottom border. You can change the look of that border line by using the Borders options:
-
In Word, on the Home tab of the ribbon, select the down arrow next to
Borders.In Outlook, on the Format Text tab of the ribbon, select the down arrow next to
Borders. -
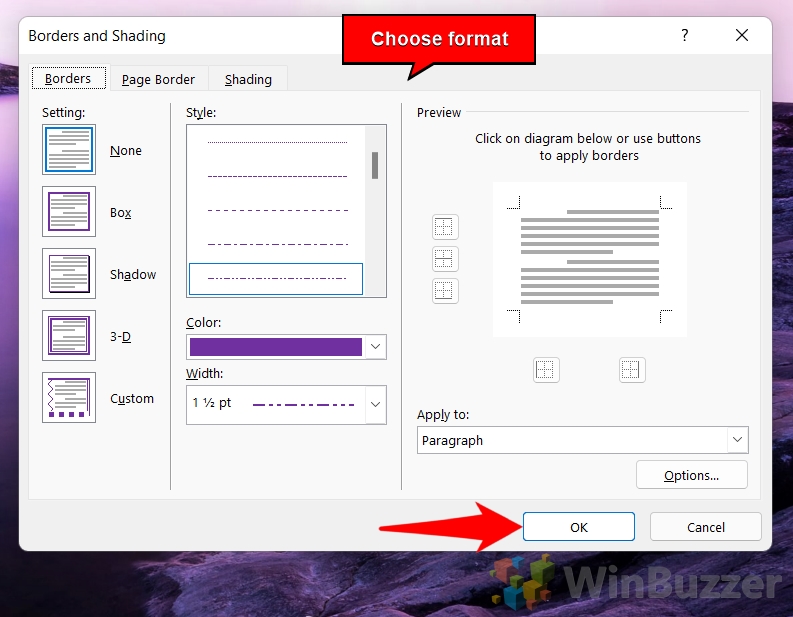
At the bottom of the menu, select Borders and Shading.
-
In the dialog, you can change the line’s style (solid, dotted, wavy, double, and so on), color, or width as you see fit.
-
When you’re done formatting the line, select OK. Then, on the ribbon, select the
Borders button to apply your changes.
 Borders.
 Borders button to apply your changes.
 Word: Turn off the automatic line feature
To prevent Word or Outlook from automatically inserting a horizontal line when you type the three shortcut characters, do the following:
-
On the ribbon, select File > Options.
-
In the dialog box, select Proofing > AutoCorrect Options > AutoFormat As You Type.
-
Clear the Border Lines option.
-
Select OK.
Outlook: Turn off the automatic line feature
-
On the ribbon, select File > Options.
-
In the dialog box, select the Mail tab, then select Editor Options.
-
On the Proofing tab, select AutoCorrect Options > AutoFormat As You Type.
-
Under Apply as you type, clear the Border Lines option.
-
Select OK.
Want to draw a line?
See Draw a line in Word or Outlook.
See Also
Add a border to some text
Draw shapes
Need more help?
Want more options?
Explore subscription benefits, browse training courses, learn how to secure your device, and more.
Communities help you ask and answer questions, give feedback, and hear from experts with rich knowledge.
![]()
Download Article
A user-friendly guide to making different types of lines in Microsoft Word
![]()
Download Article
- Using Shapes to Draw a Line
- Using Borders to Add a Line
- Using Keyboard Shortcuts
- Using the Mobile App
- Q&A
- Tips
|
|
|
|
|
Do you want to create a horizontal line in your resumé or other Microsoft Word document? If you want to customize the color and format of the line, you can use the Shapes tool. If you need to make a quick, basic line, you can use the keyboard shortcut. While you can use the keyboard shortcut on Windows and Mac, you cannot use it on the mobile app. This wikiHow will show you how to insert different lines in Microsoft Word on your Windows, Mac, iPhone, or Android device.
Things You Should Know
- On desktop, go to the Insert tab. Click Shapes, then select a line. Click and drag across the document to create a line.
- To customize the line, double-click it. Click Shape Outline to change the color.
- On mobile, click the three dots. Tap Home and select Insert. Tap Shapes to select a line. Tap and drag across the document to create a line.
-
1
Open Microsoft Word on your Windows or Mac computer. Click or double-click the Word app icon, which resembles a white «W» on a dark-blue background.
- If you want to draw a line in an existing Word document, double-click the Word document to open it and skip the next step.
- You’ll need a subscription to use Office 365.
-
2
Click Blank document. It’s in the upper-left side of the page.
Advertisement
-
3
Click the Insert tab. This tab is in the blue ribbon at the top of the Word window, between Home and Draw.
-
4
Click Shapes. It’s in the Insert toolbar, next to the icon of an overlapping circle and square.
- A drop-down menu will appear.
-
5
Select a line shape. In the «Lines» heading, click one of the line templates. You can choose a line, line arrow, double line arrow, and more.
-
6
Draw your line. Click and drag across the document to create your line.
- If you need to adjust the line’s length and orientation, click the left or right circle. Drag it left or right to adjust the length, or drag it up and down to adjust the orientation.
- To move the line, double-click and drag it to the desired position.


Advertisement
-
1
Open Microsoft Word on your Windows or Mac computer. Click or double-click the Word app icon, which resembles a white «W» on a dark-blue background.
- If you want to draw a line in an existing Word document, double-click the Word document to open it and skip the next step.
-
2
Click Blank document. It’s in the upper-left side of the page.
-
3
Click the Home tab. This tab is in the blue ribbon at the top of the Word window, between File and Insert.
- You may already be on this tab by default.
-
4
Click the «Borders» arrow. This is next to the icon of the dotted square with a solid bottom line.
- A drop-down menu will open.
-
5
Click Horizontal Line. This will be towards the bottom, above Draw Table.
- A horizontal line will be added.
-
6
Format your line. Double-click the line; a dialogue box will appear.
- To change the line thickness, use the up and down arrow below Height. The higher the number, the thicker the line will be.
- To change the color, click the color box underneath Color. Select your desired color.
- Click OK to save and apply your changes.
- To move the line, double-click and drag it to the desired position.


Advertisement
-
1
Open Microsoft Word on your Windows or Mac computer. Click or double-click the Word app icon, which resembles a white «W» on a dark-blue background.[1]
- If you want to draw a line in an existing Word document, double-click the Word document to open it and skip the next step.
-
2
Click Blank document. It’s in the upper-left side of the page.
-
3
Place your cursor where you want your line to appear. You’ll need to be on a blank line, as this won’t work if there is text before or after your cursor on the same line.
- You’ll be creating a horizontal line that spans from one edge of your page to the other. The line will stop at your set margins.
- If you want to make the line span the whole page, you’ll need to change your document margins.
-
4
Type three dashes in a row. Use your dash key on the number row at the top of your keyboard, or on the numeric pad.
-
5
Press ↵ Enter to convert the dashes into a line. AutoCorrect will automatically create a solid line that will situate itself directly beneath the previous line of text.
- Note that the line does not occupy the space of a line of text, but instead exists between lines of text.
- If you do not have AutoCorrect enabled, do so by clicking File → Options → Proofing → AutoCorrect Options…. This will open a new window.
- Make sure the Border Lines box is checked. This can be found underneath Apply as you type.
- If you want to turn off AutoCorrect, uncheck the boxes.
-
6
Use different characters for different line styles. There are a variety of different lines that you can create by using characters other than the dash:[2]
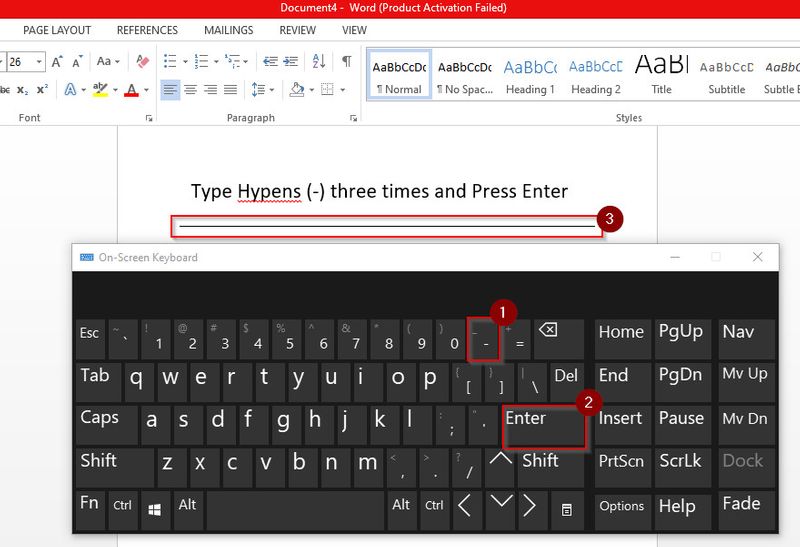
- Thin line: Three hyphens (-).
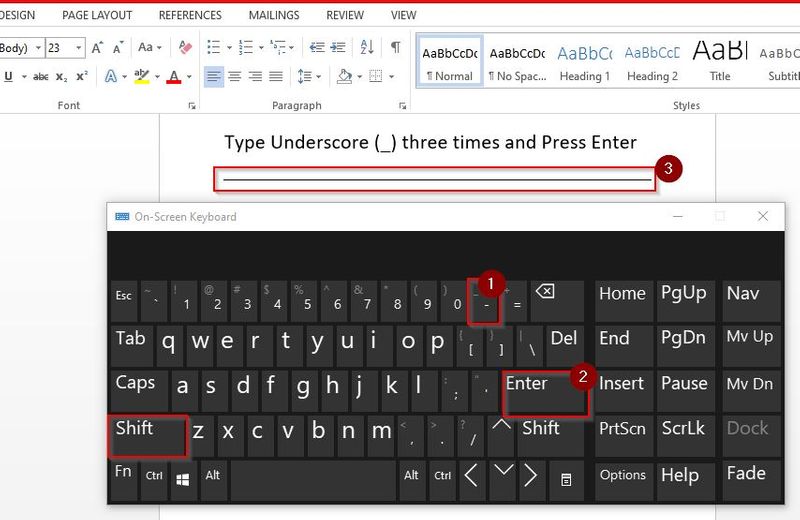
- Thick line: Three underscores (_).
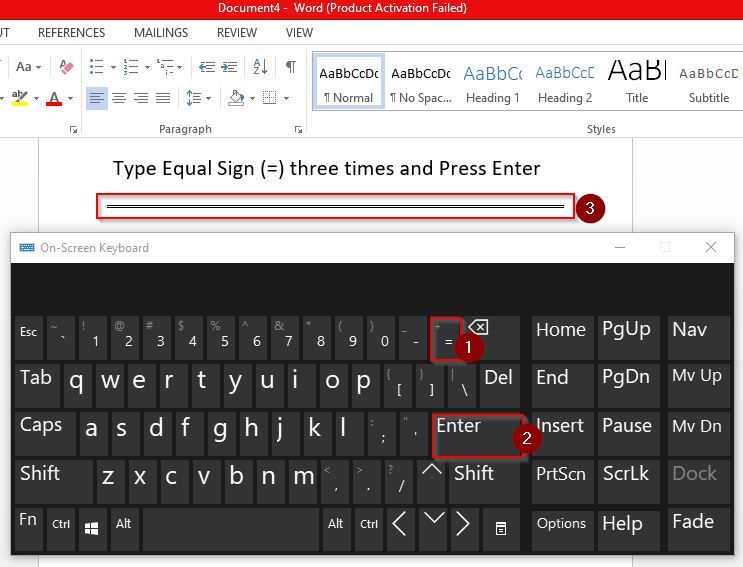
- Double line: Three equal signs (=).
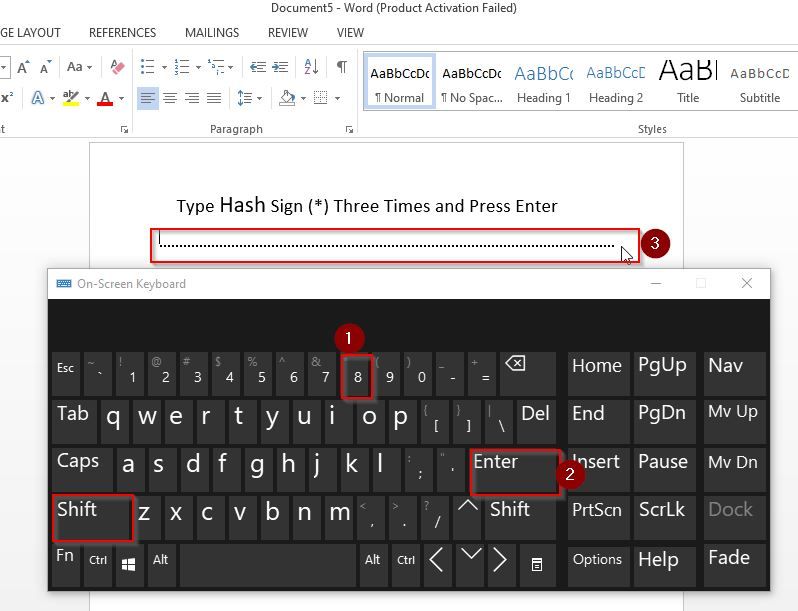
- Dotted line: Three asterisk (*).
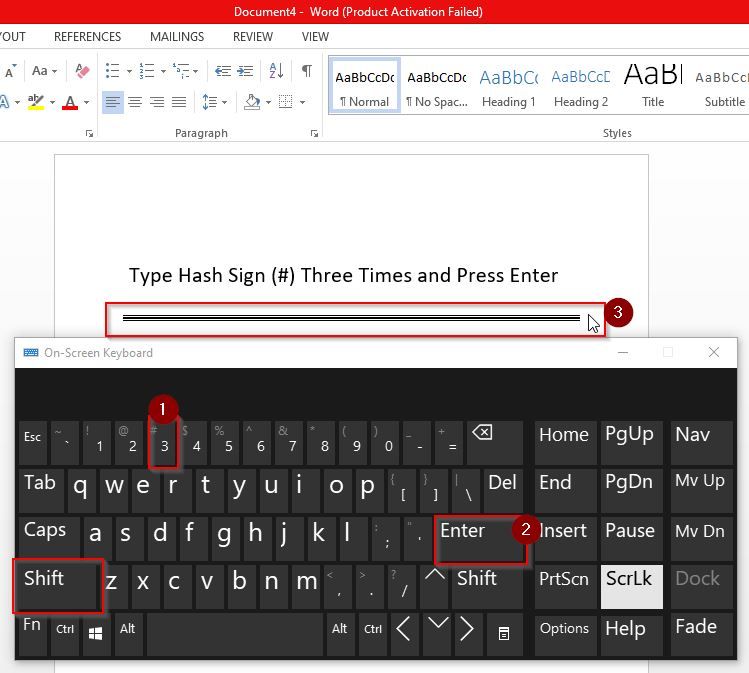
- Triple line: Three pound signs (#).
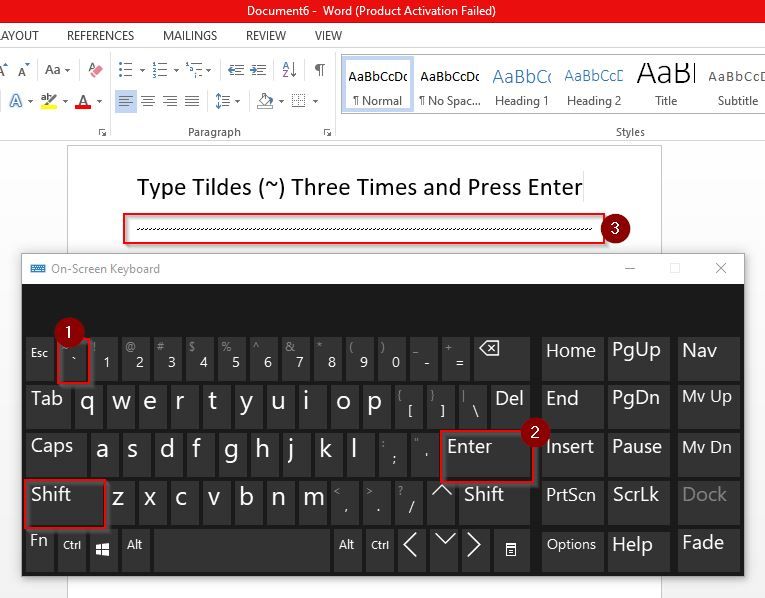
- Squiggly line: Three tildes (~).
-
7
Move the line by entering text above it. You can prompt the line to move down by typing text above it and then pressing Enter.
- Deleting text above the line will prompt it to move upward.


Advertisement
-
1
Open a document in the Microsoft Word app. This looks like a blue notebook next to a W.
- Microsoft Word is available for iOS in the App Store and for Android in the Google Play Store.
- Tap Blank document to open a new document or tap a file to open an existing document.
-
2
Tap ••• . This can be found above the keyboard, to the right.
- If you don’t see your keyboard, tap the document to bring it up.
- A new menu will open.
-
3
Tap Home. This will be to the left of the formatting window.
- A drop-down menu will open.
-
4
Tap Insert. You’ll see a list of all objects you can insert.
-
5
Tap Shapes. This is next to the icon of an overlapping circle and square.
-
6
Select a line shape. In the «Lines» heading, tap one of the line templates. You can choose a line, line arrow, double line arrow, and more.
-
7
Draw your line. Tap and drag across the document to create your line.
- Use two fingers to pinch and zoom out to view the entire document.
- If you need to adjust the line’s length and orientation, tap the left or right circle. Drag it left or right to adjust the length, or drag it up and down to adjust the orientation.
- To move the line, tap and drag it to the desired position.


Advertisement
Add New Question
-
Question
How do I view all available symbols in Microsoft Word?

Click «Insert» and then click «Symbols» and you should be shown a box with all of the symbols in it.
-
Question
How do I add a line on the first page, and no lines on the second?
Click «Insert» and then click «Symbols» and you should be shown a box with all of the symbols in it.
-
Question
How do I change the color of the line?
In the paragraph section, open the drop-down menu on the «Borders» button. At the very bottom is a «Borders and Shading» option. In that option, change the color of the bottom border to your specified color. Click the «Borders» button.
See more answers
Ask a Question
200 characters left
Include your email address to get a message when this question is answered.
Submit
Advertisement
-
Looking for money-saving deals on Microsoft Office products? Check out our coupon site for tons of coupons and promo codes on your next subscription.
Thanks for submitting a tip for review!
Advertisement
About This Article
Article SummaryX
1. Click Insert.
2. Click Shapes.
3. Select a line template.
4. Click and drag across your Microsoft Word document to draw the line.
Did this summary help you?
Thanks to all authors for creating a page that has been read 2,043,531 times.
Is this article up to date?
When it comes to business documents, it’s not aloof the agreeable that matters. Their blueprint and accepted actualization is additionally important, both to ensure they’re as bright as accessible and to accomplish them attending polished, able and attractive. Affiliate lines, in particular, accomplish abstracts easier to bound brush for accordant information, abnormally back commutual with acutely apparent area headings. Depending on your preferences and on the aftereffect you appetite to get, you can admit a solid affiliate band application several altered methods.
 How to Make a Line in Word 9")
Provided it’s switched on, Word’s AutoFormat affection makes it accessible for you to add a band with aloof four key presses. Type three hyphens in a row on an contrarily bare band and again columnist “Enter” to actualize a thin, solid line; application three underscores instead will aftereffect in a thicker solid line, while application three according signs will aftereffect in a bifold line. Three asterisks will about-face into a dotted band and three tildes into a bouncing line, while three batter signs will aftereffect in a amateur line. To analysis if AutoFormat is on, bang the “File” tab, “Options” and again baddest the “Proofing” tab. Bang the “AutoCorrect Options” button, the “AutoFormat as You Type” tab and accredit the “Border Lines” option.
Probably the best aboveboard way of creating a accumbent band is to baddest it from the Borders menu. On the Home tab, bang the arrow on the Borders button and baddest “Horizontal Line.” By default, a accumbent band created in this address is a attenuate gray rectangle, although it can be customized in agreement of height, width, blush and alignment by right-clicking on the band and selecting “Format Accumbent Line.” You can additionally accept from a array of added busy lines. To do this, bang the arrow on the Borders button, baddest “Borders and Shading” and again bang the “Horizontal Line” button.

A basal bound activated to a branch isn’t absolutely a accumbent band but can simulate it. On the Home tab, bang the arrow on the Borders button and baddest “Bottom Border” to administer a bound to the branch in which your argument cursor is currently placed. By default, the bound is a solid, attenuate line, but if you’ve ahead activated a custom bound to any allotment of your certificate it’ll use the aforementioned options. To adapt bound settings, bang the arrow on the Borders button and baddest “Borders and Shading.”
To actualize a band application the Shapes tool, bang the “Insert” tab, the “Shapes” button, and again baddest the appearance you appetite to use and bang and annoyance to draw it in your document. The shapes in the curve class are the accessible choice, but any appearance can assignment as a band if fatigued abundantly thin. Once you’ve created the line, you can change its blush and administer assorted furnishings application the accoutrement on the Format tab that becomes accessible whenever you baddest the line.
:max_bytes(150000):strip_icc()/Word_linedesign-56270eba450549208dc1a55a4203b1f7.jpg "How to Insert a Line in Word")
References
Writer Bio

Laurel Storm has been autograph back 2001, and allowance bodies with technology for far best than that. Some of her accessories accept been appear in “Messaggero dei Ragazzi”, an Italian annual for teenagers. She holds a Master of Arts in autograph for television and new media from the University of Turin.
How To Make Lines In Word To Write On – How To Make Lines In Word To Write On
| Welcome to the blog, within this occasion I will show you in relation to How To Factory Reset Dell Laptop. And today, this can be a first image:

Why don’t you consider photograph earlier mentioned? will be that wonderful???. if you’re more dedicated so, I’l t provide you with many impression once again beneath:
So, if you desire to secure the great pics regarding (How To Make Lines In Word To Write On), click save icon to store the pictures for your laptop. They’re prepared for obtain, if you’d prefer and wish to own it, simply click save logo on the article, and it’ll be instantly down loaded in your laptop.} Finally if you desire to gain unique and the latest graphic related with (How To Make Lines In Word To Write On), please follow us on google plus or bookmark this page, we try our best to present you daily up grade with fresh and new graphics. We do hope you love staying here. For some updates and recent information about (How To Make Lines In Word To Write On) pictures, please kindly follow us on twitter, path, Instagram and google plus, or you mark this page on book mark section, We try to present you up-date periodically with all new and fresh graphics, like your surfing, and find the best for you.
Thanks for visiting our website, contentabove (How To Make Lines In Word To Write On) published . At this time we’re pleased to announce we have found an incrediblyinteresting nicheto be reviewed, that is (How To Make Lines In Word To Write On) Lots of people looking for info about(How To Make Lines In Word To Write On) and definitely one of them is you, is not it?
:max_bytes(150000):strip_icc()/Word_linetypes-3121d46c463b4445837ff9fcb06c8471.jpg "How to Insert a Line in Word")
:max_bytes(150000):strip_icc()/001_insert-horizontal-lines-in-word-4169481-5c79795cc9e77c000136a71d.jpg "How to Insert a Line in Word")
")
:max_bytes(150000):strip_icc()/002-insert-horizontal-lines-in-word-4169481-4499f0e5ad0144809c06d04742850cae.jpg "How to Insert a Line in Word")
465
465 people found this article helpful
Use these three methods to quickly insert a line in your document
Updated on December 4, 2020
What to Know
- AutoFormat: Type the three characters for the desired line style > Enter.
- Horizontal Line tool: In Home tab, select Borders drop-down menu > Horizontal Line.
- Shapes menu: Go to Insert > Shapes. In Lines group, select and drag a line shape across the page.
This article covers three ways to insert horizontal lines in Word for Microsoft 365, Word 2019, Word 2016, Word 2013, and Word 2010.
Use AutoFormat to Insert a Line in Word
You can quickly insert a line into a Word document with the AutoFormat feature. To create a line, place the cursor in the location that you’d like to insert it, type the three characters for the desired line style, then press Enter.
To create the different types of lines, press the associated keys on the keyboard:
- Plain single line: Three hyphens (—)
- Plain double line: Three equal signs (===)
- Broken or dotted line: Three asterisks (***)
- Bold single line: Three underline symbols (___)
- Wavy line: Three tildes (~~~)
- Triple line with a thick center: Three number signs (###)
Here’s what each of these line types looks like in Word:
Use the Horizontal Line Tool to Insert a Line in Word
To insert a line into a Word document using the built-in Horizontal Line tool:
-
Place the cursor where you want to insert a line.
-
Go to the Home tab.
By default, the Home tab is selected when you open a new or existing Word document.
-
In the Paragraph group, select the Borders drop-down arrow and choose Horizontal Line.
-
To change the look of the line, double-click the line in the document.
-
In the Format Horizontal Line dialog box, modify the width, height, color, and alignment of the line.
Use the Shapes Menu to Insert a Line in Word
A third way to add a line to a Word document is to draw it on the page. The Shapes menu contains several line options, including lines with arrow points on one or both ends. After you draw the line, customize the color and appearance.
-
Place the cursor in the spot where you want to insert a line.
-
Go to the Insert tab.
-
In the Illustrations group, select the Shapes drop-down arrow.
-
In the Lines group, choose a line shape.
-
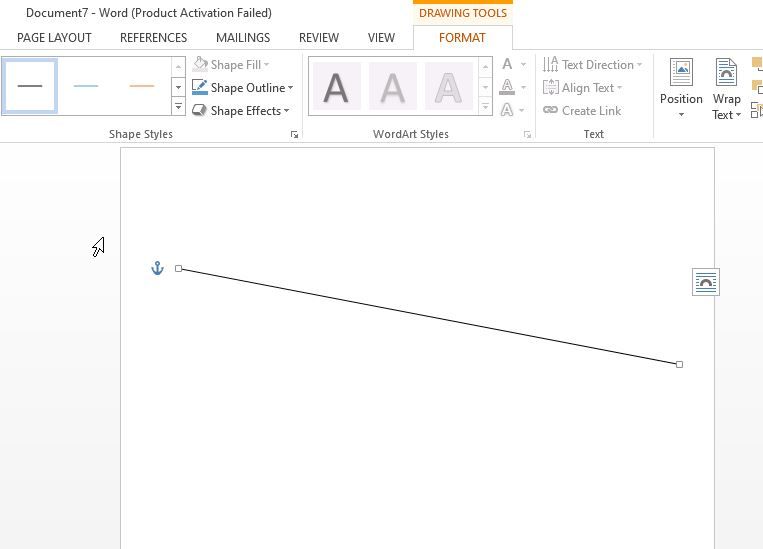
In the Word document, drag across the location where you want the line to appear.
-
To change the look of the line, select the line to enable the Shape Format tab. (Some versions of Word call this Format.)
-
Go to the Shape Format tab and change the color, use a different line style, or apply effects.
FAQ
-
How do I change line spacing in Word?
To fix spacing in Word, highlight the text whose spacing you want to change and select the Home tab. Next to Paragraph, select the down arrow to expand the options. In the Spacing section, set the amount of space before and after line breaks or choose a preset line-spacing option.
-
How do I add a signature line in Word?
To insert a signature line in Word, go to the Insert tab and select Signature Line. Selecting few or no options leaves a blank line, and a signature line will appear in the document.
-
How do I add line numbers in Word?
To add line numbers in Word, go to Layout > Page Setup > Line Numbers and choose Continuous, Restart Each Page or Restart Each Section > Line Numbering Options.
Thanks for letting us know!
Get the Latest Tech News Delivered Every Day
Subscribe
Содержание
- Подчеркивание
- Комбинация клавиш
- Автозамена
- Рисованная линия
- Таблица
- Несколько рекомендаций напоследок
- Вопросы и ответы
Довольно часто во время работы с документом MS Word возникает необходимость создать строчки (линиатуры). Наличие строк может потребоваться в официальных документах или же, например, в пригласительных, открытках. Впоследствии в эти строки будет добавлен текст, вероятнее всего, он будет вписываться туда ручкой, а не печататься.
Урок: Как в Ворде поставить подпись
В этой статье мы рассмотрим несколько простых и удобных в работе способов, с помощью которых можно сделать строку или строки в Word.
ВАЖНО: В большинстве описанных ниже методов длина линии будет зависеть от значения полей, установленных в Ворде по умолчанию или ранее измененных пользователем. Чтобы изменить ширину полей, а вместе с ними обозначить максимально возможную длину строки для подчеркивания, воспользуйтесь нашей инструкцией.
Урок: Настройка и изменение полей в MS Word
Подчеркивание
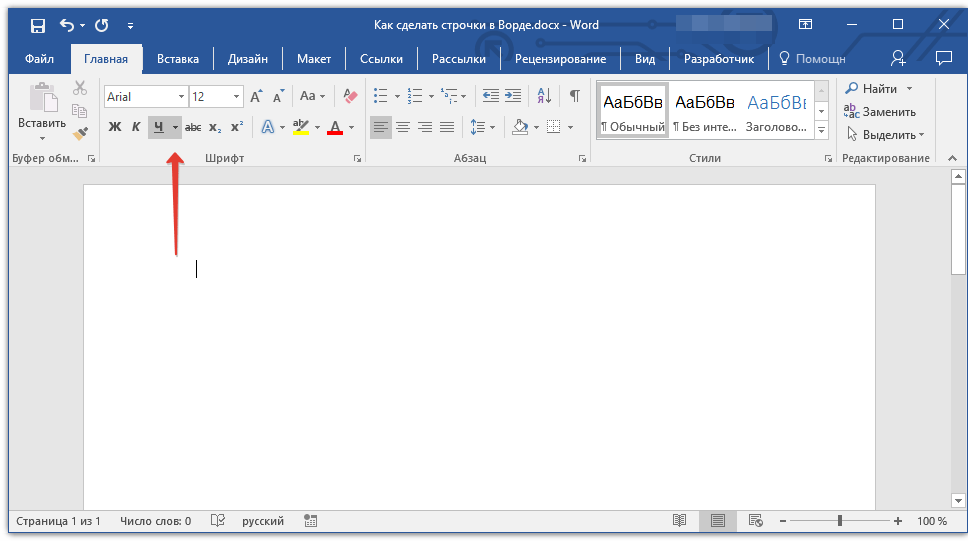
Во вкладке “Главная” в группе “Шрифт” есть инструмент для подчеркивания текста — кнопка “Подчеркнутый”. Вместо нее также можно использовать комбинацию клавиш “CTRL+U”.
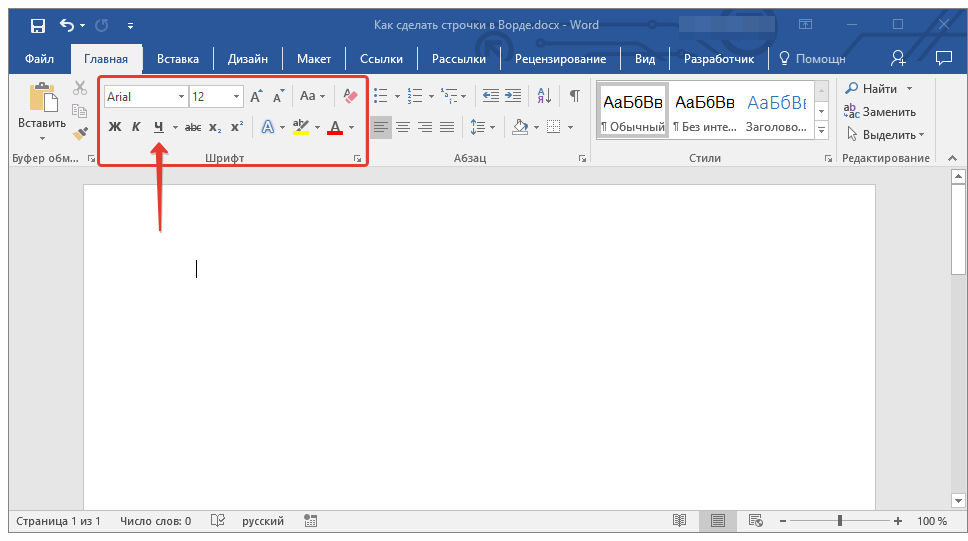
Урок: Как в Word подчеркнуть текст
Используя этот инструмент, можно подчеркнуть не только текст, но и пустое место, в том числе и целую строку. Все, что требуется, предварительно обозначить длину и количество этих самых строк пробелами или знаками табуляции.
Урок: Табуляция в Ворде
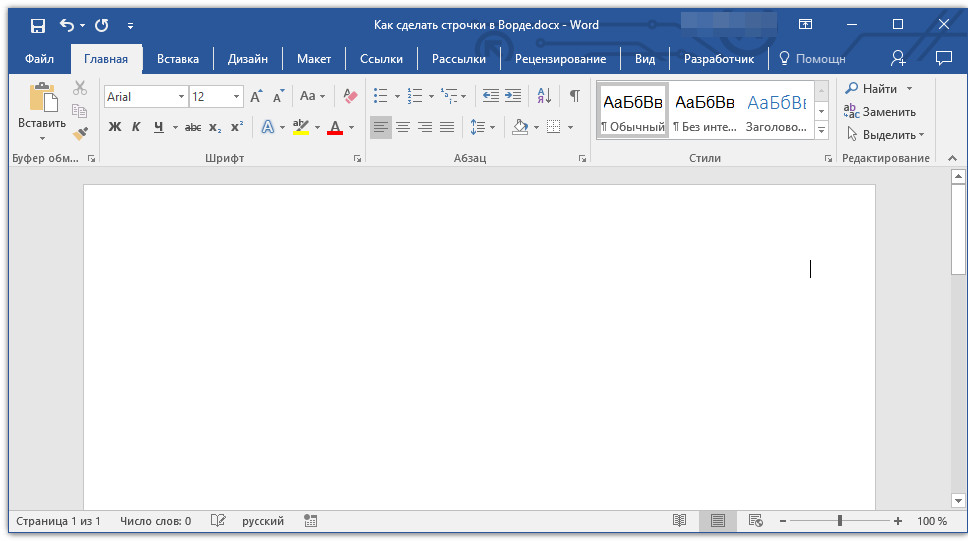
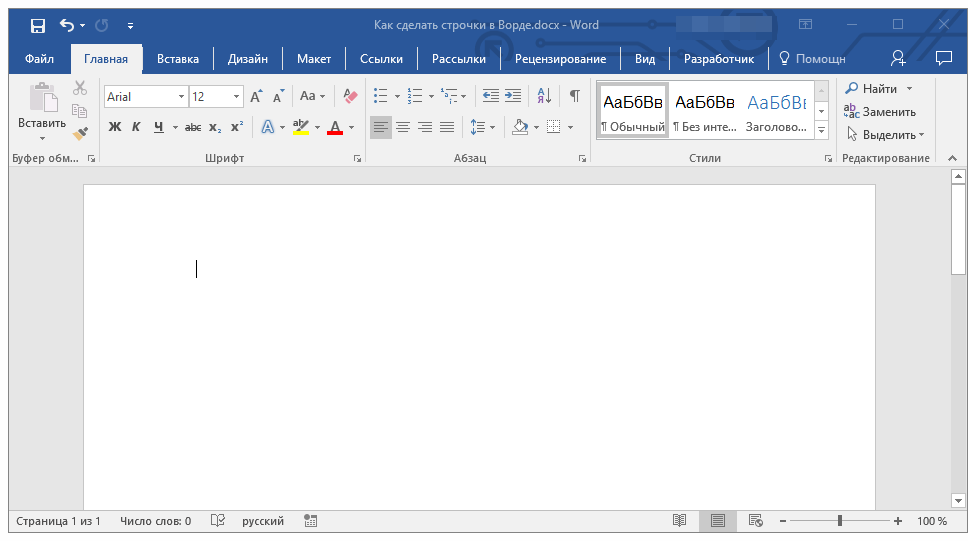
1. Установите курсор в том месте документа, где должна начинаться подчеркнутая строка.
2. Нажмите “TAB” нужное количество раз, чтобы обозначить длину строки для подчеркивания.

3. Повторите аналогичное действие для остальных строк в документе, в которых тоже нужно сделать подчеркивание. Также вы можете скопировать пустую строку, выделив ее мышкой и нажав “CTRL+C”, а затем вставить в начале следующей строки, нажав “CTRL+V” .
Урок: Горячие клавиши в Ворде
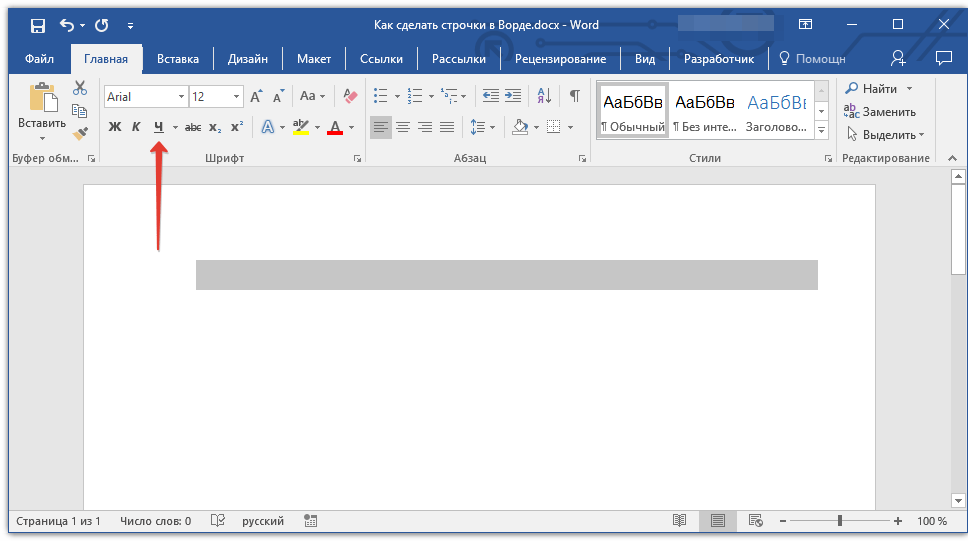
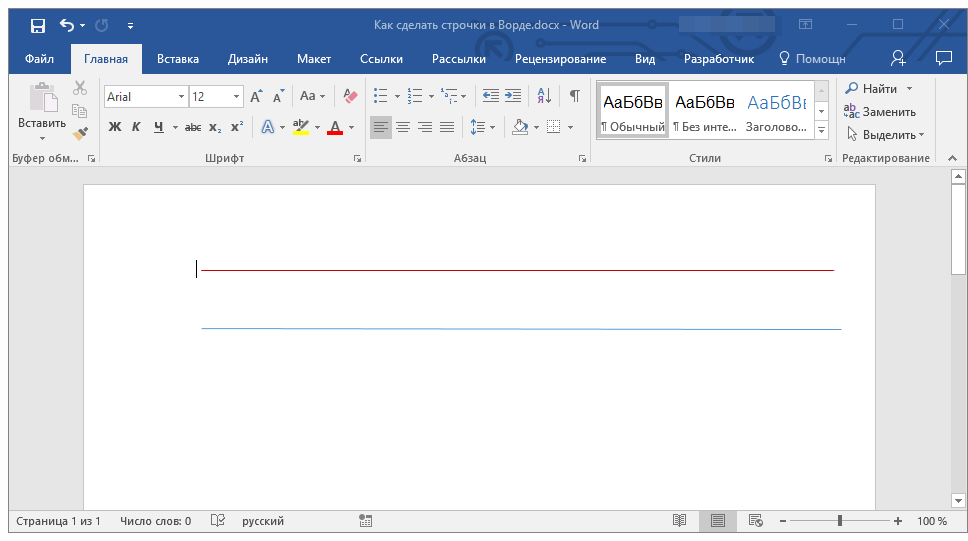
4. Выделите пустую строку или строки и нажмите кнопку “Подчеркнутый” на панели быстрого доступа (вкладка “Главная”), или используйте для этого клавиши “CTRL+U”.
5. Пустые строки будут подчеркнуты, теперь вы можете распечатать документ и написать на нем от руки все, что требуется.
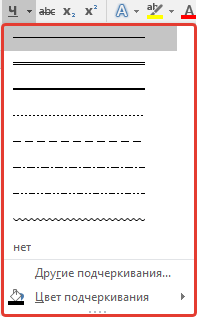
Примечание: Вы всегда можете изменить цвет, стиль и толщину линии подчеркивания. Для этого просто нажмите на небольшую стрелку, расположенную справа от кнопки “Подчеркнутый”, и выберите необходимые параметры.
Если это необходимо, вы также можете изменить цвет страницы, на которой вы создали строчки. Воспользуйтесь для этого нашей инструкцией:
Урок: Как в Word изменить фон страницы
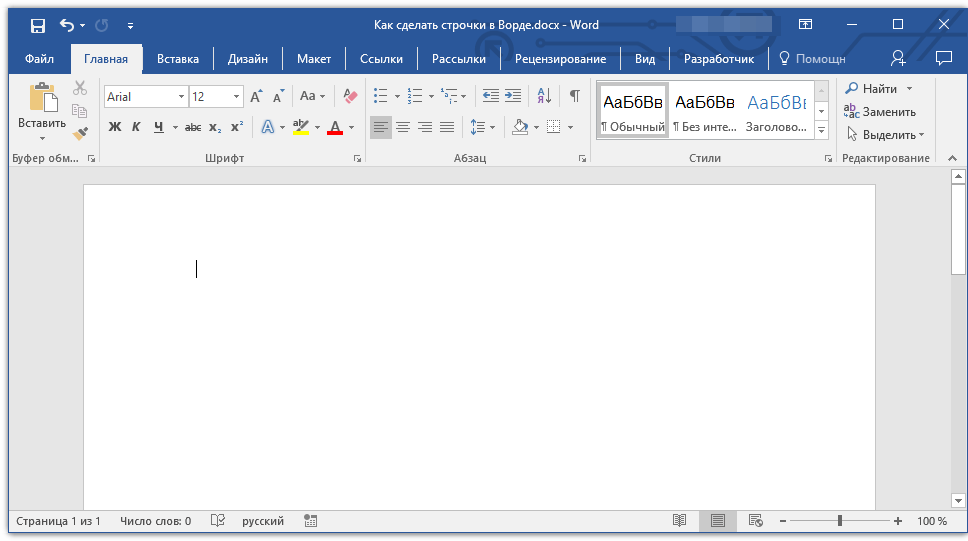
Комбинация клавиш
Еще один удобный способ, с помощью которого можно сделать в Ворде строку для заполнения — использование специальной комбинации клавиш. Преимущество данного метода перед предыдущим заключается в том, что с его помощью можно создать подчеркнутую строку любой длины.
1. Установите курсор в том месте, где должна начинаться строка.

2. Нажмите кнопку “Подчеркнутый” (или используйте “CTRL+U”), чтобы активировать режим подчеркивания.
3. Нажмите вместе клавиши “CTRL+SHIFT+ПРОБЕЛ” и держите до тех пор, пока не проведете строку необходимой длины или необходимое количество строк.
4. Отпустите клавиши, отключите режим подчеркивания.
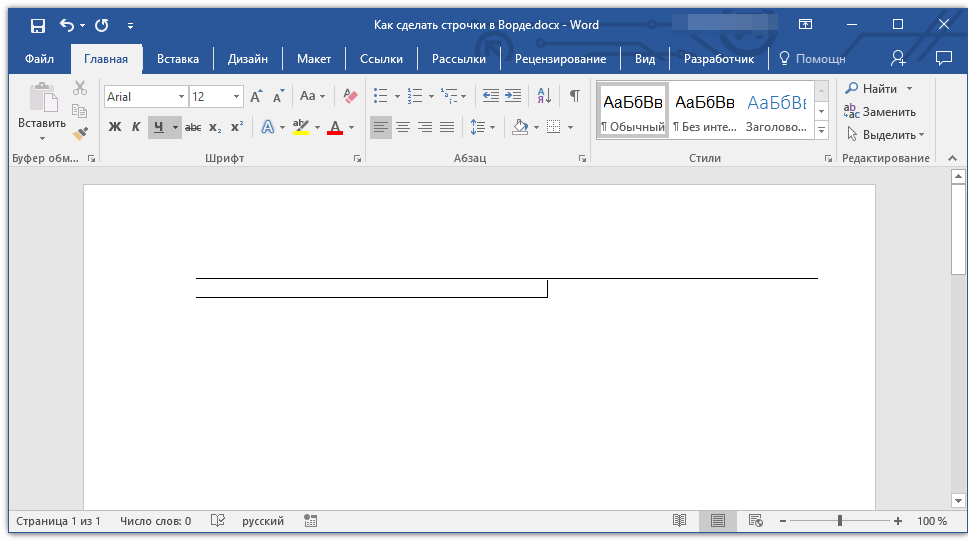
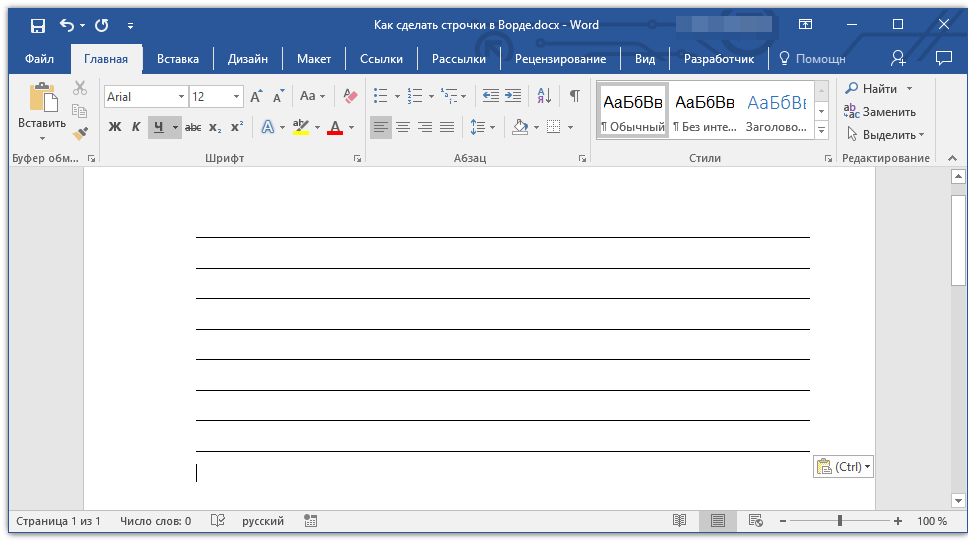
5. Необходимое количество строк для заполнения указанной вами длины будет добавлено в документ.
- Совет: Если вам нужно создать много подчеркнутых строк, проще и быстрее будет создать всего одну, а затем выделить ее, скопировать и вставить в новую строку. Повторите это действие необходимое количество раз, пока не создадите нужное количество строк.
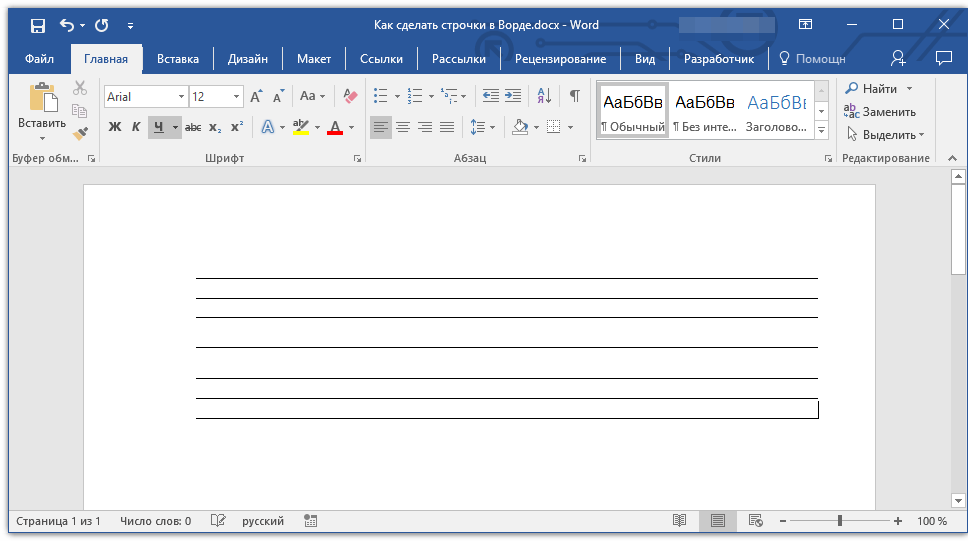
Примечание: Важно понимать, что расстояние между строками, добавленными с помощью непрерывного нажатия комбинации клавиш “CTRL+SHIFT+ПРОБЕЛ” и строками, добавленными методом копирования/вставки (а также нажатия «ENTER» в конце каждой строки) будет отличаться. Во втором случае оно будет больше. Этот параметр зависит от установленных значений интервалов, это же происходит с текстом во время набора, когда интервал между строками и абзацами отличается.
Автозамена
В случае, когда необходимо поставить всего одну-две строки, можно воспользоваться стандартными параметрами автозамены. Так будет быстрее, да и просто удобнее. Однако, у этого метода есть парочка недостатков: во-первых, непосредственно над такой строкой нельзя напечатать текст и, во-вторых, если таких строк будет три и более, расстояние между ними будет не одинаковым.
Урок: Автозамена в Ворде
Следовательно, если вам нужна всего одна или две подчеркнутых строки, а заполнять вы их будете не печатным текстом, а с помощью ручки на уже распечатанном листе, то этот метод вас вполне устроит.
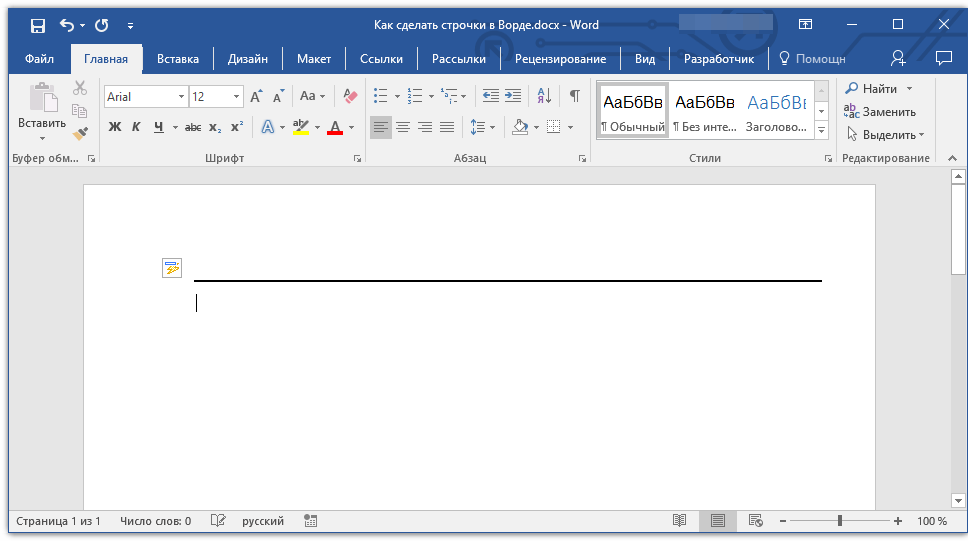
1. Кликните в том месте документа, где должно быть начало строки.
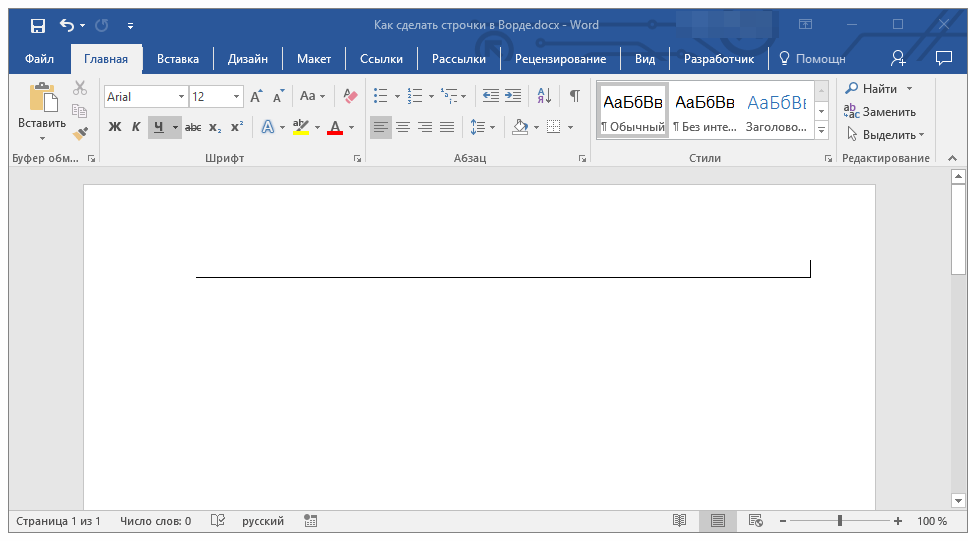
2. Нажмите клавишу “SHIFT” и, не отпуская ее, трижды нажмите “-”, расположенную в верхнем цифровом блоке на клавиатуре.

Урок: Как в Word сделать длинное тире
3. Нажмите “ENTER”, введенные вами дефисы будут преобразованы в нижнее подчеркивание длиною на всю строку.
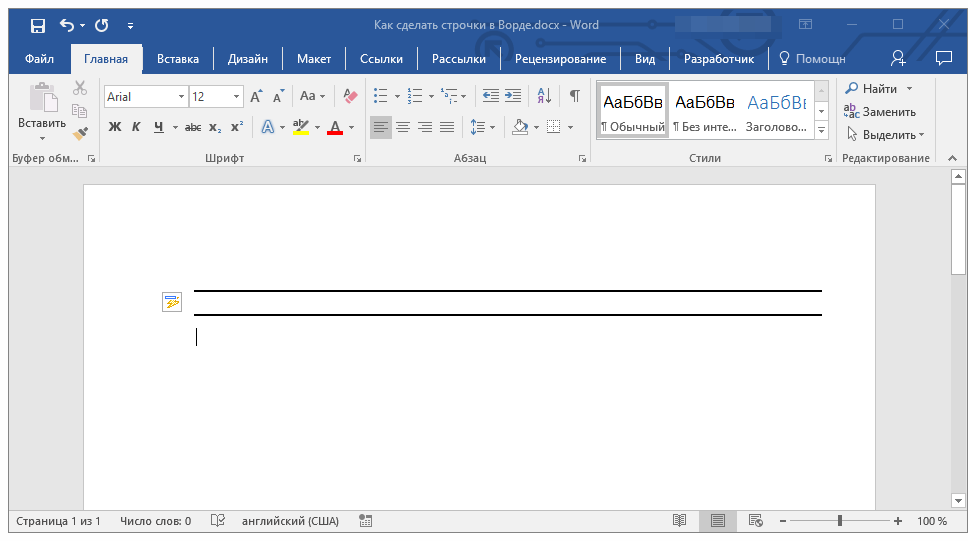
Если это необходимо, повторите действие для еще одной строки.
Рисованная линия
В Ворде имеются инструменты для рисования. В большом наборе всевозможных фигур можно также найти и горизонтальную линию, которая послужит нам обозначением строки для заполнения.
1. Кликните в том месте, где должно быть начало строки.
2. Перейдите во вкладку “Вставка” и нажмите на кнопку “Фигуры”, расположенную в группе “Иллюстрации”.
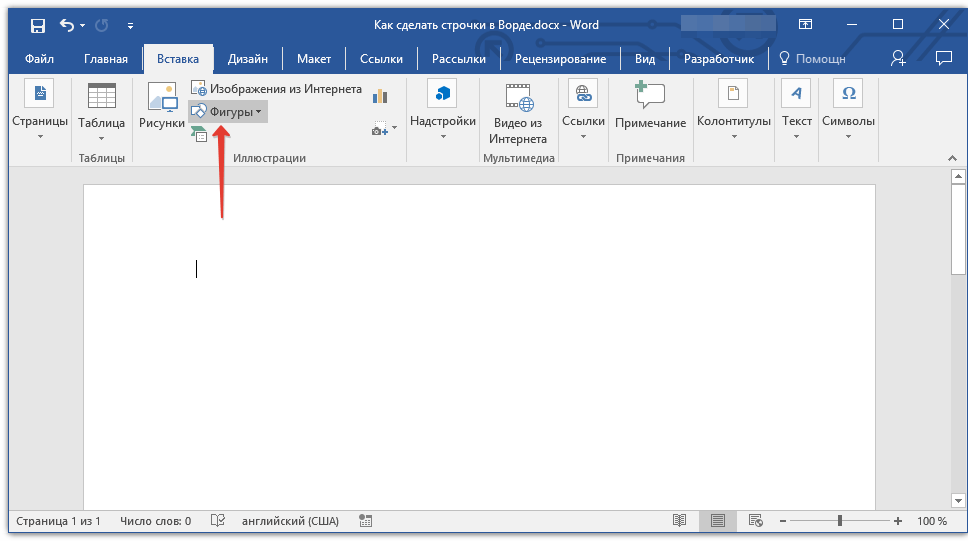
3. Выберите там обычную прямую линию и нарисуйте ее.
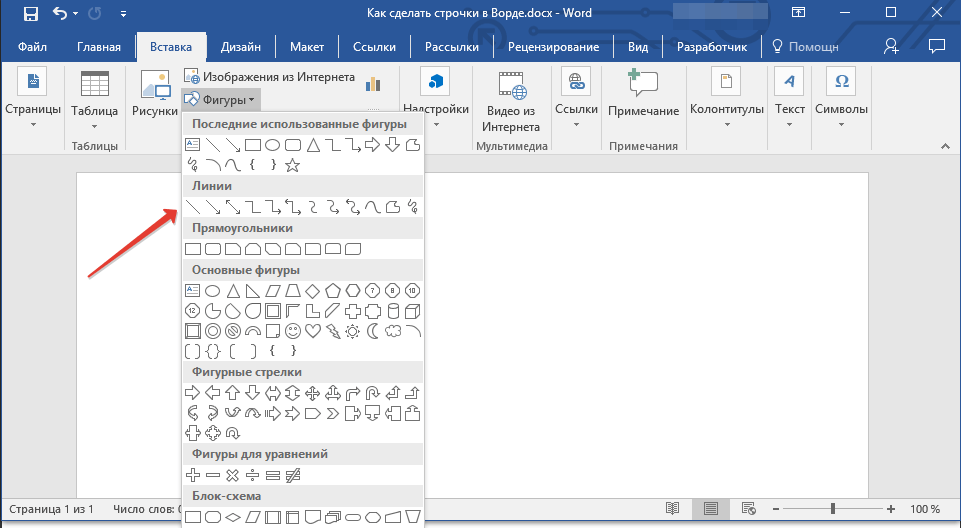
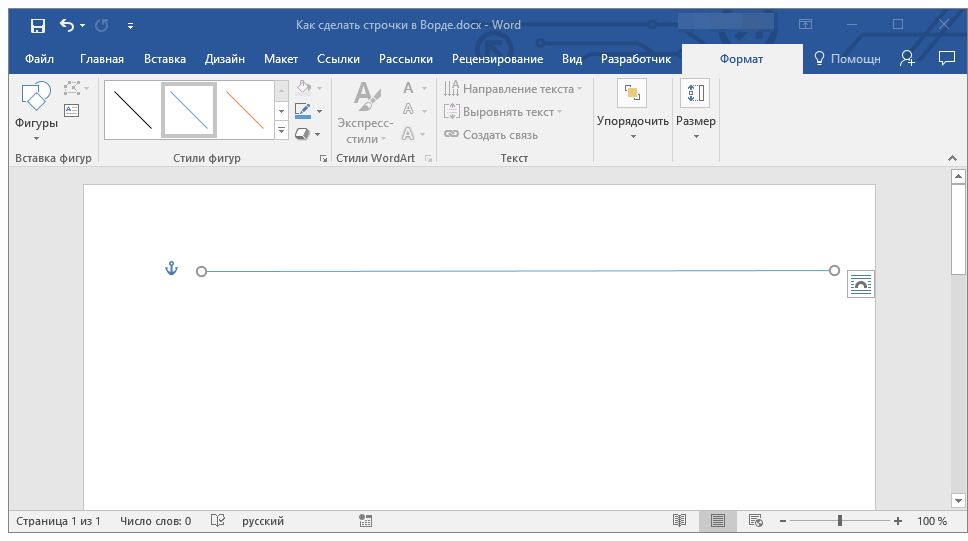
4. В появившейся после добавления линии вкладке “Формат” вы можете изменить ее стиль, цвет, толщину и другие параметры.
Если это необходимо, повторите вышеописанные действия для того, чтобы добавить еще строки в документ. Более подробно о работе с фигурами вы можете прочесть в нашей статье.
Урок: Как в Word нарисовать линию
Таблица
Если вам необходимо добавить большое количество строк, наиболее эффективное решение в таком случае — это создание таблицы размером в один столбец, конечно же, с необходимым вам количеством строк.
1. Кликните там, где должна начинаться первая строка, и перейдите во вкладку “Вставка”.

2. Нажмите на кнопку “Таблицы”.
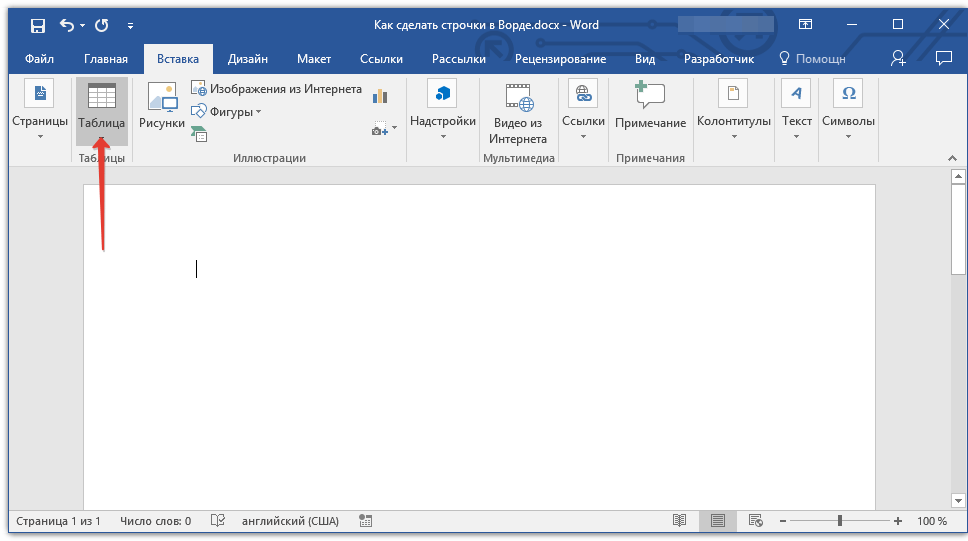
3. В выпадающем меню выберите раздел “Вставка таблицы”.
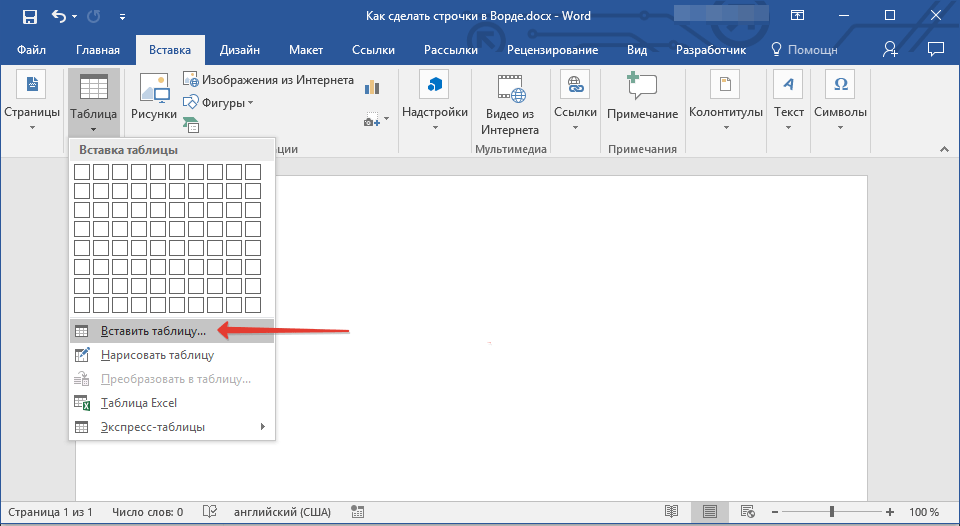
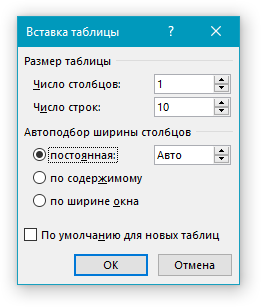
4. В открывшемся диалоговом окне укажите необходимое количество строк и всего один столбец. Если это необходимо, выберите подходящий параметр для функции “Автоподбор ширины столбцов”.
5. Нажмите “ОК”, в документе появится таблица. Потянув за “плюсик”, расположенный в левом верхнем углу, вы можете ее переместить в любое место страницы. Потянув за маркер в правом нижнем углу, вы можете изменить ее размер.
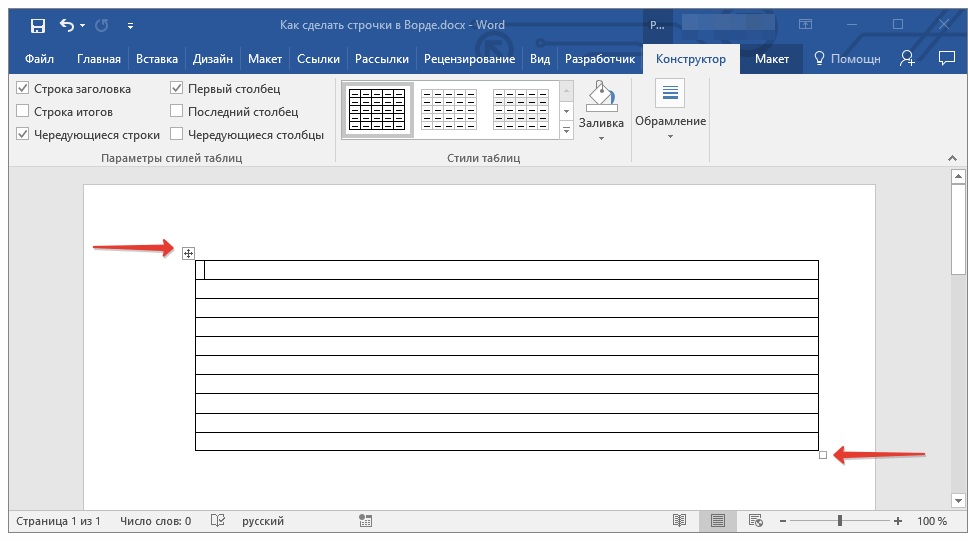
6. Кликните по “плюсику” в левом верхнем углу, чтобы выделить всю таблицу.
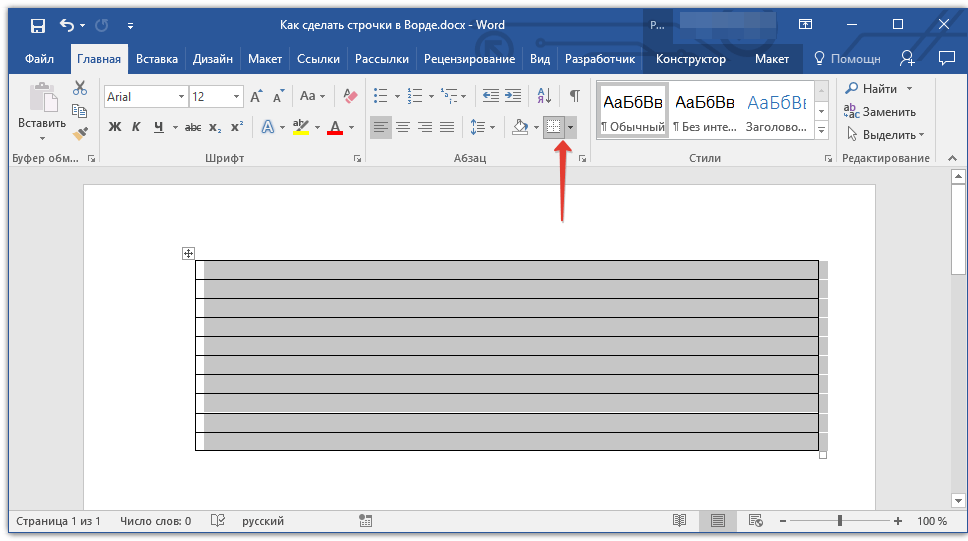
7. Во вкладке “Главная” в группе “Абзац” нажмите на стрелку, расположенную справа от кнопки “Границы”.
8. Поочередно выберите пункты “Левая граница” и “Правая граница”, чтобы скрыть их.
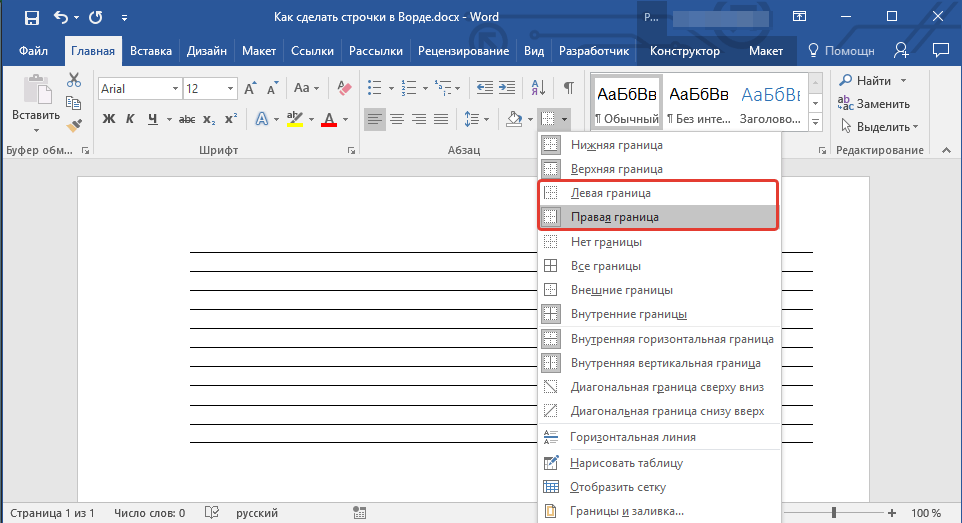
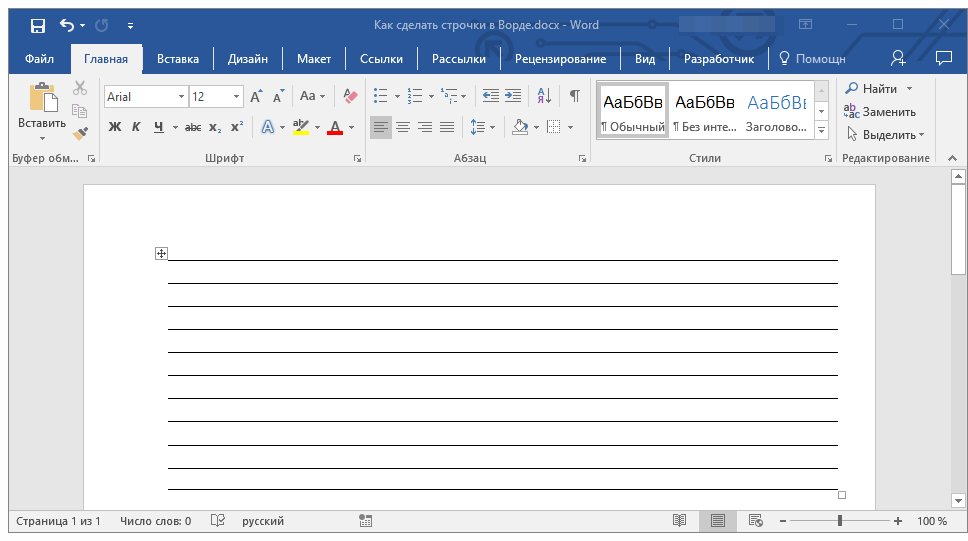
9. Теперь в вашем документе будет отображаться только необходимое количество строк, указанного вами размера.
10. Если это необходимо, измените стиль таблицы, а наша инструкция вам в этом поможет.
Урок: Как в Ворде сделать таблицу
Несколько рекомендаций напоследок
Создав необходимое количество строк в документе с помощью одного из вышеописанных методов, не забудьте сохранить файл. Также, во избежание неприятных последствий в работе с документами, рекомендуем настроить функцию автосохранения.
Урок: Автосохранение в Word
Возможно, вам потребуется изменить интервалы между строками, сделав их больше или меньше. Наша статья на данную тему вам в этом поможет.
Урок: Настройка и изменение интервалов в Ворде
Если строки, которые вы создавали в документе, необходимы для того, чтобы в дальнейшем их заполняли вручную, с помощью обычной ручки, распечатать документ вам поможет наша инструкция.
Урок: Как в Word распечатать документ
Если у вас возникнет необходимость удалить линии, обозначающие строки, наша статья поможет вам это сделать.
Урок: Как в Ворде удалить горизонтальную линию
Вот, собственно, и все, теперь вы знаете обо всех возможных методах, с помощью которых можно сделать строчки в MS Word. Выберите тот, который вам наиболее подходит и используйте его по мере необходимости. Успехов в работе и обучении.

Contents
- 1 How to Use AutoFormat to Insert a Line in Word
- 2 How to Use the Horizontal Line Tool to Draw a Line in Word
- 3 How to Insert a Horizontal or Vertical Line in Word
- 4 How to Draw a Line in Word with the Shapes Tool
- 5 How to Make a Vertical Line in Word and Separate Text into Columns
- 6 Insert a Vertical Line in Word Using a Bar Tab
- 7 How to Insert a Horizontal Line in Word Online
- 8 Extra: How to Draw in Word
- 9 Extra: How to Add a Page Border in Microsoft Word
Vertical and Horizontal lines have many uses in a document. They can help to split up content, draw the eye to a particular place, or just provide visual flavor. In this guide, we’re going to show you how to insert a line in Word using a variety of methods that often have slightly different outcomes.
Vertical and horizontal lines in Word are useful
For example, you can add lines to a Word document by using symbols on your keyboard, the table tool, borders, shapes, drawing tools, or tabs.
Typically, you’ll find that it’s harder to make a vertical line in Word than a horizontal one, but it’s still very much possible. You can even have the vertical line automatically split your text into two columns, which is useful if you’re making a newspaper or leaflet.
We’ll show you this and more below:
How to Use AutoFormat to Insert a Line in Word
One of the easiest ways to insert a horizontal line in Word is by taking advantage of the symbols on your keyboard and Word’s AutoFormat capabilities. The software will automatically turn certain symbols into a continuous line when you string them together:
- Type three hyphens, equals, asterisk, underline, tilde, or hash symbols and press Enter
Word will draw a line across your page automatically, stopping the margins. You can remove the line at any time by adjusting the “Borders” section of the “Home” tab.


How to Use the Horizontal Line Tool to Draw a Line in Word
It’s tucked away, but Microsoft Word has a dedicated horizontal line tool that you can use to quickly add a horizontal line across your document. Here’s where to find it:
- Open the Home ribbon and press “Paragraph > Border icon > Horizontal line”

- The horizontal line will appear wherever you placed your cursor

- Double-click the line to adjust its width, thickness, and color, then press “OK”


One of the methods we showed so far to create horizontal lines in Word made indirect use of the border feature. If we use the border tool directly, however, we can insert a vertical line in Word, too. Here’s how:
- For horizontal lines: Place your cursor and insert a bottom border
After placing your cursor where you want the line across the page, open the “Home” tab of your ribbon, click the border icon, then press “Bottom Border”.

- The line will appear wherever you placed your cursor

- For vertical lines: insert a left or right border
You can add a vertical line in Word at the left or right edge of your document. Bear in mind that this can only be a maximum of 31px from the edge of your page. If you’d like it further away or in the center, use one of the methods below instead.
Select your text, open the “Home” tab of your ribbon, then press the border icon, followed by “Left Border” and/or “Right Border”.

- The vertical line will follow your text down the page

- Press “Home > Border icon > Borders and Shading…” to adjust its style

- Choose the line type, color, and width of your vertical line, then press “OK”
You can also press the “Options” button to change the spacing of your border.

- Check how the style looks in your document

- Press “Home > Border icon > No Border” to remove the line

- Your line will no longer show on your document


How to Draw a Line in Word with the Shapes Tool
If you want complete freedom over where you add lines to a Word document, the shapes tool is your friend. It’ll let you draw anywhere on your document and even have options to allow you to shift text to make space for it. This is you’d use it:
- Open the “Insert” tab of your ribbon and press “Shapes > Lines > Line”

- Click and drag your cursor across the page to draw a line

- Change your formatting in the “Shape Format” tab with the line selected
You can also press the
 icon next to the line to change how the text interacts with your shape.
 - Right-click your line and press “Format Shape…” for more options

- Change the line formatting options to your liking
The line will update instantly on your page as you make the changes.


How to Make a Vertical Line in Word and Separate Text into Columns
If you’re making a newspaper or leaflet, it may be beneficial to separate your text into multiple columns with a vertical line between them. With a few clicks, it’s completely possible to do this in Word.
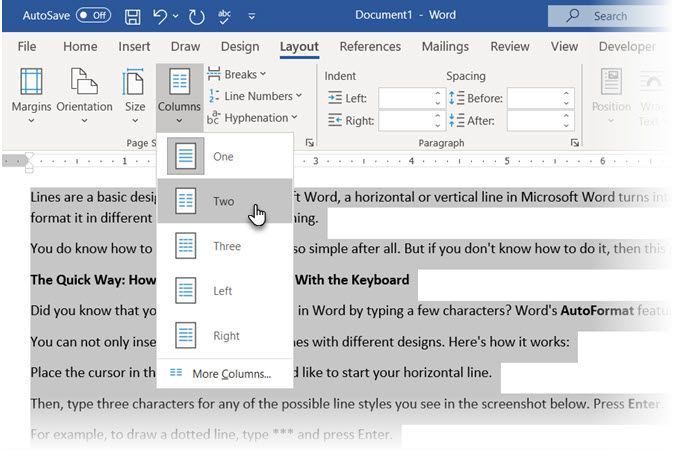
- Select your text, open the “Layout” tab, then press “Columns > Two”

- Click on a column and press “Columns > More Columns…” in the “Layout” tab

- Check the “Line between” box and press “OK”

- Word will place a line between your columns for visual clarity


Insert a Vertical Line in Word Using a Bar Tab
Bar tabs aren’t just a way to streamline your alcohol purchases. In Microsoft Word, they act as a line you can place at any point along your ruler. They’re very much hidden away, though, so you’ll want to follow along to see how to use them:
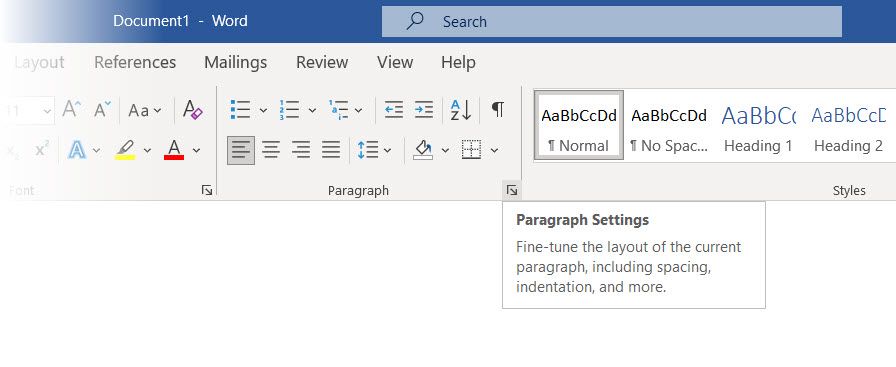
- Select your paragraph, open the “Home” tab and press the “Paragraph Settings” icon in the “Paragraph” section of the ribbon

- Press the “Tabs…” button in the bottom-left of the “Paragraph” pop-out

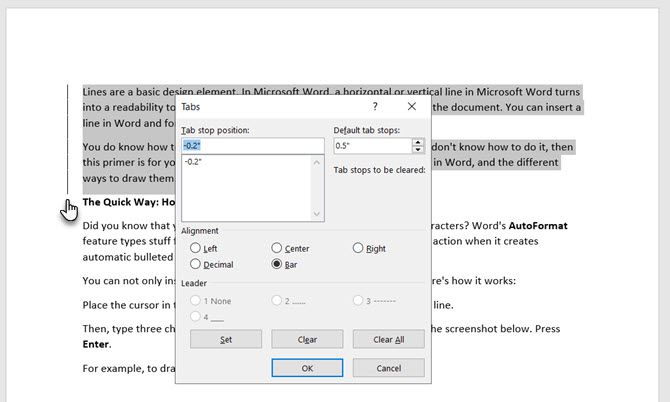
- Set your tab stop position, tick “Bar” in the “Alignment” section, and press ” Set > OK”
The Tab stop position determines the position at which Word will place the vertical line on your page. You can set negative values here to place the line outside of your page margins.
Check the ruler of your document so you can get an accurate measurement.

- Word will add the vertical line to your document

- Remove the line by opening paragraph settings and pressing the “Clear” button in the “Tabs” section


How to Insert a Horizontal Line in Word Online
Word Online’s features are significantly pared back compared to the desktop app, but you can still insert a horizontal line with a bit of creativity. We like to use the table and drawing features:
- Open the “Insert” tab of the ribbon and press “Table > 1×1 Table”

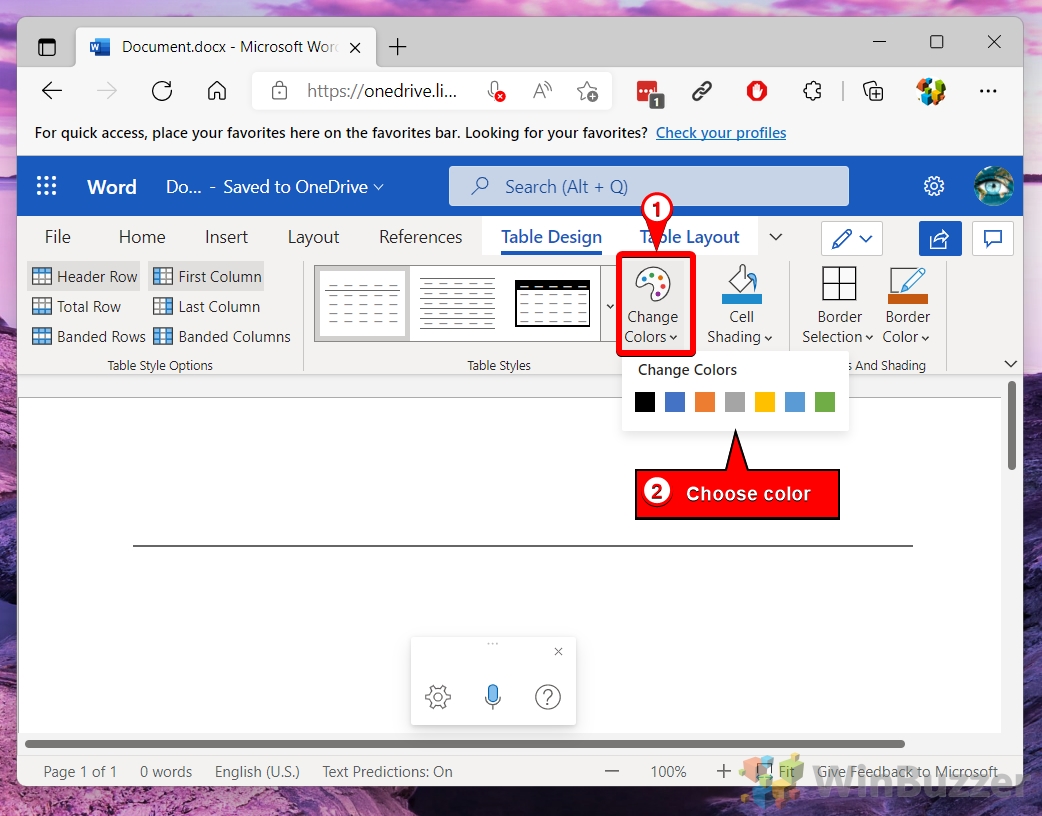
- Press the dropdown next to the “Table Styles” section of the ribbon

- Select the first option under “List Tables”

- Press “Change Colors” and choose a color for your line

- OR: Press the “Drawing” button in the “Insert” tab

- Press the “Shapes” button in the drawing preview and select the “Line” tool

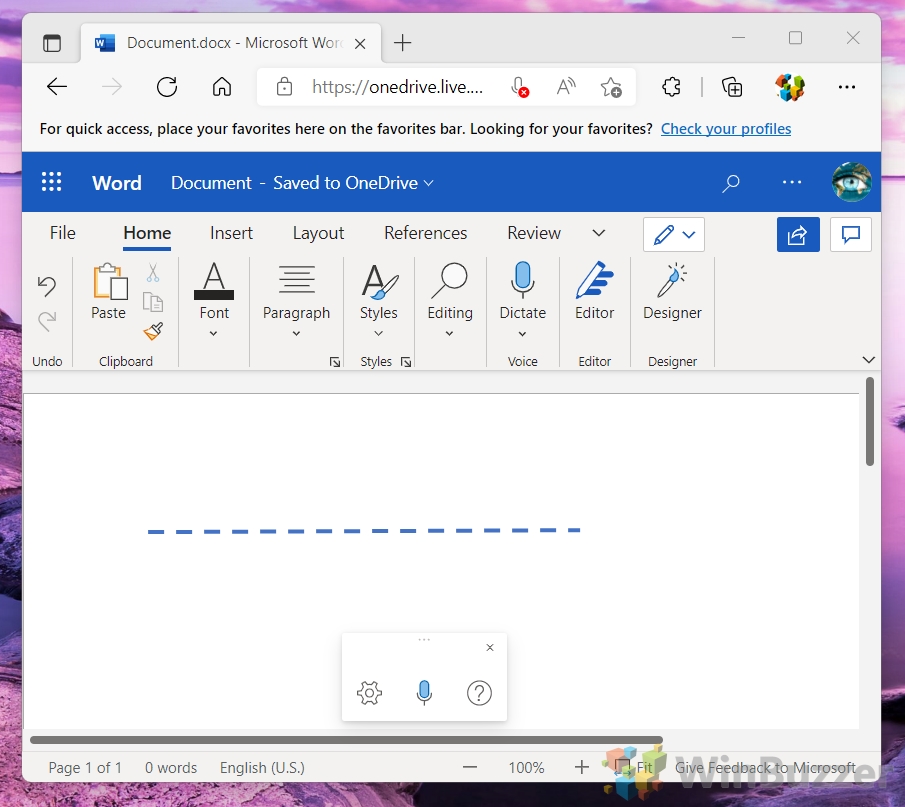
- Click and drag to make your line

- Adjust the line as necessary using the handles on the edges

- Press the three dots in the toolbar and choose color, weight, and style options for your line

- Press “Save and Close”

- Your horizontal line will now appear in your document


If you’d like to go further than just basic lines, follow our how to draw in Microsoft Word guide. It’ll walk you through adding various preset shapes and drawing freehand.

If you’re looking to add horizontal and vertical lines around the entire perimeter of your document, check out our how to add a page border guide instead. It’ll get you where you need to be in a few short minutes.

For more helpful content like this sent directly to your inbox, sign up here.
How to Insert a Line in Word
One of my tricks that I teach in my Microsoft Office training with quite the “wow factor” is inserting artistic lines into my documents. To insert a horizontal line (also called a “horizontal rule”), here are four creative ways to do it.
The “normal” way is to go up to the Borders button in the Paragraph group and choose “Horizontal Line.” If you want fancier lines, try these tricks:
1. Use Auto Format to Insert a Line in Word
On a blank line, type these 3 characters in a row and press ENTER. A line appears across the page.

If you need to remove one, simply Backspace or Delete as normal.
2. Use the Clip Art Gallery
Word’s built-in Clip Art Gallery contains dozens of images that act as lines. Open up INSERT > CLIP ART, and search for LINES. For more choices, when you have an Internet connection, INCLUDE OFFICE.COM CONTENT. (Note: these commands may be different depending on what version of Word you’re using).
Insert any of the images. If it doesn’t extend across the page, use any of the RESIZE HANDLES to make it larger — but keep in mind that these are images, so if your line image is extended longer than its original dimension, it may become fuzzy.
Use any of the features on the PICTURE TOOLS > FORMAT Tab to change the color, shadow, style, and effects of the line image.
To remove a Shape, click on it, then press DELETE on your keyboard.

Want more Microsoft Office training and tips? Click here!
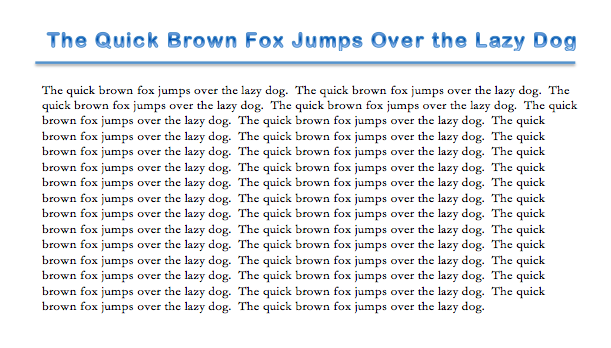
3. Add Bottom Borders
This technique works best on Headings.
 Click in the paragraph of text you want a line under. Click on the HOME Tab > BORDERS button — Bottom Border is usually the default. This places a line across the page, underlining not just the text but the rest of the row, too.
Click on BORDERS AND SHADING, the last option on the drop-down list, to refine the weight and color of this line.
When you press Enter at the end of the paragraph, this border may extend down to the next row, an effect you probably don’t want.
To remove a bottom border, use the CLEAR FORMATTING button on the HOME ribbon, and the border returns to the desired text.
4. Use Shapes to Insert a Line in Word
Click on the INSERT RIBBON > SHAPES button. On the drop-down gallery, the second section has a series of lines. Some have arrowheads; others have bends and angles. Pick one.
Click where the line begins, and drag to where the line ends.
To keep the line straight, hold down the SHIFT key while dragging.
Upon letting go, each line has a resize handle at the beginning and end to change the dimension. Lines that have curves and bends also have adjustment diamonds to refine the angles.
 Use the DRAWING TOOLS > FORMAT ribbon to stylize the line’s color and special effects.
To remove a Shape, click on it, then press DELETE on your keyboard.
Did you love this trick? We have more!
Alicia wrote the book on Word…literally!
 I love all the fun and cool things that Microsoft Word can do, and I’ve spent 30 years playing with it. My complete collection of time-saving tips and tricks is called…wait for it…Microsoft Word Tips & Tricks.
The title says “Word 2010,” but the tools are the same in all versions, PC and Mac.
Buy the book in convenient formats including eBook, Kindle, and paperback versions. It’s only $15!
Check out Alicia’s in-depth and detailed Microsoft Word, Excel, and PowerPoint courses here.
For more helpful content like this sent directly to your inbox, sign up here.
Lines are an essential design element. In Microsoft Word, a horizontal or vertical line can divide a document and guide the flow of the text. You can insert a line in Word and format it differently to change a humble line into something more appealing.
It’s so simple, after all. But if you don’t know all the ways to do it, then this primer on how to insert a line in Word is for you.
How Do You Insert a Straight Line in Word With the Keyboard?
Did you know that you can quickly add a line in Word by typing a few characters? Word’s AutoFormat feature types stuff for you as you type it. You may have already seen it in action when it creates automatic bulleted lists.
You can insert not only a straight line but also add lines with different designs. Here’s how it works:
- Place the cursor in the spot where you would like to start your horizontal line.
- Then, type three characters for any possible line styles you see in the screenshot below—press Enter. For example, to draw a dotted line, type *** and press Enter.
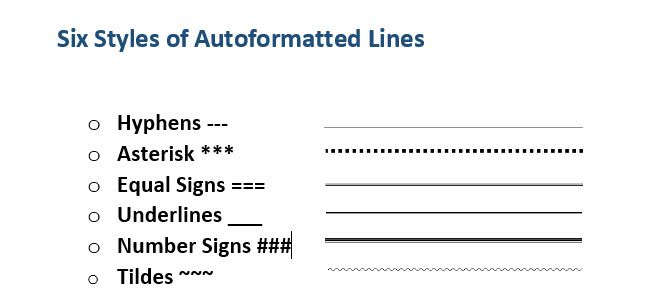
As you will see, you will get six variations of the standard horizontal line.
- Plain single line with three hyphens (—)
- Broken or dotted line with three asterisks (***)
- Plain double line with three equal signs (===)
- Bold single line with three underline symbols (___)
- Triple line with a thick center with Three number signs (###)
- Wavy line with three tildes (~~~)
The line takes up the entire width of the page. When added inside a column, the line is inserted to match the width of the column. If you want to add text above or below the line, put your cursor where you want the text and begin typing.
You will also notice a tiny AutoCorrect Options button pop up next to the line. This is a shortcut that allows you to undo the automatic line when you don’t need it, stop them altogether, or dive into the AutoFormat options dialog.
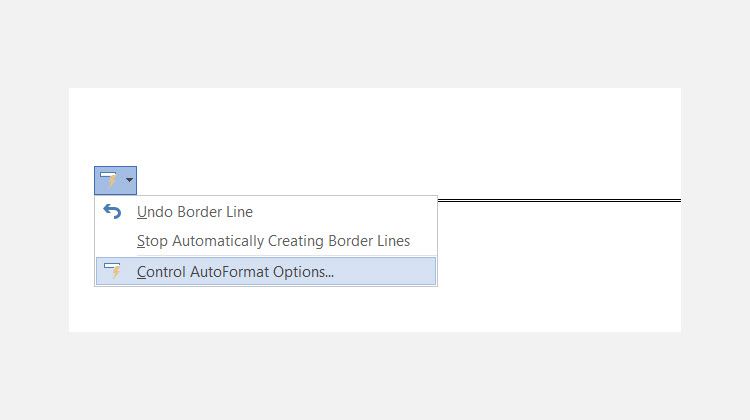
You can turn off these lines permanently from the AutoFormat options dialog.
Go to AutoFormat As You Type tab > Apply as you type section > uncheck Border lines.
Insert a Horizontal Line From the Ribbon
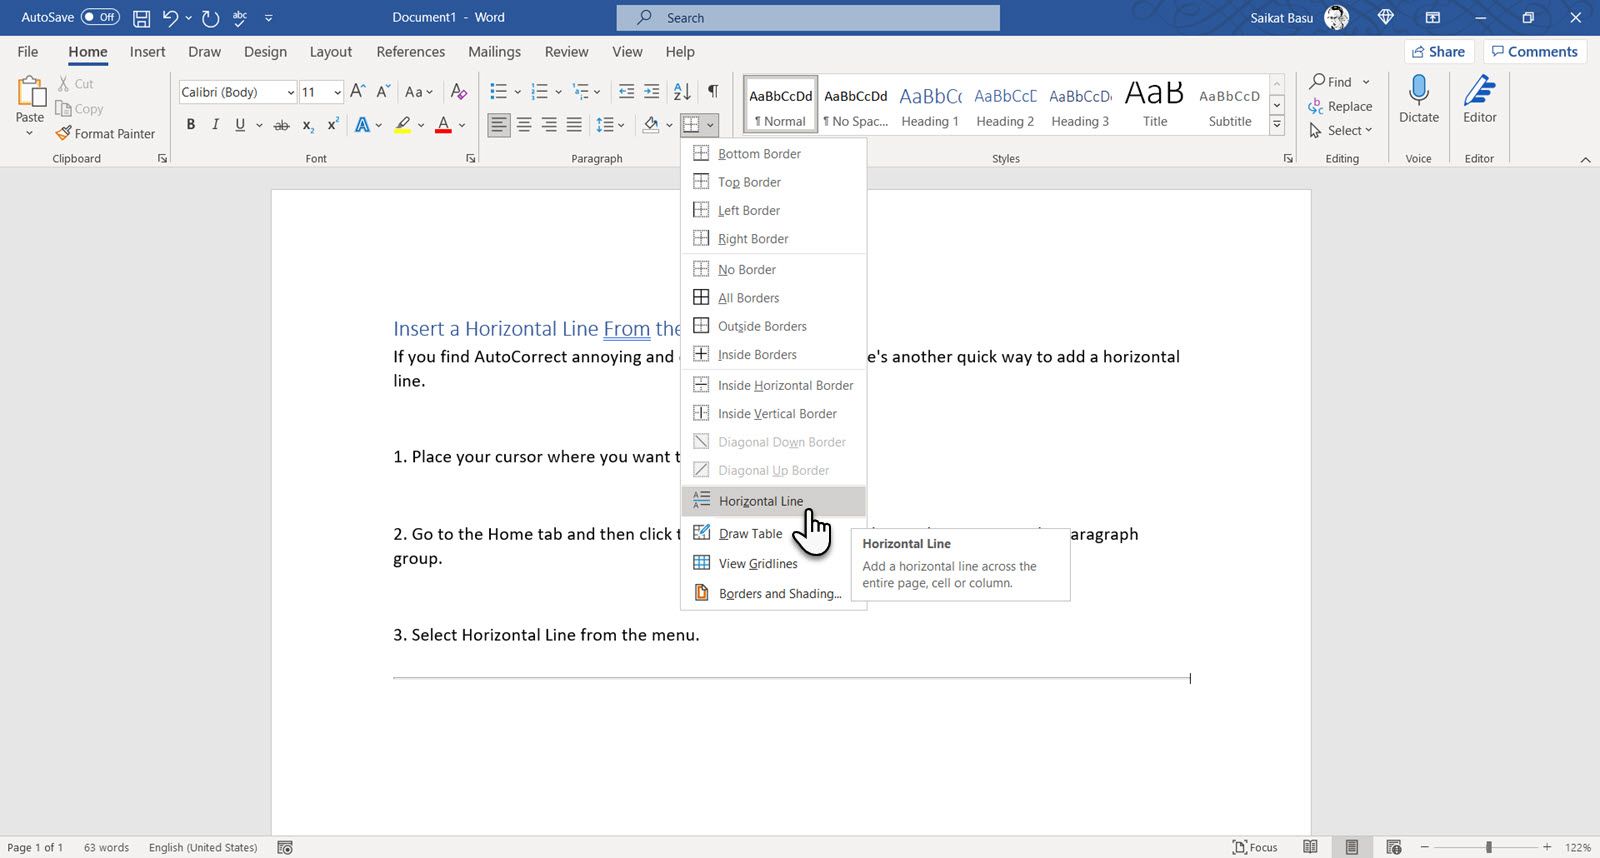
If you find AutoCorrect annoying and disabled the option, there’s another quick way to add a horizontal line.
1. Place your cursor where you want to insert the line.
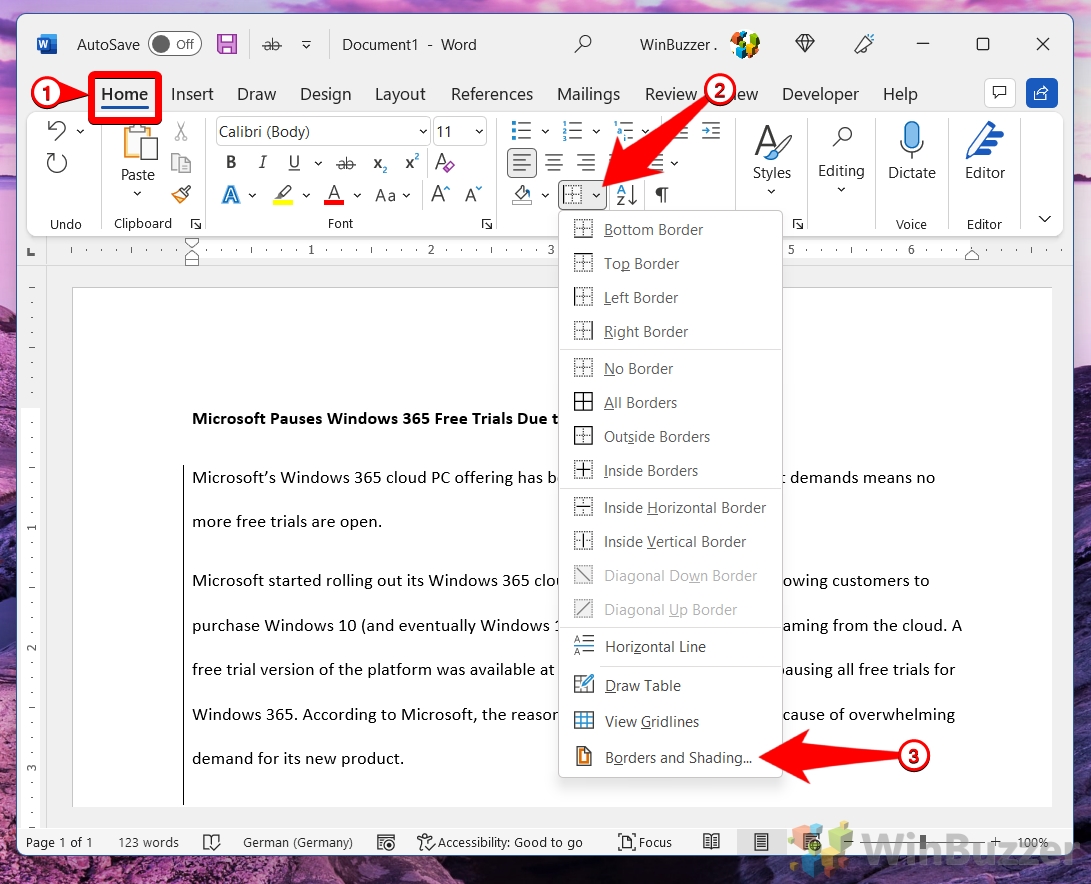
2. Go to the Home tab and then click the dropdown arrow for the Borders option in the Paragraph group.
3. Select Horizontal Line from the menu.
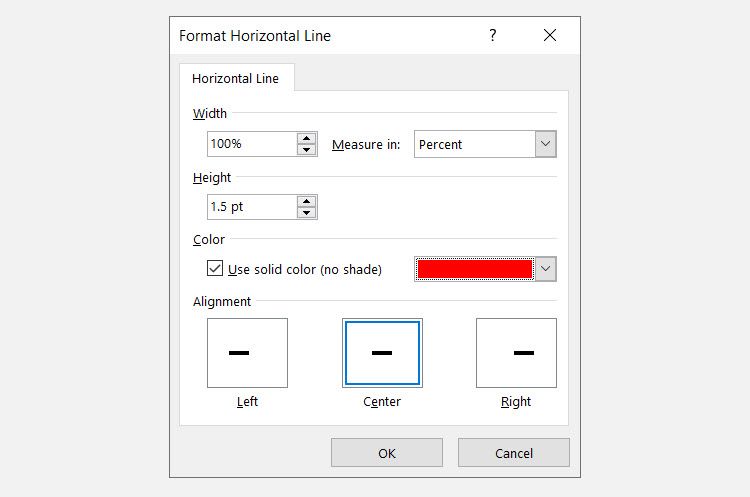
4. To tweak the look of this horizontal line, double-click the line. The Format Horizontal Line dialog box enables you to modify the width, height, color, and alignment of the line.
5. To resize a line, select the line with a double click and then drag any of the resizing points to change the length or width.
6. To remove the line, select it and press Delete on your keyboard.
Use Borders to Add Horizontal and Vertical Lines
The Borders option in the Paragraph group also gives you another way to insert a top or bottom border that resembles a horizontal line in the document.
1. Click on the paragraph of text where you want the line to appear.
2. Got to Home and the Paragraph group. Click on the Border button. The Bottom border is usually the default. This places a line below the selected text on the page, or the paragraph if you haven’t selected any text.
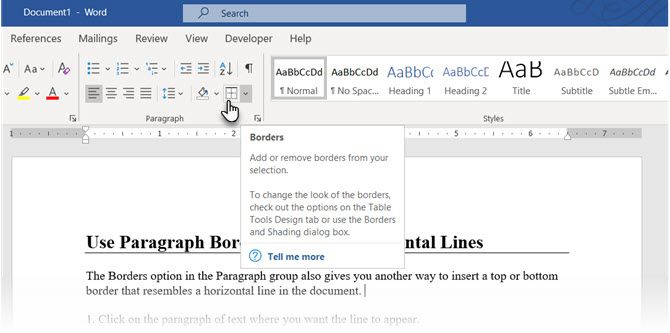
3. For other options (like a vertical border), you can click on the tiny dropdown arrow on the Borders button to access a list of options.
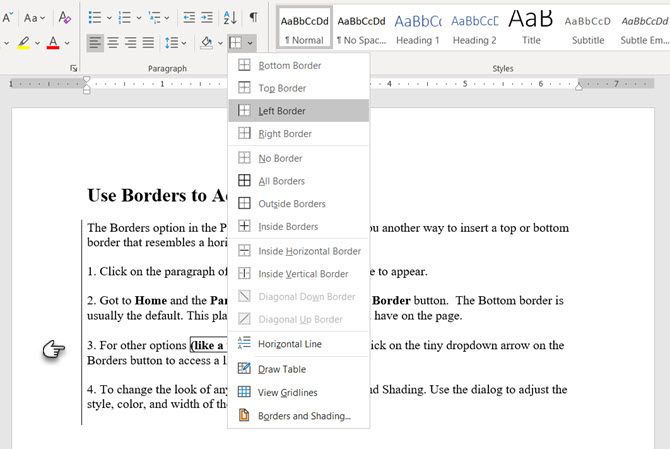
4. To change the look of any border, click on Borders and ShadiThen, use Use the dialog to adjust the border’s style, color, and width.
5. Deleting this horizontal line in your Word document may not be obvious but it easy enough.
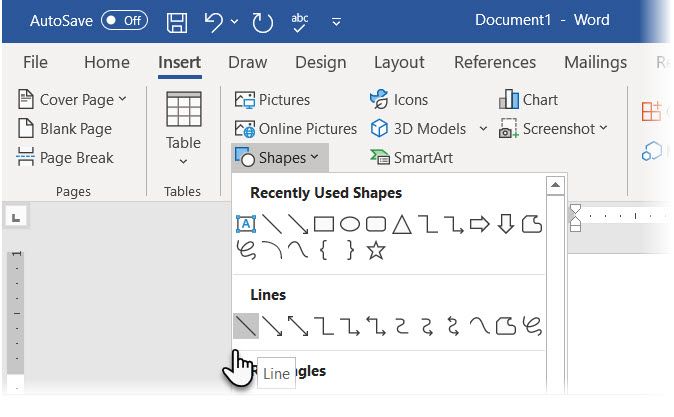
Use Shapes to Insert a Horizontal or Vertical Line in Word
The Shapes menu contains several line options. These line shapes come with one crucial difference—you can draw them at different angles. Then, after you draw the line, you can customize the color and appearance to make decorative horizontal or vertical lines even in the middle of a Word document.
1. Position the cursor where you want to insert a line.
2. Go to Insert > Illustrations group > Shapes dropdown arrow.
3. In the Lines group, choose the shape of the line.
4. Click and drag across the document with the mouse pressed till the endpoint. (Tip: Hold down the Shift key to insert a straight line that is either horizontal or vertical)
5. Keep the line selected to customize the appearance of the line with the Shape Format tab on the Ribbon.
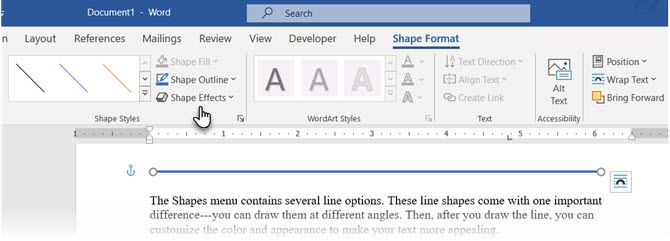
6. Go to the Shape Styles tab, change the color, use a different line style, or apply effects.
7. You can also right-click on the line and choose Format Shape from the context menu to open more options for changing the look.
How to Add a Vertical Line and Separate Text into Columns
Text arranged into columns is a basic layout technique. For example, you can separate text blocks into multiple columns and insert a vertical line between them.
1. Select the text.
2. Go to Ribbon > Layout > (Page Setup group) Columns. Click on the dropdown and select the number of columns you want.
3. The text is now arranged into columns. Click on any column and go to Layout > Columns > More Columns.
4. In the Columns dialog box, check the Line Between box and click OK.
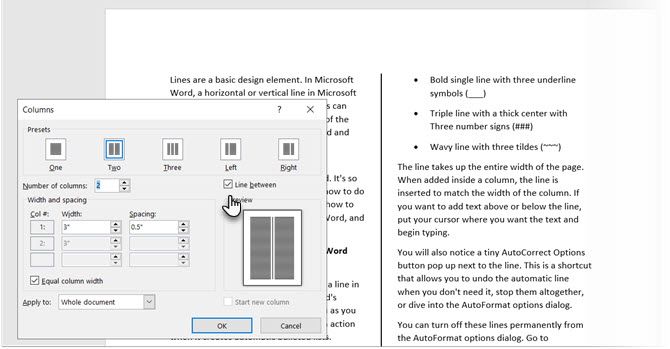
Note that you can also change the number of columns and the spacing between them from this dialog.
How to Use a Bar Tab to Insert a Vertical Line
Tab stops in Word help align lines and paragraphs. The bar tab, on the other hand, doesn’t set a tab. Instead, it. It inserts a vertical line and demarcates your paragraph into columns.
1. Select the paragraph where you want to add the vertical line.
2. Go to Ribbon > Home. In the Paragraph group click the tiny arrow to open the Paragraph Settings.
3. Click the Tabs button at the bottom of the dialog.
4. In the Tab stop position box, enter the position where you want the vertical line to appear. You can use the ruler at the top of the screen to gauge a value to enter.
5. Click the Bar button in the Alignment section. Click on Set and OK.
As you can see, I have set it to «-0.2» to make it appear just to the left of the first paragraph. To delete the vertical line, delete the bar tab.
Also: Want to make blank lines where the reader can fill in some information? You can use tabs to quickly create empty lines in forms with Microsoft Word.
How to Insert a Graphic for Creative Lines in Word
Using pictures for horizontal and vertical lines can be a creative workaround. But use them with care and avoid overusing them in a document as a stretched or condensed image can end up looking back on paper or the screen.
A graphic can be used as a straight line horizontally and vertically. Here’s how:
- Go to Ribbon > Insert > Picture.

- Choose one of the image sources from the dropdown. For instance, select This device to upload a line graphic you created in another program.
- The screenshot below sources an illustration from Stock Images. The anchor points around the image help compress and stretch the image to something that resembles a straight line. Use the rotation handle to flip the graphic for a vertical line.

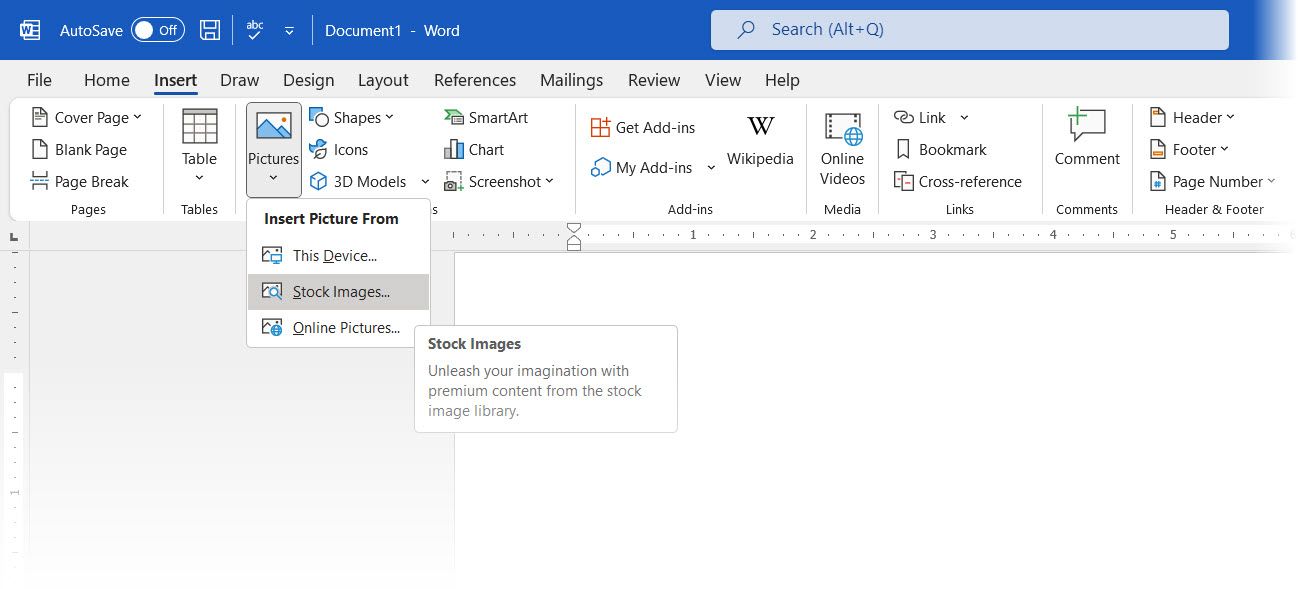
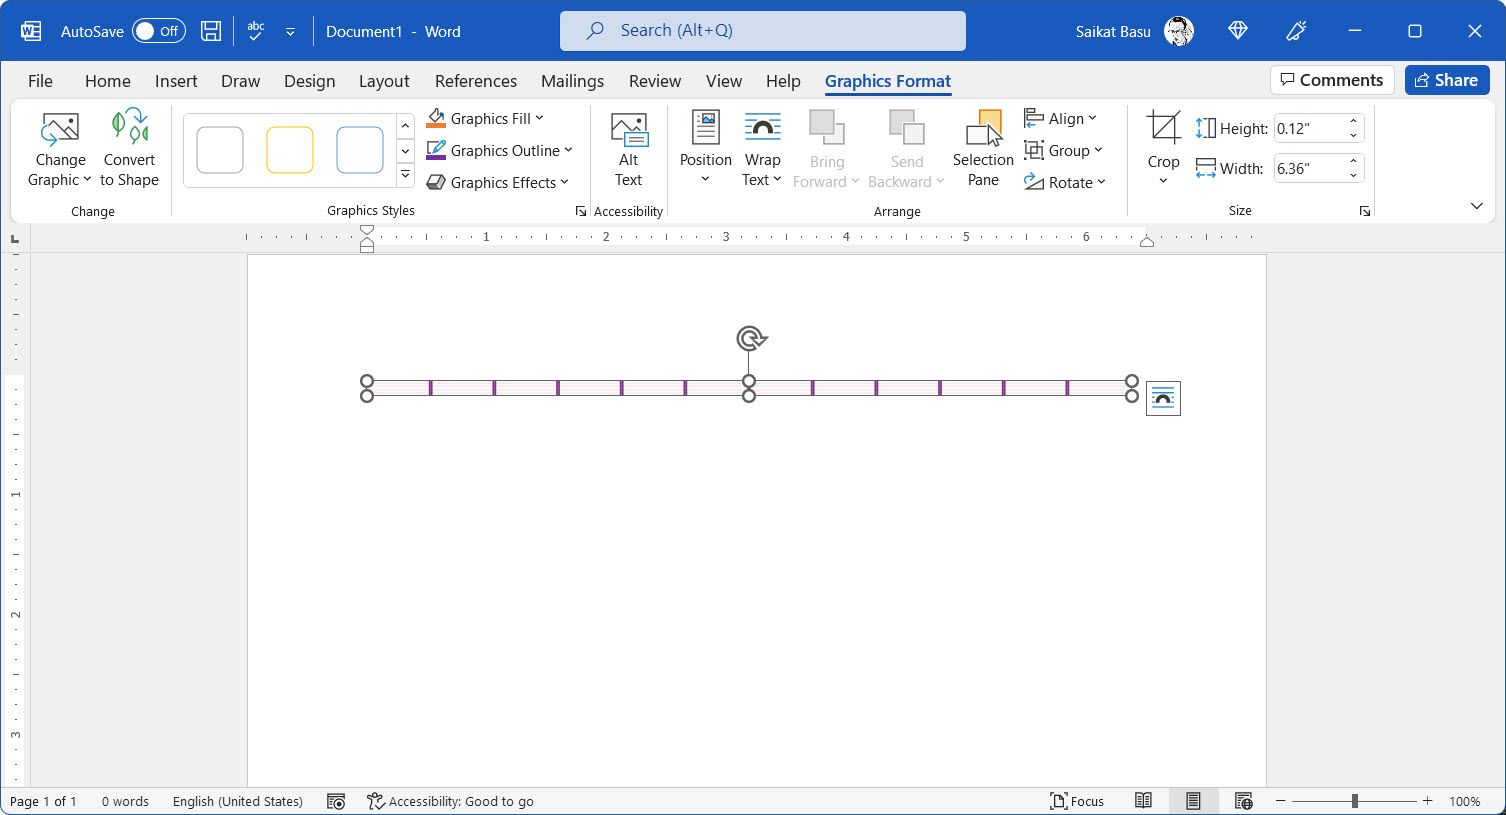
You can use these pseudo-lines as separators or as parts of the header or footer of your document. Use the Graphics Format toolbar on the Ribbon to format this illustration with Graphics Fill, Graphics Outline, and Graphics Effects.
Draw a Line in Your Word Document
Horizontal lines are more obvious and familiar. But adding vertical lines at the right place can boost the visual appeal of your content. Lines aren’t mere decorations… they can lead your eye to the most critical part of a document when used with subtlety.
Think about lines and use these methods the next time you sit down to write a professional report with Microsoft Word.
If you want to add a horizontal line inside a Word document, you can do it by using the formatting tools. But inserting a vertical line is a little trickier. You have to insert the line as a shape. Word lets you tweak the line’s color, shape, style, angle, thickness and alignment. You can also add visual effects such as 3-D styles, outlines and shadows.
In this tutorial, you will learn the different ways to draw a line inside a Word document.
Method 1: Using Shapes Menu
The very basic method to draw a line inside a Word document is to draw it. You can do this by using the Shapes menu. This menu has several options such as lines with arrow points on one or both the ends. You can also customize the appearance and color of the line after drawing it.
Please follow the steps below:
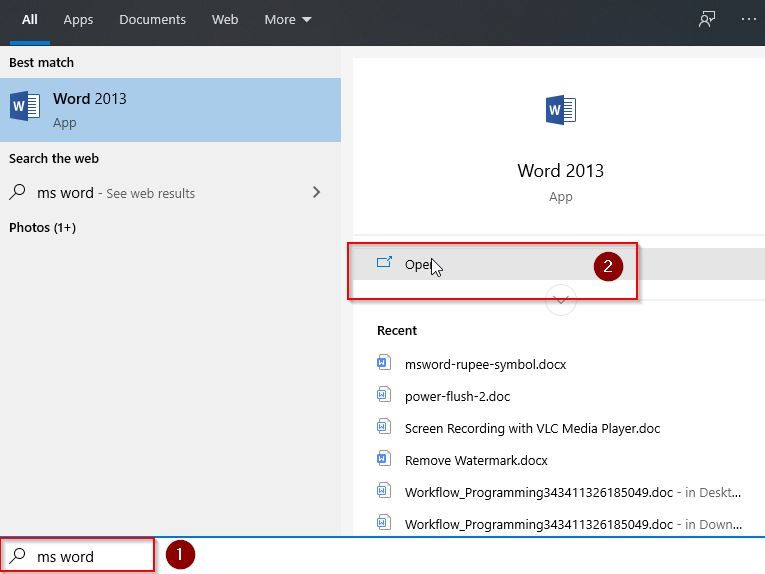
- Open Ms Word, Double-click a Word document that you want to edit, or double-click the Word App Icon and click Blank document to open a new document.
- Now place the cursor where you want to insert a line and click Insert
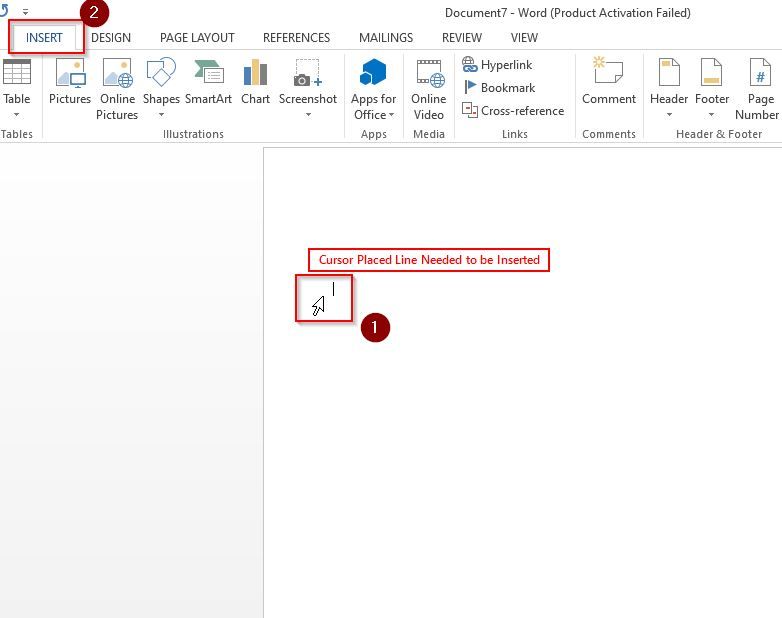
- Click on Shapes drop-down arrow available in In the Illustrations group.
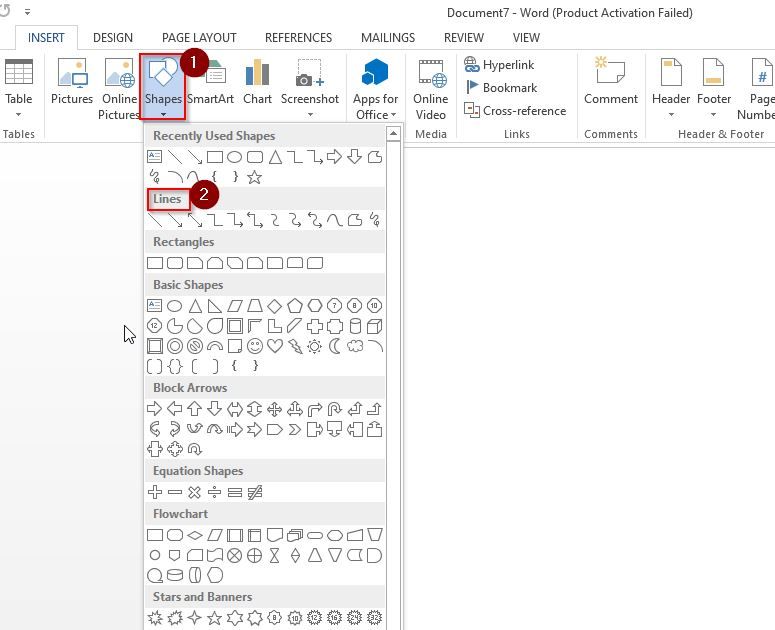
- Next,choose the shape of the line from the line group
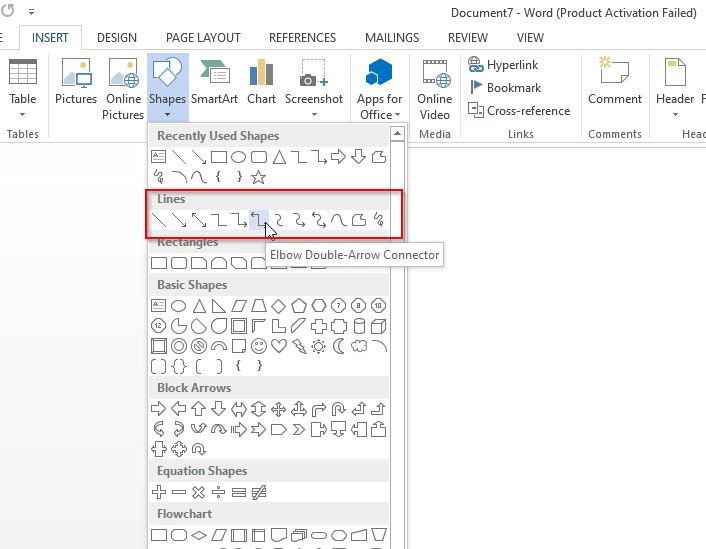
- Inside the document, click on the shape and drag across the area where you wish the line to be placed.
Creating Vertical Line
- Put your cursor where you want the line to begin. Then, drag it to the area where you want the line to end.
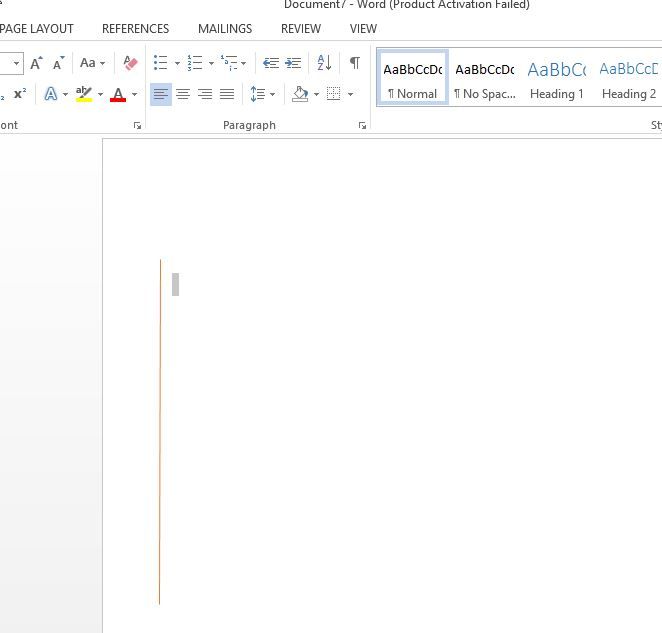
Note: If you press the Shift key and drag the mouse while drawing the line, you can easily get an absolute horizontal or vertical orientation.
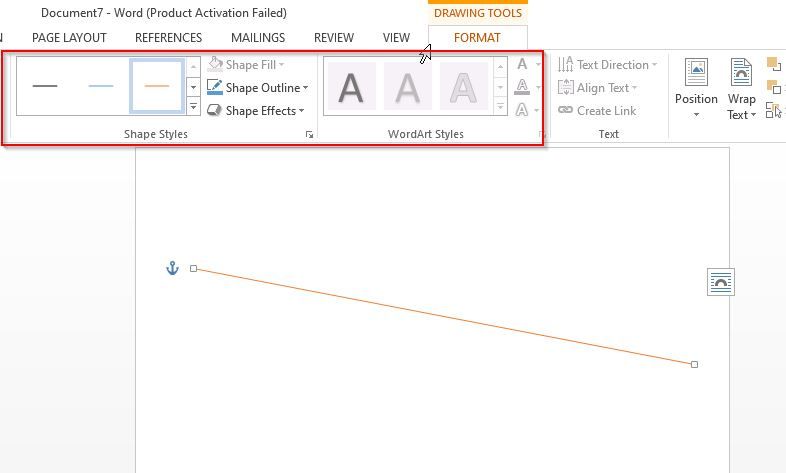
Change Style of Line
- You can change the style of the line, for that select the line and then click Format tab (Shape Format for some versions).
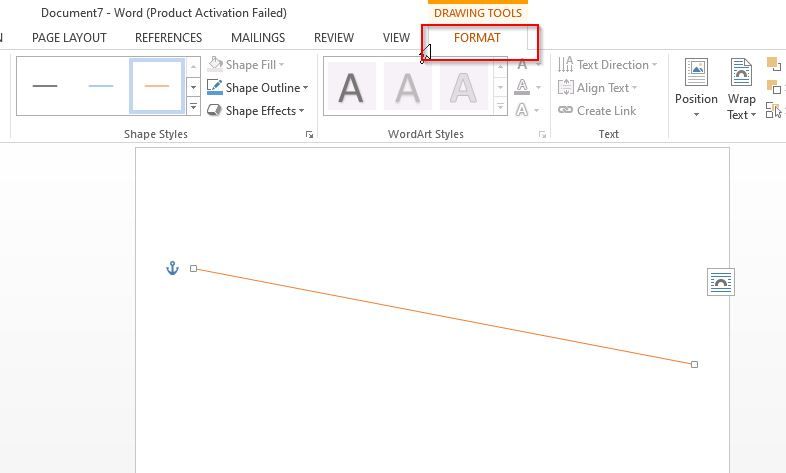
- In this Format tab you change the color, style or apply effects to the line.
Method 2: Using the Horizontal Line Tool
Another easy way to insert a line in the Word document is by using the Horizontal Line Tool present already. Let us see how you can use it.
Please follow the steps below in order to insert a line Horizontal Line Tool:
- Place the cursor in the word document where you want to draw a line and click Home Tab
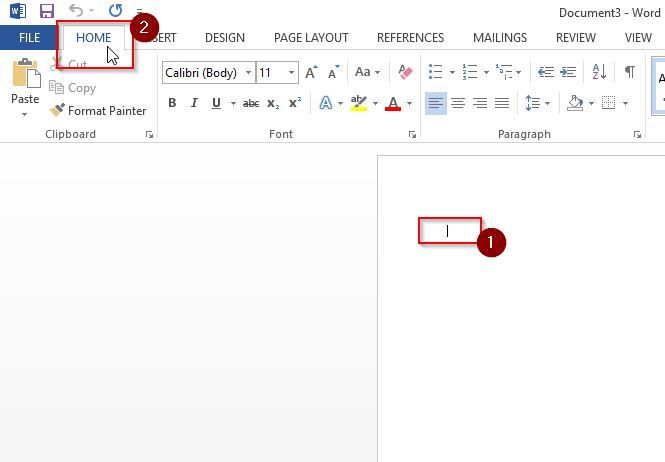
Note: When you open a New Word document or an existing one, the Home tab is selected by default.
- Now go to Paragraph group and click on the Border drop-down and select Horizontal Line.
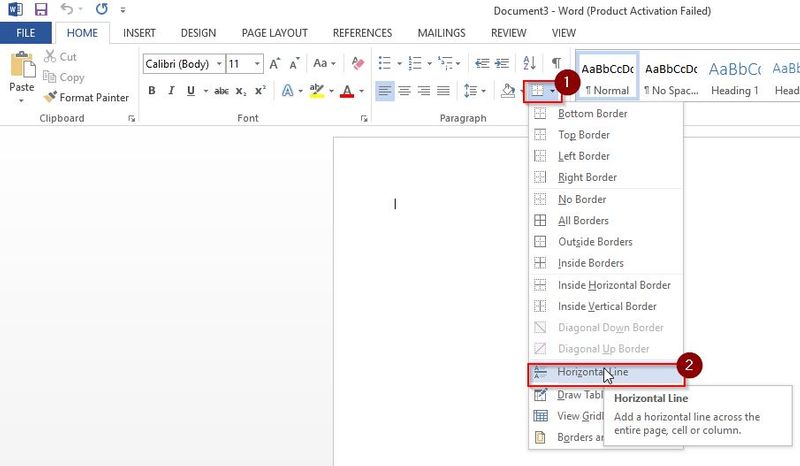
- A Horizontal Line will be inserted to your word document.
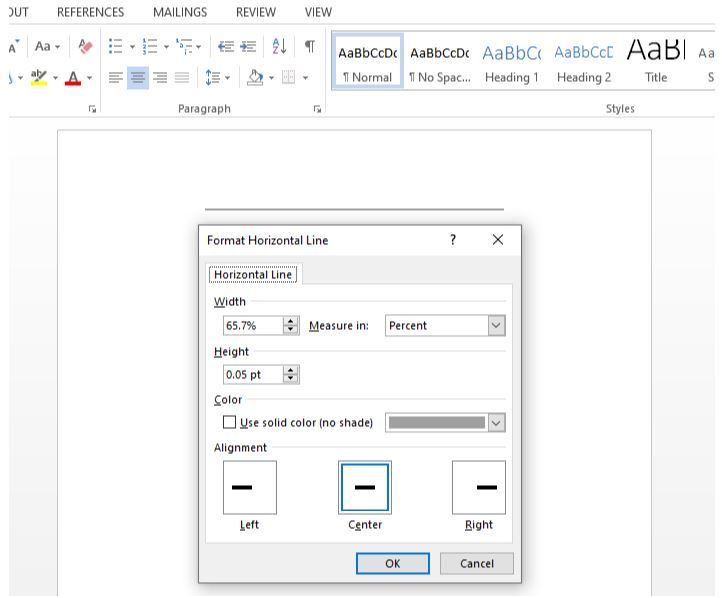
Change Style of the Line
In order to change the style (look) of the horizontal line, double click on the line
A Format Horizontal Line dialog box will appear where you can change the width, height, color and alignment of the line.
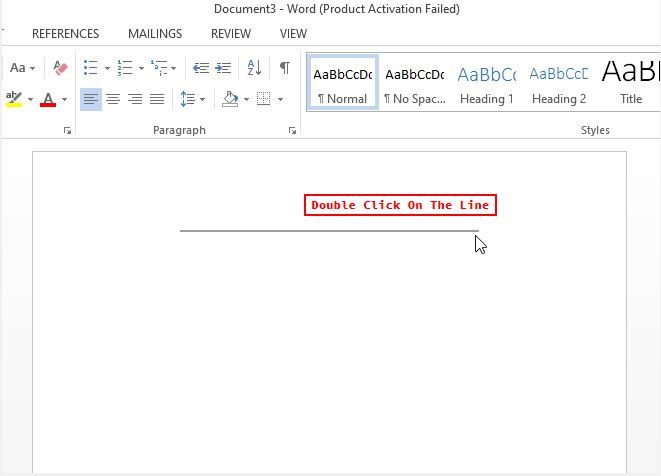
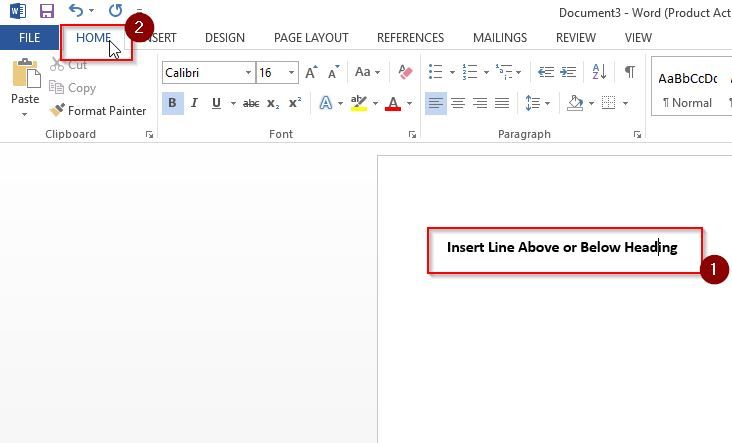
Method 3: Insert Line Above or Below Heading
Lines are commonly used in Word to decorate a heading or a subheading. It decorates the text and makes it eye-cathy, and also helps to divide the document into sections.
Please follow the steps below
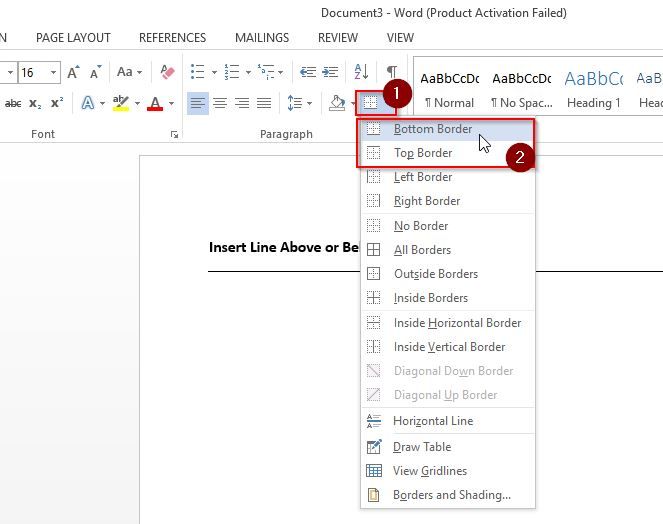
- First place the cursor on the heading (where you want to add line) and click on Home Tab.
- Now go to Paragraph group and click on the Border drop-down and select Bottom Border to add line below Heading or Top Border to add line above Heading.
Method 4: Create Lines Using Keyboard
Another easy way to create a line in Word is to press the hyphen key 3 times and hit the Enter key. This will automatically create a straight line. You can also replace the hyphen key with an underscore or the equals symbol. This will give you thicker lines and doubles lines respectively. Hash signs can be used to drawing triple lines with thick centers.
You can use the Asterisk symbol to create a dotted line or use tildes to draw some wavy lines.
Using Hyphens (—)
- Just type three hyphens and press Enter on your Keyboard.
Using Underscore (___)
- Just type three underscore and press Enter on your Keyboard for thicker line.
Note: Press Shift + Hyphen to type Underscore
Using EqualTo Sign (===)
- Just type three EqualTo sign and press Enter on your Keyboard for double line.
Using Hash Sign (###)
- Just type three hash signs and press Enter to create triple line with a thick center
Using Asterisk Sign (***)
- Just type three asterisk Sign and press Enter to create a broken or dotted line.
Using Tildes (~)
- Just type three tildes and press Enter to create a wavy line
Conclusion
All of the methods described above are simple and easy to insert your desired lines in a Word document. Modification of the styles, colors and alignments is also easy with Word’s in-built line formatting tools. So, go ahead and play around with these methods a bit until you find the one that suits you the best.