instantprint
Posted: 12 Feb 2021
12 Feb 2021
If you’re sending out a professional letter on behalf of your business, using letterheaded paper ensures you’re including all the information your recipient needs to know and reinforces your brand. In this guide, we’ll walk you through exactly how to create a company letterhead design in Microsoft Word so your communications show you off in the best possible way.
What is a Letterhead?
A letterhead is a sheet of paper with a heading at the top that identifies the sender. Businesses usually design their letterheads then order them in bulk from a printer, ready to send out at a moment’s notice. When you need to send a letter using a letterhead, you put your letterheads in your office printer and print your letter straight onto them.
Sometimes, letterheads use a more premium, thicker paper than what you’d normally use in your printer as this gives letters a more prestigious feel.
What Should You Include on a Letterhead?
Depending on the type of business you run and the communication you’re sending, there are different things you’ll need to have on your letterhead.
However, according to the Companies Act, you’ll need at least the following information on every letterhead you send:
- Your business’s name
- Where in the UK your business is registered
- Your registered company number
- The address of your registered office
To be on the safe side, you can acquaint yourself with all the different letterhead legal requirements here.
Although it’s not always necessary, in recent times it’s become popular to add your social media handles to your contact information on a letterhead. So, if your business is primarily accessed through this channel, we say go for it!
How to make letterheaded paper in Word
1. Set up your file
The first step to designing anything is getting your canvas ready. This also means you’ll not need to mess about with changing the size of your Microsoft Word document near the end!
- Open up Microsoft Word and open a new blank document
- Go to View and make sure ‘Print Layout’ is selected
- Go to Insert > Header
- Choose a header style from the options provided
If you want to also add a footer to your letterhead design:
- Go to Insert > Footer
- Choose a footer option
2. Add your logo
Your logo is one of the main aspects of your letterhead design. To add this:
- Make sure you’re adding to your header by double-clicking inside the header
- Go to Design > Image
- Add your logo image file from your computer
To resize your logo:
- Right-click the image and select Size and Position
- Alter the height and width of your logo under the Size tab
- Click OK when you’re happy with it
3. Add your text
Next, you’ll need to add your important information outlined at the beginning of this guide, like your business’ name. You can add this to either your header or footer.
- Click into your header or footer
- Type your information in
- Highlight the text and choose the font, size and colour under the Home tab
4. Save your design
Once you’re happy with your design, you’ll need to save it in a format that’s suited to printing. Here’s what we recommend:
- Go to File > Save As
- Choose where you want to save your design
- Name your file
- Change the ‘save as type’ box to ‘PDF’
Once you have made a letterheaded paper in Microsoft Word, you can upload your artwork as soon as you’ve added letterheads to your basket. We’ll then run our 10 point check, add bleed and, if necessary, tweak the colours to make sure it prints perfectly.
And there you have it – a perfectly designed letterhead that’s ready to print! If you have more questions about creating letterheads in Word or business stationery, feel free to get in touch with our team and we’ll be happy to help. feel free to get in touch with our team and we’ll be happy to help. Or why not try designing a letterhead online with our free design tool?
About the Author
I’m Amy, a Studio Team Leader at instantprint. I love using my design knowledge to give customers the confidence they need to create incredible looking print every time.
Headings make text stand out and help people scan your document.
The simplest way to add headings is with heading styles. Using heading styles means you can also quickly build a table of contents, reorganize your document, and reformat its design without having to manually change each heading’s text.
-
Select the text you want to use as a heading.
-
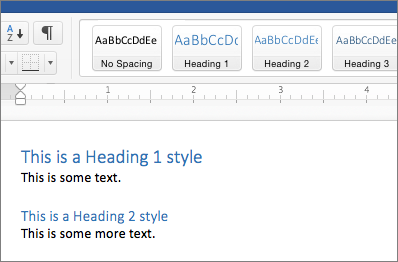
On the Home tab, move the pointer over different headings in the Styles gallery. Notice as you pause over each style, your text will change so you can see how it will look in your document. Click the heading style you want to use.
If you don’t see the style that you want, click the More button
to expand the gallery.
Tip: You can change the font and formatting of a heading style. Just select the heading text you want to customize, modify its styles the way you want, and then on the Home tab, in the Styles group, right-click the heading style that you customized and click Update Heading to Match Selection. Every time you apply that heading style in your document, the heading style will include your customizations.
Styles can do a lot more, including a table of contents. Here’s a short video on why to write first and format later using Styles.
Headings can make text stand out and help people scan your document. The simplest way to add headings is to use heading styles.
-
Select the text you want to use as a heading.
-
On the Home tab, click the heading style you want to use.
If you don’t see the style you want, click a left, right, or down arrow to see more available styles.
Asked by: Otilia Grant
Score: 4.3/5
(8 votes)
A letterhead, or letterheaded paper, is the heading at the top of a sheet of letter paper (stationery). That heading usually consists of a name and an address, and a logo or corporate design, and sometimes a background pattern.
Is it correct to say letter headed paper?
For some reason, most Americans no longer say “letterheaded paper”; only Brits and British English speakers like Nigerians do. But “letterhead” is standard in both British English and American English. I personally prefer “letterhead” to “letter-headed paper.”
What should be on letter headed paper?
What info goes on a letterhead?
- Company logo.
- Legal business name.
- Registered physical address.
- Contact information: phone number, fax number, email address.
- Company website URL.
- Company registration number, if applicable.
How do you create a headed paper in Word?
Create a Letterhead Template in Microsoft Word
- Lay Out the First Page. Create a new, blank document. …
- Lay Out the Second Page. Use the Show Next button on the Header and Footer toolbar to go to the Second Page Header. …
- Close Up and Save.
How do I print on letter headed paper?
USING LETTERHEAD PROFILE
Open the printer properties window by selecting fileprintprinter properties Page 5 2. The printer properties pop up window will appear. You will need to select your letterhead profile. Choose the down arrow to the right of the profile select box then select Ok to print.
24 related questions found
Can I print my own letterhead?
Here’s how: You can do it with a single click, using Word’s AutoCorrect feature, which is found under the Tools menu. Begin by scanning an image of your letterhead and save it. … AutoCorrect will replace the word with your selected image and presto, your letterhead is ready for printing.
How do you make a headed paper?
The really simple steps for creating headed paper in Word are as follows:
- Open a new document.
- Under Layout > Margins: set the margin sizes for the page (we recommend keeping them fairly wide).
- Under Insert > Header: choose the layout that you prefer and then insert your logo and text.
What’s a letterhead look like?
A letterhead is the heading – usually at the top, of the letter paper (or stationary). It typically includes the company logo, company name, address, and contact information. A well-designed letterhead acts like a company pad that makes letter papers look much more formal and professional.
Does Microsoft Word have letterhead templates?
With a quick web search, you can easily find a free letterhead template for Word. To avoid common free Microsoft Word templates, consider premium Microsoft Word letterhead templates. You’ll get a more unique result. These are made by professional designers, with the aim of making them simple to customize.
What makes a good letterhead?
Similar to creating an ID card, a professional letterhead should have the general components regarding the company. Now, let’s look at the 3 key elements any proper letterhead should include: the name of the company, its logo or slogan, and its general contact details.
What are two tips to use when creating an effective letterhead?
- Get the Basics Right. …
- Bring in a Beautiful Border. …
- Go Geometric With Background Graphics. …
- Add a Creative Touch With a Header… …
- 5. …or an Elegant Edge With a Spine Column. …
- Adapt to Your Audience. …
- Brand Your Letterhead With a Logo. …
- Don’t Be Color-Shy.
What is an official letterhead?
: the name and address of an organization that is printed at the top of a piece of paper used as official stationery.
What is headed paper reference?
Headed paper just means that it will be more ‘official‘ than you emailing them any old thing you could have typed up yourself Your college will know what it is. It is just their letterhead paper — the official stuff with their crest/logo/address/headteacher etc on.
How do you spell letter head?
a printed heading on stationery, especially one giving the name and address of a business concern, an institution, etc.
What is the first line of a letterhead?
Your name goes in the first line of the cover letter letterhead. Use bold or italicized text and slightly larger letters, and stick with a font that delivers a classic, professional appearance, like Times New Roman or Arial.
How do you start a formal letter?
Beginning the letter
- Most formal letters will start with ‘Dear’ before the name of the person that you are writing to:
- ‘Dear Ms Brown,’ or ‘Dear Brian Smith,’
- You can choose to use first name and surname, or title and surname. …
- ‘Dear Sir/Madam,’
- Remember to add the comma.
What is a letterhead in email?
A letterhead for email is like sending an email on personalized stationery. The letterhead identifies a specific person or company as the sender. Most companies use letterhead to write letters specifically pertaining to the company. The letterhead gives the email a sense of professionalism and legitimacy.
What are the official letters?
An official letter, also known as a «formal letter,» is a document professionally written for another company or business professional. … Official letters are often written using simple and direct sentences with a formal greeting and signature included.
How do you make headed papers for free?
How to make a letterhead
- Log in or Sign up with Canva. Go to Canva or launch the app then log in or sign up for a new account using your email, Google or Facebook profile. …
- Select a template. …
- Create a personalized design. …
- Get creative with more design features. …
- Order your prints.
How do I design a logo?
Here are the most important steps to designing a logo: —
- Understand why you need a logo.
- Define your brand identity.
- Find inspiration for your design.
- Check out the competition.
- Choose your design style.
- Find the right type of logo.
- Pay attention to color.
- Pick the right typography.
How do you design a letter head?
The key to the letterhead design is first to decide what you want to display.
…
Informational & Design Elements
- Brand Logo.
- Slogan or tagline.
- Name.
- Address.
- Phone numbers (office and cell)
- Web address.
- Email address.
- Professional license numbers.
Can I scan letterhead into Word?
Your letterhead design is going to be placed into the Header and Footer section of your Word document, which will automatically repeat on all additional pages. Go to View > Header and Footer. Now some guidelines for headers and footers will show up on the document. Click Insert > Photo > Picture from File.
What is the size of letterhead?
The term «letterhead» is often used to refer to the whole sheet imprinted with such a heading. Letterheads are generally printed by either the offset or letterpress methods. Company letterheads are printed A4 in size (210 mm x 297 mm). Letter size is typically 8.5 x 11 inches (215 x 280 mm).
What is a digital letterhead?
Digital letterhead is a template that is designed and set up in your word processor, typically MS Word, with your firm-logo/graphics and firm address built into the header and/or footer. This allows your lawyers and staff to send official communications via email while maintaining brand recognition and consistency.
Headed paper: templates, inspiration and advice
Every day, lawyers, doctors, architects, designers and other professionals print their headed paper with us. Our presses produce all sorts of headed paper, which is why we wanted to share some tips on how best to design yours.
In this article, we look at headed paper design.
We explain what headed paper is and what characteristics it should have, and then show you some great templates that could serve as inspiration.
Lastly, we show you how to produce your own with tips for creating a headed paper template in Word and a tool specially for graphic design. Let’s get started!
Headed paper: what is it and what is it used for?
Let’s start with the basics: headed paper is blank paper that carries a person or firm’s contact details at the top. It’s the paper used by companies and professionals when communicating with the public. It should always feature:
- The name and logo of the company
- The name and surname of the professional
- Company information
- Contact details (postal address, phone number, email address)
In other words, the recipient of correspondence on headed paper must have all of the information they need to contact you.
No less important: headed paper should be recognisable, should be in keeping with the company’s image and, therefore, consistent with its brand identity. It should bring out your personality through small details: layout, graphics, colours, fonts and paper type. And because it’s about the small details, it involves subtle and careful work.
What makes good headed paper
From a graphics point of view, what features make some headed paper better than others? The same features found in any good graphic design.
1.Clarity
The role of headed paper is to inform, so it should be easy to read: pay attention to the font, which should be legible without difficulty, even at small sizes (it’s better to use a sans serif font), and also watch out for line spacing. Often, in an attempt to take up as little space as possible, there’s a tendency to condense every piece of information into one corner of the page. But this renders the text illegible, not to mention unattractive.
2.Simplicity
Aim for a simple layout. The letterhead should not interfere with the content of the paper, but rather contextualise it. It’s a case of less is more.
3.Recognisability
As we’ve already said, headed paper should be consistent with brand identity. So, if you use colours, make sure they match the brand’s palette (we suggest using no more than two colours); when choosing the font, stick to those used in the rest of your communications.
With this in mind, let’s take a look at some really good examples.
Headed paper templates for professionals
We’ve put together a selection of outstanding headed paper designs and organised them by profession. Check them out.
Headed paper: doctors and dentists
On headed paper for medical professionals, as well as basic information, you need to include the specialisation and, crucially, opening hours. From a design perspective, keep things sober and opt for a traditional layout that conveys a sense of seriousness and professionalism. For the palette, if you don’t have specific colours you must use, go for blue tones, which create a sense of calm and sincerity.
Keeping things sober doesn’t, however, mean overlooking the small details that make you stand out. Look at this example, which is decidedly different from the usual templates. Clearly, a letterhead like this is not for everyone: it must go hand in hand with a bold identity.
On the other hand, here is a more sober yet sophisticated design. Simple, but at the same time different from the headed paper typically used by doctors.
Here’s a more fun version (well, as fun as going to the dentist gets): a letterhead that conveys closeness and warmth, that reassures.
Headed paper: lawyers and law firms
In addition to the standard information, headed paper for law firms should also state opening hours, a lawyer’s specialisation and details of their professional qualifications. When it comes to design, opt for understated elegance. Here are two examples that we think would work well for a law firm.
This headed paper is simple and elegant, without being too pompous.
Here’s another classic legal letterhead that’s elegant and prestigious.
Headed paper: designers and architects
It goes without saying that, in this case, aesthetic choices are even more important, as they say much about the taste and skill of the firm or professional. We’ve picked out a selection of excellent designs that we hope you’ll find inspiring.
Headed paper for food industry professionals
Creativity is also a key ingredient in cooking. That’s why, for those working in the food industry, we recommend avoiding overly traditional letterheads and experimenting, just as you would in the kitchen. Here’s an example whose elegance and originality caught our eye.
Headed paper for invoices
Lastly, we want to devote a short paragraph to headed paper for invoices, because they often use a different template. It’s important to pay particular attention to this document because it usually serves as a “goodbye” to a client. As such, it’s the last memory they’ll have of us. We’ve got two examples of sleek design for you.
Tools for creating headed paper
This part of the article is aimed at those who have no graphic design experience. In it, we show you the tools you can use to create your headed paper without having to muck about with super complicated software.
The Word headed paper template
If you don’t have lofty aesthetic ambitions and want to opt for a very simple letterhead, then all you need is Word. Through the “Header” and “Footer” functions, you can create a letterhead template with a logo and other information. We’re using the word “template” because the sheet can be saved and used to create different documents all with the same letterhead.
The really simple steps for creating headed paper in Word are as follows:
- Open a new document.
- Under Layout > Margins: set the margin sizes for the page (we recommend keeping them fairly wide).
- Under Insert > Header: choose the layout that you prefer and then insert your logo and text.
- Under Insert > Footer: choose a layout and then insert your text.
- Save the document as a template.
Tools for designing headed paper
Canva
Alternatively, you can opt for a graphic design tool that gives you greater scope for customisation. Many of you will be familiar with Canva: we’ve recommended it in the past for creating graphic designs. So, you’ll be glad to know that Canva has a section for creating headed paper. Once you’ve signed in, a work page like this will open where you can start creating your design.
You can choose from various headed paper templates and then customise them as you see fit by changing the background, adding a logo or image, altering the size, position and font, changing the text colour and text boxes or adding graphic elements. Basically, every detail in the template can be customised. Then all you have to do is print it.
Adobe Express
Another very simple graphic design tool you can use online is Adobe Express, which can be considered the famous Adobe’s response to Canva.
Adobe Express also has a huge number of professional letterhead templates: you can either use the templates as a source of inspiration, or as a starting point for your graphic design, modifying them using a simple drag&drop interface. Adobe’s extensive archives allow you to add royalty-free images or graphics to your headed paper, and you can also create or upload a logo, to use in this or other projects.
Adobe Express has a powerful free version that will be sufficient for creating your own headed paper. The Premium package, however, offers a few extra handy tools, and, most importantly, full access to the archives.
Remember that headed paper is, in its own way, very much like a business card: the care taken in its design says a great deal about the care with which you work. So, never leave anything to chance.
Have you ever wanted to make a custom letterhead to impress clients? Or, maybe you’ve decided to set up a home business? Either way, you don’t need to order from a printer or graphic designer. This easy tutorial will show you how to create a letterhead in Word without needing design skills.
I’ll use Microsoft Word for this step-by-step tutorial, which is included in Microsoft 365 (Formerly Office 365). I’ve also done a Google Docs letterhead as well. In addition, you can use a letterhead when doing a mail merge.
Informational & Design Elements
The key to letterhead design is deciding what you want to display first. Although creating the template is simple, you should do some planning. It helps to take a blank sheet of paper and sketch your design. Nothing fancy, as this is a mockup. This will help you choose the starting page header. The good news is once you grasp the power of templates, you can make changes or use different versions.
While creating your templates, you might consider using Quick Parts to add reusable assets to the Building Block Organizer. Then, you can easily find and insert those parts into other document areas.
The list of elements can vary based on whether you’re an individual, organization, or company. For example, if you’re doing a company letterhead, you might not have a slogan, or if you’re a law firm, you may not have social media addresses. To get you started, here are some visual elements to consider:
- Brand Logo
- Slogan or tagline
- Name
- Address
- Phone numbers (office and mobile)
- Web address
- Email address
- Professional license numbers
- Memberships and awards
- Established date
- Social media addresses
- color scheme
Once you’ve identified the items to include, you should determine their placement. For example, I split my elements between Microsoft’s Word header and footer.
Template Graphics Considerations
Images or logos can improve the design and be impactful. But images can pose design problems. For example, you may find a great graphic, but your office printer doesn’t do it justice. This is because your printer’s capabilities aren’t good enough to display the image. And we all know how pictures differ when you’re running low on printer ink.
The flip side is when you have a superb printer, but the image file isn’t as good as it should be. This could result from reducing the image file size too much, so it appears pixelated.
Another issue is that the image you pull in has too much white space, so you need to crop or adjust the image. But, again, an image capture program like SnagIt can do crops and adjustments.
If you work for a company or organization, you should check if they have an identity or “style guide.” They often have approved graphics they can give you in the appropriate image size and file format. Just like templates, style guides can range from simple to complex. For example, HubSpot has a lengthy article that includes examples.
In this tutorial, I’ll create a simple template starting from a blank document. It shares some of the steps we used for our Cornell Notes template. The page header will have my site logo, and the page footer will have my postal address. And yes, Microsoft Word could handle my new logo, which is an SVG file.
- Start with a blank Word document.
- Click the View menu and select Print Layout.
- From the Insert menu, select Header. It’s in the Header & Footer group. Microsoft Word will display a list with numerous starting Header styles.
- Click the style you prefer. I will use the top Blank style. You’re now in “Design” mode and you should see a Header marker tab to the left and placeholder text above.
- While on the Design menu, click Pictures from the Insert section. If your image is too large, it will scale down to fit the width.
- The Insert File dialog box will open. Find your graphic file and click Insert.
- Review your image to see if it’s balanced. In the example below, I think my logo is twice the size I prefer.
- Right-click your image and select Size and Position…
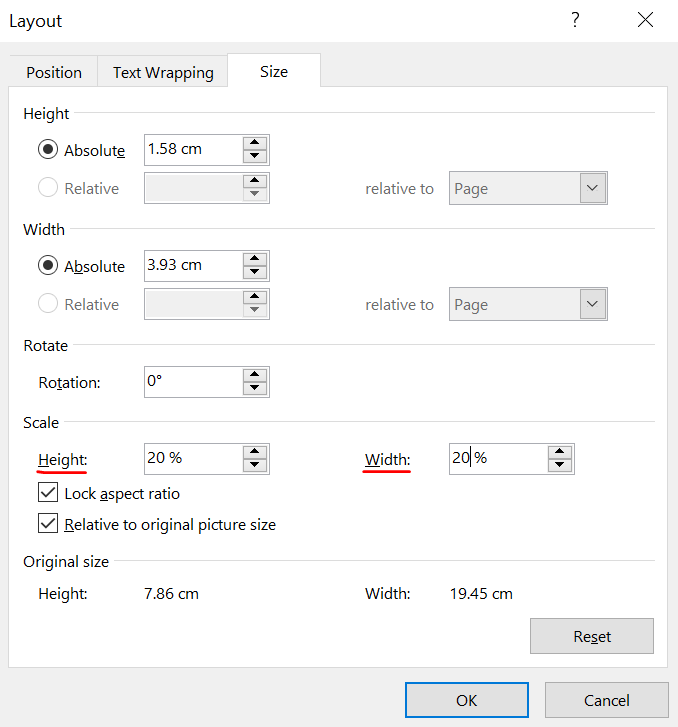
- A dialog appears with various resizing options. My initial logo was 20% and I reduced it down to 10%.
- Click OK to accept the new image size. The image will left-align.
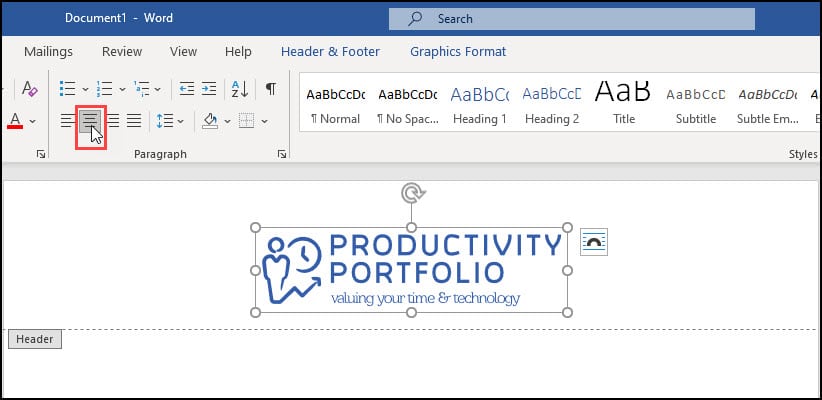
- Click the image.
- Click Home.
- Click the Center Alignment button in the Paragraph section.
- Optional: Add any other text you might like in this area.
I include my address with a smaller font and a vertical line or pipe sign in the footer area. I also centered the text.
- From the Insert menu, select Footer. Word will display a series of Footer styles.
- Click the style you prefer. A placeholder footer appears.
- Add in your text such as your address.
- If you wish to change the font, highlight your text and right-click. This will open the mini format bar.
- Optional: If you wish to center your text, click the Home menu and then the Center text button.
- Double-click the small Footer marker at the top left to get out of footer design mode.
This is also a good time to print your custom letterhead to check any artwork’s color and clarity. Your online version may show colors that are muted but print fine. You may also need to adjust your printer settings if they are in draft or economical print mode.
If you need to edit the header or footer to get into design mode, double-click anywhere in the header or footer area. The small tab markers will show to the far left.
Save the Letterhead Template – (*.dotx)
Aside from tweaking your header and footer, you may want to adjust other properties before saving the file. For example, you might change the margins, fonts, or style.
- From the File menu, select Save As…
- In the Save As dialog, change the Save as type: to Document Template (*.dotx).
- Provide a descriptive name for your template such as “letterhead”.
- Click Save.
Using Your Letterhead Template
When you saved the template, Microsoft Word stored it in a templates folder. However, you can create a custom location if you prefer.
To use the letterhead template,
- Open Microsoft Word and select New either from the File menu or Backstage view.
- Click Personal.
- Double-click the template you wish to use. A new document will open based on your selection.
Finding Your Templates Folder
Microsoft stores your templates in a designated folder. You can find the location using these steps.
- Click the File menu from the ribbon.
- From the left navigation pane, click Options.
- From the Word Options dialog box, click Advanced.
- Scroll to the General section. It’s towards the bottom.
- Click the File Locations… button.
- In the File Locations dialog box, double-click User templates.
- Windows File Explorer will open the folder.
- Click the Cancel button.
If you need to find the full file path, you can shift + right-click on the file name.
Show Me How Video
This 4-minute video was recorded using Microsoft Office 365. Click the image below to see the video page.
Key Takeaways
Making a letterhead template won’t take care of your correspondence. You’ll still have to write your letters. But you won’t have to type in your contact details each time. And you can also use this template to bulk-print your letterhead. Many commercial printers can use a Word or PDF file for a print run.
If you’re writing a longer document, you might want to add chapter headers. If nothing else, they make it much easier to find a particular section in a document quickly. Some universities also require them in theses and dissertations.
Luckily, they’re also reassuringly easy to add in Microsoft Word, as we will explain in this post.
Step One: Apply Heading Styles
Microsoft Word can automatically generate chapter/section headers based on the headings in your document. But to do this, you need to apply Heading styles first.
These can be found in the Styles gallery on the Home tab (or via the Styles pane). Usually, you would use ‘Heading 1’ for the main headings in your document. So what you need to do is:
- Find ‘Heading 1’ in the Styles gallery
The ‘Styles’ gallery. If you need to apply specific formatting options, right click and select ‘Modify’
- Select formatting as required and click ‘OK’ to update the style
- Go through your document applying ‘Heading 1’ to all chapter headings
Step Two: Adding Section Breaks
Next, you will need to add section breaks between each chapter. This will let you apply a different header to each section of the document. The process here is:
- Find the start of the first chapter in your document and place the cursor before the heading
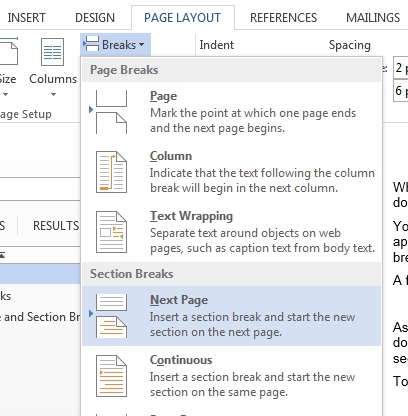
- Go to ‘Page Layout’ and select ‘Next Page’ from ‘Section Breaks’ in the ‘Breaks’ menu
Adding section breaks. - Repeat this for each chapter in your document
Step Three: Adding Headers
And now, the moment of truth! This step can be broken down into two parts. First, you need to make sure that the headers in each section are separated. To do this:
Find this useful?
Subscribe to our newsletter and get writing tips from our editors straight to your inbox.
- Go to the first chapter in your document
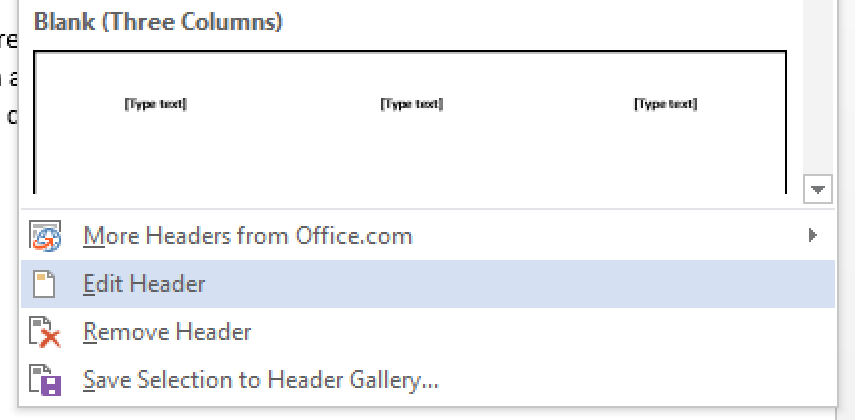
- Open the header by double clicking the space at the top of the page or going to Insert > Header & Footer > Header > Edit Header
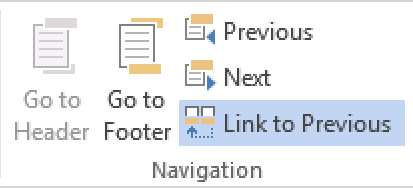
Editing headers. - Once the header is open, go to Design > Navigation and deselect ‘Link to Previous’
Unlinking sections. - Repeat for each chapter or section in the document
This will let you apply a separate header in each section. All you need to do is:
- Open the header in the first section/chapter
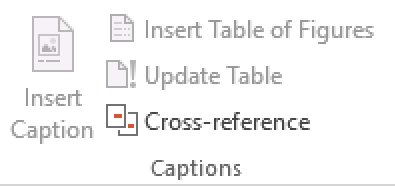
- Go to References > Captions > Cross-reference
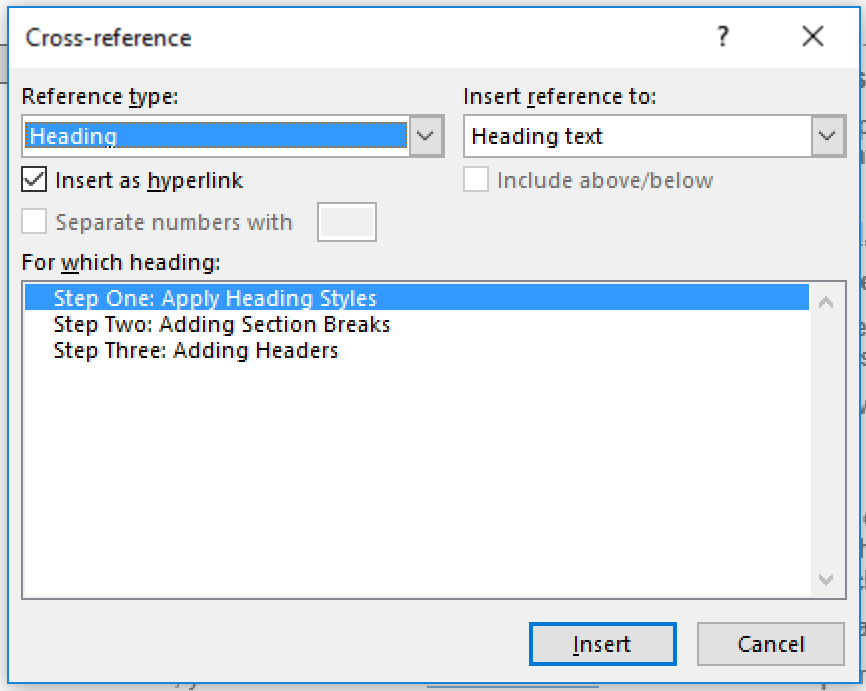
Cross-referencing. - In the new window, select ‘Heading’ under ‘Reference type’
- Pick the relevant heading from the list available and click ‘Insert’
Adding chapter headers. - Repeat for each chapter/section in the document
This will add the chapter title to the page header throughout each section. Keep in mind, though, that you will need to change the headers if you revise the chapter titles during editing, as they do not update automatically.
Once this is done, your document will look superbly professional.
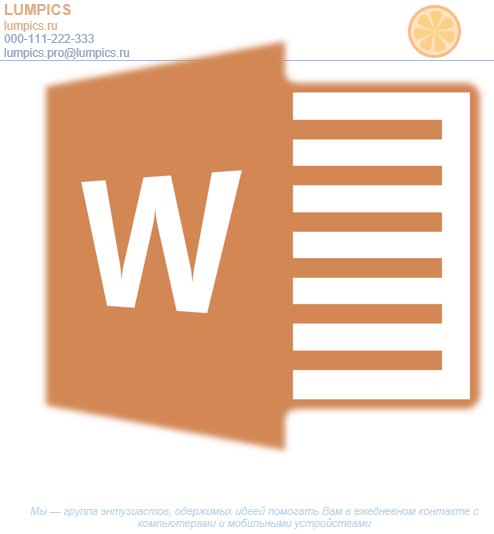
Многие компании и организации тратят немалые деньги на то, чтобы создать фирменную бумагу с уникальным дизайном, даже не догадываясь о том, что сделать фирменный бланк можно самостоятельно. Это не займет много времени, а для создания понадобится всего одна программа, которая и так используется в каждом офисе. Конечно же, речь идет о Microsoft Office Word.
Используя обширный набор инструментов текстового редактора от Майкрософт, можно оперативно создать уникальный образец, а затем использовать его в качестве основы для любой канцелярской продукции. Ниже мы расскажем о двух способах, с помощью которых можно сделать фирменный бланк в Ворде.
Урок: Как в Word сделать открытку
Создать фирменный бланк можно не только с помощью устанавливаемого на компьютер Microsoft Word, но и онлайн – достаточно перейти на сайт популярной платформы Canva. В библиотеке этого сервиса есть множество шаблонов различной тематики, включая типовые документы, каждый из которых легко изменить на свое усмотрение, а затем экспортировать в предпочтительном формате.
Создание наброска
Ничто не мешает вам сразу приступить к работе в программе, но куда лучше будет, если вы набросаете приблизительный вид шапки бланка на листе бумаги, вооружившись ручкой или карандашом. Это позволит увидеть то, как элементы, входящие в бланк, будут сочетаться между собой. При создании наброска необходимо учесть следующие нюансы:
- Оставьте достаточно места для логотипа, названия компании, адреса и другой контактной информации;
- Подумайте над тем, чтобы добавить на фирменный бланк и слоган компании. Эта идея особенно хороша в случае, когда основная деятельность или услуга, предоставляемая компанией, не указаны на самом бланке.
Урок: Как в Ворде сделать календарь
Создание бланка вручную
В арсенале MS Word есть все необходимое для того, чтобы создать фирменный бланк в целом и воссоздать набросок, созданный вами на бумаге, в частности.
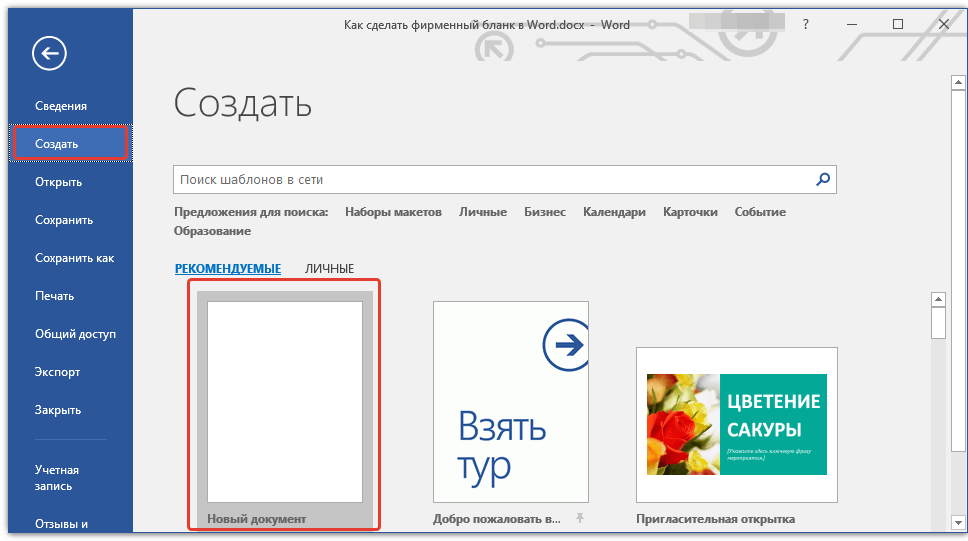
1. Запустите Ворд и выберите в разделе «Создать» стандартный «Новый документ».
Примечание: Уже на данном этапе вы можете сохранить пока еще пустой документ в удобное место на жестком диске. Для этого выберите «Сохранить как» и задайте название файла, например, «Бланк сайта Lumpics». Даже если вы не всегда успеете своевременно сохранять документ по ходу работы, благодаря функции «Автосохранение» это будет происходить автоматически через заданный промежуток времени.
Урок: Автосохранение в Ворде
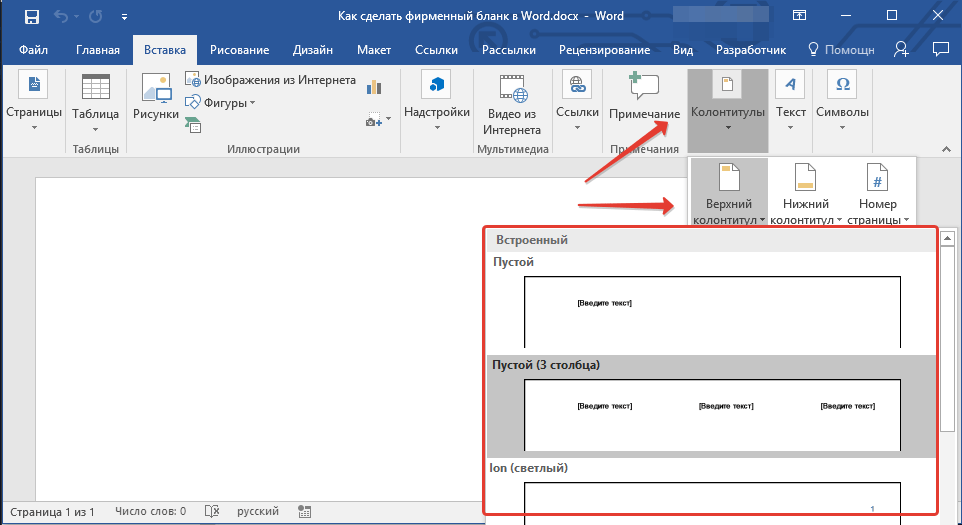
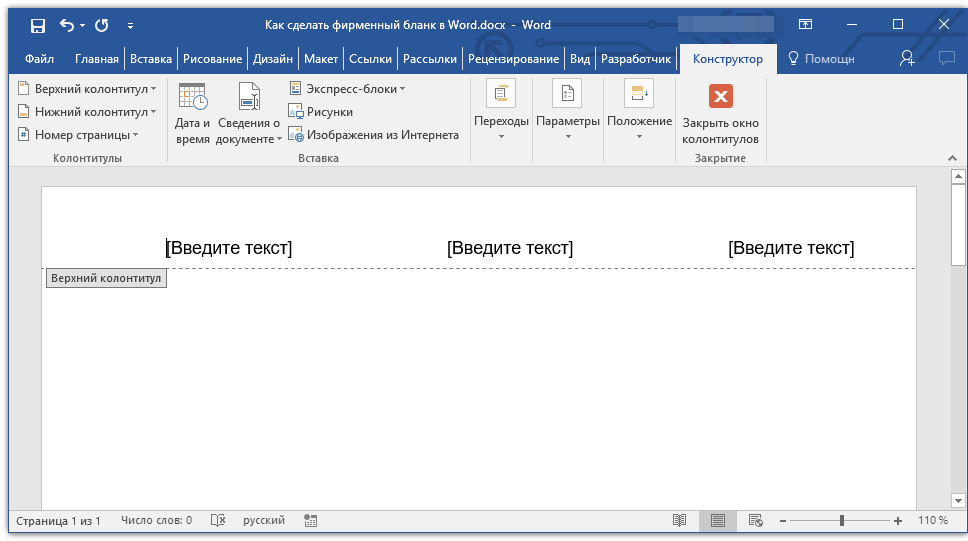
2. Вставьте в документ колонтитул. Для этого во вкладке «Вставка» нажмите кнопку «Колонтитул», выберите пункт «Верхний колонтитул», а затем выберите шаблонный колонтитул, который устроит вас.
Урок: Настройка и изменение колонтитулов в Word
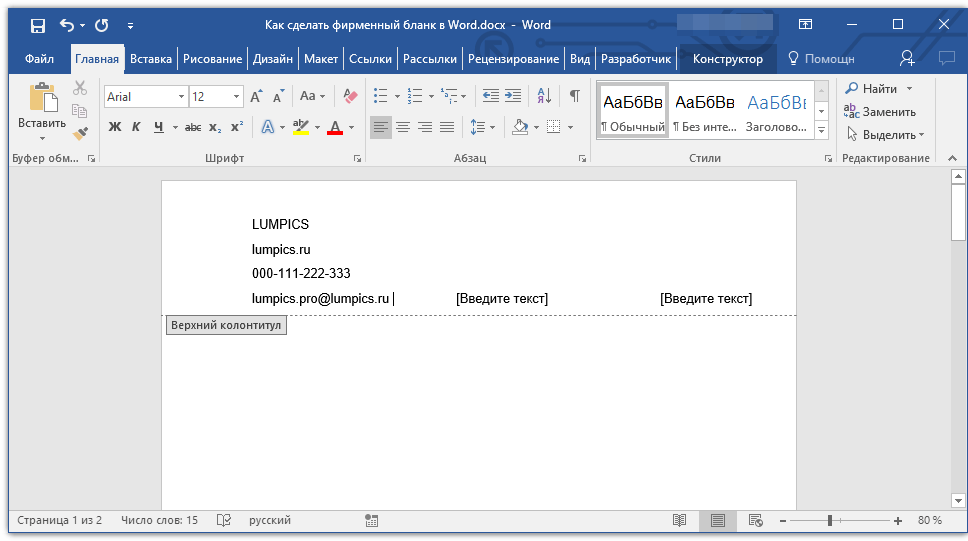
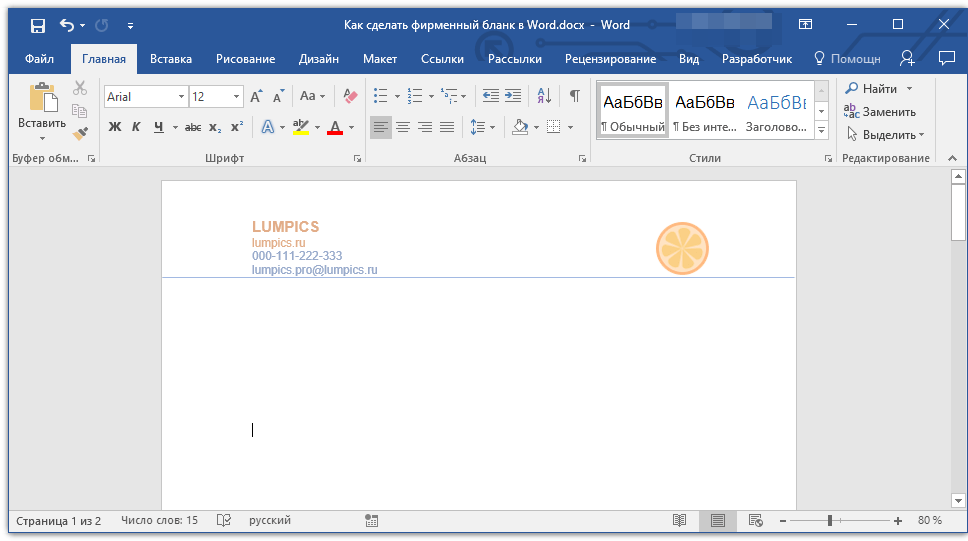
3. Теперь нужно перенести в тело колонтитула все то, что вы набросали на бумаге. Для начала укажите там следующие параметры:
- Название вашей компании или организации;
- Адрес сайта (если таковой имеется и он не указан в названии/логотипе компании);
- Контактный телефон и номер факса;
- Адрес электронной почты.
Важно, чтобы каждый параметр (пункт) данных начинался с новой строки. Так, указав название компании, нажмите «ENTER», то же проделайте и после номера телефона, факса и т.д. Это позволит разместить все элементы в красивом и ровном столбике, форматирование которого все же тоже придется настроить.
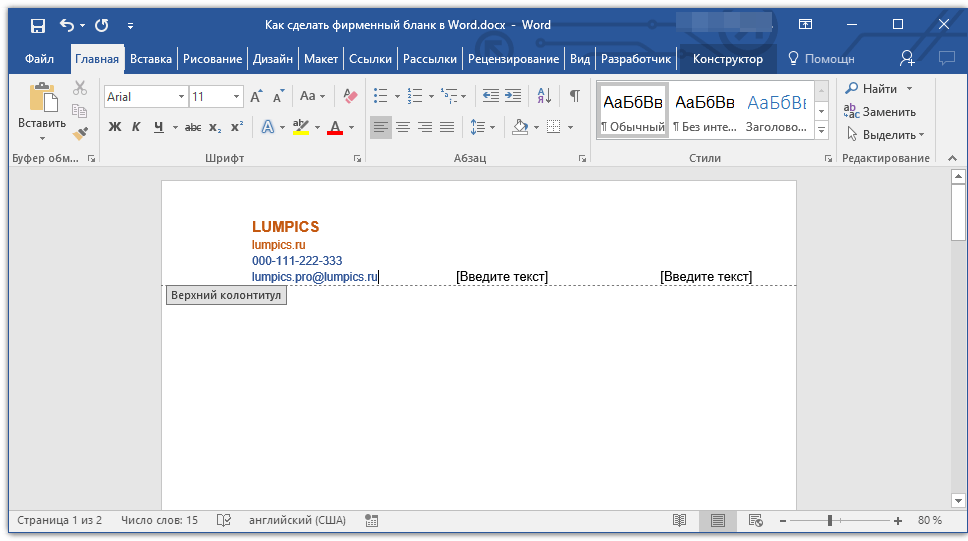
Для каждого пункта этого блока выберите подходящий шрифт, размер и цвет.
Примечание: Цвета должны гармонировать и хорошо сочетаться между собой. Размер шрифта названия компании должен быть хотя бы на две единицы больше шрифта для контактных данных. Последние, к слову, можно выделить другим цветом. Не менее важно, чтобы все эти элементы по цвету гармонировали с логотипом, который нам только предстоит добавить.
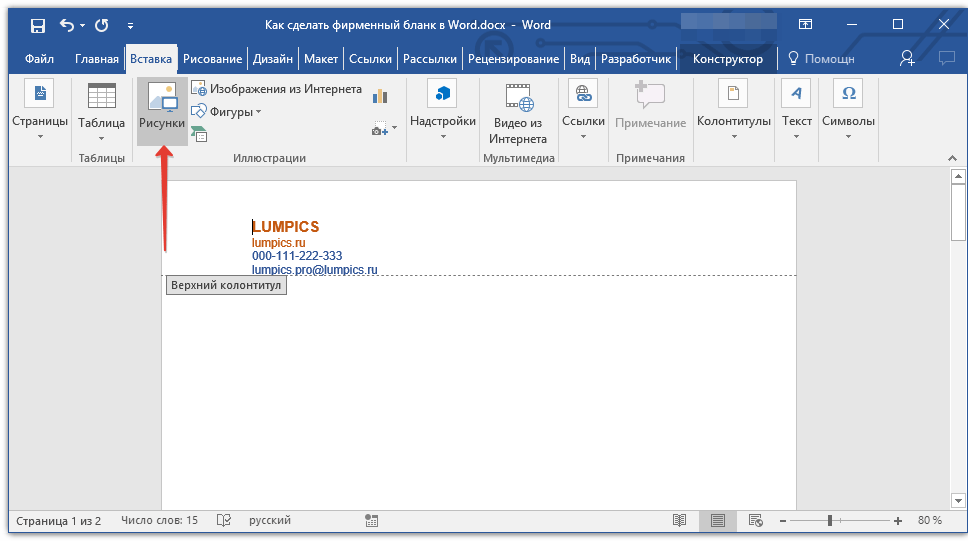
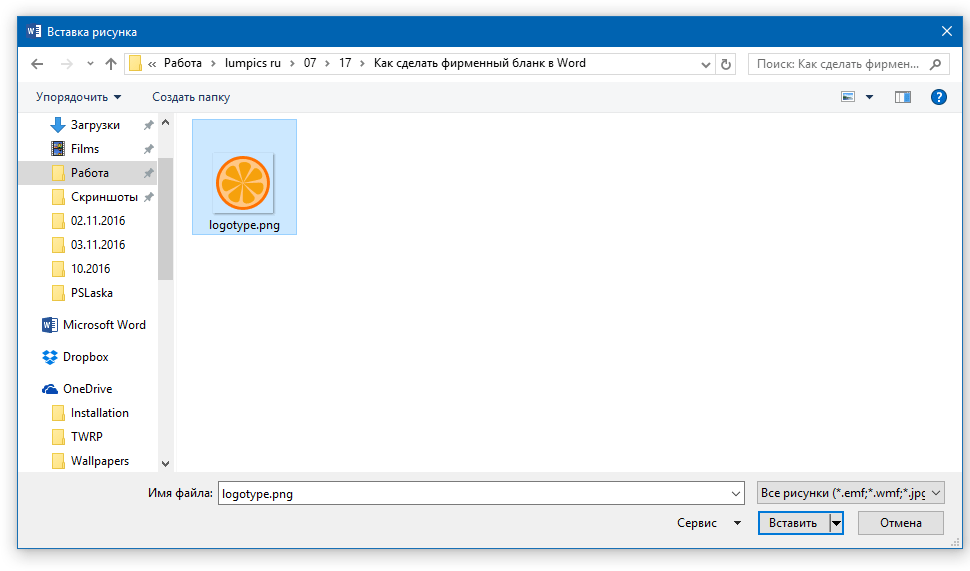
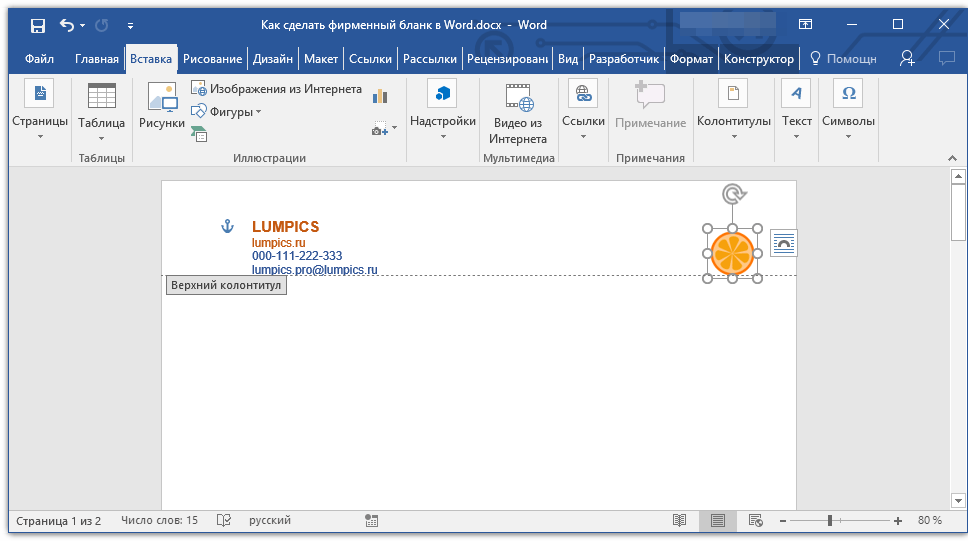
4. Добавьте в область колонтитула изображение с логотипом компании. Для этого, не покидая области колонтитула, во вкладке «Вставка» нажмите кнопку «Рисунок» и откройте подходящий файл.
Урок: Вставка изображения в Ворд
5. Задайте подходящие размеры и положение для логотипа. Он должен быть «заметным», но не большим, и, что не менее важно, хорошо сочетаться с текстом, указанным в шапке бланка.
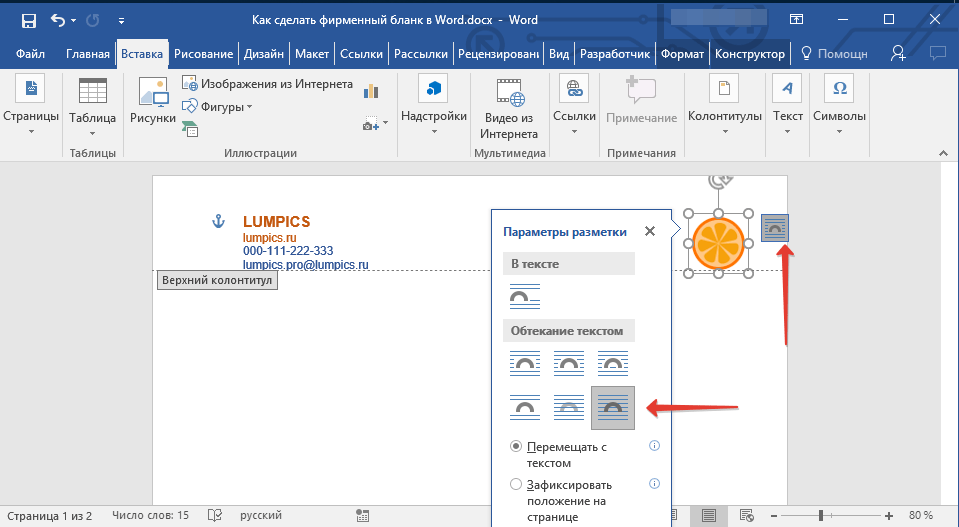
- Совет: Чтобы удобнее было перемещать логотип и изменять его размеры около границы колонтитула, задайте ему положение «Перед текстом», кликнув по кнопке «Параметры разметки», расположенной справа от области, в которой находится объект.
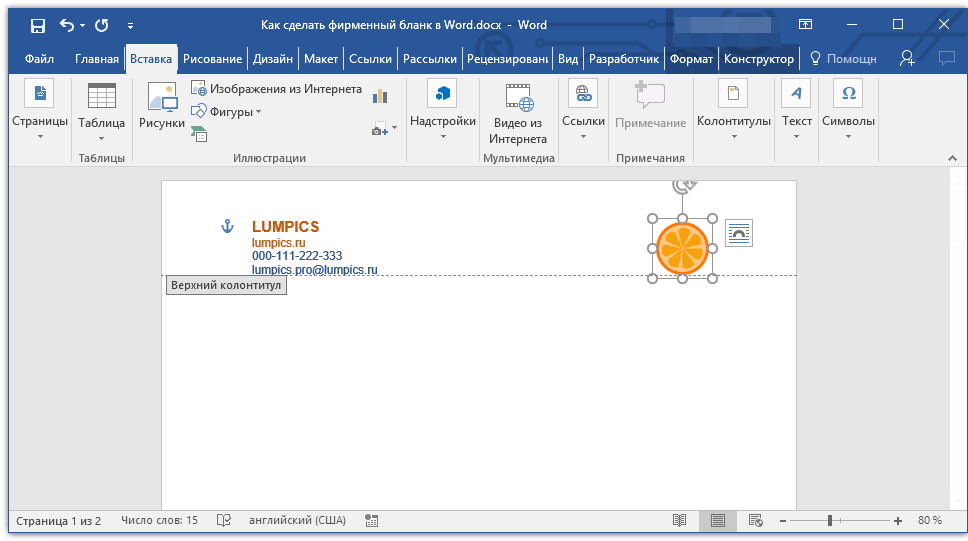
Для перемещения логотипа кликните по нему, чтобы выделить, а затем потяните в нужное место колонтитула.
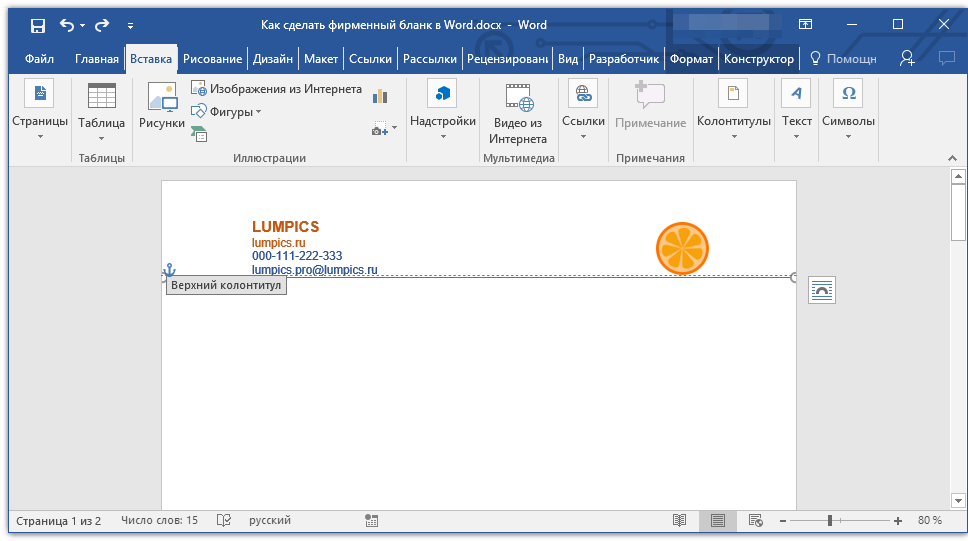
Примечание: В нашем примере блок с текстом находится слева, логотип — в правой части колонтитула. Вы же, по желанию, можете разместить эти элементы иначе. И все же, разбрасывать их по сторонам не следует.
Для изменения размера логотипа, наведите указатель курсора на один из углов его рамки. После того, как он трансформируется в маркер, потяните в нужном направлении для изменения размера.
Примечание: Изменяя размер логотипа, старайтесь не сдвигать его вертикальные и горизонтальные грани — вместо необходимого вам уменьшения или увеличения, это сделает его ассиметричным.
Старайтесь подобрать такой размер логотипа, чтобы он соответствовал общему объему всех текстовых элементов, которые тоже расположены в шапке.
6. По мере необходимости, можно добавить и другие визуальные элементы в ваш фирменный бланк. Например, для того, чтобы отделить содержимое шапки от остальной части страницы можно провести сплошную линию по нижней грани колонтитула от левого до правого края листа.
Урок: Как нарисовать линию в Word
Примечание: Помните о том, что линия как по цвету, так и по своим размерам (ширине) и виду, должна сочетаться с текстом в шапке и логотипом компании.
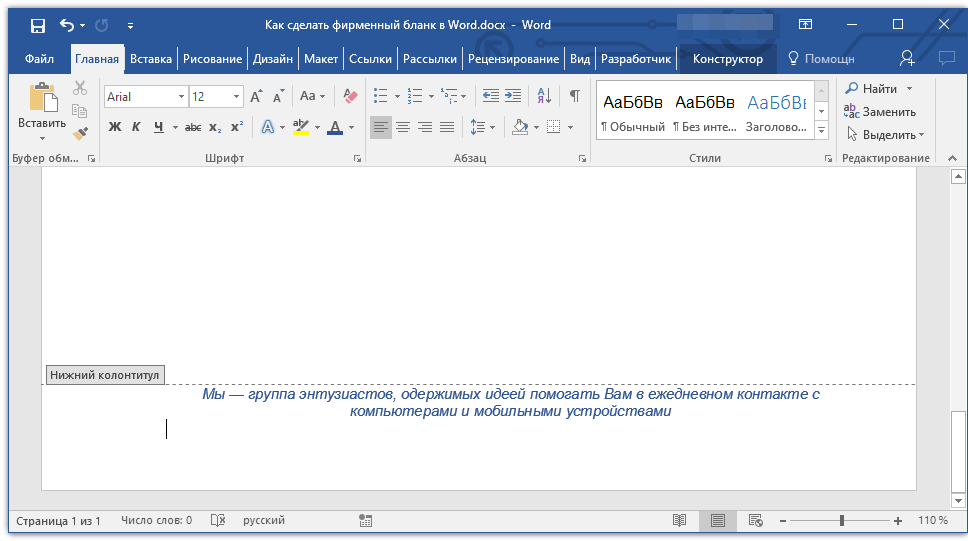
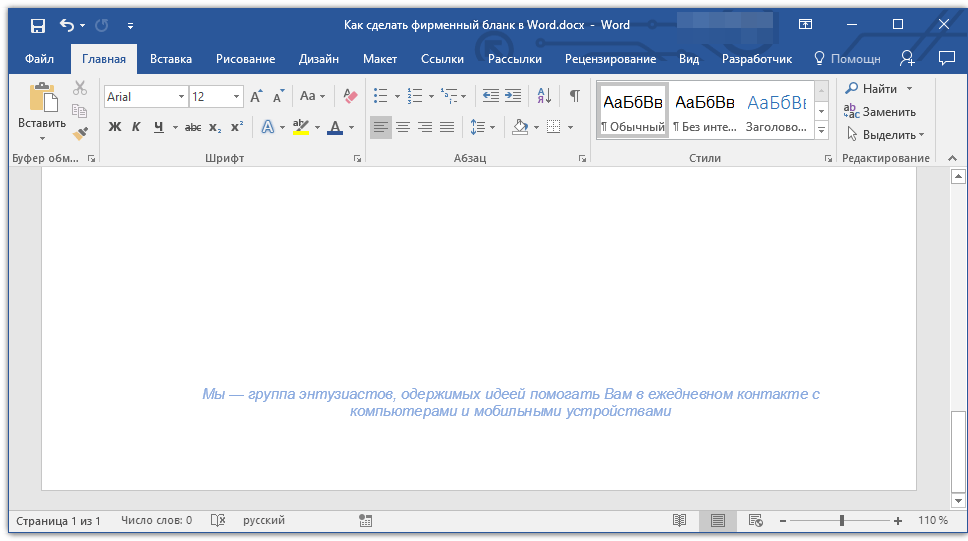
7. В нижнем колонтитуле можно (или даже нужно) разместить какую-нибудь полезную информацию о фирме или организации, которой принадлежит этот бланк. Мало того, что это позволит визуально уравновесить верхний и нижний колонтитул бланка, так еще и предоставит дополнительные данные о вас тому, кто знакомится с компанией впервые.
- Совет: В нижнем колонтитуле можно указать девиз компании, если такой, конечно, есть, номер телефона, сферу деятельности и т.д.
Для добавления и изменения нижнего колонтитула выполните следующее:
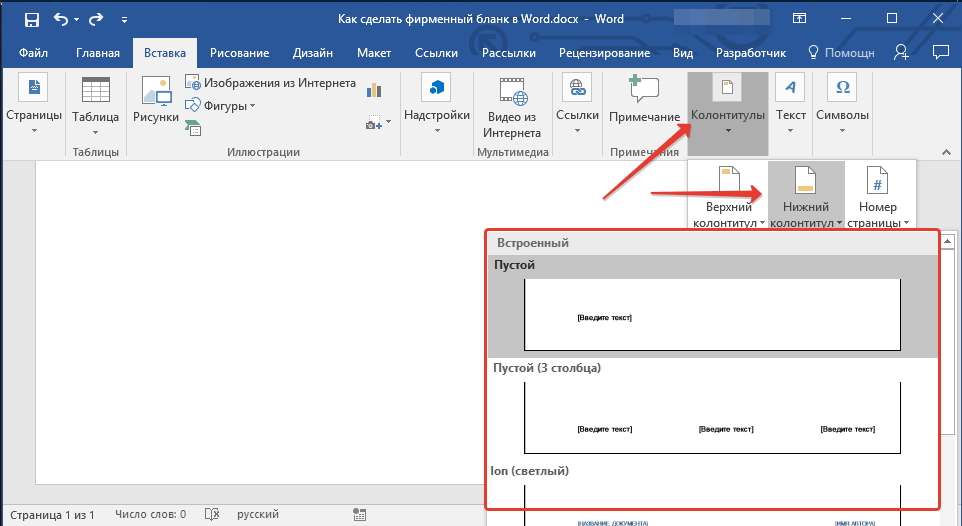
- Во вкладке «Вставка» в меню кнопки «Колонтитул» выберите нижний колонтитул. Выбирайте из выпадающего окна тот, который по своему внешнему виду полностью соответствует выбранному вами ранее верхнему колонтитулу;
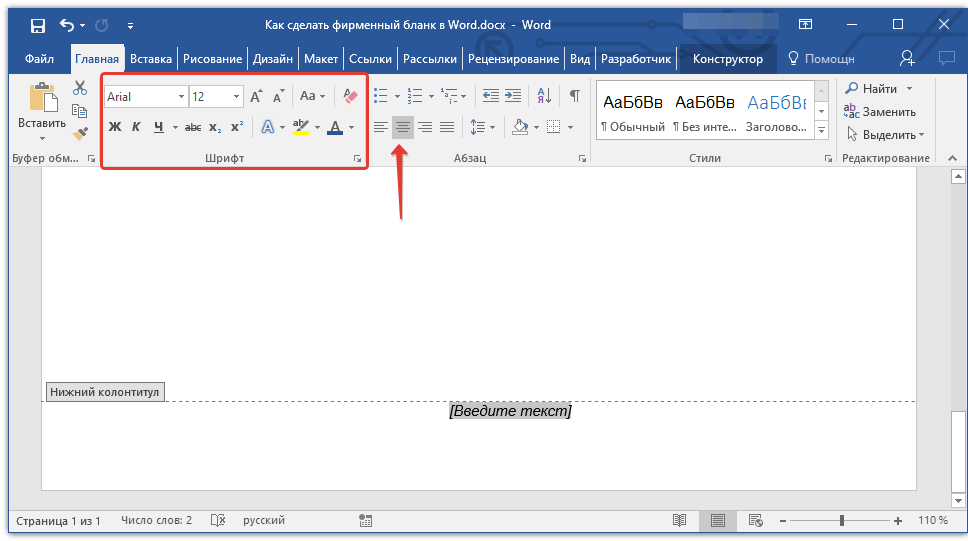
- Во вкладке «Главная» в группе «Абзац» нажмите кнопку «Текст по центру», выберите подходящий шрифт и размеры для надписи.
Урок: Форматирование текста в Ворде
Примечание: Девиз компании лучше всего написать курсивом. В некоторых случаях лучше писать эту часть заглавными буквами или же просто выделить Первые буквы важных слов.
Урок: Как в Word изменить регистр
8. Если это необходимо, вы можете добавить на бланк строку для подписи, а то и саму подпись. Если нижний колонтитул вашего бланка содержит текст, строка для подписи должна находиться выше него.
- Совет: Для выхода из режима работы с колонтитулами нажмите клавишу «ESC» или дважды кликните по пустой области страницы.
Урок: Как сделать подпись в Ворде
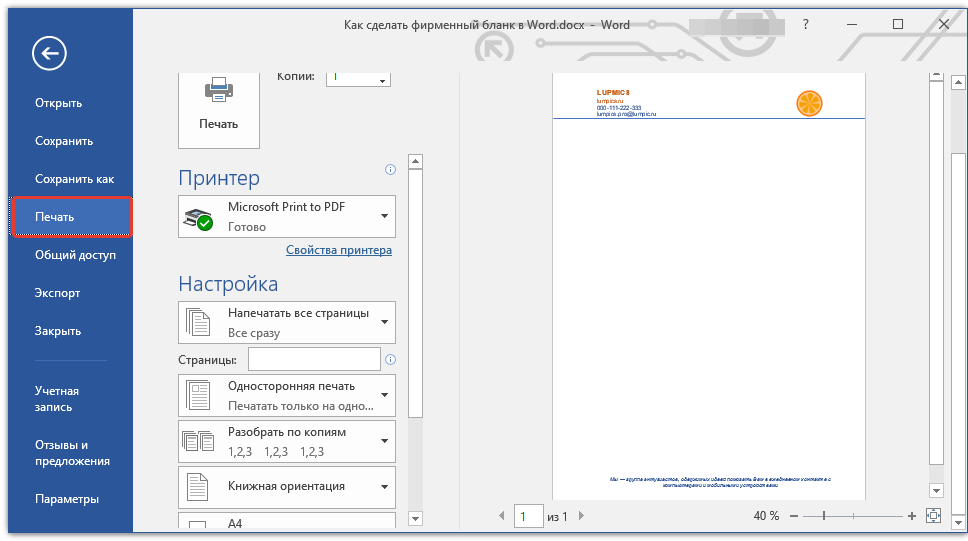
9. Сохраните созданный вами фирменный бланк, предварительно его просмотрев.
Урок: Предварительный просмотр документов в Word
10. Распечатайте бланк на принтере, чтобы увидеть, как он будет выглядеть вживую. Возможно, вам уже сейчас есть, где его применить.
Урок: Печать документов в Ворд
Создание бланка на основе шаблона
Мы уже рассказывали о том, что в Microsoft Word есть очень большой набор встроенных шаблонов. Среди них можно найти и те, которые послужат хорошей основой для фирменного бланка. Помимо того, создать шаблон для постоянного использования в этой программе можно и самостоятельно.
Урок: Создание шаблона в Ворде
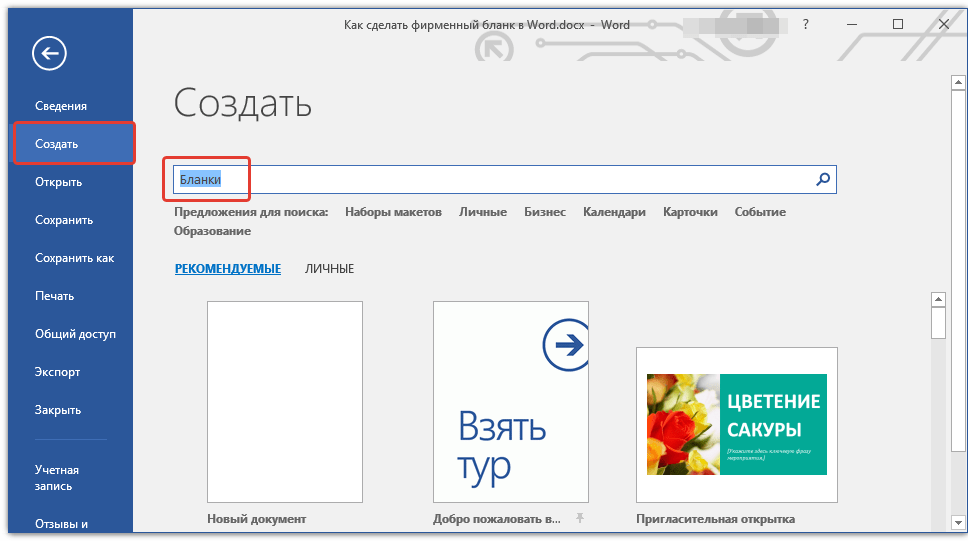
1. Откройте MS Word и в разделе «Создать» в строке поиска введите «Бланки».
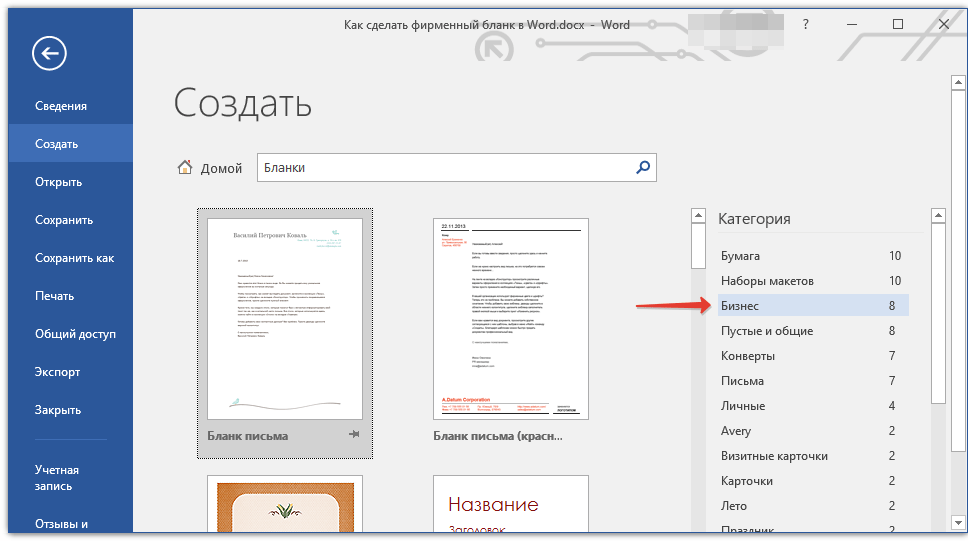
2. В списке слева выберите подходящую категорию, например, «Бизнес».
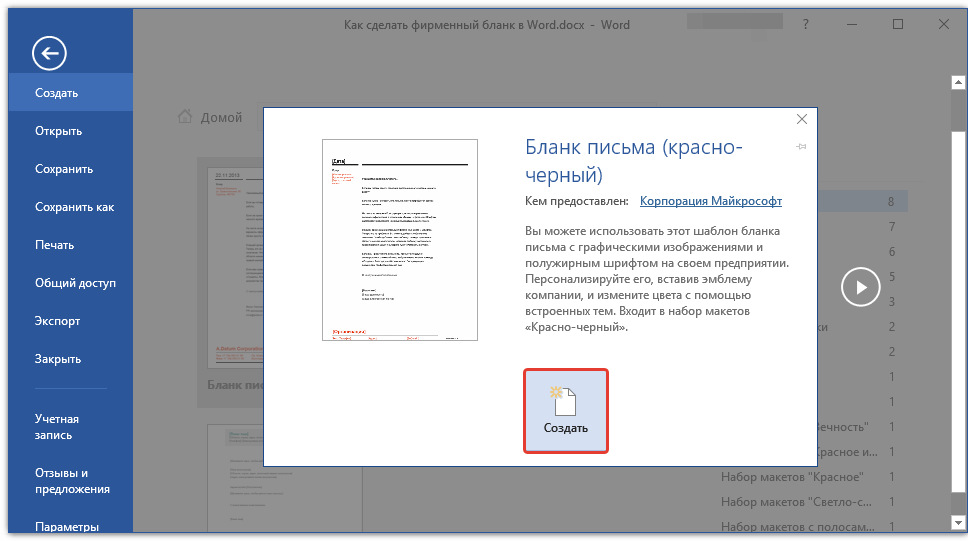
3. Выберите подходящий бланк, кликните по нему и нажмите «Создать».
Примечание: Часть представленных в Ворде шаблонов интегрирована непосредственно в программу, но часть из них, хоть и отображается, подгружается с официального сайта. Кроме того, непосредственно на сайте Office.com вы сможете найти огромный выбор шаблонов, которые не представлены в окне редактора MS Word.
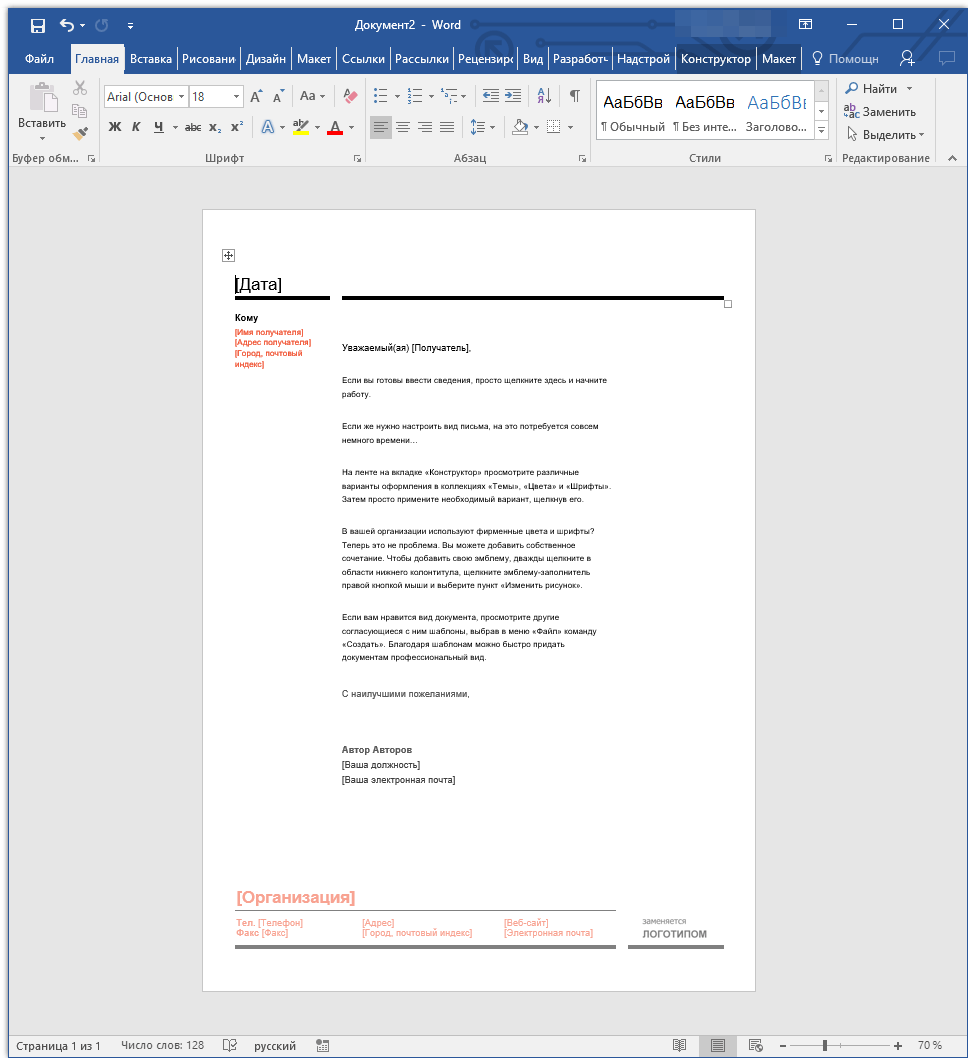
4. Выбранный вами бланк будет открыт в новом окне. Теперь вы можете изменить его и подстроить все элементы под себя, аналогично тому, как это написано в предыдущем разделе статьи.
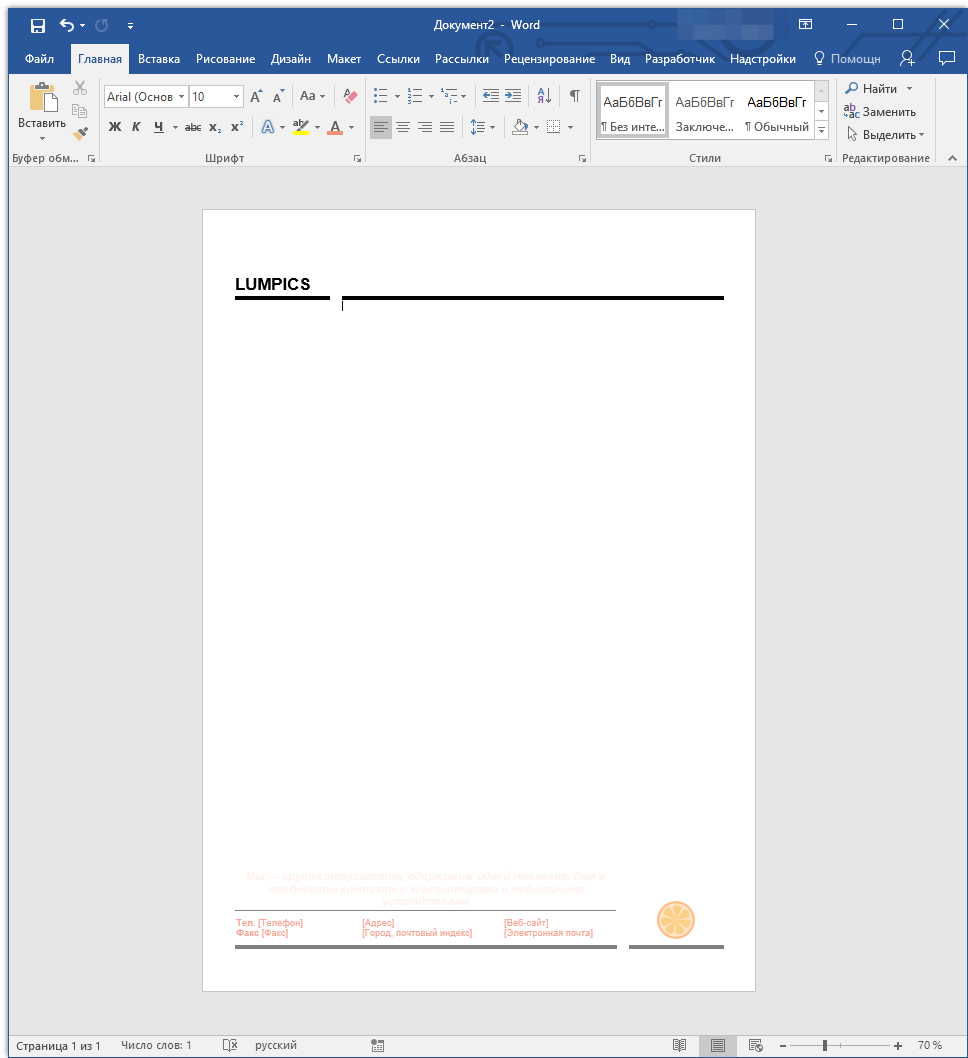
Введите название компании, укажите адрес сайта, контактные данные, не забудьте разместить на бланке логотип. Также, не лишним будет указать девиз фирмы.
Сохраните фирменный бланк на жестком диске. Если это необходимо, распечатайте его. Кроме того, вы всегда можете обращаться и к электронной версии бланка, заполняя его согласно выдвигаемым требованиям.
Урок: Как сделать буклет в Ворде
Теперь вы знаете, что для создания фирменного бланка отнюдь не обязательно идти в полиграфию и тратить кучу денег. Красивый и узнаваемый фирменный бланк вполне можно сделать самостоятельно, особенно, если в полной мере использовать возможности Microsoft Word.




 to expand the gallery.
