
Summary
This article explains how to use the Mail Merge feature in Microsoft Word to create and to print form letters by using data from a Microsoft Excel worksheet.
When you use the Word Mail Merge feature, Word merges a main document with a recipient list to generate a set of output documents:
-
The main document contains the basic text that is the same in all of the output documents. It may contain a letterhead, text, and instructions in merge fields for inserting text (such as recipient names and addresses) that vary from one output document to another.
-
The recipient list is a database that contains the data that is to be merged into the output documents. For example, the recipient list is a Microsoft Access database file or an Excel worksheet.
This database is typically a list of names, addresses, phone numbers, and other categories of personal information.
-
The output documents are the result of the mail merge. The text in an output document can be the same in all output documents, but you can apply formatting to specific documents.
Step 1: Set Up the Excel Data File
Before you proceed with the Mail Merge Wizard, make sure that your Excel worksheet is well structured for this purpose. Note the following requirements for the data table:
-
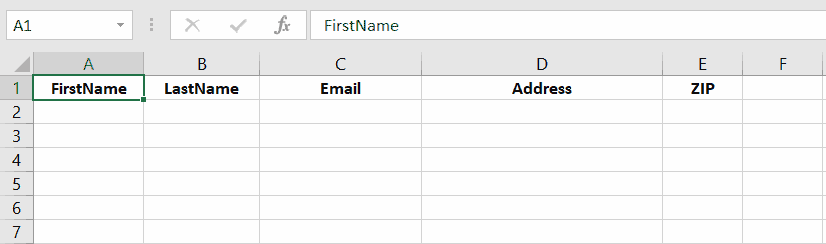
The first row should contain field names for each column — for example, Title, Salutation, First Name, Middle Name, Last Name, Address1, and Address2.
-
Each field name should be unique.
-
Each row should provide information about a particular item. For example, in a mailing list, each row might include information about a particular recipient.
-
The table should contain no blank rows.
Create your Excel data file, and then arrange it by using the fields that you want to use for your letter, as shown in the following sample data file.
After you create your Excel data file, save it, and then close the data file.
For more information about how to create a mail-merge address list, click the following article number to view the article in the Microsoft Knowledge Base:
294688 How to design and set up a mail merge address list in Word 2002 and in later versions of Word
Step 2: Set Up the Main Document
-
In Microsoft Office Word 2003 and in earlier versions of Word, point to Letters and Mailings on the Tools menu, and then click Mail Merge Wizard.
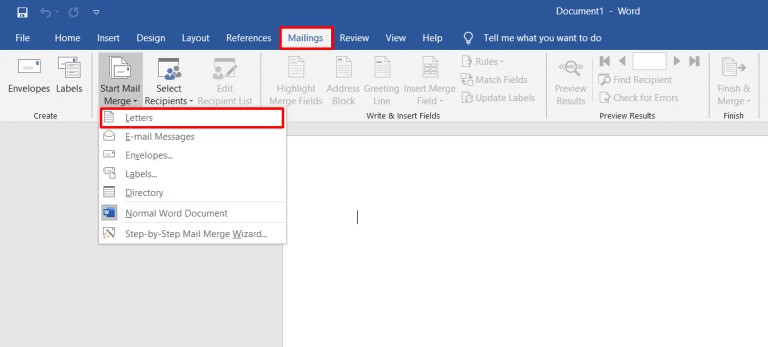
In Microsoft Office Word 2007, click Start Mail Merge in the Start Mail Merge group on the Mailings tab, and then click Step by Step by Mail Merge Wizard.
-
Under Select document type, click Letters.
The active document becomes the main document. The main document contains the text and graphics that are the same for each version of the merged document. For example, the return address and the salutation in a form letter are the same for each version.
-
Click Next: Starting document.
-
Use one of the following methods:
-
Start with the document that is currently shown in the document window. To do this, click Use the current document.
You can then either type the letter in the document window or wait until the wizard prompts you to do so in a later step.
-
Start with a template. To do this, follow these steps:
-
Click Start from a template.
-
Click Select template.
-
On the Mail Merge tab, select the template that you want in the Select Template dialog box, and then click OK.
-
-
Start with an existing document. To do this, follow these steps:
-
Click Start from existing document.
-
In the Start from existing box, select the document that you want, and then click Open.
-
If you do not see the document, click More files, and then click Open. In the Open dialog box, locate the document that you want, and then click Open.
-
-
-
Click Next: Select recipients.
Step 3: Specify the Excel Data Source
-
Under Select recipients, click Use an existing list.
-
Click Browse.
-
In the Select Data Source dialog box, locate and then click the Excel worksheet that you want to use.
By default, Word opens the «My Data Sources» folder.
-
Click Open.
-
If your Excel worksheet contains information about multiple tabs, select the tab that contains the information that you want, and then click OK.
-
All entries in the data source appear in the Mail Merge Recipients dialog box. Here, you can refine the list of recipients to include in the merge.
Step 4: Select the Recipients
-
In the Mail Merge Recipients dialog box, select the recipients that you want to include. To do this, use one of the following methods:
-
Use the check boxes to designate recipients.
This method is most useful if the list is short. Click to select the check boxes next to the recipients that you want to include, and then click to clear the check boxes next to the recipients that you want to exclude.
Note If you know that you want to include most of the list in your merge, click Select All, and then click to clear particular records. Similarly, if you want to include only a few records in the list, click Clear All, and then select the records that you want.
-
Sort items in the list.
This method is useful if you want to see items in alphabetical or numeric order. Click the column heading of the element by which you want to sort. For example, if you want to display the list alphabetically by last name, click the Last Name column heading.
-
Filter items in the list.
This method is useful if the list contains records that you know you do not want to see or include in the merge. After you have filtered the list, you can use the check boxes to include and exclude records, as described earlier. To filter the list, follow these steps:
-
Click the arrow next to the column heading of the element that you want to filter by.
-
Click any of the following:
-
(Blanks): This option displays all the records in which the corresponding field is blank.
-
(Nonblanks): This option displays all the records in which the corresponding field contains information.
-
If the data source contains records that share the same information, and if there are 10 or fewer unique values in the column, you can filter by specific information. For example, if there are multiple addresses that list Australia as the country, you can filter by Australia.
-
-
-
The Mail Merge Recipients dialog box displays only the designated records. To display all the records again, click (All).
Notes
-
For advanced sorting and filtering, click the arrow next to any column name, and then click (Advanced). Use the Filter Records and Sort Records tabs to set up the sorting or filtering query that you want.
-
If you have installed address validation software, click Validate in the Mail Merge Recipients dialog box to validate your recipients’ addresses.
-
-
Click OK to return to the Mail Merge Wizard.
Word uses the recipients that you designated for the merge.
-
Click Next: Write your letter.
Step 5: Complete the Letter and Add Merge Fields
If you have not already done this, type the text that you want to appear in every form letter in the main document.
Insert Merge Fields
Insert merge fields where you want to merge names, addresses, and other information from the data source. To insert merge fields, follow these steps:
-
In the main document, click where you want to insert the field.
-
Insert any of the following:
-
Address block with name, address, and other information:
-
Click Address block.
-
In the Insert Address Block dialog box, select the address elements that you want to include and the formats that you want, and then click OK. For help on an option, click the question mark, and then click the option.
-
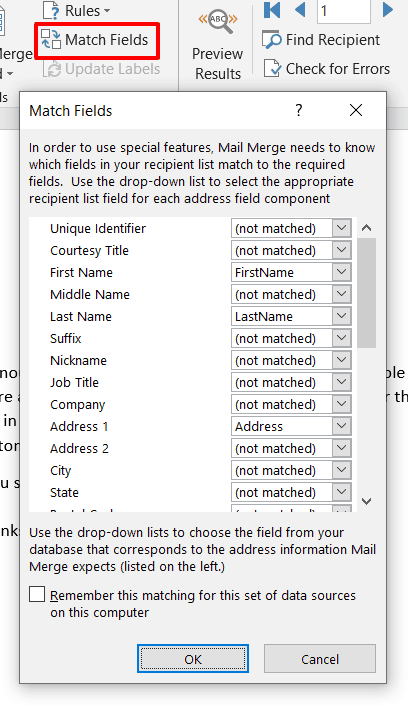
For help on an option, click the question mark, and then click the option. If the Match Fields dialog box appears, Word may be unable to find some of the information it needs for the address block. Click the arrow next to
(not available), and then select the field from your data source that corresponds to the field required for the mail merge.
-
-
Greeting line:
-
Click Greeting line.
-
Select the greeting line format that includes the salutation, name format, and following punctuation.
-
Select the text that you want to appear in the cases in which Word cannot interpret the recipient’s name. For example, Word cannot interpret the name when the data source contains no first or last name for a recipient, but only a company name.
-
Click OK.
-
If the Match Fields dialog box appears, Word may be unable to find some of the information it needs for the greeting line. Click the arrow next to (not available), and then select the field from your data source that corresponds to the field required for the mail merge.
-
-
Other fields of information:
-
Click More items.
-
Use one of the following methods:
-
Click Address Fields to select from address fields that will automatically map to corresponding fields in your data source, even if the data source’s fields do not have the same name as your fields.
-
Click Database Fields to select from fields that always take data directly from a column in a database.
-
-
In the Fields box, click the field that you want.
-
Click Insert, and then click Close.
-
If the Match Fields dialog box appears, Word may not be able to find some of the information it needs to insert the field. Click the arrow next to (not available), and then select the field from your data source that corresponds to the field required for the mail merge.
Note If you insert a field from the Database Fields list, and if you later switch to a data source that does not have a column with the same name, Word cannot insert that field information into the merged document.
-
-
Electronic postage:
To add electronic postage, you must first install an electronic postage program, such as one that you can purchase from a third-party provider on the Web. To use electronic postage, follow these steps:
-
Click Electronic postage.
If you do not have an electronic postage program installed, Word prompts you to install one, and offers to connect to the following Microsoft Office Web site:
Print Online Postage
http://office.microsoft.com/services/service.aspx?sid=2.4 -
Insert the postage according to the program’s instructions.
-
-
To add electronic postage, you must first install an electronic postage program, such as one that you can purchase from a third-party provider on the Web. To use electronic postage, follow these steps:Postal bar code: You must select a letter or envelope type that supports the POSTNET bar code. To use the Postal bar code, follow these steps:
-
Click Postal Bar Code.
-
In the Insert Postal Bar Code dialog box, select the appropriate address fields.
Note The Postal Bar Code option appears only if you are using the U.S. language version of Word.
-
Repeat steps a and b for all the fields that you want to insert. NOTES:
-
You cannot type merge field characters (» «) or insert them by using the Symbol command on the Insert menu.
-
If the merge fields appear inside braces, such as { MERGEFIELD City }, Word is displaying field codes instead of field results. This does not affect the merge, but if you want to display the results instead, right-click the field code, and then click Toggle Field Codes on the shortcut menu.
-
For example, by using the sample database shown earlier, your letter might contain the AddressBlock and GreetingLine fields, and therefore your first page appears similar to the following:
February 26, 2002
AddressBlock
GreetingLine
Type your letter here.
Sincerely,
Type your name here
-
Note You can also use the Mail Merge toolbar to insert merge fields, work with your mail-merge main document, or run a mail merge. To display the Mail Merge toolbar, point to Letters and Mailings on the Tools menu, and then click Show Mail Merge Toolbar.
The Mail Merge toolbar provides additional commands that are not included in the Mail Merge Wizard task panes. For example, you can use the Insert Word Field menu on the Mail Merge toolbar to insert Word fields for controlling the merge process. For example, you can insert an IF field that inserts text only if a particular merge field has a specified value.
Alternatively, you can click Check For Errors to make Word run the mail merge and report any errors that are contained in the main document.
-
Change the Format of the Merged Data
To format merged data, you must format the merge fields in the main document. Do not format the data in the data source, because its formatting is not retained when you merge the data into the document. To change the format of the merged data, follow these steps:
-
In the main document, select the field that contains the information that you want to format, including the enclosing merge field characters (<< >>).
-
In Word 2003 and in earlier versions of Word, click Font on the Format menu, and then select the options that you want.
In Word 2007, click the option that you want in the Theme Fonts box in the Font group on the Home tab.
Format by Using Field Codes
To control other aspects of formatting, press ALT+F9 to display field codes, and then add switches to the merge fields. When you work with fields, a switch is a special instruction that causes a specific action to occur. Generally, a switch is added to a field to modify a result.
Examples of how to use switches are as follows:
-
To display the number 34987.89 as $34,987.89, add the Numeric Picture switch (#).
-
To print client names in uppercase letters, add the Format switch (*).
-
To make sure that the merged information has the same font and point size that you apply to the merge field, add the Charformat switch (*).
Step 6: Save the Document
After you have completed the main document and inserted all the merge fields, make sure that you save the document before proceeding. To do this, follow these steps:
-
In Word 2003 and in earlier versions of Word, click Save As on the File menu.
In Word 2007, click the Microsoft Office Button, and then click Save As.
-
Name the document, and then click Save.
-
Click Next: Preview your letters.
Step 7: Preview the Letters and Fine-Tune the Recipient List
When the wizard displays the «Step 5 Mail Merge» task pane, the wizard replaces each of the merge fields in the main document that has the actual text from the first entry of the recipient list.Therefore, you can see how your first output document will look.
For example, if you were to continue to use the sample database shown earlier, the first page should resemble the following page after you click Next: Preview your letters:
February 26, 2002
Andrew Fuller
908 W. Capital Way
Tacoma 98401
Dear Andrew Fuller,
Type your letter here.
Sincerely,
Type your name here To preview additional entries, use one of the following methods:
-
To preview the items in order, click the left or right arrow buttons.
-
To locate and preview a specific item, click Find a recipient, and then enter the search criteria in the Find Entry dialog box.
Fine-tune the recipient list if you want. To do this, use one of the following methods:
-
To exclude a particular recipient from the merge operation, click Exclude this recipient.
-
To change the list of recipients, click Edit recipient list, and then make your changes in the Mail Merge Recipients dialog box.
Step 8: Complete the Merge
To complete the merge, use any of the following methods.
Personalize Individual Letters
To personalize individual items, you actually complete the merge, and then edit the information that you want in the resulting merged document. To do this, follow these steps:
-
Click Edit individual letters.
-
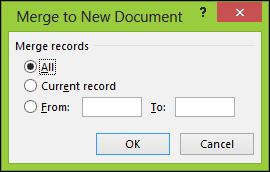
In the Merge to New Document dialog box, select the records that you want to merge.
-
Click OK.
Word creates and opens a new merged document. Your main document also remains open, and you can switch back to it if you want to change all the documents.
-
Scroll to the information that you want to edit, and then make your changes.
-
Print or save the document just as you would any regular document.
Print the Letters
To print the letters, use one of the following methods:
-
If you personalized the items and if the merged document is active, follow these steps:
-
In Word 2003 and in earlier versions of Word, click Print on the File menu.
In Word 2007, click the Microsoft Office Button, and then click Print.
-
Select the options that you want.
-
-
If you want to print directly from the Mail Merge Wizard, follow these steps:
-
In Step 6 of the Mail Merge Wizard (Complete the merge), click Print.
-
In the Merge to Printer dialog box, use one of the following methods, and then click OK:
-
To print all the documents, click All.
-
To print the document that you see in the document window, click Current record.
-
To print a range of documents, click From, and then type the record numbers in the From and To boxes.
-
-
In the Print dialog box, select the options that you want.
-
Save the Merged Letters for Later Use
If you want to edit merged letters or to save them for later use, you can collect them into a single document. To do this, follow these steps:
-
Click Edit individual letters.
-
In the Merge to a New Document dialog box, use one of the following methods, and then click OK:
-
To merge all the documents, click All.
-
To merge only the document that you see in the document window, click Current record.
-
To merge a range of documents, click From, and then type the record numbers in the From and To boxes.
-
-
Word opens a single new document that contains all the individual letters. You can then save the document for later use, just as you would any regular document.
References
For more information, click the following article numbers to view the articles in the Microsoft Knowledge Base:
318117 How to use addresses from an Excel worksheet to create labels in Word
318115 How to create a form letter by using information from an Access database in Word 2002
318112 How to use addresses from an Access 2002 database to create labels in Word 2002
294686 How to use mail merge to create a list sorted by category in Word 2002 and in later versions of Word
290408 Frequently asked questions about mail merge in Word 2002
294688 How to design and set up a mail merge address list in Word 2002 and in later versions of Word
294693 How to use mail merge to create a directory in Word 2002 and in later versions of Word
294683 How to use mail merge to create form letters in Word 2002 and in later versions of Word
![]()
Download Article
![]()
Download Article
This wikiHow teaches you how to use the «Mail Merge» feature in Microsoft Word. Mail Merge allows you to use a spreadsheet of contact information to assign automatically a different address, name, or other piece of information to each copy of a document. This is useful when personalizing newsletters or statements, as you don’t have to write by hand each person’s name or address at the top of each document.
Things You Should Know
- Create your contact sheet in Microsoft Excel. Add your headers beginning in column «A1» and moving right. Save your file and remember your save location.
- Open Word and go to Blank document > Mailings > Select Recipients > Use an Existing List…. Choose your Excel sheet.
- Go to the spot you want to insert contact information and click Insert Merge Field. Select the desired headers from your Excel document. Click Finish & Merge.
-

1
Open Microsoft Excel. Microsoft Excel’s app icon resembles a white «X» on a dark-green background. The Excel «New» page will open.
- If you already have a contact sheet in Excel, skip ahead to importing the Excel contacts instead.
-
2
Click Blank workbook. It’s in the upper-left side of the «New» page. This will open a new, blank Excel document.
Advertisement
-
3
Add your contact headers. Starting in cell A1 and moving right from there, enter the following headers:[1]
- FirstName — Your contacts’ first names will go in this column (cell A1).
- LastName — Your contacts’ last names will go in this column (cell B1).
- Tel — Your contacts’ phone numbers will go in this column (cell C1).
- StreetAddress — Your contacts’ street addresses will go in this column (cell D1).
- City — Your contacts’ cities of residence will go in this column (cell E1).
- State — Your contacts’ states of residence will go in this column (cell F1).
- ZIP — Your contacts’ ZIP codes will go in this column (cell G1).
- Email — Your contacts’ email addresses will go in this column (cell H1).
-
4
Enter your contacts’ information. Starting in column A, cell 2, begin entering the contact information for each of the people for whom you want to generate a mail merge.
- Make sure that this information is accurate before proceeding.
-
5
Save your document. To do so:
- Windows — Click File, click Save As, double-click This PC, click a save location on the left side of the window, type the document’s name into the «File name» text box, and click Save.
- Mac — Click File, click Save As…, enter the document’s name in the «Save As» field, select a save location by clicking the «Where» box and clicking a folder, and click Save.
- Keep in mind your selected save location—you’ll need to find the Excel spreadsheet later.
-
6
Close Excel. Click the X in the upper-right corner of Excel (Windows) or the red circle in the upper-left corner (Mac). You can now proceed to creating the mail merge in Microsoft Word.


Advertisement
-
1
Open Microsoft Word. The Word app icon looks like a white «W» on a dark-blue background. As with Excel, the «New» page will open.
- If you have an existing Microsoft Word document into which you want to import the Excel contacts, you’ll instead double-click it to open it and skip the next step.
-
2
Click Blank document. It’s a white box in the upper-left side of the page. A blank Microsoft Word document will open.
-
3
Click the Mailings tab. This tab is at the top of the Microsoft Word window. A toolbar will appear just below the row of tabs here.
-
4
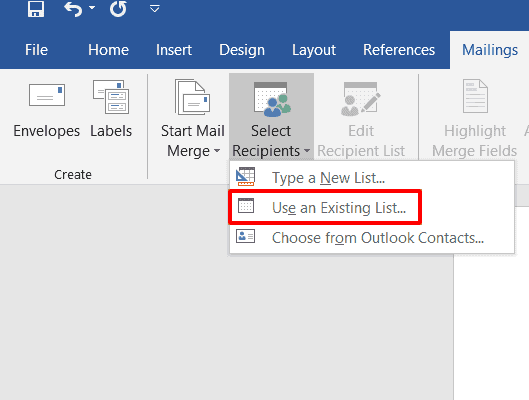
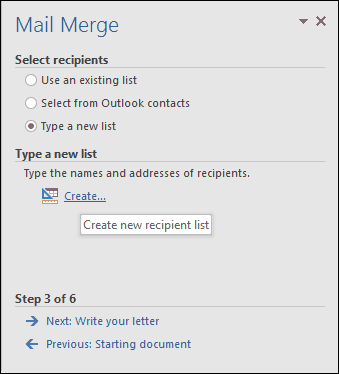
Click Select Recipients. It’s in the «Start Mail Merge» section of the Mailings toolbar. Doing so prompts a drop-down menu.
-
5
Click Use an Existing List…. You’ll find this option in the drop-down menu. A new window will open.
- If you ever want to use Outlook contacts instead, you can select the Choose from Outlook Contacts option in the drop-down menu.
- You can also type a temporary list of contact information into Word by selecting the Type a New List option. This is useful when you only need to create a handful of contacts’ information.
-
6
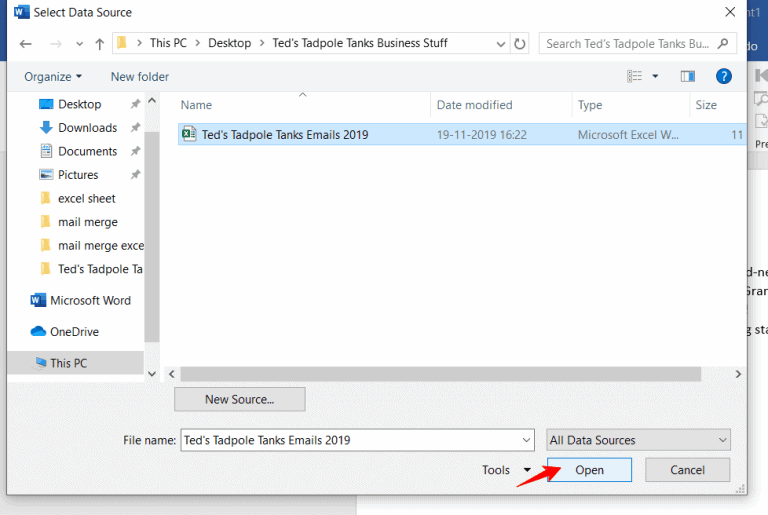
Select your Microsoft Excel contact sheet. On the left side of the window, click the folder in which you saved the Excel sheet, then click the Excel sheet to select it.
-
7
Click Open. It’s in the bottom-right corner of the window.
-
8
Confirm the decision. Click the Excel sheet’s name in the pop-up window, then click OK at the bottom of the window. Your Excel sheet will be selected as the location from which your contacts will load.
- Make sure that the «First row of data contains column headers» checkbox at the bottom of this window is checked.


Advertisement
-
1
Go to the place in which you want to insert contact information. Find the place where you want to insert contact information (e.g., the top of the document) and click it to place the cursor there.
-
2
Click Insert Merge Field. It’s an option in the «Write & Insert Fields» section of the Mailings tab. A drop-down menu will appear.
- You may have to click the Mailings tab again before doing this.
-
3
Select a type of information. In the drop-down menu, click the name of one of the headers from your Excel document to insert it.
- For example, you would click FirstName in the drop-down menu if you wanted to insert a tag for contacts’ first names.
-
4
Add other information where necessary. This might include contacts’ addresses, last names, phone numbers, and so on.
-
5
Click Finish & Merge. It’s in the far-right side of the Mailings tab’s toolbar. This prompts a drop-down menu.
-
6
Select a merge option. Click one of the following:
- Edit Individual Documents — Opens each recipient’s document, allowing you to personalize further the documents.
- Print Documents… — Allows you to print out a copy of your document for each individual listed in your contact sheet.
- Send Email Messages… — Allows you to send out the documents as emails. The contacts’ email addresses will be selected as the destination email addresses.
-
7
Follow the on-screen instructions. Depending on your selected option, you will have an additional form to review (for example, if you selected Email, you’ll have to enter a subject and then click OK). Doing so will complete the mail merge process.


Advertisement
Add New Question
-
Question
How can I perform a mail merge on MS word?

Go to the Mailings tab and click on the tab «Start Mail Merge;» it should be on the left side of the Mailings panel. Then select recipients and either make a list, or find a file if you already made one by choosing «Use existing list.» Type your letter, and press «Add merge field» whenever you need to use something from your list. Make any additional changes needed, and press «Finish and merge,» and then print if you need to.
-
Question
If I don’t use Outlook can I still send a mail merge?
Yes. You can either copy and paste, print, or click finish and merge and then go to settings regarding where you want to send your documents, and choose your destination. Also you can save to somewhere else in your computer and send it from there.
-
Question
What are the features of Microsoft Excel?
There are hundreds of formulas available to use, as well as a tool for copying data entries, continuing data patterns (1,2,3, or Monday, Tuesday, Wednesday, etc.). Also you can convert data into charts or import and edit files from other programs.
See more answers
Ask a Question
200 characters left
Include your email address to get a message when this question is answered.
Submit
Advertisement
-
Mail Merge is especially useful when creating invoices, statements, reports, or any other form of mass-produced documentation for which you have to include personal names, addresses, or so on.
Thanks for submitting a tip for review!
Advertisement
-
Always double-check your contact information before importing it to Word. Failing to do so could result in anything from using the wrong name to sending documents to the wrong email addresses.
Advertisement
About This Article
Article SummaryX
1. Open a blank document in Microsoft Word.
2. Click the Mailings tab.
3. Click Select Recipients, then click Use an Existing List….
4. Select your Mail Merge file, then click Open.
5. Click OK when prompted.
Did this summary help you?
Thanks to all authors for creating a page that has been read 1,393,031 times.
Is this article up to date?
A mail merge is a handy way to send personalized mass letters and bulk emails quickly.
It works by automatically adding personalization data from a data file (for example, a spreadsheet) to a template file (like a letter or an email).
In this article, I’ll first cover what a mail merge is and explain how it works. Then, I’ll go over how to mail merge using an Excel spreadsheet and a Word document.
Later, I’ll mention two issues of using the traditional method for mail merges and suggest a better and more powerful alternative to help you send mass emails.
Additionally, I’ll also answer seven FAQs associated with mail merges.
This Article Contains:
(Click on links to jump to specific sections)
- What Are Mail Merges?
- How Does Mail Merge Work?
- How to Use Mail Merge to Send Bulk Letters
- Two Problems of Using Microsoft Word to Send Mass Emails
- How to Use Mail Merge to Send Mass Emails
- 7 Mail Merge FAQs
Let’s jump right in.
What Are Mail Merges?
A mail merge lets you create personalized documents that are automatically customized on a recipient-by-recipient basis. This spares you the trouble of manually personalizing each document yourself!
You can use mail merges to create personalized messages automatically for:
- Marketing emails.
- Newsletters.
- Custom catalogs.
- Form letters, and more.
Note: A form letter is a template file used to create mass letters. Instead of typing a letter for each recipient, you can use a form letter to make quick, unique, personalized letters for each person.
Essentially, if there’s a document you need to personalize at scale, mail merges can take care of it for you!
Go back to Contents
Let’s now explore how a mail merge works.
How Does Mail Merge Work?
First, you need to understand the two essential components of every mail merge.
They are:
- Template File: the document that holds the message you’ll be sending out (like a letter or an email). It specifies the places where the personalization data will go. And that data (names, addresses, etc.) is fetched from a data file.
- Data File: a data source like a Microsoft Excel spreadsheet or a Google Sheets file. Each cell in the data file contains different information (first name, last name, email address, etc.) that will be placed in your template file in the corresponding space.
Essentially, a mail merge automatically adds the personalization data from your data file to your template file.
For example, let’s say you want to perform a mail merge to create mass letters.
Here, your letter is the template file — it has placeholders for your contacts’ names and addresses.
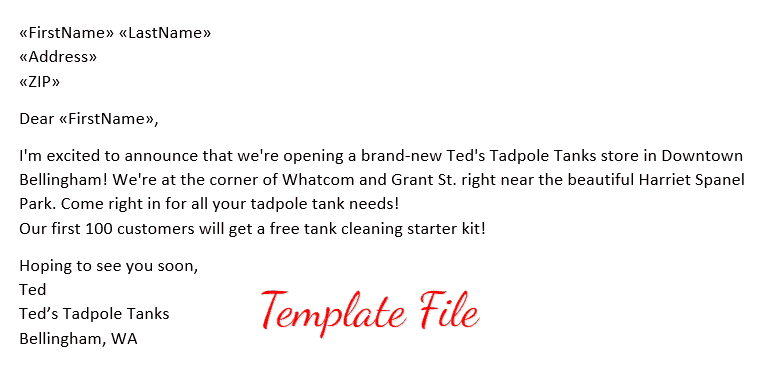
Notice the «FirstName», «Address» and other tags in the letter?
These are placeholders for your recipient’s details, also known as mail merge fields.
A mail merge field draws the personalization information from your data file (spreadsheet) to help you create your personalized letter.
But to make this work, the name of the mail merge field in your personalized letter template must match the name of the column header in your spreadsheet.
If the name of the merge fields and column headers match, the mail merge function would then merge your data file and your letter template to generate a personalized letter for each person.
Go back to Contents
Next, I’ll go over the steps involved in using mail merge to automatically personalize individual letters.
How to Use Mail Merge to Send Bulk Letters
You can use the mail merge feature in Word and Excel to create auto-personalized individual letters quickly.
Here:
- The mail merge template is a form letter in Microsoft Word.
- The data file is an Excel spreadsheet containing your recipients’ details.
Let’s now explore the steps involved in using mail merge for bulk letters:
Step 1: Create and format your address list in Microsoft Excel
Here’s a step-by-step guide on how to set up an Excel data file:
Step A
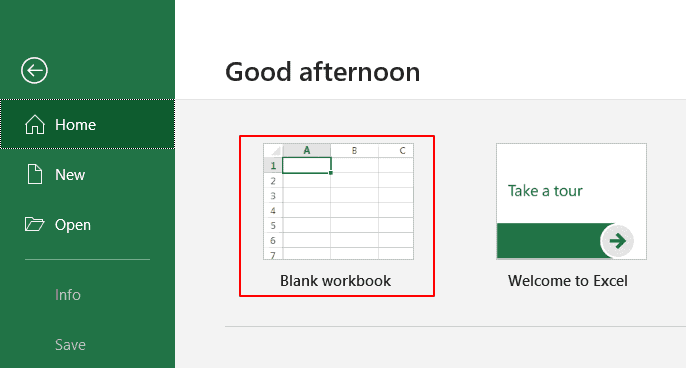
Open MS Excel and click on Blank workbook to open a blank Excel workbook (or document).
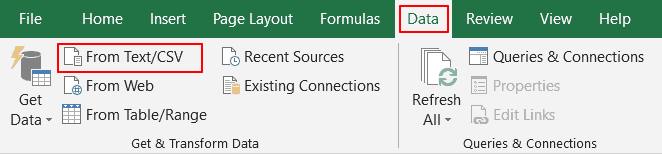
Note: If your contact data is readily available as an Excel spreadsheet, open the file and format it. If the data is present in a TXT or CSV file, go to Data → From Text/CSV to open the file in Excel.
Step B
Now you can start entering the details of your address list into the Excel workbook.
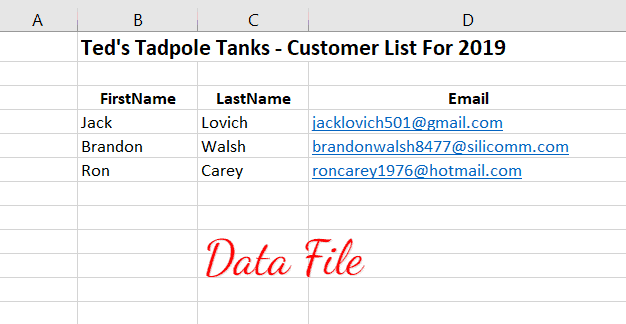
Only enter your column headers in the first row, starting in cell A1.
Check your header row to make sure the column headers in your Excel spreadsheet are exactly the same as the field names (or placeholder names) you want to use in your Word template document.
For example, if the column names in your Excel sheet are “FirstName”, “LastName”, and “Email”, the field names in your Microsoft Word document should also be “FirstName”, “LastName”, and “Email”.
Step C
Enter your contact information in your Excel database as one record per row, starting from cell A2.

Quick Tip
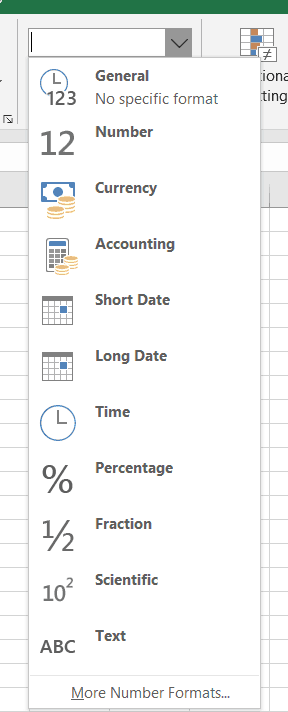
Data entries such as ZIP codes, percentages, currencies, etc., must be in the correct numeric format. To ensure this, you need to:
1. Select a column that has numeric data entries.
2. Go to the Home → Number section.

3. Click on the Number Format box and choose the correct format from the drop-down list that appears.
4. Repeat steps 1–3 for all columns containing numeric values.
Step D
Once you’ve created the contact sheet, you can save your Excel document by pressing Ctrl+S or going to File → Save or File → Save As.
Bonus Tip for Gmail Users
If you’re creating your first mail merge data file, you can export all your existing Gmail contacts (or “Google Contacts”) to get started quickly. Read my guide on how to export contacts from Gmail to learn how.
Note: Ensure that you finish all edits to the Excel spreadsheet before starting the mail merge process. Making edits to an Excel sheet once you’ve already begun a mail merge is a complicated additional step.
Step 2: Create the main mail merge document in MS Word
The next step is to create the form letter (or mail merge template — your main document) in MS Word. You can create a different mail merge template for every bulk email campaign, and you can save the templates for future use.
A favorite time-saving technique of mass email managers is to choose an old email template that worked well, update the content where necessary, and give the mail merge template a new name.
As a result, when you create your mail merge document, try writing it in a way that will let you adapt and reuse it in future bulk mailings.
Here’s a step-by-step guide on how to create a mail merge template in MS Word:
Step A
Open a new document (blank document) in Word.
This is the main document for your mail merge.
Step B
Click on the Mailings tab and select Start Mail Merge. A drop-down menu displaying every different mail merge document type will appear.
You can select the document type for letters, emails, envelopes, mailing labels, or a directory. Since we’re using the Word mail merge feature for sending letters, choose Letters as your merge document.
Step C (Optional)
You can also use the Step-by-Step Mail Merge Wizard (from the Start Mail Merge drop-down menu) to streamline the Word mail merge process.
The wizard lets you quickly select the starting mail merge document.
For example, it lets you use the current document, which is the mail merge letter you’re creating now. Or you could choose a starter template or another existing document as your mail merge template.
Step D
Write the body of the letter.
(Don’t worry about manually adding placeholders in your letter yet.)
Step 3: Select the recipient list
Now you can select the list of mail merge recipients (from your Excel file) who will receive your letter.
Here’s a step-by-step guide on how to do this:
Step A
Click on the Select Recipients option in the Mailings tab. A drop-down menu appears, showing different mail merge list sources.
As your contact information is already available as an Excel file, click on Use an Existing List.
Note: You can also include your Outlook Contact list if you have Outlook connected to Word.
Step B
In the dialog box that pops up, select the Excel sheet you created earlier and click Open.
Step C
A Select Table window appears. Choose the Excel worksheet you want to merge with the Word template and click OK.
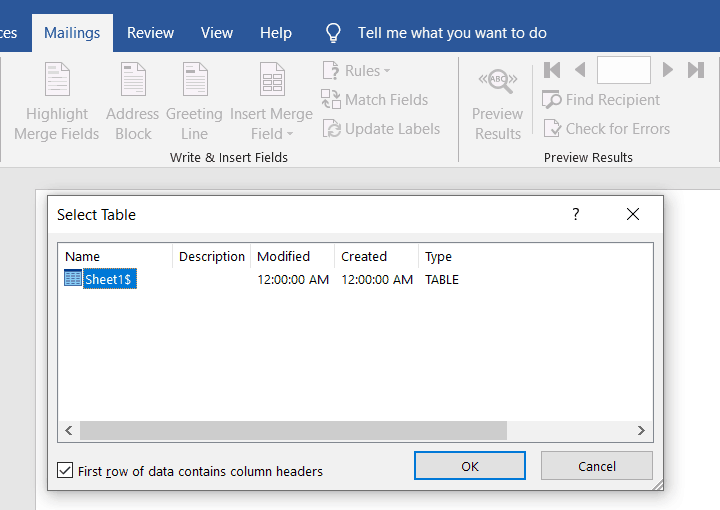
Note: If your Excel spreadsheet has only one worksheet, you’ll only see Sheet1 in the Select Table window.
Step D
If you want to edit your mail merge recipients list, click on the Edit Recipient List tab.
In the Mail Merge Recipients window that pops up, clear the checkbox of the person you don’t want in your mailing list.
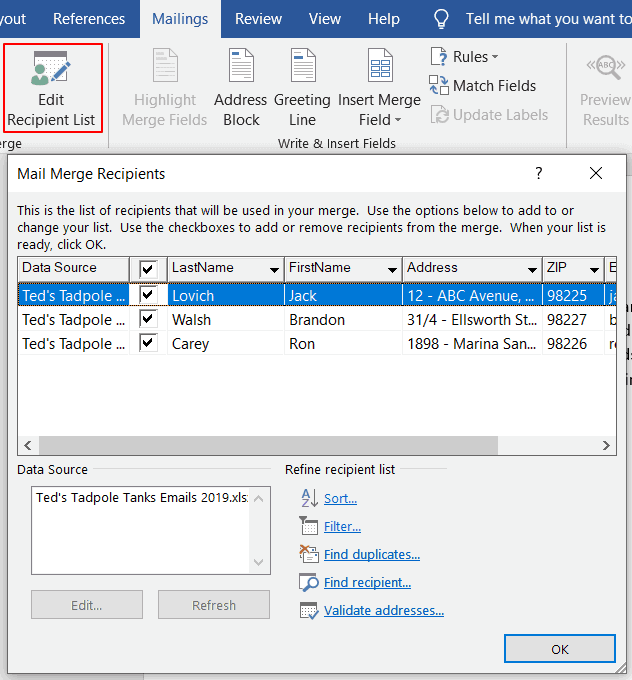
Anyone you remove from your recipient list in this step will be removed from any mail merge project that uses this data file in the future.
Step 4: Add personalized messages
The next step is to add personalized content (like contact names and addresses) to your form letter template (Word mail merge document).
In Word, you can insert three personalization variables into your document:
- Insert Address Block — add a recipient’s address to your document.
- Insert Greeting Line — include a personalized greeting or salutation in your letter.
- Insert Merge Field — insert other mail merge fields from your Excel file.
Here’s a walkthrough on how to add all three personalization variables to your merge document (form letter):
Note: You can add a personalization variable at an insertion point of your choice in the Word document. For example, to add a greeting line before the body of your letter, simply place the text cursor at the point you want to add it.
A. Insert an Address block
To insert a recipient’s address from your Excel worksheet, click on Address Block from the Write & Insert Fields section. In the window that appears, choose an address block format of your choice and click OK.
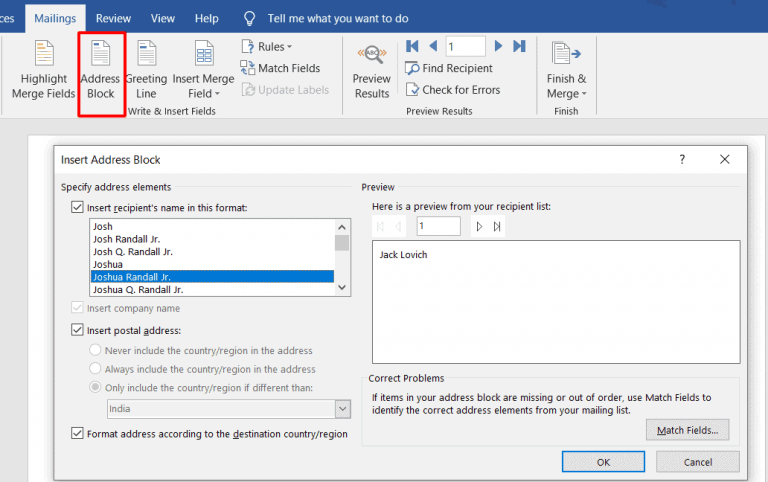
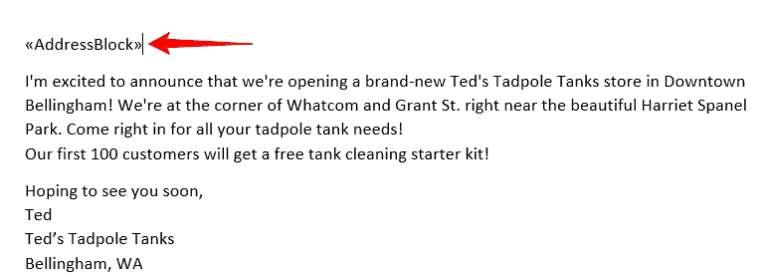
An address placeholder («AddressBlock») will be inserted automatically into your letter.
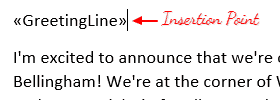
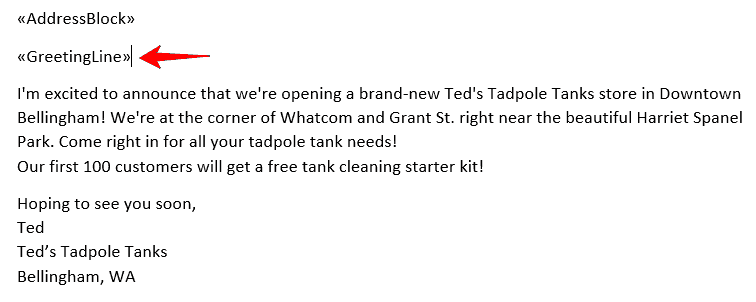
B. Insert a Greeting Line
To insert a greeting line, click on Greeting Line from the Write & Insert fields section.
In the dialog box that pops up, select the format you want to use and click OK.
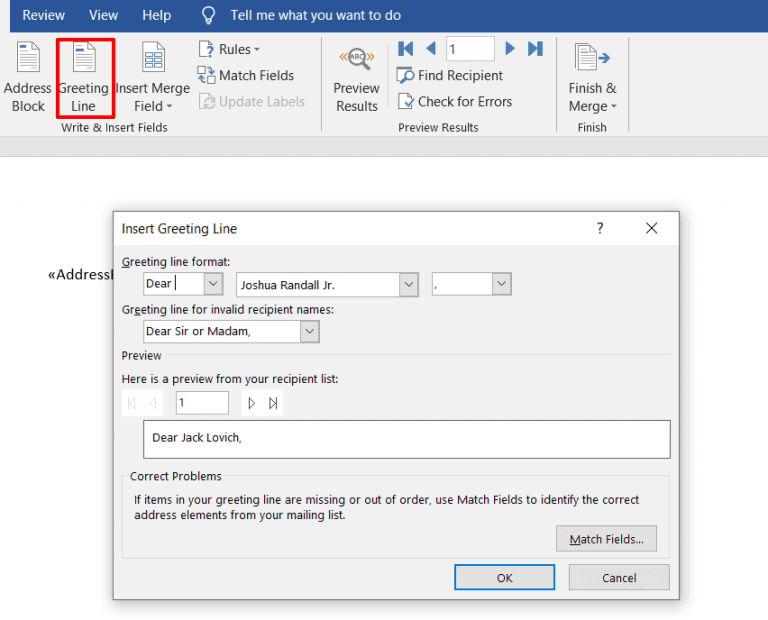
A greeting placeholder («GreetingLine») will be automatically added to your document.
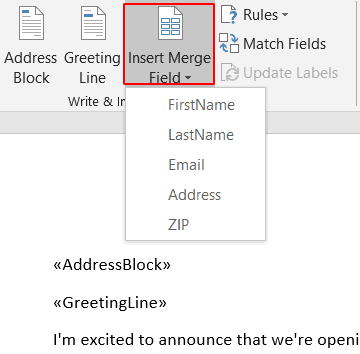
C. Insert a Merge Field
You can also add other mail merge fields, like your contact’s first name, company name, email id, etc., from your Excel worksheet to your Word template.
To do this, click on Insert Merge Field from the Write & Insert fields group.
You can see a drop-down list of some mail merge labels. These labels are the column names in your Excel spreadsheet.
If you want to create a custom field, the easiest way is to add a column to your spreadsheet with the name of the custom field you want to make, like “birthday” or “pet name”. But you must do this before starting the mail merge process since you can’t edit your spreadsheet during mail merge.
Click on the mail merge fields you want to add to your letter.
Here’s how my form letter looks after inserting the placeholders (mail merge fields) I needed:

Note: You can also use the Match Fields feature to manually match your Excel column fields with the Word placeholders. This way, you can ensure that all the mail merge fields are accurately mapped to your Excel column names.
Step 5: Preview and finish the mail merge process
After personalizing the form letter for each recipient, you can preview the letters to see how they look with the data inserted from your Excel worksheet.
Here’s a step-by-step guide on how to do this:
Step A
Click on Preview Results under the Mailings tab.
Step B
To preview the result for each recipient, you can enter the recipient number (the corresponding row number in your Excel spreadsheet) in the text box.
For example, to preview the form letter for my second recipient — Brandon Walsh, I type “2” in the text box and click the Preview Results button.
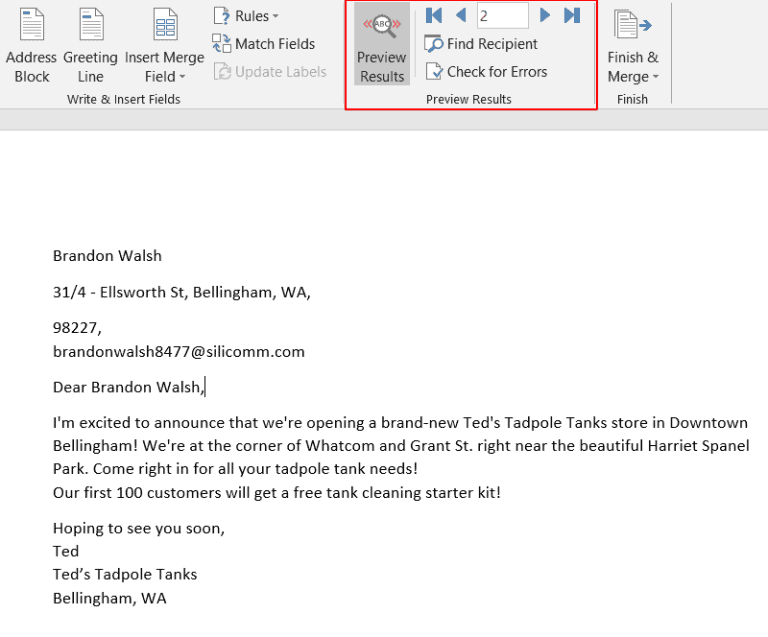
Note: You can also click on the Next and Previous buttons to quickly scroll through your mailing list to preview the letter for each person.
If you realize someone who is scheduled to receive your bulk email should be removed from the recipient list, refer to Step 3 (D) for instructions.
Step C
After previewing the form letter, click on Finish & Merge to finish the Word mail merge process.
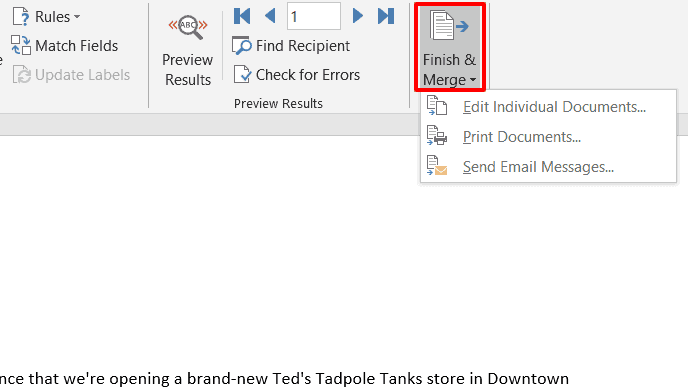
From the drop-down list that appears, you can choose to:
- Edit Individual Documents — if you want to edit each letter further, separately.
- Print Documents — if you want to print the letters.
- Send Email Messages — if you want to send the letters as emails.
Note: If you want to send the letters as email messages to a Gmail or Outlook contact, you must manually set up Gmail/Outlook with Word.
Step 6: Save the form letter
After you’ve finished working with the merged document, you can save it by pressing the Ctrl+S keys or by going to the File menu and clicking Save or Save As.
You can also reuse the merged document for sending additional letters — just open it and click Yes when Word prompts you with this alert:
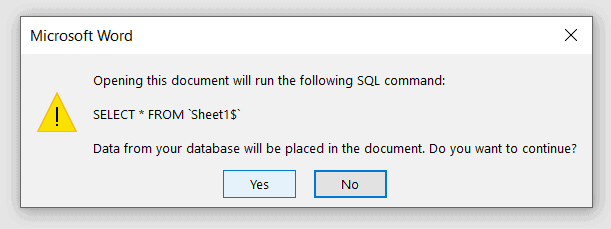
Go back to Contents
How to Use Mail Merge to Send Mass Emails
You can use mail merge to quickly create personalized emails for newsletters, promos, and other email marketing messages.
Here, your mailing list is the data file, while the email is the mail merge template.
We’ve seen how to use Excel and Word to create personalized form letters.
Just follow the same steps to send merged emails to your mailing list.
However, I don’t recommend using Microsoft Word to send personalized emails at scale. Here’s why…
2 Problems of Using Microsoft Word to Send Mass Emails
While you can use a Microsoft Word document to create merged emails, there are two major drawbacks with this approach:
- To send the merged document as an email message, you must manually set up Microsoft Outlook or Gmail with Word. This can be time-consuming and confusing for most users.
- Microsoft Word isn’t well-equipped to handle mail merges. If your personalization tags are mismatched and there are hundreds of recipients (you can’t preview every email, can you?), you could end up sending something like this:

Image Source: Twitter
Now, imagine sending hundreds of such embarrassing emails!
That’s why it’s smarter to use a dedicated mail merge tool like GMass to send mass emails.
How to Use Mail Merge with GMass to Send Mass Emails
GMass is a powerful mail merge tool that lets you easily create and send tons of emails from your Gmail account.
Its advanced mail merge features have made it a popular tool used by employees from LinkedIn, Uber, Google, and Twitter. GMass is also perfect for individuals and groups like clubs, schools, churches, and other institutions to send emails to a target audience.
With GMass, you can easily create a mail merge with a data file stored as an Excel spreadsheet or a Google Sheet.
Here’s how:
Step 1: Import your Excel spreadsheet into Google Sheets
The first step is to import your Excel file into Google Sheets (this takes only a few seconds).
Why would you want to do this?
Because Google Sheets is far more powerful than Microsoft Excel for mail merging. Its automatic cloud-sync feature auto-saves your work with each edit made in the spreadsheet.
Plus, if you’re sending emails, it makes sense to have your spreadsheet online, right?
Additionally, Google Sheets is completely free and can be used by anyone with a Google (Gmail or Google Workspace) account. You won’t need a Microsoft Office subscription!
Note: If your data file is a CSV file, you can also import it into Google Sheets.
Here’s a step-by-step guide on how to import your Excel document into Google Sheets:
Note: I’ll be using the Excel sheet shown in the screenshot below for the walkthrough.
Step A
Open Google Sheets.

Step B
Select the folder icon to open the Google Sheets File Picker.
![]()
Step C
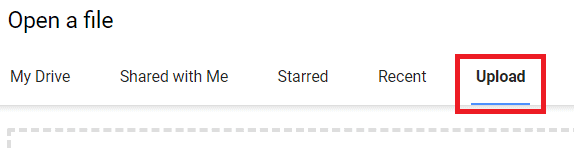
In the window that appears, click on the Upload tab to import your Excel sheet.
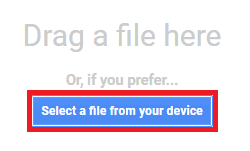
Step D
You can now choose the file you want to import from your computer. To select the file, click on the Select a file from your device button.
Step E
Choose the Excel file you want to import from your computer and click on the Open button.

Step F
Your file will be automatically imported as a new Google spreadsheet, which becomes your mail merge recipient list and data file.
Step 2: Format your Google Sheet
Your Google Sheet must be well-formatted before you use it with GMass.
But don’t worry, it’s not as complicated as formatting your Excel spreadsheet.
Here are some guidelines to ensure it works well:
- Your column names must be in plain text — they shouldn’t contain spaces, codes, or special characters.
- Your column names must begin from cell A1. If there are any blank rows or additional text (like a sheet title) above the column names, you must delete them.
- The actual personalization data must begin from the second row onward.
- There must be at least one column that has your recipients’ email addresses.
GMass will auto-detect all column names during the mail merge process. It will automatically use the column labels in your Google Sheet as the placeholders in your email template.
Step 3: Install GMass and connect it to your Gmail account
If you haven’t installed the GMass Chrome extension yet, here’s a step-by-step guide on how to install and connect it to your Gmail account quickly:
Step A
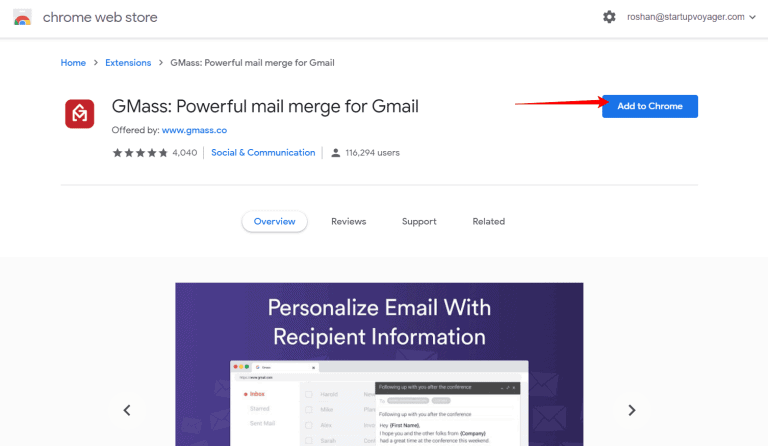
Head to the Chrome Web Store page for GMass.
Step B
Click on the Add to Chrome button.
Step C
A dialog box pops up:
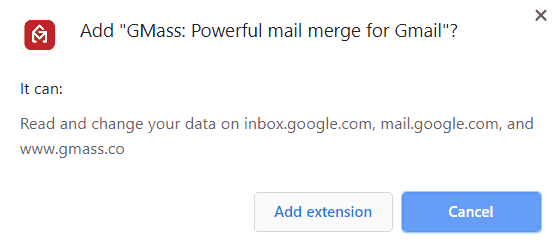
Click on the Add extension button to add GMass to Chrome.
Step D
Log in to the Gmail account you want to use with GMass.
After logging in, you can see three new GMass buttons next to your Gmail search box.
![]()
Click on one of these buttons, and you’ll be prompted to link your Gmail account to GMass:
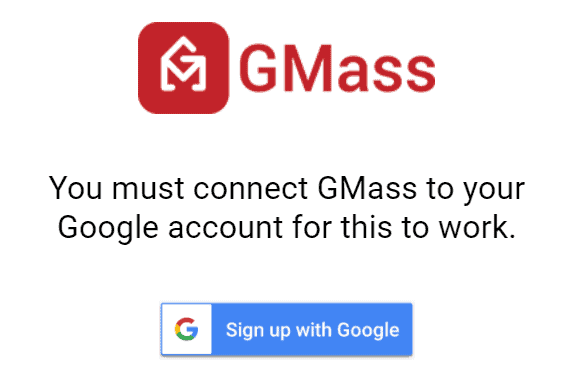
Click on the Connect GMass Now! button to connect your Gmail account with GMass.
Note: Simply installing the GMass extension doesn’t create a GMass account. It only makes the buttons appear in your Gmail account. You have to link it to your Gmail account (as above) to activate it.
Step 4: Connect your Google Sheet to GMass
Here’s a step-by-step guide on how to perform this last step:
Step A
Open your Gmail account and click on the GMass spreadsheet button near your Gmail search box.

Step B
A dialog window appears:
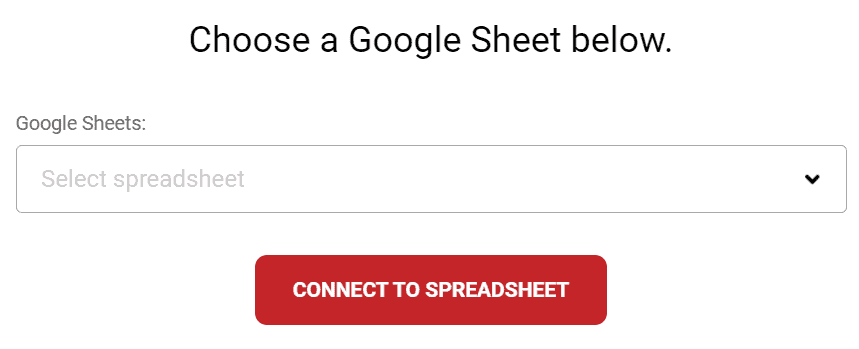
Step C
You can now use the drop-down menu to choose the Google sheet you want to use for the mail merge.
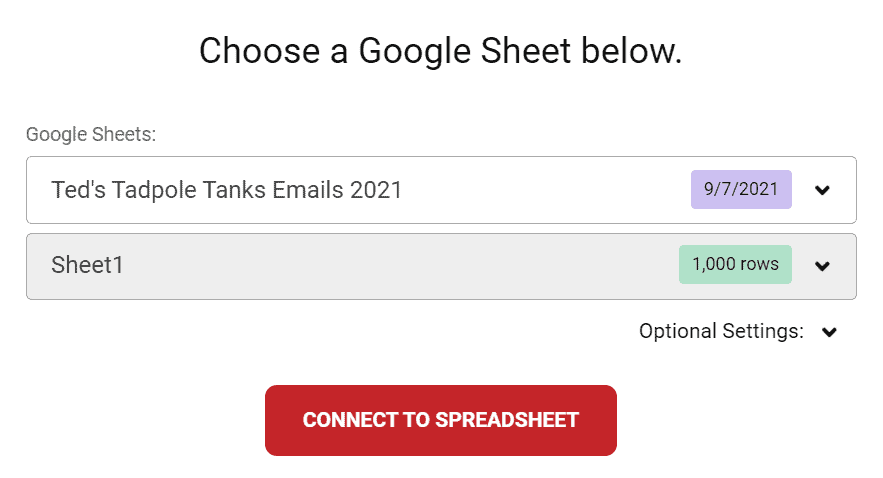
Note: If you have only one sheet (Sheet1) in your Google spreadsheet, that sheet gets chosen by default. However, if your spreadsheet has multiple sheets, you can select the sheet you want from the drop-down list.
Once you’ve chosen a spreadsheet, click on the CONNECT TO SPREADSHEET button.
Step D
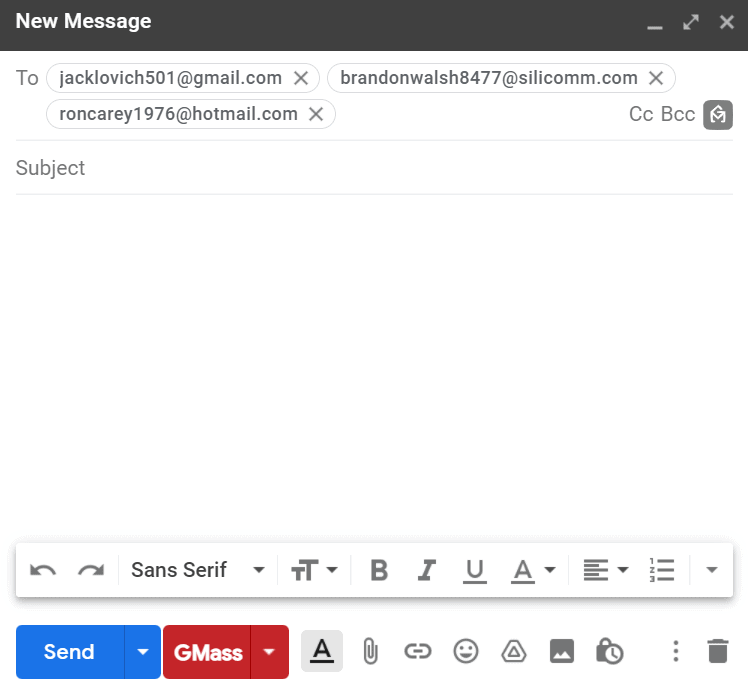
Now, GMass will auto-read all your recipients’ data from your Google sheet. It will also automatically insert their email addresses in the To field of a new email.
Note: GMass replaces the list of individual email addresses with a single alias address.
However, you can choose to display the email addresses individually. This way, you’ll be able to see the email IDs of everyone on your recipient list — but don’t worry, each recipient will see only their email address (just like when you add recipients to the BCC field).
Step E
After a new email window appears, you can compose your email with GMass’ powerful personalization features. To use these personalization settings, click on the settings arrow near the GMass button.
![]()
Click on the Personalize drop-down list button to see all the column names present in your Google sheet.
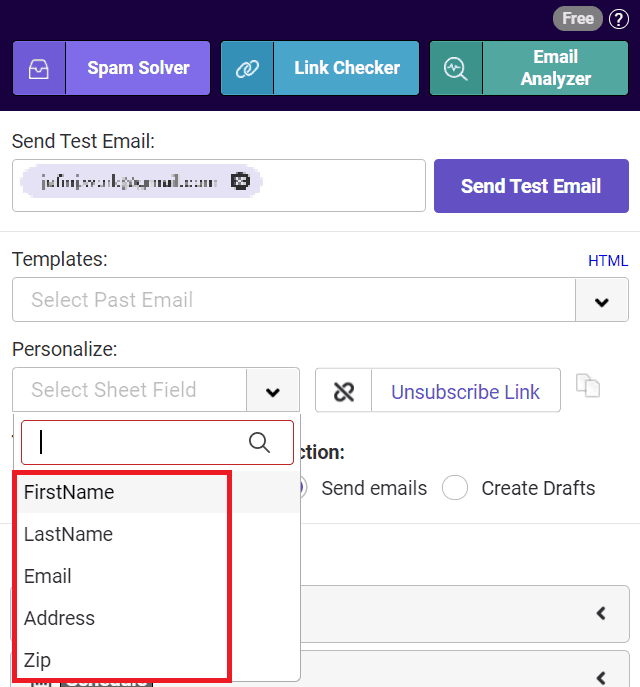
To personalize your email, select the column labels from the drop-down list. You can add these placeholders anywhere in your email message and subject line.
Here’s how my personalized email looks like with placeholders:
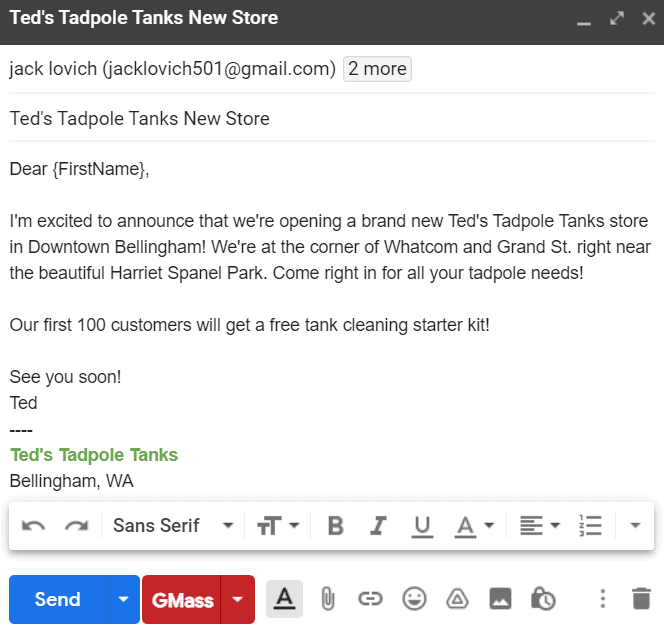
Notice the {FirstName} variable?
That’s a personalization label corresponding to the column header FirstName in my Google Sheet.
Step F
After composing your email, click on the GMass button to send it to all your recipients.
Note: GMass will auto-personalize the email for each person based on the mail merge labels you’ve used in your message.
For example, the third recipient of my email, Ron Carey, will receive an email that starts with “Dear Ron,” as the {FirstName} variable was used in the email message.
Go back to Contents
Now that we’ve seen how to use mail merge to send mass emails let’s check out some important mail merge FAQs.
7 Mail Merge FAQs
Here are the answers to seven commonly asked questions regarding mail merge:
1. What are the advantages and disadvantages of email mail merge?
Mail merge for your email marketing or cold emailing has several strong advantages, such as:
- Personalization: Mail merge personalization makes your form letter sound like individual correspondence, so it’s more likely to be read.
- Saves time: Once you set up your mail merge template, it takes relatively little time to create a large number of personalized messages because it’s tied to your Excel data — the single spreadsheet where all personalized information is kept.
- Controls the appearance of your message: A mail merge template lets you manage how the type and images look, so your email is attractive even where the personalized content is different.
- Allows for testing: You can quickly adapt a template to create two versions of the message for A/B testing. This way, you can effortlessly know what version of your message works best.
On the other hand, a mail merge also has some disadvantages for email campaigns:
- May require additional software: To go beyond the features of Microsoft Word, you may need email merge software, like GMass, with advanced features to automate data collection or add conditional formatting.
- Requires accuracy: If your Microsoft Excel database is incomplete, inaccurate, out of date, or saved under a new name, then mail merge may not work.
- Risk of error: If you make a mistake in your mail merge template or personalization data, that error will get reproduced on all the emails that use those elements. As a result, it’s essential to allow time to test your email before sending it to your entire list.
2. Can you perform an email merge with an attachment?
When you’re using Word, you don’t have the option to include an attachment with a standard mail merge message, but you can if you use the Mail Merge Toolkit add-in for Microsoft Office.
However, if you’re after a better solution, use a purpose-built mail merge platform like GMass that not only lets you include an attachment but even allows you to choose different attachments for each recipient.
Read more about how to send a mass email with personalized attachments.
3. How do you use a Mail Merge Toolkit in Word?
The Mail Merge Toolkit for Word is a third-party add-in that lets you do more personalization than the standard Word mail merge alone (for example, including attachments).
You can download a free trial and view an online toolkit tutorial to get started. Once you have the program, go to the Start Mail Merge selection under the Mailings tab and follow the prompts.
4. Can you send a mail merge from a shared mailbox?
If you want to send a mail merge from a shared mailbox (such as from an email address named for a department, company, or event instead of a person), you can arrange it in Outlook.
Start by finding the “Other User’s Folder” and open it to navigate to the shared mailbox. Associate that mailbox with the spreadsheet that contains your recipients’ data and prepare the mail merge as usual.
5. How do you do a mail merge in Word for labels?
One of the coolest features of MS Word’s mail merge functionality is the ability to drive printed labels with placement designed in Word and data-driven by your personalization datasheet.
If you know how to do a letter or email mail merge in Word, labels are very easy.
Under the Mailings tab in Word, click the Start Mail Merge selection and then the Step-by-Step Mail Merge Wizard. Choose Label as your template document type, and under Label Options, select a label manufacturer and style number (for example, Avery 5160, etc.).
From there, follow the wizard’s prompts.
You may also want to view Microsoft’s brief and helpful video tutorial.
6. How do you do a mail merge with Outlook?
To create an Outlook mail merge, you’ll need to use Microsoft Word, Excel, and Outlook.
Starting in Word, choose the Mailings menu, then Start Email Merge, and then Email Messages.
When your message is ready, click Select Recipients to link to the Excel spreadsheet with your data. Then, select Finish & Merge to send your email to your list using Outlook.
For more info, read my article on performing a mail merge in Outlook.
7. What is extended mail merge?
If you’re a Salesforce user, you have two options for mail merge — standard and extended.
Standard mail merge is the preferred approach for those with specific CRM software and operating systems, such as Luminate CRM and Windows 10.
Extended mail merge is a mail merge tool for all other Salesforce users. Although the tools are different, the results are the same — personalized emails to recipients listed in Salesforce.
Go back to Contents
Final Thoughts
Mail merging isn’t rocket science.
While you can use Microsoft Word to perform mail merges for letters, you need to follow a large number of steps correctly. Additionally, for sending mass emails, you have to set up a webmail client with Word manually.
Instead, why not use a powerful mail merge tool like GMass for sending mass emails?
Its advanced mass mailing features help you to perform mail merges and send out bulk emails effortlessly.
Why not try GMass today and simplify your mail merge experience?
See why 99% of users say they’ve had their best deliverability ever with GMass
Email marketing, cold email, and mail merge all in one tool — that works inside Gmail
TRY GMASS FOR FREE
Download Chrome extension — 30 second intall!
No credit card required

Ajay is the founder of GMass and has been developing email sending software for 20 years.
Love what you’re reading? Get the latest email strategy and tips & stay in touch.
Серийные письма – это однотипные документы, рассылаемые различным адресатам. При создании серийного письма создаются два файла: основной текстовый файл и управляющий файл. Управляющий файл содержит информацию, которая различна в разных экземплярах серийного письма (имена, адреса). Файл основного документа содержит неизменную часть с указанием мест, в который вставляется информация из управляющего файла. В результате совместной обработки основного и управляющего файлов получается готовое серийное письмо.
Полный цикл формирования рассылки делится разработчиками программы Word на шесть этапов:
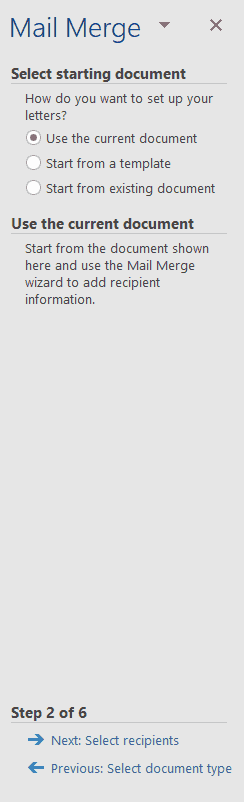
Этап 1. Выбор типа документа.
Этап 2. Выбор документа.
Этап 3. Выбор получателей.
Этап 4. Создание письма.
Этап 5. Просмотр писем.
Этап 6. Завершение слияния.
Постановка задачи
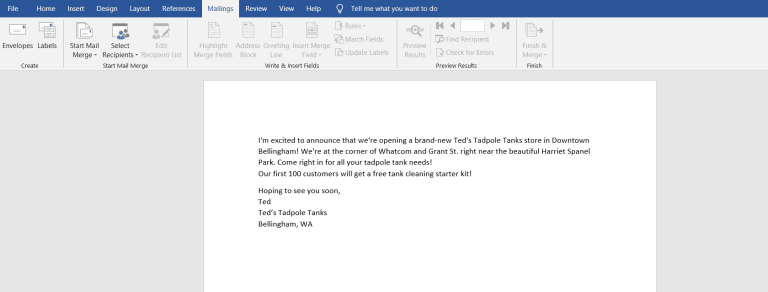
Имеем таблицу в Microsoft Excel, в которой хранится информация о ключевых клиентах нашей компании (адреса эл.почты, имена, названия компаний и т.д.), которых мы хотим поздравить с очередным праздником.
Поздравлять будем при помощи простого, но трогательного сообщения, содержащего имя клиента и название его компании. При чем все надо сделать так, чтобы получатель (не дай бог!) не подумал, что письмо сделано автоматически, а был уверен, что письмо было кропотливо написано ради него вручную.
В конце все созданные сообщения надо:
- либо отправить через Outlook каждому клиенту на его e-mail
- либо распечатать для последующей отправки обычной почтой
- либо закинуть в новый файл, где каждое письмо будет отдельным листом (разделом)
В терминах Microsoft Office такая процедура называется Слиянием
Подготовка списка клиентов в Excel

Таблица со списком клиентов для рассылки должна удовлетворять нескольким простым условиям:
- Шапка таблицы должна быть простой – одна строка с уникальными названиями столбцов (без повторений и пустых ячеек).
- В таблице не должно быть объединенных ячеек.
- В таблице не должно быть пустых строк или столбцов (отдельные пустые ячейки допускаются).
Если планируется отправка по электронной почте, то, само-собой, в таблице должен быть столбец с адресами получателей.
Поскольку Excel и Word не смогу сами определить пол клиента по имени, то имеет смысл сделать отдельный столбец с обращением (господин, госпожа и т.п.) или с родовым окончанием (-ый или -ая) для обращения “Уважаемый(ая)…” Как вариант, возможно полуавтоматическое определение пола в зависимости от окончания отчества (“а” или “ч”), реализованное функцией ПРАВСИМВ (RIGHT).
В новых версиях Microsoft Excel 2007/2010 для таких таблиц очень удобно использовать инструмент Форматировать как таблицу (Format as Table) с вкладки Главная (Home). Подробнее про такие “умные таблицы” можно почитать тут.
Создаем сообщение в Word и подключаем Excel
Открываем новый пустой документ в Microsoft Word и набираем туда текст нашего сообщения, оставляя в нем пустые места для будущей вставки имени клиента и его компании.
Потом запускаем пошаговый Мастер Слияния на вкладке Рассылки (Mailings) кнопкой Начать слияние (Start Mail Merge) – Пошаговый мастер слияния (Step-by-Step Merge Wizard):

В Word 2003 и старше эта команда была доступна в меню Сервис – Письма и рассылки – Мастер слияния (Tools – Letters and Mailings – Mail Merge).
Далее следует процесс из 6 этапов (переключение между ними – с помощью кнопок Вперед (Next) и Назад (Back) в правом нижнем углу в области задач).
Этап 1. Выбор типа документа.
На этом шаге пользователь должен выбрать тип тех документов, которые он хочет получить на выходе после слияния. Наш вариант – Письма (Letters), если мы хотим на выходе отправить созданные письма на принтер или Электронное сообщение (E-mail), если хотим разослать их по почте.

Этап 2. Выбор документа
На этом шаге необходимо определить, какой документ будет являться основой (заготовкой) для всех будущих однотипных сообщений. Мы выбираем – Текущий документ (Current document).

Этап 3. Выбор получателей
На этом шаге мы подключаем список клиентов в Excel к документу Word. Выбираем Использование списка и жмем на Обзор (Browse), после чего в диалоговом окне открытия файла указываем где лежит наш файл со списком клиентов.

После выбора источника данных, Word позволяет провести фильтрацию, сортировку и ручной отбор записей при помощи окна Получатели слияния:

Этап 4. Создание письма
На этом этапе пользователь должен указать – куда именно в документ должны попасть данные из подключенного списка. Для этого необходимо установить курсор в точку вставки в письме и использовать ссылку Другие элементы – она выводит полный набор всех полей списка, из которого мы и выбираем нужное поле для вставки:

В итоге, после вставки всех полей слияния у нас должно получиться нечто похожее (вставленные поля выделены красным):

Если в исходной таблице не было специального столбца для окончания “ый”/”ая” к слову “уважаем” (как в нашем примере), но был обычный столбец “Пол” с классическими “муж” и “жен”, то можно воспользоваться кнопкой Правила (Rules) на вкладке Рассылки (Mailings):

Эта кнопка открывает список правил (функций и полей), доступных для вставки в документ при создании рассылки. Для подстановки нужного окончания к слову “уважаемый/ая” выберем третий пункт IF…THEN…ELSE. В открывшемся затем окне зададим правило подстановки правильного окончания в зависимости от пола:

Этап 5. Просмотр писем
На этом этапе мы уже можем предварительно просмотреть результаты слияния, используя кнопки со стрелками. При необходимости, также, можно исключить любого получателя из списка.

Этап 6. Завершение слияния
На завершающем этапе возможны несколько вариантов:

Нажатие ссылки Печать (Print) приведет к немедленной отправке всех результатов слияния на принтер без вывода на экран.
Если необходимо сохранить созданные в результате слияния документы для дальнейшего использования или требуется внести ручную правку в некоторые из документов, то лучше использовать ссылку Изменить часть писем (Edit individual letters), которая выведет результаты слияния в отдельный файл:

Если вы на Шаге 1 выбирали опцию Электронные сообщения (E-mail), то на Шаге 6 вам предложат ввести тему для отправляемых сообщений и выбрать столбец таблицы, содержащий адреса электронной почты для рассылки. Затем все созданные сообщения будут помещены в папку Исходящие (Outbox)вашего почтового клиента Outlook.
Для проверки правильности созданных сообщений можно заранее временно отключить Outlook от сервера, чтобы письма сразу не ушли и вы могли их посмотреть и убедиться, что с ними все в порядке. Для этого в меню Microsoft Outlook можно выбрать команду Файл – Автономный режим или даже временно отключить сетевое подключение к вашему компьютеру. Письма временно “застрянут” в папке Исходящие (Outbox) и вы сможете их открыть и проверить перед отправкой.
Источник:
http://www.planetaexcel.ru/techniques/13/161/
Дополнительно:
http://msk.edu.ua/ivk/Informatika/Books/Word/lab_rab.pdf
Просмотров: 34425

Mail Merge is one of the classic features of Microsoft Word used to produce mass documents containing unique information. Here’s how to use it.
Mail Merge is one of the classic features of Microsoft Word used to produce mass documents containing unique information. Some examples where it can be helpful include brochures, newsletters, or materials used in mass mailings. In this article, we show you how to use Mail Merge in Microsoft Word.
Note: This was written using Word 2016 but the instructions should be similar on modern versions of Word in Microsoft 365 (formerly O365).
Using the Mail Merge Feature in Microsoft Word
For this example, I will create a document inviting friends to an event. There are two components to a mail merge letter; the main document and the data source, such as the names and addresses of the individuals invited to the event. Once you have gathered the information for the data source, Word will handle combining the documents for each guest.
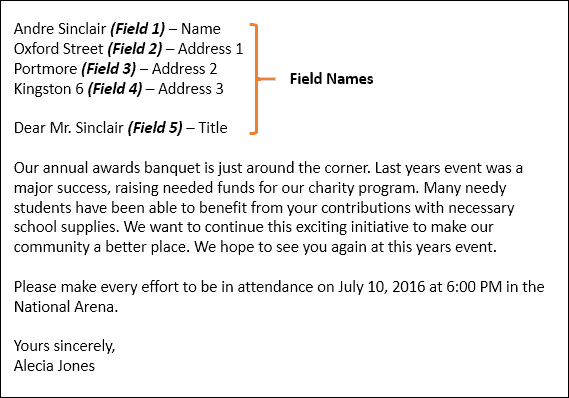
The first step is to have all the unique information for each recipient called a Field Name, such as the name, address, and salutation. Another important part of creating a mail merge document is the Form, which contains information delivered to the recipient. The sample letter below contains five fields I will need to include in each document.
Start Mail Merge Wizard
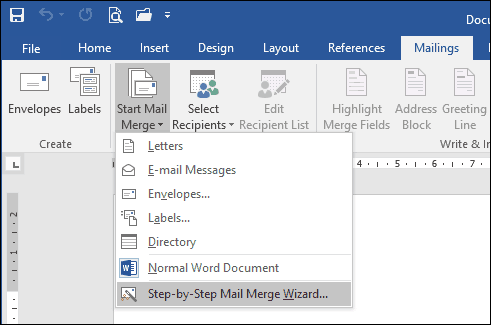
Create a new blank document in Microsoft Word and select the Mailings tab > Start Mail Merge > Step-by-Step Mail Merge Wizard.
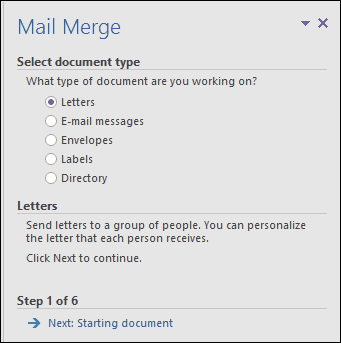
When the Mail Merge wizard comes up, choose the Letters radio box and then click Next: Starting document.
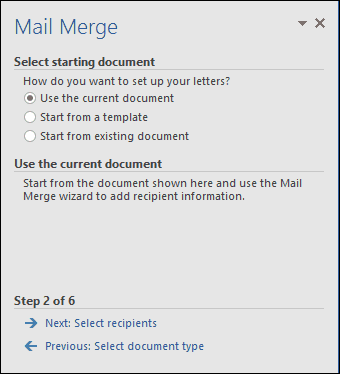
Select Use the current document and then continue to the next step to select recipients. The Mail Merge wizard gives you the choice of using an existing document. If I already had a letter prepared, I could modify the field names as the basis for the data source.
The Mail Merge wizard is powerful. You can use multiple sources for your recipient list, including a Microsoft Access Database or Excel Spreadsheet. For this article, I will create my data source from scratch by selecting, Type a new list and then click Create.
Create and Save the Data Source
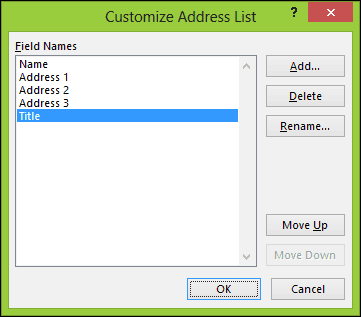
A form with pre-populated fields will be presented. This might not be ideal since we might not want some of these areas, which might confuse us. So we will delete and modify some of the field names; click the Customize Columns button to do so.
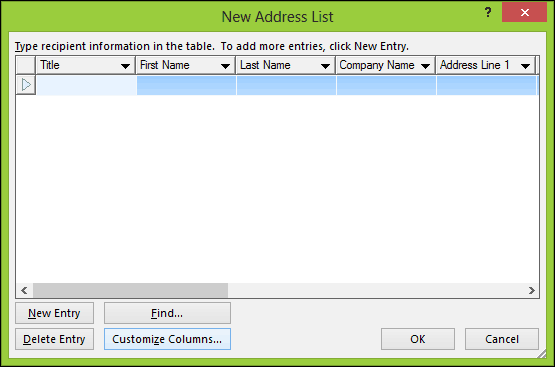
If you go back to our sample document, you will notice we only had five fields, while the pre-populated fields provided by Word total 13. Some of them are important, so we will keep just the ones we want. To delete a field, select it, then click Delete.

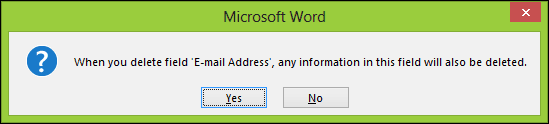
Click Yes to confirm the deletion. Repeat this step for all the sections you don’t want.
Because we don’t have some specific fields needed, we will have to rename existing fields and add new ones.
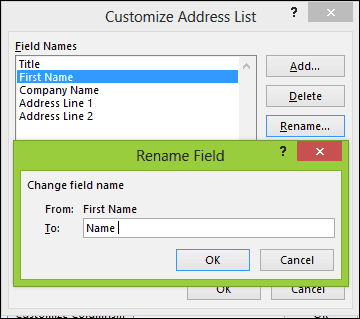
Once complete, the list of field names should match and amount to the same as described in our sample document. Click OK to confirm the changes.
Proceed to populate the fields with the names and addresses of each recipient; when complete, click OK.

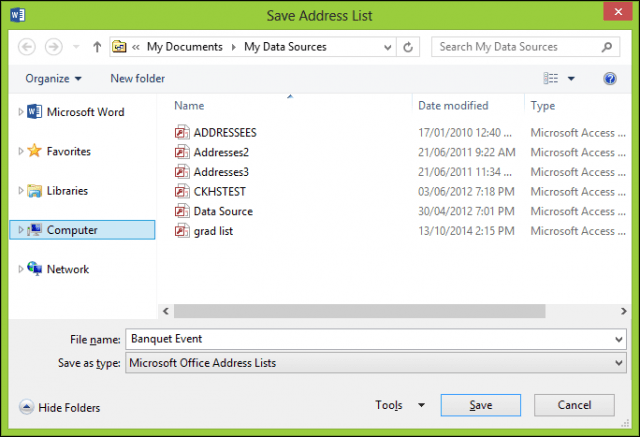
Save your data source, which will merge into your final document.
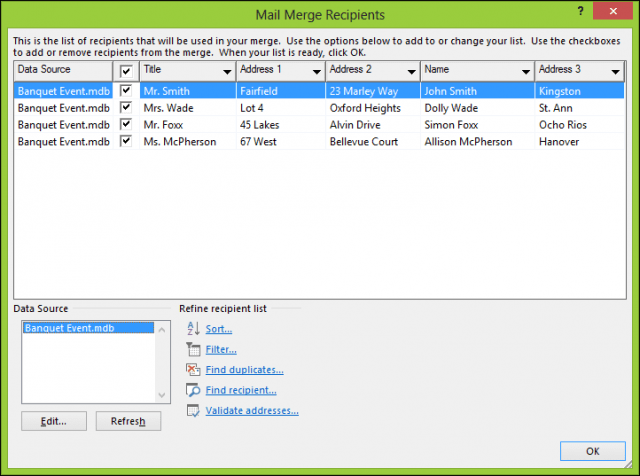
A preview of your Mail Merge Recipients will be presented. If you want to make changes such as edit or add a field, select the Data Source, then click Edit. Proceed to write your letter, then enter merge fields where necessary.
Insert Merge Fields
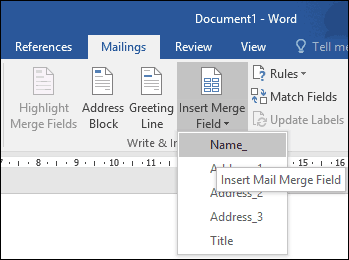
To insert a merge field, select the Mailings tab, click Insert Merge Field, then choose your merge field. Repeat the steps to populate your document with the appropriate merge fields.
When complete, save your letter; this will be called the Form Letter. If you know, you might use a document with a similar structure, and you can choose the option to reuse it in an existing document during the Mail Merge wizard.
Merge Final Document
Here comes the fun part, merging your document. Select the Mailings tab, then click Finish & Merge button, then click Edit Individual Documents.

Select All then click OK.
That’s it. Now all of your documents are ready to print or review.

These instructions also work in Microsoft Word 2013, 2010, and 2007. If you produce documents such as certificates, the Mail Merge functions also work in Office applications such as Microsoft Publisher.
For more tips and tricks for using Microsoft Office, check out the following articles, or browse our complete archive of Office articles.
- How to Activate and Use Inking in Word 2016
- How to Track Changes in Word 2016 Documents
- Improve Your Productivity with Tabs in Microsoft Word
![]()
![]()
Загрузить PDF
![]()
Загрузить PDF
Слияние – это мощный инструмент для написания и отправки персональных писем множеству получателей. Вы также можете использовать его для создания конвертов или наклеек с информацией о каждом получателе. Слияние может импортировать данные из другого источника, такого как Excel, а затем использовать их для вставки в ваше сообщение согласно определенным получателям.
-
1
Слияние – это функция, предназначенная для создания массовых рассылок, а также конвертов и наклеек с различной информацией. Вы можете импортировать базу данных получателей или ввести их вручную, а затем использовать так называемые «поля» для автоматического заполнения информации о каждом получателе. Это позволяет создать один документ, который вы можете отправить сотням или даже тысячам людей.
-
2
Создайте таблицу с информацией о получателях (если нужно). Вы можете ввести информацию о получателях вручную, но если у вас сотни адресатов, то проще создать соответствующую таблицу или базу данных.
- Как создать таблицу в Excel.
- В сети поищите информацию о создании базы данных в Access.
-
3
Перейдите на вкладку «Рассылки». Если вы работаете в Word 2003 или более старой версии, нажмите «Сервис» – «Письма и рассылки» – «Показать панель инструментов слияния».
-
4
Нажмите «Начать слияние» и выберите тип документа (сообщения электронной почты, письма, конверты, наклейки и каталоги). Если вы не уверены, выберите «Обычный документ Word».
- Выбрав «Конверты», откроется окно «Параметры конверта», в котором вы сможете выбрать размер и порядок форматирования конверта.
- Выбрав «Наклейки», откроется окно «Параметры наклейки», в котором вы сможете выбрать тип и размер наклейки.
-
5
Нажмите «Выбрать получателей» и выберите метод добавления получателей. Получатели – это самая главная часть функции слияния, так как позволяет заполнять «поля» информацией о каждом получателе. Вы можете ввести получателей вручную, загрузить таблицу или базу данных или загрузить контакты из Outlook.
- Выбрав «Ввести новый список», откроется новое окно, в котором вы сможете ввести информацию о каждом получателе. Это пригодится, если у вас нет доступа к таблице с информацией о получателях, но это очень медленный способ ввода данных. Вы можете нажать кнопку «Настройка столбцов» для создания столбцов с соответствующей информацией.
- Выбрав «Использовать существующий список», откроется проводник Windows, в котором вы сможете найти файл с таблицей или базой данных. Вы также можете нажать кнопку «Новый источник», чтобы подключиться к SQL серверу в интернете.
- Выбрав «Выбрать из контактов Outlook», загрузятся ваши контакты из Outlook (вы можете отметить, какие контакты должны быть загружены).
Реклама


-
1
Создайте документ так, как вы обычно делаете (с нуля или при помощи шаблона). Перед этим важно ввести данные получателей, чтобы использовать соответствующие «поля» при создании документа.
- В сети поищите информацию о написании официального письма.
- Как составить хороший информационный бюллетень.
-
2
Нажмите кнопку «Строка приветствия» для создания приветствия. Вы можете использовать функцию предварительного просмотра, чтобы увидеть, как приветствие выглядит на каждом экземпляре слияния.
-
3
Нажмите кнопку «Вставить поле слияния» и выберите поле, которое вы хотите вставить в документ. При создании документов это поле будет заменено на данные из таблицы получателей.
- Например, если вы хотите, чтобы в документе отображалось имя и фамилия получателя, выберите «Первый», нажмите пробел, еще раз нажмите кнопку «Вставить поле слияние», а затем нажмите «Последний».
- Также вы можете использовать кнопку «Адреса», чтобы создать конверты с адресом каждого получателя. Введите ваш адрес в строке ввода адреса отправителя, а затем нажмите «Адреса» в строке ввода адреса получателя.
- Вы можете выбрать любое поле, содержащее данные получателя. Убедитесь, что это относится ко всем адресатам из списка, так как пустые поля будут бросаться в глаза.
-
4
Нажмите кнопку «Выделить поля слияния», чтобы выделить вставленные поля и облегчить их редактирование.
-
5
Нажмите кнопку «Просмотр результатов», чтобы увидеть, как будет выглядеть документ. На экране отобразится документ слияния с информацией первого получателя.
Реклама


-
1
Проверьте документ на наличие в нем ошибок. Нажмите кнопку «Автопоиск ошибок», чтобы Word просканировал каждый документ в слиянии и убедился, что все поля заполнены соответствующими данными получателей. Программа известит вас о любом несоответствии, которое вы сможете исправить.
-
2
Завершите процесс слияния. Щелкнув «Найти и объединить», отобразятся три опции:[1]
- «Редактирование отдельных документов». Вы сможете определить редактируемые записи. После этого будет создан новый документ с каждой записью на отдельной странице. Вы можете отредактировать их вручную.
- «Печать документов». Вы сможете определить распечатываемые записи. После этого документы будут отправлены на принтер и распечатаны.
- «Отправка документов по электронной почте». Вы сможете ввести тему письма и выбрать поле, содержащее адреса электронной почты получателей. Затем вы сможете отправить рассылку через Outlook. Обратите внимание, что рассылка будет отправлена немедленно, поэтому убедитесь, что с ней все в порядке.
Реклама


Об этой статье
Эту страницу просматривали 11 795 раз.