
Data sources
Your first step in setting up a mail merge is to pick the source of data you’ll use for the personalized information. Excel spreadsheets and Outlook contact lists are the most common data sources, but any database that you can connect to Word will work. If you don’t yet have a data source, you can even type it up in Word, as part of the mail merge process.
For details about data sources, see Data sources you can use for a mail merge.
Excel or Outlook
If you know you’ll be using Excel or Outlook as the source of your data, see:
-
Mail merge using an Excel spreadsheet
-
Use Outlook contacts as a data source for a mail merge
Document types
Word provides tools for incorporating your data into the following kinds of documents. Follow the links for details about each type:
-
Letters that include a personalized greeting. Each letter prints on a separate sheet of paper.
Create and print a batch of personalized letters -
Email where each recipient’s address is the only address on the To line. You’ll be sending the email directly from Word.
Create and send email messages
-
Envelopes or Labels where names and addresses come from your data source.
Create and print a batch of envelopes for mailing
Create and print sheets of mailing labels
-
Directory that lists a batch of information for each item in your data source. Use it to print out your contact list, or to list groups of information, like all of the students in each class. This type of document is also called a catalog merge.
Create a directory of names, addresses, and other information
Data sources
Your first step in setting up a mail merge is to pick the source of data you’ll use for the personalized information. Excel spreadsheets and Outlook contact lists are the most common data sources, but if you don’t yet have a data source, you can type it up in Word, as part of the mail merge process.
-
Excel spreadsheet works well as a data source if all data is on one sheet and the data is formatted so that it can be read by Word. For more info, see Prepare your data source in Excel for a mail merge in Word for Mac.
-
Outlook Contact List contains data in a format that can be read by Word. See Use Outlook contacts as a data source for a mail merge
-
Word data file is a data source you can create on the fly, within Word. For more info, see Set up a mail merge list with Word.
Document types
-
Letters that include a personalized greeting. Each letter prints on a separate sheet of paper.
Create and print a batch of personalized letters -
Email where each recipient’s address is the only address on the To line. You’ll be sending the email directly from Word.
Create and send email messages
-
Envelopes or Labels where names and addresses come from your data source.
Create envelopes by using mail merge in Word
Create and print labels using mail merge
If you open a mail merge document that you created with the Word desktop application, Word Web App will preserve all of the mail merge settings in it, but you can’t perform a mail merge or edit any mail merge settings.
If you have the Word desktop application, open the document there and perform a mail merge there.
![]()
Download Article
![]()
Download Article
This wikiHow teaches you how to use the «Mail Merge» feature in Microsoft Word. Mail Merge allows you to use a spreadsheet of contact information to assign automatically a different address, name, or other piece of information to each copy of a document. This is useful when personalizing newsletters or statements, as you don’t have to write by hand each person’s name or address at the top of each document.
Things You Should Know
- Create your contact sheet in Microsoft Excel. Add your headers beginning in column «A1» and moving right. Save your file and remember your save location.
- Open Word and go to Blank document > Mailings > Select Recipients > Use an Existing List…. Choose your Excel sheet.
- Go to the spot you want to insert contact information and click Insert Merge Field. Select the desired headers from your Excel document. Click Finish & Merge.
-

1
Open Microsoft Excel. Microsoft Excel’s app icon resembles a white «X» on a dark-green background. The Excel «New» page will open.
- If you already have a contact sheet in Excel, skip ahead to importing the Excel contacts instead.
-
2
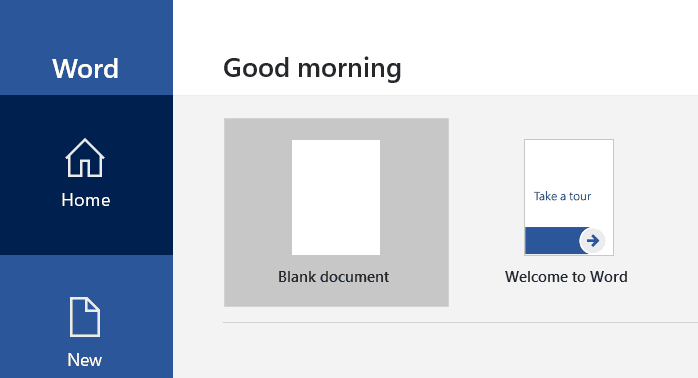
Click Blank workbook. It’s in the upper-left side of the «New» page. This will open a new, blank Excel document.
Advertisement
-
3
Add your contact headers. Starting in cell A1 and moving right from there, enter the following headers:[1]
- FirstName — Your contacts’ first names will go in this column (cell A1).
- LastName — Your contacts’ last names will go in this column (cell B1).
- Tel — Your contacts’ phone numbers will go in this column (cell C1).
- StreetAddress — Your contacts’ street addresses will go in this column (cell D1).
- City — Your contacts’ cities of residence will go in this column (cell E1).
- State — Your contacts’ states of residence will go in this column (cell F1).
- ZIP — Your contacts’ ZIP codes will go in this column (cell G1).
- Email — Your contacts’ email addresses will go in this column (cell H1).
-
4
Enter your contacts’ information. Starting in column A, cell 2, begin entering the contact information for each of the people for whom you want to generate a mail merge.
- Make sure that this information is accurate before proceeding.
-
5
Save your document. To do so:
- Windows — Click File, click Save As, double-click This PC, click a save location on the left side of the window, type the document’s name into the «File name» text box, and click Save.
- Mac — Click File, click Save As…, enter the document’s name in the «Save As» field, select a save location by clicking the «Where» box and clicking a folder, and click Save.
- Keep in mind your selected save location—you’ll need to find the Excel spreadsheet later.
-
6
Close Excel. Click the X in the upper-right corner of Excel (Windows) or the red circle in the upper-left corner (Mac). You can now proceed to creating the mail merge in Microsoft Word.


Advertisement
-
1
Open Microsoft Word. The Word app icon looks like a white «W» on a dark-blue background. As with Excel, the «New» page will open.
- If you have an existing Microsoft Word document into which you want to import the Excel contacts, you’ll instead double-click it to open it and skip the next step.
-
2
Click Blank document. It’s a white box in the upper-left side of the page. A blank Microsoft Word document will open.
-
3
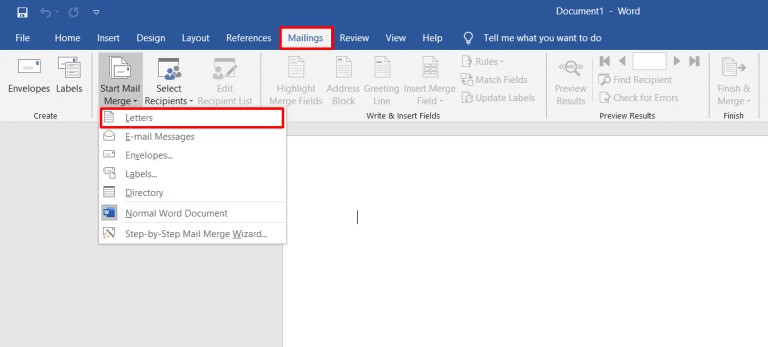
Click the Mailings tab. This tab is at the top of the Microsoft Word window. A toolbar will appear just below the row of tabs here.
-
4
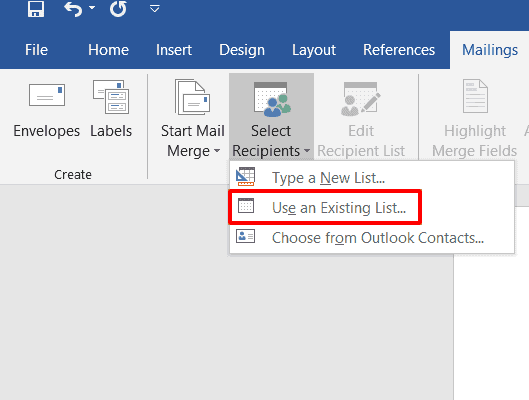
Click Select Recipients. It’s in the «Start Mail Merge» section of the Mailings toolbar. Doing so prompts a drop-down menu.
-
5
Click Use an Existing List…. You’ll find this option in the drop-down menu. A new window will open.
- If you ever want to use Outlook contacts instead, you can select the Choose from Outlook Contacts option in the drop-down menu.
- You can also type a temporary list of contact information into Word by selecting the Type a New List option. This is useful when you only need to create a handful of contacts’ information.
-
6
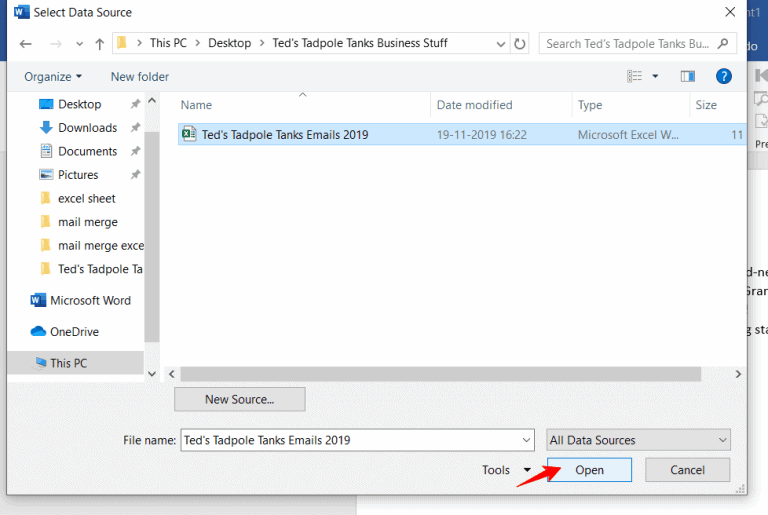
Select your Microsoft Excel contact sheet. On the left side of the window, click the folder in which you saved the Excel sheet, then click the Excel sheet to select it.
-
7
Click Open. It’s in the bottom-right corner of the window.
-
8
Confirm the decision. Click the Excel sheet’s name in the pop-up window, then click OK at the bottom of the window. Your Excel sheet will be selected as the location from which your contacts will load.
- Make sure that the «First row of data contains column headers» checkbox at the bottom of this window is checked.


Advertisement
-
1
Go to the place in which you want to insert contact information. Find the place where you want to insert contact information (e.g., the top of the document) and click it to place the cursor there.
-
2
Click Insert Merge Field. It’s an option in the «Write & Insert Fields» section of the Mailings tab. A drop-down menu will appear.
- You may have to click the Mailings tab again before doing this.
-
3
Select a type of information. In the drop-down menu, click the name of one of the headers from your Excel document to insert it.
- For example, you would click FirstName in the drop-down menu if you wanted to insert a tag for contacts’ first names.
-
4
Add other information where necessary. This might include contacts’ addresses, last names, phone numbers, and so on.
-
5
Click Finish & Merge. It’s in the far-right side of the Mailings tab’s toolbar. This prompts a drop-down menu.
-
6
Select a merge option. Click one of the following:
- Edit Individual Documents — Opens each recipient’s document, allowing you to personalize further the documents.
- Print Documents… — Allows you to print out a copy of your document for each individual listed in your contact sheet.
- Send Email Messages… — Allows you to send out the documents as emails. The contacts’ email addresses will be selected as the destination email addresses.
-
7
Follow the on-screen instructions. Depending on your selected option, you will have an additional form to review (for example, if you selected Email, you’ll have to enter a subject and then click OK). Doing so will complete the mail merge process.


Advertisement
Add New Question
-
Question
How can I perform a mail merge on MS word?

Go to the Mailings tab and click on the tab «Start Mail Merge;» it should be on the left side of the Mailings panel. Then select recipients and either make a list, or find a file if you already made one by choosing «Use existing list.» Type your letter, and press «Add merge field» whenever you need to use something from your list. Make any additional changes needed, and press «Finish and merge,» and then print if you need to.
-
Question
If I don’t use Outlook can I still send a mail merge?
Yes. You can either copy and paste, print, or click finish and merge and then go to settings regarding where you want to send your documents, and choose your destination. Also you can save to somewhere else in your computer and send it from there.
-
Question
What are the features of Microsoft Excel?
There are hundreds of formulas available to use, as well as a tool for copying data entries, continuing data patterns (1,2,3, or Monday, Tuesday, Wednesday, etc.). Also you can convert data into charts or import and edit files from other programs.
See more answers
Ask a Question
200 characters left
Include your email address to get a message when this question is answered.
Submit
Advertisement
-
Mail Merge is especially useful when creating invoices, statements, reports, or any other form of mass-produced documentation for which you have to include personal names, addresses, or so on.
Thanks for submitting a tip for review!
Advertisement
-
Always double-check your contact information before importing it to Word. Failing to do so could result in anything from using the wrong name to sending documents to the wrong email addresses.
Advertisement
About This Article
Article SummaryX
1. Open a blank document in Microsoft Word.
2. Click the Mailings tab.
3. Click Select Recipients, then click Use an Existing List….
4. Select your Mail Merge file, then click Open.
5. Click OK when prompted.
Did this summary help you?
Thanks to all authors for creating a page that has been read 1,393,031 times.
Is this article up to date?
A mail merge is a handy way to send personalized mass letters and bulk emails quickly.
It works by automatically adding personalization data from a data file (for example, a spreadsheet) to a template file (like a letter or an email).
In this article, I’ll first cover what a mail merge is and explain how it works. Then, I’ll go over how to mail merge using an Excel spreadsheet and a Word document.
Later, I’ll mention two issues of using the traditional method for mail merges and suggest a better and more powerful alternative to help you send mass emails.
Additionally, I’ll also answer seven FAQs associated with mail merges.
This Article Contains:
(Click on links to jump to specific sections)
- What Are Mail Merges?
- How Does Mail Merge Work?
- How to Use Mail Merge to Send Bulk Letters
- Two Problems of Using Microsoft Word to Send Mass Emails
- How to Use Mail Merge to Send Mass Emails
- 7 Mail Merge FAQs
Let’s jump right in.
What Are Mail Merges?
A mail merge lets you create personalized documents that are automatically customized on a recipient-by-recipient basis. This spares you the trouble of manually personalizing each document yourself!
You can use mail merges to create personalized messages automatically for:
- Marketing emails.
- Newsletters.
- Custom catalogs.
- Form letters, and more.
Note: A form letter is a template file used to create mass letters. Instead of typing a letter for each recipient, you can use a form letter to make quick, unique, personalized letters for each person.
Essentially, if there’s a document you need to personalize at scale, mail merges can take care of it for you!
Go back to Contents
Let’s now explore how a mail merge works.
How Does Mail Merge Work?
First, you need to understand the two essential components of every mail merge.
They are:
- Template File: the document that holds the message you’ll be sending out (like a letter or an email). It specifies the places where the personalization data will go. And that data (names, addresses, etc.) is fetched from a data file.
- Data File: a data source like a Microsoft Excel spreadsheet or a Google Sheets file. Each cell in the data file contains different information (first name, last name, email address, etc.) that will be placed in your template file in the corresponding space.
Essentially, a mail merge automatically adds the personalization data from your data file to your template file.
For example, let’s say you want to perform a mail merge to create mass letters.
Here, your letter is the template file — it has placeholders for your contacts’ names and addresses.
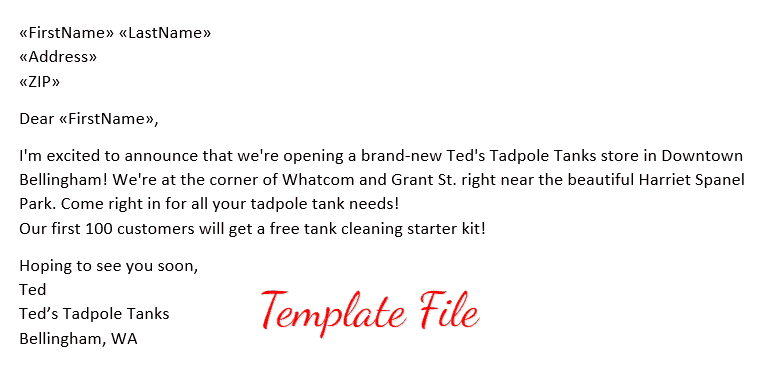
Notice the «FirstName», «Address» and other tags in the letter?
These are placeholders for your recipient’s details, also known as mail merge fields.
A mail merge field draws the personalization information from your data file (spreadsheet) to help you create your personalized letter.
But to make this work, the name of the mail merge field in your personalized letter template must match the name of the column header in your spreadsheet.
If the name of the merge fields and column headers match, the mail merge function would then merge your data file and your letter template to generate a personalized letter for each person.
Go back to Contents
Next, I’ll go over the steps involved in using mail merge to automatically personalize individual letters.
How to Use Mail Merge to Send Bulk Letters
You can use the mail merge feature in Word and Excel to create auto-personalized individual letters quickly.
Here:
- The mail merge template is a form letter in Microsoft Word.
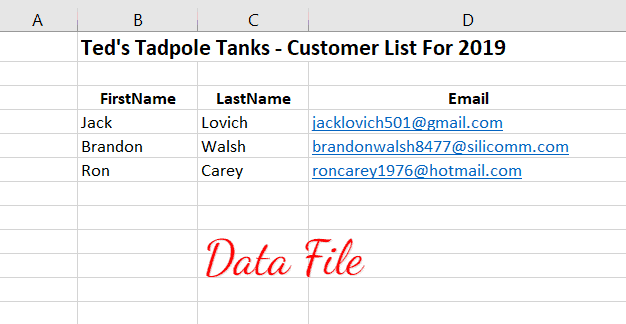
- The data file is an Excel spreadsheet containing your recipients’ details.
Let’s now explore the steps involved in using mail merge for bulk letters:
Step 1: Create and format your address list in Microsoft Excel
Here’s a step-by-step guide on how to set up an Excel data file:
Step A
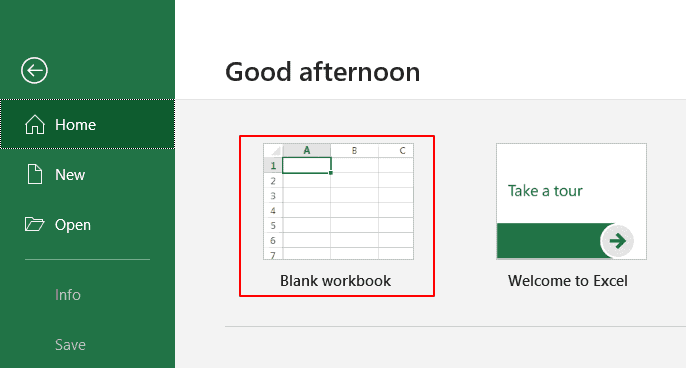
Open MS Excel and click on Blank workbook to open a blank Excel workbook (or document).
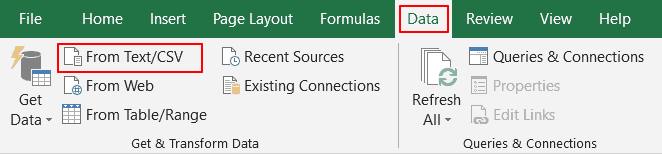
Note: If your contact data is readily available as an Excel spreadsheet, open the file and format it. If the data is present in a TXT or CSV file, go to Data → From Text/CSV to open the file in Excel.
Step B
Now you can start entering the details of your address list into the Excel workbook.
Only enter your column headers in the first row, starting in cell A1.
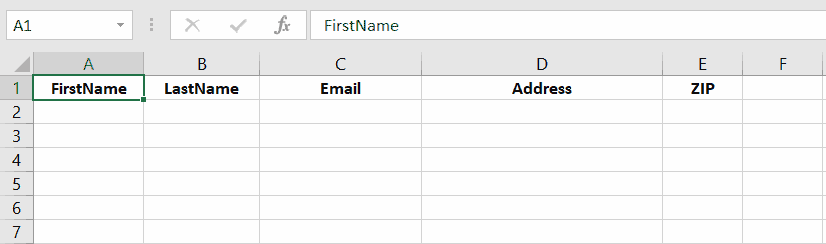
Check your header row to make sure the column headers in your Excel spreadsheet are exactly the same as the field names (or placeholder names) you want to use in your Word template document.
For example, if the column names in your Excel sheet are “FirstName”, “LastName”, and “Email”, the field names in your Microsoft Word document should also be “FirstName”, “LastName”, and “Email”.
Step C
Enter your contact information in your Excel database as one record per row, starting from cell A2.

Quick Tip
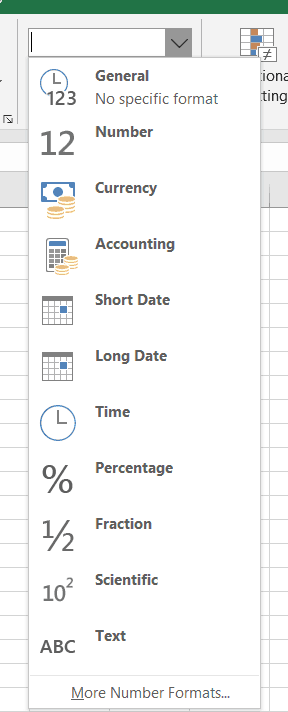
Data entries such as ZIP codes, percentages, currencies, etc., must be in the correct numeric format. To ensure this, you need to:
1. Select a column that has numeric data entries.
2. Go to the Home → Number section.

3. Click on the Number Format box and choose the correct format from the drop-down list that appears.
4. Repeat steps 1–3 for all columns containing numeric values.
Step D
Once you’ve created the contact sheet, you can save your Excel document by pressing Ctrl+S or going to File → Save or File → Save As.
Bonus Tip for Gmail Users
If you’re creating your first mail merge data file, you can export all your existing Gmail contacts (or “Google Contacts”) to get started quickly. Read my guide on how to export contacts from Gmail to learn how.
Note: Ensure that you finish all edits to the Excel spreadsheet before starting the mail merge process. Making edits to an Excel sheet once you’ve already begun a mail merge is a complicated additional step.
Step 2: Create the main mail merge document in MS Word
The next step is to create the form letter (or mail merge template — your main document) in MS Word. You can create a different mail merge template for every bulk email campaign, and you can save the templates for future use.
A favorite time-saving technique of mass email managers is to choose an old email template that worked well, update the content where necessary, and give the mail merge template a new name.
As a result, when you create your mail merge document, try writing it in a way that will let you adapt and reuse it in future bulk mailings.
Here’s a step-by-step guide on how to create a mail merge template in MS Word:
Step A
Open a new document (blank document) in Word.
This is the main document for your mail merge.
Step B
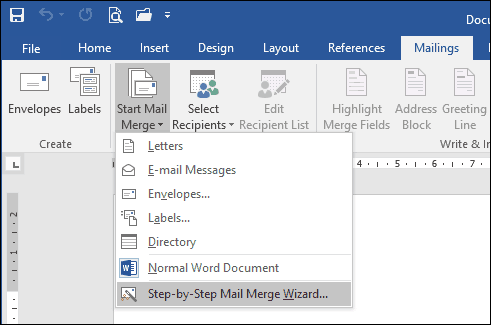
Click on the Mailings tab and select Start Mail Merge. A drop-down menu displaying every different mail merge document type will appear.
You can select the document type for letters, emails, envelopes, mailing labels, or a directory. Since we’re using the Word mail merge feature for sending letters, choose Letters as your merge document.
Step C (Optional)
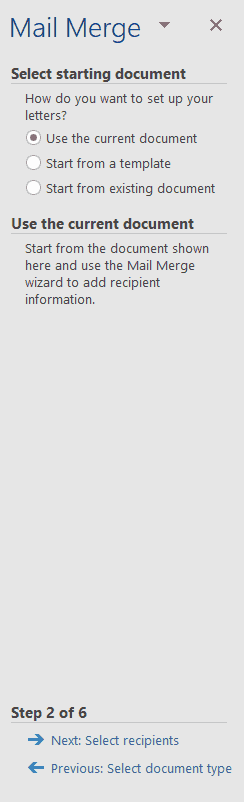
You can also use the Step-by-Step Mail Merge Wizard (from the Start Mail Merge drop-down menu) to streamline the Word mail merge process.
The wizard lets you quickly select the starting mail merge document.
For example, it lets you use the current document, which is the mail merge letter you’re creating now. Or you could choose a starter template or another existing document as your mail merge template.
Step D
Write the body of the letter.
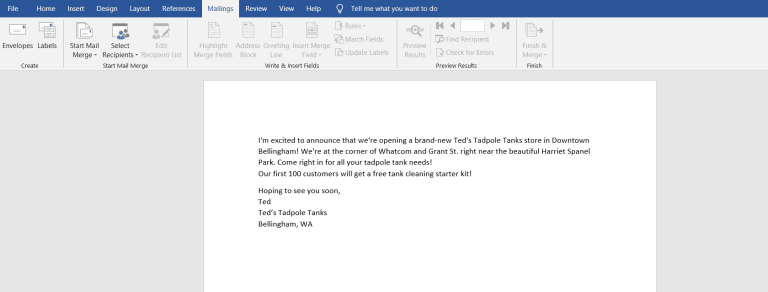
(Don’t worry about manually adding placeholders in your letter yet.)
Step 3: Select the recipient list
Now you can select the list of mail merge recipients (from your Excel file) who will receive your letter.
Here’s a step-by-step guide on how to do this:
Step A
Click on the Select Recipients option in the Mailings tab. A drop-down menu appears, showing different mail merge list sources.
As your contact information is already available as an Excel file, click on Use an Existing List.
Note: You can also include your Outlook Contact list if you have Outlook connected to Word.
Step B
In the dialog box that pops up, select the Excel sheet you created earlier and click Open.
Step C
A Select Table window appears. Choose the Excel worksheet you want to merge with the Word template and click OK.
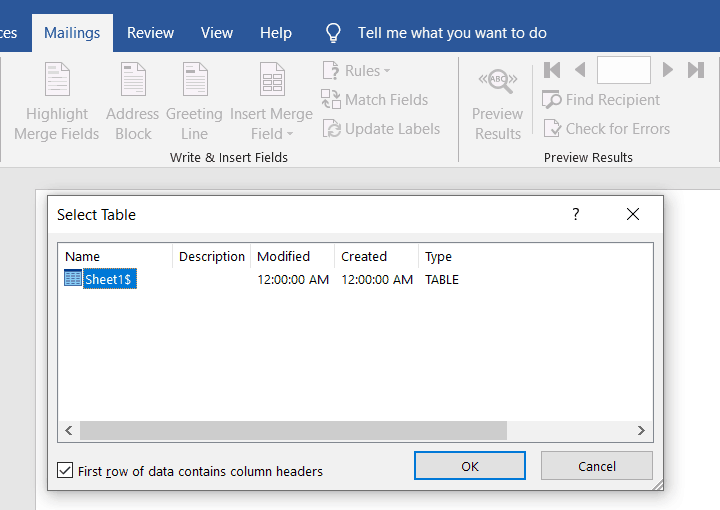
Note: If your Excel spreadsheet has only one worksheet, you’ll only see Sheet1 in the Select Table window.
Step D
If you want to edit your mail merge recipients list, click on the Edit Recipient List tab.
In the Mail Merge Recipients window that pops up, clear the checkbox of the person you don’t want in your mailing list.
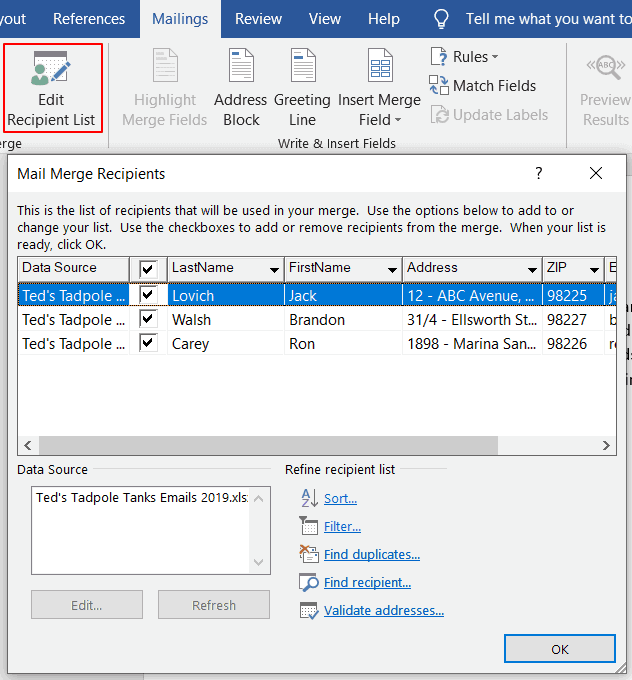
Anyone you remove from your recipient list in this step will be removed from any mail merge project that uses this data file in the future.
Step 4: Add personalized messages
The next step is to add personalized content (like contact names and addresses) to your form letter template (Word mail merge document).
In Word, you can insert three personalization variables into your document:
- Insert Address Block — add a recipient’s address to your document.
- Insert Greeting Line — include a personalized greeting or salutation in your letter.
- Insert Merge Field — insert other mail merge fields from your Excel file.
Here’s a walkthrough on how to add all three personalization variables to your merge document (form letter):
Note: You can add a personalization variable at an insertion point of your choice in the Word document. For example, to add a greeting line before the body of your letter, simply place the text cursor at the point you want to add it.
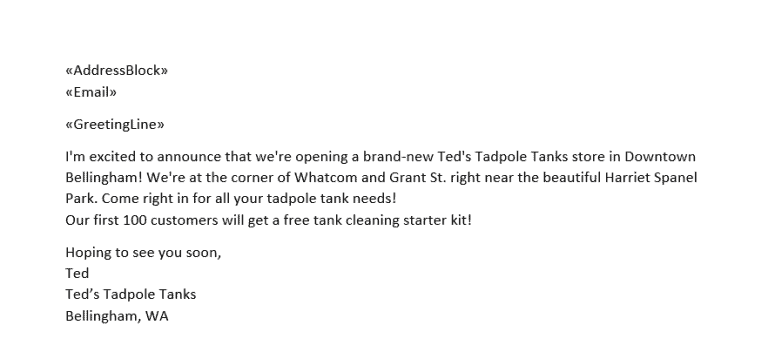
A. Insert an Address block
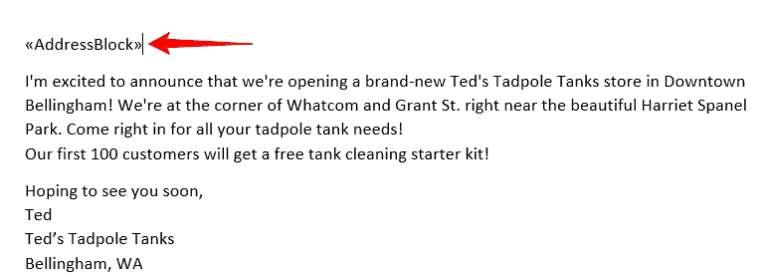
To insert a recipient’s address from your Excel worksheet, click on Address Block from the Write & Insert Fields section. In the window that appears, choose an address block format of your choice and click OK.
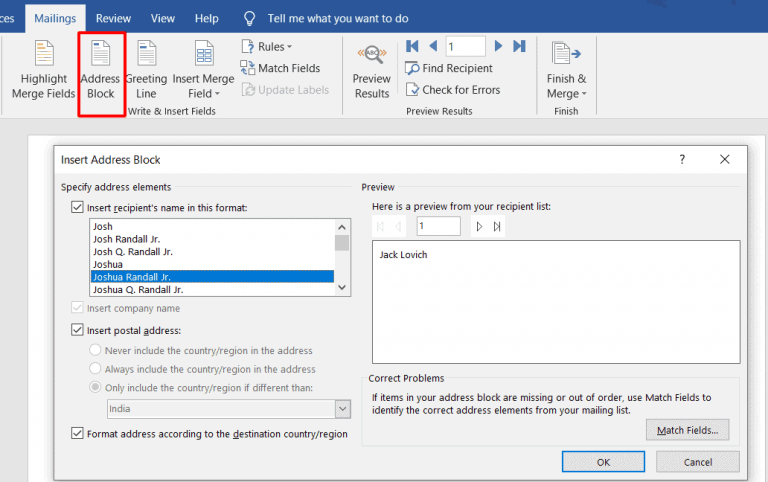
An address placeholder («AddressBlock») will be inserted automatically into your letter.
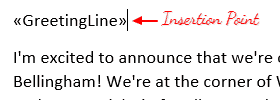
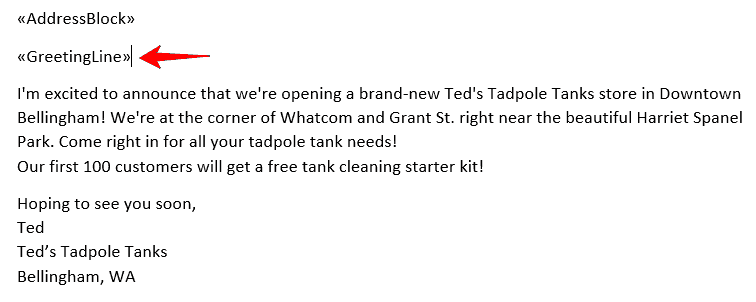
B. Insert a Greeting Line
To insert a greeting line, click on Greeting Line from the Write & Insert fields section.
In the dialog box that pops up, select the format you want to use and click OK.
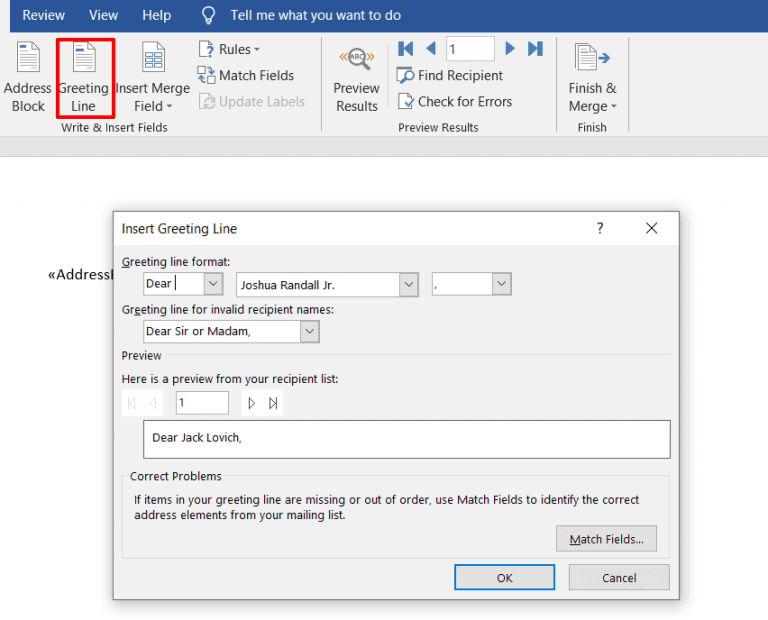
A greeting placeholder («GreetingLine») will be automatically added to your document.
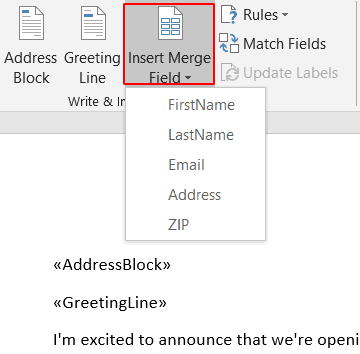
C. Insert a Merge Field
You can also add other mail merge fields, like your contact’s first name, company name, email id, etc., from your Excel worksheet to your Word template.
To do this, click on Insert Merge Field from the Write & Insert fields group.
You can see a drop-down list of some mail merge labels. These labels are the column names in your Excel spreadsheet.
If you want to create a custom field, the easiest way is to add a column to your spreadsheet with the name of the custom field you want to make, like “birthday” or “pet name”. But you must do this before starting the mail merge process since you can’t edit your spreadsheet during mail merge.
Click on the mail merge fields you want to add to your letter.
Here’s how my form letter looks after inserting the placeholders (mail merge fields) I needed:
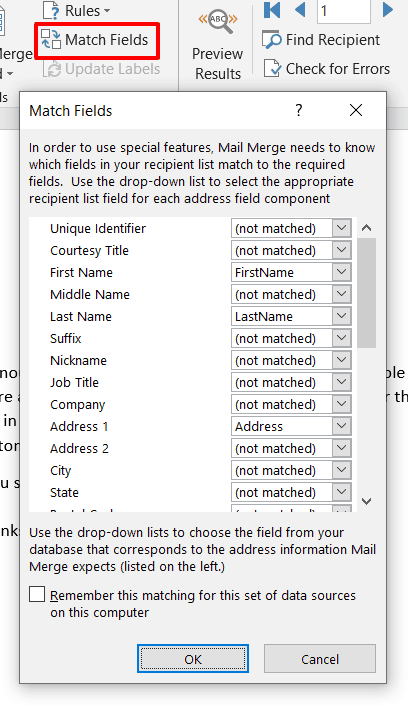
Note: You can also use the Match Fields feature to manually match your Excel column fields with the Word placeholders. This way, you can ensure that all the mail merge fields are accurately mapped to your Excel column names.
Step 5: Preview and finish the mail merge process
After personalizing the form letter for each recipient, you can preview the letters to see how they look with the data inserted from your Excel worksheet.
Here’s a step-by-step guide on how to do this:
Step A
Click on Preview Results under the Mailings tab.
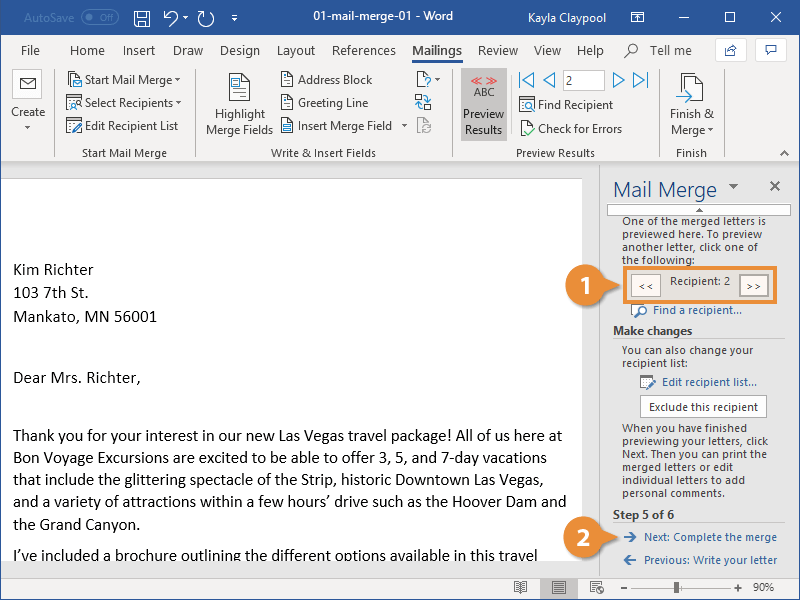
Step B
To preview the result for each recipient, you can enter the recipient number (the corresponding row number in your Excel spreadsheet) in the text box.
For example, to preview the form letter for my second recipient — Brandon Walsh, I type “2” in the text box and click the Preview Results button.
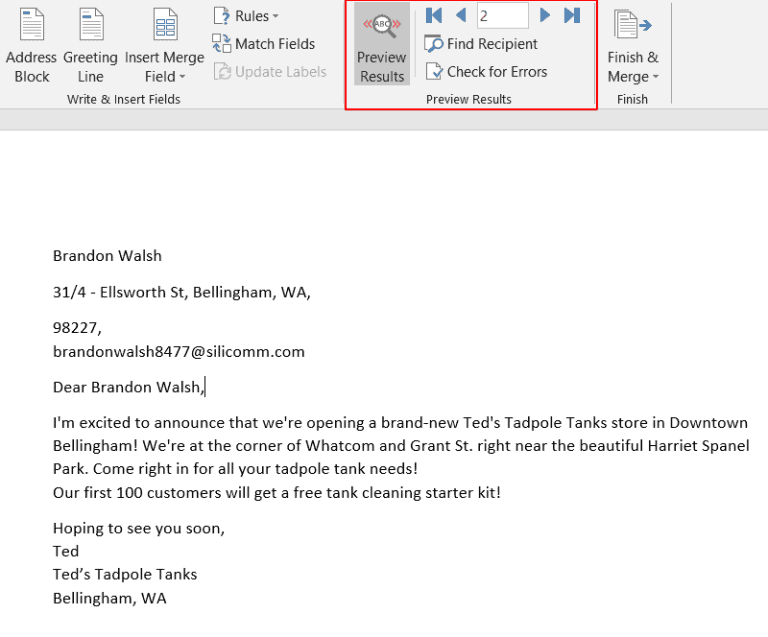
Note: You can also click on the Next and Previous buttons to quickly scroll through your mailing list to preview the letter for each person.
If you realize someone who is scheduled to receive your bulk email should be removed from the recipient list, refer to Step 3 (D) for instructions.
Step C
After previewing the form letter, click on Finish & Merge to finish the Word mail merge process.
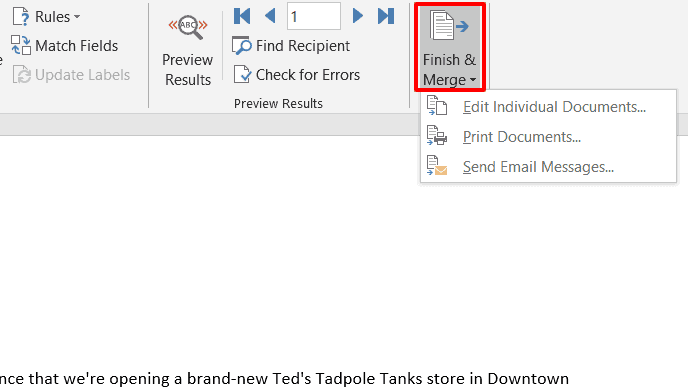
From the drop-down list that appears, you can choose to:
- Edit Individual Documents — if you want to edit each letter further, separately.
- Print Documents — if you want to print the letters.
- Send Email Messages — if you want to send the letters as emails.
Note: If you want to send the letters as email messages to a Gmail or Outlook contact, you must manually set up Gmail/Outlook with Word.
Step 6: Save the form letter
After you’ve finished working with the merged document, you can save it by pressing the Ctrl+S keys or by going to the File menu and clicking Save or Save As.
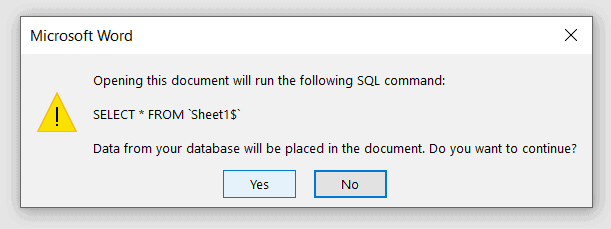
You can also reuse the merged document for sending additional letters — just open it and click Yes when Word prompts you with this alert:
Go back to Contents
How to Use Mail Merge to Send Mass Emails
You can use mail merge to quickly create personalized emails for newsletters, promos, and other email marketing messages.
Here, your mailing list is the data file, while the email is the mail merge template.
We’ve seen how to use Excel and Word to create personalized form letters.
Just follow the same steps to send merged emails to your mailing list.
However, I don’t recommend using Microsoft Word to send personalized emails at scale. Here’s why…
2 Problems of Using Microsoft Word to Send Mass Emails
While you can use a Microsoft Word document to create merged emails, there are two major drawbacks with this approach:
- To send the merged document as an email message, you must manually set up Microsoft Outlook or Gmail with Word. This can be time-consuming and confusing for most users.
- Microsoft Word isn’t well-equipped to handle mail merges. If your personalization tags are mismatched and there are hundreds of recipients (you can’t preview every email, can you?), you could end up sending something like this:
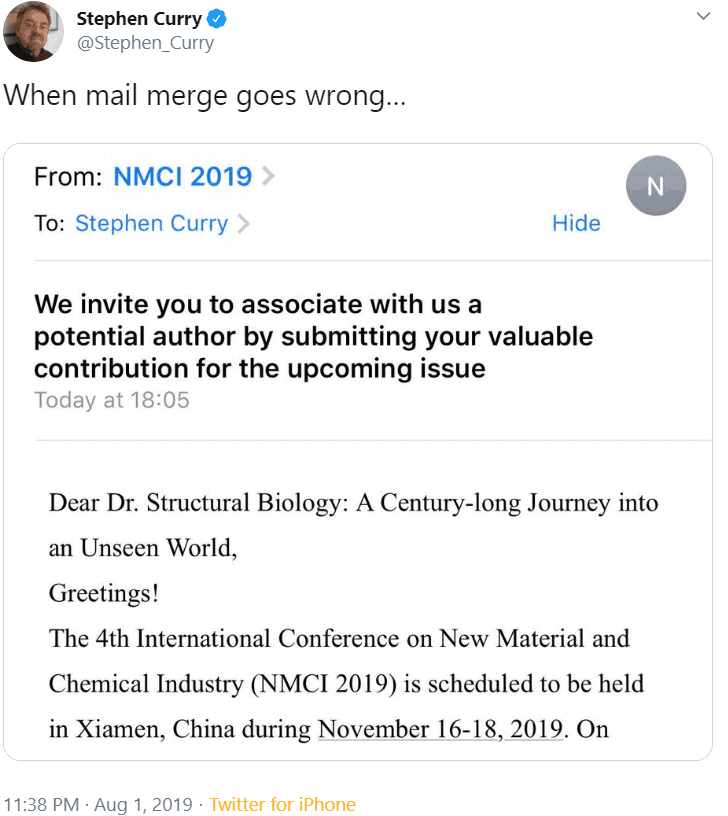
Image Source: Twitter
Now, imagine sending hundreds of such embarrassing emails!
That’s why it’s smarter to use a dedicated mail merge tool like GMass to send mass emails.
How to Use Mail Merge with GMass to Send Mass Emails
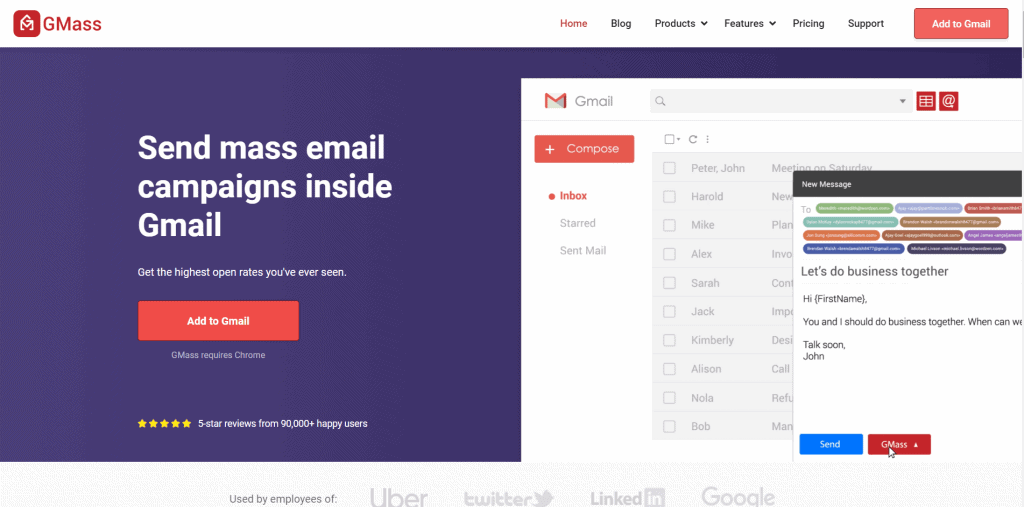
GMass is a powerful mail merge tool that lets you easily create and send tons of emails from your Gmail account.
Its advanced mail merge features have made it a popular tool used by employees from LinkedIn, Uber, Google, and Twitter. GMass is also perfect for individuals and groups like clubs, schools, churches, and other institutions to send emails to a target audience.
With GMass, you can easily create a mail merge with a data file stored as an Excel spreadsheet or a Google Sheet.
Here’s how:
Step 1: Import your Excel spreadsheet into Google Sheets
The first step is to import your Excel file into Google Sheets (this takes only a few seconds).
Why would you want to do this?
Because Google Sheets is far more powerful than Microsoft Excel for mail merging. Its automatic cloud-sync feature auto-saves your work with each edit made in the spreadsheet.
Plus, if you’re sending emails, it makes sense to have your spreadsheet online, right?
Additionally, Google Sheets is completely free and can be used by anyone with a Google (Gmail or Google Workspace) account. You won’t need a Microsoft Office subscription!
Note: If your data file is a CSV file, you can also import it into Google Sheets.
Here’s a step-by-step guide on how to import your Excel document into Google Sheets:
Note: I’ll be using the Excel sheet shown in the screenshot below for the walkthrough.
Step A
Open Google Sheets.

Step B
Select the folder icon to open the Google Sheets File Picker.
![]()
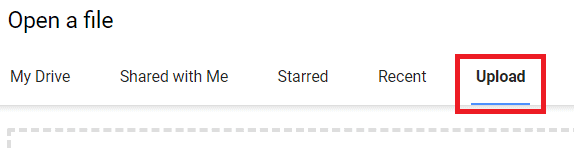
Step C
In the window that appears, click on the Upload tab to import your Excel sheet.
Step D
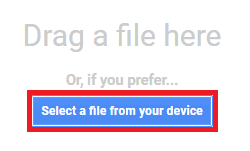
You can now choose the file you want to import from your computer. To select the file, click on the Select a file from your device button.
Step E
Choose the Excel file you want to import from your computer and click on the Open button.

Step F
Your file will be automatically imported as a new Google spreadsheet, which becomes your mail merge recipient list and data file.
Step 2: Format your Google Sheet
Your Google Sheet must be well-formatted before you use it with GMass.
But don’t worry, it’s not as complicated as formatting your Excel spreadsheet.
Here are some guidelines to ensure it works well:
- Your column names must be in plain text — they shouldn’t contain spaces, codes, or special characters.
- Your column names must begin from cell A1. If there are any blank rows or additional text (like a sheet title) above the column names, you must delete them.
- The actual personalization data must begin from the second row onward.
- There must be at least one column that has your recipients’ email addresses.
GMass will auto-detect all column names during the mail merge process. It will automatically use the column labels in your Google Sheet as the placeholders in your email template.
Step 3: Install GMass and connect it to your Gmail account
If you haven’t installed the GMass Chrome extension yet, here’s a step-by-step guide on how to install and connect it to your Gmail account quickly:
Step A
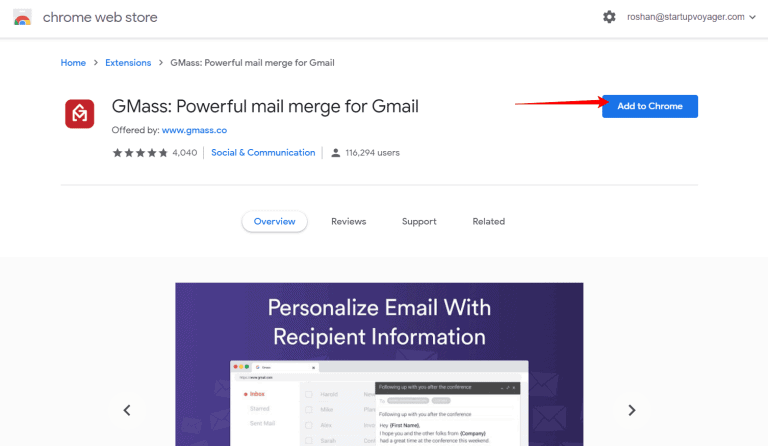
Head to the Chrome Web Store page for GMass.
Step B
Click on the Add to Chrome button.
Step C
A dialog box pops up:
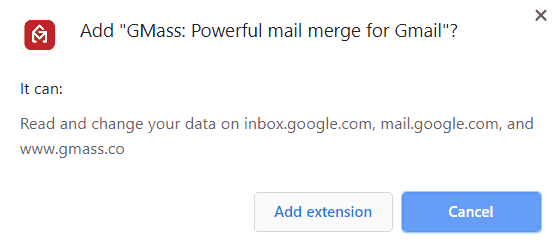
Click on the Add extension button to add GMass to Chrome.
Step D
Log in to the Gmail account you want to use with GMass.
After logging in, you can see three new GMass buttons next to your Gmail search box.
![]()
Click on one of these buttons, and you’ll be prompted to link your Gmail account to GMass:
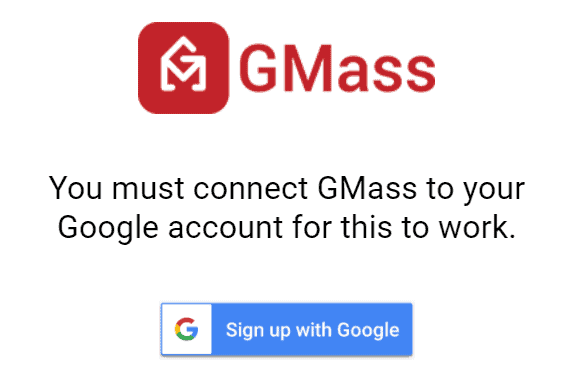
Click on the Connect GMass Now! button to connect your Gmail account with GMass.
Note: Simply installing the GMass extension doesn’t create a GMass account. It only makes the buttons appear in your Gmail account. You have to link it to your Gmail account (as above) to activate it.
Step 4: Connect your Google Sheet to GMass
Here’s a step-by-step guide on how to perform this last step:
Step A
Open your Gmail account and click on the GMass spreadsheet button near your Gmail search box.

Step B
A dialog window appears:
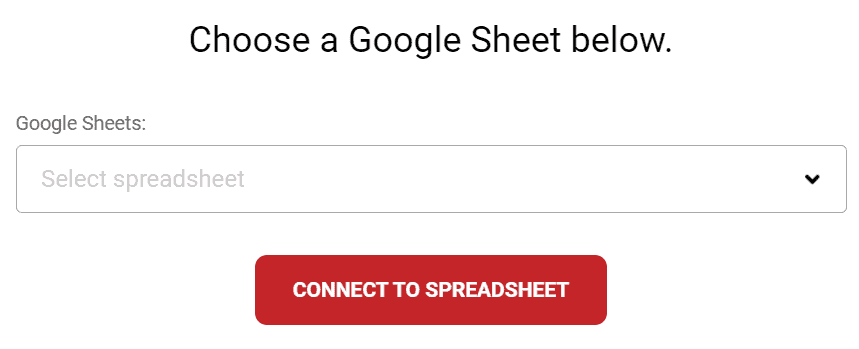
Step C
You can now use the drop-down menu to choose the Google sheet you want to use for the mail merge.
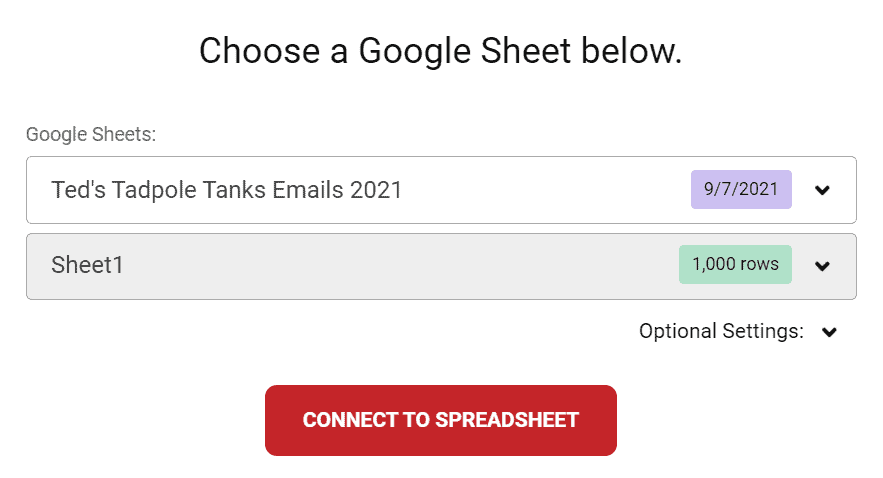
Note: If you have only one sheet (Sheet1) in your Google spreadsheet, that sheet gets chosen by default. However, if your spreadsheet has multiple sheets, you can select the sheet you want from the drop-down list.
Once you’ve chosen a spreadsheet, click on the CONNECT TO SPREADSHEET button.
Step D
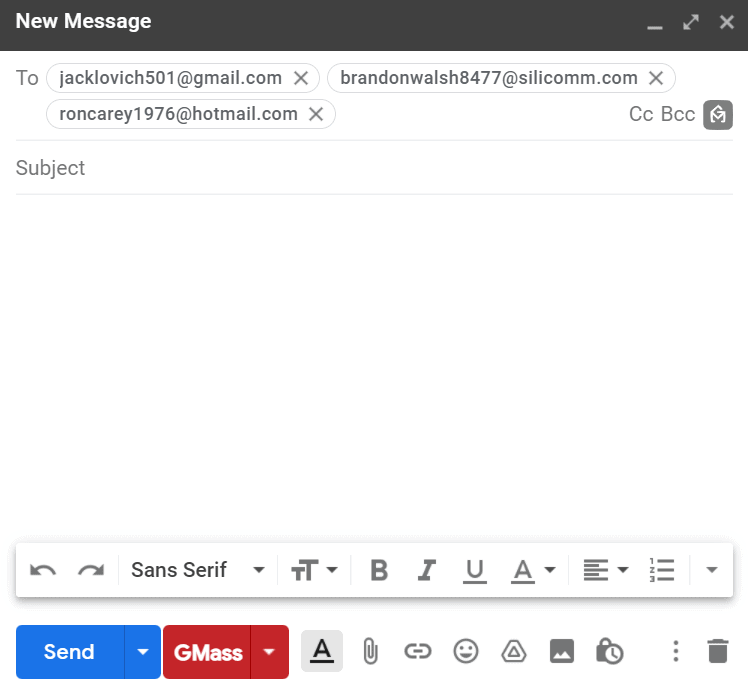
Now, GMass will auto-read all your recipients’ data from your Google sheet. It will also automatically insert their email addresses in the To field of a new email.
Note: GMass replaces the list of individual email addresses with a single alias address.
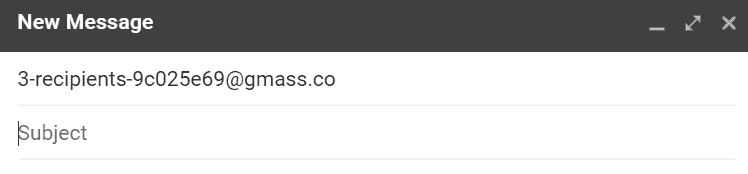
However, you can choose to display the email addresses individually. This way, you’ll be able to see the email IDs of everyone on your recipient list — but don’t worry, each recipient will see only their email address (just like when you add recipients to the BCC field).
Step E
After a new email window appears, you can compose your email with GMass’ powerful personalization features. To use these personalization settings, click on the settings arrow near the GMass button.
![]()
Click on the Personalize drop-down list button to see all the column names present in your Google sheet.
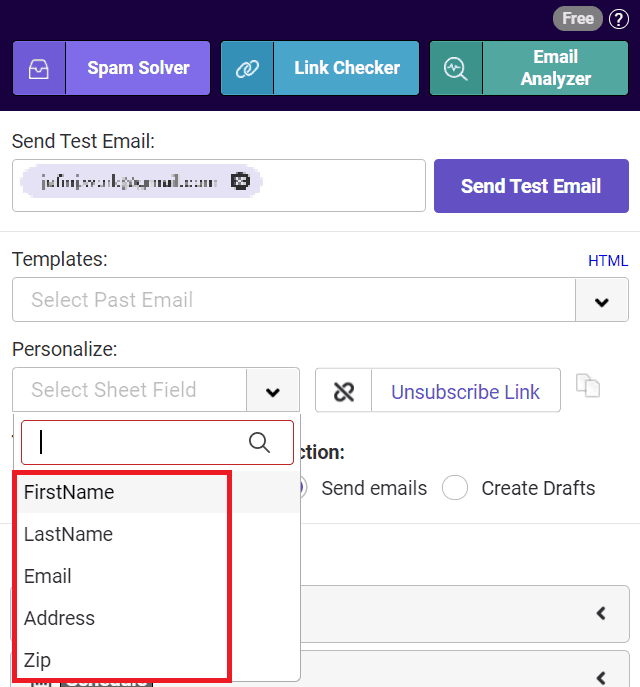
To personalize your email, select the column labels from the drop-down list. You can add these placeholders anywhere in your email message and subject line.
Here’s how my personalized email looks like with placeholders:
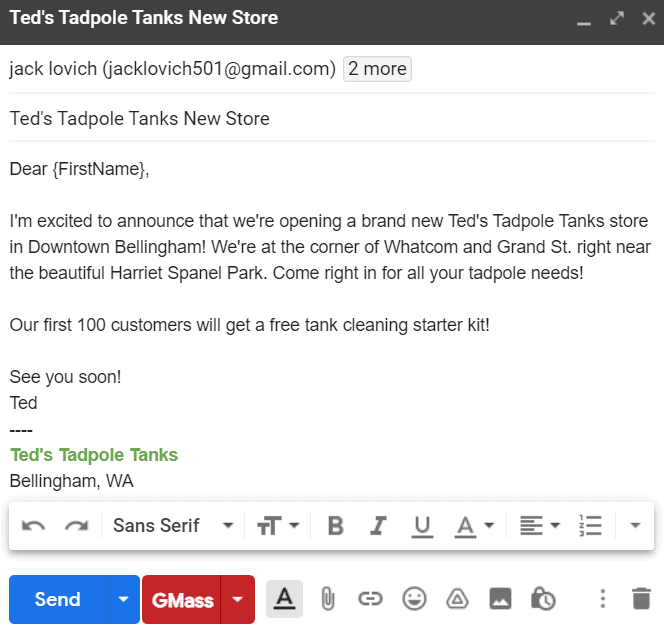
Notice the {FirstName} variable?
That’s a personalization label corresponding to the column header FirstName in my Google Sheet.
Step F
After composing your email, click on the GMass button to send it to all your recipients.
Note: GMass will auto-personalize the email for each person based on the mail merge labels you’ve used in your message.
For example, the third recipient of my email, Ron Carey, will receive an email that starts with “Dear Ron,” as the {FirstName} variable was used in the email message.
Go back to Contents
Now that we’ve seen how to use mail merge to send mass emails let’s check out some important mail merge FAQs.
7 Mail Merge FAQs
Here are the answers to seven commonly asked questions regarding mail merge:
1. What are the advantages and disadvantages of email mail merge?
Mail merge for your email marketing or cold emailing has several strong advantages, such as:
- Personalization: Mail merge personalization makes your form letter sound like individual correspondence, so it’s more likely to be read.
- Saves time: Once you set up your mail merge template, it takes relatively little time to create a large number of personalized messages because it’s tied to your Excel data — the single spreadsheet where all personalized information is kept.
- Controls the appearance of your message: A mail merge template lets you manage how the type and images look, so your email is attractive even where the personalized content is different.
- Allows for testing: You can quickly adapt a template to create two versions of the message for A/B testing. This way, you can effortlessly know what version of your message works best.
On the other hand, a mail merge also has some disadvantages for email campaigns:
- May require additional software: To go beyond the features of Microsoft Word, you may need email merge software, like GMass, with advanced features to automate data collection or add conditional formatting.
- Requires accuracy: If your Microsoft Excel database is incomplete, inaccurate, out of date, or saved under a new name, then mail merge may not work.
- Risk of error: If you make a mistake in your mail merge template or personalization data, that error will get reproduced on all the emails that use those elements. As a result, it’s essential to allow time to test your email before sending it to your entire list.
2. Can you perform an email merge with an attachment?
When you’re using Word, you don’t have the option to include an attachment with a standard mail merge message, but you can if you use the Mail Merge Toolkit add-in for Microsoft Office.
However, if you’re after a better solution, use a purpose-built mail merge platform like GMass that not only lets you include an attachment but even allows you to choose different attachments for each recipient.
Read more about how to send a mass email with personalized attachments.
3. How do you use a Mail Merge Toolkit in Word?
The Mail Merge Toolkit for Word is a third-party add-in that lets you do more personalization than the standard Word mail merge alone (for example, including attachments).
You can download a free trial and view an online toolkit tutorial to get started. Once you have the program, go to the Start Mail Merge selection under the Mailings tab and follow the prompts.
4. Can you send a mail merge from a shared mailbox?
If you want to send a mail merge from a shared mailbox (such as from an email address named for a department, company, or event instead of a person), you can arrange it in Outlook.
Start by finding the “Other User’s Folder” and open it to navigate to the shared mailbox. Associate that mailbox with the spreadsheet that contains your recipients’ data and prepare the mail merge as usual.
5. How do you do a mail merge in Word for labels?
One of the coolest features of MS Word’s mail merge functionality is the ability to drive printed labels with placement designed in Word and data-driven by your personalization datasheet.
If you know how to do a letter or email mail merge in Word, labels are very easy.
Under the Mailings tab in Word, click the Start Mail Merge selection and then the Step-by-Step Mail Merge Wizard. Choose Label as your template document type, and under Label Options, select a label manufacturer and style number (for example, Avery 5160, etc.).
From there, follow the wizard’s prompts.
You may also want to view Microsoft’s brief and helpful video tutorial.
6. How do you do a mail merge with Outlook?
To create an Outlook mail merge, you’ll need to use Microsoft Word, Excel, and Outlook.
Starting in Word, choose the Mailings menu, then Start Email Merge, and then Email Messages.
When your message is ready, click Select Recipients to link to the Excel spreadsheet with your data. Then, select Finish & Merge to send your email to your list using Outlook.
For more info, read my article on performing a mail merge in Outlook.
7. What is extended mail merge?
If you’re a Salesforce user, you have two options for mail merge — standard and extended.
Standard mail merge is the preferred approach for those with specific CRM software and operating systems, such as Luminate CRM and Windows 10.
Extended mail merge is a mail merge tool for all other Salesforce users. Although the tools are different, the results are the same — personalized emails to recipients listed in Salesforce.
Go back to Contents
Final Thoughts
Mail merging isn’t rocket science.
While you can use Microsoft Word to perform mail merges for letters, you need to follow a large number of steps correctly. Additionally, for sending mass emails, you have to set up a webmail client with Word manually.
Instead, why not use a powerful mail merge tool like GMass for sending mass emails?
Its advanced mass mailing features help you to perform mail merges and send out bulk emails effortlessly.
Why not try GMass today and simplify your mail merge experience?
Ready to transform Gmail into an email marketing/cold email/mail merge tool?
Only GMass packs every email app into one tool — and brings it all into Gmail for you. Better emails. Tons of power. Easy to use.
TRY GMASS FOR FREE
Download Chrome extension — 30 second intall!
No credit card required

Ajay is the founder of GMass and has been developing email sending software for 20 years.
Love what you’re reading? Get the latest email strategy and tips & stay in touch.
Do you have a long list of names and addresses that you need to send letters to? The Mail Merge process combines a Word document with a data source to quickly create letters that feel personal.
| Mail Merge Definitions | |
|---|---|
| Starting Document | (Main Document) A document that contains the information that is the same for each merged document. The starting document contains the field names for the variable information, like the names and addresses that will be inserted. |
| Data Source or Recipients List | A file that contains the information to be inserted into the main document during a mail merge. For example, it has records containing the names and addresses of the people a mail merge letter is sent to. Excel spreadsheets, Access databases, or Word document tables are good examples of data sources. |
| Field | A data category that stores a specific piece of information. For example, the field «LastName» would only contain people’s last names. |
| Record | A record is an entire set of data fields that relate to a single thing or person. For example, a single record would include a person’s first and last names, address, phone number, and date of birth. |
| Merge Field | A merge field is where you want to insert the information from a data source into a main document. Merge fields appear with chevrons (« ») around them. An example would be: Dear «FirstName». |
| Address Block | A group of merge fields that make up an address in a mail merge document. For example, a single address is made up of a name, street address, city, state, and zip code. Word can automatically insert all the appropriate address fields at once, so you don’t have to insert the five or six merge fields yourself. |
| Greeting Line | A group of merge fields that make up the greeting line of a mail merge document, such as “Dear Mr. McDonald”. Word can automatically insert all the appropriate greeting text, title, and name fields at once, so you don’t have to insert the text and required merge fields yourself. |
| Header Row | Data source information is stored in a table. The first row of the table is the header row and contains the field names for the data source. For example, FirstName, LastName, and Address are header rows. |
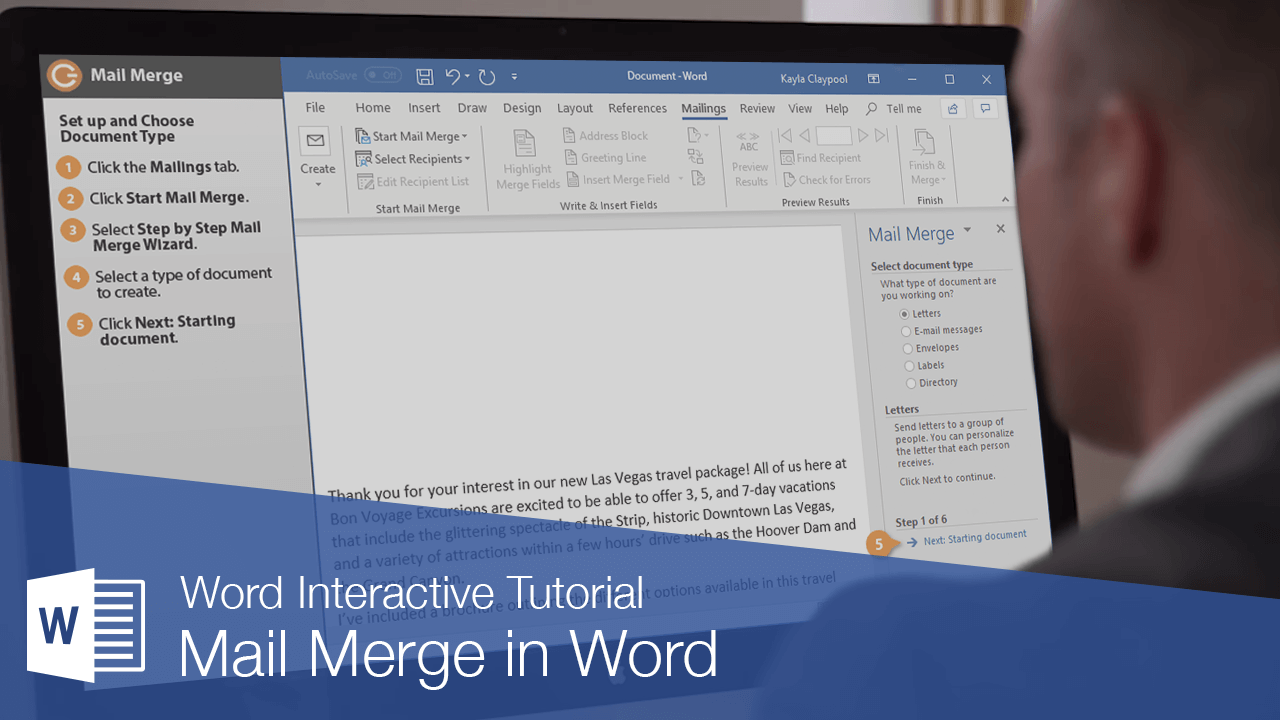
Set up and Choose Document Type
To begin the mail merge process, you first need to choose what sort of document you want to create.
- Click the Mailings tab.
- Click the Start Mail Merge button.
- Select Step-by-Step Mail Merge Wizard.
The Mail Merge pane appears on the right, ready to walk you through the mail merge.
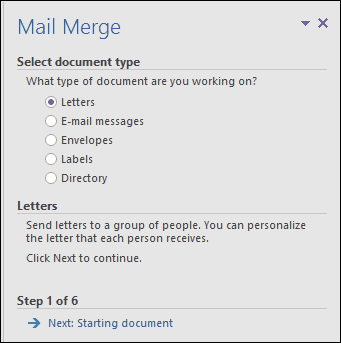
- Select a type of document to create.
- Click Next: Starting document.

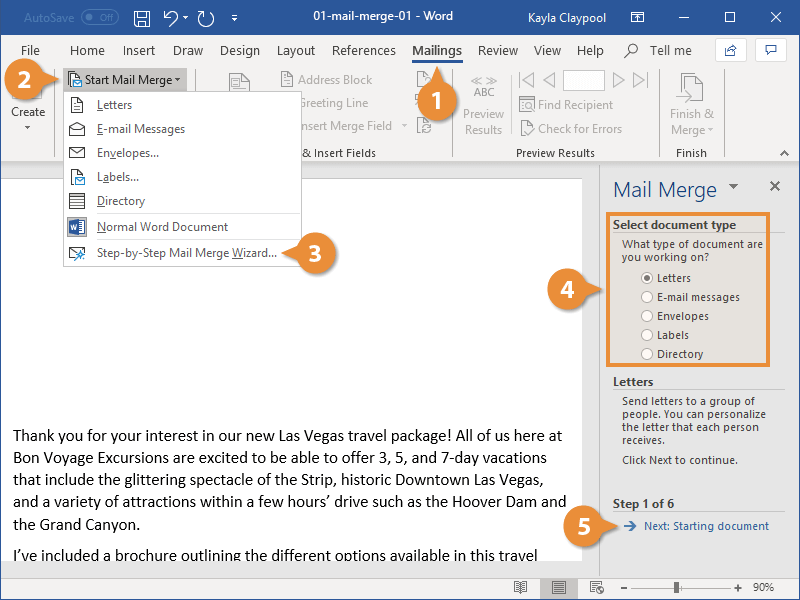
The Mail Merge wizard advances to the next step.
Select a Document
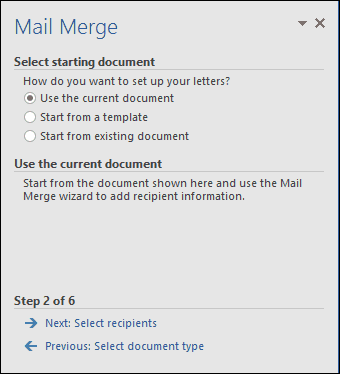
This next step is to select a starting document.
- Select a starting document.
You can use the current document as the basis for the mail merge, or you can select a template or existing document instead.
- Click Next: Select recipients.
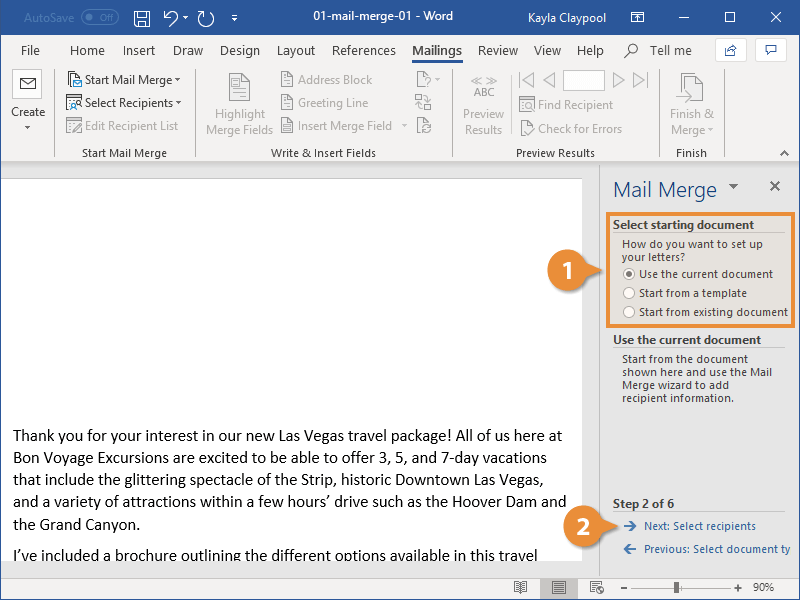
The Mail Merge wizard moves on to step 3.
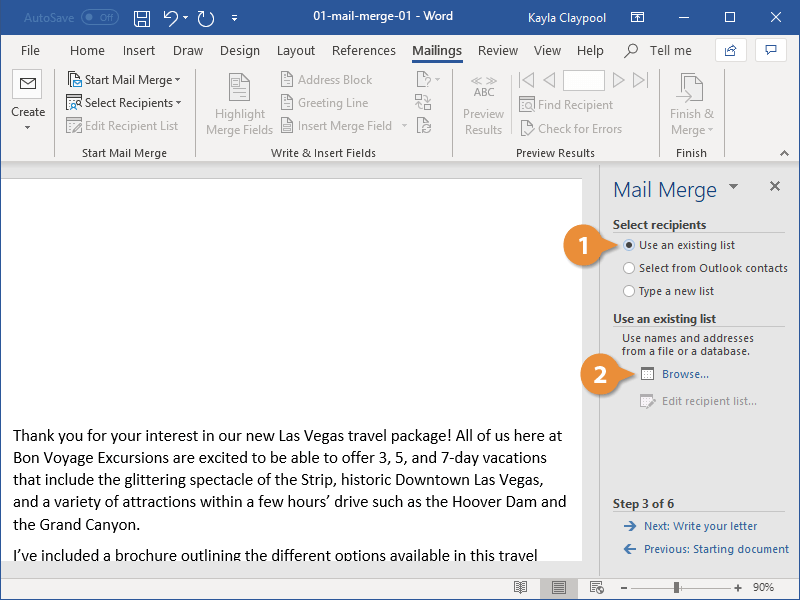
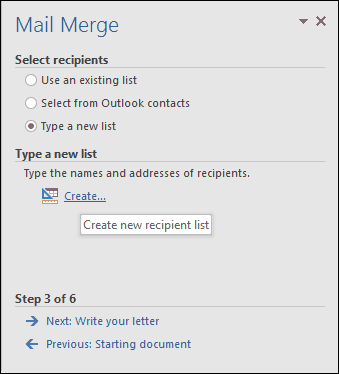
Select Recipients
Now, you will need to choose where you’ll get your list of addresses from. This example uses an existing list from a database, but you can also select Outlook contacts or manually create your own list.
- Select Use an existing list.
- Click Browse.
- Select your data file.
A data file of mail merge recipients can be in a database file, an Excel spreadsheet, another Word document, or other types of data files.
- Click Open.
The Mail Merge Recipients dialog box displays the addresses that will be used. If you’re using an Excel spreadsheet as a data source, you may also be prompted to select a worksheet containing the addresses.
If there’s an address you don’t want to use, you can uncheck it.
- Make sure the right recipients are selected and click OK.
- Click Next: Write your letter.


The Mail Merge wizard moves on to step 4.
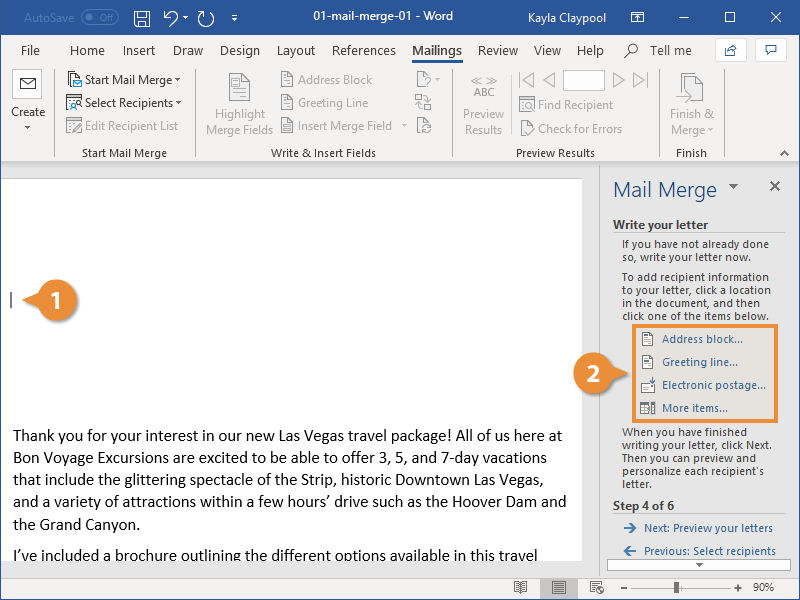
Write Your Letter
After the main document is set and the recipient list is connected and edited, you are ready to insert the merge fields in the document. The merge fields are placeholders in the document for unique information from the recipients list.
When you put a merge field in the main document, information from that field will appear for the document that is unique to that recipient.
- Click where you want the information.
- Select one of the placeholder options.
You can add merge fields from the wizard, or from the Write & Insert Fields group on the ribbon:
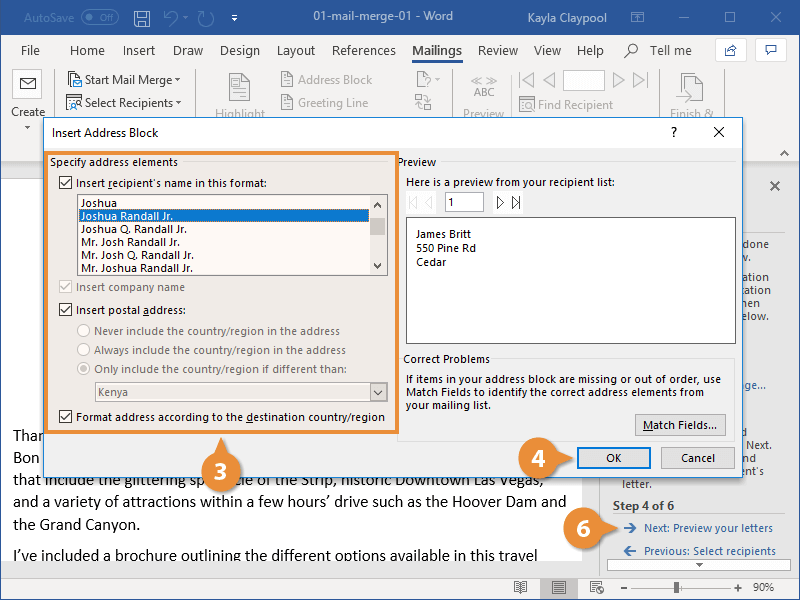
- Address Block: This is a combination of fields to insert the names and addresses of recipients.
- Greeting Line: This is a combination of fields to insert the recipient’s name in the greeting line.
- Insert Merge Field: When you click this button, a list of additional merge fields you can insert appears.
- Customize the placeholder.
- Click OK.
- (Optional) Repeat steps to add each merge field you want to include.
- Click Next: Preview your letters.
The Mail Merge wizard moves on to step 5.
Preview Your Mail Merge
Sometimes, it is helpful to see what the data will look like once it has been inserted into a document, instead of only viewing the merge field names.
You can easily preview how the mail merge will appear before finishing the mail merge. This is encouraged to make sure the results appear as you want them to.
- Use the arrow buttons in the Mail Merge pane to preview each merged document.
You can also use the arrow buttons in the Preview Results group on the ribbon.
Click the Find Recipient button in the Preview Results group or in the Mail Merge pane to search for a specific recipient.
- Click Next: Complete the merge.
The Mail Merge wizard moves on to the final step.
Complete the Merge
Once you’ve added the list of recipients and filled out a document with merge fields, the last step is to finish the merge by making a separate version of the document for each recipient.
There are a couple of different ways you can finish the mail merge:
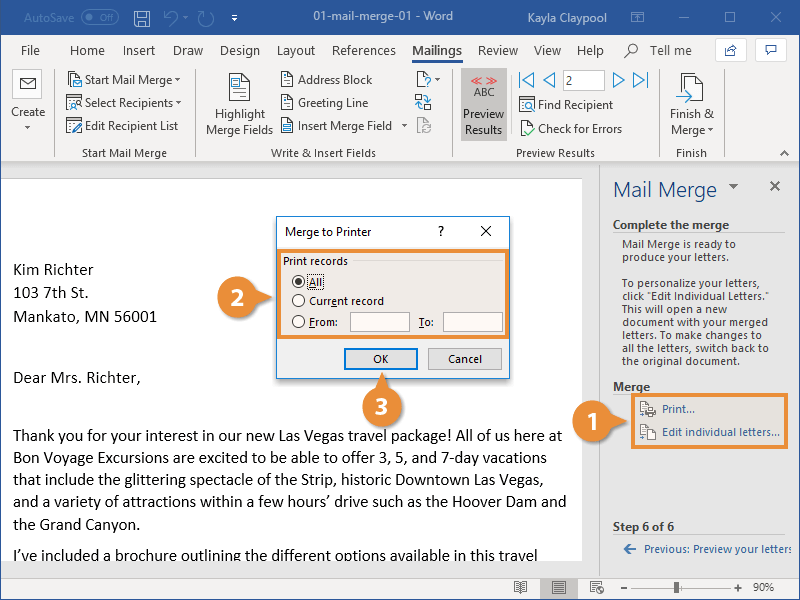
- Edit Individual Documents: Puts the results of the mail merge in a new document. You are free to edit the results of the mail merge and save and print them, just like any other document.
- Print Documents: Merges records and sends them directly to the printer.
- Select the option you want to use to finish the mail merge.
You can also click the Finish & Merge button on the ribbon and select a merge option there.
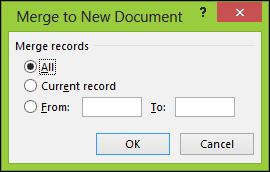
You’re also given the option to choose which records to merge. You can merge all the records in the list, only the currently displayed record, or specify a range.
- Select the records you want to merge.
- Click OK.
Word merges the main document and the information from the data source into a new Word document, or merges it and sends it to the printer, based on the option you chose.

FREE Quick Reference
Click to Download
Free to distribute with our compliments; we hope you will consider our paid training.
Mail Merge is most often used to print or email form letters to multiple recipients. Using Mail Merge, you can easily customize form letters for individual recipients. Mail merge is also used to create envelopes or labels in bulk.
This feature works the same in all modern versions of Microsoft Word: 2010, 2013, and 2016.
- In a blank Microsoft Word document, click on the Mailings tab, and in the Start Mail Merge group, click Start Mail Merge.
- Click Step-by-Step Mail Merge Wizard.
- Select your document type. In this demo we will select Letters. Click Next: Starting document.
- Select the starting document. In this demo we will use the current (blank) document. Select Use the current document and then click Next: Select recipients.
- Note that selecting Start from existing document (which we are not doing in this demo) changes the view and gives you the option to choose your document. After you choose it, the Mail Merge Wizard reverts to Use the current document.
- Select recipients. In this demo we will create a new list, so select Type a new list and then click Create.
- Write the letter and add custom fields.
- Press Enter on your keyboard and click Greeting line… to enter a greeting.
- In the Insert Greeting Line dialog box, choose the greeting line format by clicking the drop-down arrows and selecting the options of your choice, and then click OK.
- Note that the address block and greeting line are surrounded by chevrons (« »). Write a short letter and click Next: Preview your letters.


Mail Merge is one of the classic features of Microsoft Word used to produce mass documents containing unique information. Here’s how to use it.
Mail Merge is one of the classic features of Microsoft Word used to produce mass documents containing unique information. Some examples where it can be helpful include brochures, newsletters, or materials used in mass mailings. In this article, we show you how to use Mail Merge in Microsoft Word.
Note: This was written using Word 2016 but the instructions should be similar on modern versions of Word in Microsoft 365 (formerly O365).
Using the Mail Merge Feature in Microsoft Word
For this example, I will create a document inviting friends to an event. There are two components to a mail merge letter; the main document and the data source, such as the names and addresses of the individuals invited to the event. Once you have gathered the information for the data source, Word will handle combining the documents for each guest.
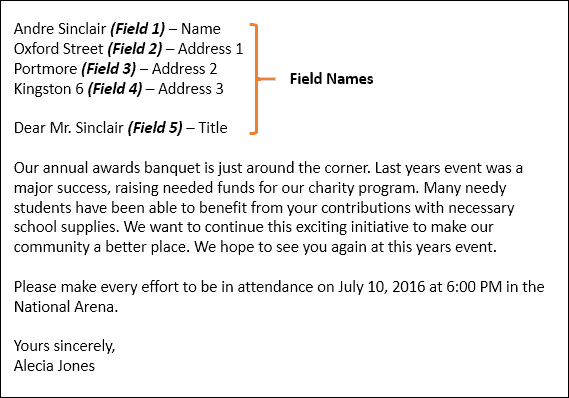
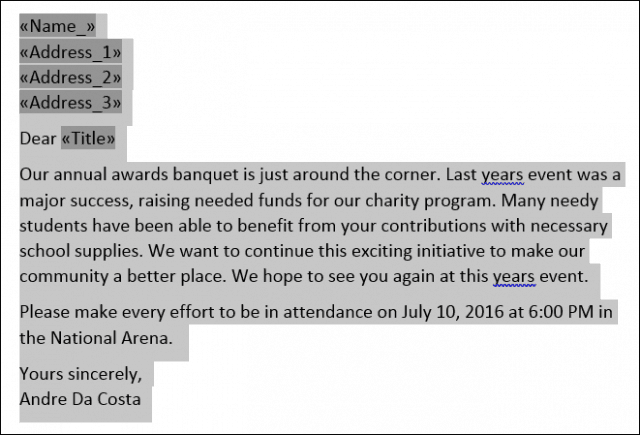
The first step is to have all the unique information for each recipient called a Field Name, such as the name, address, and salutation. Another important part of creating a mail merge document is the Form, which contains information delivered to the recipient. The sample letter below contains five fields I will need to include in each document.
Start Mail Merge Wizard
Create a new blank document in Microsoft Word and select the Mailings tab > Start Mail Merge > Step-by-Step Mail Merge Wizard.
When the Mail Merge wizard comes up, choose the Letters radio box and then click Next: Starting document.
Select Use the current document and then continue to the next step to select recipients. The Mail Merge wizard gives you the choice of using an existing document. If I already had a letter prepared, I could modify the field names as the basis for the data source.
The Mail Merge wizard is powerful. You can use multiple sources for your recipient list, including a Microsoft Access Database or Excel Spreadsheet. For this article, I will create my data source from scratch by selecting, Type a new list and then click Create.
Create and Save the Data Source
A form with pre-populated fields will be presented. This might not be ideal since we might not want some of these areas, which might confuse us. So we will delete and modify some of the field names; click the Customize Columns button to do so.
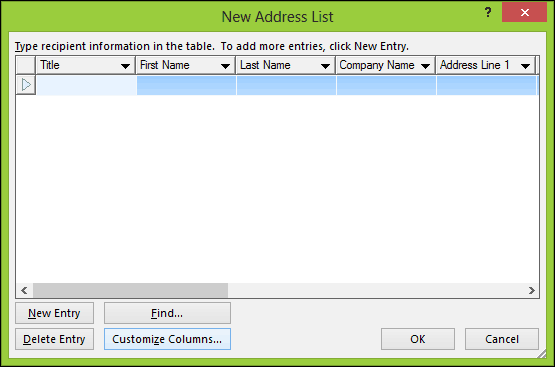
If you go back to our sample document, you will notice we only had five fields, while the pre-populated fields provided by Word total 13. Some of them are important, so we will keep just the ones we want. To delete a field, select it, then click Delete.

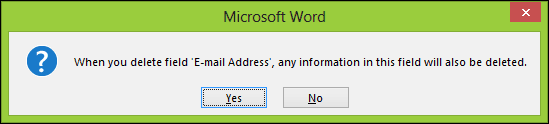
Click Yes to confirm the deletion. Repeat this step for all the sections you don’t want.
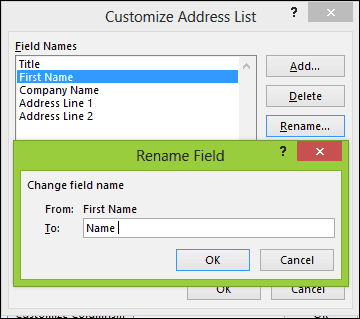
Because we don’t have some specific fields needed, we will have to rename existing fields and add new ones.
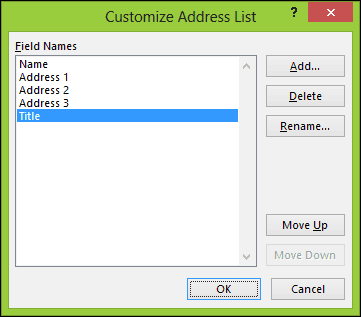
Once complete, the list of field names should match and amount to the same as described in our sample document. Click OK to confirm the changes.
Proceed to populate the fields with the names and addresses of each recipient; when complete, click OK.

Save your data source, which will merge into your final document.
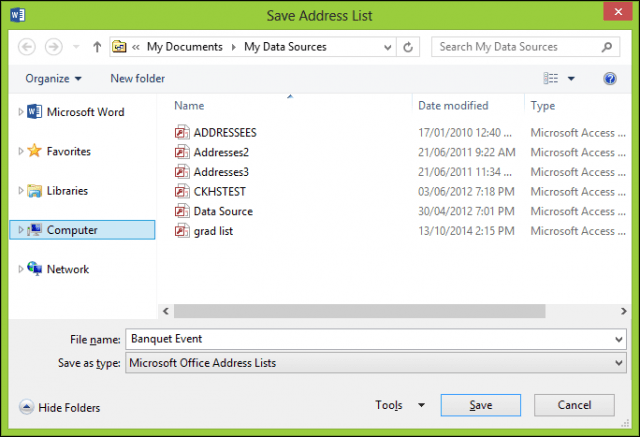
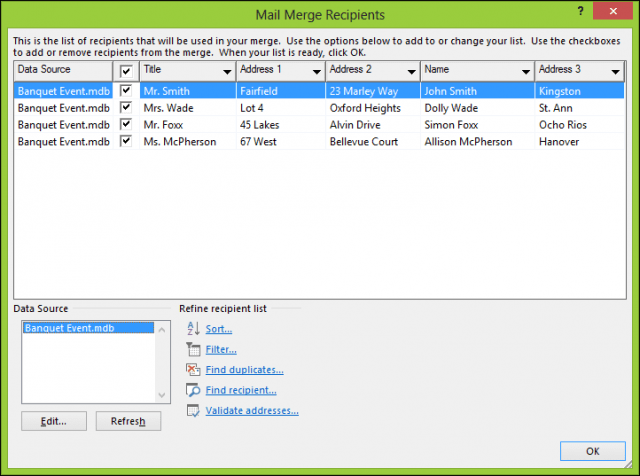
A preview of your Mail Merge Recipients will be presented. If you want to make changes such as edit or add a field, select the Data Source, then click Edit. Proceed to write your letter, then enter merge fields where necessary.
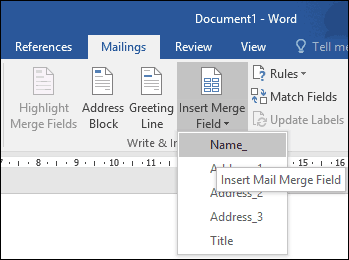
Insert Merge Fields
To insert a merge field, select the Mailings tab, click Insert Merge Field, then choose your merge field. Repeat the steps to populate your document with the appropriate merge fields.
When complete, save your letter; this will be called the Form Letter. If you know, you might use a document with a similar structure, and you can choose the option to reuse it in an existing document during the Mail Merge wizard.
Merge Final Document
Here comes the fun part, merging your document. Select the Mailings tab, then click Finish & Merge button, then click Edit Individual Documents.

Select All then click OK.
That’s it. Now all of your documents are ready to print or review.

These instructions also work in Microsoft Word 2013, 2010, and 2007. If you produce documents such as certificates, the Mail Merge functions also work in Office applications such as Microsoft Publisher.
For more tips and tricks for using Microsoft Office, check out the following articles, or browse our complete archive of Office articles.
- How to Activate and Use Inking in Word 2016
- How to Track Changes in Word 2016 Documents
- Improve Your Productivity with Tabs in Microsoft Word
![]()