
Laravel Excel v2.1.* for Laravel 5
Looking for Laravel Excel for Laravel 4? Visit the 1.3 branch


Laravel Excel brings the power of PHPOffice’s PHPExcel to Laravel 5 with a touch of the Laravel Magic. It includes features like: importing Excel and CSV to collections, exporting models, array’s and views to Excel, importing batches of files and importing a file by a config file.
- Import into Laravel Collections
- Export Blade views to Excel and CSV with optional CSS styling
- Batch imports
- A lot of optional config settings
- Easy cell caching
- Chunked and queued importer
- ExcelFile method injections
- Editing existing Excel files
- Advanced import by config files
- and many more…
Excel::create('Laravel Excel', function($excel) {

    $excel->sheet('Excel sheet', function($sheet) {

        $sheet->setOrientation('landscape');

    });

})->export('xls');
#Installation
Require this package in your composer.json and update composer. This will download the package and PHPExcel of PHPOffice.
"maatwebsite/excel": "~2.1.0"
After updating composer, add the ServiceProvider to the providers array in config/app.php
MaatwebsiteExcelExcelServiceProvider::class,
You can use the facade for shorter code. Add this to your aliases:
'Excel' => MaatwebsiteExcelFacadesExcel::class,
The class is bound to the ioC as excel
$excel = App::make('excel');
To publish the config settings in Laravel 5 use:
php artisan vendor:publish --provider="MaatwebsiteExcelExcelServiceProvider"
This will add an excel.php config file to your config folder.
Documentation
The complete documentation can be found at: http://www.maatwebsite.nl/laravel-excel/docs
Support
Support only through Github. Please don’t mail us about issues, make a Github issue instead.
Contributing
ALL bug fixes should be made to appropriate branch (e.g. 2.0 for 2.0.* bug fixes). Bug fixes should never be sent to the master branch.
More about contributing can be found at: http://www.maatwebsite.nl/laravel-excel/docs/getting-started#contributing
License
This package is licensed under LGPL. You are free to use it in personal and commercial projects. The code can be forked and modified, but the original copyright author should always be included!
We will share with you in this article how to excel and CSV import-export using maatwebsite/excel laravel package. maatwebsite/excel is a one of the best laravel packages. you need to any time in your laravel application any data store excel or CSV from database and any database data download fron excel and csv formate. you can be done this task or functionality in your laravel application help of maatwebsite/excel package.
Excel / CSV import and export is very common functionality in any application. when you have large data and you want to insert it in database then it can help a lot. as well you want back up database data into the excel or CSV file. both of functionality you can be done with maatwebsite/excel laravel package
What is new maatwebsite v.3
Here are version 3.0 many changes you can see. if you used an old version of maatwebsite/excel before then you can know all. ALL Laravel Excel 2.* methods are deprecated and will not be able to use in 3.0.
Excel::load()is removed and replaced byExcel::import($yourImport)Excel::create()is removed and replaced byExcel::download/Excel::store($yourExport)Excel::create()->string('xlsx')is removed an replaced byExcel::raw($yourExport, Excel::XLSX)- 3.0 provides no convenience methods for styling, you are encouraged to use PhpSpreadsheets native methods.
If you before never used or done Excel and CSV import-export functionality in laravel don’t worry here we will share with you all step by step. just the following steps.
In this demo example e are create one transactions table and we are export this table data into excel or CSV file and also import excel file data from the database. our table looks like this.
| id | name_on_card | card_no | exp_month | exp_year | cvv |
|----|--------------|---------|-----------|----------|-----|
|    |              |         |           |          |     |
|    |              |         |           |          |     |
|    |              |         |           |          |     |
Before implementing excel/CSV import-export functionality in laravel6 help of maatwebsite/excel package. check the following requirement.
Requirements
- PHP:
^7.0 - Laravel:
^5.5 - PhpSpreadsheet:
^1.6 - PHP extension
php_zipenabled - PHP extension
php_xmlenabled - PHP extension
php_gd2enabled
Preview

Step — 1 Package Installation
First, we need to install maatwebsite/excel package in laravel application help of the following composer command.
composer require maatwebsite/excelStep — 2 Package Configuration
The MaatwebsiteExcelExcelServiceProvider is auto-discovered and registered by default.
If you want to register it yourself, add the ServiceProvider in config/app.php:
'providers' => [
    /*
     * Package Service Providers...
     */
    MaatwebsiteExcelExcelServiceProvider::class,
]
The Excel facade is also auto-discovered.
If you want to add it manually, add the Facade in config/app.php:
'aliases' => [
    ...
    'Excel' => MaatwebsiteExcelFacadesExcel::class,
]
To publish the config, run the vendor publish command:
php artisan vendor:publish --provider="MaatwebsiteExcelExcelServiceProvider"This will create a new config file named config/excel.php. you can also change the default setting in this file and set new one options on your own requirements.
Step — 3 Create Migration
Now, we need to create a migration for transactions the table. run the following command in your terminal.
php artisan make:migration create_transactions_tblAfter running this command, then open that created file that will be created on database/migrations a folder. just open it and put the following code into that migration file.
<?php

use IlluminateSupportFacadesSchema;
use IlluminateDatabaseSchemaBlueprint;
use IlluminateDatabaseMigrationsMigration;

class Transactions extends Migration
{
    /**
     * Run the migrations.
     *
     * @return void
     */
    public function up()
    {
        Schema::create('transactions', function (Blueprint $table) {
            $table->bigIncrements('id');
            $table->string('name_on_card');
            $table->string('card_no');
            $table->string('exp_month');
            $table->string('exp_year');
            $table->string('cvv');
            $table->timestamps();
        });
    }

    /**
     * Reverse the migrations.
     *
     * @return void
     */
    public function down()
    {
        Schema::dropIfExists('transactions');
    }
}
and then run php artisan migrate commands in your terminal. then your transactions table will be created into your database, which you set into in your project .env file.
Step — 4 Create Model
After, create trasactions table, then you need to create a model. simple run the following command in your terminal
php artisan make:model TransactionAfter, hit this command app/Transaction.php file will be created automatically. open it and make the following changes into Transaction.php file.
app/Transaction.php
<?php

namespace App;

use IlluminateDatabaseEloquentModel;

class Transaction extends Model
{
    protected $table = 'transactions';
    protected $guarded = array();
}
Step — 5 Create Routes
After installing package and configure all the set up then the next things is make following three routes in routes/web.php file.
// Route for view/blade file.
Route::get('importExportView', '[email protected]')->name('importExportView');
// Route for export/download tabledata to .csv, .xls or .xlsx
Route::get('exportExcel/{type}', '[email protected]')->name('exportExcel');
// Route for import excel data to database.
Route::post('importExcel', '[email protected]')->name('importExcel');
Step — 6 Create Import Class
maatwebsite 3 version provides a way to built import class and we have to use it in the controller. So it would be a great way to create a new Import class. So you have to run following command and change following code on that file:
php artisan make:import TransactionsImport --model=TransactionExcel demo screenshot for import

app/Imports/TransactionsImport.php
<?php

namespace AppImports;

use AppTransaction;
use MaatwebsiteExcelConcernsToModel;

class TransactionsImport implements ToModel
{
    /**
    * @param array $row
    *
    * @return IlluminateDatabaseEloquentModel|null
    */
    public function model(array $row)
    {
        return new Transaction([
            'name_on_card'     => $row[0],
            'card_no'    => $row[1],
            'exp_month'    => $row[2],
            'exp_year'    => $row[3],
            'cvv'    => $row[4],
        ]);
    }
}
Step — 7 Create Export Class
maatwebsite 3 versions provides a way to built export class and we have to use it in the controller. So it would be a great way to create a new Export class. So you have to run following command and change following code on that file:
php artisan make:export TransactionsExport --model=Transactionapp/Exports/TransactionsExport.php
<?php

namespace AppExports;

use AppTransaction;
use MaatwebsiteExcelConcernsWithHeadings;
use MaatwebsiteExcelConcernsWithMapping;
use MaatwebsiteExcelConcernsFromCollection;

class TransactionsExport implements FromCollection, WithHeadings, WithMapping
{
    /**
    * @return IlluminateSupportCollection
    */
    public function collection()
    {
        return Transaction::all();
    }

    public function headings(): array
    {
        return [
            'Name On Card',
            'Card No.',
            'Exp Month',
            'Exp. Year',
            'CVV',
        ];
    }

    public function map($transaction): array
    {
        return [
            $transaction->name_on_card,
            'XXXXXXXXXXXX' . substr($transaction->card_no, -4, 4),
            $transaction->exp_month,
            $transaction->exp_year,
            $transaction->cvv,
        ];
    }
}
Step — 8 Create Controller
After, done above two routes then we need to create MaatwebsiteController.php controller file help of following artisan command.
php artisan make:controller MaatwebsiteControllerAfter running this command your MaatwebsiteController.php file automatic created on app/Http/Controllers the folder. just open it and write the following code into that file.
app/Http/Controllers/MaatwebsiteController.php
<?php

namespace AppHttpControllers;

use IlluminateHttpRequest;
use AppExportsTransactionsExport;
use AppImportsTransactionsImport;
use MaatwebsiteExcelFacadesExcel;

class MaatwebsiteController extends Controller
{
    /**
    * @return IlluminateSupportCollection
    */
    public function importExportView()
    {
       return view('maatwebsiteexcel');
    }

    /**
    * @return IlluminateSupportCollection
    */
    public function exportExcel($type)
    {
        return Excel::download(new TransactionsExport, 'transactions.'.$type);
    }

    /**
    * @return IlluminateSupportCollection
    */
    public function importExcel(Request $request)
    {
        Excel::import(new TransactionsImport,$request->import_file);

        return back();
    }
}
Step — 9 Create Blade File
After done the controller file then we create one laravel blade HTML file that simple design. Now we are creating one simple blade file in resources/views/maatwebsiteexcel.blade.php file and here we are making a very simple HTML layout for import and export excel or CSV.
resources/views/maatwebsiteexcel.blade.php
@extends('layouts.app')

@section('content')
<div class="container">
	@if($message = Session::get('success'))
		<div class="alert alert-info alert-dismissible fade in" role="alert">
	      <button type="button" class="close" data-dismiss="alert" aria-label="Close">
	        <span aria-hidden="true">×</span>
	      </button>
	      <strong>Success!</strong> {{ $message }}
	    </div>
	@endif
	{!! Session::forget('success') !!}
	<br />
	<a href="{{ URL::to('exportExcel/xls') }}"><button class="btn btn-success">Download Excel xls</button></a>
	<a href="{{ URL::to('exportExcel/xlsx') }}"><button class="btn btn-success">Download Excel xlsx</button></a>
	<a href="{{ URL::to('exportExcel/csv') }}"><button class="btn btn-success">Download CSV</button></a>
	<form style="border: 4px solid #a1a1a1;margin-top: 15px;padding: 10px;" action="{{ route('importExcel') }}" class="form-horizontal" method="post" enctype="multipart/form-data">
		{{ csrf_field() }}
		<input type="file" name="import_file" />
		<button class="btn btn-primary">Import File</button>
	</form>
</div>
@endsection
Conclusion
As you can see, Excel import-export is very easy to use in laravel application help of maatwebsite/excel package.
We hope these tutorials help everyone. if you have any issues or questions reagarding excel import export so please comment below. Thanks..
Laravel Excel is designed at being a Laravel-flavoured PhpSpreadsheet. It is a manageable and elegant wrapper around PhpSpreadsheet to simplify exports and imports. PhpSpreadsheet is a php based library that enables you to read and write different spreadsheet file formats, like Excel and LibreOffice Calc. Laravel Excel has the following features:
- Easily export collections to Excel.
- Export queries with automatic chunking for better performance.
- Queue exports for better performance.
- Easily export Blade views to Excel.
- Easily import to collections.
- Read the Excel file in chunks.
- Handle the import inserts in batches.
If you want to create easy import and export, excel file functionality, this laravel maatwebsite/excel tutorial is best for you.
At the end of this tutorial, you will be able to download or import excel & CSV files directly from the database in laravel application.
Requirements
- PHP:
^8.0|^8.1 - Laravel:
9.0 - PhpSpreadsheet:
^1.15 - PHP extension
php_zipenabled - PHP extension
php_xmlenabled - PHP extension
php_gd2enabled - PHP extension
php_iconvenabled - PHP extension
php_simplexmlenabled - PHP extension
php_xmlreaderenabled - PHP extension
php_zlibenabled
Step 1: Install Laravel Project
First, open Terminal and run the following command to create a fresh laravel project:
composer create-project --prefer-dist laravel/laravel laravel-excelor, if you have installed the Laravel Installer as a global composer dependency:
laravel new laravel-excelStep 2: Configure Database Details
After, Installation Go to the project root directory, open .env file, and set database detail as follow:
DB_CONNECTION=mysql
DB_HOST=127.0.0.1
DB_PORT=3306
DB_DATABASE=<DATABASE NAME>
DB_USERNAME=<DATABASE USERNAME>
DB_PASSWORD=<DATABASE PASSWORD>
Read Also: Laravel 9 CRUD Example Tutorial for Beginners
Step 3: Install maatwebsite/excel package
You can install Laravel Excel via composer. You’ve to run this command for the installation.
composer require maatwebsite/excelIf composer require fails on Laravel 9 because of the simple-cache dependency, you will have to specify the psr/simple-cache version as ^2.0 in your composer.json to satisfy the PhpSpreadsheet dependency. You can install both at the same time as:
composer require psr/simple-cache:^2.0 maatwebsite/excelRegister Plugin’s Service in Providers & Aliases
You can have the following code placed inside the config/app.php file.
'providers' => [
  MaatwebsiteExcelExcelServiceProvider::class,
 ],

'aliases' => [
  'Excel' => MaatwebsiteExcelFacadesExcel::class,
],
Execute the vendor, publish the command, and publish the config.
php artisan vendor:publish --provider="MaatwebsiteExcelExcelServiceProvider" --tag=configThis will create a new config file named config/excel.php.
Step 4: Generate Fake Data and Migrate Table
In the First step, We migrate the user table. After migration run successfully We moved to the second step.
php artisan migrateIn the Second Step, We generate the fake record. Here We use tinker to generate the fake records. You can use a different method as of your requirement.
php artisan tinkerAfter Opening the tinker, you need to run this command to generate the fake records in our database.
User::factory()->count(100)->create();Step 5: Create a Routes
In this step, We will add a route to handle requests for import and export files.
use AppHttpControllersUserController;

Route::get('/file-import',[UserController::class,'importView'])->name('import-view');
Route::post('/import',[UserController::class,'import'])->name('import');
Route::get('/export-users',[UserController::class,'exportUsers'])->name('export-users');
Step 6: Create Import Class
Maatwebsite provides a way to build an import class and we have to use it in the controller. So it would be a great way to create a new Import class. So you have to run the following command and change the following code on that file:
php artisan make:import ImportUser --model=Userapp/Imports/ImportUser.php
<?php

namespace AppImports;

use AppModelsUser;
use MaatwebsiteExcelConcernsToModel;

class ImportUser implements ToModel
{
    /**
    * @param array $row
    *
    * @return IlluminateDatabaseEloquentModel|null
    */
    public function model(array $row)
    {
        return new User([
            'name' => $row[0],
            'email' => $row[1],
            'password' => bcrypt($row[2]),
        ]);
    }
}
Here you can see map CSV or excel column value to our Eloquent Model. You need to format that CSV or excel column as you map in your import class.
Read Also: How to Install MongoDB on Ubuntu 20.04
Step 7: Create Export Class
Maatwebsite provides a way to build an export class and we have to use it in the controller. So it would be a great way to create a new export class. So you have to run the following command and change the following code on that file:
php artisan make:export ExportUser --model=Userapp/Exports/ExportUser.php
<?php

namespace AppExports;

use AppModelsUser;
use MaatwebsiteExcelConcernsFromCollection;

class ExportUser implements FromCollection
{
    /**
    * @return IlluminateSupportCollection
    */
    public function collection()
    {
        return User::select('name','email')->get();
    }
}
Step 8: Create Controller
Next, We have to create a controller to display a form to upload CSV or excel file records. Let’s Create a controller named UserController using the command given below:
php artisan make:controller UserControllerOnce the above command execute, it will create a controller file UserController.php in the app/Http/Controllers directory. Open the UserController.php file and put this code into that file.
<?php

namespace AppHttpControllers;

use IlluminateHttpRequest;
use MaatwebsiteExcelFacadesExcel;
use AppImportsImportUser;
use AppExportsExportUser;
use AppModelsUser;

class UserController extends Controller
{
    public function importView(Request $request){
        return view('importFile');
    }

    public function import(Request $request){
        Excel::import(new ImportUser, $request->file('file')->store('files'));
        return redirect()->back();
    }

    public function exportUsers(Request $request){
        return Excel::download(new ExportUser, 'users.xlsx');
    }
}
Step 9: Create Blade / View Files
We have reached the last step. In general, here we need to formulate the view for handling importing and exporting through the frontend. Create a resources/views/importFile.blade.php file to set up the view. Place the following code inside the blade view file:
<!DOCTYPE html>
<html lang="{{ str_replace('_', '-', app()->getLocale()) }}">

<head>
    <meta charset="utf-8">
    <meta name="viewport" content="width=device-width, initial-scale=1">
    <title>Laravel 9 Import Export Excel & CSV File - TechvBlogs</title>
    <link rel="stylesheet" href="https://stackpath.bootstrapcdn.com/bootstrap/4.5.0/css/bootstrap.min.css">
</head>

<body>
    <div class="container mt-5 text-center">
        <h2 class="mb-4">
            Laravel 9 Import Export Excel & CSV File - <a href="https://techvblogs.com/blog/laravel-9-import-export-excel-csv-file" target="_blank">TechvBlogs</a>
        </h2>
        <form action="{{ route('import') }}" method="POST" enctype="multipart/form-data">
            @csrf
            <div class="form-group mb-4">
                <div class="custom-file text-left">
                    <input type="file" name="file" class="custom-file-input" id="customFile">
                    <label class="custom-file-label" for="customFile">Choose file</label>
                </div>
            </div>
            <button class="btn btn-primary">Import Users</button>
            <a class="btn btn-success" href="{{ route('export-users') }}">Export Users</a>
        </form>
    </div>
</body>

</html>
Run Laravel Application
Lastly, we have to run the Laravel application, for this, we have to go to the command prompt, and write the following command:
php artisan serveAfter executing this command, Open http://localhost:8000/file-import in your browser.
Thank you for reading this blog.
Read Also: How To Install Vue 3 in Laravel 9 From Scratch
If you want to manage your VPS / VM Server without touching the command line go and Checkout this link. ServerAvatar allows you to quickly set up WordPress or Custom PHP websites on VPS / VM in a matter of minutes. You can host multiple websites on a single VPS / VM, configure SSL certificates, and monitor the health of your server without ever touching the command line interface.
If you have any queries or doubts about this topic please feel free to contact us. We will try to reach you.
Jun 08, 2021 . Admin
Hi Guys,
In this article, I am going to show you how to import/export excel and csv file in laravel 8 application.so We will learn how to import and export excel file in laravel 8 application. I written simple example for laravel 8 maatwebsite/excel package. I will justify you import export excel and csv file using maatwebsite/excel package in laravel 8.
In this post i will give simple and facile example for import/export excel & csv file in laravel 8 and how to export excel file from database in laravel 8. you can easily download excel & csv file from database in laravel 8.
So, We will easy to implement and create import data from excel to database in laravel 8. i will use maatwebsite/excel composer package for import and export task. maatwebsite/excel provide simple way to import and export using database model.
Here i will show you full example of import and export excel file to database in laravel 8. So let’s started first of follow few step to get example.
Step 1 : Install Laravel 8
In the first step, we need to go from scratch , get fresh laravel 8 version application So let’s open terminal and run bellow command to install fresh laravel project.
composer create-project --prefer-dist laravel/laravel blog
Step 2 : Database Configuration
In this second step, we will crate database Configuration for example database name, username, password etc for our crud application of laravel 8 So lets open .env file and fill all deatils like as bellow:
Path : .env
DB_CONNECTION=mysql
DB_HOST=127.0.0.1
DB_PORT=3306
DB_DATABASE=here your database name(blog)
DB_USERNAME=here database username(root)
DB_PASSWORD=here database password(root)
After complete configuration and migrate all the tabel so let’s open terminal run bellow artisan command:
php artisan migrate
Step 3 : Install maatwebsite/excel Package
In this third step, we will can install maatwebsite/excel package using bellow composer command so let’s open terinal and run bellow command:
composer require maatwebsite/excel
Now open config/app.php file and add service provider and aliase.
Path : config/app.php
....
'providers' => [
	....
	MaatwebsiteExcelExcelServiceProvider::class,
],

'aliases' => [
	....
	'Excel' => MaatwebsiteExcelFacadesExcel::class,
],
.....
Step 4: Create Dummy Records
First of all we need to some insert record in our daabase so basically we will insert In this step, you can create some dummy record in «users» table so let’s run bellow factory command:
php artisan tinker
User::factory()->count(50)->create()
Step 5 : Add Route
In this step, We need to create three route for export file and add form for import file.
Path : routes/web.php
<?php
use AppHttpControllersImportexportController;
use IlluminateSupportFacadesRoute;

/*
|--------------------------------------------------------------------------
| Web Routes
|--------------------------------------------------------------------------
|
| Here is where you can register web routes for your application. These
| routes are loaded by the RouteServiceProvider within a group which
| contains the "web" middleware group. Now create something great!
|
*/

// Export Import Controller
Route::get('export', [ImportexportController::class,'export'])->name('export');
Route::get('import-export-view', [ImportexportController::class,'index']);
Route::post('import', [ImportexportController::class,'import'])->name('import');
Step 6: Create Import Class
in this step we will provide maatwebsite package way to built import class and we have to use in controller. So it would be great way to engender new Import class. So you have to run following command and change following code on that file:
php artisan make:import UsersImport --model=Models/User
Path : app/Imports/UsersImport.php
<?php

namespace AppImports;

use AppModelsUser;
use MaatwebsiteExcelConcernsToModel;

class UsersImport implements ToModel
{
    /**
    * @param array $row
    *
    * @return IlluminateDatabaseEloquentModel|null
    */
    public function model(array $row)
    {
        return new User([
            'name' => $row[0],
            'email' => $row[1],
            'password' => Hash::make('123456'),
        ]);
    }
}
You can downpload demo csv file from here: Demo CSV File
Step 7: Create Export Class
In this step maatwebsite package provide way to built export class and we have to use in controller. So it would be great way to create new Export class. So you have to run following command and change following code on that file:
php artisan make:export UsersExport --model=Models/User
Path : app/Imports/UsersExport.php
<?php

namespace AppExports;

use AppModelsUser;
use MaatwebsiteExcelConcernsFromCollection;

class UsersExport implements FromCollection
{
    /**
    * @return IlluminateSupportCollection
    */
    public function collection()
    {
        return User::all();
    }
}
Step 8: Create Controller
In this step, we require an new controller as ImportexportController. this controller will manage all importExportView, export and import request and return replication. you can engender ImportexportController So let’s run bellow artisan command to engender controller:
php artisan make:controller ImportexportController
Path : app/Http/Controllers/ImportexportController.php
<?php

namespace AppHttpControllers;

use IlluminateHttpRequest;
use AppExportsUsersExport;
use AppImportsUsersImport;
use MaatwebsiteExcelFacadesExcel;

class ImportexportController extends Controller
{
    /**
     * Write code on Method
     *
     * @return response()
     */
    public function index()
    {
        return view('importView');
    }

    /**
     * Write code on Method
     *
     * @return response()
     */
    public function export()
    {
        return Excel::download(new UsersExport, 'test.xlsx');
    }

    /**
     * Write code on Method
     *
     * @return response()
     */
    public function import()
    {
        Excel::import(new UsersImport,request()->file('file'));

        return back();
    }

}
Step 9: Create Blade File
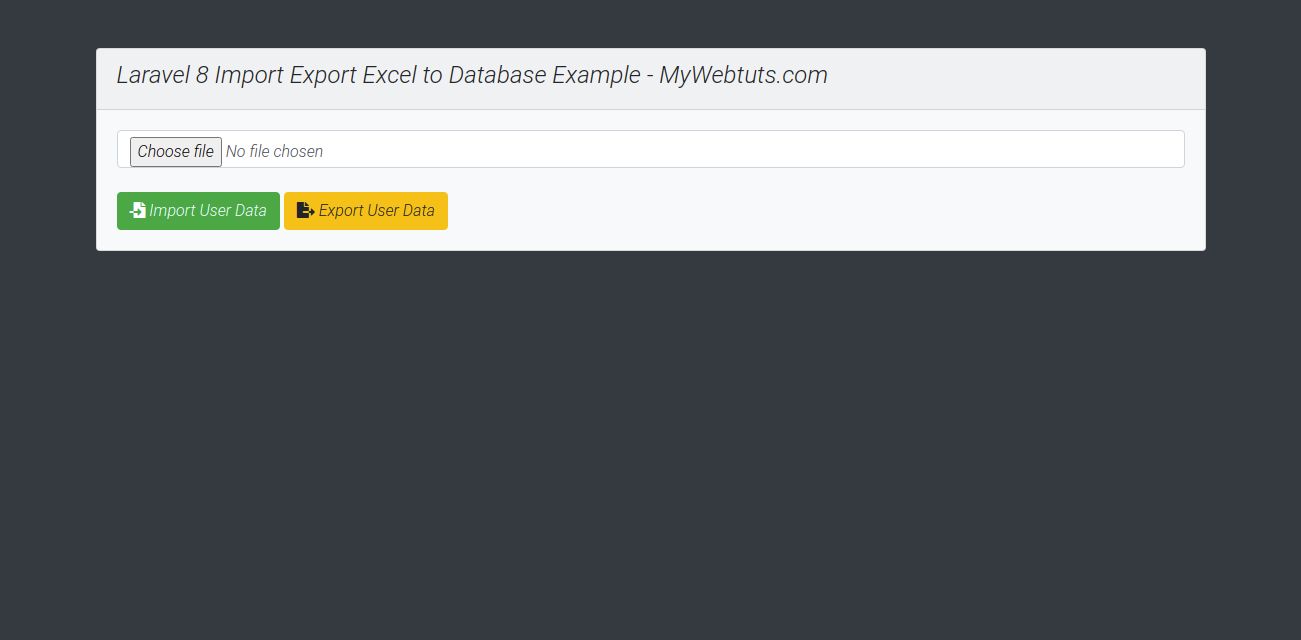
Path : resources/views/importView.blade.php
<!DOCTYPE html>
<html>
<head>
    <title>Laravel 8 Import Export Excel to Database Example - MyWebtuts.com</title>
    <link rel="stylesheet" href="https://cdnjs.cloudflare.com/ajax/libs/twitter-bootstrap/4.1.3/css/bootstrap.min.css" />
    <link rel="stylesheet" href="https://cdnjs.cloudflare.com/ajax/libs/font-awesome/5.15.3/css/all.min.css">
</head>
<body class="bg-dark">

<div class="container mt-5">
    <div class="card bg-light mt-3">
        <div class="card-header">
            <h4>Laravel 8 Import Export Excel to Database Example - MyWebtuts.com</h4>
        </div>
        <div class="card-body">
            <form action="{{ route('import') }}" method="POST" enctype="multipart/form-data">
                @csrf
                <input type="file" name="file" class="form-control">
                <br>
                <button class="btn btn-success"><i class="fas fa-file-import"></i> Import User Data</button>
                <a class="btn btn-warning" href="{{ route('export') }}"><i class="fas fa-file-export"></i> Export User Data</a>
            </form>
        </div>
    </div>
</div>

</body>
</html>
So, Let’s get run our laravel 8 application Now we are ready to run our crud application example with laravel 8 so run bellow command for quick run:
php artisan serve
Now you can open bellow URL on your browser:
localhost:8000/import-export-view
Preview
It will help you…
1. Введение
Laravel Excel интегрирован в Laravel 5PHPOffice В комплектеPHPExcel, Чтобы упростить импорт и экспорт файлов Excel / CSV с элегантным и выразительным кодом.
Адрес проекта на GitHub:https://github.com/Maatwebsite/Laravel-Excel。
В этой статье мы будем использовать Laravel Excel для простого импорта и экспорта файлов Excel в Laravel.
2. Установка и настройка
Установите зависимости с помощью Composer
Сначала установите зависимости с помощью Composer в корневой каталог проекта Laravel:
composer require maatwebsite/excel
Настройка после установки
вconfig/app.phpЗарегистрированные поставщики услуг дляprovidersМассив:
MaatwebsiteExcelExcelServiceProvider::class,
То же самое вconfig/app.phpЗарегистрируйте фасад наaliasesМассив:
'Excel' => MaatwebsiteExcelFacadesExcel::class,
Если вы хотите сделать больше пользовательских конфигураций для Laravel Excel, выполните следующую Artisan-команду:
php artisan vendor:publish
После успешного выполнения он будетconfigСоздайте файл конфигурации в каталогеexcel.php。
3. Экспорт файла Excel.
Чтобы продемонстрировать функции, связанные с Laravel Excel, мы создаем чистый контроллер для этого теста.ExcelController.php:
php artisan make:controller ExcelController --plain
Затем вroutes.phpОпределите связанные маршруты в:
Route::get('excel/export','[email protected]');
Route::get('excel/import','[email protected]');
Далее мы сначалаExcelController.phpОпределено вexportМетод достижения функции экспорта:
<?php

namespace AppHttpControllers;

use IlluminateHttpRequest;
use AppHttpRequests;
use AppHttpControllersController;

use Excel;

class ExcelController extends Controller
{
         // Экспорт
public function export(){
    $cellData = Student::get();
    $date = [];
         $ date [0] = ['Имя', 'Идентификатор студента', 'Класс', 'Пол', 'Телефон', 'Электронная почта', 'WeChat'];
    foreach ($cellData as $k=>$v){
                 $ date [$ k + 1] ['имя'] = $ v-> stu_name;
                 $ date [$ k + 1] ['номер студента'] = $ v-> stu_no;
                 $ date [$ k + 1] ['класс'] = $ v-> stu_class;
                 $ date [$ k + 1] ['Пол'] = $ v-> stu_sex;
                 $ date [$ k + 1] ['Телефон'] = $ v-> stu_tel;
                 $ date [$ k + 1] ['Почтовый ящик'] = $ v-> stu_email;
                 $ date [$ k + 1] ['WeChat'] = $ v-> stu_wei;
    }
         $ name = 'Информационная форма студента';

    Excel::create($name,function($excel) use ($date){

        $excel->sheet('score', function($sheet) use ($date){

            $sheet->rows($date);

        });

    })->store('xlsx')->export('xlsx');

}

Если вы хотите экспортировать файл csv или xlsx, просто добавьтеexportПараметры в методе можно изменить на csv или xlsx.
Если вы хотите сохранить файл Excel на сервере, вы можете использоватьstoreметод:
Excel :: create ('оценки учащихся', функция ($ excel) use ($ cellData) {
     $excel->sheet('score', function($sheet) use ($cellData){
         $sheet->rows($cellData);
     });
})->store('xls')->export('xls');
Файл сохраняется вstorage/exportsВ каталоге, если в имени файла есть искаженные китайские символы, измените имя файла с приведенным выше кодом следующим образом:
iconv ('UTF-8', 'GBK', 'оценки учащихся')
4. Импортируйте файл Excel.
Мы импортируем файл Excel, который мы только что сохранили на сервере. Импортировать очень просто. ИспользуйтеExcelНа фасадеloadМетод может быть:
public function import(){

         $ filePath = 'общедоступная / экспортная / информация о студенте'. '. xlsx';

    Excel::load($filePath, function($reader) {
        $date = [];
        $data = json_decode($reader->all());

        foreach($data as $k=>$v){
                         $ date [$ k] ['stu_name'] = $ data [$ k] -> имя;
                         $ date [$ k] ['stu_no'] = $ data [$ k] -> номер студента;
                         $ date [$ k] ['stu_class'] = $ data [$ k] -> класс;
                         $ date [$ k] ['stu_sex'] = $ data [$ k] -> Пол;
                         $ date [$ k] ['stu_tel'] = $ data [$ k] -> Телефон;
                         $ date [$ k] ['stu_email'] = $ data [$ k] -> Электронная почта;
                         $ date [$ k] ['stu_wei'] = $ data [$ k] -> WeChat;
            $rel =Student::create($date[$k]);
            if ($rel){
                echo 'success';
            }else{
                echo 'fail';
            }
        }
    });
}
loadМетод основан на использовании корневого пути проекта в качестве корневого каталога.Точно так же мы перекодировали китайский язык, иначе будет выведено сообщение о том, что файл не существует.
For web applications, importing Excel sheet data into our database and exporting data from the database into an Excel sheet, is an important feature. Because of this feature, we can easily perform batch import/export data by the web application. It is difficult in other Frameworks but easiest in laravel 8. It gives Maatwebsite/excel package to easily import/export data. In this article, we learn about, how data is exported and imported.
Features:
- Effectively send out assortments to Excel.
- Send out questions with programmed piecing for better execution.
- Line sends out for better execution.
- Effectively send out Blade perspectives to Excel.
- Effectively import to accumulations.
- Peruse the Excel record in pieces.
- Handle the import embeds in clumps.
Steps to laravel Import Export excel data: We want to follow a few steps to import and export data easily. There are 9 easy steps to follow.
- Install new laravel project
- Configure Database details and model
- Install maatwebsite/excel package
- Create Routes
- Create import class for import data
- Create an export class for export data
- Create controller
- Create blade / view files
- Run laravel project
1. Install new laravel project: In step first, create a new laravel project named laravel-excel. Use the below command to create a new laravel project.
composer create-project laravel/laravel excel
2. Configure Database details and make a model: In the second step, set up database configuration in the .env file in laravel 8.
PHP
DB_CONNECTION=mysql
DB_HOST=127.0.0.1
DB_PORT=8258
DB_DATABASE=laravel
DB_USERNAME=localhost
DB_PASSWORD=
Make model: Then make a new model named User model to connect with the user table in the database. In user, the table contains various fields like ID, name, phone, and email.
3. Install maatwebsite/excel Package: Now, using composer we install package name maatwebsite/excel to export and import data by using composer
composer require maatwebsite/excel
After installing the package we want to register the plugin’s service in providers and aliases.
We want to write the following code into the config/app.php file:
PHP
<?php
'providers' => [
MaatwebsiteExcelExcelServiceProvider::class, ],
'aliases' => [
'Excel' =>
MaatwebsiteExcelFacadesExcel::class, ],
?>
To publish the above configuration execute the vendor:publish command:
php artisan vendor:publish –provider=”MaatwebsiteExcelExcelServiceProvider” –tag=config
This command is to create a new config file config/excel.php
4. Create Routes: Then we create routes to handle requests from import and export files.
PHP
<?php
use AppHttpControllersUserController;
Route::get('/file-import',[UserController::class,
'importView'])->name('import-view');
Route::post('/import',[UserController::class,
'import'])->name('import');
Route::get('/export-users',[UserController::class,
'exportUsers'])->name('export-users');
?>
5. Create Import class import for import data: The package maatwebsite/excel provides you to build an import class file. Using the following command, we create an import class file.
php artisan make:import ImportUser --model=User
The file will create at the app/Imports/ImportUser.php path:
PHP
<?php
namespace AppImports;
use AppModelsUser;
use MaatwebsiteExcelConcernsToModel;
class ImportUser implements ToModel
{
public function model(array $row)
{
return new User([
'name' => $row[0],
'email' => $row[1],
'password' => bcrypt($row[2]),
]);
}
}
6. Create an Export class for export data: The package maatwebsite/excel provides you to build an export class file. Using the following command, we create an export class file.
php artisan make:export ExportUser --model=User
The file will create at the app/Exports/ExportUser.php path:
PHP
<?php
namespace AppExports;
use AppModelsUser;
use MaatwebsiteExcelConcernsFromCollection;
class ExportUser implements FromCollection {
public function collection()
{
return User::select('name','email')->get();
}
}
?>
7. Create Controller: To display data from the database, we need to create one controller. Using the below command we create a controller named UserController.
php artisan makes: controller UserController
The above command will create a controller file UserController.php at the path app/Http/controllers directory.
Write the below code into the UserController.php file:
PHP
<?php
namespace AppHttpControllers;
use IlluminateHttpRequest;
use MaatwebsiteExcelFacadesExcel;
use AppImportsImportUser;
use AppExportsExportUser;
use AppModelsUser;
class UserController extends Controller
{
public function importView(Request $request){
return view('importFile');
}
public function import(Request $request){
Excel::import(new ImportUser,
$request->file('file')->store('files'));
return redirect()->back();
}
public function exportUsers(Request $request){
return Excel::download(new ExportUser, 'users.xlsx');
}
}
?>
8. Create Blade/View file: To handle export and import at frontend of a web application, we need to create a view or blade file. Create a blade file at resources/views/importFile.blade.php:
HTML
<!DOCTYPE html>
<html>
<head>
<title> Import and Export Excel data to database Using Laravel 5.8 </title>
<link rel="stylesheet"
href=
</head>
<body>
<h6> Import and Export Excel data to
database Using Laravel 5.8
</h6>
<div class="container">
<div class="card bg-light mt-3">
<div class="card-header">
Import and Export Excel data
to database Using Laravel 5.8
</div>
<div class="card-body">
<form action="{{ route('import') }}"
method="POST"
enctype="multipart/form-data">
@csrf
<input type="file" name="file"
class="form-control">
<br>
<button class="btn btn-success">
Import User Data
</button>
<a class="btn btn-warning"
href="{{ route('export') }}">
Export User Data
</a>
</form>
</div>
</div>
</div>
</body>
</html>
9. Run laravel project: Run the below command on command prompt and check http://localhost:8000/file-import in the browser:
php artisan serve
Output:

Laravel Import Export
Laravel 9 Export data in excel and csv file using laravel
15-03-2022
| Share:
https://www.fundaofwebit.com/post/how-to-export-data-in-excel-file-using-laravel-9
Laravel 9 Export data in excel and csv file using laravel from database.
In this tutorial, you will be learning how to export data to excel file in laravel 9. So to export data in excel and csv in Laravel, use the maatwebsite/excel 3.1 package. So start with Laravel Excel Export.
Step 1: Install maatwebsite/excel Package with following command:
composer require psr/simple-cache:^1.0 maatwebsite/excel
If you are using less than laravel 9 version, then install with below command:
composer require maatwebsite/excel
If you are using less than laravel 9 version, lets add it manually in the following path: config/app.php and add service provider and alias:
‘providers’ => [
….
MaatwebsiteExcelExcelServiceProvider::class,
],
‘aliases’ => [
….
‘Excel’ => MaatwebsiteExcelFacadesExcel::class,
],
after adding the provider and aliases, run the below command to pushlish.
php artisan vendor:publish —provider=«MaatwebsiteExcelExcelServiceProvider» —tag=config
Step 2: Create Export Class with the following command:
php artisan make:export StudentsExport
Step 3: After Export created successfully, Open StudentsExport.php file in the following path: app/Exports/StudentsExport.php and paste the below code:
<?php
namespace AppExports;
use AppModelsStudent;
use IlluminateContractsViewView;
use MaatwebsiteExcelConcernsFromView;
class StudentsExport implements FromView
{
public function view(): View
{
return view(‘exports.studentexport’, [‘students’ => Student::all()]);
}
}
Step 4: Create a file named studentexport.blade.php in following path: resources/views/exports/studentexport.blade.php and paste below code:
This file is going to be converted in Excel Sheet when you export data. This file is called in Step 3.
<!DOCTYPE html>
<html lang=«en»>
<head>
<meta charset=«UTF-8»>
<meta name=«viewport» content=«width=device-width, initial-scale=1.0»>
<meta http-equiv=«X-UA-Compatible» content=«ie=edge»>
<title>Export Student Data</title>
</head>
<body>
<table>
<thead>
<tr>
<th>ID</th>
<th>Name</th>
<th>Email</th>
<th>Phone</th>
<th>Course</th>
<th>Created At</th>
</tr>
</thead>
<tbody>
@foreach($students as $student)
<tr>
<td>{{ $student->id }}</td>
<td>{{ $student->name }}</td>
<td>{{ $student->email }}</td>
<td>{{ $student->phone }}</td>
<td>{{ $student->course }}</td>
<td>{{ $student->created_at->format(‘d-m-Y’) }}</td>
</tr>
@endforeach
</tbody>
</table>
</body>
</html>
Step 5: Create a controller eg: StudentController.php and paste the below code in it.
<?php
namespace AppHttpControllers;
use IlluminateHttpRequest;
use AppExportsStudentsExport;
use MaatwebsiteExcelFacadesExcel;
class StudentController extends Controller
{
public function index()
{
return view(‘student.view’);
}
public function exportExcel()
{
return Excel::download(new StudentsExport, ‘students.xlsx’);
}
}
Step 6: Define the Routes in following path:
Route::get(‘students’, [AppHttpControllersStudentController::class, ‘index’]);
Route::get(‘export-student’, [AppHttpControllersStudentController::class, ‘exportExcel’]);
Step 7: Create a file view.blade.php in the path: resources/views/student/view.blade.php and paste the below code:
@extends(‘layouts.app’)
@section(‘content’)
<div class=«container mt-4»>
<div class=«card»>
<div class=«card-header»>
<h4>Export Excel / CSV File data in Laravel</h4>
</div>
<div class=«card-body»>
<a href=«{{ url(‘export-student’) }}« class=«btn btn-primary»>Export Student Data</a>
</div>
</div>
</div>
@endsection
Step 8: That’s it, you are done, Now serve the application.
php artisan serve
Once you download the excel format will be:
Thank you