
You can change the capitalization, or case, of selected text in a document by clicking a single button on the Home tab called Change Case.
Change case
To change the case of selected text in a document, do the following:
-
Select the text for which you want to change the case.
-
Go to Home > Change case
 .
. -
Do one of the following:
-
To capitalize the first letter of a sentence and leave all other letters as lowercase, click Sentence case.
-
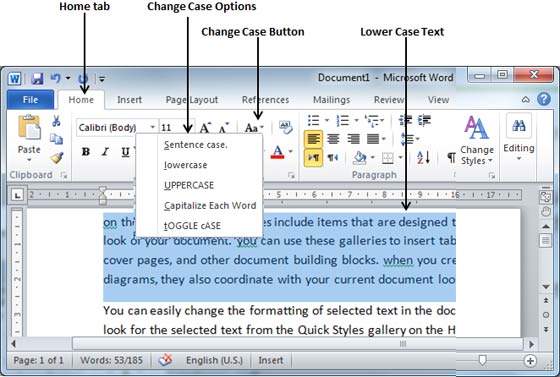
To exclude capital letters from your text, click lowercase.
-
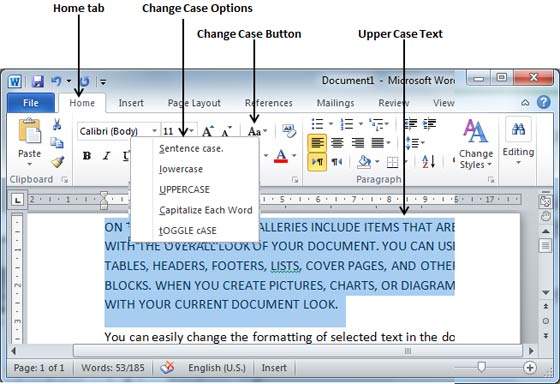
To capitalize all of the letters, click UPPERCASE.
-
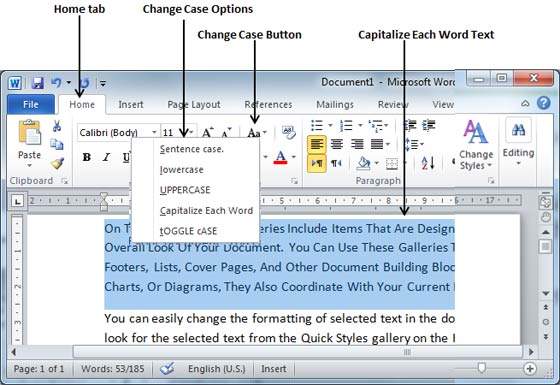
To capitalize the first letter of each word and leave the other letters lowercase, click Capitalize Each Word.
-
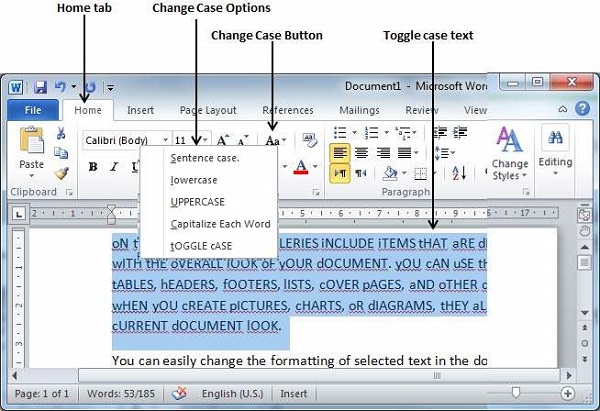
To shift between two case views (for example, to shift between Capitalize Each Word and the opposite, cAPITALIZE eACH wORD), click tOGGLE cASE.
Tips:
-
To apply small capital (Small Caps) to your text, select the text, and then on the Home tab, in the Font group, click the arrow in the lower-right corner. In the Font dialog box, under Effects, select the Small Caps check box.
-
To undo the case change, press CTRL+ Z.
-
To use a keyboard shortcut to change between lowercase, UPPERCASE, and Capitalize Each Word, select the text and press SHIFT + F3 until the case you want is applied.
-
 .
.See also
Insert a drop cap
Choose AutoCorrect options for capitalization
Change case
To change the case of selected text in a document, do the following:
-
Select the text for which you want to change the case.
-
Go to Home > Change case
. -
Do one of the following:
-
To capitalize the first letter of a sentence and leave all other letters as lowercase, click Sentence case.
-
To exclude capital letters from your text, click lowercase.
-
To capitalize all of the letters, click UPPERCASE.
-
To capitalize the first letter of each word and leave the other letters lowercase, click Capitalize Each Word.
-
To shift between two case views (for example, to shift between Capitalize Each Word and the opposite, cAPITALIZE eACH wORD), click tOGGLE cASE.
Tips:
-
To apply small capital (Small Caps) to your text, select the text, and then on the Format menu, select Font, and in the Font dialog box, under Effects, select the Small Caps box.
Small Caps shortcut key: ⌘ + SHIFT + K
-
To undo the case change, press ⌘ + Z .
-
To use a keyboard shortcut to change between lowercase, UPPERCASE, and Capitalize Each Word, select the text and then press fn+ SHIFT + F3 until the style you want is applied.
-
See also
Insert a drop cap
Choose AutoCorrect options for capitalization
PowerPoint for the web supports changing case. See the procedure below.
Word for the web doesn’t support changing case. Use the desktop application to open the document and change text case there, or else you can manually change the casing of text in Word for the web.
-
Select the text you want to change.
-
Go to Home > More Font Options > Change case.
-
Choose the case you want to use.

Updated: 12/30/2021 by

In Microsoft Word, you can use the keyboard shortcut Shift+F3 to change selected text between uppercase, lowercase, and title case.
Selecting a case
- Highlight all the text you want to change. If you want to change the case for the whole document you can use the Ctrl+A keyboard shortcut to select everything.
- Hold down Shift and press F3.
- When you hold Shift and press F3, the text toggles from sentence case (first letter uppercase and the rest lowercase), to all uppercase (all capital letters), and then all lowercase.
Note
If you are using a laptop or an Apple Mac, the function keys may not be enabled without the use of the Fn key. You may need to hold Fn, in addition to Shift, when you press F3.
If you’re not able to get Shift+F3 to work in Microsoft Word 2007 or later, you can try the following option instead.
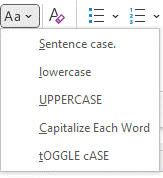
- In the menu bar, on the Home tab, click the Change Case icon, which has an uppercase ‘A’ and lowercase ‘a.’
![]()
- Select the appropriate option from the list of values. For example, if you want to change to all uppercase letters, select the UPPERCASE option. If you want to change to all lowercase letters, select the lowercase option.

Tip
Use our text tool to convert any text from uppercase to lowercase.
Содержание
- Изменение регистра в Ворде
- Способ 1: Кнопка на ленте
- Способ 2: Горячие клавиши
- Дополнительно: Видоизменение регистра
- Заключение
- Вопросы и ответы

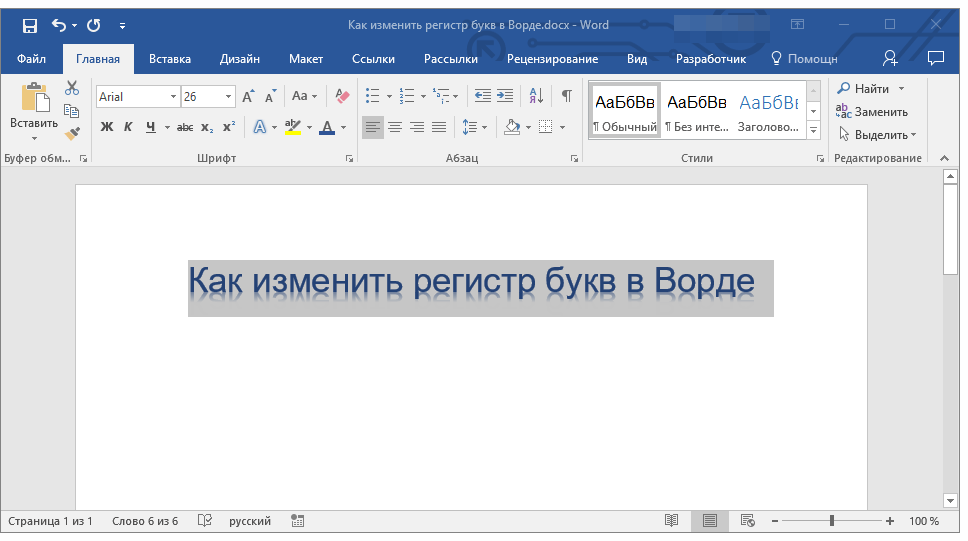
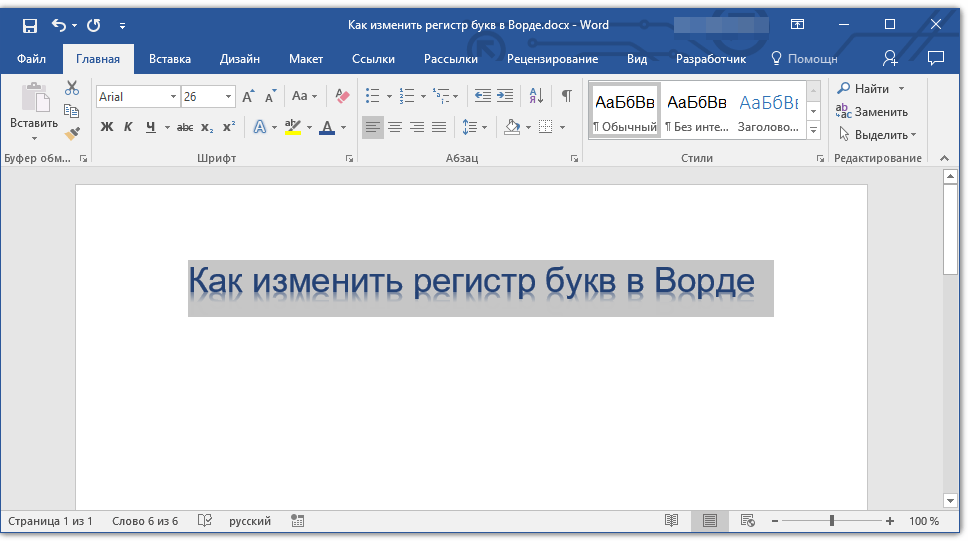
Необходимость изменить регистр, в котором записан текст в документе Microsoft Word, чаще всего возникает из-за невнимательности пользователя. Например, в случаях когда фрагмент набирался с включенным режимом CapsLock, то есть прописными буквами. Также иногда поменять регистр в Ворде нужно специально, сделав все буквы большими, маленькими или просто противоположными тому, что есть на данный момент. О том, как это сделать, мы расскажем далее.
Изменение регистра в Ворде
Большинство задач, с которыми можно столкнуться в процессе использования текстового редактора от Майкрософт, могут быть решены как минимум двумя способами – с помощью кнопок на панели инструментов (лента) и горячих клавиш на клавиатуре. Справедливо это утверждение и для интересующего нас сегодня регистра.
Читайте также: Что делать, если в Ворде пропала панель инструментов
Способ 1: Кнопка на ленте
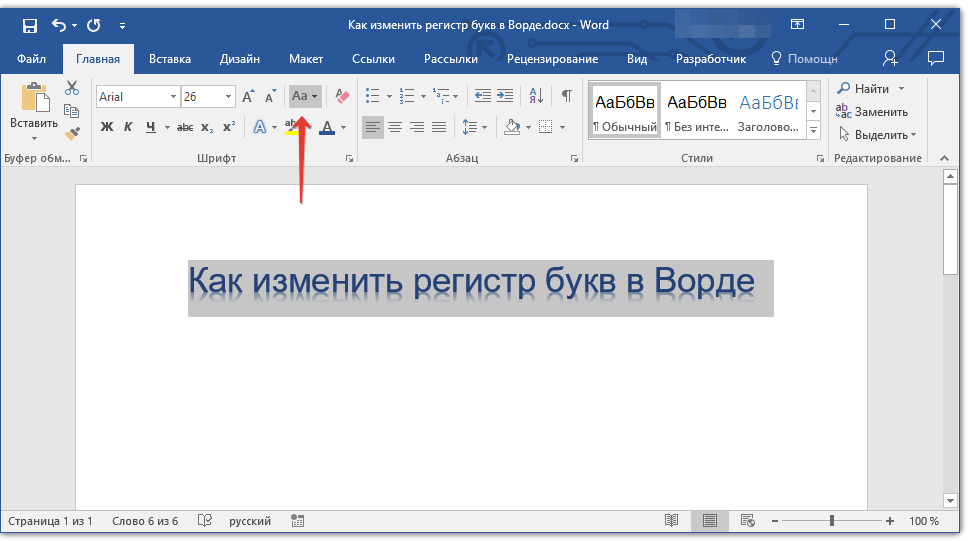
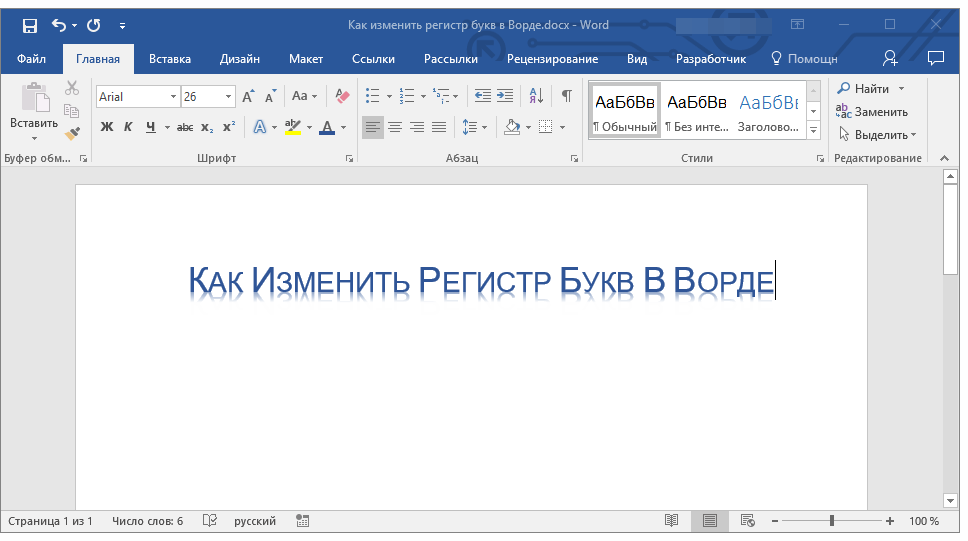
Для изменения регистра достаточно нажать всего одну кнопку на панели быстрого доступа в Word. Располагается она во вкладке «Главная» в группе инструментов «Шрифт». Так как данный элемент выполняет сразу несколько функций по части изменения регистра, будет уместно рассмотреть каждую из них.

- Выделите часть текста, для которой требуется изменить регистр.

Читайте также: Как выделить текст / абзац / страницу в Ворде
- Нажмите на панели быстрого доступа кнопку «Регистр» (Аа), расположенную в группе инструментов «Шрифт» во вкладке «Главная». Это действие откроет список доступных опций.
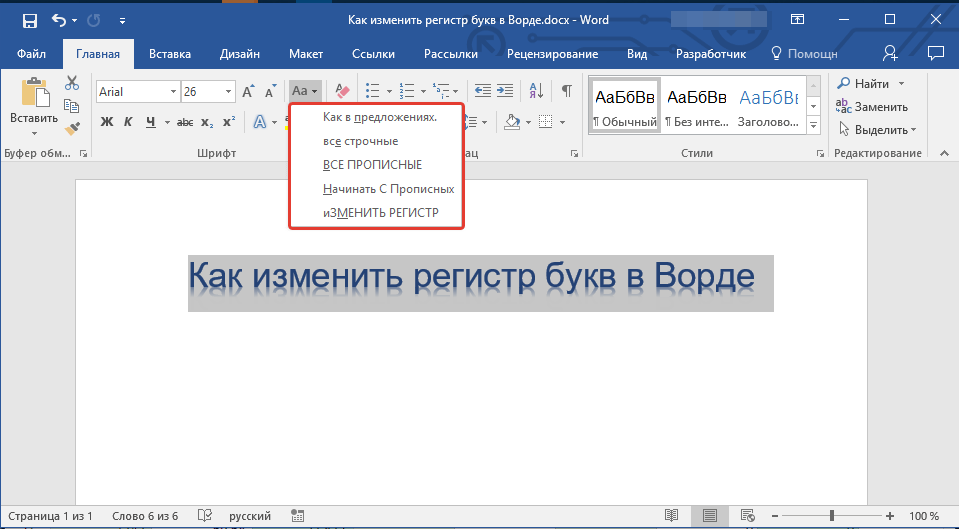
- Выберите в выпадающем меню кнопки подходящий тип изменения регистра:

Читайте также: Как в Ворд сделать маленькие буквы большими
Ввиду того что необходимая кнопка расположена в «Главной» вкладке текстового редактора, причем в наиболее активно используемой группе инструментов, а ее меню наглядно показывает то, как будет выглядеть текст после изменения регистра, данный способ можно назвать самым простым и интуитивно понятным. Но не единственным.

Читайте: Как в Word сделать большие буквы маленькими
Способ 2: Горячие клавиши
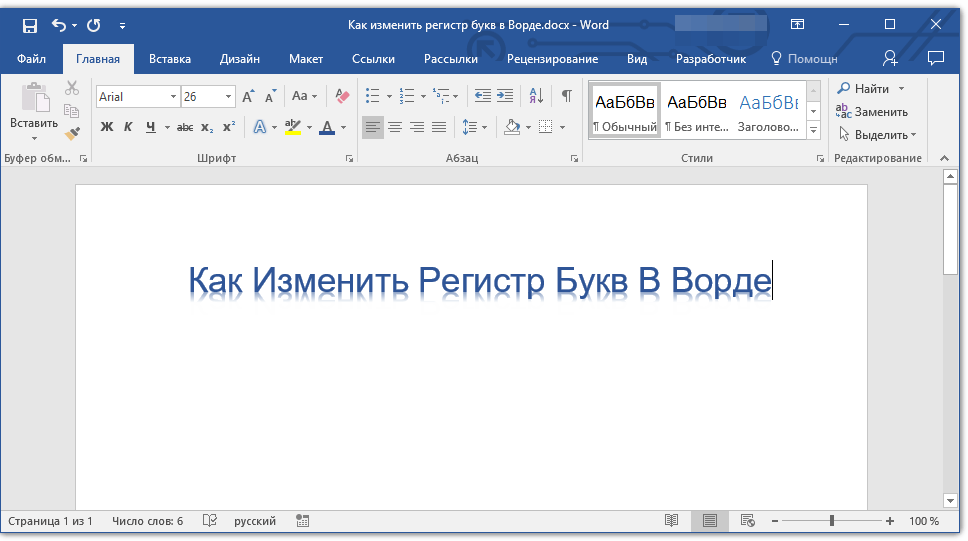
Действия, аналогичные вышеописанным, можно выполнить и без обращения к панели инструментов. За большинством вариантов изменения, представленных в меню кнопки «Регистр», закреплены горячие клавиши. К сожалению, их использование позволяет получить лишь три из пяти доступных вариантов написания. Таким образом можно только поочередно переключаться между тремя стилями регистра — «все строчные», «ВСЕ ПРОПИСНЫЕ» и «Начинать С Прописных», но не «Как в предложениях» и не «иЗМЕНИТЬ РЕГИСТР».
- Выделите часть текста, в которой нужно изменить регистр.
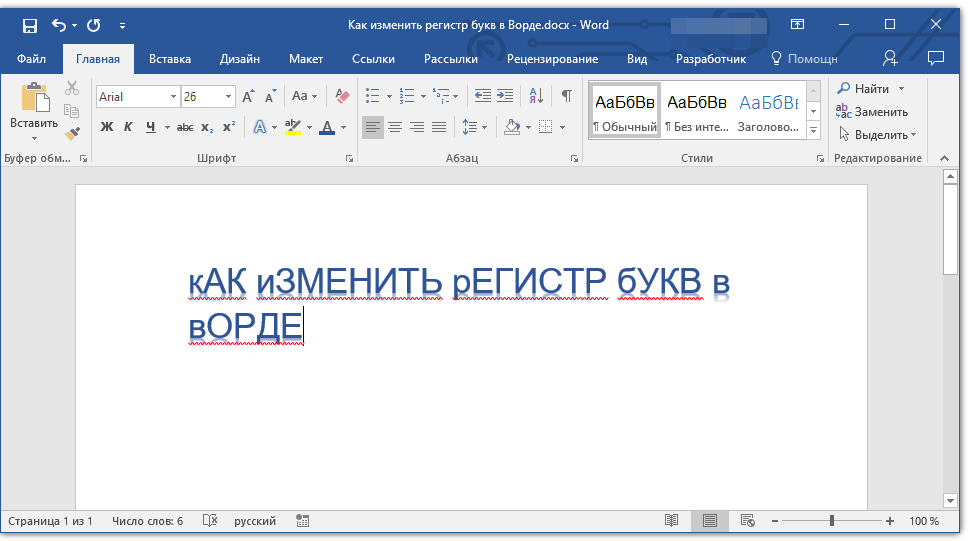
- Нажмите клавиши «SHIFT+F3» один или более раз для изменения регистра в тексте на подходящий. Изменение (для изначального текста «Как в предложениях») происходит в следующем порядке:
- ВСЕ ПРОПИСНЫЕ;
- все строчные;
- Начинать С Прописных.
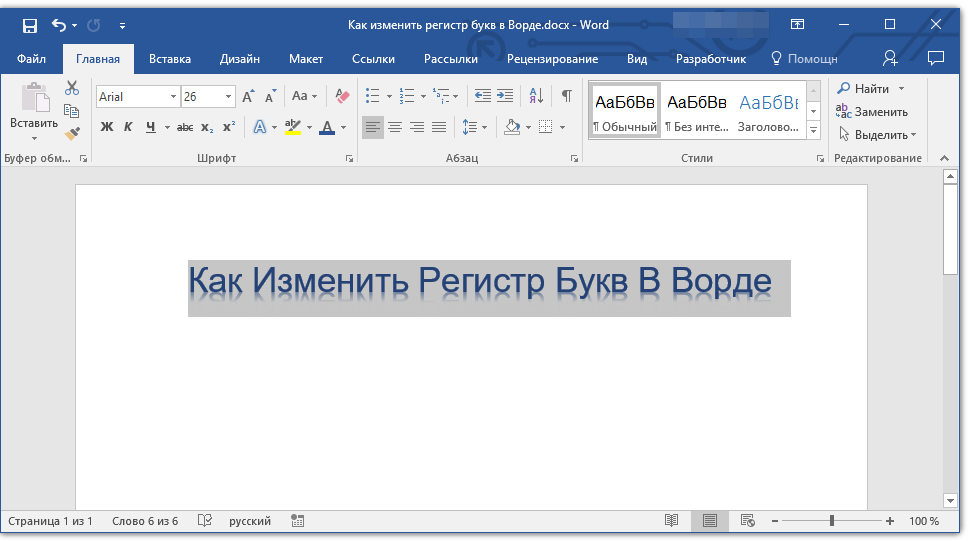
- Эту же комбинацию клавиш можно применять и к отдельным буквам в словах, что особенно удобно в случаях, когда требуется изменить регистр первой буквы в предложении и/или отдельном слове.
Читайте также: Горячие клавиши для удобной работы в Ворде
Этот способ изменения регистра букв несколько проще рассмотренного нами в первой части статьи, но для кого-то отсутствие двух из пяти вариантов написания может показаться критическим, и в таких случаях не обойтись без обращения к меню кнопки «Aa» в группе инструментов «Шрифт».
Дополнительно: Видоизменение регистра
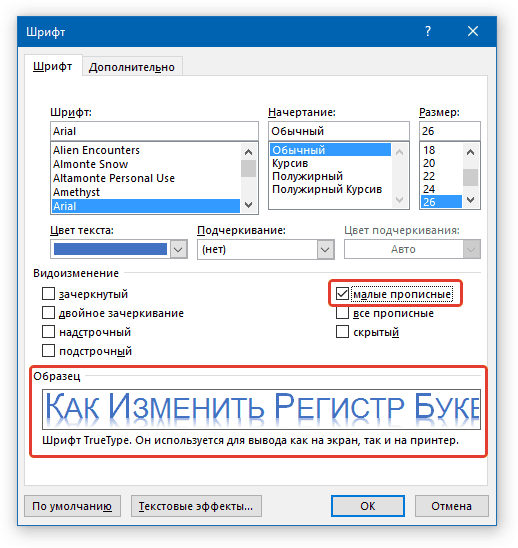
В Microsoft Word имеется еще одна возможность изменения регистра, позволяющая заменить обычные строчные буквы в словах на малые прописные. Такой стиль написания может быть применен, например, к подзаголовкам или записям в буклете.
Читайте также:
Как в Ворде сделать заголовок
Как сделать буклет в Ворде
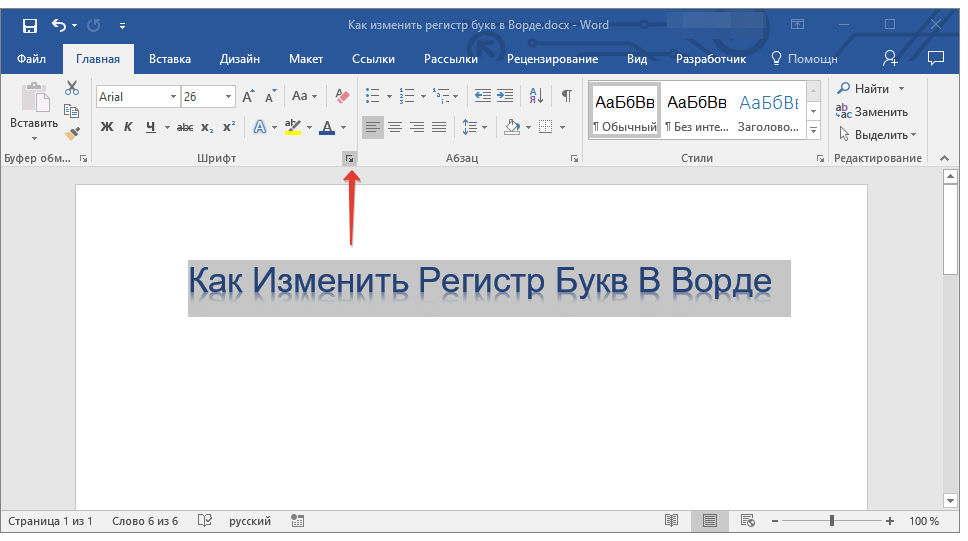
- Выделите фрагмент текста, строчные буквы в котором требуется заменить на малые прописные.
- Откройте диалоговое окно группы инструментов «Шрифт», нажав на стрелку в нижнем правом углу.
- В разделе «Видоизменение» установите галочку напротив пункта «малые прописные».

Примечание: В окне «Образец» вы сможете увидеть, как будет выглядеть текст после внесенных изменений.
Нажмите «ОК» для того, чтобы применить внесенные изменения и закрыть окно.
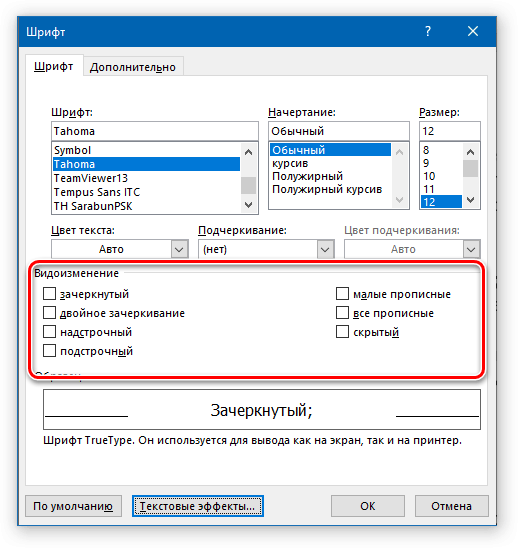
- Зачеркнутый;
- Двойное зачеркивание;
- Надстрочный;
- Подстрочный;
- Все прописные;
- Скрытый.
Обратите внимание на то, что в разделе «Видоизменение» окна «Шрифт» можно определить и некоторые другие параметры написания текста, и каждый из них нами был рассмотрен в отдельных статьях. Доступны следующие варианты:
Читайте также:
Как зачеркнуть текст в Word
Как в Word поставить индекс
Как скрыть текст в Word
Как изменить Word
Заключение
Вот так просто можно поменять регистр букв в текстовом документе Microsoft Word в соответствии с вашими требованиями или с целью исправления ошибок, допущенных по невнимательности.
Еще статьи по данной теме:
Помогла ли Вам статья?
Some fonts are naturally positioned higher than others, and when you are mixing fonts or small graphics together the positioning may look awkward.
For example, in my training guides, keystrokes or button images are used a lot.
Here is a sample sentence. Notice how the bottom of TAB and ENTER sit on the baseline of the text.

After lowering TAB by 3pt and lowering ENTER by 5pt, here is the result. Notice how it flows more naturally.

To reposition text in relation to the baseline:
1. Select the text.
2. Select the Home tab.
3. Click the launcher in the bottom-right corner of the Font group.

4. Select the Advanced tab.
5. On the Position row, nudge the By arrows up or down.
When you increase the By value, Position will switch to Raised and your text will sit higher than its natural position.
When you decrease the By value, Position will switch to Lowered and your text will sit lower than its natural position.

Here are some other advanced text effects you may be interested in.
I hope you found plenty of value in this post. I’d love to hear your biggest takeaway in the comments below together with any questions you may have.
Have a fantastic day.


About the author
Jason Morrell
Jason loves to simplify the hard stuff, cut the fluff and share what actually works. Things that make a difference. Things that slash hours from your daily work tasks. He runs a software training business in Queensland, Australia, lives on the Gold Coast with his wife and 4 kids and often talks about himself in the third person!
SHARE
3 Ways to Change or Convert Case in Microsoft Word Documents (with Shortcuts)
by Avantix Learning Team | Updated August 1, 2022
Applies to: Microsoft® Word® 2013, 2016, 2019, 2021 or 365 (Windows)
You can change case in Microsoft Word documents by changing character formatting or by converting case. If you want to be able to easily change case (like removing All Caps), it’s best to change case by applying formatting such as All Caps or Small Caps. Alternatively, you use the Change Case command to convert case. This command offers a series of options including upper, lower, capitalize each word and sentence case. You can also use a keyboard shortcut to move through different case options.
Recommended article: How to Create a Table of Contents in Word
Do you want to learn more about Microsoft Word? Check out our virtual classroom or in-person classroom Word courses >
Change Case using the Font dialog box (apply or remove All Caps or Small Caps)
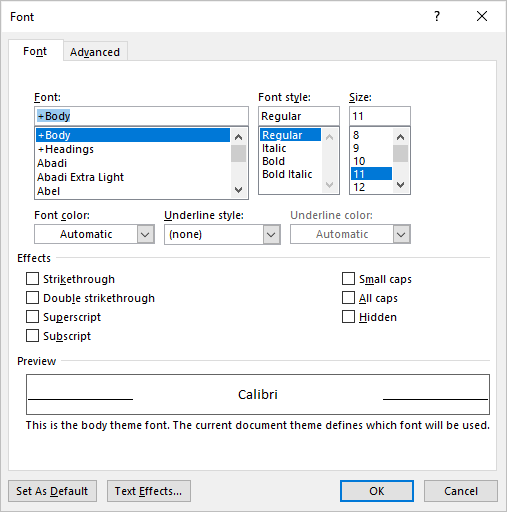
To apply All Caps or Small Caps to text as a format using the Font dialog box:
- Select the text.
- Click the Home tab in the Ribbon.
- Click the dialog box launcher on the bottom right of the Font group. Alternatively, press Ctrl + D. The Font dialog box appears.
- Select All Caps or Small Caps.
- Click OK.
The Font dialog box appears as follows:
This is usually the best way to apply All Caps since it’s a format and can be removed using the Font dialog box. You can also build this format into styles.
Change case using the Change Case command in the Ribbon
If text has been formatted with hard capitals where the user has pressed the Caps Lock key when typing text, you can remove or change the capitalization using the Change Case command. You can convert a selection typed in upper case to title case, lower case or even sentence case.
To change case using the Change Case command in the Ribbon:
- Select the text.
- Click the Home tab in the Ribbon.
- Click Change Case in the Font group (Aa). A drop-down menu appears.
- Select the desired case.
The Change Case drop-down menu appears as follows:
The following options appear in the Change Case drop-down menu:
- Sentence case – capitalizes the first letter of a sentence. If there are multiple sentences, Word will capitalize the next word after a period.
- Lowercase – removes all capitalization.
- UPPERCASE – capitalizes all letters in the selection.
- Capitalize Each Word – capitalizes each word in the selection (often called title case).
- tOGGLE cASE – shifts between two cases. For example, if the first letter of each word in the selection was capitalized, this command would switch to the opposite formatting with the first letter of each word as lower case and the other letters in upper case.
Change case using keyboard shortcuts
You can use keyboard shortcuts to move between several of the options in the Change Case drop-down menu:
- Select the text.
- Press Shift + F3. Keep pressing Shift + F3 to move between UPPERCASE, lowercase and Capitalize Each Word.
Some users may need to press the Fn key as well to activate the F3 key.
Subscribe to get more articles like this one
Did you find this article helpful? If you would like to receive new articles, JOIN our email list.
More resources
How to Create a Hanging Indent in Word (3 Ways)
How to Double Space in Word (4 Ways + Shortcuts)
10 Microsoft Word Navigation Shortcuts for Moving Around Faster
How to Keep Text Together in Microsoft Word (Words, Lines or Paragraphs)
How to Convert a PDF to Word in Microsoft Office (No Third Party Programs Needed)
Related courses
Microsoft Word: Intermediate / Advanced
Microsoft Excel: Intermediate / Advanced
Microsoft PowerPoint: Intermediate / Advanced
Microsoft Word: Long Documents Master Class
Microsoft Word: Styles, Templates and Tables of Contents
Microsoft Word: Designing Dynamic Word Documents Using Fields
VIEW MORE COURSES >
Our instructor-led courses are delivered in virtual classroom format or at our downtown Toronto location at 18 King Street East, Suite 1400, Toronto, Ontario, Canada (some in-person classroom courses may also be delivered at an alternate downtown Toronto location). Contact us at info@avantixlearning.ca if you’d like to arrange custom instructor-led virtual classroom or onsite training on a date that’s convenient for you.
Copyright 2023 Avantix® Learning
Microsoft, the Microsoft logo, Microsoft Office and related Microsoft applications and logos are registered trademarks of Microsoft Corporation in Canada, US and other countries. All other trademarks are the property of the registered owners.
Avantix Learning |18 King Street East, Suite 1400, Toronto, Ontario, Canada M5C 1C4 | Contact us at info@avantixlearning.ca
Download PC Repair Tool to quickly find & fix Windows errors automatically
If you need to change the case of the text in Google Docs or Microsoft Word, you should follow this step by step guide. It is possible to change the text case with and without taking help from third-party add-on in Google Docs. If you are using Microsoft Word, you may not need to use any add-on since Microsoft has included some in-built options to get it done.
Let’s assume that you have written a 100-word paragraph, and now you have to make the first alphabet of each word uppercase. It is very time-consuming work when you have big paragraphs. At such a moment, you can make use of these in-built options to make the change quickly.
Before getting started, you know the formatting.
- Lower case: this is lower case.
- Upper case: THIS IS UPPER CASE.
- Title case: This Is Title Case.
- Sentence case: This is sentence case.
- Toggle case: tHiS iS tOGGLE cASE.
You cannot find the Toggle case in Google Docs, but it is available in Microsoft Word. Also, The Title case of Google Docs is known as Capitalize each word in Microsoft Word.
To change the case of text in Microsoft Word, follow these steps-
- Open a document
- Select the text.
- Expand Change Case menu
- Select a case.

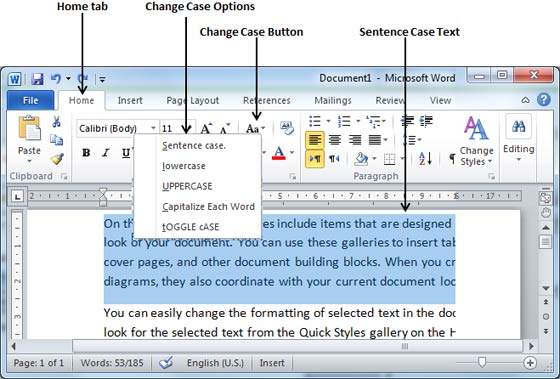
You need to open a document in Microsoft Word and select the text that you want to change. After that, make sure you are in the Home tab and click the Change Case button to get all options.
Now, you need to choose a case that you want to apply.
How to change the case of text in Google Docs
To change the case of text in Google Docs, follow these steps:
- Open a document
- Select the text.
- Go to Format > Text > Capitalization.
- Select a case as per your needs.
To get started, you need to open the document in which you want to make the change. After that, select the text that you want to change and go to Format > Text > Capitalization.
Here you can find three options – lower case, UPPER CASE, and Title Case.
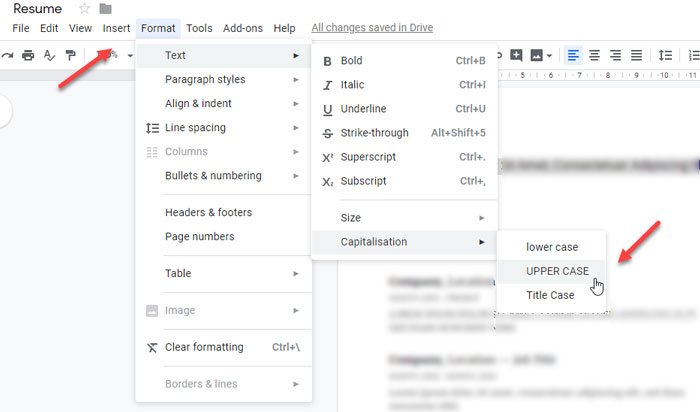
Select an option according to your requirements. The text should be changed immediately.
There is an add-on for Google Docs that does the same job. It is called the Change Case. If you want to use this add-on, click the Add-on button and select Get add-ons button. After that, search for “change case” and install it accordingly.
Whenever you need to change the case, select the text in your document, go to Add-ons > Change Case, and select a case that you want to apply.
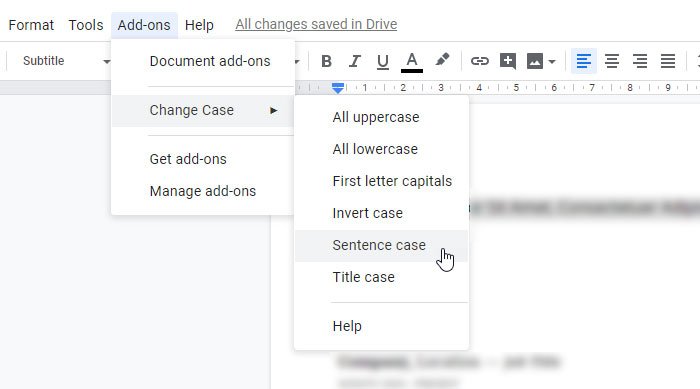
As it is a third-party add-on, it takes a couple of moments to apply the change. However, it depends on the selected text size.
That’s it! Hope these simple steps will help you to change text case easily.

When he is not writing about Microsoft Windows or Office, Sudip likes to work with Photoshop. He has managed the front end and back end of many websites over the years. He is currently pursuing his Bachelor’s degree.
In this chapter, we will discuss how to change text cases in Word 2010. You can also capitalize a character you are typing by pressing and holding the SHIFT key while you type. You can also press the CAPS LOCK to have every letter that you type capitalized, and then press the CAPS LOCK again to turn off capitalization.
Change Text to Sentence Case
A sentence case is the case where the first character of every sentence is capitalized. It is very simple to change the selected portion of text into sentence case by following two simple steps −
Step 1 − Select the portion of text that that needs to be put in sentence case. You can use any of the text selection methods to select the portion of text.
Step 2 − Click the Change Case button and then select the Sentence Case option to capitalize the first character of every selected sentence.
Change Text to Lowercase
Changing text to lowercase is where every word of a sentence is in lowercase. It is very simple to change a selected portion of text into lowercase by following two simple steps −
Step 1 − Select the portion of text that needs to be put in lowercase. You can use any of the text selection methods to select the portion of text.
Step 2 − Click the Change Case button and then select Lowercase option to display all the selected words in lowercase.
Change Text to Uppercase
This is where every word of a sentence is in uppercase. It is very simple to change selected text into uppercase by following two simple steps −
Step 1 − Select the portion of text that you want to change to a bold font. You can use any of the text selection method to select the portion of text.
Step 2 − Click the Change Case button and then select UPPERCASE option to display all selected words in all caps. All characters of every selected word will be capitalized.
Capitalize Text
A capitalize case is the case where every first character of every selected word is in capital. This is very simple to change selected text into capitalize by following two simple steps −
Step 1 − Select the portion of text that needs to be capitalized. You can use any of the text selection method to select the portion of text.
Step 2 − Click the Change Case button and then select the Capitalize Each Word option to put a leading cap on each selected word.
Toggle the Text
The Toggle operation will change the case of every character in reverse way. A capital character will become a character in lower case and a character in lower case will become a character in upper case. It is very simple to toggle case of the text by following two simple steps −
Step 1 − Select the portion of text that you want to change to a bold font. You can use any of the text selection method to select the portion of text.
Step 2 − Click the Change Case button and then select the tOGGLE cASE option to change all the words in lowercase into words in uppercase; the words in uppercase words change to words in lowercase.

Have you ever typed an entire sentence and accidentally left the caps lock key turned on? Is your caps lock key broken? In this article I will show you how to convert those annoying UPPERCASE TEXT into lowercase text in Word 2010. You can also convert your text into the following:
- Sentence case will put a capital letter at the beginning of each sentence that you have highlighted and make all the rest lower case
- lowercase will make all the text lower case
- UPPERCASE will make all the text upper case
- Capitalize Each Word will put a capital letter at the start of each word
- tOGGLE cASE will change the case of every letter selected. Upper will become lower, lower will become upper.
Just open Word 2010 on your computer. Copy Paste the text there. Select all the text which you want to convert, now click the Home tab, as highlighted below, next click the Change Case, icon as highlighted below and select the lowercase.

Extra Tip: Try the keyboard shortcut — select the text you wish to modify then whilst holding down the Shift key tap the F3 key (tap it again to cycle through CAPITAL, lower case and Sentence case
Video: